ODEIS Retailers E.D.I. : Electronic Data Interchange E.D.I. : Electronic Data Interchange 1/16 SETTINGS 1) Messaging Accounts The messaging accounts settings are opened using the following navigation: Miscellaneous - "Settings" - "Messaging Accounts" In order to separate the arrival of personal messages from vendor delivery notes, it is imperative that an e-mail address specifically for EDI is created (via the Internet service provider). The left side ("EDI Account Messaging") and the right side ("mail account") are to be configured: Indicate your EDI e-mail address as well as the login details Indicate the POP and SMTP addresses given by your provider If you use broadband (or a router), select 'IP Router', if not indicate the name of your modem connection To save your settings Allows for the simulation of sending a message in order to test the validity of the information entered Allows for the reading of the mail box in order to test the validity of the information entered
Transcript
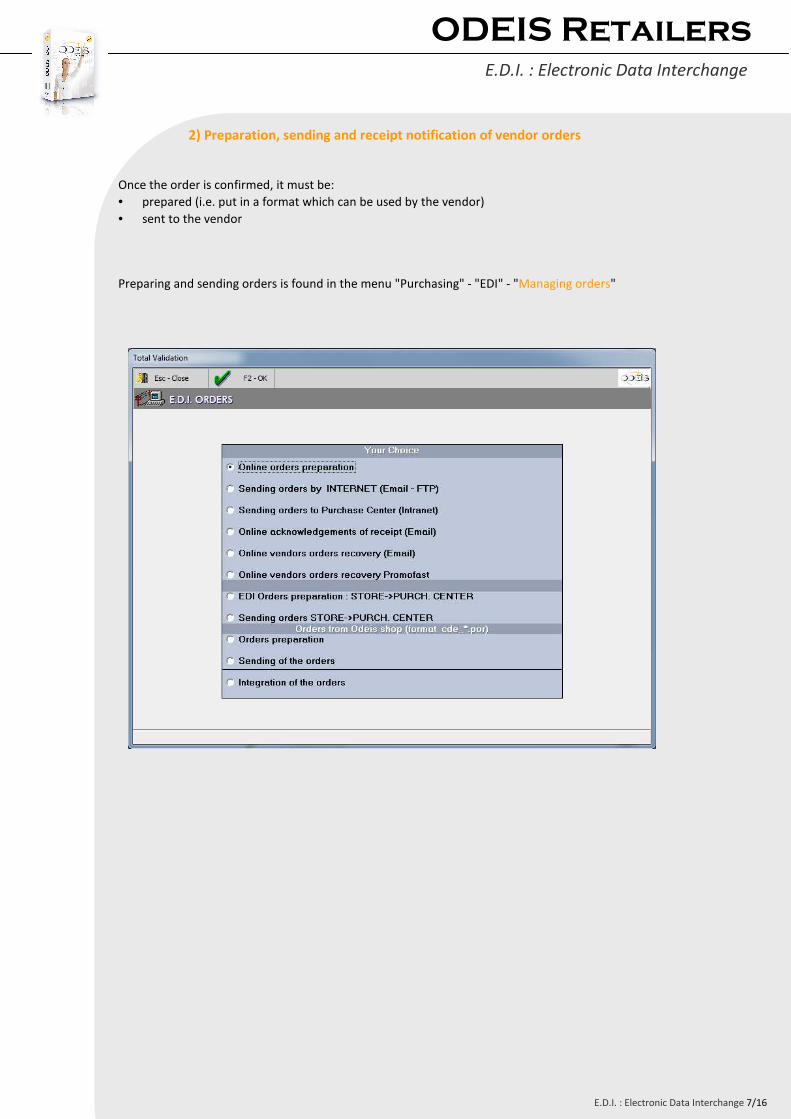
ODEIS Retailers
E.D.I. : Electronic Data Interchange
E.D.I. : Electronic Data Interchange 1/16
SETTINGS
1) Messaging Accounts
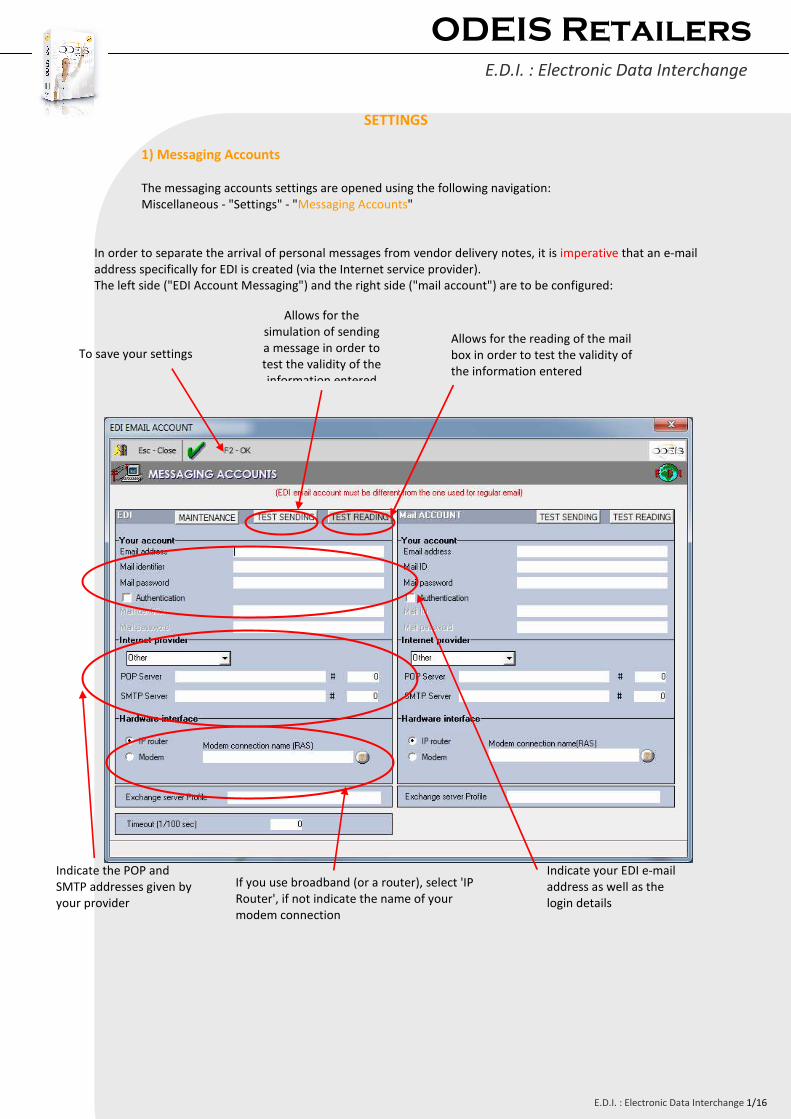
The messaging accounts settings are opened using the following navigation:
Miscellaneous - "Settings" - "Messaging Accounts"
In order to separate the arrival of personal messages from vendor delivery notes, it is imperative that an e-mail
address specifically for EDI is created (via the Internet service provider).
The left side ("EDI Account Messaging") and the right side ("mail account") are to be configured:
Indicate your EDI e-mail
address as well as the
login details
Indicate the POP and
SMTP addresses given by
your provider
If you use broadband (or a router), select 'IP
Router', if not indicate the name of your
modem connection
To save your settings
Allows for the
simulation of sending
a message in order to
test the validity of the
information entered
Allows for the reading of the mail
box in order to test the validity of
the information entered
ODEIS Retailers
E.D.I. : Electronic Data Interchange
E.D.I. : Electronic Data Interchange 2/16
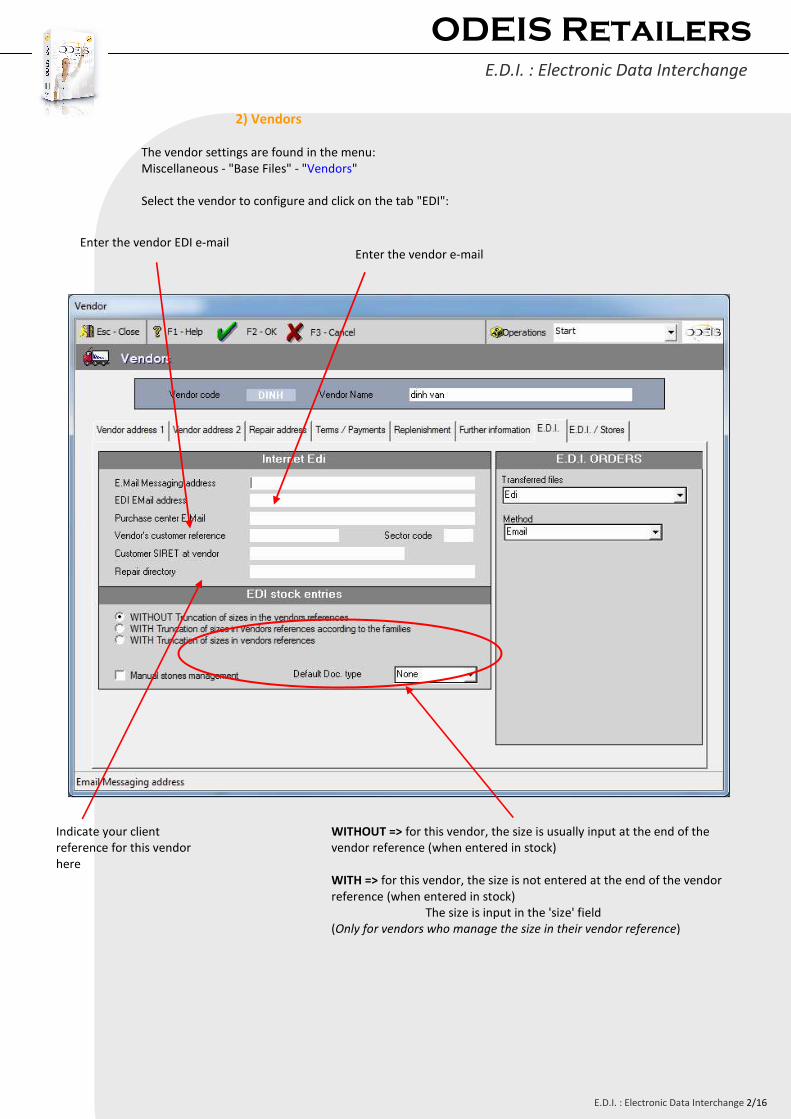
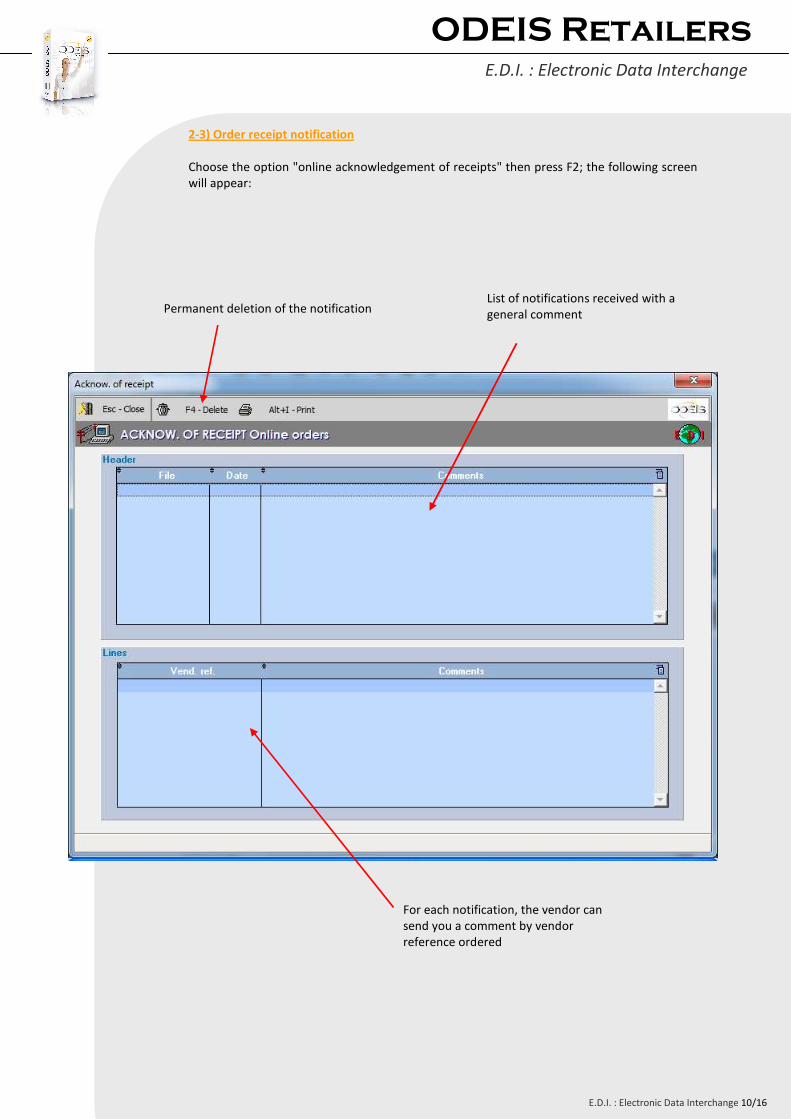
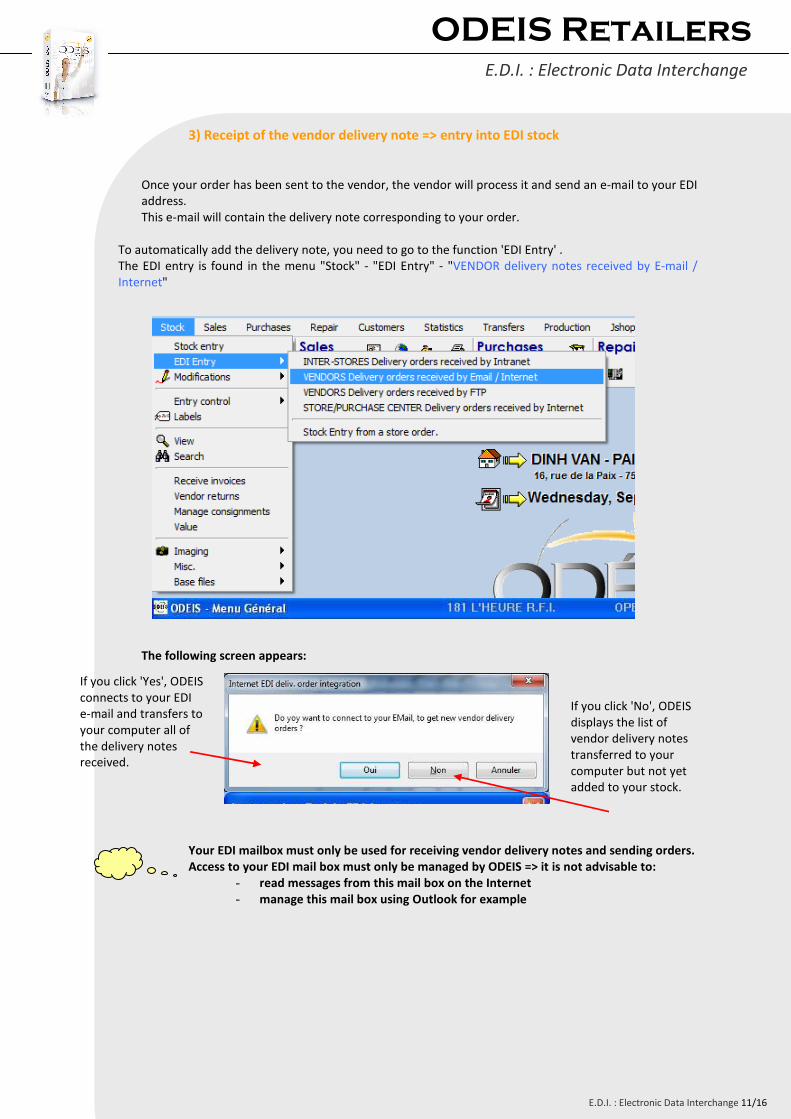
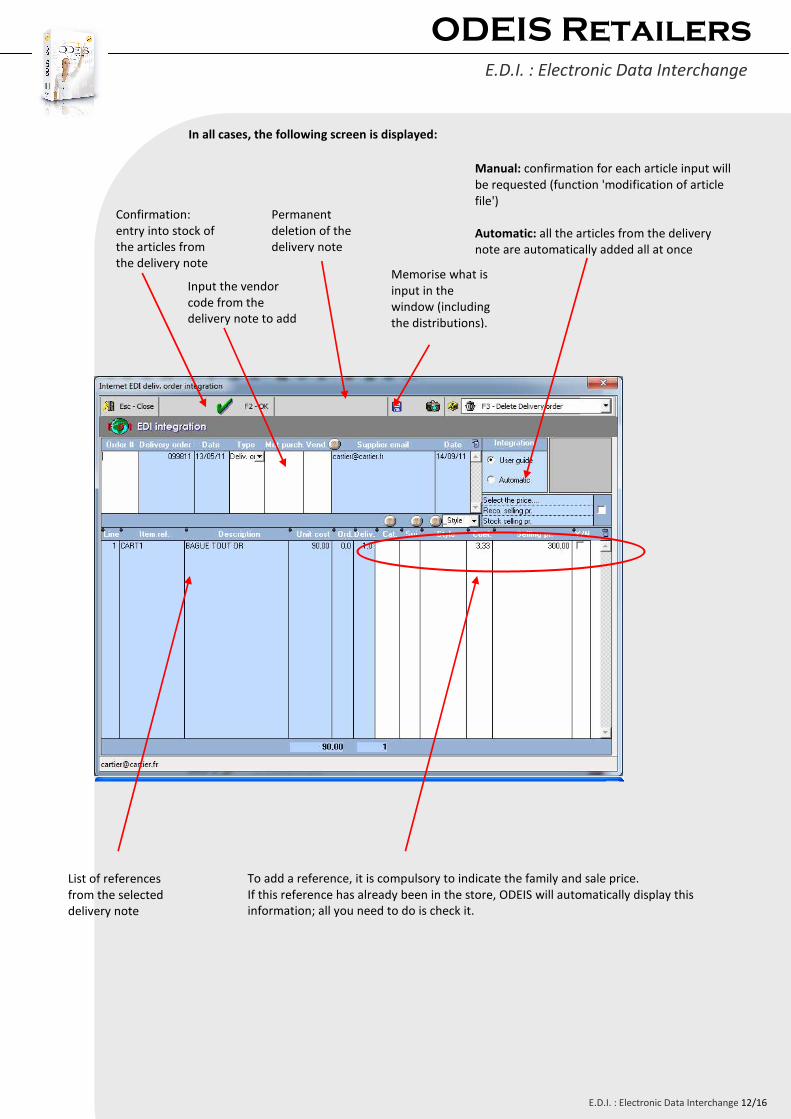
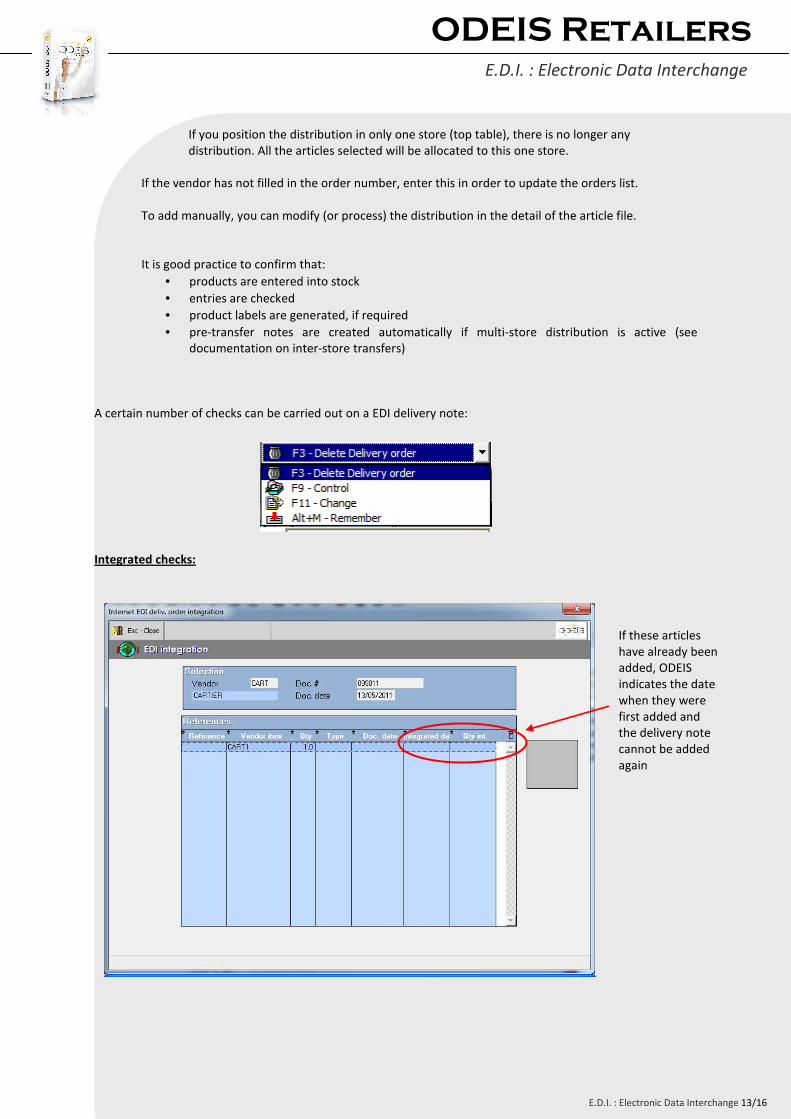
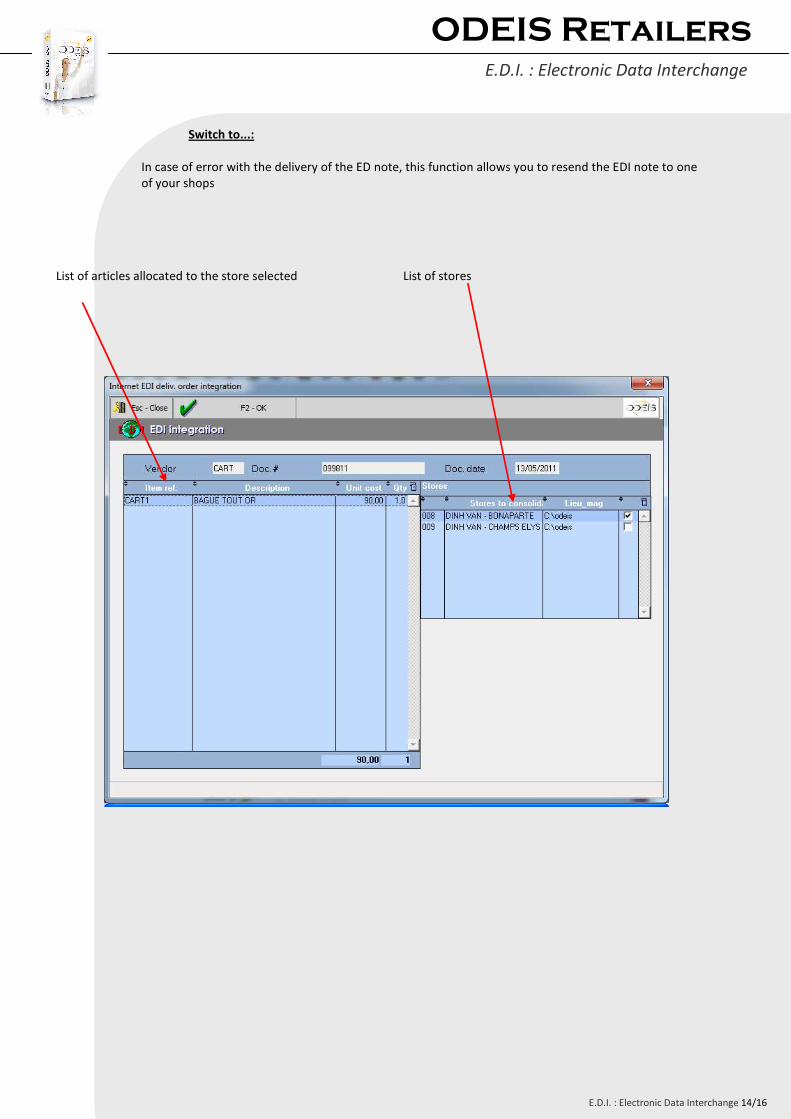
2) Vendors
The vendor settings are found in the menu:
Miscellaneous - "Base Files" - "Vendors"
Select the vendor to configure and click on the tab "EDI":
Indicate your client
reference for this vendor
here
Enter the vendor EDI e-mail
Enter the vendor e-mail
WITHOUT => for this vendor, the size is usually input at the end of the
vendor reference (when entered in stock)
WITH => for this vendor, the size is not entered at the end of the vendor
reference (when entered in stock)
The size is input in the 'size' field
(Only for vendors who manage the size in their vendor reference)
ODEIS Retailers
E.D.I. : Electronic Data Interchange
E.D.I. : Electronic Data Interchange 3/16
3) Category
The Category settings are found in the menu:
Miscellaneous - "Base Files" - "Category"
Select the category to configure:
This update can be carried out automatically due to the function 'automatic update of areas' in the category