52
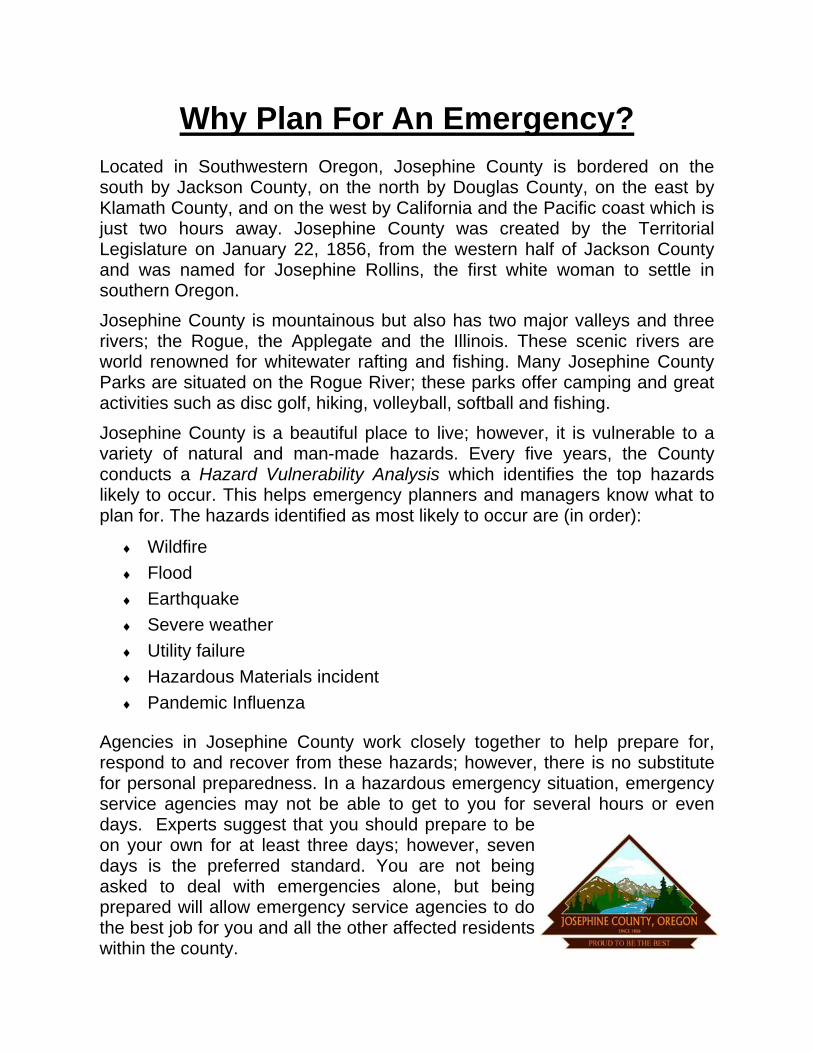
Why Plan For An Emergency? Located in Southwestern Oregon, Josephine County is bordered on the south by Jackson County, on the north by Douglas County, on the east by Klamath County, and on the west by California and the Pacific coast which is just two hours away. Josephine County was created by the Territorial Legislature on January 22, 1856, from the western half of Jackson County and was named for Josephine Rollins, the first white woman to settle in southern Oregon.
Josephine County is mountainous but also has two major valleys and three rivers; the Rogue, the Applegate and the Illinois. These scenic rivers are world renowned for whitewater rafting and fishing. Many Josephine County Parks are situated on the Rogue River; these parks offer camping and great activities such as disc golf, hiking, volleyball, softball and fishing.
Josephine County is a beautiful place to live; however, it is vulnerable to a variety of natural and man-made hazards. Every five years, the County conducts a Hazard Vulnerability Analysis which identifies the top hazards likely to occur. This helps emergency planners and managers know what to plan for. The hazards identified as most likely to occur are (in order):
Wildfire
Flood
Earthquake
Severe weather
Utility failure
Hazardous Materials incident
Pandemic Influenza
Agencies in Josephine County work closely together to help prepare for, respond to and recover from these hazards; however, there is no substitute for personal preparedness. In a hazardous emergency situation, emergency service agencies may not be able to get to you for several hours or even days. Experts suggest that you should prepare to be on your own for at least three days; however, seven days is the preferred standard. You are not being asked to deal with emergencies alone, but being prepared will allow emergency service agencies to do the best job for you and all the other affected residents within the county.
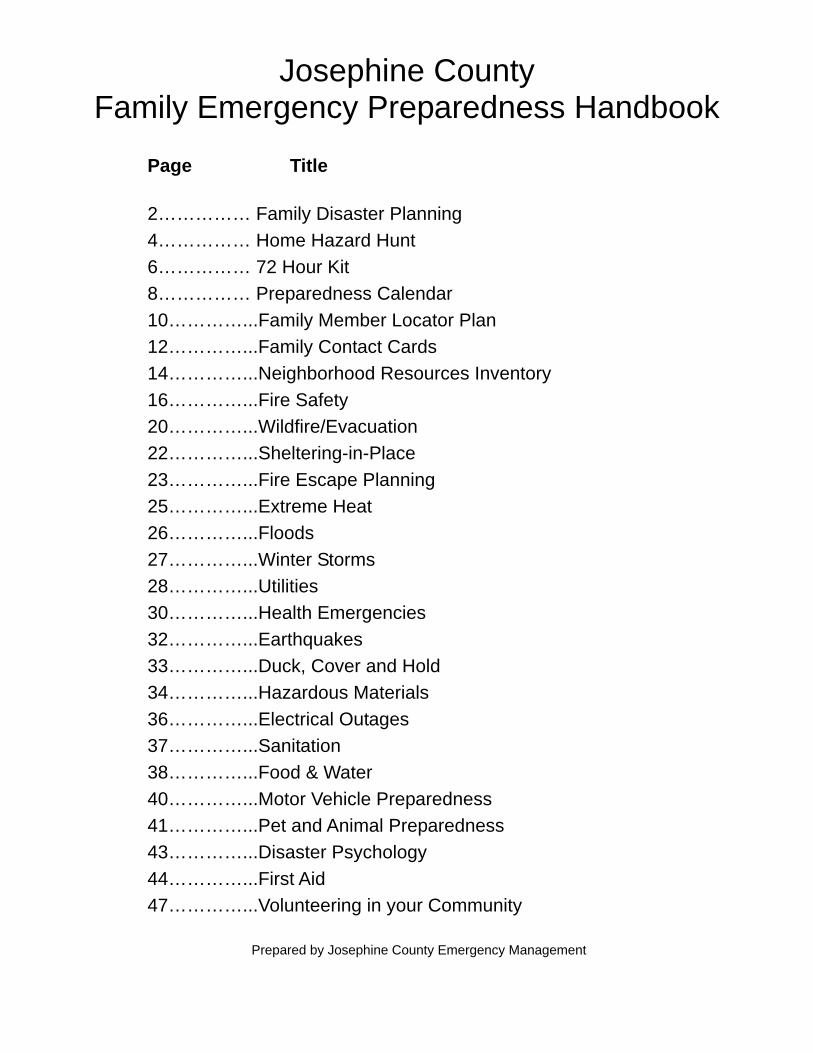
Page Title
2…………… Family Disaster Planning
4…………… Home Hazard Hunt
6…………… 72 Hour Kit
8…………… Preparedness Calendar
10…………...Family Member Locator Plan
12…………...Family Contact Cards
14…………...Neighborhood Resources Inventory
16…………...Fire Safety
20…………...Wildfire/Evacuation
22…………...Sheltering-in-Place
23…………...Fire Escape Planning
25…………...Extreme Heat
26…………...Floods
27…………...Winter Storms
28…………...Utilities
30…………...Health Emergencies
32…………...Earthquakes
33…………...Duck, Cover and Hold
34…………...Hazardous Materials
36…………...Electrical Outages
37…………...Sanitation
38…………...Food & Water
40…………...Motor Vehicle Preparedness
41…………...Pet and Animal Preparedness
43…………...Disaster Psychology
44…………...First Aid
47…………...Volunteering in your Community
Prepared by Josephine County Emergency Management
Josephine County Family Emergency Preparedness Handbook
2
Where will you and your family be when disaster strikes? What would you do if basic services like water, gas, electricity, and telephones were cut off for long periods? What would you do if there was a shortage of supplies, such as food, water or gasoline?
Whether faced with a family emergency or a regional disaster, the effort you’ve put into family preparedness and disaster planning will play a large role in how well you “survive” the event. The following steps can help you enhance your family’s preparedness:
FAMILY DISASTER PLANNING
IDENTIFY THE HAZARDS
Below are hazards that have occurred in Josephine County. Visit the library, contact the American Red Cross or log on to the Federal Emergency Management Agency (FEMA) web site at www.fema.gov to learn more about each hazard.
Wildfire Winter Storm Flood Earthquake
Severe Weather Pandemic Flu Hazardous
Material Spill
LEARN HOW THE HAZARDS CAN
IMPACT YOUR FAMILY
Think about how each hazard might affect
your family: What if family members were at work or
school? Would you be impacted differently if the
weather was very warm or very cold? How would you get by if utilities were
interrupted? How would you handle damage to your
property or blocked roads?
IDENTIFY STEPS YOU CAN TAKE TO
MINIMIZE OR PREVENT THE HAZARD
IMPACTS
Plans for home escape, neighborhood evacuation and family communication.
Procedures for drop, cover, and hold; shelter in-place; and utility shutoff.
Training in CPR, basic first aid and use of a fire extinguisher.
Hazard-resistant construction materials and fire-resistant plants.
Flood-proofing, landscaping and site drainage practices.
Non-structural earthquake hazard mitigation techniques.
Warning system installation (e.g., smoke detectors, NOAA weather radio, etc).
Comprehensive hazard insurance for your home and personal property (e.g., fire, flood and earthquake).
Neighborhood disaster resource inventory.
WOULD YOU OR SOMEONE YOU LOVE NEED SPECIAL HELP DURING AN EMERGENCY? You might want to be in the Disaster Registry if you or someone you care for would: Need outside help to safely leave your home
during a disaster Be in jeopardy if you stayed in your home,
without assistance, for three days Need special notification about the need for
evacuation, due to impairment
The Disaster Registry provides the names and locations of people who need special assistance to fire, police, health, and rescue workers. Being on the Disaster Registry does not guarantee that you’ll get help first in a disaster. There are so many needs during a disaster that our fire fighters and police can’t help everyone at once, but if your name is in the Disaster Registry, they will know of your need for special assistance.
Visit www.rvcog.org and click on Disaster Registry or call 664-6674 to sign up.
3
IDENTIFY EQUIPMENT AND SUPPLIES
YOU’LL NEED TO HELP SURVIVE
POTENTIAL CONSEQUENCES
Food and Water First Aid Supplies Sanitation Supplies Clothing and Bedding Prescription and Non-prescription
Medicines Light Sources (flashlights, lanterns) Tools, Equipment, and Supplies (manual
can opener, utensils, fire extinguisher, matches, money, batteries) etc.
Special Items (baby supplies, pet food, important family documents, etc.)
IDENTIFY THE EQUIPMENT, SUPPLIES,
PROCEDURES, AND PRACTICES YOU
ALREADY HAVE IN PLACE
Camping Gear (sleeping bags, cooking equipment, utensils, etc.)
Fire Escape Plan Extra Food and Water First Aid Kit
IDENTIFY YOUR SHORTFALLS
What equipment, supplies, procedures and plans do you need to complete your family preparedness effort?
DEVELOP A PLAN TO ELIMINATE THE SHORTFALLS
Identify short and long term objectives. For the short term, focus on items that are low cost or easy to implement and that have high payoff. Some suggestions include:
Install hazard warning systems such as smoke detectors or NOAA weather radio.
Develop fire escape and neighborhood evacuation plans. Develop a simple family communications plan such as a wallet card with common numbers to
call and important policy numbers. Develop drop, cover, and hold; utility shutoff; and shelter in-place procedures. Attend CPR, basic first aid, and fire extinguisher training. Begin or expand your disaster supplies kit. Start with basic necessities such as food, water,
light sources, first aid supplies, clothing, and bedding. Host a neighborhood meeting to exchange preparedness information and ideas.
For the long term, focus on higher cost items or those that are more difficult to implement. These items might include:
Special tools and equipment Structural earthquake mitigation Expanded insurance coverage
Drainage improvements Building retrofitting
TRAIN AND MAINTAIN
Conduct fire evacuation drills Test smoke detectors Test/recharge fire extinguishers Test communications plans
Practice utility shutoff; drop, cover, and hold; and shelter in-place procedures
Replace stored food, water and medicines before the expiration date
4
Getting Started: Using the checklist below, involve the whole family, especially your children, in a home hazard hunt. Remember, anything that can move, break, fall or burn is a potential hazard. Foresight, imagination and common sense are the only tools you will need! After identifying what needs to be done, devise a plan to do it.
HOME HAZARD HUNT Do you believe that your home is a safe place to be?
Statistics show that most fires, accidents, and injuries occur in the home.
An important step in family preparedness is the identification of hazards in your home. Once the hazards are identified, it doesn’t take much time or effort to make
your home a safer place to live.
Electricity Yes/No Avoid the use of extension cords (If
used, ensure the correct wattage rating) Plug only one heat producing device into
an electrical outlet Ensure cords are not placed under rugs Verify circuits are not overloaded Replace damaged cords, plugs, sockets Use bulbs with the correct wattage for
lamps and fixtures Check fuses/circuit breakers for the
correct amperage ratings Do not override or bypass fuses or
circuit breakers
Kitchen Yes/No Wear snug-fitting clothes when cooking Do not leave cooking food unattended Keep pan handles turned in while cooking Keep a pan lid nearby in case of fire Keep cooking areas clean and clear of
combustibles Keep cords from dangling Ensure outlets near the kitchen sink are GFI
(Ground Fault Interrupt) equipped Keep sharp knives out of reach of children
Smoking and Matches Yes/No Store matches and lighters out of reach
of children Use large, deep, non-tip ashtrays Never smoke when drowsy or in bed Dispose of ashes and cigarette butts in
a metal can at least daily Check furniture for smoldering cigarettes
every night, especially after parties
Outside Yes/No Clear dry vegetation and rubbish from around
the house; clip limbs that overhang the roof Use barbecue grills away from buildings and
vegetation Dispose of barbecue briquettes in a metal
container Stack firewood away from your house and
deck Chip and compost your yard debris, or take
them to a recycling center instead of burning If you must burn, check with the fire
department before burning debris or using a burn barrel
Clothes Washer and Dryer Yes/No Verify that appliances are properly
grounded Ensure lint filter is clean and serviceable Check vent hose and vent line to ensure
they are clean and provide unobstructed airflow
All Rooms Yes/No Ensure floor coverings (rugs, carpets) are
properly secured to prevent tripping hazards Separate draw cords on blinds and drapes to
reduce strangulation hazards for kids Ensure room exits are unobstructed
5
Heating Equipment Yes/No Ensure fireplace inserts and gas/wood
stoves comply with local codes Clean and inspect chimney annually Dispose of ashes in metal container Keep clothes, furnishings, and electrical
cords at least 12” from wall heaters and 36” from portable heaters
Service furnace annually Set water heater thermostat at 120 F Elevate new or replacement gas water
heaters at least 18” above the floor
Fire Extinguisher Yes/No Verify that an all-purpose fire
extinguisher (Class ABC) is maintained in an accessible location
Ensure that all occupants know how to use it
Additional fire extinguishers kept in the kitchen, garage, basement, and sleeping area?
Earthquake Hazards (All Rooms) Yes/No Bolt heavy, tall, upright furniture to wall
studs Lock or remove rollers on beds, furniture
and appliances Secure hanging plants and light fixtures
with one or more guy wires to prevent swinging into walls or windows and breaking
Locate beds away from windows and heavy wall-mounted objects
Secure kitchen and bathroom cabinets with “positive” (self-closing) latches
Secure items on shelves with quake mats, Velcro™, low shelf barrier, etc.
Store heavy and/or breakable items on lower shelves
Strap water heater to wall studs Use flexible connections on gas
appliances Check chimney for loose bricks and
repair as needed Check foundation for cracks and repair
as needed Bolt home to foundation to prevent
shifting during an earthquake Secure mirrors and pictures to the wall or
hang them with heavy wire, looped through eye screws or tongue-in-groove hangers
HOME HAZARD HUNT Garage/Attic/Shed Yes/No Use gasoline as a motor fuel only and never
use or store it inside the home Keep only a small quantity of gasoline, if
necessary, in an approved container locked in the garage or shed
Keep flammable liquids such as paints and thinners in their original containers and store on or near the ground and away from sources of heat, sparks, or flame
Store used oily rags in sealed metal containers
Smoke Detector Yes/No Installed properly on every level Tested 1st Tuesday of each month Battery replaced every six months
Family Preparedness Yes/No Plan two unobstructed exits from every room,
including the second floor, and make sure everyone knows them
Designate a meeting place outside Have an out-of-state contact for family check
after a disaster/emergency Develop an escape plan and practice it
regularly Store important papers and valuables in a fire-
proof safe or cabinet Maintain proper insurance coverage for your
home and its contents (earthquake, flood, renters, fire)
Bathrooms Yes/No Store poisonous cleaning supplies and
medicines in “child-proofed” cabinets Replace glass bottles with plastic containers Ensure all outlets are GFI equipped
6
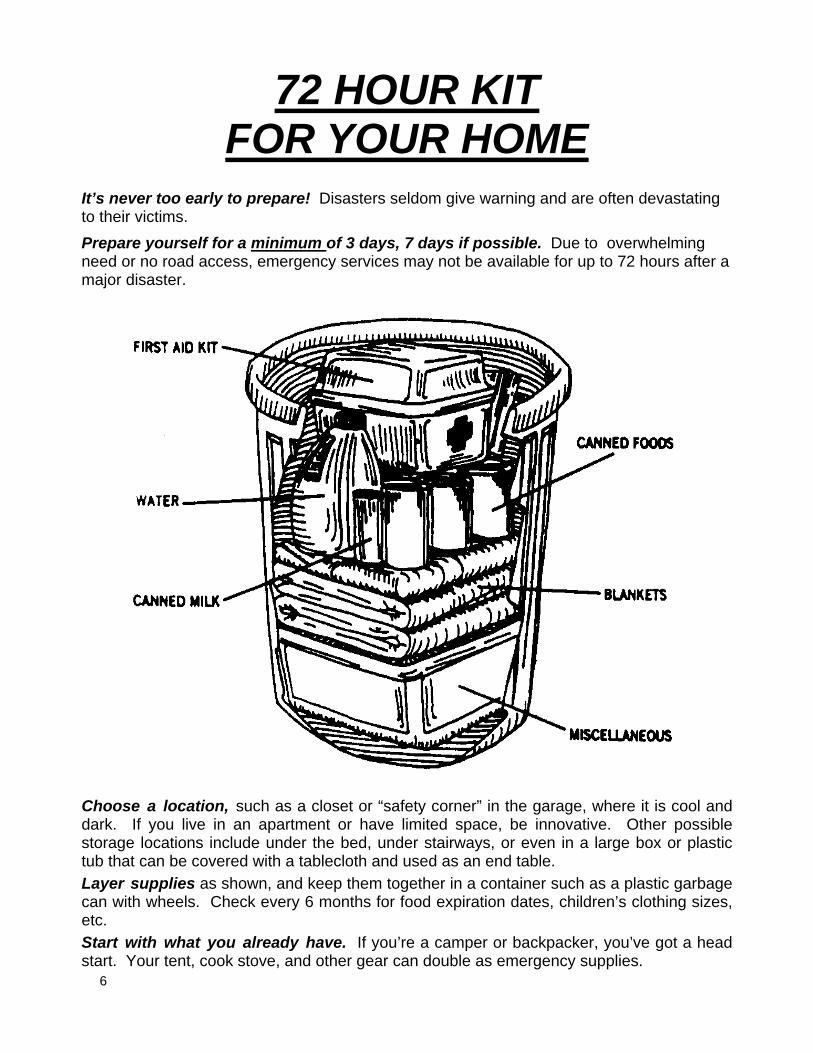
It’s never too early to prepare! Disasters seldom give warning and are often devastating to their victims.
Prepare yourself for a minimum of 3 days, 7 days if possible. Due to overwhelming need or no road access, emergency services may not be available for up to 72 hours after a major disaster.
Choose a location, such as a closet or “safety corner” in the garage, where it is cool and dark. If you live in an apartment or have limited space, be innovative. Other possible storage locations include under the bed, under stairways, or even in a large box or plastic tub that can be covered with a tablecloth and used as an end table.
Layer supplies as shown, and keep them together in a container such as a plastic garbage can with wheels. Check every 6 months for food expiration dates, children’s clothing sizes, etc.
Start with what you already have. If you’re a camper or backpacker, you’ve got a head start. Your tent, cook stove, and other gear can double as emergency supplies.
72 HOUR KIT FOR YOUR HOME
7
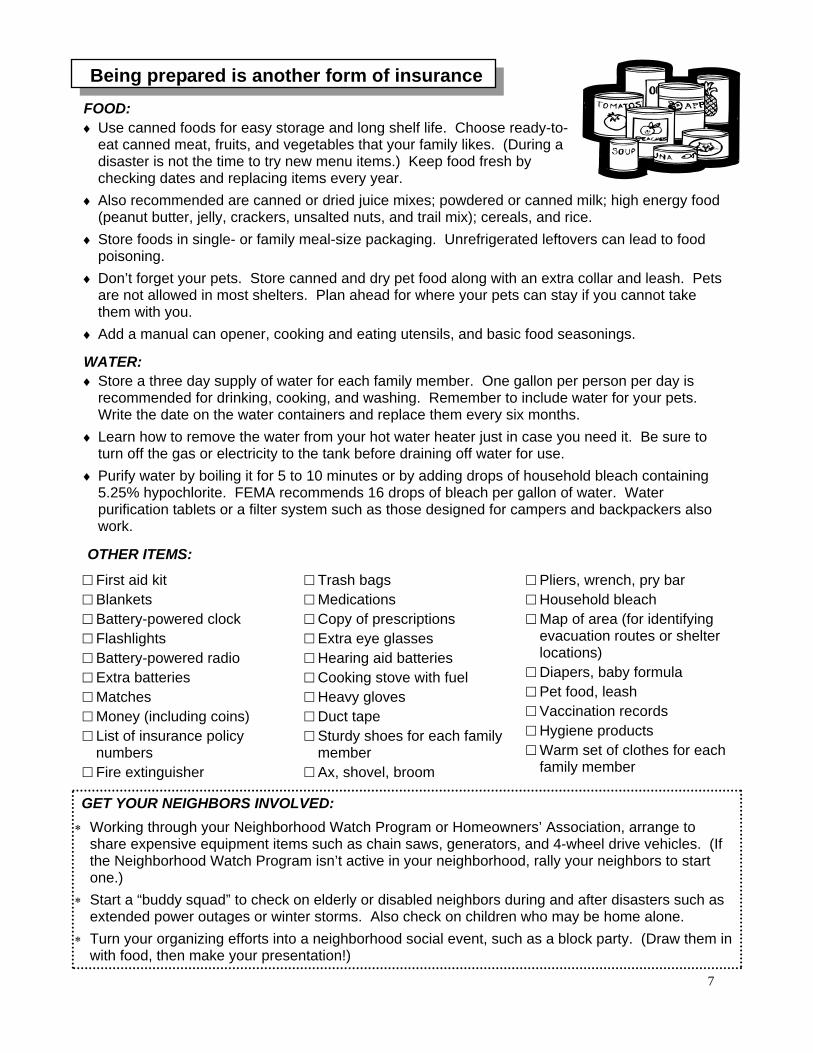
Being prepared is another form of insurance
FOOD: Use canned foods for easy storage and long shelf life. Choose ready-to-
eat canned meat, fruits, and vegetables that your family likes. (During a disaster is not the time to try new menu items.) Keep food fresh by checking dates and replacing items every year.
Also recommended are canned or dried juice mixes; powdered or canned milk; high energy food (peanut butter, jelly, crackers, unsalted nuts, and trail mix); cereals, and rice.
Store foods in single- or family meal-size packaging. Unrefrigerated leftovers can lead to food poisoning.
Don’t forget your pets. Store canned and dry pet food along with an extra collar and leash. Pets are not allowed in most shelters. Plan ahead for where your pets can stay if you cannot take them with you.
Add a manual can opener, cooking and eating utensils, and basic food seasonings.
WATER: Store a three day supply of water for each family member. One gallon per person per day is
recommended for drinking, cooking, and washing. Remember to include water for your pets. Write the date on the water containers and replace them every six months.
Learn how to remove the water from your hot water heater just in case you need it. Be sure to turn off the gas or electricity to the tank before draining off water for use.
Purify water by boiling it for 5 to 10 minutes or by adding drops of household bleach containing 5.25% hypochlorite. FEMA recommends 16 drops of bleach per gallon of water. Water purification tablets or a filter system such as those designed for campers and backpackers also work.
OTHER ITEMS:
GET YOUR NEIGHBORS INVOLVED: Working through your Neighborhood Watch Program or Homeowners’ Association, arrange to
share expensive equipment items such as chain saws, generators, and 4-wheel drive vehicles. (If the Neighborhood Watch Program isn’t active in your neighborhood, rally your neighbors to start one.)
Start a “buddy squad” to check on elderly or disabled neighbors during and after disasters such as extended power outages or winter storms. Also check on children who may be home alone.
Turn your organizing efforts into a neighborhood social event, such as a block party. (Draw them in with food, then make your presentation!)
First aid kit Blankets Battery-powered clock Flashlights Battery-powered radio Extra batteries Matches Money (including coins) List of insurance policy
numbers Fire extinguisher
Trash bags Medications Copy of prescriptions Extra eye glasses Hearing aid batteries Cooking stove with fuel Heavy gloves Duct tape Sturdy shoes for each family
member Ax, shovel, broom
Pliers, wrench, pry bar Household bleach Map of area (for identifying
evacuation routes or shelter locations)
Diapers, baby formula Pet food, leash Vaccination records Hygiene products Warm set of clothes for each
family member
8
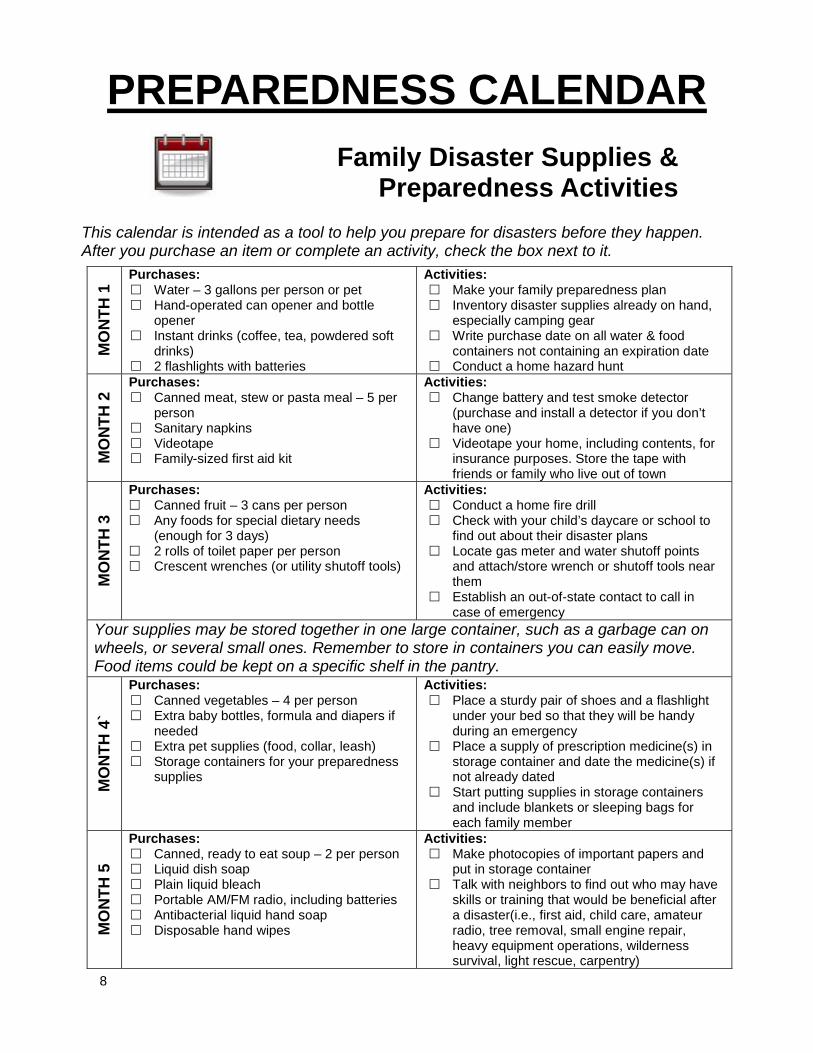
PREPAREDNESS CALENDAR
This calendar is intended as a tool to help you prepare for disasters before they happen. After you purchase an item or complete an activity, check the box next to it.
Family Disaster Supplies & Preparedness Activities
MO
NT
H 1
Purchases: Water – 3 gallons per person or pet Hand-operated can opener and bottle
opener Instant drinks (coffee, tea, powdered soft
drinks) 2 flashlights with batteries
Activities: Make your family preparedness plan Inventory disaster supplies already on hand,
especially camping gear Write purchase date on all water & food
containers not containing an expiration date Conduct a home hazard hunt
MO
NT
H 2
Purchases: Canned meat, stew or pasta meal – 5 per
person Sanitary napkins Videotape Family-sized first aid kit
Activities: Change battery and test smoke detector
(purchase and install a detector if you don’t have one)
Videotape your home, including contents, for insurance purposes. Store the tape with friends or family who live out of town
MO
NT
H 3
Purchases: Canned fruit – 3 cans per person Any foods for special dietary needs
(enough for 3 days) 2 rolls of toilet paper per person Crescent wrenches (or utility shutoff tools)
Activities: Conduct a home fire drill Check with your child’s daycare or school to
find out about their disaster plans Locate gas meter and water shutoff points
and attach/store wrench or shutoff tools near them
Establish an out-of-state contact to call in case of emergency
Your supplies may be stored together in one large container, such as a garbage can on wheels, or several small ones. Remember to store in containers you can easily move. Food items could be kept on a specific shelf in the pantry.
MO
NT
H 4
`
Purchases: Canned vegetables – 4 per person Extra baby bottles, formula and diapers if
needed Extra pet supplies (food, collar, leash) Storage containers for your preparedness
supplies
Activities: Place a sturdy pair of shoes and a flashlight
under your bed so that they will be handy during an emergency
Place a supply of prescription medicine(s) in storage container and date the medicine(s) if not already dated
Start putting supplies in storage containers and include blankets or sleeping bags for each family member
MO
NT
H 5
Purchases: Canned, ready to eat soup – 2 per person Liquid dish soap Plain liquid bleach Portable AM/FM radio, including batteries Antibacterial liquid hand soap Disposable hand wipes
Activities: Make photocopies of important papers and
put in storage container Talk with neighbors to find out who may have
skills or training that would be beneficial after a disaster(i.e., first aid, child care, amateur radio, tree removal, small engine repair, heavy equipment operations, wilderness survival, light rescue, carpentry)
9
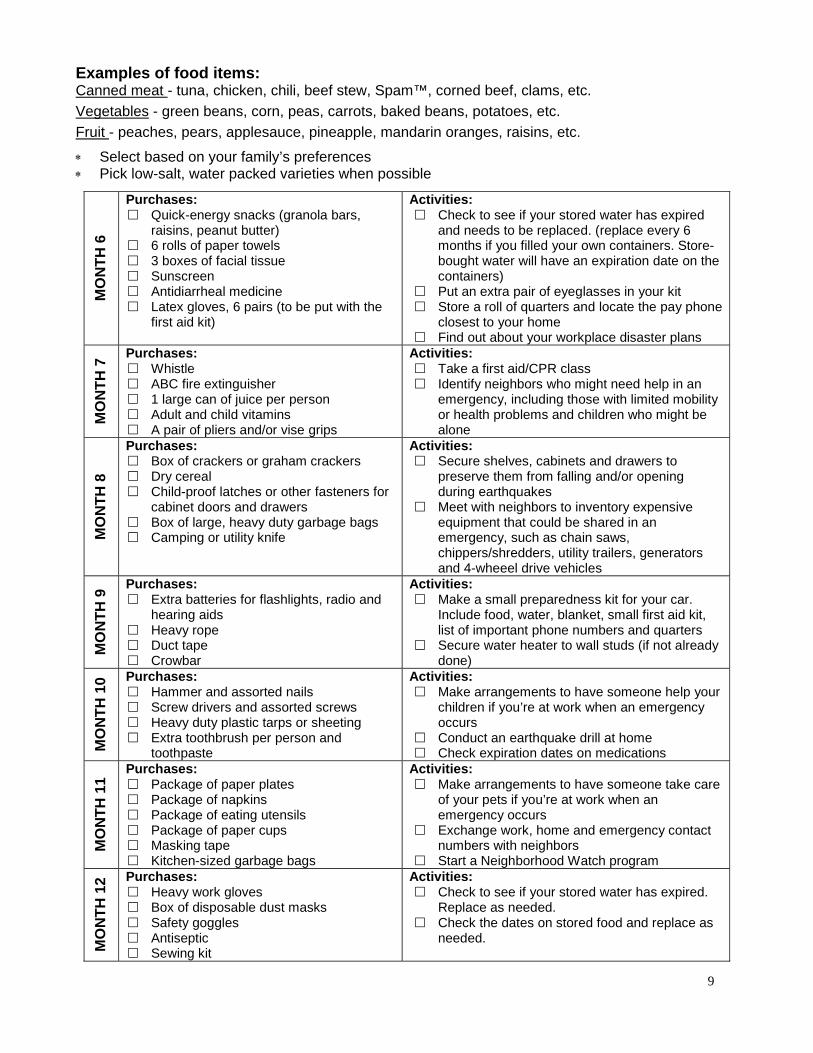
Examples of food items: Canned meat - tuna, chicken, chili, beef stew, Spam™, corned beef, clams, etc.
Vegetables - green beans, corn, peas, carrots, baked beans, potatoes, etc.
Fruit - peaches, pears, applesauce, pineapple, mandarin oranges, raisins, etc.
Select based on your family’s preferences Pick low-salt, water packed varieties when possible
MO
NT
H 6
Purchases: Quick-energy snacks (granola bars,
raisins, peanut butter) 6 rolls of paper towels 3 boxes of facial tissue Sunscreen Antidiarrheal medicine Latex gloves, 6 pairs (to be put with the
first aid kit)
Activities: Check to see if your stored water has expired
and needs to be replaced. (replace every 6 months if you filled your own containers. Store-bought water will have an expiration date on the containers)
Put an extra pair of eyeglasses in your kit Store a roll of quarters and locate the pay phone
closest to your home Find out about your workplace disaster plans
MO
NT
H 7
Purchases: Whistle ABC fire extinguisher 1 large can of juice per person Adult and child vitamins A pair of pliers and/or vise grips
Activities: Take a first aid/CPR class Identify neighbors who might need help in an
emergency, including those with limited mobility or health problems and children who might be alone
MO
NT
H 8
Purchases: Box of crackers or graham crackers Dry cereal Child-proof latches or other fasteners for
cabinet doors and drawers Box of large, heavy duty garbage bags Camping or utility knife
Activities: Secure shelves, cabinets and drawers to
preserve them from falling and/or opening during earthquakes
Meet with neighbors to inventory expensive equipment that could be shared in an emergency, such as chain saws, chippers/shredders, utility trailers, generators and 4-wheeel drive vehicles
MO
NT
H 9
Purchases: Extra batteries for flashlights, radio and
hearing aids Heavy rope Duct tape Crowbar
Activities: Make a small preparedness kit for your car.
Include food, water, blanket, small first aid kit, list of important phone numbers and quarters
Secure water heater to wall studs (if not already done)
MO
NT
H 1
0 Purchases: Hammer and assorted nails Screw drivers and assorted screws Heavy duty plastic tarps or sheeting Extra toothbrush per person and
toothpaste
Activities: Make arrangements to have someone help your
children if you’re at work when an emergency occurs
Conduct an earthquake drill at home Check expiration dates on medications
MO
NT
H 1
1
Purchases: Package of paper plates Package of napkins Package of eating utensils Package of paper cups Masking tape Kitchen-sized garbage bags
Activities: Make arrangements to have someone take care
of your pets if you’re at work when an emergency occurs
Exchange work, home and emergency contact numbers with neighbors
Start a Neighborhood Watch program
MO
NT
H 1
2 Purchases: Heavy work gloves Box of disposable dust masks Safety goggles Antiseptic Sewing kit
Activities: Check to see if your stored water has expired.
Replace as needed. Check the dates on stored food and replace as
needed.
10
Emergency Preparedness For Persons With Special Needs
Anyone with a disability, or who lives with, works with or assists a person with a disability or special need should create a disaster plan. For some individuals, being notified of or responding to a disaster may be more difficult because of a disability. Disabilities may be physical, mental, emotional, ethnic, socio-economic, cultural, or language based. Addressing special needs ahead of time will reduce the physical and emotional trauma caused by the emergency. All Persons With Special Needs
Ask about special assistance that may be available to you in an emergency. Register in the Disaster Registry, so that responders are aware of your needs (See
below) If you currently use a personal care attendant from an agency, check with the
agency to see if they have special provisions for emergencies. If you hire your own personal care attendant, discuss your emergency plan with
her/him and encourage them to have their own emergency plan. Determine what you will do in each type of emergency. Learn what to do in case of power outages. Know how to connect or start a back-
up power supply for essential medical equipment. Write it down in clear directions, and attach it to the power supply.
Arrange for a relative or neighbor to check on you in an emergency. Keep your medications and aids in a consistent place. Keep extra aids in a second
place, if possible. Keep extra supplies of the special items you need, including extra batteries for
these items. Be sure to rotate out any items that expire. Service animals may become confused or frightened. Keep them confined or
securely leashed. Persons with Mobility Challenges
Store emergency supplies in a pack or backpack attached to the walker, wheelchair or scooter.
Keep a pair of heavy gloves in your supply kit to use while wheeling over glass or debris.
If your chair does not have puncture-proof tires, keep a patch kit or can of sealant and air to repair tires.
If you cannot use stairs, discuss lifting and carrying techniques that work for you. Write out brief instructions, and keep in your pack.
11
Persons with Visual Challenges If you have some vision, place security lights in each room to light paths of travel.
These lights plug in, but have a battery backup in case of power failure. If helpful, mark emergency supplies with large print, fluorescent tape, or Braille. Store high-powered flashlights with wide beams and extra batteries.
Persons with Hearing Challenges
Store hearing aids in a strategic and consistent place, so they can be located quickly.
Have paper and pencil in your kit to use if you do not have your hearing aids. Install smoke alarms with both a visual and audible alarm. At least one should be
battery operated. If possible, obtain a battery operated TV with a decoder chip for access to signed or
captioned emergency reports.
Persons with Medical Needs Always have at least a ten (10) day supply of all of your medications and
medical supplies (bandages, ostomy bags, syringes, tubing, solutions, etc). If you use oxygen, be sure to have at least a three (3) day supply.
Store your medications in one location, in their original container. Keep lists of all of your medications: name of medication, dose, frequency, and pre-
scribing doctor in your wallet. For all medical equipment that requires power, get information regarding back-up
power such as a battery or generator. Know if your IV infusion pump has a battery back-up and how long it would last in
an emergency. Ask your home care provider about manual infusion techniques. Have written instructions for all equipment attached to the device(s).
Join the Disaster Registry The Rogue Valley Council of Governments (RVCOG) maintains a database of people who need assistance evacuating their homes or sheltering in place, or who need special notification about an emergency due to varying abilities.
The Disaster Registry provides the names and locations of people who need special assis-tance to fire, police, health and rescue workers to be used during the emergency. This infor-mation is kept secured when not needed for disaster planning or response. Visit http://www.rvcog.org/pdf/Disaster_Registry.pdf or call the Rogue Valley Council of Governments (RVCOG) at (541)664-6674 for more information. Preparing for Disaster for People with Disabilities or Special Needs and Disaster Prepared-ness for People with Disabilities are great planning tools and are available for free from the Red Cross. Call your local chapter at 471-7822 or visit www.redcross.org
12
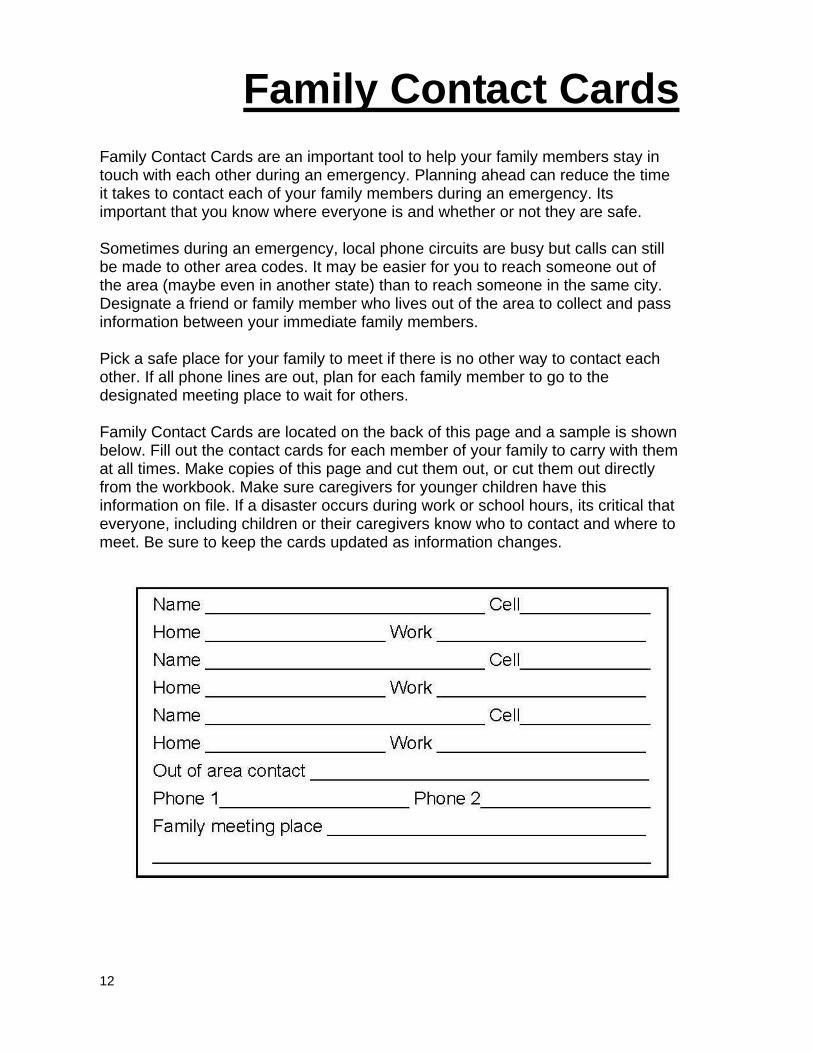
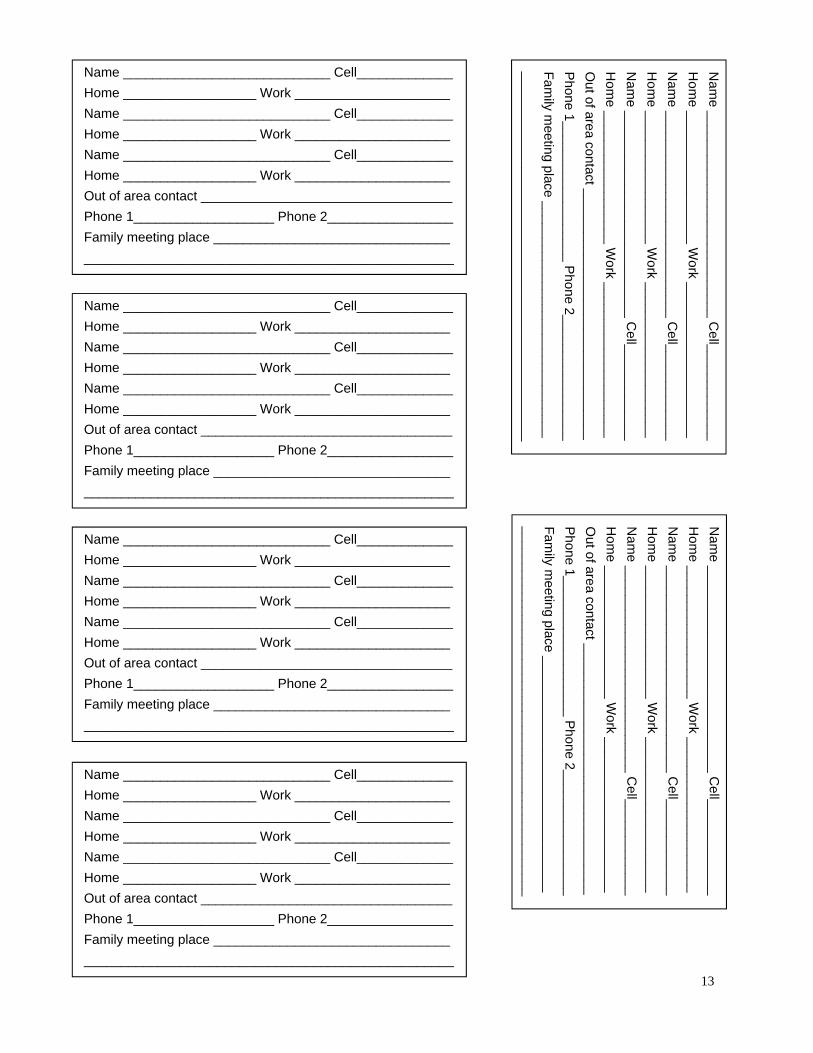
Family Contact Cards are an important tool to help your family members stay in touch with each other during an emergency. Planning ahead can reduce the time it takes to contact each of your family members during an emergency. Its important that you know where everyone is and whether or not they are safe. Sometimes during an emergency, local phone circuits are busy but calls can still be made to other area codes. It may be easier for you to reach someone out of the area (maybe even in another state) than to reach someone in the same city. Designate a friend or family member who lives out of the area to collect and pass information between your immediate family members. Pick a safe place for your family to meet if there is no other way to contact each other. If all phone lines are out, plan for each family member to go to the designated meeting place to wait for others. Family Contact Cards are located on the back of this page and a sample is shown below. Fill out the contact cards for each member of your family to carry with them at all times. Make copies of this page and cut them out, or cut them out directly from the workbook. Make sure caregivers for younger children have this information on file. If a disaster occurs during work or school hours, its critical that everyone, including children or their caregivers know who to contact and where to meet. Be sure to keep the cards updated as information changes.
Family Contact Cards
13
Name ____________________________ Cell_____________
Home __________________ Work _____________________
Name ____________________________ Cell_____________
Home __________________ Work _____________________
Name ____________________________ Cell_____________
Home __________________ Work _____________________
Out of area contact __________________________________
Phone 1___________________ Phone 2_________________
Family meeting place ________________________________
__________________________________________________
Name ____________________________ Cell_____________
Home __________________ Work _____________________
Name ____________________________ Cell_____________
Home __________________ Work _____________________
Name ____________________________ Cell_____________
Home __________________ Work _____________________
Out of area contact __________________________________
Phone 1___________________ Phone 2_________________
Family meeting place ________________________________
__________________________________________________
Nam
e ____________________________ Cell_____________
Hom
e __________________ Work _____________________
Nam
e ____________________________ Cell_____________
Hom
e __________________ Work _____________________
Nam
e ____________________________ Cell_____________
Hom
e __________________ Work _____________________
Out of area contact __________________________________
Phone 1___________________ P
hone 2_________________
Fam
ily meeting place ________________________________
__________________________________________________
Name ____________________________ Cell_____________
Home __________________ Work _____________________
Name ____________________________ Cell_____________
Home __________________ Work _____________________
Name ____________________________ Cell_____________
Home __________________ Work _____________________
Out of area contact __________________________________
Phone 1___________________ Phone 2_________________
Family meeting place ________________________________
__________________________________________________
Nam
e ____________________________ Cell_____________
Hom
e __________________ Work _____________________
Nam
e ____________________________ Cell_____________
Hom
e __________________ Work _____________________
Nam
e ____________________________ Cell_____________
Hom
e __________________ Work _____________________
Out of area contact __________________________________
Phone 1___________________ P
hone 2_________________
Fam
ily meeting place ________________________________
__________________________________________________
14
NEIGHBORHOOD RESOURCE INVENTORY
“Neighbors Helping Neighbors”
There’s So Much To Do... So Get Some Help!
Planning ahead can lessen the impact of a disaster on your neighborhood and also help you recover more quickly. And when you get your neighbors involved, it can even be fun!
To do it right, preparing for emergencies can be a full-time job with a hefty price tag. But it doesn’t have to be that way when you make it a collaborative effort among your neighbors. Many of the skills and equipment you will need in an emergency may already exist in your neighborhood. Search them out, then work with your neighbors on a plan to use them to everyone’s best advantage. Getting agreement ahead of time to share disaster resources can save valuable time when it is needed most - in an emergency. Sound like an overwhelming task? Then break it down into smaller, manageable tasks, as described below.
Start With What You Already Have.
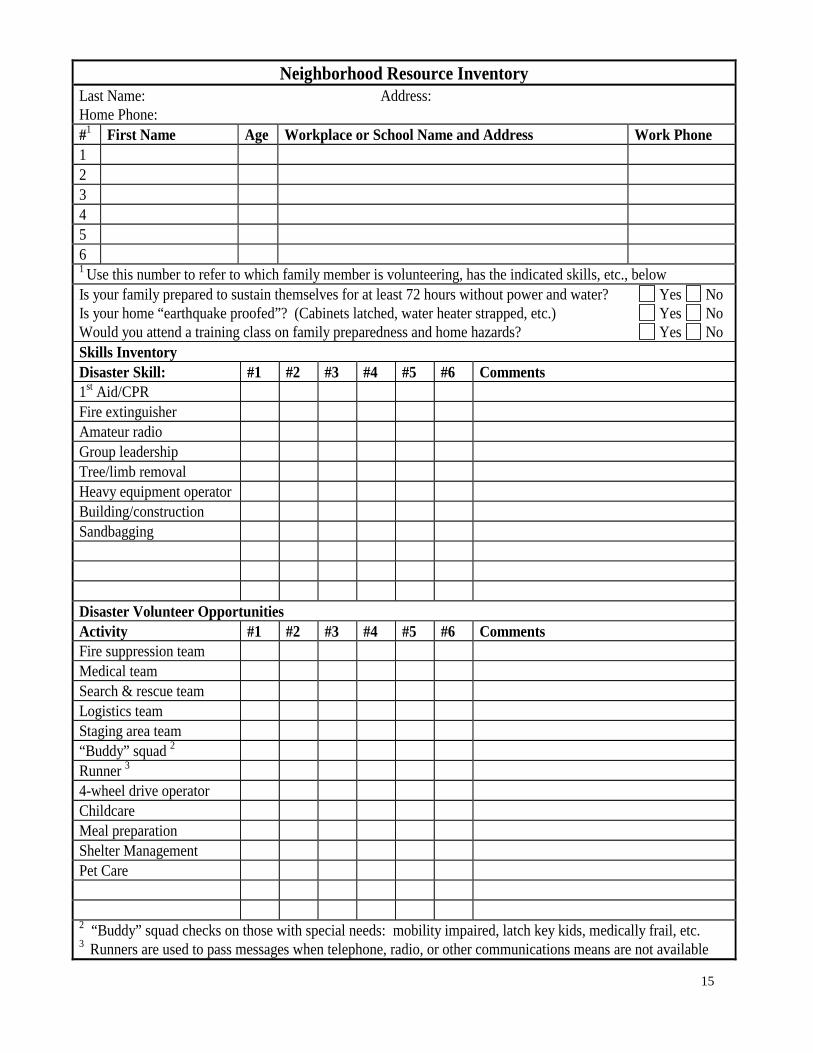
Assess your neighbors for disaster skills and equipment that could be shared in an emergency. Make it a social event. Invite your neighbors out for a block party - if you feed them, they will come! Put neighborhood preparedness as the only thing on the agenda. Most of all, have fun!
Use the form on the reverse side of this flyer to help you. Don’t be discouraged if the resulting list seems small - creativity and innovation are your most valued resources!
Camping gear such as tents, canopies, and cooking stoves can be used for temporary shelter, a feeding station, a first aid station, a pet care center, etc.
Individuals with a certificate or license for medical skills (MD, DC, RN, LPN, etc.), building skills (architect, construction worker, building inspector), utility worker, heavy equipment operator, etc., may indicate willingness to lead their particular area of expertise.
Communications gear, especially amateur (ham) or citizen’s band radio, may be your only link to rescue crews, local government, or each other if telephone lines and cellular telephone sites are down.
Transportation such as 4-wheel drive vehicles, cargo trucks, boats, snowmobiles, etc., may become the only means available to get through debris-strewn, icy, snowy, or flooded streets.
Equipment and tools used for debris removal, home repair, snow removal, etc., could be shared rather than purchased. Be sure to include provisions for replacement, if necessary.
Integrate this approach into your Neighborhood Watch Program or Homeowners’ Association. Don’t reinvent the organizational “wheel;” use what you already have in place and working.
Invite knowledgeable neighbors to teach disaster skills at a Neighborhood Watch or Homeowners’ Association meeting. Invite guest speakers from your local emergency management office, the fire department or the American Red Cross to discuss related topics.
Build On Your Strengths.
15
Neighborhood Resource Inventory Last Name: Address: Home Phone: #1 First Name Age Workplace or School Name and Address Work Phone 1 2 3 4 5 6 1 Use this number to refer to which family member is volunteering, has the indicated skills, etc., below Is your family prepared to sustain themselves for at least 72 hours without power and water? Yes No Is your home “earthquake proofed”? (Cabinets latched, water heater strapped, etc.) Yes No Would you attend a training class on family preparedness and home hazards? Yes No Skills Inventory Disaster Skill: #1 #2 #3 #4 #5 #6 Comments 1st Aid/CPR Fire extinguisher Amateur radio Group leadership Tree/limb removal Heavy equipment operator Building/construction Sandbagging Disaster Volunteer Opportunities Activity #1 #2 #3 #4 #5 #6 Comments Fire suppression team Medical team Search & rescue team Logistics team Staging area team “Buddy” squad 2 Runner 3 4-wheel drive operator Childcare Meal preparation Shelter Management Pet Care 2 “Buddy” squad checks on those with special needs: mobility impaired, latch key kids, medically frail, etc. 3 Runners are used to pass messages when telephone, radio, or other communications means are not available
16
If a fire breaks out in your home, you may have less than two minutes to escape before it’s engulfed in flames. How can you be sure you and your family will know what to do? PREPARE, PREVENT & PRACTICE so you are ready for a house fire.
PREPARE Working smoke detectors
Test your smoke detectors monthly by pressing the test button and listening for the alarm. Change the detector batteries twice a year. Consider doing this at the same time you change your
clocks in the fall and spring. NEVER disable a smoke detector—only WORKING smoke detectors save lives! Consider going to smoke detectors that have a battery life of 10 years.
Home Escape Plan
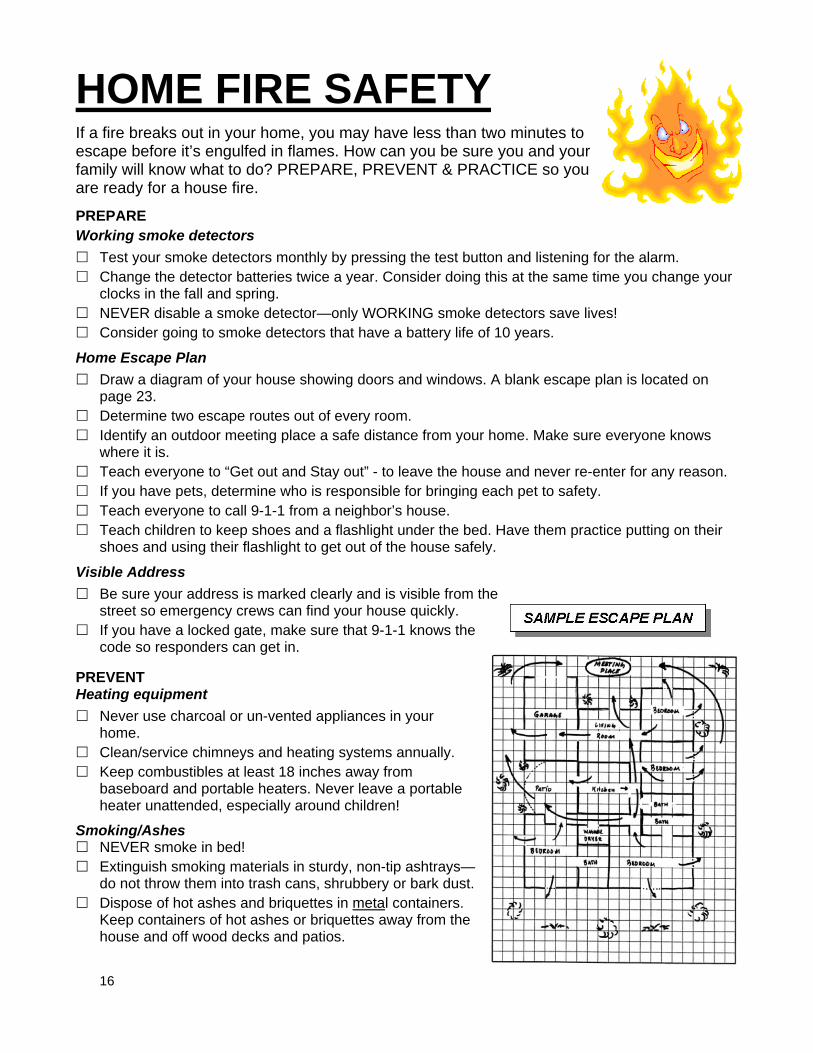
Draw a diagram of your house showing doors and windows. A blank escape plan is located on page 23.
Determine two escape routes out of every room. Identify an outdoor meeting place a safe distance from your home. Make sure everyone knows
where it is. Teach everyone to “Get out and Stay out” - to leave the house and never re-enter for any reason. If you have pets, determine who is responsible for bringing each pet to safety. Teach everyone to call 9-1-1 from a neighbor’s house. Teach children to keep shoes and a flashlight under the bed. Have them practice putting on their
shoes and using their flashlight to get out of the house safely.
Visible Address
Be sure your address is marked clearly and is visible from the street so emergency crews can find your house quickly.
If you have a locked gate, make sure that 9-1-1 knows the code so responders can get in.
PREVENT Heating equipment
Never use charcoal or un-vented appliances in your home.
Clean/service chimneys and heating systems annually. Keep combustibles at least 18 inches away from
baseboard and portable heaters. Never leave a portable heater unattended, especially around children!
Smoking/Ashes NEVER smoke in bed! Extinguish smoking materials in sturdy, non-tip ashtrays—
do not throw them into trash cans, shrubbery or bark dust. Dispose of hot ashes and briquettes in metal containers.
Keep containers of hot ashes or briquettes away from the house and off wood decks and patios.
HOME FIRE SAFETY
17
Matches & Lighters Keep matches and lighters out of the reach of
children! Teach children to tell an adult when they find
matches or lighters, and that those items are not toys.
Do not allow children to use matches or lighters to light candles, especially in bedrooms.
Consider using only lighters with child-resistant features.
Cooking Never leave the room when using burners, especially when warming food. Fats and grease are
highly flammable. In the case of a grease fire, smother the fire with the lid to the pan or use an extinguisher. NEVER throw water on a grease fire.
Keep combustibles away from cooking surfaces—even if the heating elements are not in use. Do not store extra pans or combustibles in the oven.
Electrical Safety Extension cords should not be used in place of permanent wiring. Do not overload plugs or extension cords! If you cannot avoid using a number of power cords,
such as for Christmas lights, be sure to use power strips with circuit breakers. Unplug small appliances, like toasters and curling irons, when not in use. Do not overlook tripped circuit breakers, as they may be an indication of a dangerous situation.
Flammable liquids Store paint, paint thinner, gasoline and other flammable liquids outside your home and away from
heat sources. Rags or combustibles soaked with flammable liquid should be discarded in metal containers with
lids, not trash cans, to prevent spontaneous ignition.
PRACTICE...Panic can slow you down—know what to do and how to do it! When you test your smoke detectors, discuss what the alarm means. Teach family members to crawl low along the floor in a smoke-filled room. Teach family members to feel whether doors are hot before they open them. There could be fire
on the other side! If you have a multi-story home and plan to use an escape ladder, make sure everyone has
practiced using it. Climbing down a ladder in the dark can be scary!
Hold regular fire drills to practice your plan. Practice during the day, and at night so your family is used to getting out of the house under
different conditions. Be sure to include meeting at the designated spot and going to the neighbor’s house as if you
were going to call 9-1-1. Keep track of how long it takes everyone to get out. Try to be as fast as possible. Remember to bring your pets out with you during your fire drills.
Do You Have… Working smoke detectors on each
level of your home and in each bedroom?
Fire extinguishers in the kitchen and garage?
An escape ladder for upper floors? A home escape plan?
Contact your local fire department or visit the Rogue Valley Fire Prevention Cooperative website at www.rvfpc.com for more information on preventing and surviving a house fire.
18
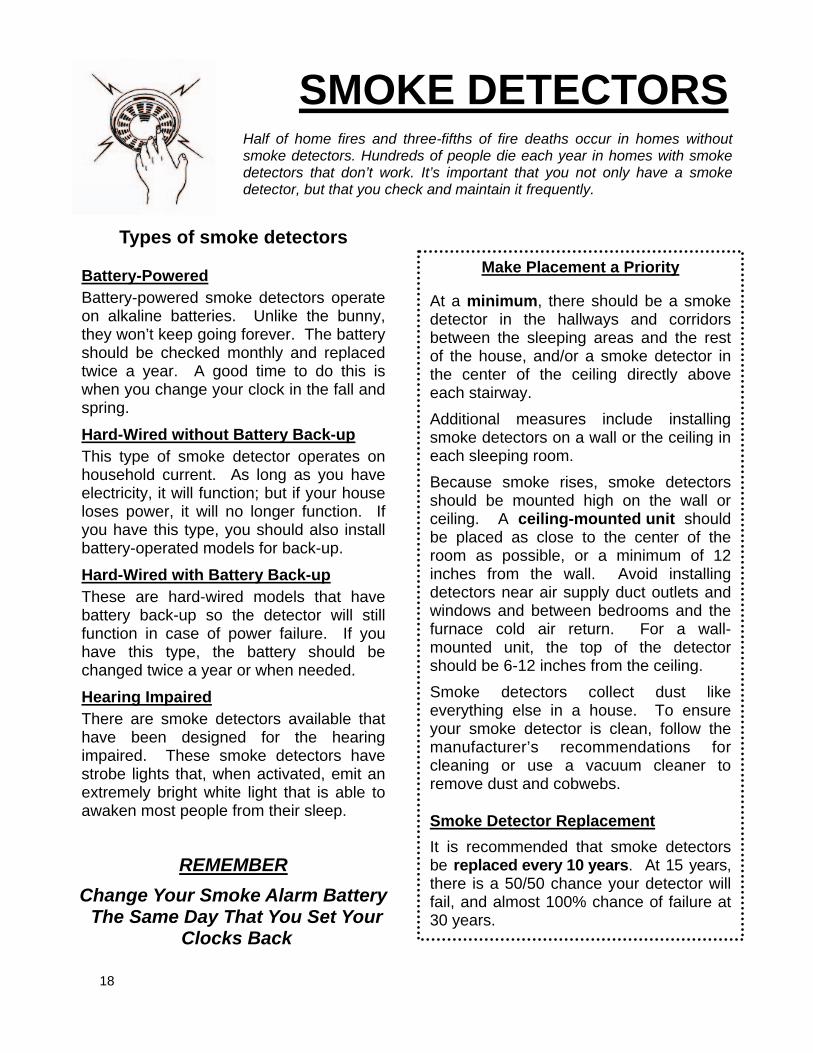
SMOKE DETECTORS
Types of smoke detectors Battery-Powered Battery-powered smoke detectors operate on alkaline batteries. Unlike the bunny, they won’t keep going forever. The battery should be checked monthly and replaced twice a year. A good time to do this is when you change your clock in the fall and spring.
Hard-Wired without Battery Back-up This type of smoke detector operates on household current. As long as you have electricity, it will function; but if your house loses power, it will no longer function. If you have this type, you should also install battery-operated models for back-up.
Hard-Wired with Battery Back-up These are hard-wired models that have battery back-up so the detector will still function in case of power failure. If you have this type, the battery should be changed twice a year or when needed.
Hearing Impaired There are smoke detectors available that have been designed for the hearing impaired. These smoke detectors have strobe lights that, when activated, emit an extremely bright white light that is able to awaken most people from their sleep.
Make Placement a Priority
At a minimum, there should be a smoke detector in the hallways and corridors between the sleeping areas and the rest of the house, and/or a smoke detector in the center of the ceiling directly above each stairway.
Additional measures include installing smoke detectors on a wall or the ceiling in each sleeping room.
Because smoke rises, smoke detectors should be mounted high on the wall or ceiling. A ceiling-mounted unit should be placed as close to the center of the room as possible, or a minimum of 12 inches from the wall. Avoid installing detectors near air supply duct outlets and windows and between bedrooms and the furnace cold air return. For a wall-mounted unit, the top of the detector should be 6-12 inches from the ceiling.
Smoke detectors collect dust like everything else in a house. To ensure your smoke detector is clean, follow the manufacturer’s recommendations for cleaning or use a vacuum cleaner to remove dust and cobwebs. Smoke Detector Replacement
It is recommended that smoke detectors be replaced every 10 years. At 15 years, there is a 50/50 chance your detector will fail, and almost 100% chance of failure at 30 years.
Half of home fires and three-fifths of fire deaths occur in homes without smoke detectors. Hundreds of people die each year in homes with smoke detectors that don’t work. It’s important that you not only have a smoke detector, but that you check and maintain it frequently.
REMEMBER
Change Your Smoke Alarm Battery The Same Day That You Set Your
Clocks Back
19
For more information contact your local fire department
Know Your Fire
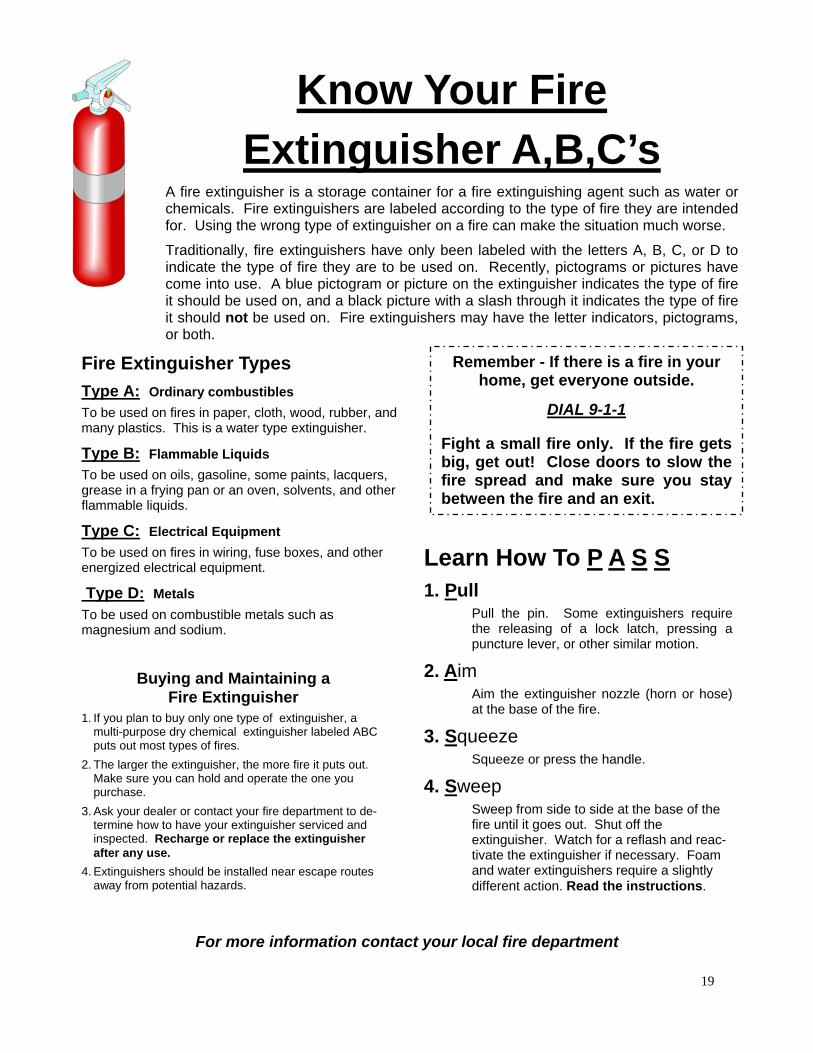
Extinguisher A,B,C’s
Fire Extinguisher Types
Type A: Ordinary combustibles To be used on fires in paper, cloth, wood, rubber, and many plastics. This is a water type extinguisher.
Type B: Flammable Liquids To be used on oils, gasoline, some paints, lacquers, grease in a frying pan or an oven, solvents, and other flammable liquids.
Type C: Electrical Equipment To be used on fires in wiring, fuse boxes, and other energized electrical equipment.
Type D: Metals To be used on combustible metals such as magnesium and sodium.
Learn How To P A S S
1. Pull Pull the pin. Some extinguishers require the releasing of a lock latch, pressing a puncture lever, or other similar motion.
2. Aim Aim the extinguisher nozzle (horn or hose) at the base of the fire.
3. Squeeze Squeeze or press the handle.
4. Sweep Sweep from side to side at the base of the fire until it goes out. Shut off the extinguisher. Watch for a reflash and reac-tivate the extinguisher if necessary. Foam and water extinguishers require a slightly different action. Read the instructions.
Remember - If there is a fire in your home, get everyone outside.
DIAL 9-1-1
Fight a small fire only. If the fire gets big, get out! Close doors to slow the fire spread and make sure you stay between the fire and an exit.
Buying and Maintaining a Fire Extinguisher
1. If you plan to buy only one type of extinguisher, a multi-purpose dry chemical extinguisher labeled ABC puts out most types of fires.
2. The larger the extinguisher, the more fire it puts out. Make sure you can hold and operate the one you purchase.
3. Ask your dealer or contact your fire department to de-termine how to have your extinguisher serviced and inspected. Recharge or replace the extinguisher after any use.
4. Extinguishers should be installed near escape routes away from potential hazards.
A fire extinguisher is a storage container for a fire extinguishing agent such as water or chemicals. Fire extinguishers are labeled according to the type of fire they are intended for. Using the wrong type of extinguisher on a fire can make the situation much worse.
Traditionally, fire extinguishers have only been labeled with the letters A, B, C, or D to indicate the type of fire they are to be used on. Recently, pictograms or pictures have come into use. A blue pictogram or picture on the extinguisher indicates the type of fire it should be used on, and a black picture with a slash through it indicates the type of fire it should not be used on. Fire extinguishers may have the letter indicators, pictograms, or both.
20
ARE YOU PREPARED?
Fire is a natural element in forest ecosystems. Today, more people are taking up residence in the forests and rangelands—and thus becoming part of the wildland/urban interface—where the urban environment meets the wild. Residents living in wildland/urban interface areas should be aware of the danger of wildfire and prepare accordingly.
There are basically three ways structures ignite: When fire reaches such intense radiant heat that a nearby combustible starts burning; When the fire burns right to an object or right to the structure, causing the flames to
directly touch and ignite something that will burn; and When fiery embers, also known as firebrands, fly through the air and land on the structure
or one or more combustibles, starting a fire.
THE HOME IGNITION ZONE (HIZ)
The home ignition zone includes your home and the immediate area surrounding your home, up to 200 feet from the home depending on terrain and vegetation. Keeping your home ignition zone as fire-safe as possible will reduce the chances that your home will ignite during a wildfire.
Your home: Replace wood shake roofs with non-flammable roofing material. Remove leaves & needles from gutters, roofs and decks. Remove tree limbs that hang over the roof. Keep decks free of flammable lawn furniture, door mats, etc. Screen vents and areas under decks with 1/8” metal mesh to keep embers from getting
in your house. Store firewood in a safe location - at least 30 feet away from your home and deck.
Within 30 feet of your home: Maintain 30 feet around your home – lean, green and clean. Remove dead vegetation
and keep dry grass trimmed to 4 inches tall. Plants directly near the home should be carefully chosen (ideally they should be of a fire-
resistant nature) and maintained (well-watered and free of dead materials that could ignite during a wildfire).
Flammable brush (juniper, for example) should be removed.
Within 100 feet of your home: Remove dead plants and brush. Remove low branches from trees and shrubs. Mow grass to 6 inches. Tree crowns should be spaced 10-15 feet apart to avoid dangerous crown fires. Driveways leading to the home should also be clear of heavy vegetation on either side,
and should be wide enough to accommodate fire-suppression vehicles and personnel.
Visit the Rogue Valley Fire Prevention Cooperative website at www.rvfpc.com for more information.

21
EVACUATION Evacuations are done to save lives, and to allow responding personnel to focus on the emergency at hand. Please evacuate promptly when requested!
Evacuation Orders Some evacuation terms you may hear are Voluntary and Mandatory Evacuation, and Precautionary and Immediate Threat. It is important that you follow ALL evacuation instructions immediately, for your safety.
The Evacuation Process Officials will determine the areas to be evacuated and the routes to use depending upon the safest option based for the specific incident.
Law enforcement agencies are typically responsible for enforcing an evacuation order. Follow their directions promptly!
You will be advised of potential evacuations as early as possible.
Continually listen to your radio/TV for announcements from law enforcement / emergency personnel.
If Evacuation Is A Possibility Below is a suggested list of items that you should take with you in the event you must evacuate (gather enough for several days). Be sure to add or subtract from this list as it applies to your family situation. Place these items in your vehicle (make sure each family member has also gathered their items):
Several changes of clothing and sturdy shoes for each family member Toiletries Hearing aids, glasses, etc. Special dietary items Baby supplies, toys, books, etc. Water or snacks (don’t forget water for your pets) Medications, copies of prescriptions, vaccination records Pet food & supplies Important papers (insurance policies, health information, etc) & identification Important phone numbers, cell phone and charger, change for a pay phone
Make an evacuation plan for your family, including where you will go, how you will get there, where your pets will go if they can’t go to a shelter with you, and how you will let others know where you will be.
Park your vehicle facing outward and carry your car keys with you. Locate your pets and keep them nearby; prepare livestock/horses for transport. Leave house lights on, windows closed, and air conditioning off.
Returning Home Emergency officials will determine when it is safe for you to return to your home. This will be done as soon as possible considering safety and accessibility.
Be alert for downed power lines and other hazards.
Check propane tanks, regulators, and lines before turning gas on.
22
SHELTERING-IN-PLACE
Planning to shelter in place
Keep enough supplies on hand for your family and pets for at least three days, or up to seven days If possible.
Remember that during a disaster some services can be out for an extended period of time.
Be sure to store shelf-stable foods, and one gallon of water per day per person or pet.
NEVER ration water unless told to do so by authorities.
Store the items in an easily accessible place, and in quantities that are easy to handle.
Keep an extra supply of important items such as medications, baby supplies, pet supplies, special dietary items, etc. Refer to page 13 for a sample checklist.
Remember to rotate your stored items every six months.
Be sure to listen to your radio to stay updated on the emergency. Authorities will inform you about the status of the emergency, and issue any special instructions such as a boil water advisory.
Plan to have activities for your children such as coloring books, board games or puzzles.
Extended sheltering in place
Professionals in emergency management recommend that everyone be prepared to shelter in place for longer than three days. Some even recommend storing a month or more of essential supplies. Plan for as long as you realistically can. Winter storms can result in trees and limbs across many roads, heavy snow pack, or major flooding. Many natural disasters could result in a power outage or disruption of other essential service for an extended period.
Think about the supplies you have stored and how long they would last.
Are there additional supplies you need to store if power or water were out for a month or more?
How will you ensure sanitation in your home?
Talk to your doctor or pharmacist about ensuring adequate supplies of your prescription medications.
During some emergencies, it may be safest to stay wherever you are rather than to go outside.
Other times, it may be safest to stay at home and weather the storm, rather than evacuate to a family member’s house or an American Red Cross shelter.
23
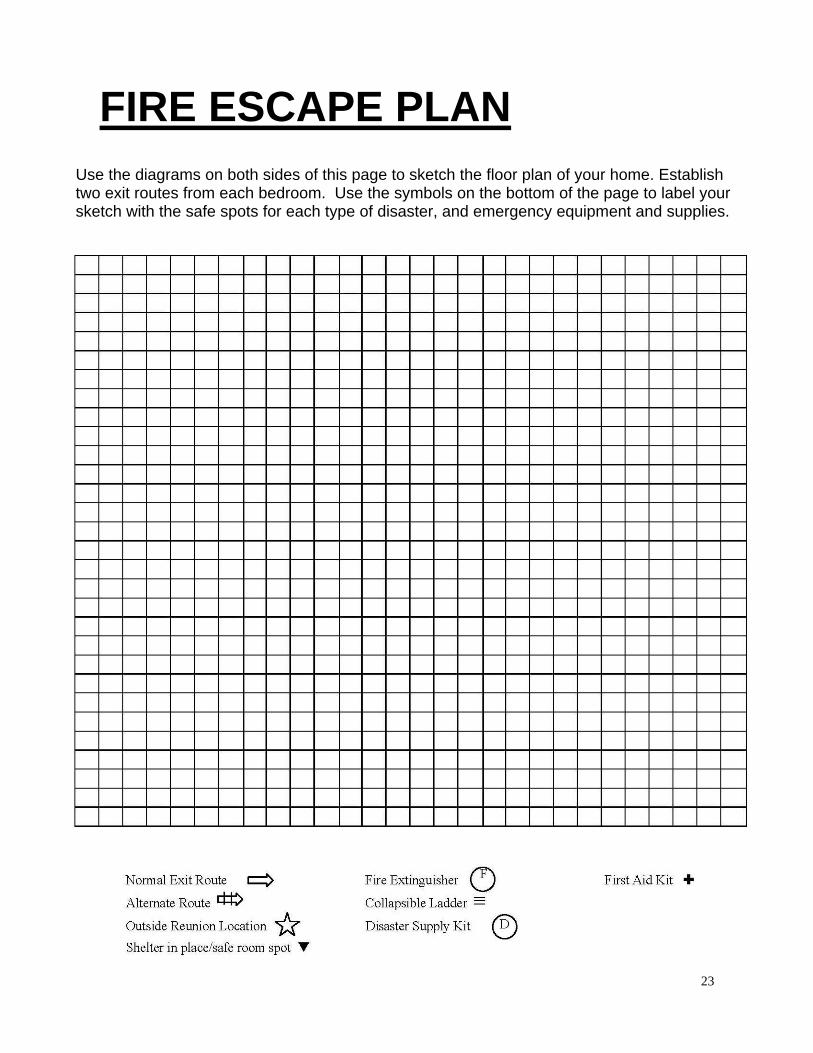
FIRE ESCAPE PLAN Use the diagrams on both sides of this page to sketch the floor plan of your home. Establish two exit routes from each bedroom. Use the symbols on the bottom of the page to label your sketch with the safe spots for each type of disaster, and emergency equipment and supplies.

24
25
EXTREME HEAT
Heat kills by taxing the human body beyond its capabilities. Under normal conditions, the body produces perspiration that evaporates and cools you. In extreme heat or high humidity, evaporation is slowed and your body has to work harder to cool itself. In a normal year, an average of 175 Americans die from extreme heat. Young children, the elderly and those who are sick or overweight are more likely to become victims.
Extreme Heat Terms
Heat Wave - Prolonged periods of excessive heat, often combined with excessive humidity. Heat Index - A number in degrees Fahrenheit (F) that tells how hot it feels when relative humidity is added to the air temperature. Exposure to full sunshine can increase the heat index by 15 degrees. Heat Cramps - Muscular pains and spasms due to heavy exertion. Although heat cramps are the least severe, they are often the first signal that the body is having trouble with the heat. Heat Exhaustion - Typically occurs when people exercise heavily or work in a hot, humid place where body fluids are lost through heavy sweating. Blood flow to the skin increases, causing blood flow to decrease to the vital organs. This results in a form of mild shock. If not treated, the victim’s condition will worsen. Body temperature will keep rising and the victim may suffer heat stroke. Heat Stroke - A life-threatening condition. The victim’s temperature control system, which produces sweating to cool the body, stops working. The body temperature can rise so high that brain damage and death may result if the body is not cooled quickly. Sun Stroke - Another term for heat stroke.
In Josephine County, summer temperatures can hover in the 90’s for weeks at a time. It is not unusual to have numerous days where the temperature reaches over 100 degrees! Whenever possible, avoid prolonged exposure to the heat. Remember that pets, young children and the elderly can be more susceptible to the effects of extreme heat.
DURING A HEAT EMERGENCY
Stay indoors as much as possible and limit exposure to the sun.
Stay on the lowest floor out of the sunshine if air conditioning is not available.
Consider spending the warmest part of the day in public buildings such as libraries, schools, movie theaters, shopping malls and other community facilities.
Eat well-balanced, light and regular meals. Avoid using salt tablets unless directed to do so by a physician.
Drink plenty of water. Persons who have epilepsy or heart, kidney or liver disease; are on fluid-restricted diets; or have a problem with fluid retention should consult a doctor before increasing liquid intake.
Limit intake of alcoholic beverages. Dress in loose-fitting, lightweight clothes
that cover as much skin as possible. Protect face and head by wearing a wide-
brimmed hat. Check on family, friends and neighbors
who do not have air conditioning and who spend much of their time alone.
Never leave children or pets alone in closed vehicles.
Be sure pets have plenty of water and shelter from the sun.
Avoid strenuous work during the warmest part of the day. Use a buddy system when working in extreme heat, and take frequent breaks.
26
Floods Flooding can occur in many places including near any stream, river or other water way. Flooding can also occur in any low lying area if the amount of rainfall and runoff exceeds the capacity of the storm drain system or ditch.
PREPARING FOR A FLOOD Find out if you live in a flood prone area.
Consider purchasing flood insurance for your home. Flood damage and loss is not covered under a homeowner’s policy.
If a flood were to occur, think about how you would keep water from getting in your home.
Consider keeping sandbags on hand. Sandbags are available at most farm and home improvement stores.
IF FLOODING IS IMMINENT Listen to the radio or TV, or check the
internet at www.wrh.noaa.gov for watches and warnings issued by the National Weather Service.
Keep a battery-operated radio on hand in case the power goes out.
Move important items and papers to a safe place in your home, or wrap them in plastic bags to protect them.
If you plan to stay in your home, check your supplies of stored water and food, and other items such as flashlights, batteries and important medications.
If you need to leave, call 511 or visit www.tripcheck.com for road conditions.
DURING A FLOOD The safety of your family is the most
important consideration. If you think the flood may reach your home, evacuate immediately. If time permits, turn off utilities (gas, water and electricity) at the main switch or valve.
Secure outdoor equipment, furniture and other movable objects that might be swept away.
Never walk through flood waters. Strong currents can sweep you off your feet.
Do not allow children or animals to play in flood waters. Flood waters are often contaminated with sewage and flood-related chemical spills.
Listen for information from the health department about the safety of drinking water. If there is a problem with wells or public drinking water, the health department will provide instructions for boiling water before drinking it or suggest you use only bottled water.
Never go around safety barricades set up in the road! Two feet of water is enough to float a car, and the flood waters can conceal places where roadways and bridges have been washed out.
Weather Terminology Flood Watch - A watch is used when forecasters believe it is likely that hazardous weather will occur, but are still unsure about its location and/or timing. A watch is issued to give people time to prepare for the event.
Flood Warning - A warning is used when forecasters believe that hazardous weather is imminent, or very likely to occur. A warning is used for conditions that would threaten lives or property.
27
Winter Storms Winter can bring weather such as snow, ice, freezing temperatures and windstorms. Being prepared for these types of emergencies can save lives!
Monitor weather reports so that you can prepare to lessen the impacts of severe weather. Know what the terms “watch” and “warning” mean.
Winter Preparedness Tips
Keep rock salt on hand to melt ice from walkways around your house.
Ensure that outside pets have adequate shelter from the elements. Check their water bowls to keep them from freezing.
Make sure you have sufficient heating fuel or an alternate heat source in case the power goes out. Do not use portable gas heaters or charcoal grills for heating in closed areas.
Insulate your pipes to keep them from freezing.
Winterize your home by insulating walls and attics, caulking and weather-stripping doors and windows, and installing storm windows or covering windows with plastic.
Have your vehicle winterized and use traction tires or carry tire chains. Always keep the fuel tank full.
Check battery-powered items in your emergency kits to make sure you have plenty of spare batteries.
During a storm: Eat regularly and drink ample fluids. Avoid
caffeine and alcohol. Listen to your NOAA weather radio or your
local radio station for weather reports and emergency information.
If you go outside: Wear several layers of loose-fitting,
lightweight warm clothing. Make sure the outer layer is water and wind-proof.
Wear mittens or gloves. Wear a hat. Cover your mouth with a scarf to protect
your lungs from extremely cold air. Avoid overexertion if possible.
Overexertion can bring on a heart attack - a major cause of winter deaths. Stretch before any strenuous activity and take plenty of breaks.
After a storm: Check your home for any structural
damage, or damage to utilities. If in doubt, ask a building inspector or call your utility company.
Replenish any items used from your emergency kits.
Weather Terminology Winter Storm Watch - A watch is used when forecasters believe it is likely that hazardous weather will occur, but are still unsure about its location and/or timing. A watch is issued to give people time to prepare for the event.
Winter Storm Warning - A warning is used when forecasters believe that hazardous weather is imminent, or very likely to occur. A warning is used for conditions that would threaten lives or property.
Wind Chill - Wind chill is the apparent temperature felt on exposed skin due to wind. As the wind increases, heat is carried away from the body at an accelerated rate, lowering the body temperature.
28
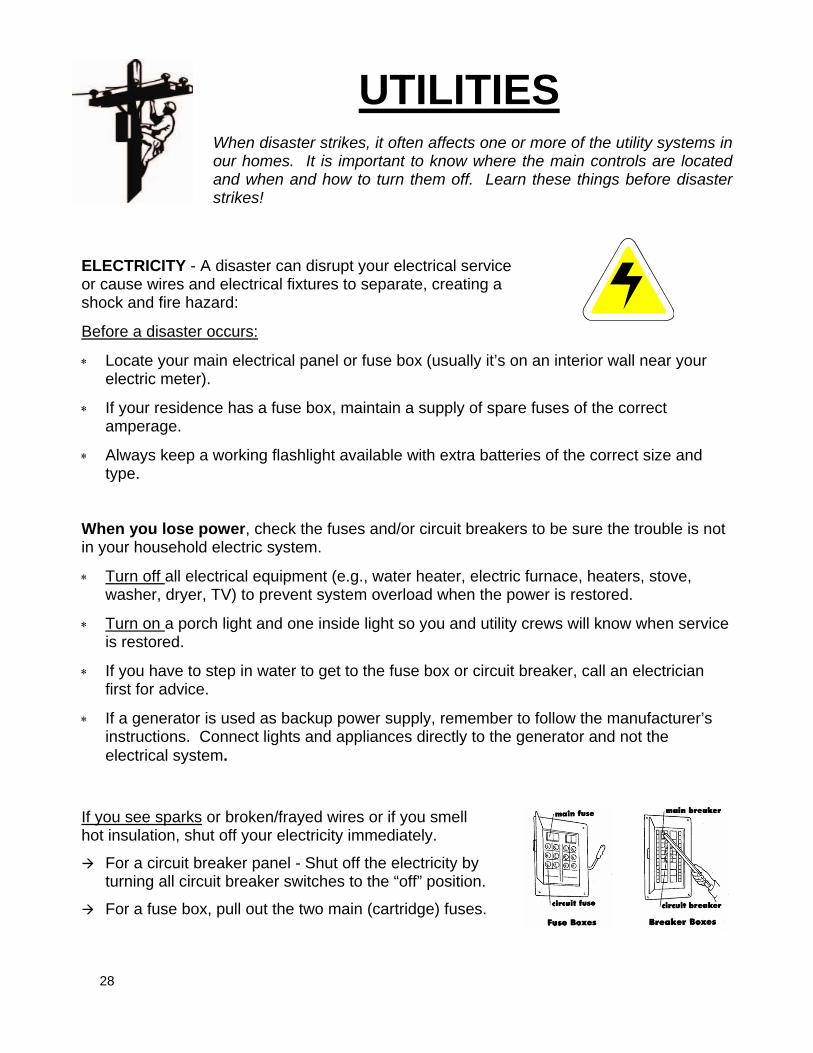
UTILITIES When disaster strikes, it often affects one or more of the utility systems in our homes. It is important to know where the main controls are located and when and how to turn them off. Learn these things before disaster strikes!
ELECTRICITY - A disaster can disrupt your electrical service or cause wires and electrical fixtures to separate, creating a shock and fire hazard:
Before a disaster occurs:
Locate your main electrical panel or fuse box (usually it’s on an interior wall near your electric meter).
If your residence has a fuse box, maintain a supply of spare fuses of the correct amperage.
Always keep a working flashlight available with extra batteries of the correct size and type.
When you lose power, check the fuses and/or circuit breakers to be sure the trouble is not in your household electric system.
Turn off all electrical equipment (e.g., water heater, electric furnace, heaters, stove, washer, dryer, TV) to prevent system overload when the power is restored.
Turn on a porch light and one inside light so you and utility crews will know when service is restored.
If you have to step in water to get to the fuse box or circuit breaker, call an electrician first for advice.
If a generator is used as backup power supply, remember to follow the manufacturer’s instructions. Connect lights and appliances directly to the generator and not the electrical system.
If you see sparks or broken/frayed wires or if you smell hot insulation, shut off your electricity immediately.
For a circuit breaker panel - Shut off the electricity by turning all circuit breaker switches to the “off” position.
For a fuse box, pull out the two main (cartridge) fuses.
29
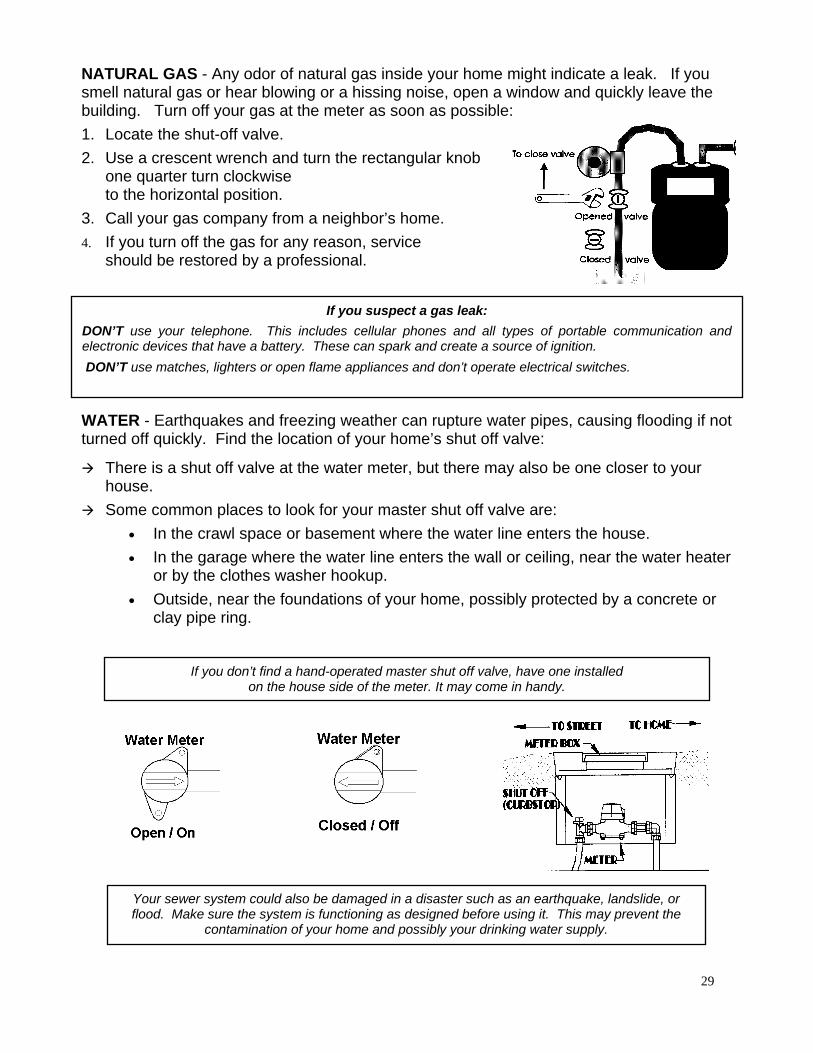
NATURAL GAS - Any odor of natural gas inside your home might indicate a leak. If you smell natural gas or hear blowing or a hissing noise, open a window and quickly leave the building. Turn off your gas at the meter as soon as possible:
1. Locate the shut-off valve.
2. Use a crescent wrench and turn the rectangular knob one quarter turn clockwise to the horizontal position.
3. Call your gas company from a neighbor’s home.
4. If you turn off the gas for any reason, service should be restored by a professional.
If you suspect a gas leak:
DON’T use your telephone. This includes cellular phones and all types of portable communication and electronic devices that have a battery. These can spark and create a source of ignition.
DON’T use matches, lighters or open flame appliances and don’t operate electrical switches.
WATER - Earthquakes and freezing weather can rupture water pipes, causing flooding if not turned off quickly. Find the location of your home’s shut off valve:
There is a shut off valve at the water meter, but there may also be one closer to your house.
Some common places to look for your master shut off valve are:
In the crawl space or basement where the water line enters the house.
In the garage where the water line enters the wall or ceiling, near the water heater or by the clothes washer hookup.
Outside, near the foundations of your home, possibly protected by a concrete or clay pipe ring.
If you don’t find a hand-operated master shut off valve, have one installed on the house side of the meter. It may come in handy.
Your sewer system could also be damaged in a disaster such as an earthquake, landslide, or flood. Make sure the system is functioning as designed before using it. This may prevent the
contamination of your home and possibly your drinking water supply.
30
HEALTH EMERGENCIES As you are preparing for hazards like wildfires and floods, it’s important to also prepare for health emergencies. Health emergencies can vary in size
from an outbreak of food poisoning at a community event to a pandemic illness.
Sometimes health emergencies can be scary; you can’t see, touch or smell diseases the same way that you can smell the smoke from a wildfire or see the flood waters rising. Although thinking about these things can be upsetting, it’s important to learn how to keep yourself and your family as safe as possible.
What are federal, state and local public health agencies doing to prepare? The US Department of Health and Human Services, Oregon State Public Health Division and Josephine County Public Health have developed many emergency plans to respond to health emergencies. State and local health departments are also working with healthcare facilities, businesses, faith-based organizations and other community groups to help them prepare.
What can you do to prepare?
Start by staying healthy!
It sounds simple, like what your grandmother used to tell you, but staying healthy can increase your chances of success in any disaster!
You can find more information about preparing for health emergencies at the following websites:
www.cdc.gov www.pandemicflu.gov www.who.int
www.oregon.gov/dhs/ph/preparedness
Get a yearly flu shot Make sure children are current on
immunizations Maintain a healthy diet Cook foods to the proper temperature and
store them in a safe manner
Get plenty of rest Limit consumption of alcohol and tobacco Dress appropriately for the weather Wear sunscreen Follow health advisories from Public
Health Officials
Cover your cough! Cover your mouth and nose with a tissue when you cough or sneeze, or cough or sneeze into your upper sleeve, not your hands.
Put your used tissues in a waste basket.
After coughing or sneezing, wash your hands with warm soapy water for at least 20 seconds (the time it takes to sing Happy Birthday twice) or clean your hands with alcohol-based sanitizer.
Stay home when you’re sick! With many illnesses, you are more contagious when you first become sick. Staying home limits the spread of germs to other people, and can help you get better sooner.
31
Community Mitigation If a lot of people are sick, Public Health Officials may implement something called “Community Mitigation Strategies.” Community mitigation strategies are ways that members of the community can work together to limit the spread of disease until a vaccine or a cure is available. This can be done in a number of ways: Closing schools, daycares and after-school programs Cancelling public gatherings Asking businesses to have workers work from home (telecommuting) Asking businesses to increase their leave policies In addition, Public Health Officials may ask that people to follow isolation and quarantine guidelines. Isolation is when a person who is sick is asked to stay home for a specified period of time. This helps to ensure that the person doesn’t infect others with the disease. Quarantine is when people who may have been exposed to the disease are asked to stay home for a specified period of time. In some cases, a person can spread an illness before they even know they are sick.
In order for community mitigation strategies to work, community members must follow the instructions from Public Health Officials. Although some of these measures may seem disruptive, its important for everyone’s safety!
During a health emergency: Stay informed about the status of the illness (Television, radio,
newspapers, internet)
Learn what you can do to protect yourself
Follow instructions from Public Health Officials
The Strategic National Stockpile The Strategic National Stockpile (SNS) has large quantities of medicine and medical supplies to protect the American public if there is a public health emergency (terrorist attack, flu outbreak, earthquake) severe enough to cause local supplies to run out. Once Federal and local authorities agree that the SNS is needed, medicines and/or supplies will be delivered to any state in the U.S. within 12 hours. Each state has plans to receive and distribute SNS medicine and medical supplies to local communities as quickly as possible. The medication in the SNS is FREE for everyone.
Josephine County Public Health has worked with other agencies and community partners to develop plans for receiving and distributing our county’s portion of the SNS during an emergency. Many of the supplies (including medical supplies like masks and gowns) will be pushed out to the medical community so that they may continue to treat patients. Medications may be given to the public in a variety of ways, including through a person’s healthcare provider or at a POD.
If there was a need to distribute medication or vaccine to a large number of citizens to help keep them from getting sick, Josephine County Public Health would open a Point of Dispensing (POD) at a location such as the Fairgrounds or the County Building in Cave Junction. Citizens who were not sick would be instructed to go to the POD to receive their medication or vaccine. Each person receiving medication or vaccine would be asked to fill out a short health questionnaire. Sick citizens would be instructed to see their doctor or go to the hospital to receive treatment.
32
Falling objects cause most earthquake-related injuries!
When you begin to feel an earthquake, DUCK under a sturdy piece of furniture like a desk or table. Stay away from windows, bookcases, pictures and mirrors, hanging plants and other heavy objects that may fall. Be aware of falling materials such as plaster, ceiling tiles and bricks that may come loose during the quake. Stay under COVER until the shaking stops. HOLD on to the desk or table that you are under and if it moves, move with it.
EARTHQUAKES
If you are not near a table or desk, move against an interior wall, and protect your head with your arms. Do not go into a doorway, the shaking can cause the door to swing forcibly shut.
HIGH-RISE BUILDINGS - Do not use the elevators and don't be surprised if the fire alarm and/or sprinkler systems come on.
OUTDOORS - Move to a clear area away from trees, signs, power lines, buildings and poles.
NEAR BUILDINGS - Be aware of falling bricks, glass, plaster and other debris. Duck into an entryway and protect your head with your arms.
DRIVING - Pull to the side of the road and stop. Avoid overpasses, power lines, and other hazards. Stay inside the vehicle until the shaking is over.
STORE OR OTHER PUBLIC PLACE - Do not rush for the exit. Move away from shelves and displays that may fall over or contain objects that could fall, then duck, cover and hold.
WHEELCHAIR - If you are in a wheelchair, stay in it. Move to cover, if possible (i.e., an interior wall), lock your wheels, and protect your head with your arms.
KITCHEN - Move away from the refrigerator, stove and overhead cupboards, then duck, cover and hold. [Now would be a good time to anchor appliances and install security latches on cupboards to reduce hazards.]
THEATER OR STADIUM - If possible get on the floor between the rows and cover your head with your arms, otherwise stay in your seat and protect your head with your arms. Do not try to leave until the shaking stops, then leave in a calm, orderly manner.
AFTER AN EARTHQUAKE, BE PREPARED FOR AFTERSHOCKS AND PLAN WHERE YOU WILL TAKE
COVER WHEN THEY OCCUR.
33
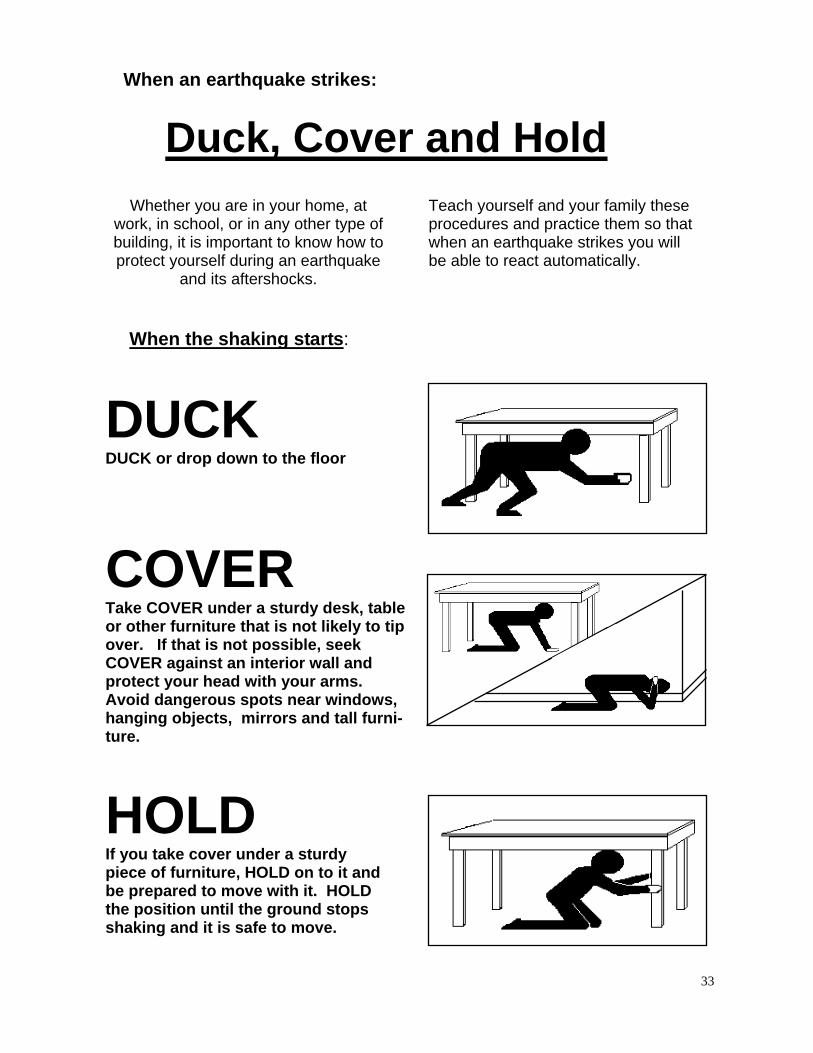
When an earthquake strikes:
Whether you are in your home, at work, in school, or in any other type of building, it is important to know how to protect yourself during an earthquake
and its aftershocks.
Teach yourself and your family these procedures and practice them so that when an earthquake strikes you will be able to react automatically.
When the shaking starts:
DUCK DUCK or drop down to the floor
COVER Take COVER under a sturdy desk, table or other furniture that is not likely to tip over. If that is not possible, seek COVER against an interior wall and protect your head with your arms. Avoid dangerous spots near windows, hanging objects, mirrors and tall furni-ture.
HOLD If you take cover under a sturdy piece of furniture, HOLD on to it and be prepared to move with it. HOLD the position until the ground stops shaking and it is safe to move.
Duck, Cover and Hold
34
Cleaning Products: Bleach (liquid, powdered cleanser, etc.) - reactive and can form
toxic vapors when mixed with other cleaners - especially ammonia or any acid, including vinegar. Irritant to eyes and mucous membranes. Corrosive.
Ammonia (liquid, glass cleaner, etc.) - reacts with acids (such as vinegar) to form a flammable vapor. Skin, eyes, nose, and throat irritant. Corrosive if swallowed.
Oven cleaner - skin irritant, inhalation hazard, caustic substance. Laundry detergent - harmful if swallowed. Mild to severe irritant to skin and eyes. Aerosols - container may explode if heated. Contents may be highly flammable, irritants,
corrosives, toxins, or poisons.
Beauty Aids: Hair spray (pump or aerosol) - most contain alcohol, which is flammable. Aerosol types have
inherent propellant flammability. Nail polish and removers - flammable Perfume, cologne - flammable Deodorant (aerosol) - flammable
Garage or Garden Shed Products: Paints, varnish, paint thinner - flammable Gasoline - flammable and irritant Diesel - combustible and suspected carcinogen Pesticides, herbicides - poison Fertilizer - poison, caustic, oxidizer. Explosive when mixed with hydrocarbons (such as diesel). Lighter fluid - flammable
Other Materials: Propane tanks - flammable gas. Exposure to heat may cause venting or vapor ignition. Oily rags - spontaneously combustible when stored in other than airtight containers.
HAZARDOUS MATERIALS in Your Home and Community
WHAT TYPES OF HAZARDOUS MATERIALS ARE FOUND IN A “TYPICAL” HOME?
WHAT ARE “HAZARDOUS MATERIALS”?
While the United States has a body of law governing the safe handling, transport, and disposal of hazardous materials, accidents can and do occur throughout the country on a regular basis.
By law, a hazardous material is “any product that corrodes other materials, explodes or is easily ignited, reacts strongly with water, is unstable when exposed to heat or shock, or is otherwise toxic to humans, animals, or the environment.” Hazardous materials can include: explosives, flammable gases and liquids, poisons and poisonous gases, corrosives and caustics, nonflammable gases, oxidizers, water-reactive materials and radioactive materials.
For more information on hazardous household products and effective alternatives, call your local Fire Department.
Always call before disposing of possible hazardous material.
Please remember to dispose of hazardous material properly!
35
While there is no way to predict hazardous materials accidents, certain areas are at some degree of risk, including those located near interstate highways, railways, manufacturing, storage, or disposal facilities. Prevention of accidents, rather than prediction, is central to avoiding potential damage, loss, or contamination from hazardous materials.
All producers of hazardous material substances are required to describe the hazards on the product label. Always read the labels carefully and follow directions completely when purchasing, using, or storing these products. Whenever possible, store substances in original containers. Bulk items, such as gasoline for your power mower, should be stored only in approved containers.
Around the house, remember the acronym LIES:
Limit - limit the amount of hazardous materials stored to the absolute minimum.
Isolate - store hazardous materials in a separate, locked cabinet whenever possible.
Eliminate - get rid of hazardous materials as soon as they are no longer needed. Separate - do not store potential reactants together - for example, oxidizers with flammables, or bleach with ammonia.
During a hazardous materials incident in your neighborhood, emergency personnel will tell you what to do. They will likely evacuate you to a safe area until the spill is cleaned up. If you witness a hazardous materials transportation accident, spill, or leakage, distance yourself from the site to minimize risk of contamination - stay uphill, upwind, or upstream. Try to go at least one-half mile (about 10 city blocks) from the danger area. Call 9-1-1. Your local fire department will isolate the area, investigate the situation, and may call in the regional hazardous materials response team, if needed.
A wide variety of hazardous materials are transported through, stored, or used in Josephine County, from flammable gases to highly toxic materials. Most hazardous materials are transported into and out of Josephine County by truck or rail. Common hazardous materials sites include high tech facilities, commercial gas stations, propane distributors, fertilizer plants, feed and garden stores, and public swimming pools. Once hazardous materials are on site at industrial storage and manufacturing facilities, strict Fire and Building Codes mandate double- and triple-redundancy safety systems to reduce the impact of human error or mechanical failures.
In the event of a hazardous materials release in your community:
Tune to your local radio or television stations for further information. In Josephine County the emergency alert radio station is KAJO 1270 AM. Local television stations will also cover any large event.
If you’re in the affected area, follow all instructions from public officials.
AM I IN DANGER IN MY COMMUNITY?
WHAT CAN I DO TO DECREASE MY RISK OF EXPOSURE?
HOW WILL I KNOW WHAT TO DO?
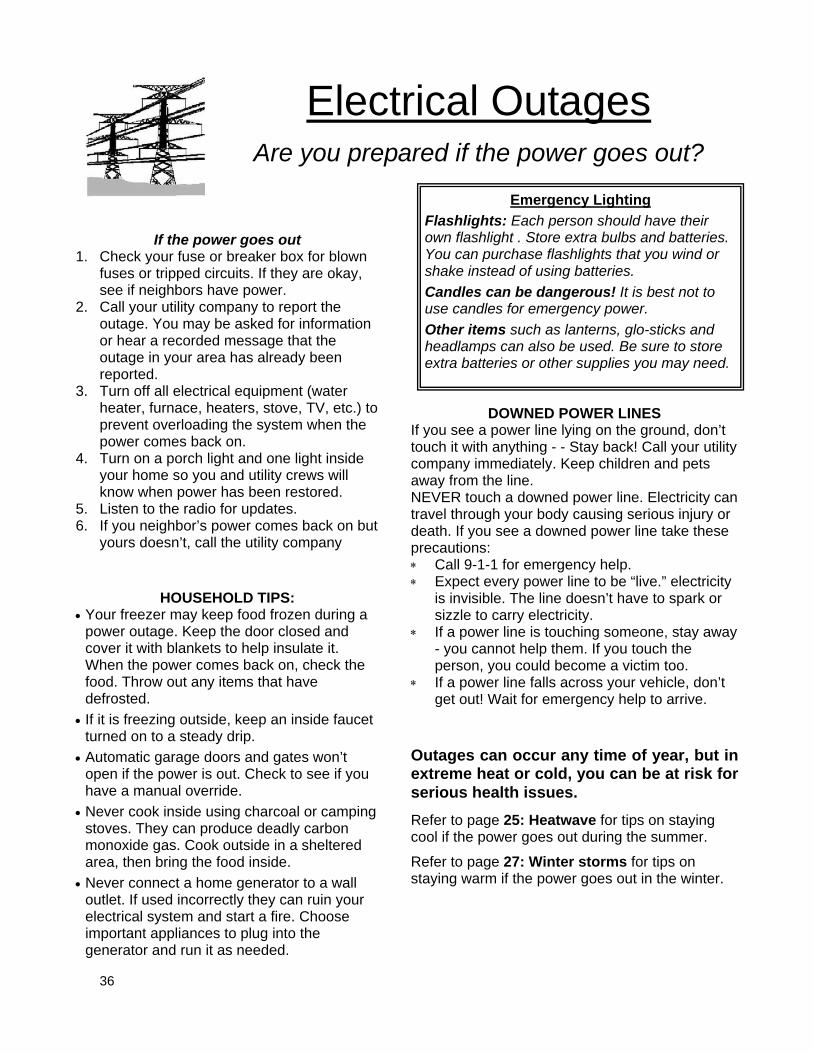
36
Electrical Outages Are you prepared if the power goes out?
If the power goes out 1. Check your fuse or breaker box for blown
fuses or tripped circuits. If they are okay, see if neighbors have power.
2. Call your utility company to report the outage. You may be asked for information or hear a recorded message that the outage in your area has already been reported.
3. Turn off all electrical equipment (water heater, furnace, heaters, stove, TV, etc.) to prevent overloading the system when the power comes back on.
4. Turn on a porch light and one light inside your home so you and utility crews will know when power has been restored.
5. Listen to the radio for updates. 6. If you neighbor’s power comes back on but
yours doesn’t, call the utility company
Emergency Lighting
Flashlights: Each person should have their own flashlight . Store extra bulbs and batteries. You can purchase flashlights that you wind or shake instead of using batteries.
Candles can be dangerous! It is best not to use candles for emergency power.
Other items such as lanterns, glo-sticks and headlamps can also be used. Be sure to store extra batteries or other supplies you may need.
DOWNED POWER LINES If you see a power line lying on the ground, don’t touch it with anything - - Stay back! Call your utility company immediately. Keep children and pets away from the line. NEVER touch a downed power line. Electricity can travel through your body causing serious injury or death. If you see a downed power line take these precautions: Call 9-1-1 for emergency help. Expect every power line to be “live.” electricity
is invisible. The line doesn’t have to spark or sizzle to carry electricity.
If a power line is touching someone, stay away - you cannot help them. If you touch the person, you could become a victim too.
If a power line falls across your vehicle, don’t get out! Wait for emergency help to arrive.
Outages can occur any time of year, but in extreme heat or cold, you can be at risk for serious health issues.
Refer to page 25: Heatwave for tips on staying cool if the power goes out during the summer.
Refer to page 27: Winter storms for tips on staying warm if the power goes out in the winter.
HOUSEHOLD TIPS: Your freezer may keep food frozen during a
power outage. Keep the door closed and cover it with blankets to help insulate it. When the power comes back on, check the food. Throw out any items that have defrosted.
If it is freezing outside, keep an inside faucet turned on to a steady drip.
Automatic garage doors and gates won’t open if the power is out. Check to see if you have a manual override.
Never cook inside using charcoal or camping stoves. They can produce deadly carbon monoxide gas. Cook outside in a sheltered area, then bring the food inside.
Never connect a home generator to a wall outlet. If used incorrectly they can ruin your electrical system and start a fire. Choose important appliances to plug into the generator and run it as needed.
37
SANITATION IN AN EMERGENCY
Emergency Supplies Recommended:
Several five-gallon plastic polyethylene buckets with tight-fitting lids or five-gallon metal containers with tight-fitting lids should be stored as makeshift toilets. A seat can be fashioned from a hole cut in the seat of an old chair, or a toilet seat can be purchased for use with your temporary toilet. Porta-potties can be obtained from camping stores for around $20.
One or more large metal covered garbage cans should be available to contain waste.
A supply of plastic liners (5-6 gallon size) should be stored.
Disinfectant spray.
Deodorizer tablets and air fresheners.
If you elect to build a latrine, be sure it is lower than any nearby water supply and at least one hundred feet away. The hole should be 2 1/2 feet deep, 1 foot wide and 4 feet long. Soil removed from the trench should be placed nearby to shovel in after use. Cover the trench completed when the waste and soil reach within a foot of the top.
In a disaster situation, plumbing may not be usable due to disrupted water and sewer lines. Each household should know how to properly sanitize and dispose of human waste in order to avoid infection and the spread of disease.
The best way to prevent disease is to make sure you wash your hands for at least 20 seconds after each time you use the restroom and before preparing food or eating.
If the water is off but the sewer lines are unaffected, toilets can be flushed with stored water. If sewer lines are broken but the toilets in your home are usable, the bowl can be lined with plastic bags. If it is unusable, substitute a plastic bag in a bucket.
Four types of disinfectant may be used:
If water is available, it is best to use a solution of one part liquid chlorine bleach to ten parts water. (Don’t use dry bleach, which is caustic and not safe for this type of use.)
HTH, or calcium hypochlorite, is available at swimming pool supply stores. HTH is intended to be used in solution. It can be mixed according to the package directions and then stored.
Portable toilet chemicals, both liquid and dry, are available at recreational vehicle supply stores. These chemicals are for use with toilets that are not connected to sewer lines. Use as directed.
Powdered, chlorinated lime is available at building supply stores. It can be used dry. Be sure to get chlorinated lime and not quick lime, which is highly alkaline and corrosive.
CAUTION: Chlorinated products that are intended to be mixed with water for use can be dangerous if used dry. Be sure to read and follow the directions on the package.
38
REMEMBER:
Never ration water. Drink the amount you need today, and try to find more for tomorrow!
If an earthquake, winter storm, or other disaster strikes your community, you might not have access to food and water for days or even weeks. Take some time now to store emergency food and water supplies.
WATER - THE ABSOLUTE NECESSITY You and your family can survive for many days without food, but only a short time without water. Following an earthquake or other catastrophe, there may be significant damage to regional and local water supply systems, and even wells. Having an ample supply of clean water is a top priority in an emergency. Store a three-day supply of water for each family member. One gallon per person per day is recommended for drinking, cooking, and washing. Remember to include water for your pets. Write the date on the water containers and replace the water every six months.
Indoor Water Sources
Ice Cubes - Melt and use.
Toilet Tank (not the bowl) - Contains clean water which can be used directly from tank. Do not use this water if you have added any chemical treatments (cleaners) to the tank.
Hot Water Heater - Be sure electricity or gas are turned off. Open the drain at the bottom of the tank. Start the water flowing by turning off the water intake valve and turning on a hot water faucet. Do not turn on the gas or electricity when the tank is empty.
Never drink or cook with water from a water bed! It contains an algicide that can make you very sick.
Outdoor Water Sources
If you need to seek water outside your home, you can use these sources. Be sure to purify the water before drinking it.
• Rainwater
• Ponds and lakes
• Natural springs
• Streams, rivers, and other moving bodies of water
Purify water by boiling it for 5-10 minutes or by adding 16 drops of household bleach containing 5.25% hypochlorite per each gallon of water. Water purification tablets or filter systems; such as those designed for campers and backpackers also work.
FOOD & WATER IN AN EMERGENCY
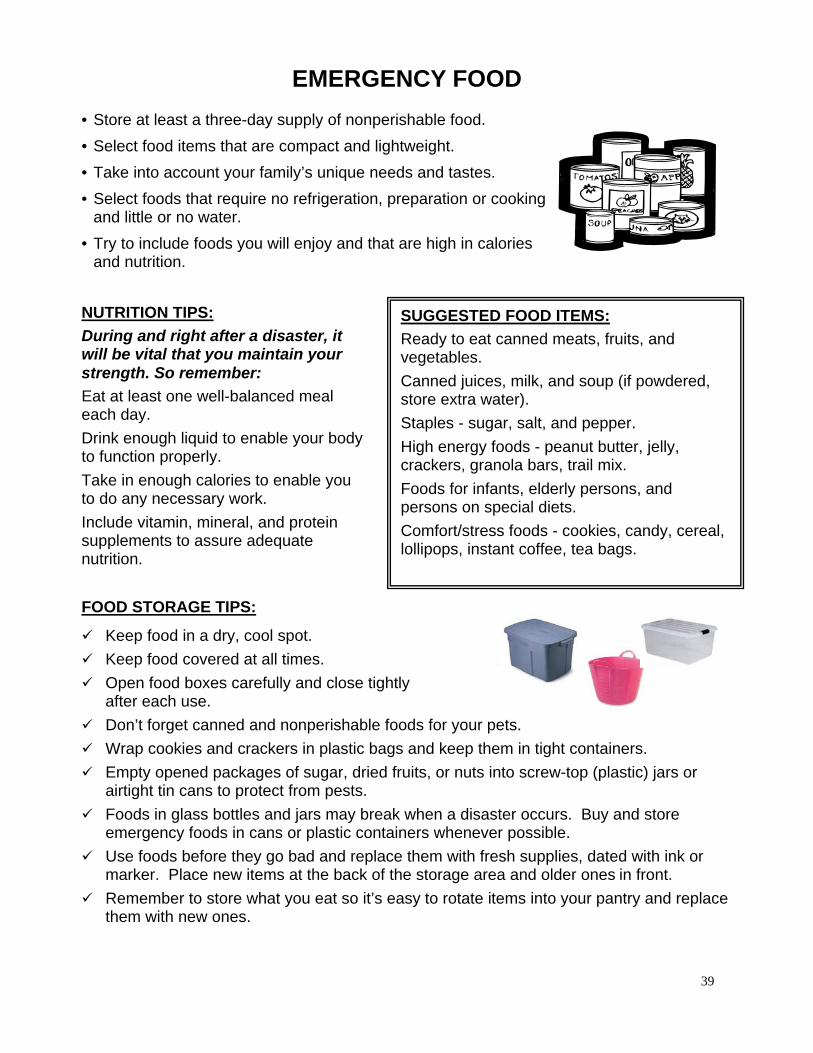
39
FOOD STORAGE TIPS:
Keep food in a dry, cool spot.
Keep food covered at all times.
Open food boxes carefully and close tightly after each use.
Don’t forget canned and nonperishable foods for your pets.
Wrap cookies and crackers in plastic bags and keep them in tight containers.
Empty opened packages of sugar, dried fruits, or nuts into screw-top (plastic) jars or airtight tin cans to protect from pests.
Foods in glass bottles and jars may break when a disaster occurs. Buy and store emergency foods in cans or plastic containers whenever possible.
Use foods before they go bad and replace them with fresh supplies, dated with ink or marker. Place new items at the back of the storage area and older ones in front.
Remember to store what you eat so it’s easy to rotate items into your pantry and replace them with new ones.
NUTRITION TIPS:
During and right after a disaster, it will be vital that you maintain your strength. So remember:
Eat at least one well-balanced meal each day.
Drink enough liquid to enable your body to function properly.
Take in enough calories to enable you to do any necessary work.
Include vitamin, mineral, and protein supplements to assure adequate nutrition.
EMERGENCY FOOD
• Store at least a three-day supply of nonperishable food.
• Select food items that are compact and lightweight.
• Take into account your family’s unique needs and tastes.
• Select foods that require no refrigeration, preparation or cooking and little or no water.
• Try to include foods you will enjoy and that are high in calories and nutrition.
SUGGESTED FOOD ITEMS:
Ready to eat canned meats, fruits, and vegetables.
Canned juices, milk, and soup (if powdered, store extra water).
Staples - sugar, salt, and pepper.
High energy foods - peanut butter, jelly, crackers, granola bars, trail mix.
Foods for infants, elderly persons, and persons on special diets.
Comfort/stress foods - cookies, candy, cereal, lollipops, instant coffee, tea bags.
40
Motor Vehicle Preparedness
What if you were held up in traffic for a prolonged period of time due to weather conditions or a traffic accident? Keeping some basic supplies in your vehicle can make the delay much more comfortable.
If someone on the road needed help, would you have supplies to help them, such as a blanket, first aid kit or flares?
BASIC EMERGENCY SUPPLY KIT FOR YOUR CAR
Bottled water or juice
Energy or granola bars
Pop-top canned fruit
Dried fruit or trail mix
Napkins or paper towels
Cell phone charger
Flashlight and batteries
Work gloves
Tire chains
Blanket
Jumper cables
First aid kit
Flares or warning triangles
Maps
Extra warm clothes, such as jacket, hat or mittens
Other supplies such as diapers, formula, dog leashes, etc.
Winter Storms
If you are caught in a storm, stay in your vehicle until you are rescued. Never attempt to walk from the vehicle unless you can see a definite safe haven ahead.
Run your engine for brief periods of time to provide heat and recharge the battery. Leave a window cracked to avoid a buildup of deadly carbon monoxide.
Check to ensure that your vehicle's exhaust pipe is free from snow.
Floods
Get out of your vehicle and move to high ground.
Never attempt to drive across a flooded road. Flood waters can conceal areas where the road has been washed away or other hazards.
A foot of water exerts about 500 pounds of force against a vehicle. Your vehicle can easily be swept away.
Earthquake
Stay in your vehicle.
Pull to the side of the road and turn off the ignition.
If possible, stop clear of buildings, overpasses and utility wires.
When the shaking has stopped, proceed cautiously. Be careful of downed trees and power lines.
STAY OUT OF PARKED VEHICLES IN THE SUMMER!
During hot weather, heat can build up rapidly in a closed, or nearly closed car.
Children, the elderly and pets can die of heatstroke in a matter of minutes when left in a closed car.
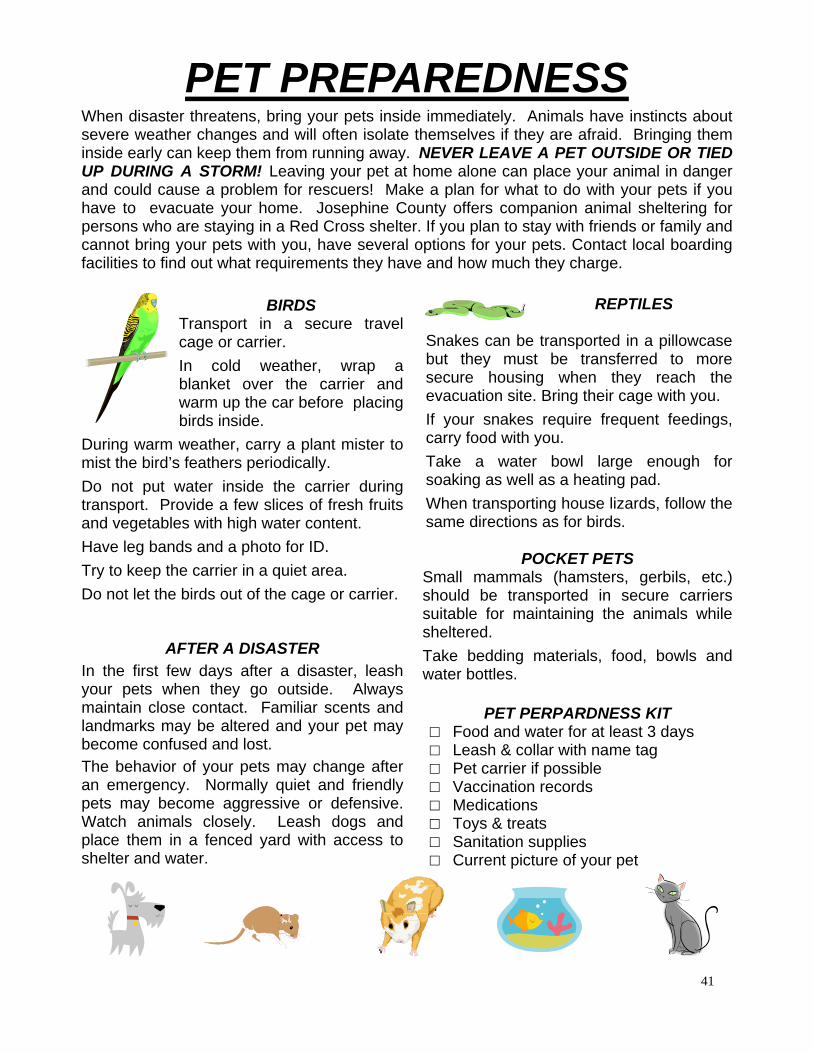
41
BIRDS Transport in a secure travel cage or carrier.
In cold weather, wrap a blanket over the carrier and warm up the car before placing birds inside.
During warm weather, carry a plant mister to mist the bird’s feathers periodically.
Do not put water inside the carrier during transport. Provide a few slices of fresh fruits and vegetables with high water content.
Have leg bands and a photo for ID.
Try to keep the carrier in a quiet area.
Do not let the birds out of the cage or carrier.
REPTILES
Snakes can be transported in a pillowcase but they must be transferred to more secure housing when they reach the evacuation site. Bring their cage with you.
If your snakes require frequent feedings, carry food with you.
Take a water bowl large enough for soaking as well as a heating pad.
When transporting house lizards, follow the same directions as for birds.
POCKET PETS Small mammals (hamsters, gerbils, etc.) should be transported in secure carriers suitable for maintaining the animals while sheltered.
Take bedding materials, food, bowls and water bottles.
AFTER A DISASTER In the first few days after a disaster, leash your pets when they go outside. Always maintain close contact. Familiar scents and landmarks may be altered and your pet may become confused and lost.
The behavior of your pets may change after an emergency. Normally quiet and friendly pets may become aggressive or defensive. Watch animals closely. Leash dogs and place them in a fenced yard with access to shelter and water.
PET PERPARDNESS KIT Food and water for at least 3 days Leash & collar with name tag Pet carrier if possible Vaccination records Medications Toys & treats Sanitation supplies Current picture of your pet
PET PREPAREDNESS When disaster threatens, bring your pets inside immediately. Animals have instincts about severe weather changes and will often isolate themselves if they are afraid. Bringing them inside early can keep them from running away. NEVER LEAVE A PET OUTSIDE OR TIED UP DURING A STORM! Leaving your pet at home alone can place your animal in danger and could cause a problem for rescuers! Make a plan for what to do with your pets if you have to evacuate your home. Josephine County offers companion animal sheltering for persons who are staying in a Red Cross shelter. If you plan to stay with friends or family and cannot bring your pets with you, have several options for your pets. Contact local boarding facilities to find out what requirements they have and how much they charge.
42
LIVESTOCK PREPAREDNESS
It is especially important for livestock owners to be prepared because of their transportation and shelter needs. Disasters can happen anywhere at any time. Being prepared can help you to act quicker during a disaster.
Be prepared to evacuate as soon as an order is given.
Make a disaster plan to protect your property, your facilities and your animals. Review and update your disaster plan, supplies and information regularly.
Create a list of emergency telephone numbers, including those of your employees, neighbors, veterinarian, state veterinarian, poison control, local animal shelter, county extension service, local agricultural schools, trailering resources and local volunteers. Include a contact person outside the disaster area. Make sure all this information is written down and that everyone has a copy.
Sheltering in place Depending on the disaster, it may be safest to shelter in place. Think about how you would care for your livestock and keep them safe during a disaster.
Decide whether to confine your animals to available shelter or leave them out in pastures.
Install a hand pump and obtain enough large containers to water your animals for at least a week.
Identify alternate water and power sources. A generator with a safely stored supply of fuel may be essential, especially if you have electrical equipment necessary for the well being of your animals.
Secure or remove anything that could become blowing debris; make a habit of securing trailers, propane tanks and other large objects. If you have boats, feed troughs or other large containers, fill them with water before any high wind event. This prevents them from blowing around and also gives you an additional supply of water.
Evacuation During some disasters, you may have no choice but to evacuate with your livestock. Plan ahead as much as possible to allow yourself enough time to get you animals to safety.
Before the disaster, make plans for where you can take your animals. Talk to other livestock owners, agricultural schools, the extension service and others in your community for ideas.
Make sure every animal has durable visible identification.
Plan to take food and other supplies that your animals will need for their care.
Plan to take vaccination records, records of feeding and tests, and ownership information.
For more information, contact the Humane Society of the United States at www.hsus.org or (202) 452-1100
43
Disaster Psychology When disaster strikes, physical assistance may be only part of what survivors need. “Psychological First Aid” for disaster-induced stress and trauma may also be required.
Severe cases will require the assistance of a mental health professional. For many, however, the best medicine you can provide may be a sympathetic ear.
Disaster survivors normally experience a range of psychological and physiological reactions. Survivors’ reactions may become more intense as the amount of disruption to their lives increases. The strength and type of reaction varies with each person and depends upon several factors:
Prior experience with the same or a similar event
The intensity of the disruption
The emotional strength of the individual
Individual feelings that there is no escape, which sets the stage for panic
The length of time that has elapsed since the event occurred
Disaster-induced stress is a “normal” reaction to an “abnormal” situation.
Pre-empt some of the symptoms by taking care of yourself!
Try to rest a bit more.
Eat well-balanced and regular meals (even when you don’t feel like it).
Try to keep a reasonable level of activity - physical activity is often helpful.
Reestablish a normal schedule as soon as possible. Fight against boredom.
If you are alone, have someone stay with you for at least a few hours or periods of a day.
Recurring thoughts, dreams or flashbacks are normal - don’t try to fight them. They’ll decrease over time and become less painful.
The intensity, timing and duration of post-event psychological and physiological symptoms will vary from person to person. They may be acute or mild and may be immediate or delayed.
Psychological symptoms may include:
Irritability or anger Self-blame or blaming others Isolation or withdrawal Fear of recurrence
Feeling stunned, numb or overwhelmed Feeling helpless Sadness, depression or grief Mood swings Concentration and memory problems
Physiological symptoms may include:
Loss of appetite Headaches, chest pain Diarrhea, stomach pain, nausea
Increase in alcohol or drug use Hyperactivity Nightmares Inability to sleep Fatigue, low energy
During any disaster, mental health workers are available to help survivors, response workers and others affected by the disaster. If you or a family member or friend is in need of assistance, help will be
available from the American Red Cross or Josephine County.

44
First Aid
It’s an old saying, but...An Ounce of Prevention, IS Worth a Pound of Cure, especially in an emergency situation when seconds count. Here are a few selected first aid tips that may be useful in a disaster situation.
First aid is the immediate care given to a person who is injured or ill. Sudden illness or injury can often cause irreversible damage or death to the victim unless proper care is initiated as soon as possible.
Because life-threatening situations do occur, everyone should know how to provide emergency care until a victim can be treated or transported to a medical facility.
First aid is not intended to replace care by a medical professional. Its intent is to protect the victim until medical assistance can be obtained.
For any situation that appears to be life-threatening, it’s important to remember to call 9-1-1 and get help on the way as soon as possible.
The primary purpose of first aid is to:
Care for life-threatening situations Protect the victim from further injury and
complications Arrange transportation for the victim to a
medical facility
As a Rule of Thumb Call 9-1-1 if: The victim has lost consciousness, is
unusually confused, or is losing consciousness
The victim has difficulty breathing or is not
breathing in a normal way
The victim has chest pain or pressure that won’t go away
The victim has persistent pressure or pain in the abdomen
The victim is vomiting or passing blood
The victim is having seizures or severe headache, or has slurred speech
The victim has head, neck, or back injuries
The victim seems to have been poisoned
First aid Kit You can purchase a pre-made kit or build your own. You should have a kit for your home and each of your vehicles. Below is a list of basic supplies. Be sure to include any other supplies you and your family may need: American Red Cross or other first aid
book
Basic bandages (an assortment of adhesive bandages or athletic tape and moleskin)
Basic medications (Tylenol, ibuprofen, antacids, antibacterial ointment)
Basic tools (tweezers, small mirror, scissors, needle, thermometer)
Cleansing agent/soap
Antiseptic and moistened towlettes
Latex gloves (2 pair)
Additional items such as: gauze pads, Ace and butterfly bandages, burn gel, Caladryl, sunscreen, ice packs, slings, basic splints, safety pins, etc.
45
An accident can occur at any time or any place. If you are the first person to arrive, there are a few basic principles you should follow to protect your self and the victim.
CALL 9-1-1; then:
Survey the Scene. Before you help the victim, determine if the scene is safe. If anything dangerous is present, don’t put your own life at risk to try and help the victim; you will be of no aid if you become a victim too. Summon help and wait for trained people to resolve the situation. If the scene is safe, try to determine what happened and how many victims there may be. Never move a victim unless an immediate, life-threatening danger exists, such as a fire or the threat of a building collapse.
Primary Victim Survey. After ensuring the scene is safe, you can turn your attention to the victim. If the victim appears to have head or neck injuries do not attempt to move them!
To check for consciousness, gently tap the person and ask if they are okay. If there is no response, this in an indication that a possible life-threatening situation may exist. If the person is responsive and can talk or cry, this indicates they are conscious, breathing, have an unobstructed airway, and a pulse. If the victim is unconscious, kneel down next to the head and check for the ABC’s: Airway, Breathing, and Circulation. To check the Airway (clear and maintain an open airway), Breathing (restore breathing), and Circulation (restore circulation), place your ear next to the victim’s mouth and listen/feel for breath sounds while looking for a rise and fall of the chest. These three steps will determine if cardiopulmonary resuscitation (CPR) is needed.
If you would like to learn how to perform CPR and First Aid, contact your local fire department, hospital, or the American Red Cross.
SHOCK - The Silent Killer
Shock is a life-threatening secondary condition wherein the body’s vital physical and mental functions are seriously impaired due to an inadequate supply of oxygenated blood reaching the lungs, heart or brain. This is the body’s reaction to a serious injury, illness or other traumatic event.
Characteristics of shock include:
Anxiety (usually the earliest sign), weakness, paleness, sweating, and thirst
Pulse may become rapid and weak
Patient may become dizzy and pass out
The more severe the injury or illness, the more likely shock will set in
Shock can result in death if not treated rapidly
To treat shock, check your “ABC’s,” then handle the patient gently, and only if necessary. If conscious, place the victim on his/her back. if unconscious, place face down, with the head to one side, but only if no neck injury is suspected. Except in the case of a head injury or suspected neck fracture, lower the head and shoulders and elevate the feet approximately 15 inches. Make sure there are no broken bones before straightening the patient out. Protect the patient from becoming cold, especially from the ground below. Continue to reassure the patient.
46
Bone Fractures There are two types of fractures:
Closed Fracture which is a break or crack in a bone that does not puncture or penetrate the skin.
Open Fracture which is a break in the skin caused by a protruding bone, or there is an open wound in the area of the fracture. Open fractures are more serious than closed fractures.
Some symptoms of a fracture are:
The injured part appears deformed
Pain is present when attempting to move the part
Absence of feeling when touched
Bluish color and swelling in the area of the injury
To treat a fracture:
Splint the patient before moving
Pad the splint and place it so that it supports the joint above and below the fracture
Immobilize a leg fracture by splinting the fractured leg to the unbroken leg if no other materials are present
If the limb is grossly deformed by the fracture, splint in place, and do not try to straighten it
Elevate and use indirect (not on skin) ice packs if available
Caring for minor open wounds Blood color for a minor wound is dark red/purple. Always wear latex gloves when you
come into contact with body fluids. Stop the bleeding by applying direct
pressure with a clean absorbent cloth. If a cloth is not available, use your fingers.
If the blood soaks through, apply a second bandage on top. DO NOT remove the first bandage because it will disturb the clotting which has already occurred.
If the bleeding still does not stop, elevate the wound higher than the person’s heart.
Once the bleeding stops, clean the wound gently to get all the debris and dirt out.
Apply an antibiotic ointment if necessary. Wrap the wound firmly in a cloth or
bandage. Be careful not to cut the circulation off.
Caring for a major open wound Blood color for a major wound can be either dark red/purple or bright red. If the blood is bright red and spurts from the wound, it is arterial. Arterial bleeding is life-threatening and must be treated immediately. Cover the wound with a clean dressing
and press against it firmly with your hand. Elevate the wound higher than the
person’s heart. Cover over the clean dressing with a roll
bandage to hold the dressing in place. If the bleeding does not stop, add
additional dressings over the roll. Squeeze a pressure point, which means
to press the artery, above the wound, against the bone. The primary pressure points are on the inside of the arm just under the armpit and on the inside of the leg in the groin.
Seek medical attention as soon as possible.
Be careful not to cut off the circulation.
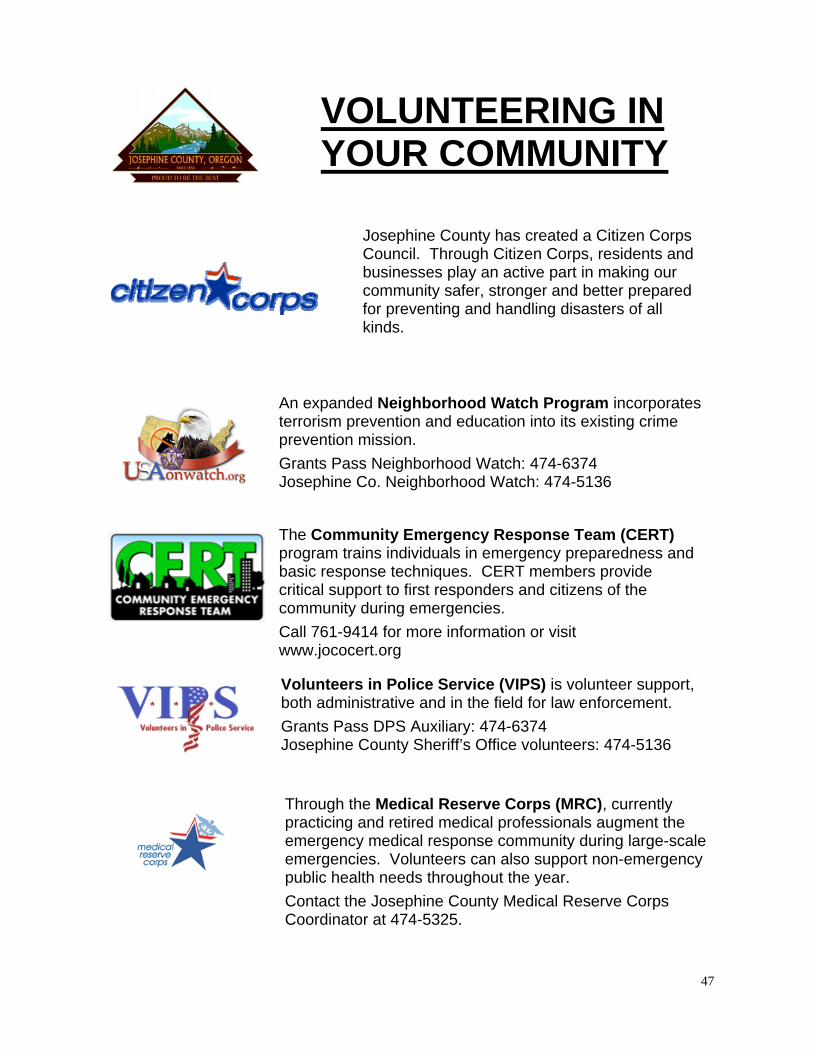
47
VOLUNTEERING IN YOUR COMMUNITY
An expanded Neighborhood Watch Program incorporates terrorism prevention and education into its existing crime prevention mission.
Grants Pass Neighborhood Watch: 474-6374 Josephine Co. Neighborhood Watch: 474-5136
The Community Emergency Response Team (CERT) program trains individuals in emergency preparedness and basic response techniques. CERT members provide critical support to first responders and citizens of the community during emergencies.
Call 761-9414 for more information or visit www.jococert.org
Through the Medical Reserve Corps (MRC), currently practicing and retired medical professionals augment the emergency medical response community during large-scale emergencies. Volunteers can also support non-emergency public health needs throughout the year.
Contact the Josephine County Medical Reserve Corps Coordinator at 474-5325.
Volunteers in Police Service (VIPS) is volunteer support, both administrative and in the field for law enforcement.
Grants Pass DPS Auxiliary: 474-6374 Josephine County Sheriff’s Office volunteers: 474-5136
Josephine County has created a Citizen Corps Council. Through Citizen Corps, residents and businesses play an active part in making our community safer, stronger and better prepared for preventing and handling disasters of all kinds.

48
The Josephine County Sheriff’s SEARCH & RESCUE was incorporated as a legal unit in March of 1967. This volunteer, non-profit, non-political organiza-tion is not funded by any agency. The Sheriff is responsible for every search in Josephine County under ORS 401, therefore every active member of this organization is deputized. Only those of high moral standards and willingness to help are accepted.
Each active member has their own personal equipment with additions pro-vided by the organization. Members of this organization are represented from all walks of life; willing to go on-call whenever needed, day or night. Jose-phine County Search & Rescue is an all-weather, versatile unit, equipped with everything needed to conduct a well organized search. The individuals have proven themselves available 24 hours a day, 7 days a week at no cost to the county.
In addition to active duty members, Search & Rescue has specialty teams for specialized rescue situations. These teams include: the Swift Water rescue team, Dive team, Mountain Rescue team, Confined Space/Technical rescue team Snow rescue team and K-9 team. The Sheriff’s Mounted Posse assists in search efforts as needed.
For information on joining call:
Josephine County Emergency Management: 474-5300
www.co.josephine.or.us/SectionIndex.asp?SectionID=143
SAR Blog Site: http://jocosarblog.typepad.com/jocosarblog/
Josephine County Sheriff’s
SEARCH & RESCUE
Contact Phone Numbers
In case of emergency call 911. For other business or non-emergency assistance:
Agency Phone Number American Medical Response…………………………………….(541) 474-6303
American Red Cross…………………………………………… (800) 433-9285
Applegate Fire District……………………………….............. (541) 899-1050
Avista Utilities………………………………………………………(800) 227-9187
Emergency Services………………………………………………(541) 474-5300
Grants Pass Dept. of Public Safety (Police & Fire)…….. (541) 474-6370
Grants Pass Rural Fire Department…………………………. (541) 476-6854
Illinois Valley Rural Fire Protection District………………. (541) 592-2225
Josephine County Animal Protection & Regulation……. (541) 474-5458
Josephine County Health Department……………………… (541) 474-5325
Josephine County Sheriff’s Office……………………………. (541) 474-5123
Rural Metro Fire Department………………………………….. (541) 474-1218
Oregon Department of Forestry………………………………. (541) 474-3152
Oregon State Police……………………………………………… (541) 474-3174
Oregon State University Extension Service………………. (541) 476-6613
Pacific Power (to report power outage)……………………. (877) 548-3768
Providence Hospital……………………………………………….(541) 732-5000
Qwest Telephone Company (residential repair)………… (877) 348-9007
Retired Senior Volunteer Program (RSVP)……………….. (541) 955-5547
Rogue Valley Medical Center………………………………….. (541) 789-7000
Senior Services……………………………………………………(541) 474-3110
Three Rivers Community Hospital………………………….. (541) 472-7000
TTY Relay Services (in Oregon)…………………..…………. (800) 735-2900
National TTY Relay Service…………………………………….. 711
Williams Rural Fire Protection District…………………….. (541) 846-7644
Wolf Creek Rural Fire Protection District…………………. (541) 866-2584