member of BAINES MASONRY 900 Wilton Road (P.O. Box 89) Appin NSW 2560 Tel: (02) 4631 1383 Fax: (02) 4631 1402 [email protected]www.bainesmasonry.com.au Fence Stone® a Between wall panels a End of walls at gate openings etc a Internal & external right angles a Do it yourself a No bricklaying skills required a Attractive & efficient Self locating Wall System Australian Owned, Designed and Manufactured For fences from low gardens to 2.2 metres high
Transcript
member of BAINES MASONRY 900 Wilton Road (P.O. Box 89) Appin NSW 2560
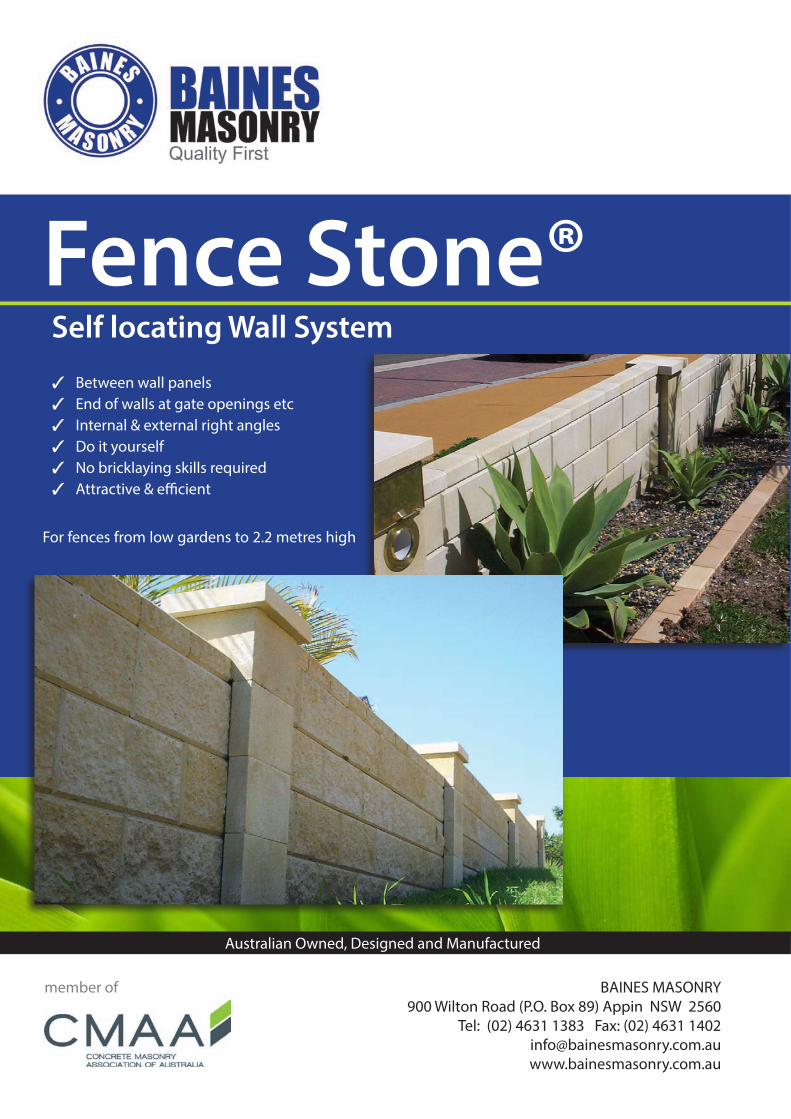
Fence Stone® a Between wall panels a End of walls at gate openings etc a Internal & external right angles a Do it yourself a No bricklaying skills required a Attractive & efficient
Self locating Wall System
Australian Owned, Designed and Manufactured
For fences from low gardens to 2.2 metres high
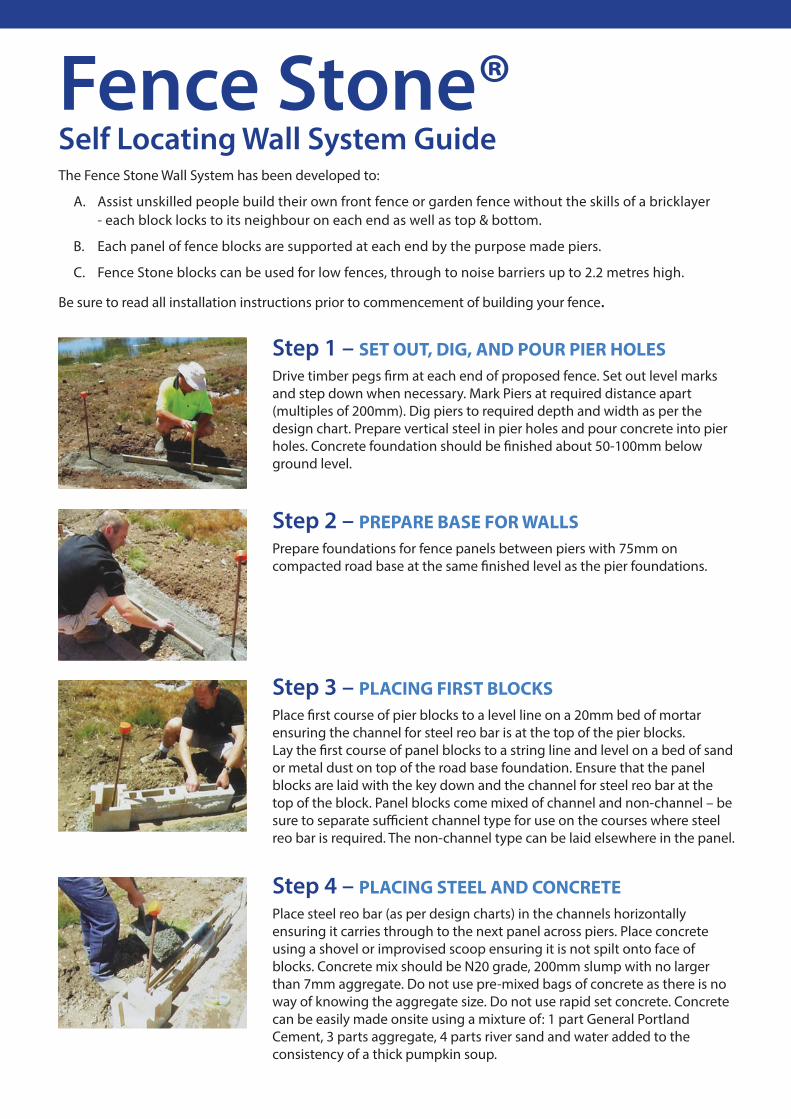
Step 1 – SET OUT, DIG, AND POUR PIER HOLESDrive timber pegs firm at each end of proposed fence. Set out level marks and step down when necessary. Mark Piers at required distance apart (multiples of 200mm). Dig piers to required depth and width as per the design chart. Prepare vertical steel in pier holes and pour concrete into pier holes. Concrete foundation should be finished about 50-100mm below ground level.
Step 2 – PREPARE BASE FOR WALLSPrepare foundations for fence panels between piers with 75mm on compacted road base at the same finished level as the pier foundations.
Step 3 – PLACING FIRST BLOCKSPlace first course of pier blocks to a level line on a 20mm bed of mortar ensuring the channel for steel reo bar is at the top of the pier blocks. Lay the first course of panel blocks to a string line and level on a bed of sand or metal dust on top of the road base foundation. Ensure that the panel blocks are laid with the key down and the channel for steel reo bar at the top of the block. Panel blocks come mixed of channel and non-channel – be sure to separate sufficient channel type for use on the courses where steel reo bar is required. The non-channel type can be laid elsewhere in the panel.
Step 4 – PLACING STEEL AND CONCRETEPlace steel reo bar (as per design charts) in the channels horizontally ensuring it carries through to the next panel across piers. Place concrete using a shovel or improvised scoop ensuring it is not spilt onto face of blocks. Concrete mix should be N20 grade, 200mm slump with no larger than 7mm aggregate. Do not use pre-mixed bags of concrete as there is no way of knowing the aggregate size. Do not use rapid set concrete. Concrete can be easily made onsite using a mixture of: 1 part General Portland Cement, 3 parts aggregate, 4 parts river sand and water added to the consistency of a thick pumpkin soup.
The Fence Stone Wall System has been developed to:
A. Assist unskilled people build their own front fence or garden fence without the skills of a bricklayer - each block locks to its neighbour on each end as well as top & bottom.
B. Each panel of fence blocks are supported at each end by the purpose made piers.
C. Fence Stone blocks can be used for low fences, through to noise barriers up to 2.2 metres high.
Be sure to read all installation instructions prior to commencement of building your fence.
Fence Stone® Self Locating Wall System Guide
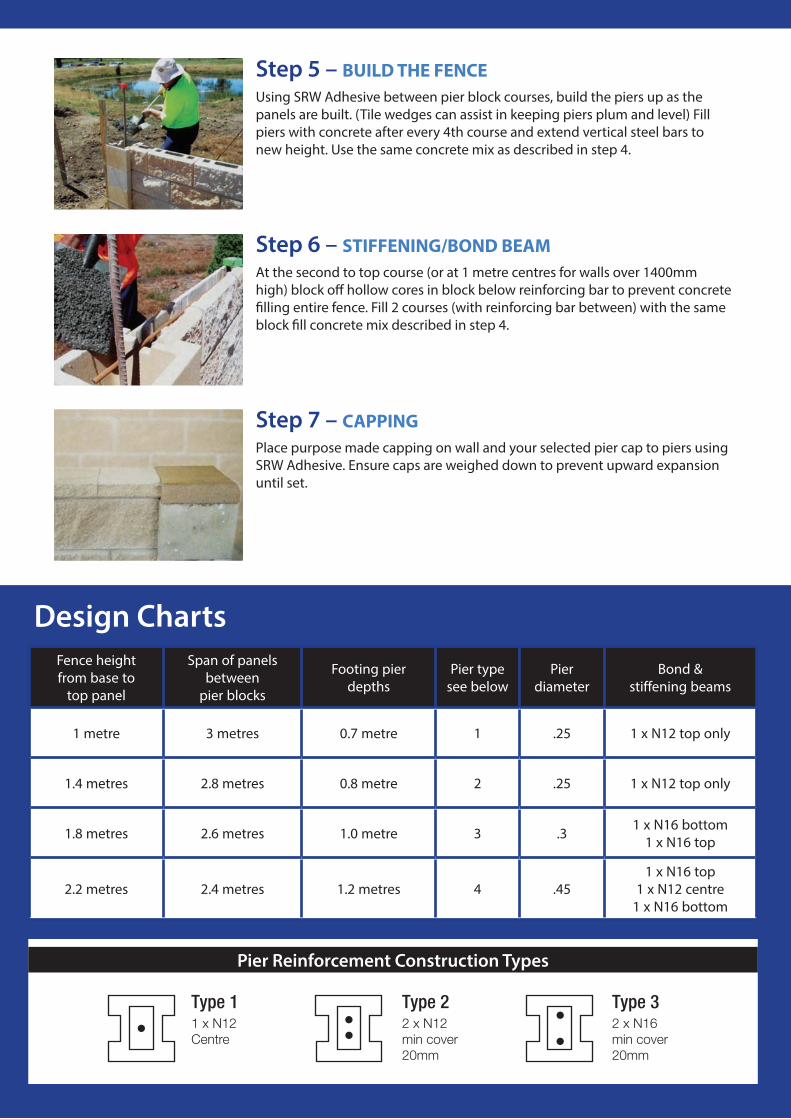
Step 5 – BUILD THE FENCEUsing SRW Adhesive between pier block courses, build the piers up as the panels are built. (Tile wedges can assist in keeping piers plum and level) Fill piers with concrete after every 4th course and extend vertical steel bars to new height. Use the same concrete mix as described in step 4.
Step 6 – STIFFENING/BOND BEAMAt the second to top course (or at 1 metre centres for walls over 1400mm high) block off hollow cores in block below reinforcing bar to prevent concrete filling entire fence. Fill 2 courses (with reinforcing bar between) with the same block fill concrete mix described in step 4.
Step 7 – CAPPINGPlace purpose made capping on wall and your selected pier cap to piers using SRW Adhesive. Ensure caps are weighed down to prevent upward expansion until set.
Type 11 x N12Centre
Type 22 x N12min cover20mm
Type 32 x N16min cover20mm
Design ChartsFence heightfrom base to
top panel
Span of panelsbetween
pier blocks
Footing pierdepths
Pier typesee below
Pierdiameter
Bond &stiffening beams
1 metre 3 metres 0.7 metre 1 .25 1 x N12 top only
1.4 metres 2.8 metres 0.8 metre 2 .25 1 x N12 top only
1.8 metres 2.6 metres 1.0 metre 3 .3 1 x N16 bottom1 x N16 top
2.2 metres 2.4 metres 1.2 metres 4 .451 x N16 top
1 x N12 centre1 x N16 bottom
Pier Reinforcement Construction Types
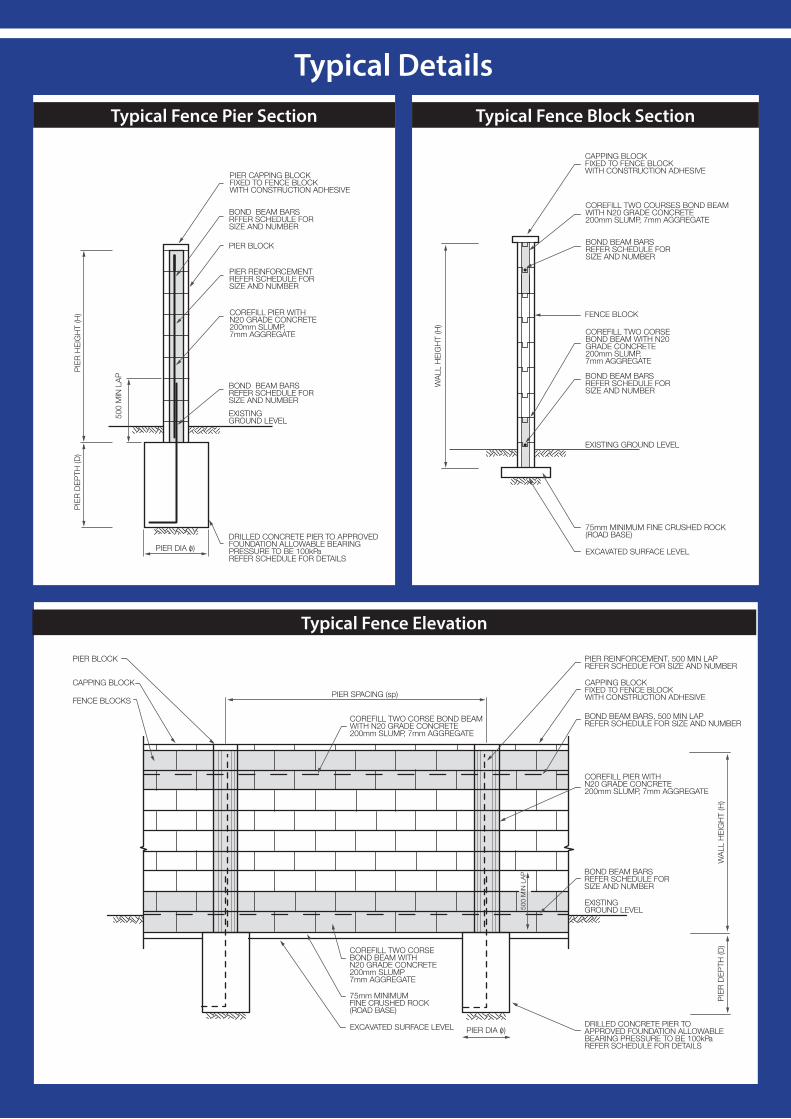
PIER CAPPING BLOCKFIXED TO FENCE BLOCKWITH CONSTRUCTION ADHESIVE
BOND BEAM BARSRFFER SCHEDULE FOR SIZE AND NUMBER
PIER BLOCK
PIER REINFORCEMENTREFER SCHEDULE FOR SIZE AND NUMBER
COREFILL PIER WITH N20 GRADE CONCRETE200mm SLUMP, 7mm AGGREGATE
BOND BEAM BARSREFER SCHEDULE FOR SIZE AND NUMBER
EXISTING GROUND LEVEL
DRILLED CONCRETE PIER TO APPROVED FOUNDATION ALLOWABLE BEARING PRESSURE TO BE 100kPaREFER SCHEDULE FOR DETAILS
PIER DIA (ø)
500
MIN
LA
P
PIE
R D
EP
TH (D
)P
IER
HE
IGH
T (H
)
CAPPING BLOCKFIXED TO FENCE BLOCKWITH CONSTRUCTION ADHESIVE
COREFILL TWO COURSES BOND BEAMWITH N20 GRADE CONCRETE200mm SLUMP, 7mm AGGREGATE
BOND BEAM BARSREFER SCHEDULE FOR SIZE AND NUMBER
FENCE BLOCK
COREFILL TWO CORSE BOND BEAM WITH N20 GRADE CONCRETE200mm SLUMP, 7mm AGGREGATE
BOND BEAM BARSREFER SCHEDULE FOR SIZE AND NUMBER
EXISTING GROUND LEVEL
75mm MINIMUM FINE CRUSHED ROCK(ROAD BASE)
EXCAVATED SURFACE LEVEL
WA
LL H
EIG
HT
(H)
PIER BLOCK
CAPPING BLOCK
FENCE BLOCKS
PIER SPACING (sp)
COREFILL TWO CORSE BOND BEAMWITH N20 GRADE CONCRETE200mm SLUMP, 7mm AGGREGATE
COREFILL TWO CORSE BOND BEAM WITH N20 GRADE CONCRETE200mm SLUMP7mm AGGREGATE
75mm MINIMUM FINE CRUSHED ROCK(ROAD BASE)
EXCAVATED SURFACE LEVEL PIER DIA (ø)DRILLED CONCRETE PIER TO APPROVED FOUNDATION ALLOWABLEBEARING PRESSURE TO BE 100kPaREFER SCHEDULE FOR DETAILS
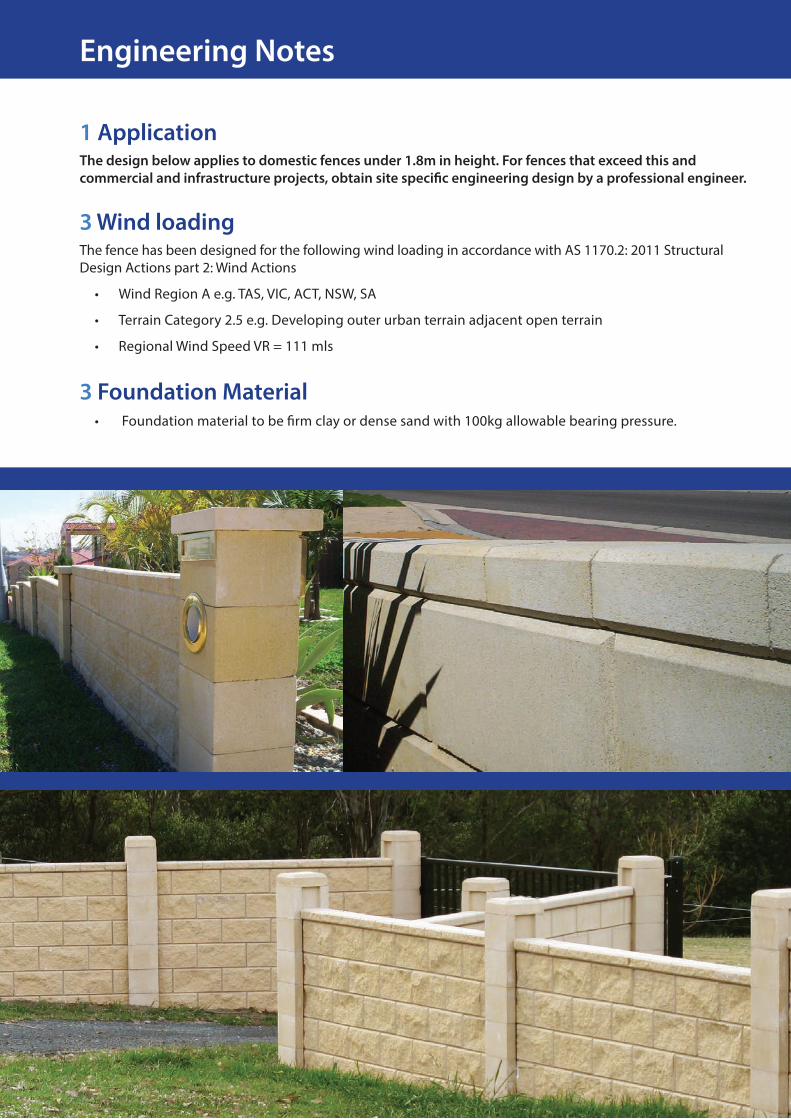
1 ApplicationThe design below applies to domestic fences under 1.8m in height. For fences that exceed this and commercial and infrastructure projects, obtain site specific engineering design by a professional engineer.
3 Wind loadingThe fence has been designed for the following wind loading in accordance with AS 1170.2: 2011 Structural Design Actions part 2: Wind Actions
• Wind Region A e.g. TAS, VIC, ACT, NSW, SA
• Terrain Category 2.5 e.g. Developing outer urban terrain adjacent open terrain
• Regional Wind Speed VR = 111 mls
3 Foundation Material• Foundation material to be firm clay or dense sand with 100kg allowable bearing pressure.
Engineering Notes
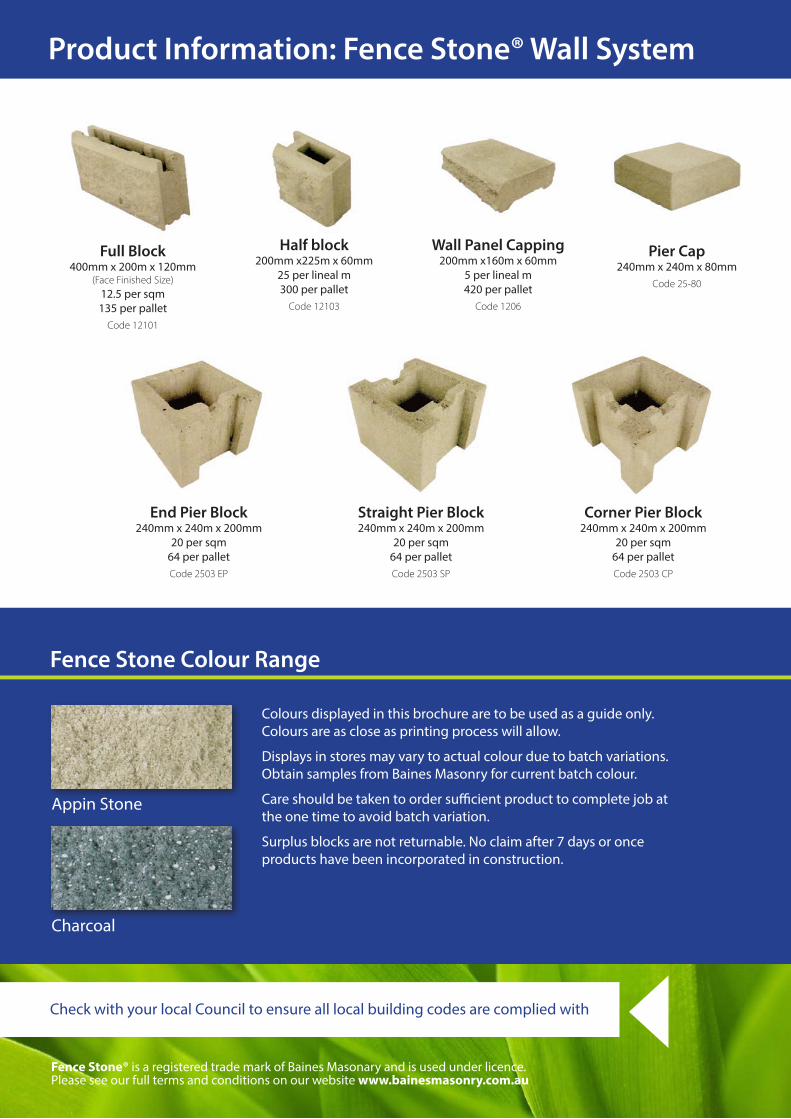
Product Information: Fence Stone® Wall System
Appin Stone
Charcoal
Fence Stone® is a registered trade mark of Baines Masonary and is used under licence. Please see our full terms and conditions on our website www.bainesmasonry.com.au
Check with your local Council to ensure all local building codes are complied with
Fence Stone Colour Range
Colours displayed in this brochure are to be used as a guide only. Colours are as close as printing process will allow.
Displays in stores may vary to actual colour due to batch variations. Obtain samples from Baines Masonry for current batch colour.
Care should be taken to order sufficient product to complete job at the one time to avoid batch variation.
Surplus blocks are not returnable. No claim after 7 days or once products have been incorporated in construction.