33
Operating Manual Nr. 548.GB.40B.0 EUROPROFI JUMBO mit LBS-Control FENDT Vario-Terminal

Operating ManualNr. 548.GB.40B.0
EUROPROFIJUMBO
mit LBS-Control
FENDT Vario-Terminal

GBLBS WITH FENDT VARIO
GENERAL DESCRIPTION
- 23 -548.GB.40B.0 LBS-FENDT VARIO
Table of content
Appendix ......................................................................... 43
A1. Loading wagon ........................................................ 44
A1.1 Loading moment ........................................................... 44
A1.2 Changing settings ......................................................... 44
A1.3 Automatic loading .......................................................... 44
Advantages of automatic loading: .......................................... 44
PÖTTINGER LBS CONTROL control panel .................. 44
When the wagon is full ........................................................... 44
FENDT VARIO TERMINAL control panel ....................... 44When the wagon is full ........................................................... 44
Manual loading ...................................................................... 44
A2. Unloading wagon ..................................................... 45
A2.1 Automatic unloading (with transverse conveyor) ........... 45
Stopping the unloading process ............................................ 45
A2.2 Manual unloading (with transverse conveyor) ............... 45
A.2.3 Instructions for adjusting sensors to dosage system’sdrive shaft ........................................................................ 46
A.2.4 Instructions for Pöttinger LBS Control control panel .... 46
A2.5 Instructions for FENDT VARIO TERMINAL ................... 46
A3. Basic tractor equipment ......................................... 47
Terminal plan ......................................................................... 49
Plan of electrical system ........................................................ 49
A4. Hydraulic control block ........................................... 50
A5. Total failure of entire electrical system .................. 50
A6. External cutter operation ........................................ 51
Swivel cutter in: ...................................................................... 51
Swivel cutter out: ................................................................... 51
Hydraulic plan ................................................................ 52
Welding ........................................................................... 52
10. System setup ............................................................ 24
LBS operation................................................................. 25
Miscellaneous................................................................. 26
Fendt Vario Terminal .............................................................. 26
Pöttinger LBS Control ............................................................ 26
Adjust settings ....................................................................... 26
11. Initial operation ........................................................ 27
12. WORK menu .............................................................. 29
12.7 Making settings .............................................................. 31
12.8 12.8 Operating notes .................................................... 32
13. SET menu .................................................................. 34
• Switch automatic loading function on and off .................. 34
• Select user language (Fig. 3) .......................................... 34
• Change system settings .................................................. 34
• Delete both daily counters ............................................... 34
13.1 Changing system settings in SET menu ........................ 35
13.2 Changing scraper-floor settings in SET menu ............... 36
13.3 Making settings .............................................................. 37
14. DIAG menu ................................................................ 38
Exiting the DIAG menu .......................................................... 38
15. HELP menu ............................................................... 39
Exiting the HELP menu ......................................................... 39
16. MISC menu ............................................................... 40
17. Errors ......................................................................... 41
17.1 Initial settings ................................................................. 41
17.2 Error messages ...................................................... 42

GBLBS WITH FENDT VARIO
GENERAL DESCRIPTION
- 24 -548.GB.40B.0 LBS-FENDT VARIO
10. System setup
Hydraulic connection
− See chapter entitled FIRST-TIME CONNECTION TOTRACTOR in the loader wagon manual.
7a
Standard position with ano p e n hydraulic system
7b
Be careful with tractors with ac l o s e d hydraulic system
7b001-01-23
P TLS7
7a
Be careful with tractors with a closed hydraulic systemJOHN-DEERE, CASE - MAXXUM, CASE - MAGNUM,
FORD SERIE 40 SLE
Job computer
Distributorhousing
LBS connectioncable
Vario-Terminal
Joystick

GBLBS WITH FENDT VARIO
GENERAL DESCRIPTION
- 25 -548.GB.40B.0 LBS-FENDT VARIO
Electrical connection- LBS socket at the rear of the tractor LBS operation
Either the FENDT VARIO Terminal or the Pöttinger control panel (2)can be used.
1. With the Pöttinger LBS Control control panel (Pos. 2)- Connect power cable (1) to LBS socket in tractor cabin
- LBS symbol must be deactivated for this operating mode (Pos. 3a)
- See 17.1 Initial settings also
2. Without the Pöttinger LBS Control control panel (Pos. 2)Using the FENDT VARIO Terminal
- Connect terminal plug (E) to LBS socket in tractor cabin, otherwisemalfunction will result
- LBS symbol must be activated (Pos. 3c) for this operating mode
- See 17.1 Initial settings also
2
1
3a
3c

GBLBS WITH FENDT VARIO
GENERAL DESCRIPTION
- 26 -548.GB.40B.0 LBS-FENDT VARIO
Miscellaneous
Fendt Vario TerminalThis manual was written under the assumption that the operator is familiar with the terminal’s basic functions.
- Function keys (F1, F2, F3, F4, F5 and ESC)
- Knobs (potentiometer)
More information can be found in the tractor’s operating manual.
Pöttinger LBS ControlThe machine has been preconfigured with the Pöttinger LBS Control. All systems will be operational as soon as the electrical system has beenconnected to the tractor.
- Transfer of the program data will begin automatically when the machine is attached to the tractor for the first time.
- The machine-specific data from the attached machine’s job computer will be loaded in the tractor’s computer.
- This can take a few minutes.
- Only those functions which are available will then appear on the display, depending on the attached machine’s equipment.If a wagon is not equipped with a transverse conveyor, the corresponding symbol will be crossed out on the display.
Adjust settingsIf desired, some of the settings can be changed and therefore adjusted to actual working conditions. Though this is normally not necessary, theprocess is described in detail in the SET menu chapter.
Please note!
Adjust the scraper floor’s transport speed!
The scraper-floor speeds (0-20) must be adjusted to the amount of oil transported by the hydraulic pump.
For this reason, adjustment should take place when the machine is attached to the tractor for the first time (see Changingscraper-floor settings in SET menu chapter).

GBLBS WITH FENDT VARIO
GENERAL DESCRIPTION
- 27 -548.GB.40B.0 LBS-FENDT VARIO
11. Initial operation
1. Connection of electrical system
2. Transfer of program data will start automatically- Transfer might can a few minutes.
3. Start menu will appear on display (Fig. 1)Wait until LBS symbol appears (Pos. 1)
If LBS symbol does not appear
- Check electrical connection
- Check initial settings as described in Chapter 17, Errors (17.1)
4. Press F5The symbol for device control will appear (Fig. 2).
The F3 key is allocated to this symbol (to the right of the display).
5. Press F3A new page with symbols will appear (Fig. 2a).
We recommend that the user always activate the joystick.
Operation with joystick:
- Continue with Item 6.
Operation without joystick:
- Continue with Item 7.
6. Activate joystickTurn knob (P1) until joystick symbol appears (Fig. 2b).
- Press F1
The symbol indicating joystick is activated will appear (Fig. 2c).
- Continue with Item 7.
1 Fig.1
Fig.2b
Fig.2c
Fig.2
Fig.2a

GBLBS WITH FENDT VARIO
GENERAL DESCRIPTION
- 28 -548.GB.40B.0 LBS-FENDT VARIO
Fig.3
P1
7. Press F1The symbol for the loader wagon will appear briefly,followed by the operating data for the attached device (Fig.3).
h Daily hours of operation
h Total hours of operation
L Daily number of loads
L Total number of loads
Five menu fields will appear on the right-hand side.
WORK, SET, DIAG, HELP, MISC*)
The contents can be displayed by pressing the allocatedkeys (F1 to F5).
If none of these keys are pressed, the display willautomatically switch to the WORK menu after about fiveseconds.
ESC
When pressed oncePress this key once to return to the previous menu or page.
When pressed twicePress this key twice to enter the menu for tractor control.
Press this key twice again to return to the previous loader-wagon menu.
*) See MISC menu

GB" WORK" MENU
- 29 -548.DE.40B.0 LBS-FENDT VARIO
12. WORK menu
This menu permits operation of the attached loader wagon during ajob.
- Raising and lowering pickup
- Opening and closing back wall
- Switching scraper-floor drive on and off
Etc.
12.1 WORK menu is on displayFig. WORK-1, Fig. WORK-2, Fig. WORK-3
Not all functions can be displayed simultaneously.
The book symbol means that this menu has severalpages (Fig. 11). There are a total of three pages in thiscase. The number of the page currently displayed will bevisible in the lower right-hand corner (pag).
F5Press this key several times to scroll through the pages until thedesired functions appear.
Examples:
- Raise and lower pickup (Fig. WORK-1)
- Open back wall (Fig. WORK-3)
ESCPress this key once to return to the previous menu or page.
Meaning of P1, P2 and P3 symbolsThe displayed value can be changed by means of the allocated knob(potentiometer) on the right-hand side of the terminal (POT).
Menu
POT
Keys
pag
pag
pag
11

GB" WORK" MENU
- 30 -548.DE.40B.0 LBS-FENDT VARIO
Scraper-floor drive On / off- Regulate conveyor speed
- Infinitely adjustable from 0 to 100
Loading moment- % of maximum
Unloading moment- % of maximum
Load percentage- Current load on loading system
- % of maximum
Pick up- Raise
Pick up- Lower
Automatic unloading- ON / OFF
Back wall- Close
Book symbol- Proceed to next page
Articulated drawbar- Raise wagon
Articulated drawbar- Lower wagon
Cutter- Swivel in
Cutter- Swivel out
Book symbol- Proceed to next page
Activated function- Indicates that cutter has not been
swiveled in
Back wall- Open
Scraper-floor advance- Direction of transport conveyor is
forward
Proportioning rollers- To switch drive on and off
Back wall- Close
Book symbol- Proceed to next page (page 1)
InformationSymbols will be displayed forthe following:
• Cutter- When swiveled out
• Automatic loading- When on
• Full display- When loading space
is full
• Back wall- When open
• Transverse conveyor- When transverse
conveyor is in theoperational position

GB" SET" MENU
- 31 -548.DE.40B.0 LBS-FENDT VARIO
12.2 Loading moment:• This parameter is effective during automatic loading of the wagon
only.
• When the load percentage exceeds the set limit, the Load scraperfloor function will be triggered automatically (KR).
• Standard setting: 55
This setting can be raised when the feed is dry.
This setting can be lowered when the feed is wet.
• Possible settings: 1 - 100
12.3 Unloading moment:• Effective during automatic unloading only (with or without transverse
conveyor).
• If the current load percentage exceeds the set limit, the Reversescraper floor function will be stopped automatically (see 3.10 also).
Standard setting: 45
This setting can be raised when the feed is dry.
This setting can be lowered when the feed is wet.
• Possible settings: 1 - 100
12.4 Minimum scraper floor switch-off time• This parameter is effective during automatic or manual unloading
only.
When the load on the system is too great, the scraper floor drive willbe stopped until
- The load decreases
- For the time period which has been set
Standard setting: 5 (0.5 sec.)
This setting should not be changed.
• Possible settings: 1 - 100 (1 = 0.1 sec.; 100 = 10 sec.)
12.5 Sensitivity of load percentage display:• This setting controls the load percentage display’s reaction time.
It therefore influences automatic loading and unloading.
- If set too low, the system will react too sensitively and trigger aswitching operation immediately (such as scraper-floor drive on oroff).
- If set too high, the system will react too slowly, possibly triggeringa switching operation too late (such as scraper-floor drive on oroff).
• Standard setting: 10
This setting should not be changed.
• Possible settings: 1 - 100
12.6 Scraper-floor advance time (KV):• Effective during automatic unloading only.
Before the proportioning rollers begin to turn
- The scraper floor will transport the load forward (KV)
- Until the set time has expired.
• Possible settings: 0 - 1 sec.
• Factory setting: 0.5 sec. (wagon with proportioning rollers)
• Factory setting: 0.0 sec. (wagon without proportioning rollers)
12.7 Making settings- Make the desired setting with the knob (P1, P2 or
P3).
The new setting will be displayed in the right-handfield only at first.
- Press F2, F3 or F4.
The new setting will be transferred to the left-handfield and will be in effect immediately.
Note:
All loader wagon-specific settings are savedpermanently and will remain in effect after a powerfailure!
KB KV-KR
KV KR

GB" WORK" MENU
- 32 -548.DE.40B.0 LBS-FENDT VARIO
Raise pickup:The pickup will move upward as long as this keyis held down.
Lower pickup:After this key is pressed briefly, the pickup willbegin to move downward and will remain in afloating position. The integrated control lamp willlight up.
Raise articulated drawbar:The front of the loader wagon will be raisedhydraulically as long as this key is held down.
Lower articulated drawbar:The front of the loader wagon will be loweredhydraulically as long as this key is held down.
Swivel cutter in:The cutter bar will swivel into the conveyor channelas long as this key is held down.
Swivel cutter out:The cutter bar will swivel out of the conveyorchannel without pressure as long as this key isheld down.
If the cutter bar has not been swiveled incompletely, the integrated control lamp will lightup.
Automatic loading:Press this key to turn automatic loading on andoff.
When automatic loading is active, this symbolwill appear on the display.
(See 3.9.1 also.)
Automatic unloading (without transverseconveyor)Press this key for three seconds.
- Automatic unloading will then be switched onor off.
When automatic unloading is active, this trianglewill appear next to the symbol.
This symbol will also appear for informationalpurposes.
Automatic unloading, transport to left(with transverse conveyor):Press this key briefly
- Automatic unloading will then be switched onor off.
When automatic unloading is active, this trianglewill appear next to the symbol.
Note: Automatic unloading can be switched onwith this key when a transverse conveyor ispresent and in the operational position only.
This symbol will also appear for informationalpurposes.
Automatic unloading, transport to right(with transverse conveyor):Press this key briefly
- Automatic unloading will then be switched onor off.
When automatic unloading is active, this trianglewill appear next to the symbol.
Note: Automatic unloading can be switched onwith this key when a transverse conveyor ispresent and in the operational position only.
This symbol will also appear for informationalpurposes.
Proportioning rollers:Press this key briefly
- The proportioning-roller drive will then beswitched on or off.
Note: The back wall must be open.
12.8 12.8 Operating notes
STOP
STOP:Press this key briefly to
- Switch off all functions
- Stop the opening of the rear wall at any position
This key is functional in alloperating modes, evenwhen the joystick was notactivated at the systemstartup.

GB" WORK" MENU
- 33 -548.DE.40B.0 LBS-FENDT VARIO
Transverse conveyor, transport to left:This symbol is displayed with wagons withtransverse conveyors only.
- In the WORK menu
- Page 4 (pag)
Press this key briefly
- The transverse conveyor drive will then beswitched on or off.
When the direction of transport is active, thistriangle (green) will appear next to the symbol.
Transverse conveyor, transport to right:This symbol is displayed with wagons withtransverse conveyors only.
- In the WORK menu
- Page 4 (pag)
Press this key briefly
- The transverse conveyor drive will then beswitched on or off.
When the direction of transport is active, thistriangle (green) will appear next to the symbol.
Advance scraper floor:The scraper floor will move forward at maximumspeed (KV) as long as this key is held down.
Open back wall:The back wall will open for as long as this key isheld down.
This red warning symbol will appear on the displayif the back wall is not completely closed.
Close back wall:The back wall will continue to lower as long as thiskey is held down.
The back wall will lower slowly and under its ownweight only at first. When it reaches its lowerrange (opening of approximately 10 cm), ahydraulic function will be triggered and it will beclosed under pressure.
Danger! Do not stand too close.
Back wall cannot be closed:This symbol appears when the transverseconveyor is in its operational position only.
In this case, the back wall is fixed and cannot belowered.
KB KV-KR
KRKV
1
pag
Scraper-floor drive on / offWhen loading the wagon, the scraper-floor drive can be started manuallyat any time, even if automatic loading has been activated.
- Proceed to page 3 (pag) in the WORK menu.
- Start the scraper-floor drive with the knob (1) and adjust the transportspeed.
- Infinitely adjustable from 0 - 100.
Automatic unloading with transverseconveyor- Transport to right
Automatic unloadingactivated

GB" SET" MENU
- 34 -548.DE.40B.0 LBS-FENDT VARIO
F1
F2
F3
F5
13. SET menu
1. Open the initial menu (Fig. 1)
2. Press F2
- The SET menu will appear (Fig. 2)
With this menu, the user can
Fig.2
Fig.1
33
Fig.3
F1
F2
F5
• Switch automatic loading function on and off- Press F1 (on / off).
Automatic loading on: A triangular symbol will appear(Pos. 33).
Automatic loading off: The triangular symbol willdisappear.
• Select user language (Fig. 3)- Press F2.
- The menu for language selection will appear (Fig. 3).
- Select the desired language with the knob (P2).
- Press F5 to save the new setting.
• Change system settingsThe user can change various settings in this menu.
- See next page.
• Delete both daily counters- Press F5 and hold it down for approximately 3 sec.
(resets counter to 0).
h = daily hours of operation
L = daily number of loads
F3
The function selected herewill be displayed in theWORK menu.

GB" SET" MENU
- 35 -548.DE.40B.0 LBS-FENDT VARIO
F1
F2
F3
F5
13.1 Changing system settings in SET menuThe user can change various settings in this menu.
The factory settings will be suitable for most conditions.
For more difficult or complex conditions, the system can be optimizedby adjusting certain parameters.
Note: Settings (numbers) which appear in red should notbe used!
These are limits which can result in excessive loads oncertain components during operation.
The factory settings should normally not be changed; premature wearon individual parts can be avoided in this way.
Descriptions of the functions: see 12.2 to 12.6
1. Open SET menu (Fig. 1)
2. Press F3- A warning will appear on the display (Fig. 4).
3. The next menu will appear after approximately 5 sec. (Fig. 5).The user can change the scraper floor’s transport speed for automatic unloading in this menu.
Note: Do not use excessively high transport speeds. Otherwise, the scraper-floor drive will switch on andoff too often.
- Default setting is 30.
- See 12.4 also.
The user can change the transport speed during unloading with the P1knob.
The book symbol indicates that this menu consists of several pages(Fig. 5 and 6).
1. Change the settings (Fig. 6) with the allocated knobs (P1,P2 and P3)The new setting will be shown in the right-hand field only at first.
2. Press the allocated key (F2, F3 or F4) to save the newsetting.The new setting will then appear in both fields.
3. Press ESCThe new settings will be in effect immediately.
Fig.4
Fig.2
F1
F2
F3
F5
F4
Fig.6
Fig.5
F1
F2
F3
F5
F4

GB" SET" MENU
- 36 -548.DE.40B.0 LBS-FENDT VARIO
13.2 Changing scraper-floor settingsin SET menu
1. Open the SET menu (Fig. 6)2. Press F1- The menu for scraper-floor settings will appear (Fig. 7).
The user can adjust the scraper-floor speed to the amountof oil transported in this menu.
0 to 20
If this adjustment is not performed properly, the scraper-floordrive could run too fast when set at 1 and when a hydraulicpump is operating at full power.
For this reason, this adjustment should bemade when the wagon is attached to thetractor for the first time.
Note: These settings are saved permanently and will remainin effect after a power failure.
Press F2 to select one of the two symbols
and
and then make the corresponding settings.
- See next page.
Fig.7
F1
F2
F3
F5
F4
Fig.6
F1
F2
F3
F5
F4

GB" SET" MENU
- 37 -548.DE.40B.0 LBS-FENDT VARIO
Fig.8
Fig.9
F1
F2
F3
F5
F4
F1
F2
F3
F5
F4
13.3 Making settings
Notes
• The back wall must be closed.• The loading wagon must be empty.
• Set the tractor’s rpm at approximately 2000.
• The setting process can be canceled at any timewith ESC.
Setting the scraper-floor speed at thelowest level (Fig. 8).
1. Set a number between 1 and 15 with the allocatedkeys (F4 and F5).- The scraper floor should still move at minimum speed.
2. Press F2- The new setting will be saved.
- The display will change (Fig. 9).
Setting the highest scraper-floor speed(Fig. 9).
3. Make a setting of 1 to 15 with the allocated keys(F4 and F5).- The scraper floor should move at a little less than
maximum speed.
4. Press F2- The new setting will be saved.
- The display will change (Fig. 7).
5. Press ESCThe new setting will be in effect immediately.
- The display will change (Fig. 6).

GB" DIAG" MENU
- 38 -548.DE.40B.0 LBS-FENDT VARIO
F1
F2
F3
F5
F4
14. DIAG menu
INFO menu
1. Open the DIAG menu (Fig. 10)2. Press F5
- A display will appear (Fig. 11)
This display will contain general information about
- System version
- Job-computer version
- Device type.
Note: You should have this information ready before callingcustomer service.
ESCPress this key once to return to the previous page (Fig. 10).
Sensor TEST menu
1. Open the DIAG menu (Fig. 10)
2. Press F2- A display will appear (Fig. 12)
The Status field will provide information about• A sensor’s position
E.g. whether the cutter has been swiveled in or out
• Whether the sensor is functioning properly
Cutter sensor as an example:
- Cutter in - status is 1
- Cutter out - status is 0
• Whether the sensor is malfunctioning
The cutter sensor is malfunctioning
- When a status of 0 is indicated whether the cutter is in or out.
1. Select a sensor• Press F3
- Proceed to the next sensor.
• Press F4
- Return to the previous sensor.
Exiting the DIAG menu
• Press ESC
Fig.10
Fig.11
Fig.12
F1: Test valvesThis function is intended for use by customer-servicetechnicians only.

GB" DIAG" MENU
- 39 -548.DE.40B.0 LBS-FENDT VARIO
Joystick TEST menu
1. Press F1- A display showing the joystick’s keys will appear (Fig. 14).
2. Press a key on joystick (Fig. 16)- The symbol (switching function) allocated to this key will
appear.
15. HELP menu
1. Open the HELP menu (Fig. 13)
2. Press F1
- A menu showing all the symbols of the joystick’s allocated keys willappear (Fig. 15).
• Press ESC
Press this key once to return to the previous page (Fig. 13).
Exiting the HELP menu
Press ESC
Fig.15
Fig.16
Fig.13
Fig.14
GB" MISC" MENU
- 40 -548.DE.40B.0 LBS-FENDT VARIO
F1
F2
F3
F5
F4
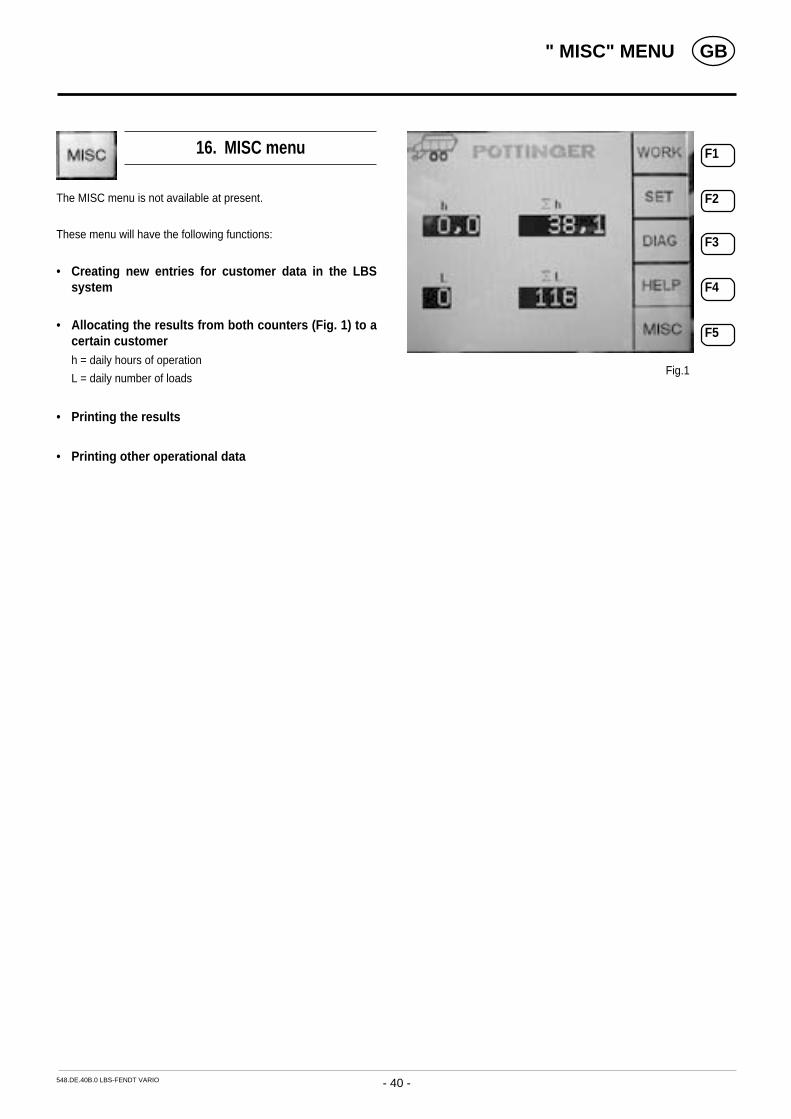
16. MISC menu
The MISC menu is not available at present.
These menu will have the following functions:
• Creating new entries for customer data in the LBSsystem
• Allocating the results from both counters (Fig. 1) to acertain customerh = daily hours of operation
L = daily number of loads
• Printing the results
• Printing other operational data
Fig.1

GBERRORS
- 41 -548.DE.40B.0 LBS-FENDT VARIO
17. Errors
17.1 Initial settingsThe LBS symbol will normally appear for approximately 5 sec. (Fig. 4,Pos. 1).
If the LBS symbol does not appear (Fig. 1):- This indicates an error in the FENDT VARIO Terminal
Contact the tractor manufacturer in this case.
Select LBS symbol- Press F5 (Fig. 1)
A window with symbols will appear (Fig. 2)
- Press F4
One of the following displays will appear (Fig. 3)
- LBS symbol (3a)
- LBS symbol (3b)
- Press F5 until the desired LBS symbol appears.
The LBS functions of the attached machines will be available thenext time the tractor is started (Fig. 4, Pos. 1).
Fig.2
Fig.1
Fig.3
3c
3b
3a
Fig.41
GBERRORS
- 42 -548.DE.40B.0 LBS-FENDT VARIO
17.2 Error messages
MiscellaneousThe hydraulic-valve function is monitored constantly by the loaderwagon’s computer.
Valves will be shut off after:
• Malfunction
• Cable breakage
• Short circuit
When this happens, the device might still be partially functional
Before continuing work, find out
- Which hydraulic valve is no longer functioning
- Whether this hydraulic valve performs an important function
- Whether damage to the machine could result
In any case, the electronic system will not be damaged.
17.2.1 Defective valve- See Appendix, valve no., according to table of functions, A5
Type of defect1. Interruption (valve connector has been disconnected or cable is
broken)
2. Cable or valve coil has a short circuit to the ground
3. Cable or valve coil has a short circuit to power supply
4. Excessive temperature (valve requires too much performance)
Note:
Problems should be fixed by trained persons only!
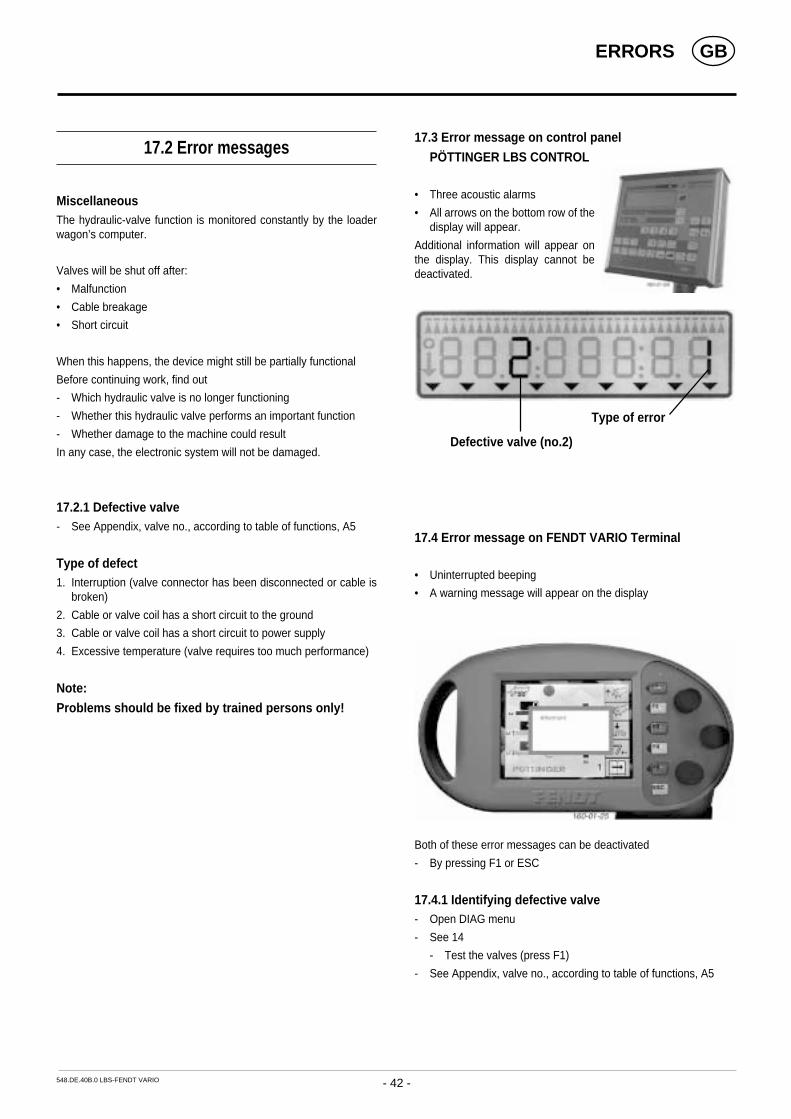
17.3 Error message on control panel
PÖTTINGER LBS CONTROL
• Three acoustic alarms
• All arrows on the bottom row of thedisplay will appear.
Additional information will appear onthe display. This display cannot bedeactivated.
17.4 Error message on FENDT VARIO Terminal
• Uninterrupted beeping
• A warning message will appear on the display
Both of these error messages can be deactivated
- By pressing F1 or ESC
17.4.1 Identifying defective valve- Open DIAG menu
- See 14
- Test the valves (press F1)
- See Appendix, valve no., according to table of functions, A5
Defective valve (no.2)
Type of error

GBAPPENDIX
- 43 -548.DE.40B.0 LBS-FENDT VARIO
Appendix

GBAPPENDIX
- 44 -548.DE.40B.0 LBS-FENDT VARIO
A1. Loading wagon
A1.1 Loading momentThe moment of the loading system’s drive will be subjected toconstant electronic monitoring while the wagon is beingloaded (loading moment). The load’s maximum moment islimited by the set value. If the moment reaches 55% of themaximum (55 is the factory setting), the scraper-floor drive willswitch on automatically.
Enter the settings as percentages of the maximum moment.
Maximum moment of JUMBO: 2000 Nm
Maximum moment of EUROPROFI: 1500 Nm
A1.2 Changing settingsFor example, when the scraper-floor drive switches on too
often, the setting can be changed from 55 to 60.
A1.3 Automatic loading
Advantages of automatic loading:• Resulting load is extremely compact
• Minimized clogging in conveyor channel
• Prevents overloads on drive
• Easier on feed
• Less work for driver
• Increase in load capacity
This is achieved through automatic control of the scraper-floor drive. In other words, the drive is switched on and offautomatically during loading.
Automatic control is monitored by sensors (see A5), andthe load on the loading system is also measured constantly.
At the beginning of the loading process, the load will still berelatively small, and it will increase in size as the frontloading space fills. When a certain load size is reached, thescraper-floor drive will switch on automatically and theload will be moved backward slightly.
- As a result, there will be more room available in the loadingspace.
- The load on the loading system will be reduced.
- The scraper-floor drive will then switch off automatically.
This process will be repeated until the entire loading space isfull.
The scraper floor transports the feed to the rear of the loadingspace as soon as
• The current load indicated exceeds the settingor
• The level sensor reaches the upper flap.
The wagon is full when• The feed presses against the lower proportioning rollers for longer than 1
second
or, with loader wagons without proportioning rollers
The feed presses against the back wall for longer than 1 second.
PÖTTINGER LBS CONTROL control panel
When the wagon is full- The FULL display will appear.
- An acoustic signal will sound from the controlpanel.
- The counter for the daily number of loads willincrease by one.
- The counter for the total number of loads willincrease by one.
FENDT VARIO TERMINAL control panel
When the wagon is full- The FULL display will appear.
- The warning symbol will light up on thedashboard (Pos. 10).
- The counter for the daily number ofloads will increase by one.
- The counter for the total number of loadswill increase by one.
• Press ESC
- The FULL display will disappear.
Note:Switching on automatic loading is necessaryonly once. As soon as the loader wagon is full,automatic loading will be deactivatedautomatically.
After the loader wagon has been emptied (the FULL display will disappear),automatic loading will be activated automatically.
Automatic loading will remain active even after the system has been switchedoff and on again (e.g. after engine standstill).
HintDuring the loading process with automatic loading, the driver can switch thescraper-floor drive on and off also.
Manual loadingThis means that the driver must switch the scraper-floor drive on and off duringloading.

GBAPPENDIX
- 45 -548.DE.40B.0 LBS-FENDT VARIO
A2. Unloading wagon
A2.1 Automatic unloading (with transverse conveyor)Advantages of automatic unloading:
• Fast, efficient and even unloading
• Prevents clogging and jams
• Easier on feed during unloading
This is a result of automatic control of the scraper-floor drive. In otherwords, the scraper-floor drive is switched on and off automaticallyduring unloading.
The automatic control is monitored by sensors (see A10 also).
The automatic unloading function performs four separatetasks consecutively.
1. Opens the back wall (on wagons without a transverse conveyoronly)
Please note: The back wall is opened completely.
2. Before the proportioning rollers begin to turn, the scraper-flooradvance (direction of transport: KV) will switch on briefly in orderto decrease the pressure of the feed on the proportioning rollers.
3. Switches on the transverse conveyor (on wagons with a transverseconveyor only)
4. Switches on the proportioning rollers
5. Controlled unloading
Stopping the unloading process
Pushing the button to close the back wall during
unloading starts triggers the following processes:
1. The open back wall will lower slowly under its own weightUnloading will not be interrupted when this happens.
2. When the back wall reaches the lower area (opening ofapproximately 10 cm):
- The drivers for the scraper floor, proportioning rollers and transverseconveyor will be switched off
- A hydraulic function will be triggered and the back wall will beclosed under pressure.
Danger! Do not stand too close.
A2.2 Manual unloading (with transverse conveyor)
The driver must all perform all tasks manually (closing the back wall,proportioning rollers, scraper floor, etc.).
Automatic safety function: In order to prevent damage to themachine, the scraper-floor drive (direction of transport: KR) will beswitched off briefly when the load on the proportioning rollersbecomes excessive.
KB KV-KR
KRKV

GBAPPENDIX
- 46 -548.DE.40B.0 LBS-FENDT VARIO
A.2.4 Instructions for PöttingerLBS Control control panel
1. Start the tractor and engage thepower take-off shaft.
2. Switch on the LBS Control, open theback wall and switch on theproportioning-roller drive.
3. Set rpm of power take-off shaft toapproximately 1000.
- Use the throttle; the rpm should be as constant as possible duringadjustment.
4. Press the Traverse conveyor, transport to the right key
- Until the number 99 appears on the right-hand side of the display(approximately 10 sec.; the scraper-floor speed is normally indicatedhere).
- The figure saved in the job computer from the last adjustment willnow be visible on the left-hand side of the display. This figure willbe 0 with a new counter.
5. Press the Traverse conveyor, transport to the right key againbriefly
- The number to the right will change to 98.
- The number to the left will keep changing.
These are the measured values from both sensors. In case of anerror, 0 will appear.
An error is present when the proportioning shaft does not turn orone of the two sensors does not function properly. The error mustthen be corrected.
6. Now press the Traverse conveyor, transport to the right key brieflyfor a third time
The measured value which had been displayed will be saved andthe standard display will reappear with
- The load percentage on the power take-off shaft on the left-handside
- The scraper-floor speed on the right-hand side
Hint: Since the measured value changes constantly, the user shouldpress the button when a relative average is being displayed.
Note: The user can also begin the process at item 4 to display thevalue currently saved. When the LBS Control is off, the user cancancel the adjustment procedure in this way.
A2.5 Instructions for FENDTVARIO TERMINAL
1. Start the tractor and engage thepower take-off shaft.
2. Switch to loader-wagonoperation with the Vario Terminal
- Open the back wall and switch on the proportioning-roller drive withthe joystick or via the WORK menu.
3. Set rpm of power take-off shaft to approximately 1000.
- With the throttle; the rpm should be as constant as possible duringadjustment.
4. Open the DIAG menu
- Set the code 13579 (will then be red) with the P1 knob
- Press F2
The user will then see a special page with two numbers
- The left-hand number is the value from the last adjustment procedurewhich has been saved in the job computer. This figure will be 0 witha new counter.
- The right-hand number will change constantly.
This is the measured value from both sensors. In case of an error,0 will appear.An error is present when the proportioning shaft does not turn orone of the two sensors does not function properly. The error mustthen be corrected.
5. Press F1
The measured value which was just displayed will be saved, andthe adjustment procedure is then complete. Hint: The user can alsopress F1 several times.
Hint: Since the measured value changes constantly, the user shouldpress the button when a relative average is being displayed.
6. Exit the menu by pressing ESC, and the machine will be ready foroperation.
The user can interrupt the adjustment procedure at any time bypressing ESC.
A.2.3 Instructions for adjusting sensors to dosage system’s drive shaftAn adjustment must always be made after replacement of a job computer. The values determined during adjustment will then be transferred to thenew job computer.
Basic requirements for adjustment in all systems:• The wagon’s loading space must be empty.
• The dosage system’s drive shaft must be in motion.
• The distance between the two sensors and the hole disk should be approximately 1-2 mm (theshorter the distance, the better)
Please note: The sensor must not touch the hole disk, not even as a result of vibrations.
• The hole disks should run as evenly as possible.
In the event that a hole disk is deformed in such a way that the distance between it and thesensor changes by more than 2 mm, a hammer can be used to adjust it slightly.

GBAPPENDIX
- 47 -548.DE.40B.0 LBS-FENDT VARIO
A3. Basic tractor equipment
At present, few tractors are equipped with basic LBS equipment.At the same time, a tractor can be made suitable for LBS afterpurchase.
In the event of questions, please consult the manufacturer orPöttinger’s customer service.
Job computer- See chapter on system setup, items 1 and 10 also.
Process control and monitoring, and communication with thetractor user station is all performed in the job computer.
The job computer can be considered a type of black box withthe functions described in chapters 2 and 3. Only the interfaces(plugged connections) to other system components areexplained below.
Incoming signals and valve outputs are linked to the jobcomputer by the distributor via chassis plugs C and B.Information is transferred to and from the tractor through LBSplug A.
DistributorThe cables from chassis plugs C and B do not lead directly tothe sensors and valves, as this would complicate findingmalfunctions and repairing broken cables.
Two switches are located on the top of the distributor cabinet.
Functions:Loading-space lighting on / off
External device on / off

GBAPPENDIX
- 48 -548.DE.40B.0 LBS-FENDT VARIO
LBS plug AThe job computer’s operating mode can be set with a coding jumper in plug A. As a result, various types of equipment can be operated with thesame job computer.
Type: EUROPROFI Jumper
Without transverse conveyor 9 - 10
With transverse conveyor 8 - 10
Without transverse conveyor, with rear control panel 7 - 9 - 10
With transverse conveyor, with rear control panel 7 - 8 - 10
Basic LBS equipmentPlug A
(female)
Socket A
(male) Job computer
Coding pins
Analog input
CPU
LBS plug

GBAPPENDIX
- 49 -548.DE.40B.0 LBS-FENDT VARIO
Terminal planPlan of electrical system
To plug C
To plug B
To plug B
To plug B
To plug B
To plug B
To plug C
To plug C
To plug C
To plug C
To plug B
To plug C
To plug C
To plug C
To plug C
To plug C
To plug C
To plug B
To plug B
To plug B
To plug B
To plug B
To plug B
To plug B
To plug B
Sensor m
oment-3 (Jum
bo)
Sensor m
oment-2 (Jum
bo)
Torque
RP
M sensor
Cutter out key
Cutter in key
Loading-gate sensor
Cutter sensor
Back-w
all switch
Proportioning-roller sensor
Scraper-floor tw
o-stage motor
Valve, back w
all
Valve, back w
all
Valve, cutter
Valve, cutter
Valve, transverse conveyor
Valve, transverse conveyor
Valve, articulated draw
bar
Valve, articulated draw
bar
Valve, dosage system
Valve, pickup
Directional valve
Directional valve
Valve, scraper floor loading/unloading
Valve, scraper floor advanc
Cable to theaddition-light
Cable to thea d d i t i o n -silage set
3-pol plug
Cable B from the Job computer

GBAPPENDIX
- 50 -548.DE.40B.0 LBS-FENDT VARIO
A4. Hydraulic control block
The outputs on the distributor lead to the hydraulic control block.
The control block comprisesa Basic block
b Scraper floor
c Slide valve for seat valves
d Seat-valve block
A5. Total failure of entire electrical system
In the event of a malfunction in the electrical system, the desiredhydraulic function can be performed with the aid of an emergencymechanism.
Similarly to the table of functions (see hydraulic control block),press the respective valve’s button for the desired function.
See the chapter on the electrohydraulic system in the loaderwagon operating manual.
Y9 Y10
Querförderb.li
Querförderb.re
ein
ein
aus
aus
Pick-up
Knickdeichsel
Ladeautomatik
Kratzboden
Rückwand
Schneidwerk
MAGNETVENTILE Y2 Y3 Y4 Y5 Y7 Y14
Funktionsschaubild
heben
heben
ein
senken
senken
aus
auf
laden
ein
zu
entladen
aus
TD 97/98/01
Y8 Y11 Y12 Y13FUNKTIONEN-PULT
Y1
VorlaufKratzboden
Dosierer ein
aus
Y6
1
2
3
4
5
6
7
8
9
Y10
Y14
Y12
Y8
Y6
Y3
Y2
Y9
Y13
Y11
Y7
Y5
Y4
Y1
A
A
B
B
Table of functions
MAGNETIC VALVES
FUNCTION CONTROL PANEL
1 Pickup raiselower
2 Dosage system inout
3 Articulated drawbar raiselower
4 Transverse con., r inout
5 Transverse con., l inout
6 Cutter inout
7 Back wall openclosed
8 Scraper floor advance9 Scraper floor load
unloadAutomatic loading on
off

GBAPPENDIX
- 51 -548.DE.40B.0 LBS-FENDT VARIO
A6. External cutter operation
Key a)Swivel cutter in:
The cutter bar will swivel into the conveyor channel as long as thiskey is held down.
Key b)Swivel cutter out:
The cutter bar will swivel out of the conveyor channel as long as thiskey is held down.
Note:
These keys are intended for maintenance purposes.These keys may be used when the conveyor channel is empty and thepress drive is off only.
Please follow the notes provided in the chapter on the electrohydraulicsystem in the loader wagon operating manual.
NOTE: Make sure that the cutter is in acceptablecondition before swiveling it in.

GBAPPENDIX
- 52 -548.DE.40B.0 LBS-FENDT VARIO
Hydraulic plan
Welding
Disconnect the following plugged connections to protect the electronic components of the loader wagon before performingany welding work.
• Disconnect cable from LBS Control control panel
• Unplug main LBS cable from tractor
Pump
Pressure filter Proportioning rollers
Scraper floorArticulated drawbar Cutter Back wall Transverse conveyor

Following the policy of the PÖTTINGERGes.m.b.H to improve their products as
technical developments continue, PÖTTINGER reservethe right to make alterations which must not necessarilycorrespond to text and illustrations contained in thispublication, and without incurring obligation to alterany machines previously delivered.
Technical data, dimensions and weights are given asan indication only. Responsibility for errors or omissionsnot accepted.
Reproduction or translation of this publication, in wholeor part, is not permitted without the written consent ofthe ALOIS PÖTTINGER
Maschinenfabrik Gesellschaft m.b.H.
A-4710 Grieskirchen.
All rights under the provision of the Copyright Act arereserved.
La société PÖTTINGER Ges.m.b.H amélioreconstamment ses produits grâce au le progrès
technique. C'est pourquoi nous nous réservons le droitde modifier descriptions et illustrations de cette noticed'utilisation, sans qu'on en puisse faire découler undroit à modifications sur des machines déjà livrées.
Caractéristiques techniques, dimensions et poids sontsans engagement. Des erreurs sont possibles.
Copie ou traduction, même d'extraits, seulement avecla premission écrite de
ALOIS PÖTTINGER
Maschinenfabrik Gesellschaft m.b.H.
A-4710 Grieskirchen.
Tous droits réservés selon la réglementation des droitsd'auteurs.
De PÖTTINGER Ges.m.b.H werkt perma-nent aan de verbetering van hun produkten in
het kader van hun technische ontwikkelingen. Daarommoeten wij ons veranderingen van de afbeeldingen enbeschrijvingen van deze gebruiksaanwijzingvoorbehouden, zonder dat daaruit een aanspraak opveranderingen van reeds geieverde machines kanworden afgeleid.
Technische gegevens, maten en gewichten zijn nietbindend. Vergissingen voorbehouden.
Nadruk of vertailing ook gedeeltelijk, slechts metschiftelijke toestemming van de
ALOIS PÖTTINGER
Maschinenfabrik Gesellschaft m.b.H.
A-4710 Grieskirchen.
Alle rechten naar de wet over het auteursrechtvoorbehouden.
La empresa PÖTTINGER Ges.m.b.H seesfuerza contínuamente en la mejora
constante de sus productos, adaptándolos a laevolución técnica. Por ello nos vamos obligados areservarnos todos los derechos de cualquiermodificación de los productos con relación a lasilustraciones y a los textos del presente manual, sinque por ello pueda ser deducido derecho alguno a lamodificación de máquinas ya suministradas.
Los datos técnicos, las medidas y los pesos seentienden sin compromiso alguno.
La reproducción o la traducción del presente manualde instrucciones, aunque sea tan solo parcial, requierede la autorización por escrito de
ALOIS PÖTTINGER
Maschinenfabrik Gesellschaft m.b.H.
A-4710 Grieskirchen.
Todos los derechos están protegidos por la ley de lapropiedad industrial.
D
NL
GBF
E
Im Zuge der technischen Weiterentwicklungarbeitet die PÖTTINGER Ges.m.b.H ständig
an der Verbesserung ihrer Produkte.
Änderungen gegenüber den Abbildungen und Be-schreibungen dieser Betriebsanleitung müssen wiruns darum vorbehalten, ein Anspruch auf Änderungenan bereits ausgelieferten Maschinen kann daraus nichtabgeleitet werden.
Technische Angaben, Maße und Gewichte sind unver-bindlich. Irrtümer vorbehalten.
Nachdruck oder Übersetzung, auch auszugsweise,nur mit schriftlicher Genehmigung der
ALOIS PÖTTINGER
Maschinenfabrik Gesellschaft m.b.H.
A-4710 Grieskirchen.
Alle Rechte nach dem Gesetz des Urheberrecht vorbe-halten.
La PÖTTINGER Ges.m.b.H è costantementeal lavoro per migliorare i suoi prodottimantenendoli aggiornati rispetto allo sviluppo
della tecnica.
Per questo motivo siamo costretti a riservarci la facoltàdi apportare eventuali modifiche alle illustrazioni e alledescrizioni di queste istruzioni per l’uso. Allo stessotempo ciò non comporta il diritto di fare apportaremodifiche a macchine già fornite.
I dati tecnici, le misure e i pesi non sono impegnativi.Non rispondiamo di eventuali errori. Ristampa otraduzione, anche solo parziale, solo dietro consensoscritto della
ALOIS PÖTTINGER
Maschinenfabrik Gesellschaft m.b.H.
A-4710 Grieskirchen.
Ci riserviamo tutti i diritti previsti dalla legge sul dirittod’autore.
I
V d˘sledku technickÈho v˝voje pracujefirma PÖTTINGER Ges.m.b.H neust·le
na zlepöenÌ sv˝ch v˝robk˘.
ZmÏny v n·vodu k pouûÌv·nÌ si v˝robce vyhrazuje.Poûadavky na zmÏnu n·vodu k pouûÌv·nÌ napr·vÏ dodanÈ stroje nemohou b˝t vyvozov·ny.
TechnickÈ ˙daje, rozmÏry a hmotnosti jsounez·vaznÈ.
Dotisk nebo nov˝ p¯eklad je moûn˝ pouze zapÌsemnÈho souhlasu firmy
ALOIS PÖTTINGER
Maschinenfabrik Gesellschaft m.b.H.
A-4710 Grieskirchen
Vöechna pr·va podlÈhajÌ autorskÈmu pr·vu.
CZВ ходе технического развития фирма«ПЁТТИНГЕР Гез.м.б.Х.» постояннозанимается усовершенствованием своей
продукции.
В связи с этим мы сохраняем за собой право вноситьизменения в рисунки и описания этой инструкции поэксплуатации, однако,требование вносить такиеизменения в уже поставленные машины предъявлениюне подлежит.
Технические данные, указание размеров и массы даютсябез обязательств. Ошибки не исключены.
Перепечатка или перевод, в том числе отрывками,разрешается только с письменного согласия фирмы
«АЛОЙС ПЁТТИНГЕР
Машиненфабрик Гезельшафт м.б.Х.»
А-4710 Грискирхен.
С сохранением всех прав в соответствии с авторскимправом.
RUS

GEBR. PÖTTINGER GMBHServicezentrumSpöttinger-Straße 24Postfach 1561D-86 899 LANDSBERG / LECHTelefon:
Ersatzteildienst: 0 81 91 / 92 99 - 166 od. 169Kundendienst: 0 81 91 / 92 99 - 130 od. 231
Telefax: 0 81 91 / 59 656
ALOIS PÖTTINGERMaschinenfabrik Gesellschaft m.b.HA-4710 Grieskirchen
Telefon: 0043 (0) 72 48 600-0Telefax: 0043 (0) 72 48 600-511
e-Mail: [email protected]: http://www.poettinger.co.at
GEBR. PÖTTINGER GMBHStützpunkt NordWentruper Mark 10D-48 268 GrevenTelefon: (0 25 71) 93 45 - 0
Ersatzteildienst: (0 25 71) 93 45 - 11Kundendienst: (0 25 71) 93 45 - 12
Telefax: (0 25 71) 93 45 - 14
PÖTTINGER France129 b, la ChapelleF-68650 Le Bonhomme
Tél.: 03.89.47.28.30Fax: 03.89.47.28.39


