+ All Categories
Home > Documents > Field Explorer: Multimedia Data Management-Sharing...

Field Explorer: Multimedia Data Management-Sharing...

Date post: 22-Apr-2018
Category:
Upload: phamtuong
View: 214 times
Download: 0 times
Share this document with a friend
31
Field Explorer: Multimedia Data Management-Sharing System For Enhancing Student’s Fieldwork Activities Yosuke TSUCHIYA 3 rd Year Ph.D course, Graduate School of Media and Governance Keio University, SFC.
Transcript

Field Explorer: Multimedia Data Management-Sharing System For Enhancing Student’s Fieldwork Activities

Yosuke TSUCHIYA3rd Year Ph.D course, Graduate School of Media and GovernanceKeio University, SFC.

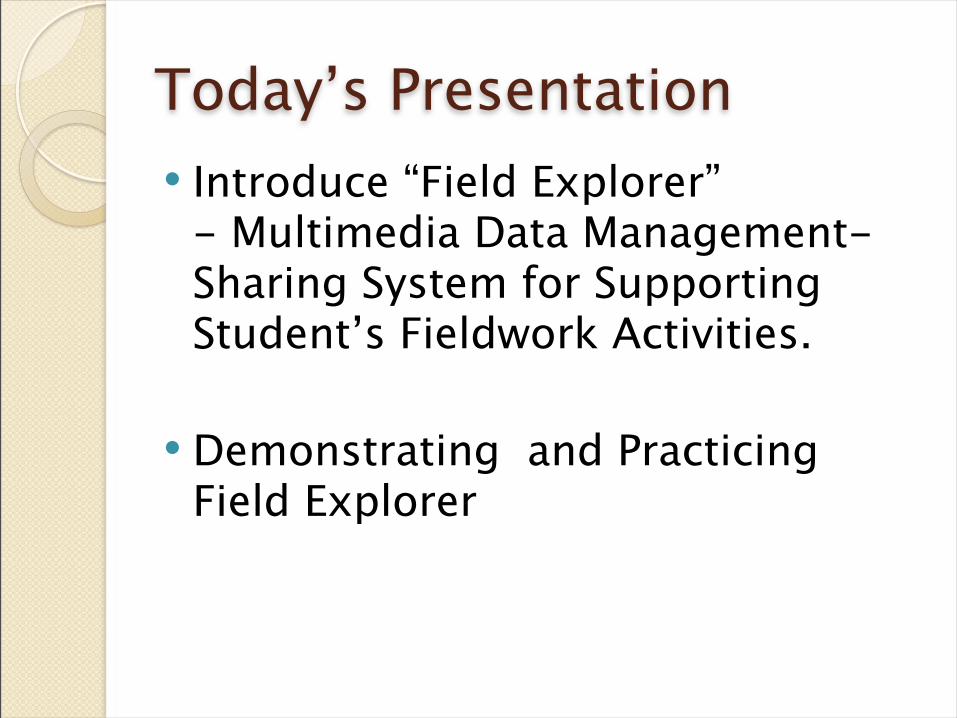
Today’s Presentation Introduce “Field Explorer”

- Multimedia Data Management-Sharing System for Supporting Student’s Fieldwork Activities.

Demonstrating and PracticingField Explorer

BACKGROUND

Background

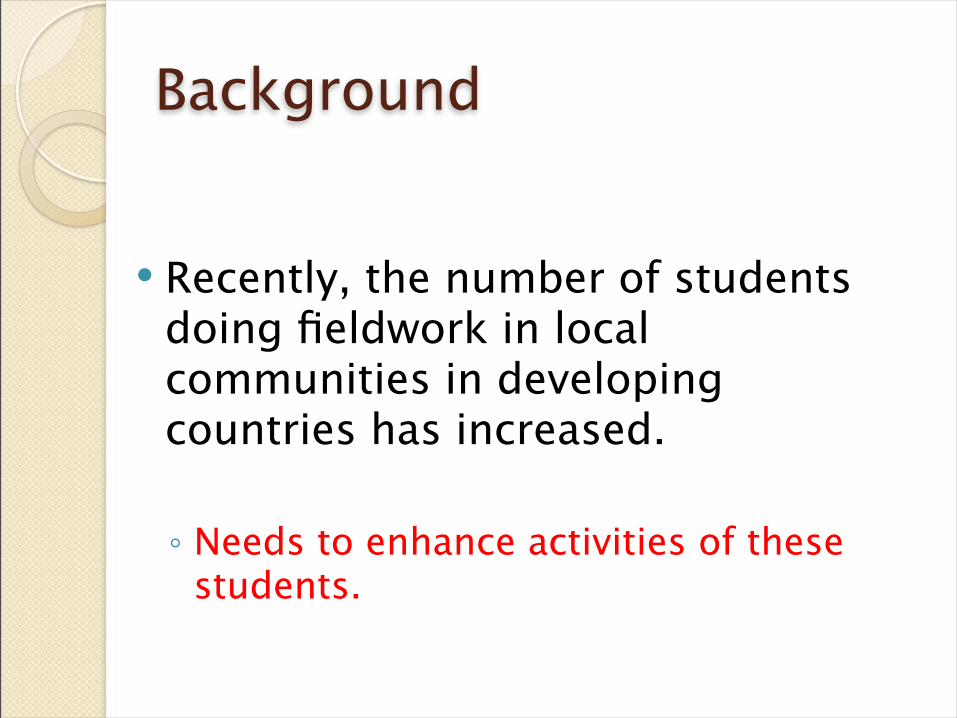
Recently, the number of students doing fieldwork in local communities in developing countries has increased.

◦ Needs to enhance activities of these students.

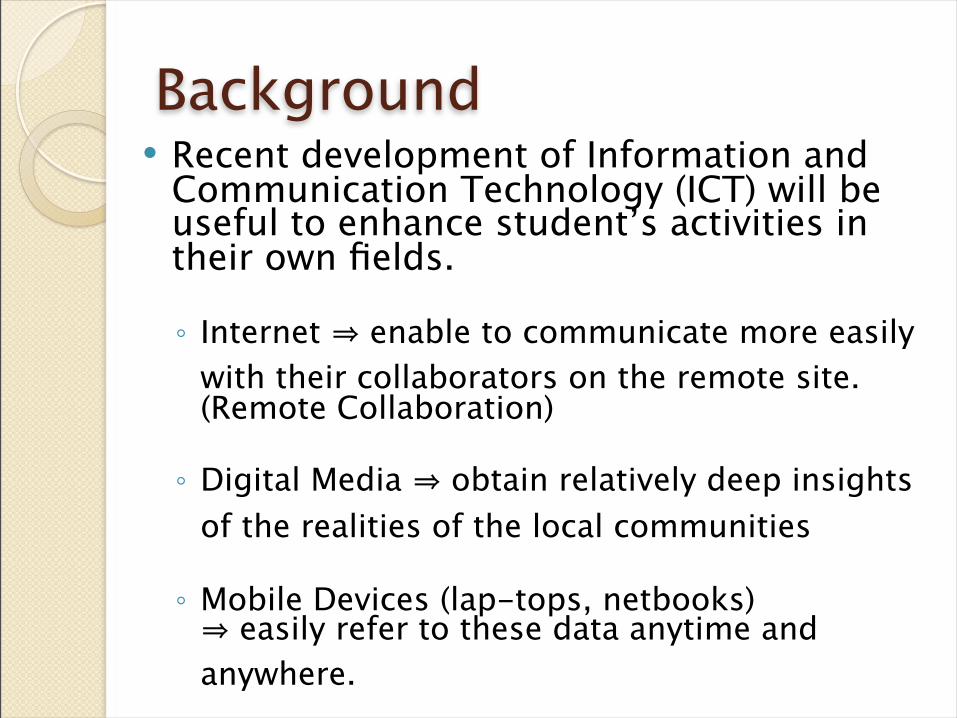
Background Recent development of Information and

Communication Technology (ICT) will be useful to enhance student’s activities in their own fields.

◦ Internet ⇒ enable to communicate more easily with their collaborators on the remote site. (Remote Collaboration)

◦ Digital Media ⇒ obtain relatively deep insights of the realities of the local communities

◦ Mobile Devices (lap-tops, netbooks)⇒ easily refer to these data anytime and anywhere.

Background However, no digital tools that are

designed to have all the merits included.

◦ Existing Management Tools (iPhoto, Picasa…. ) ⇒ Cannot classify plural media data such as photo, video, voices or texts with student’s viewpoints…..◦ Existing Collaboration Tools.⇒ Difficult to share the data with classified in student’s viewpoint.

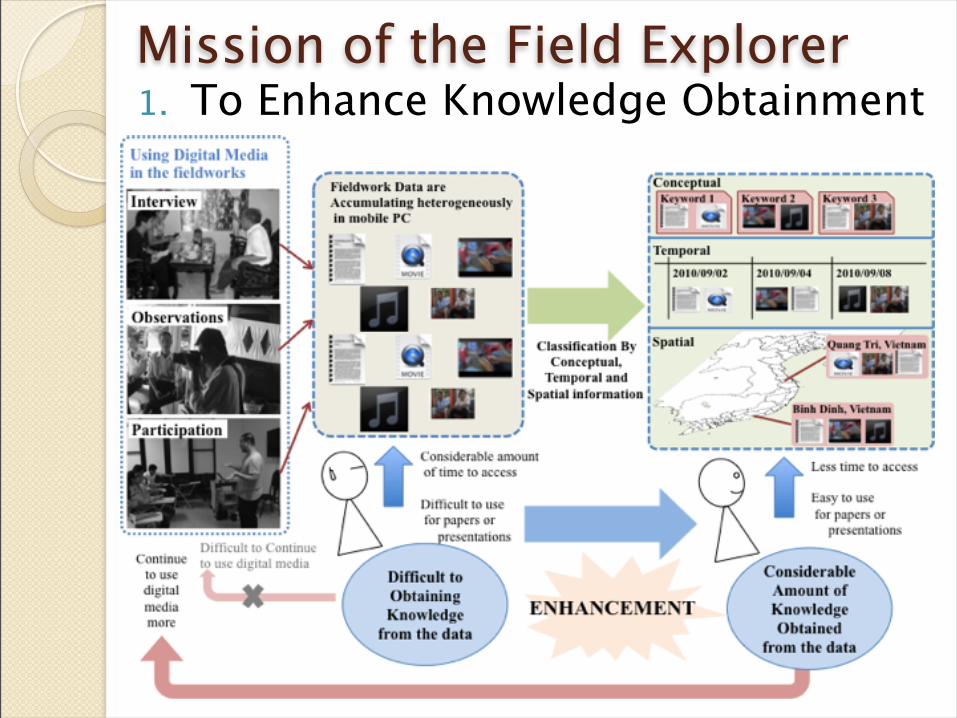
Mission of the Field Explorer 1. To Enhance Knowledge Obtainment

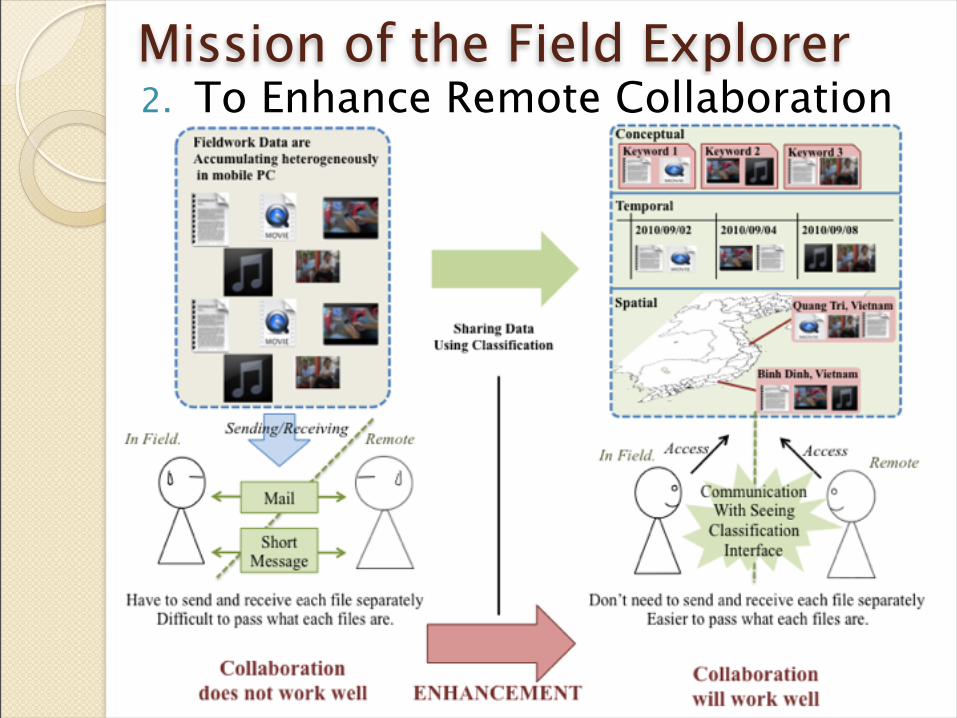
Mission of the Field Explorer 2. To Enhance Remote Collaboration

ARCHITECTURE

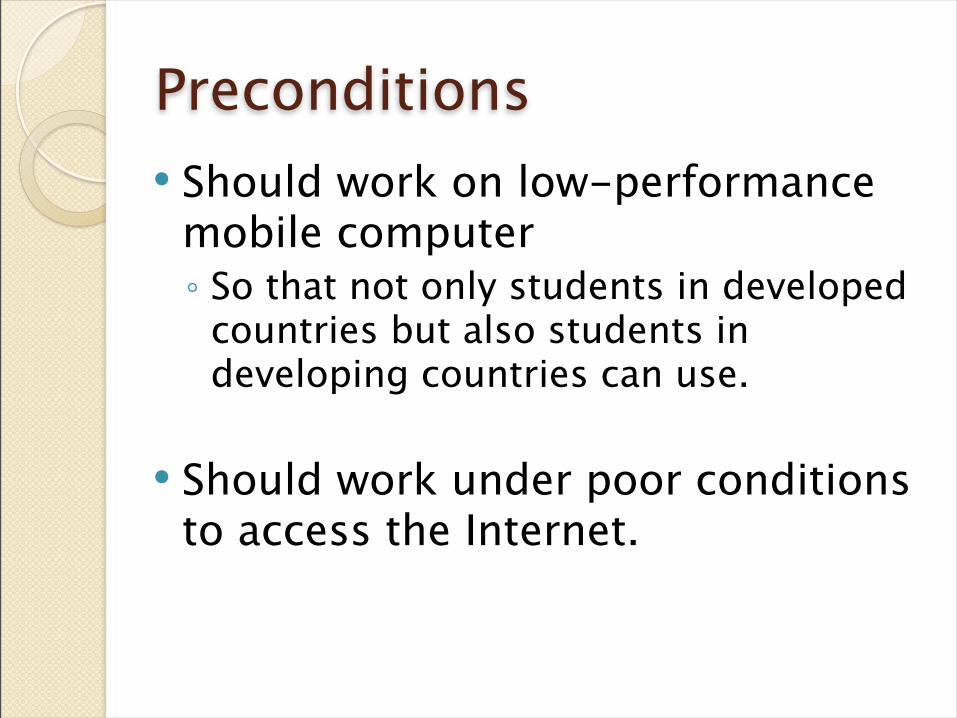
Preconditions Should work on low-performance

mobile computer◦ So that not only students in developed

countries but also students in developing countries can use.

Should work under poor conditions to access the Internet.

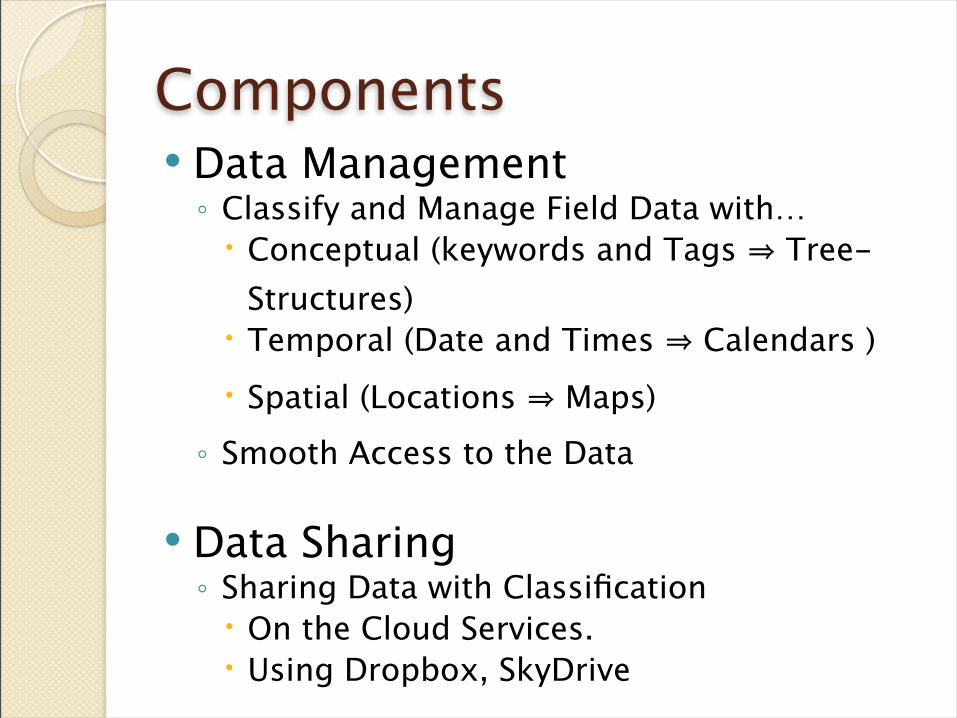
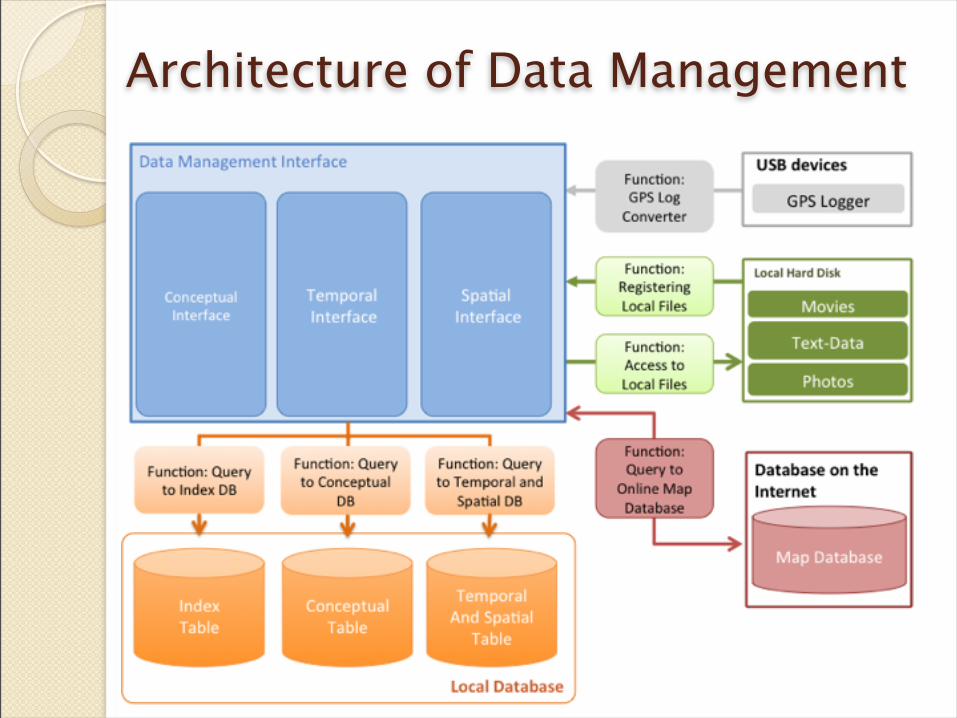
Components Data Management◦ Classify and Manage Field Data with… Conceptual (keywords and Tags ⇒ Tree-

Structures) Temporal (Date and Times ⇒ Calendars ) Spatial (Locations ⇒ Maps)◦ Smooth Access to the Data

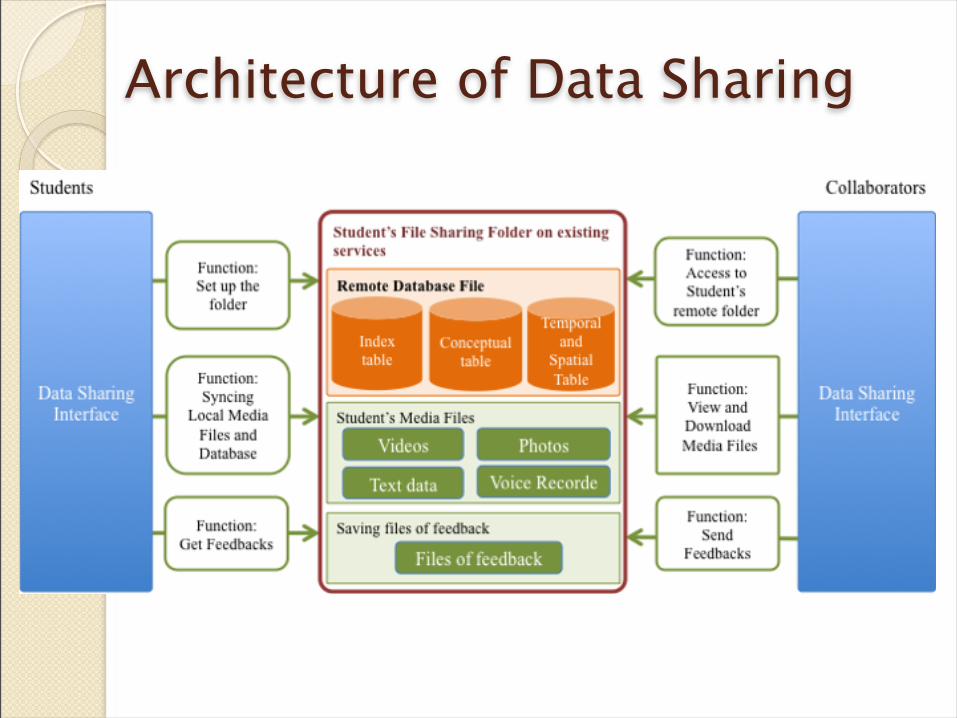
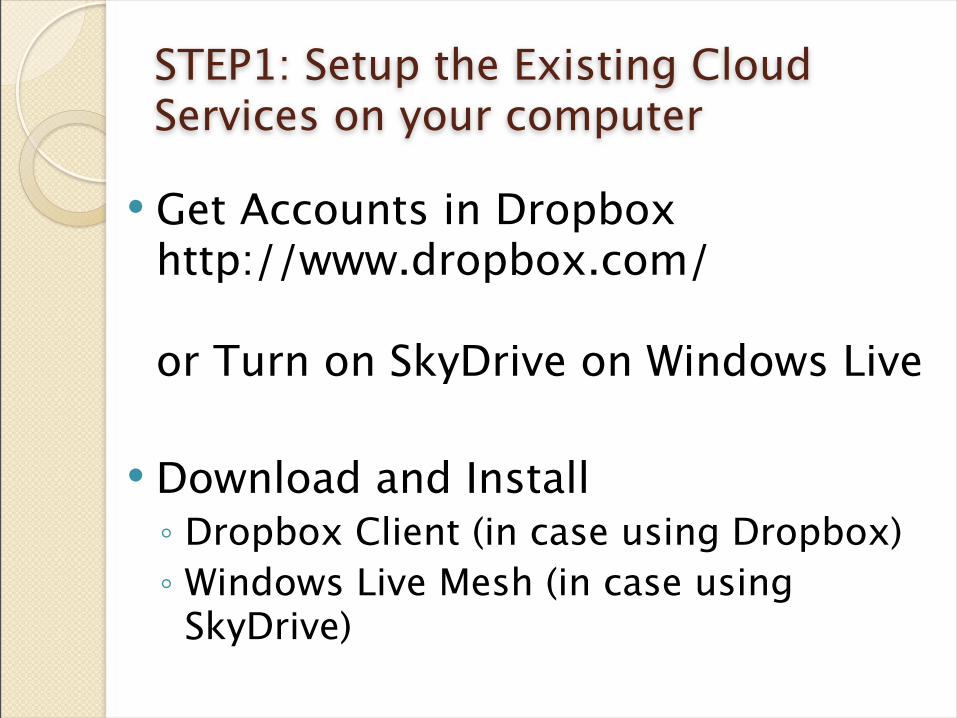
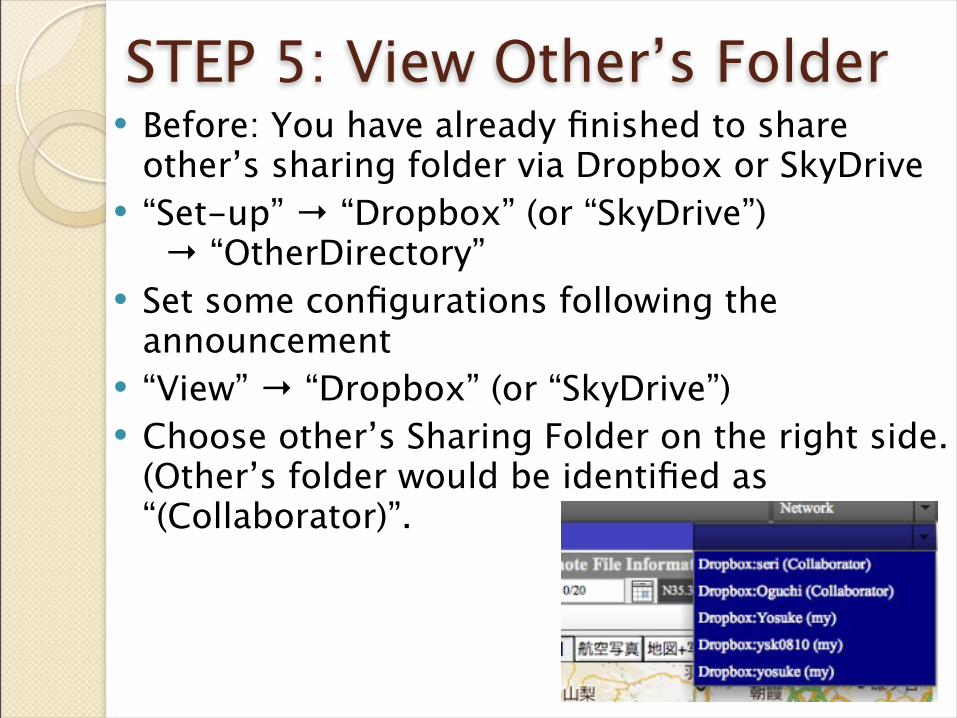
Data Sharing◦ Sharing Data with Classification On the Cloud Services. Using Dropbox, SkyDrive

Architecture of Data Management

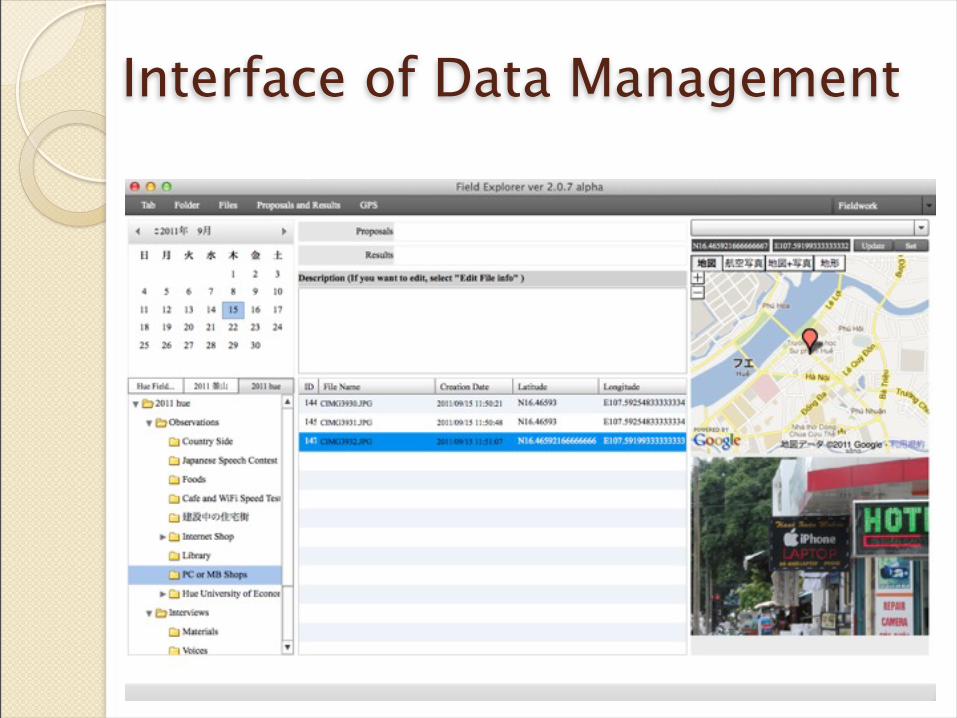
Interface of Data Management

Architecture of Data Sharing

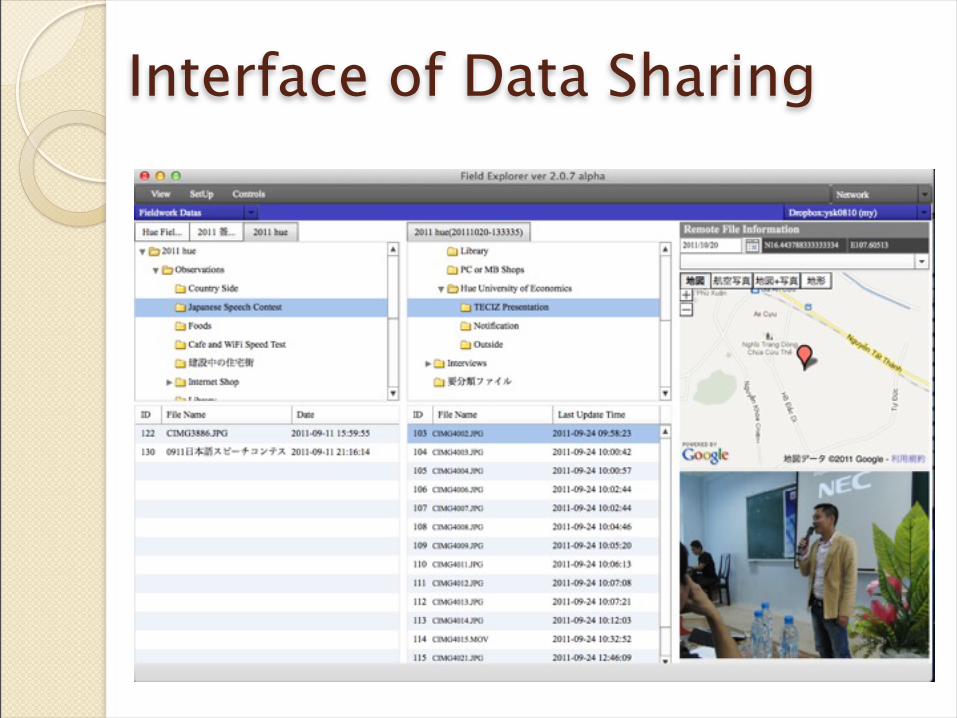
Interface of Data Sharing

DEMONSTRATION - DOWNLOAD AND INSTALL -
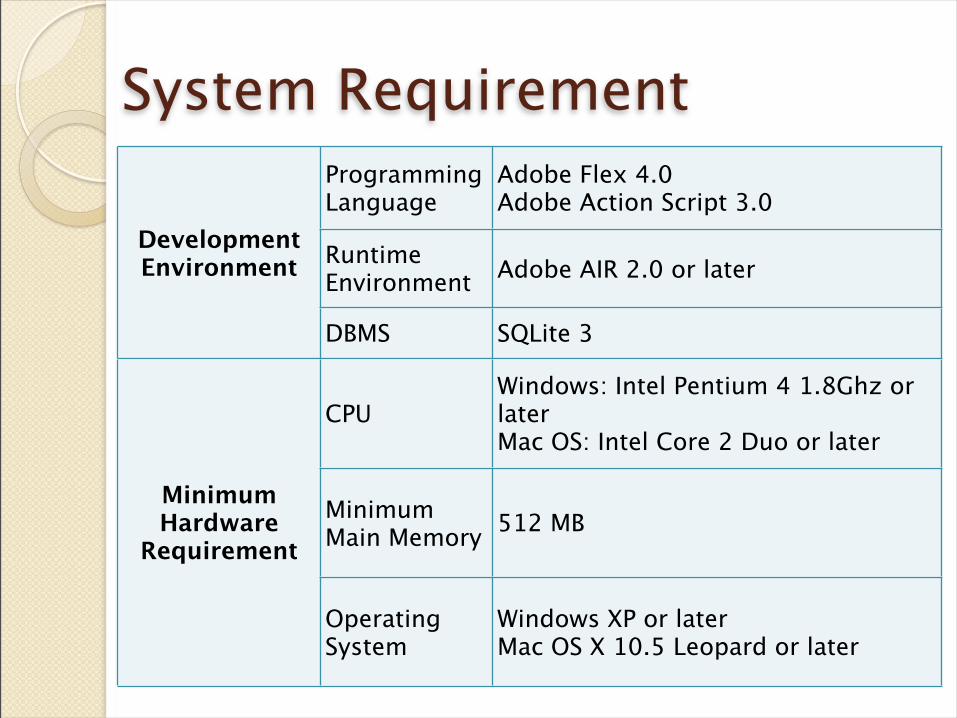
System Requirement

DevelopmentEnvironment

ProgrammingLanguage

Adobe Flex 4.0Adobe Action Script 3.0

DevelopmentEnvironment Runtime

Environment Adobe AIR 2.0 or laterDevelopmentEnvironment

DBMS SQLite 3

MinimumHardware

Requirement

CPUWindows: Intel Pentium 4 1.8Ghz or laterMac OS: Intel Core 2 Duo or later

MinimumHardware

RequirementMinimum Main Memory 512 MB

MinimumHardware

Requirement

OperatingSystem

Windows XP or laterMac OS X 10.5 Leopard or later

Definition: Fieldwork Data Recorded as Files in user’s computer.◦ Ex. Descriptions or notes = Notepad, Word Files

Observations = Photos (.jpg) or Videos (.avi) Interview = Voice Record (mp3) File Locations = GPS Log Files (.log)

Accumulated in user’s computer

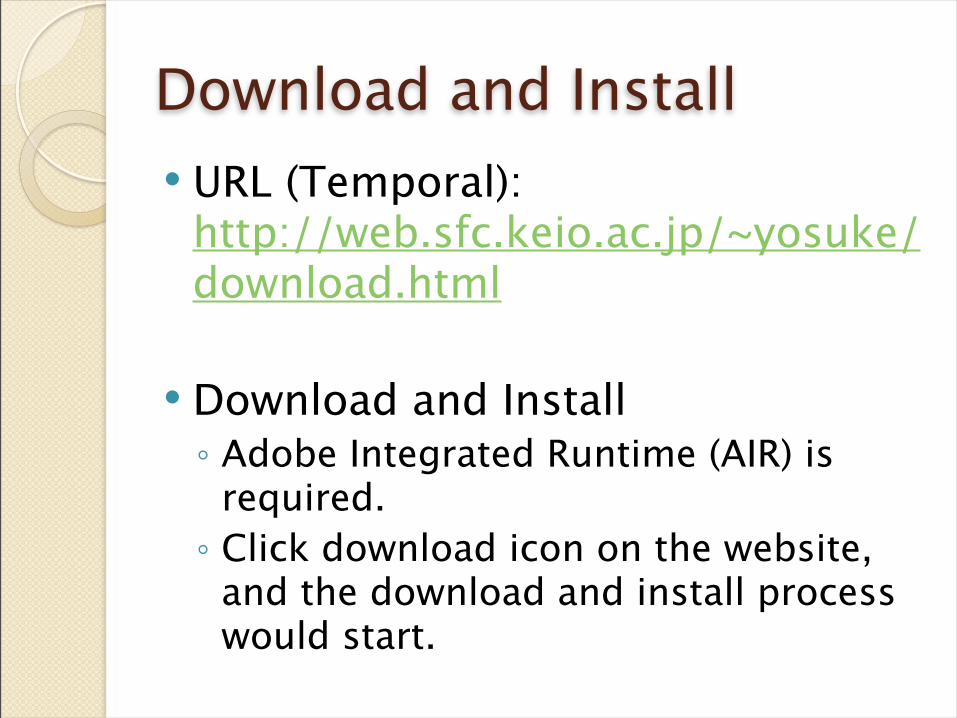
Download and Install URL (Temporal):

http://web.sfc.keio.ac.jp/~yosuke/download.html

Download and Install◦ Adobe Integrated Runtime (AIR) is

required.◦ Click download icon on the website,

and the download and install process would start.

DEMONSTRATION - DATA MANAGEMENT -

STEP 1: Make Tabs and Folders

First, Making Tabs and Folders = Basic of Data Management

Note: We cannot add any data without making tabs and folders

Tabs: Basic Categories of the dataex. “2011 Summer in Vietnam” “Interview Data”, “XXX Journal”

Folders: Detail keywords of the dataex. “Women”, “xxx street”,

STEP 2: Add/Delete Files How to Add the Files (recorded each

FW Data)?1. Select a Tab and Folder that you want

to add2. Drag & Drop the file that you want to

add or “Files” → “Add Files”

How to delete the Files?1. Select the file that you want to delete.2. “Files” → “Delete Files”

STEP3: Add GPS Files (Optional)

1. Import GPS Log files from GPS Logger

2. “GPSLog” → “Import GPS Log”

3. Click “Browse” button to select the GPS Log file

4. Select timezone that the GPS data were logged.Ex. If you logged at Vietnam, choose “Hanoi”.

5. Click “Import”

6. Wait until the GPS log will be imported.

STEP 4: View the files From Tabs and Folders◦ Click the folder,

1. the files which are related to the folder would be picked up.

2. The date when you recorded are pointed on the calendar.

3. And the location where you recorded would be pointed on the Map (if the GPS Log Data were added)

From the Calendar◦ Click the date, and the files which are recorded on that day would be

picked up. and the route where you went would be traced on the

Map. (if the GPS Log Data on that day were added.)

DEMONSTRATION - DATA SHARING -

STEP1: Setup the Existing Cloud Services on your computer

Get Accounts in Dropboxhttp://www.dropbox.com/

or Turn on SkyDrive on Windows Live

Download and Install ◦ Dropbox Client (in case using Dropbox)◦ Windows Live Mesh (in case using

SkyDrive)

STEP2: Add your Cloud Folder

Left-top : Choose “Network” “Set-up” → “Dropbox” (or “SkyDrive”)

→ “myDirectory”

Set some configurations following the announcement

Click “Create” to make Sharing Folder in your Cloud Service Folder.

STEP 3: Sync your Local Folders and Files to the Sharing Folder “View” → “Dropbox” (or “SkyDrive)◦ Choose your Sharing Folder on the right side.

(your folder would be identified as “(my)”.

◦ Click the tabs which you want to sync on the left (local) side. ◦ “Control” → “Copy Selected Tab And Folders

to my Remote Directory”.

STEP 4: Share your Folder with Others

Access to Dropbox or SkyDrive on the Webpage.

Find the folder named “FEShare_<yourNickname>

Setup to share above folder following each announcements.

STEP 5: View Other’s Folder Before: You have already finished to share

other’s sharing folder via Dropbox or SkyDrive “Set-up” → “Dropbox” (or “SkyDrive”)

→ “OtherDirectory” Set some configurations following the

announcement “View” → “Dropbox” (or “SkyDrive”) Choose other’s Sharing Folder on the right side.

(Other’s folder would be identified as “(Collaborator)”.

Further Information If anything, please send a message to:

[email protected]

Recent Release: Please check the website:http://web.sfc.keio.ac.jp/~yosuke/download.html

User’s Manual and Multi-Language version (Japanese, Vietnamese… ) would be released soon.

We are looking some people to help monitoring our system.


Recommended