4 P U B L I CFiorified Business Intelligence Launch Pad User Guide
Content
1 Document History
The following table provides an overview of the most important changes in this document.
Version Date Description
Fiorified Business Intelligence Launch Pad 4.2 SP4
May 2017 Initial release.
Fiorified Business Intelligence Launch Pad 4.2 SP5
December 2017 Updated the following topics:
● "Creating a Category"● "Variant filter"● "Changing your Password"● "Recurrence pattern options"● "Working with instances"
Fiorified Business Intelligence Launch Pad 4.2 SP7
February 2019 Added the following topics:
● Accessing a Link to a Folder or Category [page 27]
● Mapping of Default Values from CMC to Fiorified BI Launch Pad [page 28]
● Rescheduling instances [page 51]
● Viewing Error Message Through Details Pane [page 57]
● Viewing Error Messages in the Schedule Tab [page 58]
● Fiorified BI Workspace [page 61]● Working with Hyperlinks [page
29]● External Links [page 29]● To Customize the Appearance of
the Launch Pad [page 23]● Sending Content Objects to BI
Inbox [page 30]● Scheduling Content Objects to BI
Inbox [page 51]
Updated the following topic:
● Working with Instances through Schedule Tab [page 57]
● Working With Instances through the History Page [page 57]
● Setting Page Preferences [page 21]
Fiorified Business Intelligence Launch Pad User GuideDocument History P U B L I C 5
2 Getting Started with BI Launch Pad 4.2 SP7
The new BI Launch pad is a modern version of the classic BI Launch pad application, built for maximum productivity. It has a fiorified user experience that makes the user interface (UI) simple and intuitive. With the ever-so-simplified UI, it is now that much simpler to access, view, organize, and manage your BI objects. This documentation provides information about and instructions for using the BI Launch pad.
The BI Launch pad application runs in a web browser and is the main interface for working with objects in the BI platform. You use the BI Launch pad to perform the following tasks:
● Access and organize Crystal reports, Web Intelligence documents, and other objects.● View information in a web browser, export it to other business applications (such as Microsoft Excel), and
save it to a specified location.● Use analytic tools to explore business information in detail.
Because the appearance and functionality of BI Launch pad can be customized, your user interface may be different from images shown in this documentation. Depending on your configuration, you can usually apply the information to your user interface.
2.1 Who should use this documentation?
This documentation is intended for users who work with objects over the web in the BI platform and the BI Launch pad.
For more information about the platform, see the SAP BusinessObjects Business Intelligence Platform User Guide and the SAP BusinessObjects Business Intelligence Platform Administrator Guide on the SAP Help Portal.
2.2 Licensing
Each type of user license in the BI platform grants or restricts access to particular tasks and applications. Depending on which license you have, you may be unable to access some applications or to perform some tasks in the BI repository.
The BI platform supports the following types of user licenses:
● Concurrent user● Named user
6 P U B L I CFiorified Business Intelligence Launch Pad User Guide
Getting Started with BI Launch Pad 4.2 SP7
NoteNumber of concurrent logon sessions for a named user is limited to 10. If the named user tries to log into the 11th concurrent logon session, the sytem displays an approprite error message. You need to release one of the existing sessions to be able to log in.
To determine which license you have, contact your system administrator. For more information about licensing, see the SAP BusinessObjects Business Intelligence Platform Administrator Guide on the SAP Help Portal.
2.3 Key Concepts
Familiarize yourself with key concepts in BI Launch pad. Depending on which tasks you perform, some concepts may not apply to you.
Term Definition
BI Objects An object is a document or file created in the BI platform or other software that is stored and managed in the platform repository.
Categories A category is an organizational alternative to a folder. Use categories to label objects.
Scheduling Scheduling is the process of automatically running an object at a specified time. Scheduling refreshes dynamic content or data in an object, creates instances, and distributes the instances to users or stores them locally.
Events An event is an object that represents an occurrence in the BI platform system. Events can be used for the following purposes:
● As scheduling dependencies that trigger actions after a scheduled job runs
● To trigger alert notifications● To monitor the performance of the platform
Calendars A calendar is a customized list of run dates for scheduling jobs.
Instances An instance is a snapshot of an object that contains data from the time an object was run.
Alerting Alerting is the process of notifying users and administrators when events occur in the BI platform.
Fiorified Business Intelligence Launch Pad User GuideGetting Started with BI Launch Pad 4.2 SP7 P U B L I C 7
2.4 Key Tasks
Depending on your user license and access rights, you can perform the following tasks in the BI Launch pad:
● View objects● Add objects● Modify and manage the objects you add● Distribute content to users● Set personal preferences for the BI Launch pad user interface
2.5 Logging on to BI Launch Pad
Before you can log on to the BI launch pad application, you must have Microsoft Internet Explorer, Firefox, Chrome, or Safari installed on your computer.
1. In a web browser, enter the URL for BI Launch pad.
NoteThe URL should be http://<WebServer>:<PortNumber>/BOE/BILaunchpad, where <WebServer> is the name of the web server for BI platform and <PortNumber> is the port number for the platform.
If your system administrator has configured a custom URL for BI launch pad, you may need to ask the administrator for the name of the web server, the port number, or the URL to enter.
By default, you do not need to enter a system name. However, some Enterprise systems may require it.
2. If prompted, in the System field, enter the name of your Central Management Server (CMS).3. In the Username field and the Password field, enter your logon credentials.4. Choose Log On.
2.6 Finding Help for BI Launch Pad
Various help resources like product documentation (in PDF and HTML) formats, in-build help, and video tutorials are available to help you get accustomed with and use the Fiorified BI Launch pad application.
You can access product documentation, like the Fiorified Business Intelligence Launch Pad User guide, for your Fiorified BI Launch pad from the SAP Help Portal. Additionally, you can find walkthrough demo videos for various BI Suite workflows here: https://wiki.scn.sap.com/wiki/pages/viewpage.action?pageId=449905204
For more tutorials related to BI products, visit https://www.sap.com/LearnBI
8 P U B L I CFiorified Business Intelligence Launch Pad User Guide
In-build help in the product provides access to all documentation available at the time the software ships. It is accessible through the (Help) option present in BI Launch pad. To access in-build help for the BI Launch pad application, perform the following:
1. From the Home page, choose (User Settings) on the Global Navigation Bar.
The User Settings page opens.
2. Choose (Help).
The in-build application help opens.
2.7 Logging Out
If you want to end your session and log out of the BI Launch pad, perform the following steps:
1. From the Home page, choose (User Settings) on the Global Navigation Bar.
The User Settings page opens.
2. Choose (Log Out).
You successfully log out of the application and return to the Login screen.
Fiorified Business Intelligence Launch Pad User GuideGetting Started with BI Launch Pad 4.2 SP7 P U B L I C 9
3 Home
When you first log in to the BI Launch pad, you see the default user interface, which you can customize for the tasks you perform there.
The BI Launch pad default Home page is typical:
● The Global Navigation Bar allows you to traverse between User Settings, Applications, and the BI Inbox. It also allows you to search within the BI Launch pad.
● The BI platform Tool Bar allows you to navigate between different tabs like My Home, Schedule, Inbox, Folders, and Recycle Bin.
● The Workspace comprises of Categories, Filters, and more options to manage your content.
10 P U B L I CFiorified Business Intelligence Launch Pad User Guide
Home
4 Introducing the BI Launch Pad User Interface
The new BI Launch pad has a renewed, enriched, and fresh user experience, designed to help you focus on your tasks with ease. The new interface allows you to create and manage your documents and files using various elements such as panels, bars, windows, and tiles. Any arrangement of these elements together contributes to the User Interface.
● Home [page 10]● User Settings [page 12]● Variant filter [page 16]● Categories [page 14]● Search [page 12]● Views [page 17]● BI Platform Tool Bar [page 13]
Fiorified Business Intelligence Launch Pad User GuideIntroducing the BI Launch Pad User Interface P U B L I C 11
4.1 Global Navigation Bar
4.1.1 User Settings
The User Settings page allows you to access your account information and set personalization preferences. In the User Settings page, you can perform the following:
● Find Help within the product● Get an overview About the product● Manage your user Settings● Log Out of the application
To navigate to the User Settings page, perform the following:
1. Log on to the BI Launch Pad.
2. Choose (User Settings) from the Global Navigation Bar.
You are now in the User Settings page.
4.1.2 Search
BI Launch pad search enables you to search content within the BI Launch pad repository. The search in the BI Launch pad starts looking for matches as you enter search text.
The following filters available in the Search drawer help you retrieve filtered views of the search results:
● Fields: Set to search all objects' metadata fields by default (title, description, and keywords). You can switch it to search only the title.
● Type: Set to 'All Documents' by default. You can switch it to filter for a specific document type (Web Intelligence, Crystal Reports, etc.), or to 'All' to search all repository administration objects (users, jobs, etc.).
● Location: Allows you to filter documents or objects by their higher-hierarchy-level folder.● Refresh Time: Allows you to filter by refresh date ranges.
You can press Enter to view the complete results.
Search string recognition as you type
As you type, the search looks for results that match words in the search text. Matches to search text are based on an object's keyword, title, description, and owner information. Quick search results appear at the top of the current page, and full results (after you press Enter ) appear in a separate full results page.
12 P U B L I CFiorified Business Intelligence Launch Pad User Guide
Introducing the BI Launch Pad User Interface
Matched word highlighting
When the search text matches words in an object’s title or description, matched words appear in bold type.
Facets and search result grouping
Facet grouping by report field is available for the following document types: Crystal Reports, Web Intelligence reports, Agnostic, Text, Adobe Acrobat, Microsoft PowerPoint, Microsoft Word, Microsoft Excel, Rich Text, Design Studio, Analysis Office, Lumira, etc.
When a search produces many results, the BI Launch pad classifies the result information in facets (that is, groups). You can select a facet and view search results for it. Search results are classified in the following facets:
● Fields● Type● Location● Refresh Time
Each facet is assigned objects that appear in search results. Facets are generated from metadata.
4.2 BI Platform Tool Bar
Use the BI platform tool bar to view and manage different tabs in the workspace.
Tab Description
My Home When you first log in to the BI Launch pad, you see the default user interface, which you can customize for the tasks you perform there.
Schedule Scheduling refreshes dynamic content or data in an object, creates instances, and distributes the instances to users or stores them locally.
Inbox The Inbox lets you view and manage system alerts and administrator notifications.
Folders You can organize and manage your content objects using public and personal folders.
Fiorified Business Intelligence Launch Pad User GuideIntroducing the BI Launch Pad User Interface P U B L I C 13
Tab Description
Recycle Bin Recycle Bin is an application in the BI Launch pad. When the user deletes an item from the BOE system, it is moved to the Recycle Bin, where it is temporarily stored until the Recycle Bin is emptied. This gives the user the opportunity to recover accidentally deleted reports/folders and restore them to their original locations.
4.3 Categories
The BI platform supports both public and personal categories.
Public categories (accessible to all users) are typically created by a system administrator. Depending on your access rights, you may be able to create personal categories in the BI Launch pad.
Corporate category:
Corporate categories are typically created by the administrator or by users who have appropriate access rights. If you have the appropriate rights, you can create corporate categories.
Personal category:
You can create any number of personal categories to organize your objects.
4.3.1 Creating a Category
Perform the following steps to create a category:
1. In the My Home tab, choose (More) at the top-right corner.
The Category Details dialog box appears.2. In the Category Name filed, enter a desired name for the category.3. (Optional) In the Description field, enter a description for the category.4. Select the desired Type of the category.5. (Optional) In the Add Tags field, enter desired tags for the category.6. (Optional) In the Upload Image field, browse and choose an image file to upload to the category.
NoteThe supported image types are as follows: .jpeg/.jpg, .png, .gif, .svg. The maximum image size supported is 100 kb.
14 P U B L I CFiorified Business Intelligence Launch Pad User Guide
Introducing the BI Launch Pad User Interface
You can delete the image you uploaded to a category by navigating to (More) > Properties, and choose the 'Edit' icon followed by the 'Close' icon on the category image. You can then choose to upload a new (different) image to the category.
7. Choose Save.
After the folder or category is created, you can add objects to it, if you have appropriate access rights to the objects.
4.3.2 Working with Categories
4.3.2.1 Opening a Category
Perform the following steps to open a category:
1. In the My Home tab, select All Categories from the variant filter.
List of all categories appears.2. Choose the desired category to open.
4.3.2.2 Deleting a Category
Perform the following steps to delete a category:
1. In the My Home tab, select All Categories from the variant filter.
List of all categories appears.
2. In the desired category, choose (More Options).
3. Select Delete .
The desired category is now deleted.
4.3.2.3 Marking a Category as Favorite
Perform the following steps to mark a category as favorite:
1. In the My Home tab, select All Categories from the variant filter.
List of all categories appears.
2. In the desired category, choose (More Options).3. Select Mark as Favorite.
Fiorified Business Intelligence Launch Pad User GuideIntroducing the BI Launch Pad User Interface P U B L I C 15
The desired category is now marked as your favorite.
4.4 Filters
By default, when you first log in to the BI Launch pad, it displays all content objects that you have access rights to view in the My Home tab. Content objects are sorted alphabetically by title, but you can filter them using filters.
The BI Launch pad provides two filters to help you filter desired content objects: Variant filter.
4.4.1 Variant filter
Variant filter helps you to filter out different categories of content objects like My Recently Viewed, My Documents, All Categories and My Favorites. By default, the My Recently Viewed option is selected and your most recently viewed content objects are displayed.
Filter Description
Show all This filter lists all the BI objects like documents, reports, folders, and categories in the Home page.
My Recently Viewed This filter lists the last 10 documents that you viewed; sorted by type, with the most recently viewed document at the top (in list view).
My Documents This filter lists all documents you created in the Home page.
All Categories A category is an organizational alternative to a folder. Use categories to label objects. This filter lists all the categories in the Home page.
My Favorites This filter lists all documents or categories that you marked as your favorites in the Home page.
My Recently Run This filter lists the last 10 document instances in the repository that you scheduled or ran, with the status of each document instance.
16 P U B L I CFiorified Business Intelligence Launch Pad User Guide
Introducing the BI Launch Pad User Interface
4.5 Views
The BI Launch pad provides a (Toggle button) to help you navigate between different views to see
your content objects. You can choose to view the content objects as tiles by choosing the (Tile view)
button, or as a list by choosing the (List view) button.
Fiorified Business Intelligence Launch Pad User GuideIntroducing the BI Launch Pad User Interface P U B L I C 17
5 Personalizing your BI Launch Pad
Your personal preferences determine how you log on to BI launch pad, which views appear, and which settings apply to viewed objects.
You can manage all actions concerning your BI launch pad account by choosing the (User Settings) icon on the Global Navigation Bar.
On choosing (User Settings), you are directed to the User Settings page of the BI launch pad.
The access rights assigned by your system administrator determine whether you can set your own preferences. Before you start using BI launch pad, check whether your preferences have been set—and configure them, if needed.
NoteIf the Account Preferences and Application Preferences menu is not available in BI launch pad, you do not have the "Change preferences for objects that the user owns" right assigned in the Central Management Console (CMC) in the BI platform. To request access, contact your system administrator.
5.1 Managing your Account
You can view general information related to your user account, by accessing the (Settings) option in the User Settings page of the BI Launch pad.
18 P U B L I CFiorified Business Intelligence Launch Pad User Guide
Personalizing your BI Launch Pad
● Accessing your Info [page 19]● Changing your Password [page 20]● Account Preferences [page 21]
5.1.1 Accessing your Info
To view your user account information, perform the following steps:
1. From the Home page, choose (User Settings) on the Global Navigation Bar.
The User Settings page opens.
2. Choose (Settings).
Fiorified Business Intelligence Launch Pad User GuidePersonalizing your BI Launch Pad P U B L I C 19
The Settings dialog box appears. By default, the User Account menu option is selected and Account Information is displayed in the User Account tab.
The details displayed under Account Information include Account Name, Full Name, Email, Description, and the Password Last Changed On date.
5.1.2 Changing your Password
You can choose to change your account password, at any time, for the BI Launch pad.
You must have appropriate access rights to change passwords. If you have access rights but cannot change your password, contact your system administrator.
NoteIf the Account Preference and Application Preference menu is not available on the header panel in the BI Launch pad, you do not have the "Change preferences for objects that the user owns" right assigned in the Central Management Console (CMC) in the BI platform. To request access, contact your system administrator.
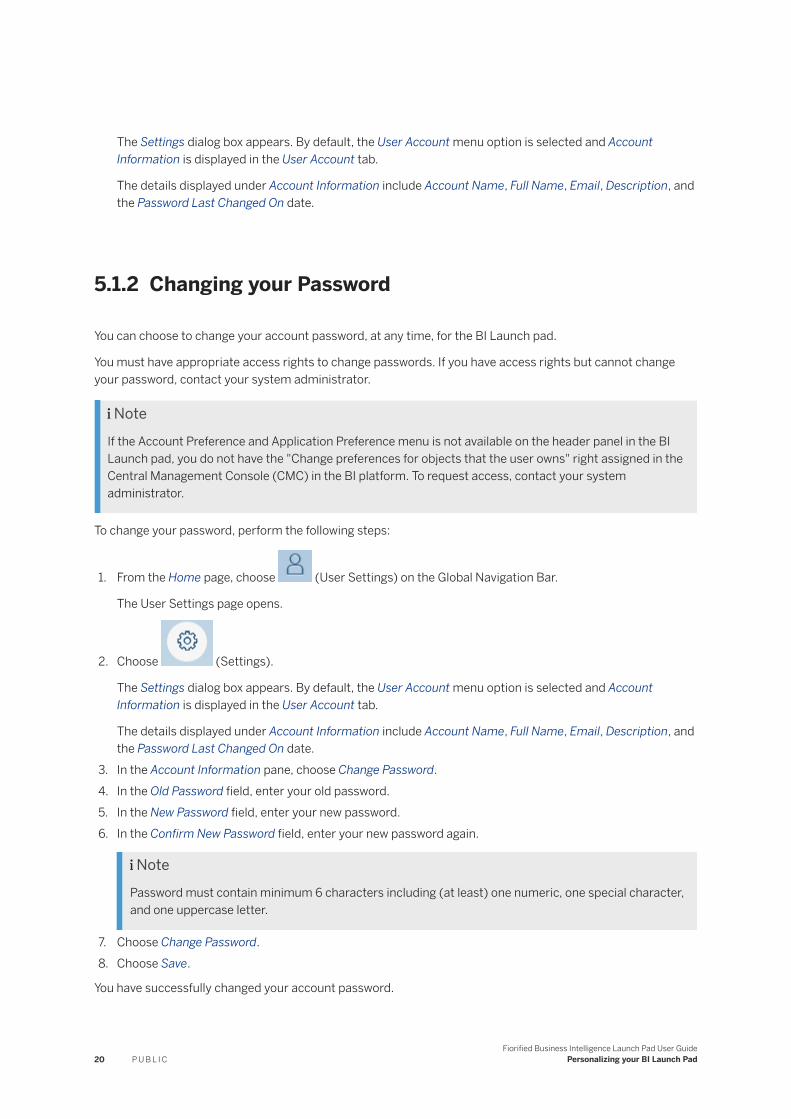
To change your password, perform the following steps:
1. From the Home page, choose (User Settings) on the Global Navigation Bar.
The User Settings page opens.
2. Choose (Settings).
The Settings dialog box appears. By default, the User Account menu option is selected and Account Information is displayed in the User Account tab.
The details displayed under Account Information include Account Name, Full Name, Email, Description, and the Password Last Changed On date.
3. In the Account Information pane, choose Change Password.4. In the Old Password field, enter your old password.5. In the New Password field, enter your new password.6. In the Confirm New Password field, enter your new password again.
NotePassword must contain minimum 6 characters including (at least) one numeric, one special character, and one uppercase letter.
7. Choose Change Password.8. Choose Save.
You have successfully changed your account password.
20 P U B L I CFiorified Business Intelligence Launch Pad User Guide
Personalizing your BI Launch Pad
NoteWhen you, or your administrator, change your password, you are logged out of all your current sessions and are directed to the 'Login' page to log in again.
5.2 Account Preferences
BI Launch pad account preferences determine what appears in the default view of the software.
You can specify your account preferences by navigating to the Settings page.
5.2.1 Setting Page Preferences
You can set your preference for the landing page when logging onto the Fiorified BI Launch pad from the Home page.
1. On the Home page, choose (User Settings) on the Global Navigation Bar.
2. On the User Settings page, choose (Settings).3. In the Settings dialog box, from the General pane on the left, choose Account Preferences.4. In the Account Preferences pane on the right, choose the Page Preferences tab.5. Disable the Use Administrator Provided Settings option.
The Use Administrator Provided Settings option is enabled by default and the application uses the default administrator-configured preferences. You can modify the administrator preferences by disabling this feature.
6. Depending on the Home Tab you choose, do the following:
Home Tab selected Next Steps
Document In the Select Document field, choose a document from My Folders or Public Folders to view it as the default landing page.
Category In the Select Category field, choose a category from Personal Categories or Corporate Categories to view it as the default landing page.
If you select a category, the default view is a Grid view.
Fiorified Business Intelligence Launch Pad User GuidePersonalizing your BI Launch Pad P U B L I C 21
Home Tab selected Next Steps
Custom Home Tab 1. In the Landing Page field, select a landing page:○ My Home○ Schedule○ Inbox○ Folders○ Recycle Bin
If you choose Folders, select a folder to display as the landing page.
2. In the List Documents As field, select Tile view (Default) or List view.
3. In the Landing Filter field, select a landing filter:○ Show All○ My Documents○ All Categories○ My Favorites○ My Recently Viewed○ My Recently Run
4. In the Choose Column to display field, select a column:○ Type○ Last Run○ Instances○ Description○ Created By○ Last Updated○ Created On○ Location (Categories)○ My Favorites (Home Page)○ Status (Schedule)○ Instance time (Schedule)
NoteBy default, Type, Description, Last Updated, My Favorites (Home page), Status (Schedule), and Instance time (Schedule) are selected. You can choose the required columns to display.
NoteOnce you have customized the page preferences, refresh the Fiorified BI Launch pad to see the changes.
22 P U B L I CFiorified Business Intelligence Launch Pad User Guide
Personalizing your BI Launch Pad
5.2.2 Setting Locale and Time Zone Preferences
Your Preferred Viewing Locale (PVL) and time zone preferences determine how dates, times, and numbers are formatted in the BI launch pad. For multilingual objects, the PVL also sets the language used to display an object's name and description. If an object has multiple translated names and descriptions, the display language is determined as follows:
1. The system displays the name and description that correspond to the user's PVL. The BI platform may use a default fallback locale, but it is typically a variation of the user's PVL. For example, if the PVL is French (Canada) and the object does not have a translated name and description in Canadian French, the platform will use French (France).
2. If no PVL is set, the platform displays the name and description in the same language as the product locale.3. If option 1 or 2 is not feasible, the platform displays the name and description in the object's source
language.
Selecting the preferred locale and time zone ensures that scheduled objects are processed in the time zone you are working in.
Before scheduling objects, check the time zone selected for the BI launch pad. The default time zone is local to the web server that is running the BI platform, not to the Central Management Server (CMS) computer that your machine connects to.
To set your preferred locale and time zone, perform the following steps:
1. From the Home page, choose (User Settings) on the Global Navigation Bar.
The User Settings page opens.
2. Choose (Settings).
The Settings dialog box appears.3. From the General pane on the left, choose Account Preferences.4. In the Account Preferences pane on the right, choose the Locale and Time Zone Preferences tab.5. In the Preferred Viewing Locale field, select the desired preferred viewing locale.6. In the Current Time Zone field, select the desired time zone.7. In the Product Locale field, select the desired product locale.8. Choose Save.
5.3 To Customize the Appearance of the Launch Pad
You can customize the appearance of the Fiorified BI Launch pad.
1. Log on to the Fiorified BI Launch pad.
2. Go to Settings Appearance .
Fiorified Business Intelligence Launch Pad User GuidePersonalizing your BI Launch Pad P U B L I C 23
3. In the Themes list, choose a theme:
○ SAP Belize Deep○ SAP Belize
4. Click Save.5. Refresh the Fiorified BI Launch pad to see the theme you selected.
NoteTo enable this feature in the Fiorified BI Launch pad, make sure the CSS rule in FioriBI.properties file is theme.enable=default.
24 P U B L I CFiorified Business Intelligence Launch Pad User Guide
Personalizing your BI Launch Pad
6 Organizing Content Objects
The BI platform supports both public and personal folders and categories.
Public folders and categories (accessible to all users) are typically created by a system administrator. Depending on your access rights, you may be able to create personal folders and categories in the BI Launch pad.
6.1 Creating a Folder
To create a folder, proceed as follows:
1. Log on to the BI Launch Pad.2. From the Home page, choose the Folders tab.3. In the Folders page, navigate to the location where you want to create a folder:
○ To create a personal folder, expand the My Folders drawer.○ To create a public folder, expand the Public Folders drawer.
4. When you are at the desired location, from the Menu bar, choose (More).5. Select the New Folder option from the dropdown menu.6. Enter the Folder Details:
a. In the Name field, enter a name for the new folder.b. In the Description field, enter an optional description for the new folder.c. In the Keywords filed, enter optional keywords for the new folder.
7. Choose Save.
You have now successfully created a new folder.
6.2 Uploading Documents to a Folder
To upload a document to a folder, proceed as follows:
1. Log on to the BI Launch pad.2. From the Home page, choose the Folders tab.3. In the Folders page, navigate to the folder in which you want to upload the document.
4. Choose (More) from the Menu bar and select the Upload Document option from the dropdown menu.
Fiorified Business Intelligence Launch Pad User GuideOrganizing Content Objects P U B L I C 25
5. In the "Upload Document" dialog, browse and upload the required file. Then choose Add.
The document is uploaded to the folder.
6.3 Setting the Properties of a Folder
To set properties for a folder, proceed as follows:
1. Log on to the BI Launch Pad.2. From the Home page, choose the Folders tab.3. In the Folders page, navigate to the desired folder for which you want to set properties.
4. Choose (More) corresponding to the desired folder.5. Select Properties from the dropdown menu.6. In the Properties dialog box, enter/edit the desired properties.7. Choose Save.
You have now successfully set properties for a folder.
6.4 Moving or Copying a Folder
You can cut or copy a folder and paste it to another folder location in the Folders view.
To move a folder from a source to a target location, proceed as follows:
1. Log on to the BI launch pad.2. From the Home page, choose the Folders tab.3. In the Folders page, navigate to the required folder.
4. Choose (More) corresponding to the desired folder and choose Organize Cut from the drop-down menu.
Note
If you want to retain the folder in the source location and just copy it to the target, choose OrganizeCopy .
5. Navigate to the target folder (where you want to move the copied/cut folder).
6. In the target folder location, choose (More) from the page menu bar and select Paste.
The chosen folder is moved or copied to the target folder location and appears in the list of contents.
26 P U B L I CFiorified Business Intelligence Launch Pad User Guide
Organizing Content Objects
6.5 Deleting a Folder
To delete a folder, proceed as follows:
1. Log on to the BI Launch pad.2. From the Home page, choose the Folders tab.3. In the Folders page, navigate to the desired folder.
4. Choose (More) corresponding to the desired folder and choose Delete from the drop-down menu.
The chosen folder is deleted.
6.6 Assigning Content Objects to a Category
To assign a content object to a category, proceed as follows:
1. Log on to the BI Launch pad.2. From the Home page, choose the Folders tab.3. In the Folders page, navigate to the folder that contains the content object that you want to assign to a
category.
4. Select the object, and choose (More) corresponding to that object.5. Select Categories from the dropdown menu.
The Assign to Category dialog box appears.6. Choose the categories that you want to assign the content objects to.7. Choose OK.
You have now successfully assigned a content object to a category.
6.7 Accessing a Link to a Folder or Category
A folder link provides direct access to a public folder or a category in the Fiorified BI Launch pad. You can send the link to someone to give them access to the folder or category, if they have the appropriate access permissions.
NoteA folder link is not available for personal categories.
1. Log on to the CMC and select Applications Processing settings .
Fiorified Business Intelligence Launch Pad User GuideOrganizing Content Objects P U B L I C 27
Under Set Default folder for New Fiorified BI Launchpad URL, the default folder link is visible as: http://(Host Name):(Web Application Server Port)/BOE/BI?startFolder=%SI_CUID%
2. Replace Host Name with the valid host name or the IP address.3. Refresh the Fiorified BI Launch pad.4. Go to the Folders tab and locate the folder or category to associate with the folder link.5. Right-click the folder or category and select Details.
A folder link for the respective folder or category is displayed.6. Copy the folder link and click OK to close the dialog box.7. Share the copied folder link with the recipients, with the instruction to contact a system administrator if
they receive an error message about their access rights.
Recipients must have access rights to a folder or a category to open its link.
When a recipient opens a folder link in a browser, the Fiorified BI Launch pad logon screen appears if the session is not available. After the recipient enters valid logon credentials, the Fiorified BI Launch pad opens to the folder or category.
If the recipient has no rights to access the folder or category, an error message is displayed.
In this case, the recipient should contact a system administrator.
6.8 Mapping of Default Values from CMC to Fiorified BI Launch Pad
Once you configure Default Settings in the Central Management Console (CMC), they are reflected as default values in the Fiorified BI Launch pad.
1. Log on to the CMC.2. Right-click a report and choose Properties.3. Configure Default Settings and click Save.4. Log on to or refresh the Fiorified BI Launch pad.
5. Select the report for which you configured the default properties in the CMC, click (More) and choose Schedule.
The default properties you configured in the CMC are displayed in the Schedule tab.
28 P U B L I CFiorified Business Intelligence Launch Pad User Guide
Organizing Content Objects
6.9 Quick access to content objects
6.9.1 Working with Hyperlinks
Hyperlinks make it easy to access a content object. They let you view the content object in the Unified Viewer or through Open Document.
1. Click the Folders tab, open a folder and click “+”(Add)2. Click New Hyperlink.3. In the Create Hyperlink dialog box, enter a title for the hyperlink.4. Enter description and keywords for the hyperlink.5. Enter the URL of the desired content object.6. Click Assign to Category and choose one or more categories (from Personal Category or a Corporate
Category) to assign the hyperlink.7. Click Save.
As the hyperlink, always an HTTP URL is created for the selected content object. The hyperlink appears as a content object in the selected folder.
You can perform the following actions on a hyperlink:
○ View - You can view the hyperlink InfoObject.You can view hyperlinks to content objects through Open Document. Hyperlinks to Web Intelligence documents and Lumira documents can be viewed in the Unified Viewer as well.
○ Properties - You can view and edit the title, description, keywords, URL, and Assign to Category fields of the hyperlink.
○ Mobile Properties - You can view a hyperlink on mobile devices. You must set these properties before sending the hyperlink to the BI Inbox.
○ Categories - You can assign the hyperlink InfoObject to a desired category.○ Mark as Favorite - You can mark the hyperlink InfoObject as favorite for easy access.○ Details - You can view the details of the hyperlink such as Description, Keywords, Categories, Folder
path, and Document link.○ Send To - You can send the hyperlink InfoObject to the BI Inbox.○ Delete - You can delete the hyperlink InfoObject.
6.9.2 External Links
You can view a web page in the Unified Viewer through an external link.
1. Click the Folders tab, open a folder and click “+”(Add).2. Click New Hyperlink.3. In the Create Hyperlink dialog box, enter a title for the external link.4. Enter description and keywords for the external link.5. Enter the URL of the desired webpage.
Fiorified Business Intelligence Launch Pad User GuideOrganizing Content Objects P U B L I C 29
6. Click Assign to Category and choose one or more categories (from Personal Category or a Corporate Category) to assign the external link.
7. Click Save to create the external link for the web page chosen.
Note○ Once the external link is created, it appears as a content object in the selected folder.○ In the URL field, only HTTP URL links are supported. You can view an external link in the Unified
Viewer. On an external link, you can perform all the actions that are mentioned for a hyperlink.
6.10 Sending Content Objects to BI Inbox
You can send a content object to the BI Inbox of specific users or groups.
1. Log on to the Fiorified BI Launch pad.
2. Select a content object and click (More).
3. Choose Send To BI Inbox .4. In the Send to BI Inbox dialog box, search for a user or user group in the Search field.
In the Search field, you can search for the user or the user group through username/user group name or full name of the user.
In the search results, username/user group name is displayed in the Title column and the full name of the users or groups is displayed in the Full Name column.
30 P U B L I CFiorified Business Intelligence Launch Pad User Guide
Organizing Content Objects
7 Scheduling objects
You can schedule an object to automatically run at specified times. When a scheduled object runs successfully, an instance is created.
An instance is a version of the object that contains data from the time the object ran. You can view a list of instances in an object's history. If you have access rights to view objects on demand, you can view and refresh any instance to retrieve the latest data from the data source. By scheduling and viewing instances, you ensure that objects have the most up-to-date information available for viewing, printing, and distributing.
The default time zone is local to the web server that runs the BI platform, not to the Central Management Server (CMS) that your machine connects to. Before scheduling objects, confirm that your local time zone is selected in the BI Launch pad preferences. If you do not have access rights to view or to set your preferences, contact your system administrator.
7.1 Scheduling an objectFor object options with a default setting, you can keep the default or change the setting when scheduling an object.
Before scheduling a Web Intelligence document, confirm that a context is set in the document. If there are multiple contexts in the Web Intelligence document, refresh the document with the correct context before scheduling it.
1. On the document tile, choose and select Schedule.
The fiorified Schedule page appears as shown below:
Fiorified Business Intelligence Launch Pad User GuideScheduling objects P U B L I C 31
2. In the Schedule dialog box, click a category in the horizontal navigation list, and then set options in that category for the object.Repeat this step for each category that you want to set scheduling options for.
3. Click Schedule.A status message indicating success appears.
7.1.1 Labeling a scheduled instance
1. On the document tile, choose and select Schedule.2. In the Schedule dialog box, click Instance Title.3. Enter a name for the instance in the Instance Title box, and click Schedule.
7.1.2 Selecting a recurrence pattern
The recurrence pattern you choose determines when the BI platform runs an object.
1. On the document tile, choose and select Schedule.2. In the Schedule dialog box, click Recurrence.3. In the Run object list, select a recurrence pattern.4. Click Schedule.
7.1.2.1 Recurrence pattern options
NoteThe recurrence options in the Schedule page of the Fiorified BI Launch pad are changed to only 4 first level options (Now, Once, Recurring [with sub-options] and Calendar) starting from 4.2 SP4.
Option Sub-options Description
Now Runs the object one time, starting immediately
32 P U B L I CFiorified Business Intelligence Launch Pad User Guide
Scheduling objects
Option Sub-options Description
Once Runs the object once, at the specified start time. If you schedule an object with events, the object will run once, if the event is triggered between the start and end times.
Choose when to start and to stop running the object in the Start Date/Time and End Date/Time lists, and enter the date of the start and the stop times.
Recurring Hourly Creates an instance every nth hour (where 'n' ranges from 00 to 23), at the specified time. The first instance will be created at the specified start time, and instances will continue to be created every nth hour, until the object stops running at the specified end time.
Choose the time to run the object in the Hours and Minutes lists that appear on clicking the Every Hour(s) drop-dow. Select when to start and to stop running the object in the Start Date/Time and End Date/Time lists, and enter the date of the start and the stop times.
Recurring Daily Runs the object once daily, at the specified start time. The first instance will be created at the specified start time, and instances will be created daily at that time, until the object stops running at the specified end time.
Choose the day of the week to run the object in the Every Days(N) box, select when to start and to stop running the object in the Start Date/Time and End Date/Time lists, and enter the date of the start and the stop times.
Fiorified Business Intelligence Launch Pad User GuideScheduling objects P U B L I C 33
Option Sub-options Description
Recurring Weekly Runs the object each week on the selected days, at the specified start time. The first instance will be created at the specified start time, and instances will be created each week on those days at that time, until the object stops running at the specified end time.
Select the required week-day ON which to run the object, choose when to start and to stop running the object in the Start Date/Time and End Date/Time lists, and enter the date of the start and the stop times.
Recurring Monthly Runs the object on the specified date, at the specified start time, and at the specified monthly intervals. The first instance will be created at the specified start time, and instances will be created in monthly intervals at that time, until the object stops running at the specified end time.
Choose the month in which to run the object in the Every Month(N) box, choose when to start and to stop running the object in the Start Date/Time and End Date/Time lists, and enter the date of the start and the stop times.
NoteIf you choose to run the object every (1) month, the options to choose day of the month and day of the week also get enabled.
Calendar Creates an instance on each calendar date you specify, at the specified start time.
Enter the time to start and to stop running the object, and select a calendar that you have access to. The schedule runs based on the dates defined in the CMC for the selected calendar.
34 P U B L I CFiorified Business Intelligence Launch Pad User Guide
Scheduling objects
7.1.3 Specifying database logon information
Before you can specify database logon information, you must have access rights to an object's data source.
1. On the document tile, choose and select Schedule.2. In the Schedule dialog box, click Database Logon.3. Change the logon information for the object's data source as needed, and click Schedule.
7.1.4 Selecting an instance format
Depending on the type of object you are scheduling, you can select the format to save the object instance in, after the BI platform generates it.
1. On the document tile, choose and select Schedule.2. In the Schedule dialog box, click Formats, and perform one of the following actions to select an output
format:
○ For a Crystal report instance, select a format in the Output Format list.○ For a Web Intelligence document instance, select a format in the Format Options for Selected
Document list.3. Set the remaining formatting options as needed.
You may need to specify additional options for some Crystal report instance formats.4. Set the remaining scheduling options as needed, and click Schedule.
7.1.4.1 Output file formats for instances
You can send or schedule objects to different formats for each type of instance.
Crystal report file formats
The Crystal Reports option preserves more formatting than other file formats. When you select other file formats, the BI platform preserves as much formatting as the format allows. However, reports may lose some or all formatting. If you choose to print a report when it is scheduled, the report instance is automatically sent to the printer in Crystal Reports format. This file format does not conflict with the file format you select when scheduling the report.
For information about scheduling a Crystal report to a specific format, see exporting information in the SAP Crystal Reports 2011 User's Guide.
Fiorified Business Intelligence Launch Pad User GuideScheduling objects P U B L I C 35
Format Description
Crystal Reports This .rpt format preserves the most formatting of all output format options. It produces a normal, editable report.
Crystal Reports (RPTR) This .rptr format produces a read-only Crystal report.
Microsoft Excel (97-2003) This .xls format attempts to preserve the look and feel of the original report. It preserves data and does not merge cells. You must specify some formatting properties for the report.
Microsoft Excel (97-2003) (Data Only) This .xls format saves only data, and each cell represents a field.
Microsoft Excel Workbook Data-only
Microsoft Word (97-2003) This .doc format preserves as much formatting as possible, including graphics. Each object appears in an individual text field.
PDF .pdf format
Rich Text Format (RTF) This .rtf format preserves as much formatting as possible, including graphics. Each object appears in an individual text field. This option is available only from a web viewer.
Microsoft Word - Editable (RTF) This .doc format preserves less formatting than the Microsoft Word (97-2003) option. Text appears in lines, and images are placed inline with text.
Plain Text
Paginated Text You must specify some formatting properties for the report.
Tab Separated Text (TTX) This format places a tab character between values. You must specify some formatting properties for the report.
Separated Values (CSV) This .csv format places a specified character between values. You must specify some formatting properties for the report. For example, if you select this option, you must enter characters for the separator and delimiter.
XML .xml format
Web Intelligence file formats
Format Notes
Web Intelligence .wid format
36 P U B L I CFiorified Business Intelligence Launch Pad User Guide
When you schedule a Crystal report instance to some output formats, you may need to set additional options.
Microsoft Excel (97-2003) format
Option Description
Page Range ● To include all pages in a report, select All.● To include a page range, select Pages from, enter the first page number to include, and en
ter the last page number to include in the to box.
Use the export options defined in the report
Select this check box to use the export options defined in a report. You cannot set any other formatting options.
Set Column Width ● To set the width of Excel columns based on objects in a report, select Column width based on objects in the, and choose a report area from which to take the column width in the list.
● To set a constant column width, select Constant column width (in points), and enter the width in the box.
Export page header and page footer
● To choose when to export page headers and footers in an instance, select Once Per Report or On Each Page.
● To exclude page headers and footers from an instance, select None.
Create page breaks for each page
Select this check box to create a page break after each page in a report
Convert date values to strings
Select this check box to export date values in a report as text strings
Show gridlines Select this check box to view grid lines in exported documents
Microsoft Excel (97-2003) (Data Only) and Microsoft Excel Workbook Data-only formats
Option Description
Use the export options defined in the report
Select this check box to use the export options defined in a report. You cannot set any other formatting options.
Fiorified Business Intelligence Launch Pad User GuideScheduling objects P U B L I C 37
Option Description
Set Column Width ● To set the width of Excel columns based on objects in a report, select Column width based on objects in the, and choose a report area from which to take the column width in the list.
● To set a constant column width, select Constant column width (in points), and enter the width in the box.
Export object formatting Select this check box to preserve the object formatting.
Export images Select this check box to export the images in a report.
Use worksheet functions for summaries
Select this check box to use summaries in a report to create worksheet functions in Excel.
Maintain relative object position
Select this check box to maintain the position of objects, relative to one another.
Maintain column alignment
Select this check box to preserve the alignment of text in columns in a report.
Export page header and page footer
Select this check box to include the header and footer in an instance.
Simplify page headers Select this check box to use simple page headers.
Show group outlines Select this check box to show group outlines.
Microsoft Word (97-2003) format
Option Description
Page Range ● To include all pages in a report, select All.● To include a page range, select Pages from, enter the first page number to include, and en
ter the last page number to include in the to box.
PDF format
Option Description
Page Range ● To include all pages in a report, select All.● To include a page range, select Pages from, enter the first page number to include, and en
ter the last page number to include in the to box.
Use the export options defined in the report
Select this check box to use the export options defined in a report. You cannot set any other formatting options.
Create bookmarks from group tree
Select this check box to create bookmarks in a PDF file based on the tree structure of a report. This makes reports easier to navigate.
38 P U B L I CFiorified Business Intelligence Launch Pad User Guide
Scheduling objects
Rich Text Format (RTF) format
Option Description
Page Range ● To include all pages in a report, select All.● To include a page range, select Pages from, enter the first page number to include, and en
ter the last page number to include in the to box.
Microsoft Word—Editable (RTF) format
Option Description
Page Range ● To include all pages in a report, select All.● To include a page range, select from, enter the first page you want to include, and enter the
last page you want to include in the to box.
Use the export options defined in the report
Select this check box to use the export options defined in a report. You cannot set any other formatting options.
Insert page break after each report page
Select this check box to insert page breaks after each page in a report.
Plain Text format - Crystal Reports 2016 only
Option Description
Use the export options defined in the report
Select this check box to use the export options defined in a report. You cannot set any other formatting options.
Number of Characters per Inch
Enter a value between 8 and 16 to indicate the number of characters to include per inch. This setting determines how text files appear and are formatted.
Paginated Text format - Crystal Reports 2016 only
Option Description
Use the export options defined in the report
Select this check box to use the export options defined in a report. You cannot set any other formatting options.
Number of Lines per Page Enter the number of lines of text to include between page breaks.
Number of Characters per Inch
Enter a value between 8 and 16 to indicate the number of characters to include per inch. This setting determines how text files appear and are formatted.
New Paginated Text format – Crystal Reports for Enterprise only
Option Description
Page Range Use the options in this area to limit the number of report pages that you want to export.
Use the export options defined in the report
Select this check box to use the export options defined in a report. You cannot set any other formatting options.
Fiorified Business Intelligence Launch Pad User GuideScheduling objects P U B L I C 39
Option Description
Export page header and page footer
Select Once Per Report or On Each Page to choose when to export page headers and footers in an instance.
Select None to exclude page headers and footers from an instance.
Character Encoding Select the character encoding system to use in the exported text file: UTF-8, UTF-16 Little Endian, or UTF-16 Big-Endian.
Minimum Lines per Page Enter the number of lines of text to include between page breaks.
Insert Form Feed character Select this check box to insert a form feed character after each page, as specified in the Minimum Lines Per Page field. The form feed character creates a page break.
Number of Characters per Inch
Enter a value between 8 and 20 to indicate the number of characters to include per inch. This setting determines how text files appear and are formatted.
New Tab Separated Text format – Crystal Reports for Enterprise only
Option Description
Page Range Use the options in this area to limit the number of report pages that you want to export.
Use the export options defined in the report
Select this check box to use the export options defined in a report. You cannot set any other formatting options.
Double quote string fields Select this checkbox to surround string fields with double quotes(“”). To keep the quoted strings meaningful, multi-line text objects are exported in a single line.
Export page header and page footer
Select Once Per Report or On Each Page to choose when to export page headers and footers in an instance.
Select None to exclude page headers and footers from an instance.
Character Encoding Select the character encoding system to use in the exported text file: UTF-8, UTF-16 Little Endian, or UTF-16 Big-Endian.
Minimum Lines per Page Enter the number of lines of text to include between page breaks.
Insert Form Feed character Select this check box to insert a form feed character after each page, as specified in the Minimum Lines Per Page field. The form feed character creates a page break.
Number of Characters per Inch
Enter a value between 8 and 20 to indicate the number of characters to include per inch. This setting determines how text files appear and are formatted.
Separated Values (CSV) format
Option Description
Use the export options defined in the report
Select this check box to use the export options defined in a report. You cannot set any other formatting options.
Delimiter Enter the character to use as the delimiter.
40 P U B L I CFiorified Business Intelligence Launch Pad User Guide
Scheduling objects
Option Description
Separator Enter the character to use to separate values, or select the Tab check box.
Mode Select Standard Mode or Legacy Mode. When you select Standard Mode, you can choose report, page, and group sections to include in an instance. When you select Legacy Mode mode, you cannot choose report, page, or group section options.
Report and page sections If you chose Standard Mode, select Export or Do not export to indicate whether to export report and page sections.
If you selected Export, select the Isolate report/page sections check box if you want to isolate the report and page sections.
Group sections If you chose Standard Mode, select Export or Do not export to indicate whether to export group sections. If you selected Export, select the Isolate group sections check box if you want to isolate the group sections.
XML
Option Description
Use the export options defined in the report
Select this check box to use the export options defined in a report. You cannot set any other formatting options.
XML Exporting Formats Choose an XML export format, such as Crystal Reports XML.
7.1.5 Selecting a destination
You can schedule an object instance to be sent to a specific destination.
The destinations available depend on which destinations your system administrator enabled and on your access rights. If your administrator specified a destination for an object, that destination option is listed in the Schedule dialog box. You may be able to set options for the destination or to select a different destination. For most destinations, you must provide additional information.
1. On the document tile, choose and select Schedule.2. In the Schedule dialog box, click Destinations.
The Destinations dialog box appears. The options available depend on which destination you chose.3. Select a destination in the Destination list.4. To save a copy of the instance, select the Keep an instance in the history check box.5. To use the default settings for the destination, select the Use default settings check box.6. Set the remaining destination options as needed.7. Click Schedule.
Fiorified Business Intelligence Launch Pad User GuideScheduling objects P U B L I C 41
7.1.5.1 Destination Options
You can change options for the default Adaptive Job Server in the Servers area of the Central Management Console (CMC).
For more information, see the SAP BusinessObjects Business Intelligence Platform Administrator Guide.
Default Enterprise Location options
Option Description
Destination Default Enterprise Location
The scheduled job will run on the Output File Repository Server (FRS). You do not need to set additional options for this destination. Historical instances are saved to the default Enterprise server but not to any other destination.
BI Inbox options
Option Description
Destination BI Inbox
Keep an instance in the history
Select this check box to retain a copy of this instance in the object's history. This check box is selected by default.
Clear this check box if you want the BI platform to automatically delete the instance from the Output FRS to minimize the number of instances on the server.
Use default settings Select this check box to use the default Adaptive Job Server values for BI Inboxes.
If you do not want to use the default Adaptive Job Server values, clear this check box, and set the destination recipient options that appear.
Available Recipients and Selected Recipients
In the Available Recipients list, select users or user groups to send the instance to, and click > to add the users or groups to the Selected Recipients list.
Find title (if available) Enter a recipient's user name, full name, or email address in the Find title box to quickly locate the user in the Available Recipients list.
42 P U B L I CFiorified Business Intelligence Launch Pad User Guide
Scheduling objects
Option Description
Target Name ● To use a system-generated file name for the instance, select Use Automatically Generated Name.
● To choose a file name for the instance, select Use Specific Name, and enter a name or select variables for the file name from the Add placeholder list. The available variables are Title, ID, Owner, DateTime, (your) Email Address, and (your) User Full Name, Date, and File Extension.
Send As ● To send a shortcut to the instance to recipients, select Shortcut.● To send a copy of the instance to recipients, select Copy.
Email options
Option Description
Destination Email
Keep an instance in the history
Select this check box to retain a copy of this instance in the object's history. This check box is selected by default.
Clear this check box if you want the BI platform to automatically delete the instance from the Output FRS to minimize the number of instances on the server.
Use default settings Select this check box to use the default Adaptive Job Server values for email.
If you do not want to use the default Adaptive Job Server values, clear this check box, and set the destination recipient options that appear.
From Enter a return email address, or select variables for the email address from the Add placeholder list. The available variables are Title, ID, Owner, DateTime, (your) Email Address, and (your) User Full Name, and Date. Click a variable to add it. Separate email addresses with a semicolon (;).
This option may be unavailable, depending on your system configuration.
To Enter each email address that you want to send the instance to, or select variables for the email address from the Add placeholder list. The available variables are Title, ID, Owner, DateTime, (your) Email Address, and (your) User Full Name, and Date. Click a variable to add it. Separate email addresses with a semicolon (;).
Cc Enter each email address that you want to send a copy of the email and instance to, or select variables for the email address from the Add placeholder list. The available variables are Title, ID, Owner, DateTime, (your) Email Address, and (your) User Full Name, and Date. Click a variable to add it. Separate email addresses with a semicolon (;).
Fiorified Business Intelligence Launch Pad User GuideScheduling objects P U B L I C 43
Option Description
Bcc Enter the email address of each undisclosed recipient, or select variables for the email address from the Add placeholder list. The available variables are Title, ID, Owner, DateTime, (your) Email Address, and (your) User Full Name. Click a variable to add it. Separate email addresses with a semicolon (;).
Subject Enter the subject of the email, or select variables for the subject from the Add placeholder list. The available variables are Title, ID, Owner, DateTime, (your) Email Address, and (your) User Full Name, and Date. Click a variable to add it.
Message Enter the message for the body of the email, or select variables for the message from the Add placeholder list. The available variables are Title, ID, Owner, DateTime, (your) Email Address, (your) User Full Name, Date, Viewer, and Document Name. Click a variable to add it.
Add Attachment Select this check box if you want to add an attachment to the email message containing the instance.
File Name ● To use a system-generated file name for the instance, select Use Automatically Generated Name.
● To choose the file name for the instance, select Use Specific Name, and enter a name or select variables for the file name from the Add placeholder list. The available variables are Title, ID, Owner, DateTime, (your) Email Address, (your) User Full Name, Date, and File Extension.Select the Add File Extension check box to automatically add the file extension to the instance file name. If you do not add a file extension, you may be unable to open the document.
FTP Server options
Option Description
Destination FTP Server
Keep an instance in the history
Select this check box to retain a copy of this instance in the object's history. This check box is selected by default.
Clear this check box if you want the BI platform to automatically delete the instance from the Output FRS to minimize the number of instances on the server.
Use default settings Select this check box to use the default Adaptive Job Server values for FTP servers.
If you do not want to use the default Adaptive Job Server values, clear this check box, and set the destination recipient options that appear.
You can change the values in the Servers area of the CMC. For more information, see the SAP BusinessObjects Business Intelligence Platform Administrator Guide.
44 P U B L I CFiorified Business Intelligence Launch Pad User Guide
Scheduling objects
Option Description
Host Enter the IP address of the FTP server host computer where you want to send the instance.
Port Enter the port of the FTP server where you want to send the instance. The default is 21.
User Name Enter a user name with access rights to upload the object to the FTP server.
Password Enter the password required to access the FTP server.
Account Enter the account required to access the FTP server.
The account is part of the standard FTP protocol but is rarely implemented. Enter an account only if your FTP server requires it.
Directory Enter the path to the FTP directory where you want to send the instance.
File Name ● To use a system-generated file name for the instance, select Use Automatically Generated Name.
● To choose the file name for the instance, select Use Specific Name, and enter a name or select variables for the file name from the Add placeholder list. The available variables are Title, ID, Owner, DateTime, (your) Email Address, (your) User Full Name, Document Name, Date, and File Extension.Select the Add File Extension check box to automatically add the file extension to the instance file name. If you do not add a file extension, you may be unable to open the document.
SFTP (Secure FTP) Server options
Option Description
Destination SFTP Server
Keep an instance in the history
Select this check box to retain a copy of this instance in the object's history. This check box is selected by default.
Clear this check box if you want the BI platform to automatically delete the instance from the Output FRS to minimize the number of instances on the server.
Use default settings Select this check box to use the default Adaptive Job Server values for FTP servers.
If you do not want to use the default Adaptive Job Server values, clear this check box, and set the destination recipient options that appear.
You can change the values in the Servers area of the CMC. For more information, see the SAP BusinessObjects Business Intelligence Platform Administrator Guide.
Host Enter the IP address of the FTP server host computer where you want to send the instance.
Port Enter the port of the FTP server where you want to send the instance. The default is 21.
Fiorified Business Intelligence Launch Pad User GuideScheduling objects P U B L I C 45
Option Description
User Name Enter a user name with access rights to upload the object to the FTP server.
Password Enter the password required to access the FTP server.
Account Enter the account required to access the FTP server.
The account is part of the standard FTP protocol but is rarely implemented. Enter an account only if your FTP server requires it.
Directory Enter the path to the FTP directory where you want to send the instance.
File Name ● To use a system-generated file name for the instance, select Use Automatically Generated Name.
● To choose the file name for the instance, select Use Specific Name, and enter a name or select variables for the file name from the Add placeholder list. The available variables are Title, ID, Owner, DateTime, (your) Email Address, (your) User Full Name, Document Name, Date, and File Extension.Select the Add File Extension check box to automatically add the file extension to the instance file name. If you do not add a file extension, you may be unable to open the document.
Fingerprint Enter your fingerprint. For more information on how to enter your finger-print, refer to the SAP BusinessObjects Business Intelligence Platform Administrator Guide.
File System options
Option Description
Destination File System
Keep an instance in the history
Select this check box to retain a copy of this instance in the object's history. This check box is selected by default.
Clear this check box if you want the BI platform to automatically delete the instance from the Output FRS to minimize the number of instances on the server.
Instances are required for auditing events. This check box is overruled if auditing is enabled for a scheduled object.
Use default settings Select this check box to use the default Adaptive Job Server values for the file system.
If you do not want to use the default Adaptive Job Server values, clear this check box, and set the destination recipient options that appear.
User Name Enter a user name with access rights to save files to the destination directory.
You can specify a user name and password only for servers on Windows.
46 P U B L I CFiorified Business Intelligence Launch Pad User Guide
Scheduling objects
Option Description
Password Enter the user password that is required to access the destination directory.
You can specify a user name and password only for servers on Windows.
Directory Enter the path to a local hard disk location or mapped location or a UNC path to the directory where you want to send the instance.
If you are scheduling a Web Intelligence document and want to create folders based on variables (such as the title of the instance, owner, date and time, or user names), use a placeholder. The placeholder is inserted after the text in the box.
File Name ● To use a system-generated file name for the instance, select Use Automatically Generated Name.
● To choose the file name for the instance, select Use Specific Name, and enter a name or select variables for the file name from the Add placeholder list. The available variables are Title, ID, Owner, DateTime, (your) Email Address, (your) User Full Name, Document Name, Date, and File Extension.Select the Add File Extension check box to automatically add the file extension to the instance file name. If you do not add a file extension, you may be unable to open the document.
7.1.6 Applying a record selection formula
Selection formulas help determine which data appears in a report and may improve performance by eliminating unwanted records.
If an object includes a record or group selection formula, you can modify the formula before scheduling the object. For more information about record selection formulas, see the SAP Crystal Reports User Guide.
1. On the document tile, choose and select Schedule.2. In the Schedule dialog box, click Filters.3. Change the record or group selection formula as needed.4. Click Schedule.
7.1.7 Scheduling an object with parameters (prompts)
Parameters (prompts) ask you to enter information. In report objects, the information you enter may determine which data appears in a report. For example, in a report used by sales, a parameter may ask users to choose a region. When a user chooses a region, the report displays only results for that region.
When a document is scheduled, prompt can have static values and are specified when creating the job. For SAP Business Explorer (SAP BEx) queries, SAP HANA queries or universe prompt parameters, it is possible to fill prompts dynamically using default values. This mechanism supports any type of SAP Business Warehouse (SAP BW) default value including SAP exit variable.
Fiorified Business Intelligence Launch Pad User GuideScheduling objects P U B L I C 47
NoteTo have dynamic prompt value in scheduled document, make sure that :
● In the Variable Manager, select the option Use BEx query defined default values at runtime.● Purge document data with option Purge Last Selected Prompt Values.● When you create the scheduling job, purge prompt value.
1. On the document tile, choose and select Schedule.2. In the Schedule dialog box, click Prompts.
The way that parameter (prompt) options appear may differ from document to document, depending on how your system administrator has configured the parameter. For example, program documents may appear in an Argument box.
If the Prompts button is not available, the document to schedule does not contain parameters (prompts).3. (Crystal reports only) In the Prompts dialog box, click Edit Values to edit the parameter(s) value(s).4. For Web Intelligence documents based on SAP BEx queries, SAP HANA queries or universe queries
only: In the Prompts dialog box, click Modify to edit a prompt value, Constant Value or Dynamic Value to set a prompt value as dynamic value.
NoteAs of Web Intelligence 4.1 SP7 version, Dynamic Value is set as the default behavior. It replaces the Clear button that was present in earlier versions of Web Intelligence and that enabled to clear prompt values and delegate the processing to SAP BW.
Dynamic values contain expressions and require calculations at runtime. The application delegates the calculations to the backend (either the Universe Information Engine, SAP BEx or SAP HANA), and schedules the document after the values are computed. SAP BW exit or customer exit variables for example are often used as dynamic variables in prompts.
5. Click Schedule.
7.1.8 Scheduling an object with events
When you schedule an object with events, it runs after the specified event occurs in the BI platform.
Working with events consists of two steps: creating an event and scheduling an object. After you create an event, you can select it as a dependency when you schedule an object. The scheduled job is then processed when that event occurs.
You create events in the Central Management Console (CMC), and then select the events in the BI launch pad when you schedule object. For more information about scheduling objects with events, see the SAP BusinessObjects Business Intelligence Platform User Guide.
1. On the document tile, choose and select Schedule.2. In the Schedule dialog box, click Events.3. To specify an event that will trigger the scheduled object, select the event in the Available Events list, and
click > to move the event to the Events to wait for list.
48 P U B L I CFiorified Business Intelligence Launch Pad User Guide
Scheduling objects
4. To specify an event that will be triggered by the completion of the scheduling job, select the scheduled event in the Available Schedule Events list, and click > to move the event to the Events to trigger on completion list.
5. Click Schedule.
7.1.9 Selecting a cache format for a Web Intelligence document
When the BI platform runs a scheduled Web Intelligence document, an instance is generated and stored on the Output File Repository Server. You can select the format used to cache the document.
Before selecting a cache format:
● Confirm that a context is set in the Web Intelligence document. If there are multiple contexts, refresh the document with the correct context before scheduling it. Documents without a context cannot be scheduled.
● Confirm that Web Intelligence is selected as the output format for the object. If a different output format is selected, cache options will have no effect.
If you do not select a cache format, the platform will not cache the document.
1. On the document tile, choose and select Schedule.2. In the Schedule dialog box, click Caching.3. Under Select the formats to pre-load the cache with when scheduling, select one or more check boxes.
You can select more than one format to cache.4. Under Available locales, select one or more locales for the cache, and click > to move the locale(s) to the
Selected locales list.
When you schedule the document, the platform preloads the format and locales you selected and generates cached versions of the document in the locale(s) you specified.
5. Click Schedule.
7.1.10 Selecting print settings for a Crystal report
When you schedule a Crystal report, you can print the object instance after it is generated.
1. On the document tile, choose and select Schedule.2. In the Schedule dialog box, click Print Settings.3. Select a print mode for the web viewer:
○ If you want to print the report in PDF, select Always print to PDF (Preview).○ If you want to use the report's default print settings, select Follow Crystal Reports preference setting.
4. If you want to print the report after it runs, select the Print Crystal reports when scheduling check box, and perform the following actions:a. Under You can use the default printer or specify a printer, select Default printer to use your default
printer, or select Specify the printer and select a printer in the list.
Fiorified Business Intelligence Launch Pad User GuideScheduling objects P U B L I C 49
b. In the Number of Copies box, enter the number of copies you want to print.c. Under Page Range, select All if you want to print every page in the report, or select Pages and enter the
first page number to print in the from box and the last page number to print in the to box.d. In the Set collate option to list, select Collate, Do not collate, or Use printer defaults to indicate whether
to collate printed copies of the instance.e. In the Page Scaling list, select Scale to fit, Only shrink to fit, or Do not scale.f. To center each page, select the Center the page check box.g. To force horizontal pages to fit the paper, select the Fit horizontal pages into one page check box.
5. (Optional) Under Specify page layout, beside Set layout to, choose the page layout:
○ To use the report's page layout, select Report file default.○ To use the printer's page layout, select Specify printer settings, and select Default printer or Specify the
printer.If you chose Specify the printer, select a printer in the list.
○ If you want to choose the page layout, select Custom settings, and select Use standard layout settings or Use custom layout settings.If you chose Use custom layout settings, select Portrait or Landscape orientation, and select the paper size in the Paper Size list.
6. Click Schedule.
7.1.11 Selecting a language for Crystal report instances
You can schedule a Crystal report to create instances in the default language set by the preferred viewing locale (PVL) or in multiple languages.
1. On the document tile, choose and select Schedule.2. In the Schedule dialog box, click Languages.3. Perform one of the following actions:
○ To schedule the report according to the PVL set in your preferences and create instances using only that locale, select Schedule the report in Preferred Viewing Locale.
○ To schedule the report in multiple languages, select Schedule the report in Multiple Locales, select one or more locales in the All Locales list, and click > to move the locale(s) to the Selected Instance Locales list.
4. Click Schedule.
7.1.12 Selecting the scheduling server group for an object
1. On the document tile, choose and select Schedule.2. In the Schedule dialog box, click Scheduling Server Group.3. Perform one of the following actions:
○ (Default) Select Use the first available server to run the document on the server with the most resources free at the time of scheduling.
50 P U B L I CFiorified Business Intelligence Launch Pad User Guide
Scheduling objects
○ Select Give preference to servers belonging to the selected group to attempt to run the document on servers in a particular server group, and then select the server group in the list.If no servers in the selected server group are available, the document is run on the next available server.
○ Select Only use servers belonging to the selected group to run the document only on servers in a particular server group, and then select the server group in the list.If no servers in the selected server group are available, the object is not processed.
4. If your deployment of the BI platform uses federation and you want to run the document at the site where it is located, select the Run at origin site check box.
5. Click Schedule.
7.1.13 Rescheduling instances
In the Fiorified BI Launch pad, the Reschedule option is available for instances in the Schedule tab and the History page.
1. Log on to the Fiorified BI Launch pad.
There are two ways you can reschedule the instances:
○ Through the Schedule tab.○ Through the History page.
2. To reschedule an instance through the Schedule tab, select the Schedule tab.a. Select a scheduled instance.
b. Click (More) and select Reschedule.3. Alternatively, go to the History page.
a. Select the Folders tab.
b. Click (More) and select History.
c. Select an instance of the object, click (More) and select Reschedule.
Using either method, Schedule or History, the result is the same: the Fiorified schedule page appears for the selected instance. Previously selected values appears as default values for the scheduling options.
4. In the Fiorified BI Launch pad schedule page, modify the proposed values for the scheduling options if necessary, and reschedule the instance.
7.1.14 Scheduling Content Objects to BI Inbox
You can schedule a content object to the BI Inbox of specified users or groups.
1. Log on to the Fiorified BI Launch pad.
2. Select a content object and click (More).3. Choose Schedule.
Fiorified Business Intelligence Launch Pad User GuideScheduling objects P U B L I C 51
4. In the Schedule dialog box, click Destinations.5. Choose BI Inbox for Destination.6. In the Users or Groups dialog box, you can search for the user or the user group through username/user
group name or full name of the user.
In the search results, username/user group name is displayed in the Title column and the full name of the users or user groups is displayed in the Full Name column.
52 P U B L I CFiorified Business Intelligence Launch Pad User Guide
Scheduling objects
8 Scheduling object packages
An object package is an object that acts as a container for other objects (also called components). You can put any object type that can be scheduled in an object package. You create and edit object packages in the Central Management Console (CMC) in the BI platform.
To add objects to an object package, in the CMC, a user with appropriate access rights copies the object and pastes it in the object package. Components of an object package are separate from the object they were copied from; the objects are now components of the object package.
When you schedule an object package, instances are created for each component so that you can simultaneously schedule several objects. You cannot schedule one component in an object package without scheduling all components in the package. Scheduling an object package is slightly different from scheduling an individual object. You set the following scheduling options at an object-package level:
● Recurrence● Destinations● Events● Server group settings
You set the following scheduling options for each component in the object package:
1. Locate and select the object package to schedule.2. On the toolbar, click Actions, and select Schedule in the list that appears.3. In the Schedule dialog box, in the Instance Title box, enter a name for the instance.4. Click Recurrence, and select a recurrence pattern in the Run object list for the object package.5. Click Events, and select one or more events for the object package.6. Click Scheduling Server Group, and select a server group option for the object package.7. Click Destinations, and select a destination for the object package.8. Click Components, click the name of a component, set the notification, database logon, filter, format, print,
cache, and parameters or prompts for the component, and click OK.9. Repeat step 8 for each component in the object package.
Fiorified Business Intelligence Launch Pad User GuideScheduling object packages P U B L I C 53
10. Click Schedule.
The object package will run at the scheduled time.
54 P U B L I CFiorified Business Intelligence Launch Pad User Guide
Scheduling object packages
9 Managing your instances
An instance is a single publication of a report. For each scheduled object that runs, the BI platform saves a history of its instances to the default Enterprise server.
The History dialog box chronologically lists the instances for an object, with the most recent instances at the top of the list. Depending on the type of object you are viewing, the following historical information may be available:
● Title ● Status● Type● Creation Time
The sub-sections of this topic explain how to view and work with the instances of your scheduled objects.
9.1 Viewing the Latest Instance of an Object
You can view the latest instance of objects such as Crystal reports, Web Intelligence documents and object packages.
Choose on the object instance tile and select History.
The latest instance of the object appears in the viewer.
9.2 Viewing the Historical Instances of an Object
1. Choose on the object instance tile and select History.2. In the History dialog box, double-click a link in the Instance Time column to view the historical instance.
9.3 Viewing All Your Available Instances for Specific Dates
The new "Schedule" page of the fiorified BI LaunchPad allows you to view all your instances available on:
● Specific calendar dates● An interval of time (specified using the Start date and End date)
Fiorified Business Intelligence Launch Pad User GuideManaging your instances P U B L I C 55
To view your available instances, perform the below procedure:
1. Choose the Schedule tab in the fiorified BI LaunchPad.
Below is an example view of the Schedule page. (By default, the available instances of today's calendar date are displayed. )
2. Perform one of the following:○ To view the instances available on a specific date- Choose the required date in the Calendar widget.○ To view the instances available in a date-range (time-interval)- Choose a start date and an end-date in
the Calendar widget.
TipThe calendar widget only allows you to select two dates consecutively. Once your selected dates turn blue (get highlighted), they are enabled.
3. Choose Show Schedules.
The available instances (schedules) are listed on the right of the page.
9.4 Working With Instances
In the Schedule tab and the History page of Fiorified BI Launch pad, you can selectone or more instances and perform actions based on the status of the instance.
When you select a single instance, you can perform the following actions depending on its status:
● View● Details● Delete● Run Now
56 P U B L I CFiorified Business Intelligence Launch Pad User Guide
Managing your instances
● Send To● Pause
When you select multiple instances, you can perform the following actions depending on their status:
● Run Now● Pause● Send To● Delete
9.4.1 Working with Instances through Schedule Tab
From the Schedule tab, you can select a single instance or multiple instances, and perform specified actions based on the status of the instance.
1. Log on to the SAP Fiorified BI Launch pad.2. Select the Schedule tab.
3. Select a scheduled instance or instances, choose (More), and select an action to perform.
9.4.2 Working With Instances through the History Page
You can select a single instance or multiple instances of an object in the History page.
1. Select an object in the Folders tab.
2. Click (More) and select History.
3. Select one or more instances of the object, click (More) and select an action to perform.
9.5 Detailed Error Message for Failed Instances
9.5.1 Viewing Error Message Through Details Pane
You can see a detailed error message for any report by accessing each object.
1. Select an object in the Folders tab.
2. Click (More) and select History.
3. Select an instance of the object, click (More) and select Details.
The detailed error message is displayed for a failed instance.
Fiorified Business Intelligence Launch Pad User GuideManaging your instances P U B L I C 57
9.5.2 Viewing Error Messages in the Schedule Tab
You can see a detailed error message for an instance in the Schedule tab.
1. Log on to the Fiorified BI Launch pad.2. Select the Schedule tab. Specify a Scheduling Date to list the instances.
3. Select any scheduled instance, choose (More), and select Details.
A detailed error message is displayed for the failed instance.
58 P U B L I CFiorified Business Intelligence Launch Pad User Guide
Managing your instances
10 Managing Deleted Items
Recycle Bin is an application in BI Launch Pad. When the user deletes an item from the BOE system, it is moved to Recycle Bin, where it is temporarily stored until Recycle Bin is emptied. This gives the user the opportunity to recover accidentally deleted reports/folders and restore them to their original locations.
With the recycle bin application, the user can:
● Initiate restoration of any deleted item (such as reports and folders)● Permanently delete items from the recycle bin
The recycle bin displays the Title, Type, date and time of deletion of the Deleted documents.
10.1 Restoring an item from the Recycle Bin
The Recycle Bin displays a list of deleted items. In order to restore an item from the recycle bin, proceed as follows:
1. Log on to BI Launch Pad.2. From the Home page, choose the Recycle Bin tab.
3. Select the checkbox corresponding to the item you want to restore, and choose (More).4. Select Restore from the dropdown menu.
You can navigate to the location of the restored item to confirm the restore operation.
NoteIf you restore an item from the Recycle Bin and another item with the same name already exists in the restore location, the item is saved in the restore location with the following name: "<item name> restored(1, 2, ...)".
NoteWhen the parent folder of an item in the Recycle Bin is deleted, the parent folder is recreated when the item is restored. However, the parent folder will only contain the item that is restored from the Recycle Bin.
NoteYou cannot open/navigate to an item from within the Recycle Bin.
You have now successfully restored an item from the Recycle Bin.
Fiorified Business Intelligence Launch Pad User GuideManaging Deleted Items P U B L I C 59
10.2 Permanently deleting items from the Recycle Bin
As a BI Launch Pad user, you have the right to permanently delete items from the Recycle Bin or to empty the Recycle Bin.
In order to permanently delete items from the Recycle Bin, proceed as follows:
1. Log on to BI Launch Pad.2. From the Home page, choose the Recycle Bin tab.
3. Select the checkbox corresponding to the item you want to delete, and choose (More).4. Select Delete from the dropdown menu.
A warning message appears.5. Choose OK.
You have now successfully deleted an item from the Recycle Bin.
60 P U B L I CFiorified Business Intelligence Launch Pad User Guide
Managing Deleted Items
11 Fiorified BI Workspace
A BI workspace lets you organize and display different BI platform data sources in a single view. It lets you quickly see your organizational goals and monitor your organization's performance and growth. With BI workspaces, you can analyze and manage complex data effectively and share the information across organizations.
You can build your own portfolio of reports and categories and create one or more BI workspaces to display them as needed.
BI workspaces can contain the following types of data-source objects:
● Modules● Web Intelligence documents, Lumira and XCelcius documents● Crystal Reports● Adobe PDF documents● Microsoft Excel spreadsheets● Microsoft Word documents● Text files● Rich text format (RTF) files● Microsoft PowerPoint presentations● Hyperlinks, including external web pages● Crystal Reports for Enterprise
In addition to these, BI workspaces also offer interportlet communication capabilities that enable page components to exchange information.
You can view your BI workspaces either in the Folders tab or by navigating to My Home All Categories .
BI workspaces are present in Public Folders, My Folders, Personal Categories, and Corporate Categories.
● The Public Folders and Corporate Categories folders contain BI workspaces and modules created for public viewing. These BI workspaces can be accessed and viewed by everyone.
● The My Folders folder contains BI workspaces and modules created for personal viewing. They store information about modules whose parameters can be extended and modified personally. These BI workspaces can be accessed by only their creators.
11.1 Displaying Tabs and Subtabs in a BI Workspace
In a BI workspace, you can display more than one tab and subtab.
1. Click Tabs on the toolbar.2. Select a tab from the list.
The tab you selected is displayed along with any subtabs.
Fiorified Business Intelligence Launch Pad User GuideFiorified BI Workspace P U B L I C 61
11.2 Default Tab
You can set a tab to open by default to the subtab you choose.
1. In BI Launch pad, mark a tab's subtab as a Default Tab.2. In the Fiorified BI workspace, select the tab.
The content of the default subtab you defined is displayed.
11.3 Viewing a BI Workspace
In the Fiorified BI Launch pad, you can view the BI workspace which is created in the Classic BI Launch pad.
Layouts in BI Workspace
You can view a BI workspace in the following layout formats:
● Freeform layout displays the objects placed in the BI workspace without a layout format.● Template layout displays the objects created using a column, row, or mixed column-and-row layout.● Columns layout displays a column-structured BI workspace.
Module Templates in BI Workspace
The Fiorified BI Launch pad supports the following module templates:
● Group● Navigation List● Text Module● Viewer● Web Page Module
The Fiorified BI Launch pad supports the following BI Launch pad modules:
● My Alerts shows the alert notifications.● My Inbox lists the documents in your BI Inbox.● My Recently Run Documents lists the documents in the repository that you scheduled or ran, with the
status of each document instance.● My Recently Viewed Documents lists the documents that you viewed, sorted by view date, with the most
recently viewed document at the top.
NoteThe Fiorified BI Launch pad does not support these BI Launch pad modules:
62 P U B L I CFiorified Business Intelligence Launch Pad User Guide
Fiorified BI Workspace
● SAP Streamwork Feed● Collaboration Feed● My Applications
Document Explorer in BI Workspace
In the Fiorified BI Launch pad you can view the Document Explorer modules created in the Classic BI Launch pad.
The Fiorified BI Launch pad supports the following modules of Document Explorer:
● Inbox shows the alerts and documents in your BI inbox.● Query Panel lets you create queries.● Root Folder has two types:
○ Personal Root Folder displays the content in personal folders.○ Public Root Folder displays the content in public folders.
● Folder Module displays the content in the selected folder.
Help in BI Workspace
The Help menu lets you access the Fiorified Business Intelligence Launch Pad User Guide from the SAP Help Portal. This helps you become familiar with how to use the Fiorified BI workspace. You can see detailed information on all the features available in the Fiorified BI Workspace.
Fiorified Business Intelligence Launch Pad User GuideFiorified BI Workspace P U B L I C 63
Important Disclaimers and Legal Information
HyperlinksSome links are classified by an icon and/or a mouseover text. These links provide additional information.About the icons:
● Links with the icon : You are entering a Web site that is not hosted by SAP. By using such links, you agree (unless expressly stated otherwise in your agreements with SAP) to this:
● The content of the linked-to site is not SAP documentation. You may not infer any product claims against SAP based on this information.● SAP does not agree or disagree with the content on the linked-to site, nor does SAP warrant the availability and correctness. SAP shall not be liable for any
damages caused by the use of such content unless damages have been caused by SAP's gross negligence or willful misconduct.
● Links with the icon : You are leaving the documentation for that particular SAP product or service and are entering a SAP-hosted Web site. By using such links, you agree that (unless expressly stated otherwise in your agreements with SAP) you may not infer any product claims against SAP based on this information.
Beta and Other Experimental FeaturesExperimental features are not part of the officially delivered scope that SAP guarantees for future releases. This means that experimental features may be changed by SAP at any time for any reason without notice. Experimental features are not for productive use. You may not demonstrate, test, examine, evaluate or otherwise use the experimental features in a live operating environment or with data that has not been sufficiently backed up.The purpose of experimental features is to get feedback early on, allowing customers and partners to influence the future product accordingly. By providing your feedback (e.g. in the SAP Community), you accept that intellectual property rights of the contributions or derivative works shall remain the exclusive property of SAP.
Example CodeAny software coding and/or code snippets are examples. They are not for productive use. The example code is only intended to better explain and visualize the syntax and phrasing rules. SAP does not warrant the correctness and completeness of the example code. SAP shall not be liable for errors or damages caused by the use of example code unless damages have been caused by SAP's gross negligence or willful misconduct.
Gender-Related LanguageWe try not to use gender-specific word forms and formulations. As appropriate for context and readability, SAP may use masculine word forms to refer to all genders.
64 P U B L I CFiorified Business Intelligence Launch Pad User Guide
Important Disclaimers and Legal Information
Fiorified Business Intelligence Launch Pad User GuideImportant Disclaimers and Legal Information P U B L I C 65
No part of this publication may be reproduced or transmitted in any form or for any purpose without the express permission of SAP SE or an SAP affiliate company. The information contained herein may be changed without prior notice.
Some software products marketed by SAP SE and its distributors contain proprietary software components of other software vendors. National product specifications may vary.
These materials are provided by SAP SE or an SAP affiliate company for informational purposes only, without representation or warranty of any kind, and SAP or its affiliated companies shall not be liable for errors or omissions with respect to the materials. The only warranties for SAP or SAP affiliate company products and services are those that are set forth in the express warranty statements accompanying such products and services, if any. Nothing herein should be construed as constituting an additional warranty.
SAP and other SAP products and services mentioned herein as well as their respective logos are trademarks or registered trademarks of SAP SE (or an SAP affiliate company) in Germany and other countries. All other product and service names mentioned are the trademarks of their respective companies.
Please see https://www.sap.com/about/legal/trademark.html for additional trademark information and notices.