PLEASE KEEP THESE INSTRUCTIONS FOR FUTURE REFERENCE SHERWOOD INDUSTRIES IS AN ENVIRONMENTALLY RESPONSIBLE COMPANY. THIS MANUAL IS PRINTED ON RECYCLED PAPER. 50-1385 PELLET STOVE Empress OWNER’S MANUAL PLEASE READ THIS ENTIRE MANUAL BEFORE INSTALLATION AND USE OF THIS PELLET BURNING ROOM HEATER. FAILURE TO FOLLOW THESE INSTRUCTIONS COULD RESULT IN PROPERTY DAMAGE, BODILY INJURY, OR EVEN DEATH. Contact your building or fire officials about restrictions and installation inspection requirements in your area. Fireplace Insert
Transcript
PLEASE KEEP THESE INSTRUCTIONS FOR FUTURE REFERENCESHERWOOD INDUSTRIES IS AN ENVIRONMENTALLY RESPONSIBLE COMPANY. THIS MANUAL IS PRINTED ON RECYCLED PAPER.
50-1385
PELLET STOVE
EmpressOWNER’S MANUAL
PLEASE READ THIS ENTIRE MANUAL BEFORE INSTALLATION AND USE OF THIS PELLET BURNING ROOM HEATER. FAILURE TO FOLLOW
THESE INSTRUCTIONS COULD RESULT IN PROPERTY DAMAGE, BODILY INJURY, OR EVEN DEATH.
Contact your building or fire officials about restrictions and installation inspection requirements in your area.
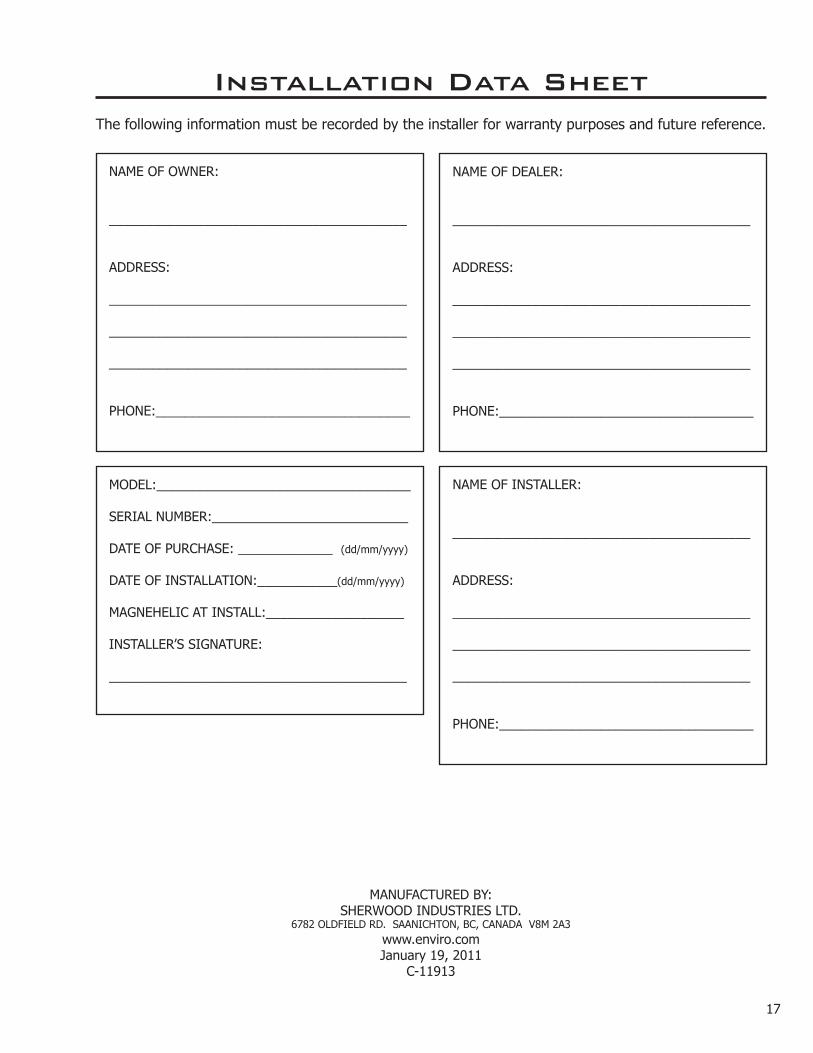
Installation Data Sheet............................................................................17
3
Introduction* This manual is designed for the home owner in conjunction with the technical manual. *
Pellet Quality:
Pellet quality is important, please read the following:
Your enviro pellet stove has been designed to burn wood pellets only. Do not use any other type of fuel, as this will void any warranties stated in this manual.
The performance of your pellet stove is greatly affected by the type and quality of wood pellets being burned. As the heat output of various quality wood pellets differs, so will the performance and heat output of the pellet stove.
CAUTION: It is important to select and use only pellets that are dry and free of dirt or any impurities such as high salt content. Dirty fuel will adversely affect the operation and performance of the unit and will void the warranty.
ASH: The ash content of the fuel and operation of your stove will directly determine the frequency of cleaning. The use of high ash fuels may result in the stove needing to be cleaned daily. A low ash fuel may allow longer intervals between cleaning.
CLINKERING: [clinkers are silica (sand) or other impurities in the fuel that will form a hard mass during the burning process]. This hard mass will block the air flow through the Burn Pot Liner and affect the performance of the stove. Any fuel, even approved types, may tend to clinker. Check the Burn-Pot Liner daily to ensure that the holes are not blocked with clinkers. If they become blocked, remove the liner (when the unit is cold) and clean/scrape the clinkers out. Clean the holes with a small pointed object if required. Refer to the section Routine Cleaning and Maintenance.
PELLET FEED RATES: Due to different fuel densities and sizes, pellet feed rates may vary. This may require an adjustment to the slider damper setting or to the auger feed trim setting on Low.
Since Sherwood Industries Ltd. has no control over the quality of pellets that you use, we assume no liability for your choice in wood pellets.
Store pellets at least 36” (1 m) away from the pellet stove.
automatic Safety featureS:
Your pellet Stove has the following safety features:
A) The stove will shut off when the fire goes out and the exhaust temperature drops below 120 °F (49°C).
B) The stove has a high temperature safety switch. If the temperature on the hopper reaches 200 °F (93 °C) the auger will automatically stop and you will get a #2 flash code, and the stove will shut off when the exhaust temperature cools. If this happens call your local dealer to reset the 200 °F (93 °C) high limit switch. FIND THE REASONS WHY THE UNIT OVERHEATED.
C) The unit is equipped with a vacuum switch to monitor the venting and the build up of ash in the burn pot; if either becomes blocked the vacuum switch will turn off the auger and the stove will shut off.
4
imPortant Safety Data:
Please read this entire Owner’s Manual before installing or operating your ENVIRO Pellet Stove. Failure to follow these instructions may result in property damage, bodily injury or even death. Contact your local building or fire official to obtain a permit and any information on installation restrictions and inspection requirements for your area.
To prevent the possibility of a fire, ensure that the appliance is properly installed by adhering to the installation instructions. An ENVIRO dealer will be happy to assist you in obtaining information with regards to your local building codes and installation restrictions.
The stove’s exhaust system works with negative combustion chamber pressure and a slightly positive chimney pressure. It is very important to ensure that the exhaust system be sealed and airtight. The ash pan and viewing door must be locked securely for proper and safe operation of the pellet stove.
Do not burn with insufficient combustion air. A periodic check is recommended to ensure proper combustion air is admitted to the combustion chamber. Setting the proper combustion air is achieved by adjusting the slider damper located in the front of the unit under the ash pan.
Soot or creosote may accumulate when the stove is operated under incorrect conditions such as an extremely rich burn (black tipped, lazy orange flames).
If you have any questions with regard to your stove or the above-mentioned information, please feel free to contact your local dealer for further clarification and comments.
Safety WarningS anD recommenDationS:
Caution: Do not connect to any air distribution duct system.
Do not burn garbage or flammable fluids such as gasoline, naptha or engine oil.
Unit hot while in operation. Keep children, clothing and furniture away. Contact may cause skin burns.
FUEL: This pellet stove is designed and approved to only burn wood pellet fuel with up to 3% ash content. Dirty fuel will adversely affect the operation and performance of the unit and may void the warranty. Check with your dealer for fuel recommendations.
THE USE OF CORDWOOD IS PROHIBITED BY LAW.
SOOT: Operation of the stove with insufficient combustion air will result in the formation of soot which will collect on the glass, the heat exchanger, the exhaust vent system, and may stain the outside of the house. This is a dangerous situation and is inefficient. Frequently check your stove and adjust the slider/damper as needed to ensure proper combustion. See: oPerating inStructionS - SliDer / DamPer Setting.
CLEANING: There will be some build up of fly ash and small amounts of soot in the exhaust. This will vary due to the ash content of the fuel used and the operation of the stove. It is advisable to inspect and clean the exhaust vent semi-annually or every two tons of pellets.
Introduction
5
ASHES: Disposed ashes should be placed in a metal container with a tight-fitting lid. The closed container of ashes should be on a non-combustible floor on the ground, well away from all combustible materials pending final disposal. The ashes should be retained in the closed container until all cinders have thoroughly cooled before disposing of them.
ELECTRICAL: The use of a surge protected power bar is recommended. The unit must be grounded. The grounded electrical cord should be connected to a standard 120 volts, 60 hertz electrical outlet and also must be accessible. If this power cord should become damaged, a replacement power cord must be purchased from the manufacturer or a qualified ENVIRO dealer. Be careful that the electrical cord is not trapped under the appliance and that it is clear of any hot surfaces or sharp edges. This unit’s maximum power requirement is (4.1 Amps) 500 watts.
GLASS: Do not abuse the glass by striking or slamming the door. Do not attempt to operate the stove with broken glass. The stove uses ceramic glass. Replacement glass must be purchased from an ENVIRO dealer. Do not attempt to open the door and clean the glass while the unit is in operation or if glass is hot. To clean the glass, use a soft cotton cloth and mild window cleaner, gas or wood stove glass cleaner, or take a damp paper towel and dip into the fly ash. This is a very mild abrasive and will not damage the glass.
FLAMMABLE LIQUIDS: Never use gasoline, gasoline-type lantern fuel, kerosene, charcoal lighter fluid, or similar liquids to start or “freshen up” a fire in the heater. Keep all such liquids well away from the heater while it is in use.
SMOKE DETECTOR: Smoke detectors should be installed and maintained in the structure when installing and operating a pellet burning appliance.
OPERATION: The ash pan and door must be closed securely for proper and safe operation of the pellet stove. Also ensure all gaskets on the door are checked and replaced when necessary.
KEEP ASH PAN FREE OF RAW FUEL.
DO NOT PLACE UNBURNED OR NEW PELLET FUEL IN ASH PAN. A fire in the ash pan may occur.
If you have any questions with regards to your stove or the above-mentioned information, please feel free to contact your local dealer for further clarification and comments.
SINCE SHERWOOD INDUSTRIES LTD. HAS NO CONTROL OVER THE INSTALLATION OF YOUR STOVE, SHERWOOD INDUSTRIES LTD. GRANTS NO WARRANTY IMPLIED OR STATED FOR THE INSTALLATION OR MAINTENANCE OF YOUR STOVE. THEREFORE, SHERWOOD INDUSTRIES LTD. ASSUMES NO RESPONSIBILITY FOR ANY CONSEQUENTIAL DAMAGE(S).
SAVE THIS INSTRUCTION MANUAL FOR FUTURE REFERENCE
Introduction
1913/16"
(503mm
)
2113/16"
(554mm
)
30"(762m
m)
1415/16"
(379mm
)
83/4"
(222mm
)
151/16"
(383mm
)
2715/16" (710m
m)
207/8" (530m
m)
2913/16"
(757mm
)
27"(686m
m)
229/16"
(573mm
)
3011/16" (779m
m)
42" (1067mm
)
3015/16" (786m
m)
131/8"
(334mm
)
711/16"
(196mm
)
Figure 1: Dim
ensions of Empress Fireplace Insert.
SpecificationsDimenSionS:
6
rating label location:
The rating label is located on the hopper top behind the surround panel.
Specificationsrating label:
Figu
re 2
: Rat
ing
Labe
l for
Em
pres
s Fi
repl
ace
Inse
rt.
7
Certif
ied fo
r use
in Ca
nada
& US
ACe
rtifié
pour
instal
lation
au
Cana
da et
aux E
tats-U
nis.
Listed
Room
Heate
r, Pelle
tized F
uel T
ype (
Appa
reil d
e cha
uffag
e à gr
anule
s ce
rtifié)
Suita
ble Fo
r Mob
ile Ho
me In
stallat
ion (A
ccepté
pour
l'insta
llation
dans
une m
aison
mob
ile, te
st)RE
PORT
#307
-4141
-00 (F
ebrua
ry 20
06)
Teste
d to (T
estée
selon)
: AST
M 1509
-04. U
S Envi
ronme
ntal P
rotect
ion Ag
ency, c
ertifie
d to co
mply J
uly 1,
1990,
particu
late em
ission
standa
rds. (É
tats-Un
is Envi
ronnem
ental P
rotect
ion Ag
ence, a
certifi
é pour
confo
rmer
au Jui
llet 1,
1990, l
es nor
mes d
e part
icules
d'émis
sion.)
This p
ellet a
pplian
ce ha
s bee
n test
ed an
d liste
d for
use in
manu
factur
ed ho
mes in
accor
dance
with
Oreg
on Ad
ministr
ation
Rules
814-2
3-900
throu
gh 81
4-23-9
09. In
stall a
nd us
e only
in acc
ordan
ce wit
h the
Man
ufactu
re’s in
stallat
ion an
d ope
rating
ins
tructio
ns. Co
ntact l
ocal bu
ilding
or fir
e offic
ials ab
out re
stricti
ons a
nd ins
tallatio
n inspe
ction in
your
area.
Do no
t conn
ect
this un
it to a
chimn
ey flue
servin
g ano
ther a
pplian
ce. Se
e local
buildi
ng co
des a
nd m
anufa
cturer
s instr
uction
s for p
recau
tions
requir
ed fo
r pass
ing a
chimn
ey thr
ough
a com
bustib
le wall
or cei
ling. E
lectric
al ratin
g: 12
0 volts
, 60 h
z, 4.1
Amps.
Route
cor
d awa
y from
the h
eater
.Ce
t app
areil a
été t
esté
et ce
rtifié
pour
utilisa
tion d
ans le
s mais
ons m
obiles
en ac
cord
avec
les "
Règle
s Adm
inistra
tives
de l'O
regon
814-2
3-900
à 81
4-23-9
09". I
nstal
lez et
utilis
ez ce
t app
areil s
eulem
ent s
elon l
es in
struc
tions
d'ins
tallat
ion et
d'o
pérat
ion du
fabri
cant.
Conta
ctez le
s auto
rités lo
cales
de vo
tre qu
artier
conc
ernan
t les r
estric
tions
et le
s insp
ectio
ns
d'insta
llation
. Con
sulte
z les c
odes
de bâ
timen
t loca
ux et
les in
struc
tions
du fa
brica
nt po
ur les
préc
autio
ns à
prend
re lor
sque
une c
hemi
née d
oit êt
re ins
tallée
au tra
vers
un m
ur ou
un pl
afond
comb
ustib
le. CL
ASSE
MENT
ÉLEC
TRIQ
UE :
120 V
olts,
60 Hz
, 4.1
Amps
. Plac
ez le
câble
élec
trique
loin
de la
chale
ur.Fo
r Use
With
Only P
elletize
d Woo
d fue
ls. Op
erate
only w
ith vie
wing d
oor a
nd as
h rem
oval do
or clo
sed. O
nly re
place
glass
with c
eramic
glass.
Comp
onen
ts req
uired
for in
stallat
ion: a
3 inc
h (75
mm)
or 4in
ch (10
0 mm)
listed
PL ve
nt, co
mplete
with
compo
nents
. Hea
rth m
ount
install
ations;
a list
ed sin
gle wa
ll chim
ney li
ner m
ay be
used
. Insp
ect an
d clea
n Exha
ust Ve
nting
system
frequ
ently.
Utilisa
tion a
vec les
comb
ustible
s sou
s form
e de b
oulets
uniqu
emen
t. Utilis
er se
uleme
nt lor
sque
les p
ortes
avan
ts et
la po
rte du
réce
ptacle
de ce
ndre
sont
fermé
es. S
i une
ou de
s vitre
s dev
aient
être r
empla
cées
, utilis
ez se
uleme
nt du
verre
cé
ramiqu
e. Le
s com
posa
ntes r
equis
es po
ur l'in
stallat
ion so
nt un
éven
t PL c
ertifié
de 3i
n/75m
m or
4in/10
0mm
avec
ses
WH-
MANU
FACT
URED
BY / F
ABRIQ
UE PA
R: SH
ERWO
OD IN
DUST
RIES L
TD.
VICTO
RIA BC
CANA
DA
DATE
OF M
ANUF
ACTU
RE / D
ATE D
E FAB
RICAT
ION:
J F
M A
M J
J A
S O
N D
2012
201
3 20
14
CAUT
ION:
Hot w
hile o
perat
ing. D
o not
touch
, sev
ere bu
rns m
ay
result
. Kee
p chil
dren,
clothi
ng,
furnit
ure, g
asoli
ne or
othe
r fla
mmab
le va
pors
away
.
ATTE
NTION
:Trè
s cha
ud qu
and a
llumé
. Ne t
ouch
ez pa
s, les
brûlu
res sé
vères
peuv
ent ré
sulte
r. Te
nez lo
in de
s enfa
nts, d
es vê
temen
ts, de
s me
ubles
,de l’e
ssen
ce ou
d’au
tres f
luide
s pro
duisa
nt de
s vap
eurs
inflam
mable
s.
C-12
034
INPUT
Ratin
g: 12
,000 t
o 36,0
00 BT
U/Hr (3
.5 to
10.5
kW)
LIGHT
ING IN
STRU
CTIO
NS: P
ress a
nd re
lease
the o
n/off b
utton
. Onc
e fire
has s
tarted
, set
the he
at ou
tput to
the d
esire
d sett
ing.
TO TU
RN TH
E UNIT
OFF
: Pus
h the
on/of
f butt
on(R
efer to
owne
rs ma
nual
for de
tailed
instr
uctio
ns)
INSTR
UCTIO
NS PO
UR L’A
LLUM
AGE:
Presse
et re
laeas
e le s
ur /
de
bouto
n. Un
e fois
le fe
u a co
mmen
ce, a
regle
le pr
oduc
tion d
e cha
leur a
u mo
ntage
desir
e.PO
UR ET
EINDR
E L’UN
ITE: A
ppuy
er le
sur /
de b
outon
(Refe
rez-vo
us au
guide
de l’u
tilisate
ur po
u un m
ode d
’emplo
i deta
ille.)
DO NO
T REM
OVE T
HIS LA
BEL /
NE
RETIR
EZ PA
S CET
TE ÉT
IQUET
TE
See i
nstal
lation
and o
perat
ing in
struc
tions
acco
mpan
ying a
pplian
ce. /
Cons
ultez
le m
anue
l ave
c les in
struc
tions
d’ins
tallat
ion et
d’op
ératio
n.
A Sid
ewall
to ce
nter o
f unit
(De la
paroi
au ce
ntre d
e l'un
ité)
24” (6
10 m
m)B
Sidew
all to
surro
und p
anel
(De l
a paro
i à l'e
ntoure
le pa
nnea
u) 3”
(76 m
m)C
Botto
m of
unit t
o an u
nshie
lded 1
2” (30
5 mm)
man
tle
(Le
fond
de l'u
nité à
un m
antea
u de c
hemi
née n
on bl
indé)
36” (9
14 m
m)D
Unit t
o top
facin
g (pro
trudin
g ¾” [1
9 mm]
)
( De l
'unité
au so
mmet
du pa
remen
t) 0”
(0 mm
)E
Unit t
o side
facin
g (pro
trudin
g ¾” [1
9 mm]
) ( De l
'unité
au cô
té du
parem
ent)
0” (0
mm)
F Fro
m do
or op
ening
of un
it to e
dge o
f floo
r prot
ectio
n
(De l
a port
e ouv
rant a
u dev
ant d
e prot
ectio
n de p
lanch
er)
6” (15
2 mm)
G Fro
m sid
e of u
nit to
edge
of flo
or pro
tectio
n
(De l
'ouve
rture
de po
rte po
ur pre
ndre
parti
de pr
otectio
n de p
lanch
er)
6” (15
2 mm)
C
A
EB
D
Adjacent wall
GF
Comb
ustible
floors
must
be pr
otecte
d by
a non
-comb
ustible
mate
rial.
- See
Owne
rs Ma
nual.
Le pla
ncher
combu
stible d
oit êtr
e pro
tégé p
ar un
maté
riel in
combu
stible.
INSTA
LLED
AS A
FIREP
LACE
INSE
RT ST
OVE M
ODEL
(FPI)
/ A IN
STAL
LE
COMM
E UN M
ODEL
E SUR
PIED
DE PO
ELE.
Minimu
m cle
arance
s to co
mbust
ible m
ateria
ls./ Le
s dég
agem
ents m
inimum
s aux
matér
iels co
mbust
ibles:
Seria
l No.
/ No.
De Se
rié:
EMPR
ESS F
PI
MI
LAN
Envir
o Mod
el / M
odèle
:
1591
1
Operating Instructionscontrol boarD functionS:
1. THERMOSTAT SWITCH: Used to set the unit’s controls to one of three mode settings; manual, high/low, or auto/off.
ON/OFF
FEED RATETRIM
COMBUSTIONBLOWER TRIM
HEATLEVEL
AUTO/OFF
HIGH/LOW
MANUAL
C-11825
1
2
3
4
5
ON/OFF
FEED RATETRIM
COMBUSTIONBLOWER TRIM
HEATLEVEL
AUTO/OFF
HIGH/LOW
MANUAL
C-11825
1
2
3
4
5
1
2
3
4
5
6
2. FEED RATE TRIM BUTTON: Used to change the feed rate trims in ¼ second increments for all feed settings. When this button is pressed, all the light will light up on the Heat Output Indicator except for the one that shows the current setting; the default setting is the number 4 light. To adjust the setting hold the Feed Rate Trim button down and press the Heat Level up or down buttons to adjust the setting.
3. COMBUSTION BLOWER TRIM BUTTON: Used to change the Combustion Blower trims in 5 volt increments for all feed settings until it reaches line voltage. When this button is pressed, all the light will light up on the Heat Output Indicator except for the one that shows the current setting; the default setting is the number 2 light. To adjust the setting hold the Combustion Blower Trim button down and press the Heat Level up or down buttons to adjust the setting.
4. ON/OFF BUTTON: Used to turn the unit ON and OFF.
5. HEAT LEVEL ADJUSTMENT BUTTONS: When pressed, will change the heat level setting of the unit up or down.
6. HEAT OUTPUT INDICATOR: Shows the present heat output setting.Figure 3: Circuit Board Control
Panel Decal.
oPerating your Pellet Stove:
PRE-BURN INSTRUCTIONS: The burn pot liner holes must be clear and the liner installed properly against the ignitor tube for proper operation. Check the hopper for enough pellets to start the unit.
DO NOT OPERATE THE UNIT WITH THE DOOR OR ASH PAN OPEN.
Note: The thermostat mode can be changed during normal operation.MANUAL MODE:All control of circuit board function is adjusted at the circuit board.
To START: Press the ON / OFF button. The Heat Level Indicator will show the Heat Level that the stove will run at after start-up and can be adjusted but the change will not take affect until the start -up has finished.
If this is the first time the unit has been started or the unit has run out of fuel, the auger will need to be primed. This can be done by restarting the unit five (5) minutes into its start-up or by putting a small hand full of pellets into the burnpot.
To OPERATE: When a fire has been established after approximately 10 - 15 minutes the unit will switch from start up mode to run at the corresponding Heat Level setting. The convection blower (room air blower) will turn on. The speed of this blower is controlled by the setting of the heat level output indicator.
8
Figure 4: Thermostat Switch in MANUAL position.
ON/OFF
FEED RATETRIM
COMBUSTIONBLOWER TRIM
HEATLEVEL
AUTO/OFF
HIGH/LOW
MANUAL
C-11825
1
2
3
4
5
ON/OFF
FEED RATETRIM
COMBUSTIONBLOWER TRIM
HEATLEVEL
AUTO/OFF
HIGH/LOW
MANUAL
C-11825
1
2
3
4
5
3
4
5
6
8
9
9
Figure 5: Thermostat Switch in HIGH/LOW position.
Figure 6: Thermostat Switch in AUTO/OFF position.
HIGH/LOW MODE: (Requires a thermostat) INITIAL START-UP: See manual mode above.OPERATION: When the thermostat calls for heat (contacts are closed) the stove settings are adjustable as per Manual Mode. When the thermostat contacts open, the HEAT LEVEL and Fans will drop down to the LOW setting until the thermostat contacts close again. *The LOW heat setting can be adjusted for different fuel qualities (see “Operating instructiOns - cOntrOl BOard FunctiOns”). The stove will come back to the previous HEAT LEVEL setting when the thermostat contacts close again.
AUTO/OFF MODE: (Requires a thermostat) INITIAL START-UP: See manual mode above.OPERATION: When the thermostat contacts close, the unit will light automatically. Once up to temperature, the stove operates the same as in MANUAL. When the thermostat contacts open, the stove’s HEAT LEVEL and Fans will drop down to the LOW setting for 30 minutes. If the thermostat contacts close within the 30 minutes, the HEAT LEVEL will return to the previous MANUAL setting. If the thermostat contacts remain open the stove automatically begins its shutdown routine. The ON / OFF button can be presses at any time the the stove will immediately shut down. The stove will re-light when the thermostat contacts close again.
turning your Pellet Stove off:
• MANUAL and HI / LOW mode: To turn the unit OFF, simply press the ON / OFF button. This will stop the feed of pellets. The blowers will continue to operate and cool the stove down. When cool enough, the stove will turn off.
• AUTO / OFF mode: To turn the unit OFF, turn the thermostat down or off. NOTE: The unit will run on low for three (3) minutes before it turns off.
DO NOT unplug unit while Combustion fan is operating. This may lead to smoke escaping from the stove.
guiDelineS for fine-tuning for fuel Quality:
Due to fuel quality the slider damper and control board trims may need to be fine-tuned.
1. If the unit builds up on all settings, the slider damper rod should be pulled out in small increments to give the unit more air.
2. If the unit has excessive ash build-up in the liner on the lower feed settings, the Combustion Blower Trim should be increased one setting at a time until the problem improves (Factory Setting is #2).
3. If the fire is going out on low because the airflow is too great, the Combustion Blower Trim can be lowered to the #1 setting.
4. If the stove has excesses ash build-up in the liner on the higher settings the Feed Rate Trim should be trimmed down a setting at a time until the problem improves (Factory setting is #4).
5. If you need more heat and the fuel has long pellets, the majority are over 1” (2.5cm) in length, the Feed Rate Trim can be moved up to the #5 setting. NOTE: Only do this if the fuel burns without building up.
Operating Instructions
ON/OFF
FEED RATETRIM
COMBUSTIONBLOWER TRIM
HEATLEVEL
AUTO/OFF
HIGH/LOW
MANUAL
C-11825
1
2
3
4
5
ON/OFF
FEED RATETRIM
COMBUSTIONBLOWER TRIM
HEATLEVEL
AUTO/OFF
HIGH/LOW
MANUAL
C-11825
1
2
3
4
5
3
4
5
6
8
9
ON/OFF
FEED RATETRIM
COMBUSTIONBLOWER TRIM
HEATLEVEL
AUTO/OFF
HIGH/LOW
MANUAL
C-11825
1
2
3
4
5
ON/OFF
FEED RATETRIM
COMBUSTIONBLOWER TRIM
HEATLEVEL
AUTO/OFF
HIGH/LOW
MANUAL
C-11825
1
2
3
4
5
3
4
5
6
8
9
Operating InstructionsSliDer/DamPer Setting:This is used to regulate the airflow through the pellet stove.THE SLIDER / DAMPER MUST BE SET AT TIME OF INSTALLATION.
A Qualified Service Technician or Installer must set the Slider Damper.
• If the fire should happen to go out and the heat output indicator has been set on the lowest setting, the Slider Damper should be moved to the left slightly, lessen the air flow into the firebox.
• If, after long periods of burning, the fire builds up and overflows the burn pot or there is a build up of clinkers, this would be a sign that the pellet quality is poor, this requires more primary air, the slider damper must be moved to the right to give the fire more air.
More Air
Less Air
Figure 7: Slider / damper positions.
The easiest way to make sure that an efficient flame is achieved is to understand the characteristics of the fire.• A tall, lazy flame with dark orange tips requires
more air – Push Right• A short, brisk flame, like a blowtorch, has too
much air – Push Left• If the flame is in the middle of these two
characteristics with a bright yellow/orange, active flame with no black tips then the air is set for proper operation.
10
Figure 8: Efficient Flame.
The combustion exhaust blower is a variable speed blower controlled by the heat output setting. This blower will increase or decrease the blower speed as the heat output setting is turned up or down.
SPECIAL NOTES:
Pellet quality is a major factor in how the pellet stove will operate. If the pellets have a high moisture content or ash content the fire will be less efficient and has a higher possibility of the fire building up and creating clinkers (hard ash build-up). If this happens, move the Slider / Damper to the right slightly to increase the air flow to the fire.
11
2-3 Days / Weekly Semi-annually or 2 Tons of FuelBurn Pot and Liner Fresh Air IntakeDoor Latch Exhaust PassagesDoor Glass Exhaust VentAsh pan and Door gaskets Blower MechanismsAsh Pan Behind firebox linersHeat exchanger All HingesInside Firebox Post Season Clean-up
TOOLS REQUIRED TO CLEAN UNIT
• Torx T-20 Screwdriver • Brush • Soft Cloth• 5/16” Wrench or Socket • Vacuum with fine filter bag
Routine Cleaning and MaintenanceThe following list of components should be inspected and maintained routinely to ensure that the appliance is operating at its optimum and giving you excellent heat value:
Burn Pot Liner
Ignitor
Air Intake Tube
Burn Pot
BURN POT AND LINER (2-3 days)
Cleaning of the burn pot and liner must only be done when stove is cold. To remove the burn pot and burn pot liner, open the door located on the right-hand side of the stove. Swing the door open. Lift the liner from the burn pot. Lift the burn pot from the firebox by gently lifting up the front of the burn pot, then sliding the assembly from the air intake tube and the ignitor cartridge.
This is the ‘pot’ where the pellets are burned. Every two to three days (when the unit is cold), remove the burn-pot liner from the stove and inspected it to ensure proper air flow through the liner. Failure to keep the liner clean may cause a build up of fuel past the burn pot liner and up the drop tube. This will cause the auger to jam and may result in pellets burning in the drop tube and hopper. Using a metal scrapper, remove material that has accumulated or is clogging the liner’s holes. Then dispose of the scrapped ashes from the liner and from inside the burn-pot. Place the burn-pot back into the stove, making sure that the pipes are properly inserted into the burn pot. Place the liner back into the burn-pot, making sure that the ignitor hole in the liner is aligned with the ignitor tube. Pushing the liner up against the ignitor tube.
If, after long periods of burning, the fire continually builds up and overflows the burn pot or there is a build up of clinkers, this is an indication that the pellet fuel quality is poor or the stove may need cleaning. Check the stove for ash build up (clean if required) and adjust the slider / damper to produce the proper clean combustion.
DOOR LATCH (2-3 days)
Check the door latch every time the door is opened or closed to ensure proper engagement.
DOOR GLASS CLEANING (When needed)
Cleaning of the glass must only be done when stove is cold. Open the door by lifting the handle. The glass can be cleaned by wiping down the outside and inside of the glass with a dry soft cloth.
If the glass has build up that can not be removed with only the cloth, clean the glass using paper towel and a glass cleaner, a special glass cleaner can be purchased through most dealers. If a glass cleaner is not available, use a damp paper towel dipped in fly ash to clean the glass. After the glass has been cleaned use the dry soft cloth to wiping down the outside and inside of the glass.
Figure 9: Burn pot assembly.
ASH PAN AND DOOR GASKETS (weekly)
After extended use the gasketing may come loose. To repair this, glue the gasketing on using high-temperature fiberglass gasket glue available from your local ENVIRO dealer. This is important to maintain an airtight assembly.
ASH PAN (2-3 days)
The ash pan is located under the door. To remove the ash pan, simply turn the latch with a large standard blade screwdriver and pull out towards the front. Dump the ashes into a metal container stored away from combustibles. Vacuum the ash pan and inside the firebox. CAUTION: BECAUSE THE FLY ASH IS VERY FINE, THE USE OF A FINE FILTER VACUUM BAG WILL BE REQUIRED TO PREVENT ASH FROM BEING BLOWN BACK INTO THE ROOM. Please pay special attention that there are no hot ashes in the firebox or there could be a possibility of a fire hazard inside the vacuum cleaner. Place all hot ashes into a non-combustible container.
Monitor the ash level every week. Remember that different pellet fuels will have different ash contents. Ash content is a good indication of fuel efficiency and quality. Refer to “intrOductiOn - saFety Warnings and recOmmendatiOns” for disposal of ashes. It is important to latch the ash pan tightly when re-installing it.
DO NOT PLACE UNBURNED OR RAW PELLET FUEL IN ASH PAN.
HEAT EXCHANGER (weekly)
Clean away any fly ash that may have collected on the heat exchanger by opening the door and brushing off the fins on the inside of the firebox. As different types of pellets produce different amounts of ash, cleaning of the fins should be done on a regular basis to enable the unit to run efficiently.
EXHAUST PASSAGES (season)
Removal of the firebox backing for bi-annual cleaning (refer to Figure 10):
Routine Cleaning and Maintenance
• Open the door by lifting the handle.
• Remove the burn pot and burn pot liner.
• Lubricate all screws with penetrating oil.
• Remove the two (2) screws that hold each brick liner retainer in place. Remove side brick liners by sliding them forward then out.
• Pull the center panel out.
• Vacuum and clean thoroughly.
Installation of firebox backing:
• Insert center panel with backing.
• Place the two (2) side panels back into the firebox and reinstall the two (2) retainers using two (2) screws on each side.
• Replace the burn pot and burn pot liner
• Close the glass door and secure.Figure 10: Firebox Components Removal.
12
13
Routine Cleaning and Maintenance
FRESH AIR INTAKE (season)
Inspect periodically to be sure that it is not clogged with any foreign materials.
EXHAUST VENT (season)
This vent should be cleaned every year or after two (2) tons of pellets. We recommend contacting your dealer for professional cleaning. To clean the vent pipe, run a chimney cleaning brush through the pipe. Open the bottom of the “T” to dump the ash, then vacuum as much of the ash out of the vent pipe as possible.
BLOWER MECHANISMS (season)
Unplug the stove and pull out the unit to access the two blowers. Vacuum all dust from motors and lubricate the convection motor. Check gaskets and replace if needed.
ALL HINGES (season)
Check all the hinges on the unit to ensure proper movement.
POST SEASON CLEAN-UP
Once you are finished using the pellet appliance for the season, run the unit out of fuel and unplug the stove for added electrical protection. It is very important that the stove be cleaned and serviced as stated above.
CLEANING SURFACES
Enamel finishes and painted surfaces can be wiped down with a soft damp cloth. The paint on the firebox panels may discolour or peel. This is due to extreme conditions applied to the paint and is in no way covered by warranty.
FIREBOX PANEL
All surfaces should be brushed off periodically.
REPLACING DOOR GLASS
It is recommended that your ENVIRO dealer replace the glass if broken.
The door glass is made of high temperature PYRO CERAMIC 5 mm thick. The panel is 18.5 x 13.5 inches (470 mm x 343 mm) and must be replaced with (PART # 50-1400). Substitute materials will not be permitted.
14
Warranty
Sherwood Industries Ltd. is the manufacturer of the Enviro line of heating products. At Sherwood Industries, our commitment to the highest level of quality and customer service is the most important thing we do. Each Enviro stove is built on a tradition of using only the finest materials and is backed by our Exclusive Lifetime Limited Warranty to the original purchaser. With Enviro, you’re not just buying a stove, you’re buying a company with years of unequalled performance and quality.
Limited Lifetime Warranty:Under this warranty, Sherwood Industries Ltd. covers the fireplace or stove body and accessories against defects in materials and workmanship, for part repair or replacement for the first seven (7) years and limited labour for the first two (2) years to the original purchaser. This Warranty covers: Firebox, Heat Exchanger, Burn Pot, Firebox Panels, Ceramic Glass, Pedestals, Panels, Legs, and Door Assembly. Please see the exclusions and limitation section below as certain restrictions and exclusions apply to this warranty.
Limited Three (3) Year WarrantyUnder this warranty, Sherwood Industries Ltd. covers the Burn Pot Liner and Log Sets against defects in materials and workmanship, for part repair or replacement for the first three (3) years and limited labour for the first two (2) years to the original purchaser. Please see the exclusions and limitation section below as certain restrictions and exclusions apply to this warranty.
Limited Two (2) Year Warranty:Under this warranty, Sherwood Industries Ltd. covers: Ignitor, Auger Motor, Circuit Board, Timers, Temp Sensors, Blowers, Vacuum Switch and Wire Harness, against defects in materials and workmanship, for part repair or replacement for the first two (2) years and limited labour for the first two (2) years to the original purchaser. Please see the exclusions and limitation section below as certain restrictions and exclusions apply to this warranty.
Limited One (1) Year Warranty:Under this warranty, Sherwood Industries Ltd. covers all exterior surface finishes against defects in materials and workmanship, for part repair or replacement and limited labour for the first (1) year to the original purchaser. Please see the exclusions and limitation section below as certain restrictions and exclusions apply to this warranty.
Here is how our Warranty worksIf you have any concerns with your Enviro product please contact the dealer where you purchased the fireplace or stove. Your dealer shall make all claims under this warranty in writing.
To the DealerWhen filling out a warranty claim please complete the following information on an official warranty claim form: Customer information: Name, address and telephone number of purchaser and date of purchase.Dealer information: Date of installation, name of installer and dealer, serial number of the appliance, nature of complaint, defects or malfunction, description and part numbers of any parts replaced.
To the DistributorSign and verify that work and information are correct.
Warranty
Exclusions and Limitations:1. This Warranty does not cover tarnish, discoloration or wear on the plating or paint. 2. This Warranty excludes wear and tear or breakage caused by cleaning, moving or service on log set.3. A qualified installer must install this stove or fireplace. This Limited Warranty covers defects in materials
and workmanship only if the product has been installed in accordance with local building and fire codes; in their absence, refer to the owner’s manual. If the product is damaged or broken as a result of any alteration, willful abuse, mishandling, accident, neglect, or misuse of the product, the Limited Warranty does not apply.
4. The stove must be operated and maintained at all times in accordance with the instructions in the Owner’s Manual. If the unit shows signs of neglect or misuse, it is not covered under the terms of this Warranty policy. Performance problems due to operator error will not be covered by the Limited Warranty policy.
5. As this is a heating appliance some changes in colour of surface finishes may occur. This is not a flaw and as such is not covered under this warranty.
6. Some minor expansion, contraction, or movement of certain parts and resulting noise, is normal and not a defect and, therefore, is not covered under this Limited Warranty.
7. Misuse includes over-firing. Over-firing this appliance can cause serious damage and will nullify the Limited Warranty.
8. The Limited Warranty will cover glass thermal breakage only and will not cover misuse of the stove glass, including but not limited to glass that is struck, has surface contaminates or has had harsh or abrasive cleaners used on it.
9. This warranty does not cover products made or provided by other manufacturers and used in conjunction with the operation of this stove without prior authorization from Sherwood Industries Ltd. The use of such products may nullify the Limited Warranty on this stove. If unsure as to the extent of this Limited Warranty, contact your authorized Enviro dealer before installation.
10. Sherwood Industries Ltd. will not be responsible for inadequate performance caused by environmental conditions.
11. The Limited Warranty does not cover installation and operational related problems such as spillage caused by environmental conditions. Environmental conditions include but are not limited to nearby trees, buildings, roof tops, wind, hills, mountains, inadequate venting or ventilation, excessive offsets, negative air pressures or other influences caused by mechanical systems such as furnaces, fans, clothes dryers etc.
12. The Limited Warranty is void if: a) The stove has been operated in atmospheres contaminated by chlorine, fluorine or other damaging
chemicals. b) The stove is subject to submersion in water or prolonged periods of dampness or condensation. c) Any damage to the unit, combustion chamber or other components due to water, or weather damage
which is the result of, but not limited to, improper chimney/venting installation. c) Salt air in coastal areas or high humidity can be corrosive to the finish; these environments can cause
rusting. Damage caused by salt air or high humidity is not covered by the Limited Warranty.13. Exclusions to the Limited Warranty include: injury, loss of use, damage, failure to function due to
accident, negligence, misuse, improper installation, alteration or adjustment of the manufacturer’s settings of components, lack of proper and regular maintenance, alteration, or act of God.
14. The Limited Warranty does not cover damage caused to the fireplace or stove while in transit. If this occurs, do not operate the stove and contact your courier and/or dealer.
15. The Limited Warranty does not extend to or include firebox paint, door or glass gaskets with damage caused by normal wear and tear, or exterior paint discoloration or chipping, worn gaskets, etc.
16. The Limited Warranty does not include damage to the unit caused by abuse, improper installation, or modification of the unit.
15
16
Warranty
17. Damage to plated surfaces caused by fingerprints, scratches, melted items, or other external scores and residues left on the plated surfaces from the use of abrasive cleaners or polishes is not covered in this warranty.
18. The Limited Warranty does not cover tarnish, discoloration or wear on the plated surfaces.19. The paint on the Metal Brick Liner may peel. This is due to the extreme conditions applied to the paint
during normal usage. It is not a flaw and is not covered under warranty.20. Sherwood Industries Ltd. is free of liability for any damages caused by the fireplace or stove, as well as
inconvenience expenses and materials. The Limited Warranty does not cover incidental or consequential damages.
21. The Limited Warranty does not cover any loss or damage incurred by the use or removal of any component or apparatus to or from the Enviro fireplace or stove without the express written permission of Sherwood Industries Ltd. and bearing a Sherwood Industries Ltd. label of approval.
22. Any statement or representation of Enviro products and their performance contained in Enviro advertising, packaging literature, or printed material is not part of the Limited Warranty.
23. The Limited Warranty is automatically voided if the fireplace or stove’s serial number has been removed or altered in any way. If the stove is used for commercial purposes, it is excluded from the Limited Warranty.
24. No dealer, distributor, or similar person has the authority to represent or warrant Enviro products beyond the terms contained within the Limited Warranty. Sherwood Industries Ltd. assumes no liability for such warranties or representations.
25. Sherwood Industries Ltd. will not cover the cost of the removal or re-installation of the stove, hearth, facing, mantels, venting or other components.
26. Labour to replace or repair items under this Limited Warranty will be covered per our warranty service fee reimbursement schedule. Labour rates are set per component and as such total labour costs may not be covered.
27. Sherwood Industries Ltd. is not liable for freight or labour on any stove replaced in-field and is not liable for travel costs for service work. In the event of in-home repair work, the customer will pay any in-home travel fees or service charges required by the Authorized Dealer.
28. At no time will Sherwood Industries Ltd. be liable for any consequential damages which exceed the purchase price of the unit. Sherwood Industries Ltd. has no obligation to enhance or modify any stove once manufactured (example: as a stove evolves, field modifications or upgrades will not be performed).
29. This Limited Warranty is applicable only to the original purchaser and it is non-transferable.30. This warranty only covers Enviro products that are purchased through an authorized Enviro dealer.31. If for any reason any section of the Limited Warranty is declared invalid, the balance of the warranty
remains in effect and all other clauses shall remain in effect.32. The Limited Warranty is the only warranty supplied by Sherwood Industries Ltd., the manufacturer
of the stove. All other warranties, whether express or implied, are hereby expressly disclaimed and purchaser’s recourse is expressly limited to the Limited Warranty.
33. Sherwood Industries Ltd. and its employees or representatives will not assume any damages, either directly or indirectly, caused by improper usage, operation, installation, servicing or maintenance of this stove.
34. Sherwood Industries Ltd. reserves the right to make changes without notice. Please complete and mail the warranty registration card and have the installer fill in the installation data sheet in the back of the manual for warranty and future reference.
35. Sherwood Industries Ltd. is responsible for stocking parts for a maximum of seven (7) years after discontinuing the manufacture or incorporation of the item into its products. An exception to this would be if an OEM supplier is not able to supply a part.