Page 1
Flare Tips and Tricks
Scott DeLoach
[email protected]
Founder, ClickStart
Certified Instructor, Flare | RoboHelp | Captivate
UX and UA consultant and trainer
© 2010 ClickStart, Inc. All rights reserved.
Page 2
© 2010 ClickStart, Inc. All rights reserved. www.clickstart.net
Tips and tricks
Styles Creating a character style
Creating a non-scrolling region
Creating a non-scrolling table header
Auto-numbering content
Single sourcing Using tags to only include selected topics
Using a variable in a TOC or as a link’s target
Creating a character-level snippet
Print documents Setting up odd/even headers and footers
Adding chapter breaks
“Hidden” features Adding an “Open with…” application
Specifying a “next paragraph” style
Use the Flare help system’s stylesheet
and some surprises…
Page 3
© 2010 ClickStart, Inc. All rights reserved. www.clickstart.net
Styles
Character styles
Non-scrolling regions
Non-scrolling table headers
Auto-numbering content
Page 4
© 2010 ClickStart, Inc. All rights reserved. www.clickstart.net
Creating a character style
To create a character style:
1 Select the span tag in the stylesheet editor.
2 Click Add Class.
3 Type a name and click OK.
4 Format the style as needed.
To apply a character style:
1 Select content in a topic.
2 Select the span class from the style drop-down list.
Page 5
© 2010 ClickStart, Inc. All rights reserved. www.clickstart.net
Creating a non-scrolling region
1 Open your stylesheet in the Internal Text Editor.
2 Add the following properties to the body style.padding: 5em 0 0 0;background:url(nothing) fixed;
3 Add the following properties to the h1 style:position:fixed;_position:absolute;top:0; _top:expression(eval(document.body.scrollTop));margin-top:0; padding-top:0; left: 0; padding-left: 10px; width: 100%; _width:expression(eval(document.body.clientWidth)); background:gray;
.
Page 6
© 2010 ClickStart, Inc. All rights reserved. www.clickstart.net
Adding a non-scrolling table header
div {
position: relative;
overflow-y: scroll; overflow-x: hidden;
height: 200px; width: 100%;
border: solid #000000; border-width: 1px;
}
table { border-width: 1px; width: 100%; }
thead tr {
position: absolute;
top: expression(this.offsetParent.scrollTop);
background-color: #ffffcc;
text-align: left;
}
tbody { height: auto; }
table tbody tr:first-child td { padding: 18px 4px 0px 2px; }
Page 7
© 2010 ClickStart, Inc. All rights reserved. www.clickstart.net
Auto-numbering content
Format Result
{n+}
{n=0}
GH:
CH:
GH: Chapter {chapnum}
Increments number
Resets number to 0
Global counter (throughout project)
Chapter-wide counter
A list of checkmarks (or another symbol)
Chapter 1, Chapter 2…
CH: {n+}
{n+}.{n+}
1, 2,3…(restarts in each chapter)
1.1, 1.2, 1.3…2, 2.1, 2.2, 2.3…
Page 8
© 2010 ClickStart, Inc. All rights reserved. www.clickstart.net
Condition tags, variables, and snippets
Only include selected topics using condition tags
Variables in TOC books and pages
Find-and-replace text with variables
Creating a character-level snippet
Page 9
© 2010 ClickStart, Inc. All rights reserved. www.clickstart.net
Only including specific topics using tags
1 Create a tag to exclude all of your topics (ex: ExcludeAll).
2 Apply the tag to the Content folder.
3 Create a tag to include selected topics. (ex: “IncludeMe”).
4 Apply the tag to the topics you want to include.
5 Open a target.
6 On the Conditional Text tab, exclude your “ExcludeAll” tag
and include your “IncludeMe” tag.
Page 10
© 2010 ClickStart, Inc. All rights reserved. www.clickstart.net
Using a variable in a TOC label or link
In a TOC:
For the book or page label, type:
mcvariable:variablesetname.variablename
In a link:
1 Open the Insert hyperlink dialog box.
2 Select topic in project, external topic, website, or
email.
3 For the link location, type:
mcvariable:variablesetname.variablename
Page 11
© 2010 ClickStart, Inc. All rights reserved. www.clickstart.net
Replacing text with variables
1 Press Ctrl-F.The Find and Replace window appears.
2 For Find what, type the text you want to replace.
3 For Replace with, type the following:<MadCap:variable name="variablesetname.variablename" />
4 For Find in, select (whole project).
5 For File types, select Topics.
6 Select Find in source code.
7 Click Start.
8 Click Replace All.
.
Page 12
© 2010 ClickStart, Inc. All rights reserved. www.clickstart.net
Creating a character-level snippet
1 Highlight the content you want to turn into a snippet.
2 Select Format > Create Snippet.
3 Type a name for the snippet.
4 Click Replace.
.
Page 13
© 2010 ClickStart, Inc. All rights reserved. www.clickstart.net
Printed documentation
Setting up odd/even headers and footers
Adding chapter breaks
Page 14
© 2010 ClickStart, Inc. All rights reserved. www.clickstart.net
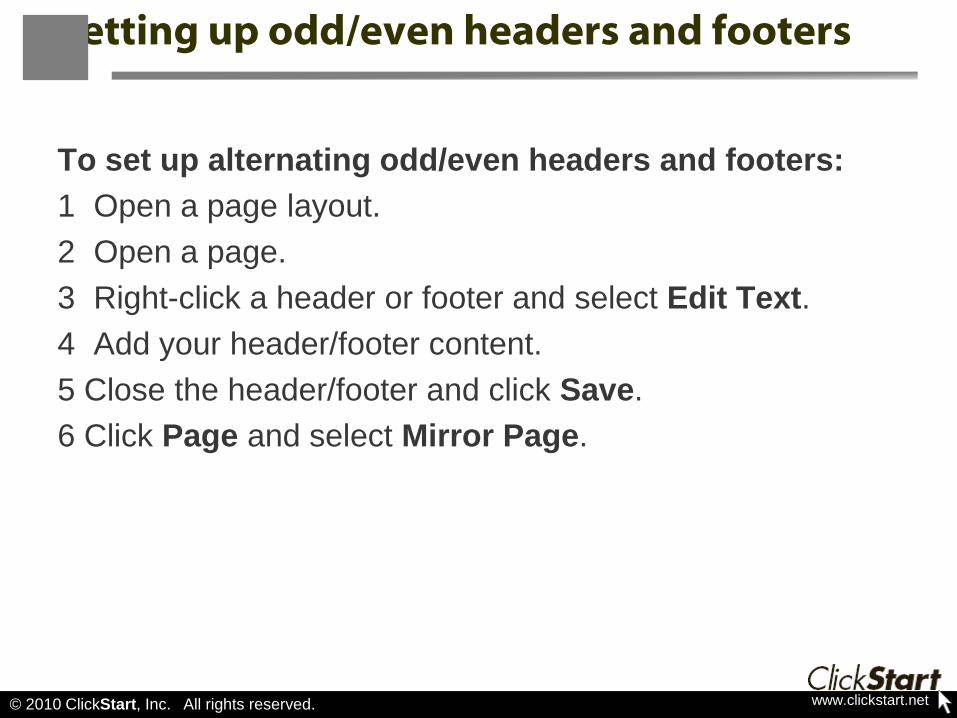
Setting up odd/even headers and footers
To set up alternating odd/even headers and footers:
1 Open a page layout.
2 Open a page.
3 Right-click a header or footer and select Edit Text.
4 Add your header/footer content.
5 Close the header/footer and click Save.
6 Click Page and select Mirror Page.
Page 15
© 2010 ClickStart, Inc. All rights reserved. www.clickstart.net
Adding chapter breaks
Chapter breaks allow you to use different page layouts for different sections in a document.
To add a chapter break:
1 Open your TOC.
2 Right-click a TOC book or page and select Properties.The Properties dialog box appears.
3 Select the Printed Output tab.
4 Select Start a new chapter document.
5 Click OK.
Page 16
© 2010 ClickStart, Inc. All rights reserved. www.clickstart.net
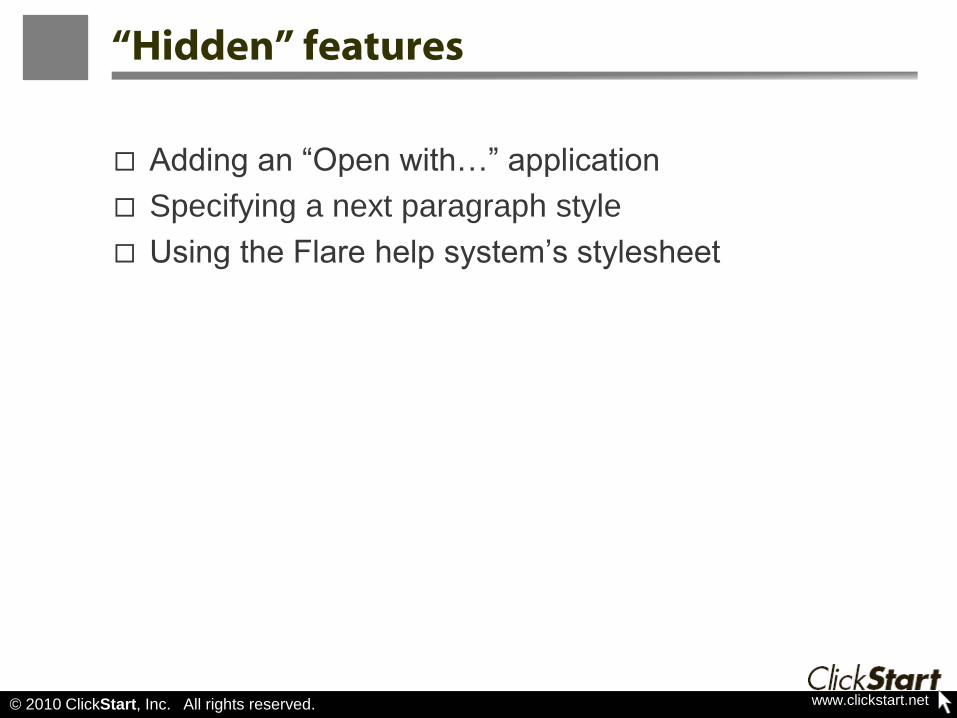
“Hidden” features
Adding an “Open with…” application
Specifying a next paragraph style
Using the Flare help system’s stylesheet
Page 17
© 2010 ClickStart, Inc. All rights reserved. www.clickstart.net
Adding an “Open with” application
1 Open the Registry Editor.
2 Select the following:
HKEY_CURRENT_USER\Software\Microsoft\Windows\
CurrentVersion\Explorer\FileExts\.htm\OpenWithList
3 Add a new string value.
Page 18
© 2010 ClickStart, Inc. All rights reserved. www.clickstart.net
Specifying a next paragraph style
1 Open your stylesheet in the Internal Text editor.
2 Find the style you want to modify.
3 Add the following style property definition:
mc-next-tag: p;
4 Save your stylesheet.
Specifying the next class:
mc-next-class: introParagraph;
Page 19
© 2010 ClickStart, Inc. All rights reserved. www.clickstart.net
Using the Flare help system’s stylesheet
Download it from:
http://www.madcapsoftware.com/support/files/
documentation/Styles/styles.css
Page 20
© 2010 ClickStart, Inc. All rights reserved. www.clickstart.net
Resources
Forums
forums.madcapsoftware.com
Knowledge base
kb.madcapsoftware.com
Getting Started guide
www.madcapsoftware.com/assets/FlarePrintedManual.pdf
WebHelp skinswww.madcapsoftware.com/downloads/utilities/flareskingallery.aspx
WebHelp examples
forums.madcapsoftware.com/viewtopic.php?t=1015
Page 21
© 2010 ClickStart, Inc. All rights reserved.
Questions?
Scott DeLoachFounder, ClickStart
UX and UA consultant and trainer
Certified Instructor, Flare | RoboHelp | Captivate
author:
CSS to the Point
MadCap Flare Certified Test Review + Developer’s Guide
[email protected]
404.520.0003
www.clickstart.net