MANUAL NO. 2 HW0485673 Part Number: 156439-1CD Revision: 2 DX100 OPTIONS INSTRUCTIONS FOR MACRO COMMAND FUNCTION Upon receipt of the product and prior to initial operation, read these instructions thoroughly, and retain for future reference. MOTOMAN INSTRUCTIONS DX100 INSTRUCTIONS DX100 OPERATOR’S MANUAL DX100 MAINTENANCE MANUAL The DX100 Operator’s manual above corresponds to specific usage. Be sure to use the appropriate manual. 1/21
Transcript
DX100 OPTIONSINSTRUCTIONSFOR MACRO COMMAND FUNCTION
Upon receipt of the product and prior to initial operation, read these instructions thoroughly, and retain for future reference.
The DX100 Operator’s manual above corresponds to specific usage. Be sure to use the appropriate manual.
MANUAL NO.
2HW0485673 1/21
156439-1CD
DX100
MANDATORY
• This manual explains the macro command function of the DX100 system. Read this manual carefully and be sure to understand its contents before handling the DX100.
• General items related to safety are listed in Chapter 1: Safety of the DX100 Instructions. To ensure correct and safe operation, carefully read the DX100 Instructions before reading this manual.
CAUTION
• Some drawings in this manual are shown with the protective covers or shields removed for clarity. Be sure all covers and shields are replaced before operating this product.
• The drawings and photos in this manual are representative examples and differences may exist between them and the delivered product.
• YASKAWA may modify this model without notice when necessary due to product improvements, modifications, or changes in specifications. If such modification is made, the manual number will also be revised.
• If your copy of the manual is damaged or lost, contact a YASKAWA representative to order a new copy. The representatives are listed on the back cover. Be sure to tell the representative the manual number listed on the front cover.
• YASKAWA is not responsible for incidents arising from unauthorized modification of its products. Unauthorized modification voids your product's warranty.
ii
HW0485673 2/21
156439-1CD
DX100
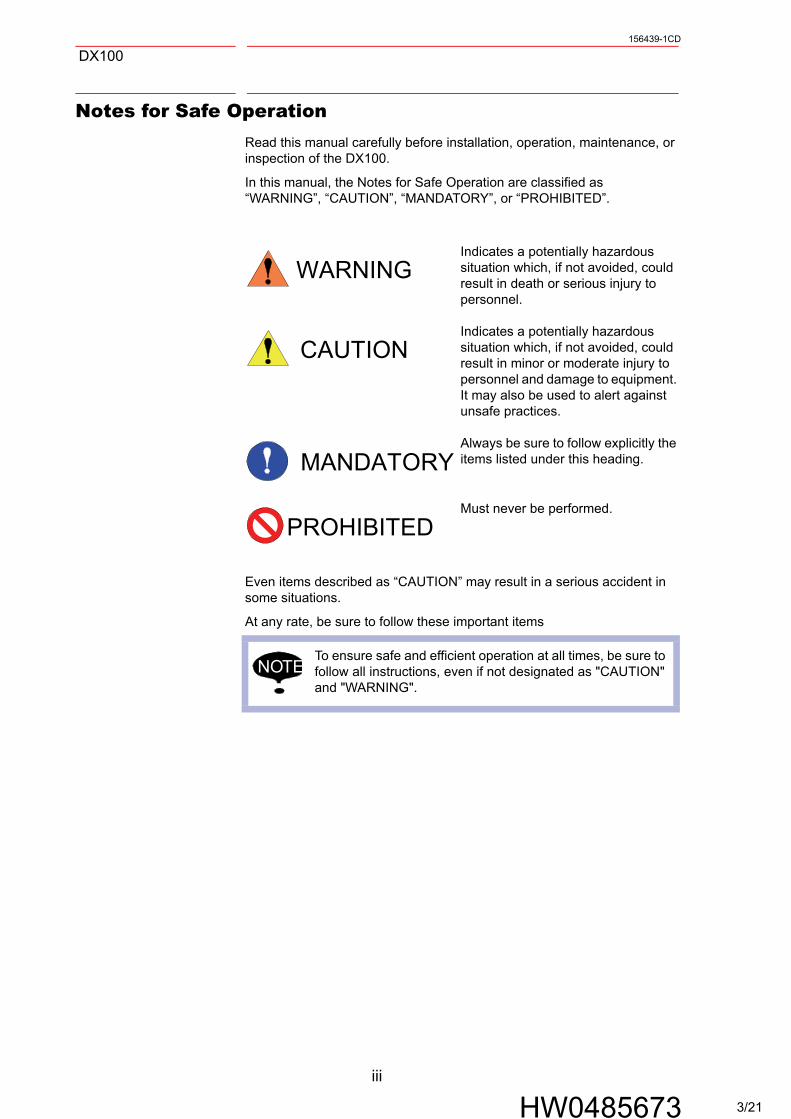
Notes for Safe OperationRead this manual carefully before installation, operation, maintenance, or inspection of the DX100.
In this manual, the Notes for Safe Operation are classified as “WARNING”, “CAUTION”, “MANDATORY”, or “PROHIBITED”.
Even items described as “CAUTION” may result in a serious accident in some situations.
At any rate, be sure to follow these important items
WARNINGIndicates a potentially hazardous situation which, if not avoided, could result in death or serious injury to personnel.
CAUTIONIndicates a potentially hazardous situation which, if not avoided, could result in minor or moderate injury to personnel and damage to equipment. It may also be used to alert against unsafe practices.
MANDATORYAlways be sure to follow explicitly the items listed under this heading.
PROHIBITEDMust never be performed.
NOTETo ensure safe and efficient operation at all times, be sure to follow all instructions, even if not designated as "CAUTION" and "WARNING".
iii
HW0485673 3/21
156439-1CD
DX100
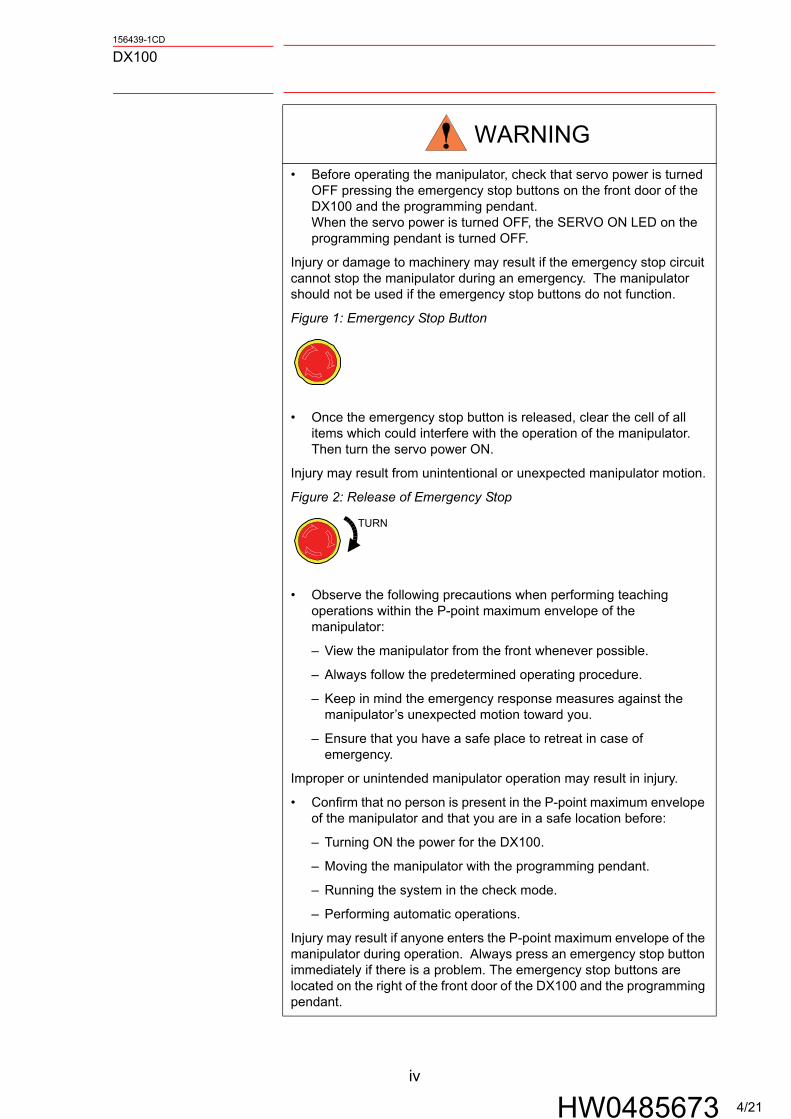
WARNING
• Before operating the manipulator, check that servo power is turned OFF pressing the emergency stop buttons on the front door of the DX100 and the programming pendant.When the servo power is turned OFF, the SERVO ON LED on the programming pendant is turned OFF.
Injury or damage to machinery may result if the emergency stop circuit cannot stop the manipulator during an emergency. The manipulator should not be used if the emergency stop buttons do not function.
Figure 1: Emergency Stop Button
• Once the emergency stop button is released, clear the cell of all items which could interfere with the operation of the manipulator.Then turn the servo power ON.
Injury may result from unintentional or unexpected manipulator motion.
Figure 2: Release of Emergency Stop
TURN
• Observe the following precautions when performing teaching operations within the P-point maximum envelope of the manipulator:
– View the manipulator from the front whenever possible.
– Always follow the predetermined operating procedure.
– Keep in mind the emergency response measures against the manipulator’s unexpected motion toward you.
– Ensure that you have a safe place to retreat in case of emergency.
Improper or unintended manipulator operation may result in injury.
• Confirm that no person is present in the P-point maximum envelope of the manipulator and that you are in a safe location before:
– Turning ON the power for the DX100.
– Moving the manipulator with the programming pendant.
– Running the system in the check mode.
– Performing automatic operations.
Injury may result if anyone enters the P-point maximum envelope of the manipulator during operation. Always press an emergency stop button immediately if there is a problem. The emergency stop buttons are located on the right of the front door of the DX100 and the programming pendant.
iv
HW0485673 4/21
156439-1CD
DX100
Definition of Terms Used Often in This ManualThe MOTOMAN is the YASKAWA industrial robot product.
The MOTOMAN usually consists of the manipulator, the controller, the programming pendant, and supply cables.
In this manual, the equipment is designated as follows:
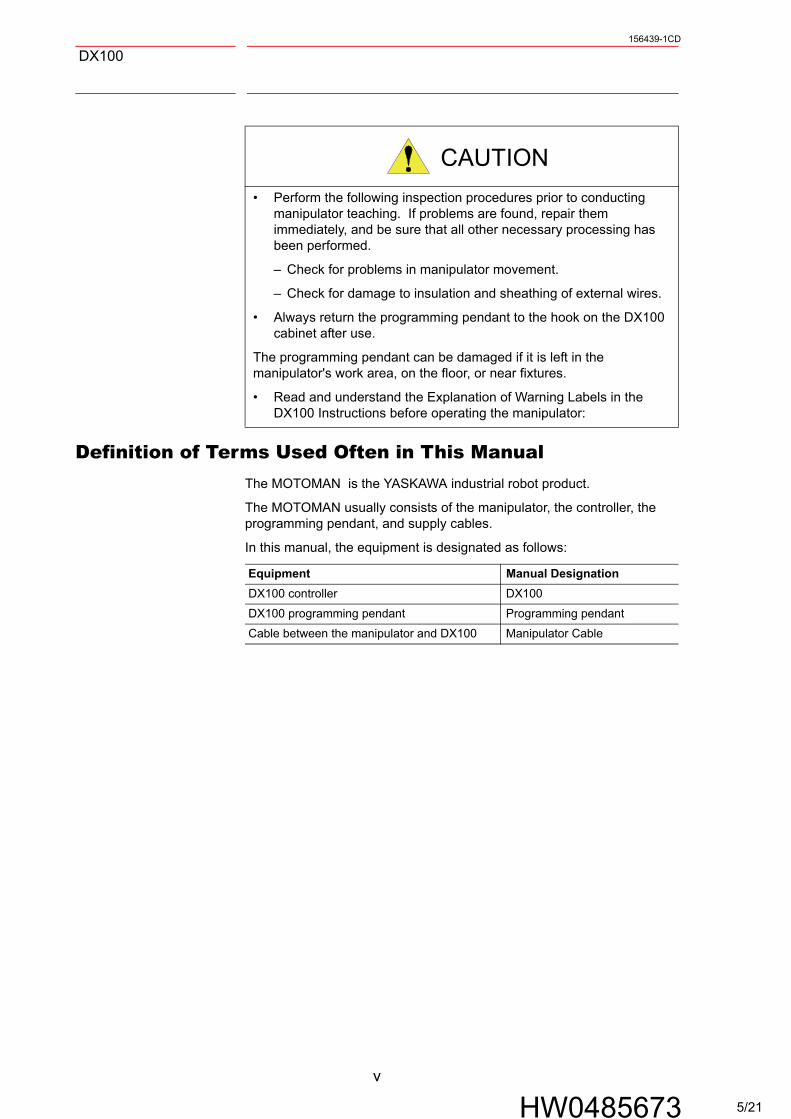
CAUTION
• Perform the following inspection procedures prior to conducting manipulator teaching. If problems are found, repair them immediately, and be sure that all other necessary processing has been performed.
– Check for problems in manipulator movement.
– Check for damage to insulation and sheathing of external wires.
• Always return the programming pendant to the hook on the DX100 cabinet after use.
The programming pendant can be damaged if it is left in the manipulator's work area, on the floor, or near fixtures.
• Read and understand the Explanation of Warning Labels in the DX100 Instructions before operating the manipulator:
Equipment Manual Designation
DX100 controller DX100
DX100 programming pendant Programming pendant
Cable between the manipulator and DX100 Manipulator Cable
v
HW0485673 5/21
156439-1CD
DX100
Descriptions of the programming pendant, buttons, and displays are shown as follows:
Description of the Operation ProcedureIn the explanation of the operation procedure, the expression "Select • • • " means that the cursor is moved to the object item and the SELECT key is pressed, or that the item is directly selected by touching the screen.
Registered TrademarkIn this manual, names of companies, corporations, or products are trademarks, registered trademarks, or bland names for each company or corporation. The indications of (R) and TM are omitted.
Equipment Manual Designation
ProgrammingPendant
Character Keys
The keys which have characters printed on them are denoted with [ ].ex. [ENTER]
SymbolKeys
The keys which have a symbol printed on them are not denoted with [ ] but depicted with a small picture.
ex. page key
The cursor key is an exception, and a picture is not shown.
Axis KeysNumber Keys
“Axis Keys” and “Number Keys” are generic names for the keys for axis operation and number input.
Keys pressed simultaneously
When two keys are to be pressed simultaneously, the keys are shown with a “+” sign between them, ex. [SHIFT]+[COORD]
Displays The menu displayed in the programming pendant is denoted with { }.ex. {JOB}
2.2.1.1 Function .................................................................................................. 2-3
2.2.1.2 Format ..................................................................................................... 2-3
2.2.1.3 Job Example ........................................................................................... 2-4
3 Registration of Macro Commands .................................................................................................. 3-1
3.1 Setting an Execution Macro Job........................................................................................ 3-2
3.2 Setting the Contents of Argument Tag Added to the Macro Command ............................ 3-4
3.3 Setting an Interruption Macro Job...................................................................................... 3-7
7/21
1 Outline1.1 Features
1-1
156439-1CD
HW0485673
DX100
1 Outline
The macro command function registers a prepared job as a macro command and then carries out the job by the macro command.
With the macro command function, system integrators who apply various MOTOMAN robot systems can freely create INFORM (a robot programming language used in DX100) that corresponds to each system.
The macro command function enables an easier robot system with use of the key customize function. (Refer to "8.15 Numeric Key Customize Function" in "DX100 INSTRUCTIONS" for details.)
1.1 Features
• A job prepared with the macro command function by user is registered as a macro command.
• The contents of macro command can be prepared with INFORM, which is the same manner as the normal job data.
An argument tag can be added to a macro command like a normal instruction. Macro commands and their argument tags can be easily programmed at will in the job data display.
< Example > Macro command for sealing
• The macro commands can be used in the same way as the other instructions. Unlike the CALL instruction, end users do not have to consider the restarting method in case of a job interruption.
• The macro command function enables settings for post-processing of the job interruption, such as the cancellation of current work instruction, etc.
• If a macro command is interrupted during the execution, the interrupted macro command is reexecuted from the beginning when the operation is restarted.
NOTE The macro command function is enabled only when the security mode is in the management mode.
SEALON WIDTH=8
Argument tag to specify the sealing widthMacro command to start sealing
8/21
156439-1CD
DX100 2 Preparation of Macro Commands2.1 Preparing a Macro Job
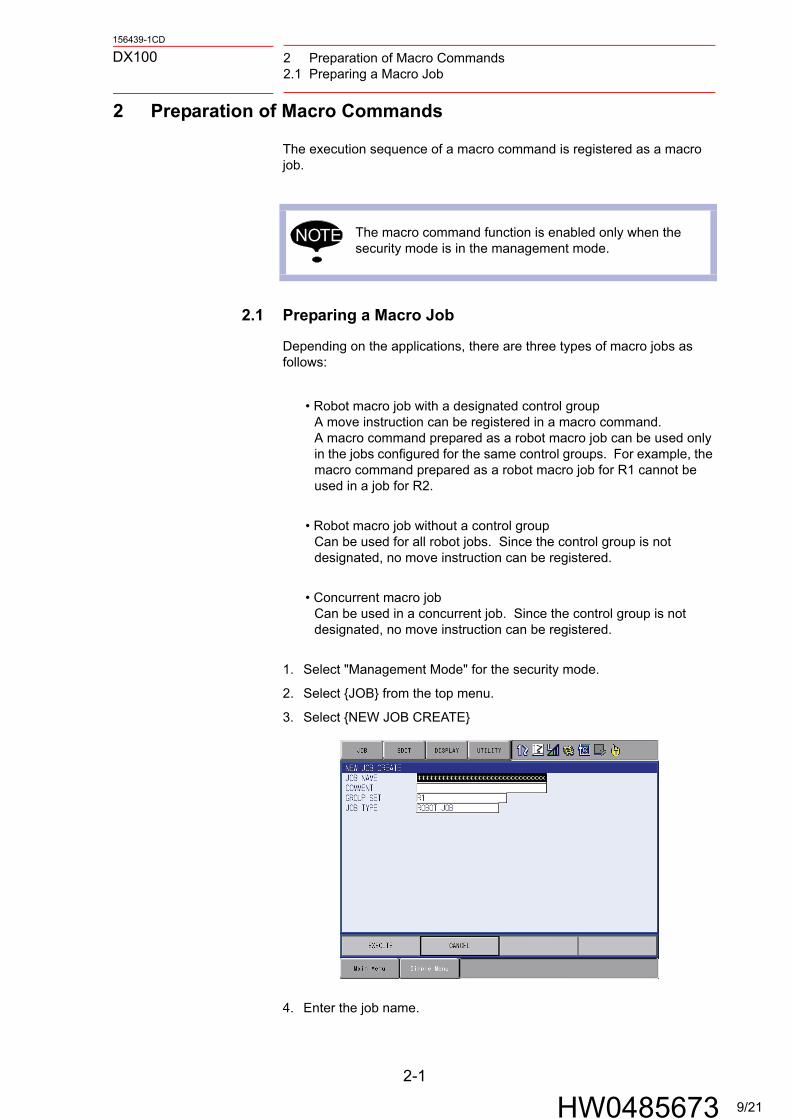
2 Preparation of Macro Commands
The execution sequence of a macro command is registered as a macro job.
2.1 Preparing a Macro Job
Depending on the applications, there are three types of macro jobs as follows:
• Robot macro job with a designated control groupA move instruction can be registered in a macro command. A macro command prepared as a robot macro job can be used only in the jobs configured for the same control groups. For example, the macro command prepared as a robot macro job for R1 cannot be used in a job for R2.
• Robot macro job without a control groupCan be used for all robot jobs. Since the control group is not designated, no move instruction can be registered.
• Concurrent macro jobCan be used in a concurrent job. Since the control group is not designated, no move instruction can be registered.
1. Select "Management Mode" for the security mode.
2. Select {JOB} from the top menu.
3. Select {NEW JOB CREATE}
4. Enter the job name.
NOTE The macro command function is enabled only when the security mode is in the management mode.
2-1
HW0485673 9/21
2 Preparation of Macro Commands2.1 Preparing a Macro Job
156439-1CD
DX100
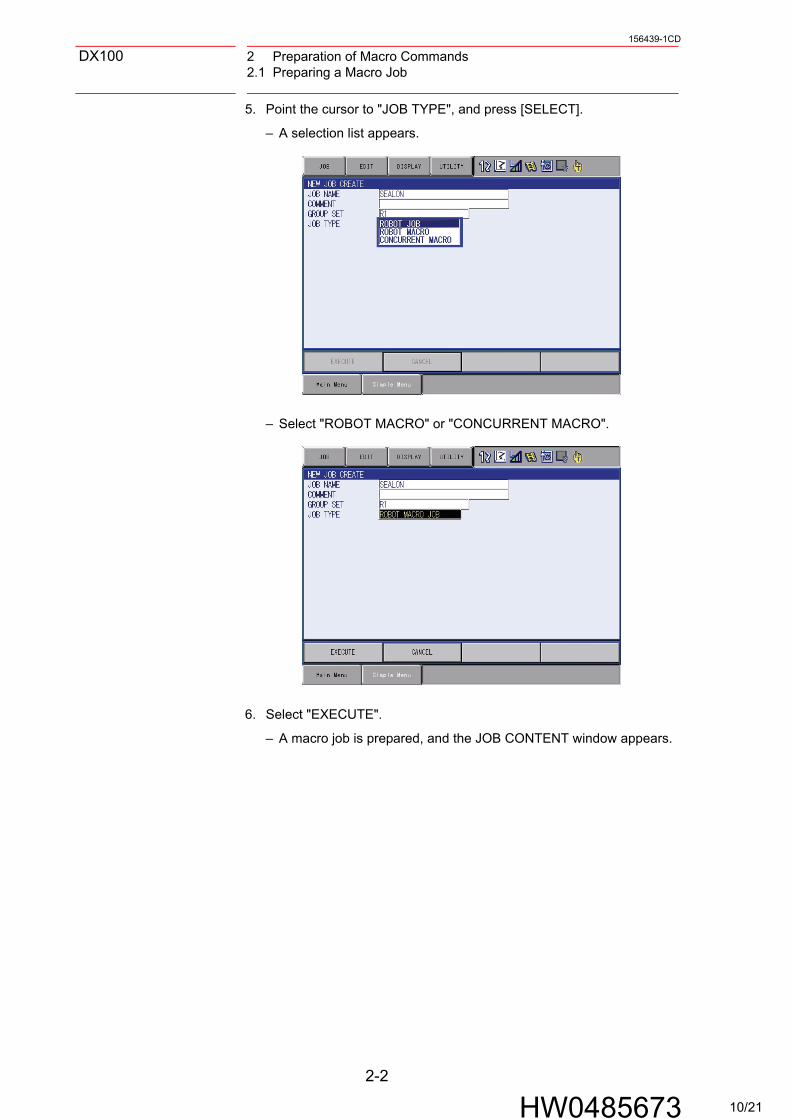
5. Point the cursor to "JOB TYPE", and press [SELECT].
– A selection list appears.
– Select "ROBOT MACRO" or "CONCURRENT MACRO".
6. Select "EXECUTE".
– A macro job is prepared, and the JOB CONTENT window appears.
2-2
HW0485673 10/21
156439-1CD
DX100 2 Preparation of Macro Commands2.2 Teaching a Macro Job
2.2 Teaching a Macro Job
Teach a macro job which is prepared as a macro command in the same manner as normal jobs.
A maximum of sixteen argument tags can be added to a macro command. Since the data of the argument tag is stored in a local variable to be used, the required number of local variables must be set in a "JOB HEADER" before teaching the macro job.
2.2.1 GETARG Instruction
2.2.1.1 Function
The GETARG instruction is an instruction to receive an argument for macro command. When a macro command is executed, the GETARG instruction gets the data of the argument tag which is added to the macro command, and stores it in a local variable to be used in the macro job.
2.2.1.2 Format
Designation of the local variable as the storage destination of the argument data.The following types of local variables can be used for storage destination: -Byte-type -Integer-type -Double-precision integer type -Real-number type -Robot-axis-position type -Base-axis-position type -Station-axis-position type
Designation of argument data. Specifies the number of the argument data to be taken.
SUPPLE-MENT
For the setting procedure of the local variables, refer to "3.9.11 Editing Local Variables" described in "DX100 OPERATOR'S MANUAL".
NOTE In a macro job, job execution instructions such as JUMP, CALL, and PSTART cannot be registered.
GETARG LB000 IARG#(1)
Stores the data of the first argument in the local variable LB000.
2-3
HW0485673 11/21
2 Preparation of Macro Commands2.2 Teaching a Macro Job
Stores the first argumentdata "8" in the local variableLI000.
Outputs the analog voltage according to the first argumentdata.
Robot Job Macro Job: SEALON
2-4
HW0485673 12/21
156439-1CD
DX100 3 Registration of Macro Commands
3 Registration of Macro Commands
To register the macro job prepared in Section 2.1 “Preparing a Macro Job” as a macro command, display the MACRO (ROBOT) window or MACRO (CONCURRENT) window following the procedure below.
1. Select "Management Mode" for the security mode.
2. Select {SETUP} from the top menu.
3. Select {MACRO INST.}.
– The macro command setting window appears.
– Press the page key to alternately display the MACRO (ROBOT) window and the MACRO (CONCURRENT) window.
NOTE The macro command function is enabled only when the security mode is in the management mode.
PAGE
GO BACGO BACK
PAGE
GO BAC
3-1
HW0485673 13/21
3 Registration of Macro Commands3.1 Setting an Execution Macro Job
156439-1CD
DX100
3.1 Setting an Execution Macro Job
The execution macro jobs are macro jobs in which the operations to be carried out by a macro command are programmed. Note that the JOB CONTENT window of a macro command displays the names of the jobs which are specified as execution macro jobs.
1. Point the cursor to the "EXECUTE JOB" to be set in the macro command setting display, and press [SELECT].
– A list box appears.
2. Select "SETTING MACRO JOB".
– The MACRO JOB NAME window appears.
3-2
HW0485673 14/21
156439-1CD
DX100 3 Registration of Macro Commands3.1 Setting an Execution Macro Job
3. Select the desired macro job.
– The selected macro job is registered as an execution macro job.
NOTE
Even if the macro job registration is cancelled, the argument setting of the macro command still remains. Confirm the content of the argument setting of the macro command before registering the macro job to the same macro number which is already cancelled.
3-3
HW0485673 15/21
3 Registration of Macro Commands3.2 Setting the Contents of Argument Tag Added to the Macro Command
156439-1CD
DX100
3.2 Setting the Contents of Argument Tag Added to the
Macro Command
Set the contents of argument tag to be added to the registered macro command.
This setting is not necessary for the macro command with no argument.
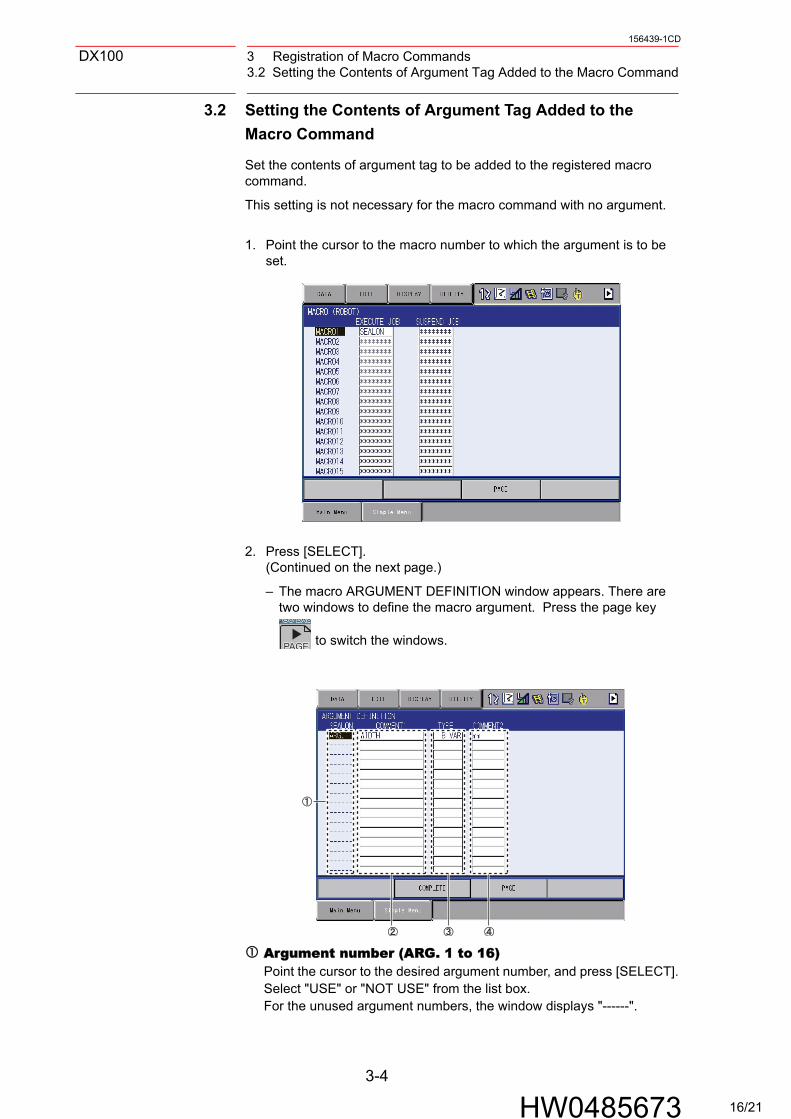
1. Point the cursor to the macro number to which the argument is to be set.
2. Press [SELECT].(Continued on the next page.)
– The macro ARGUMENT DEFINITION window appears. There are two windows to define the macro argument. Press the page key
to switch the windows.
Argument number (ARG. 1 to 16)Point the cursor to the desired argument number, and press [SELECT].Select "USE" or "NOT USE" from the list box. For the unused argument numbers, the window displays "------".
PAGE
GO BACGO BACK
PAGE
GO BAC
3-4
HW0485673 16/21
156439-1CD
DX100 3 Registration of Macro Commands3.2 Setting the Contents of Argument Tag Added to the Macro Command
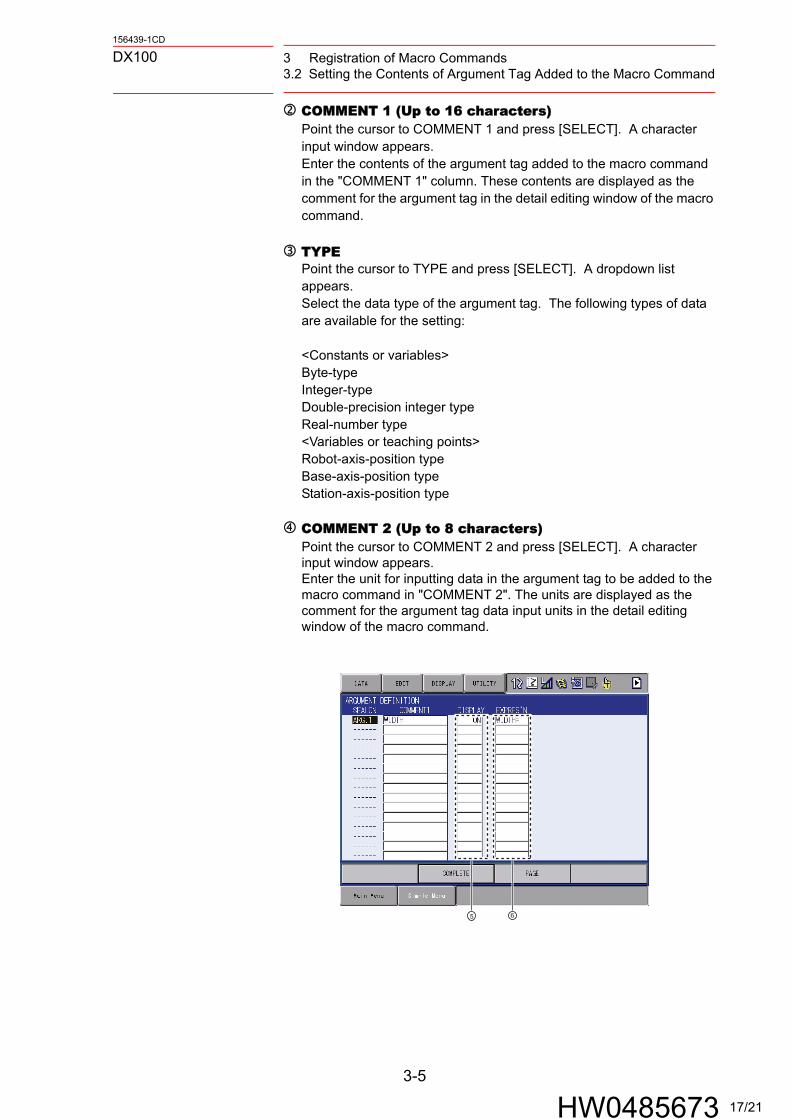
COMMENT 1 (Up to 16 characters)Point the cursor to COMMENT 1 and press [SELECT]. A character input window appears.Enter the contents of the argument tag added to the macro command in the "COMMENT 1" column. These contents are displayed as the comment for the argument tag in the detail editing window of the macro command.
TYPEPoint the cursor to TYPE and press [SELECT]. A dropdown list appears. Select the data type of the argument tag. The following types of data are available for the setting:
<Constants or variables>Byte-typeInteger-typeDouble-precision integer typeReal-number type<Variables or teaching points>Robot-axis-position typeBase-axis-position typeStation-axis-position type
COMMENT 2 (Up to 8 characters)Point the cursor to COMMENT 2 and press [SELECT]. A character input window appears. Enter the unit for inputting data in the argument tag to be added to the macro command in "COMMENT 2". The units are displayed as the comment for the argument tag data input units in the detail editing window of the macro command.
5 6
3-5
HW0485673 17/21
3 Registration of Macro Commands3.2 Setting the Contents of Argument Tag Added to the Macro Command
156439-1CD
DX100
DISPLAYSelect whether to display the expression in the EXPRES'N column. Pressing [SELECT] displays "ON" and "OFF" alternately: "ON" displays the expression; "OFF" hides the expression. When the teaching point for the robot position, base position, or station position is set in "TYPE", the screen does not display the tag set for the teaching point even if "ON" is selected.
EXPRES'N (Up to 8 characters)Point the cursor to EXPRES'N and press [SELECT]. The character input box appears. Enter the expression for the argument tag.
3. Perform the settings for each item.
3-6
HW0485673 18/21
156439-1CD
DX100 3 Registration of Macro Commands3.3 Setting an Interruption Macro Job
3.3 Setting an Interruption Macro Job
If a post-processing is required when a macro command is interrupted, add an interruption macro job (SUSPEND JOB) to the grogram.
The interruption macro job is carried out when a macro command that includes an interruption macro job (SUSPEND JOB) is interrupted by being putting on a status such as hold, emergency stop, or mode switching.
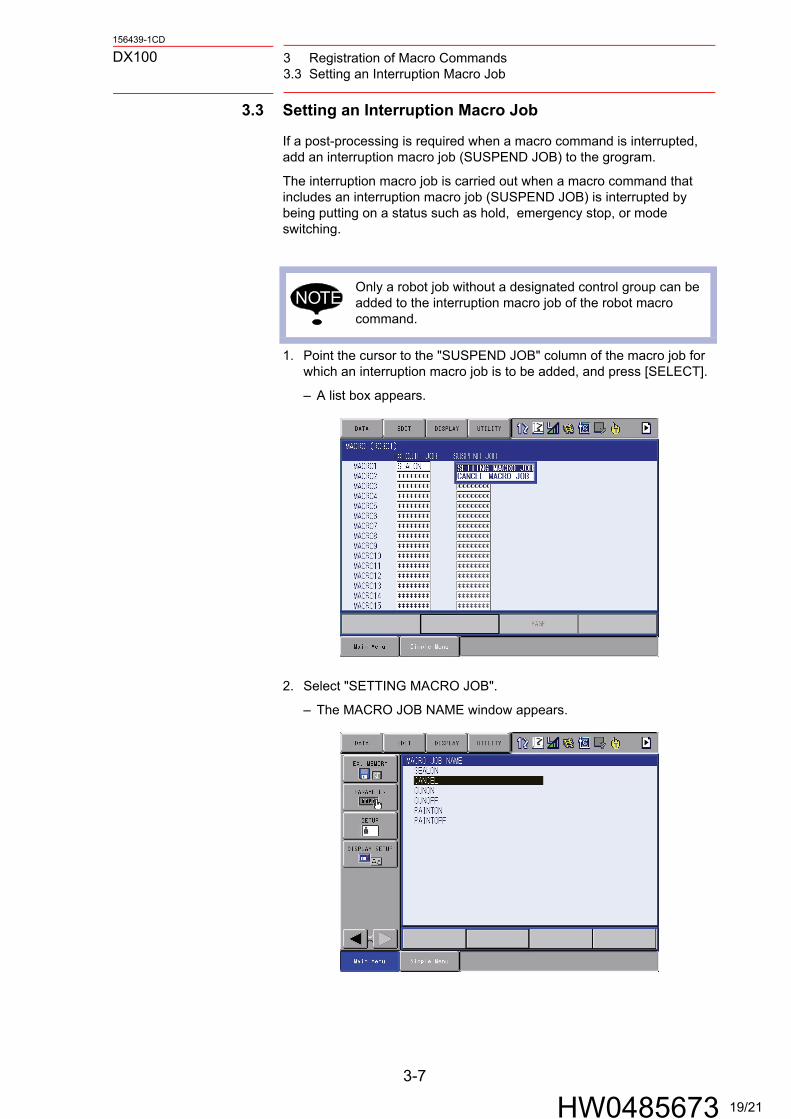
1. Point the cursor to the "SUSPEND JOB" column of the macro job for which an interruption macro job is to be added, and press [SELECT].
– A list box appears.
2. Select "SETTING MACRO JOB".
– The MACRO JOB NAME window appears.
NOTEOnly a robot job without a designated control group can be added to the interruption macro job of the robot macro command.
3-7
HW0485673 19/21
3 Registration of Macro Commands3.3 Setting an Interruption Macro Job
156439-1CD
DX100
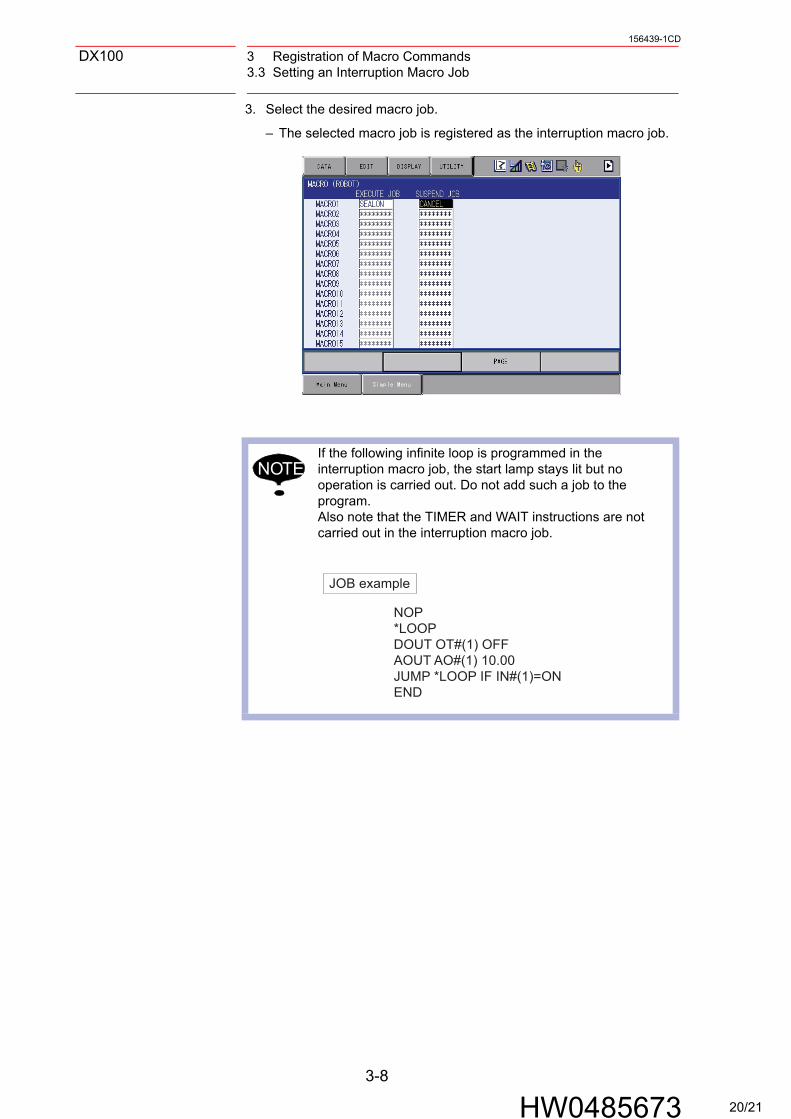
3. Select the desired macro job.
– The selected macro job is registered as the interruption macro job.
NOTEIf the following infinite loop is programmed in the interruption macro job, the start lamp stays lit but no operation is carried out. Do not add such a job to the program.Also note that the TIMER and WAIT instructions are not carried out in the interruption macro job.
NOP*LOOPDOUT OT#(1) OFFAOUT AO#(1) 10.00JUMP *LOOP IF IN#(1)=ONEND
JOB example
3-8
HW0485673 20/21
DX100 OPTIONSINSTRUCTIONSFOR MACRO COMMAND FUNCTION
2HW0485673MANUAL NO.
Specifications are subject to change without noticefor ongoing product modifications and improvements.