Page 1
GameStop GS3 GameCube Controller ButtonsReplacement
This guide will instruct you on how to replace the buttons of the GameStop GS3 GamecubeController.
Written By: Andrew Gonsalves
GameStop GS3 GameCube Controller Buttons Replacement Draft: 2019-05-16Guide ID: 73885 -
This document was generated on 2019-09-18 08:13:23 PM (MST).
© iFixit — CC BY-NC-SA www.iFixit.com Page 1 of 6
Page 2
INTRODUCTION
This guide will instruct you on how to replace the buttons of the GameStop GS3 GamecubeController.
TOOLS:Mako Driver Kit - 64 Precision Bits (1)
GameStop GS3 GameCube Controller Buttons Replacement Draft: 2019-05-16Guide ID: 73885 -
This document was generated on 2019-09-18 08:13:23 PM (MST).
© iFixit — CC BY-NC-SA www.iFixit.com Page 2 of 6
Page 3
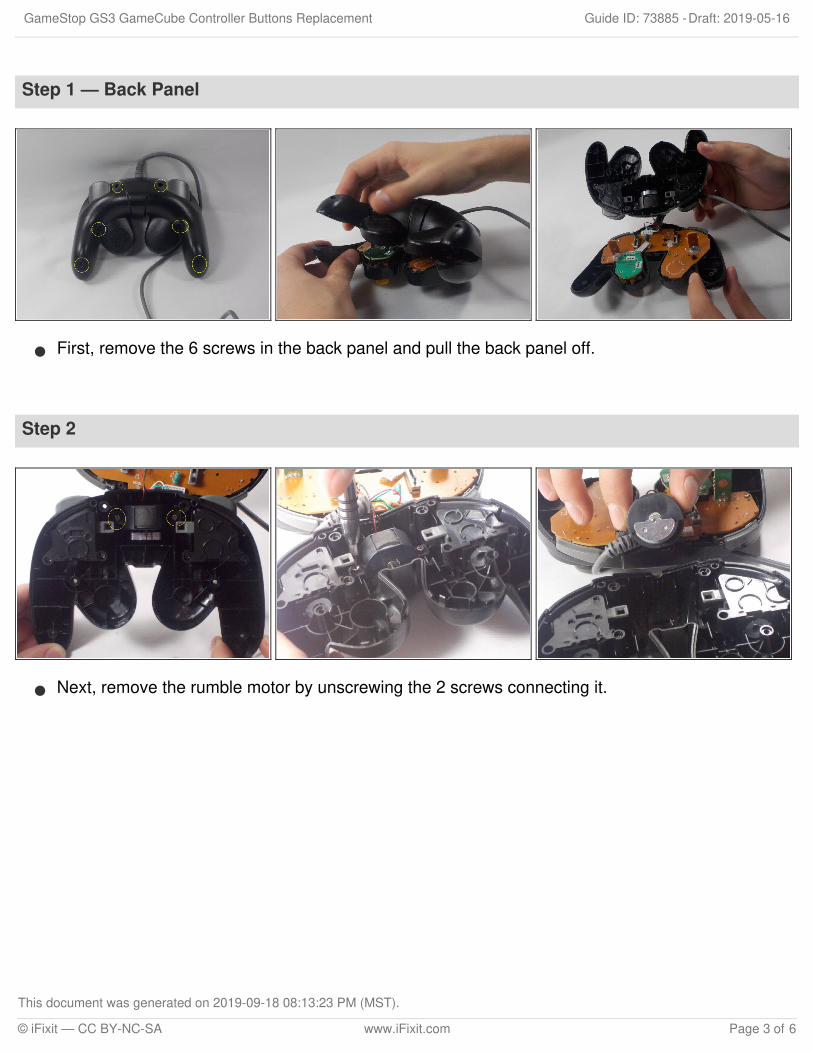
Step 1 — Back Panel
First, remove the 6 screws in the back panel and pull the back panel off.
Step 2
Next, remove the rumble motor by unscrewing the 2 screws connecting it.
GameStop GS3 GameCube Controller Buttons Replacement Draft: 2019-05-16Guide ID: 73885 -
This document was generated on 2019-09-18 08:13:23 PM (MST).
© iFixit — CC BY-NC-SA www.iFixit.com Page 3 of 6
Page 4
Step 3
Finally remove the screws holding in the right and left triggers. It's easiest to hold the triggertogether as shown in the third picture. Remove both the left and right trigger, and then you havesuccessfully removed your back panel.
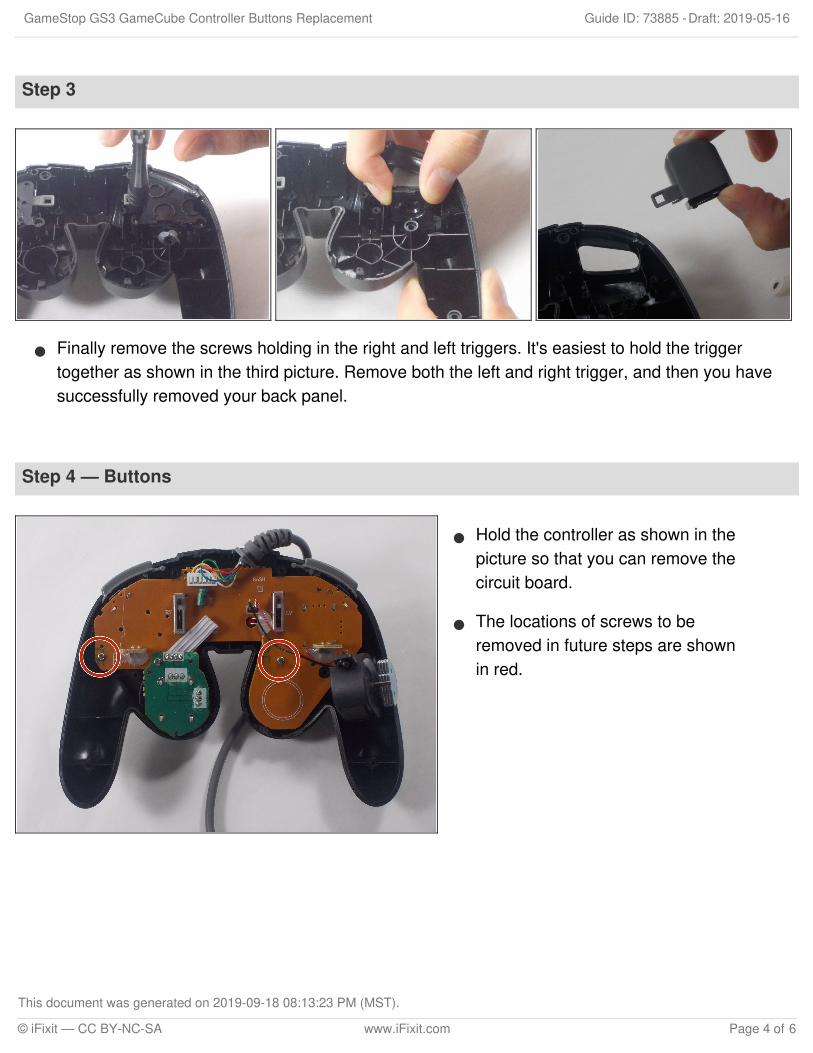
Step 4 — Buttons
Hold the controller as shown in thepicture so that you can remove thecircuit board.
The locations of screws to beremoved in future steps are shownin red.
GameStop GS3 GameCube Controller Buttons Replacement Draft: 2019-05-16Guide ID: 73885 -
This document was generated on 2019-09-18 08:13:23 PM (MST).
© iFixit — CC BY-NC-SA www.iFixit.com Page 4 of 6
Page 5
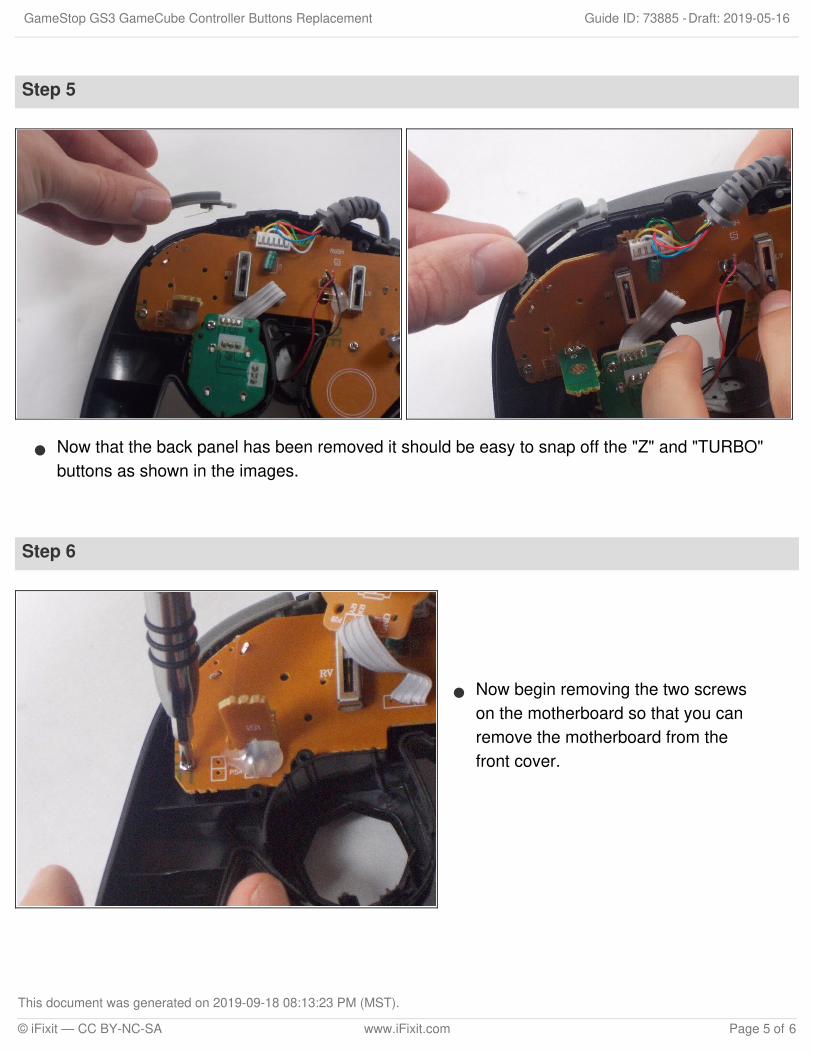
Step 5
Now that the back panel has been removed it should be easy to snap off the "Z" and "TURBO"buttons as shown in the images.
Step 6
Now begin removing the two screwson the motherboard so that you canremove the motherboard from thefront cover.
GameStop GS3 GameCube Controller Buttons Replacement Draft: 2019-05-16Guide ID: 73885 -
This document was generated on 2019-09-18 08:13:23 PM (MST).
© iFixit — CC BY-NC-SA www.iFixit.com Page 5 of 6
Page 6
To reassemble your device, follow these instructions in reverse order.
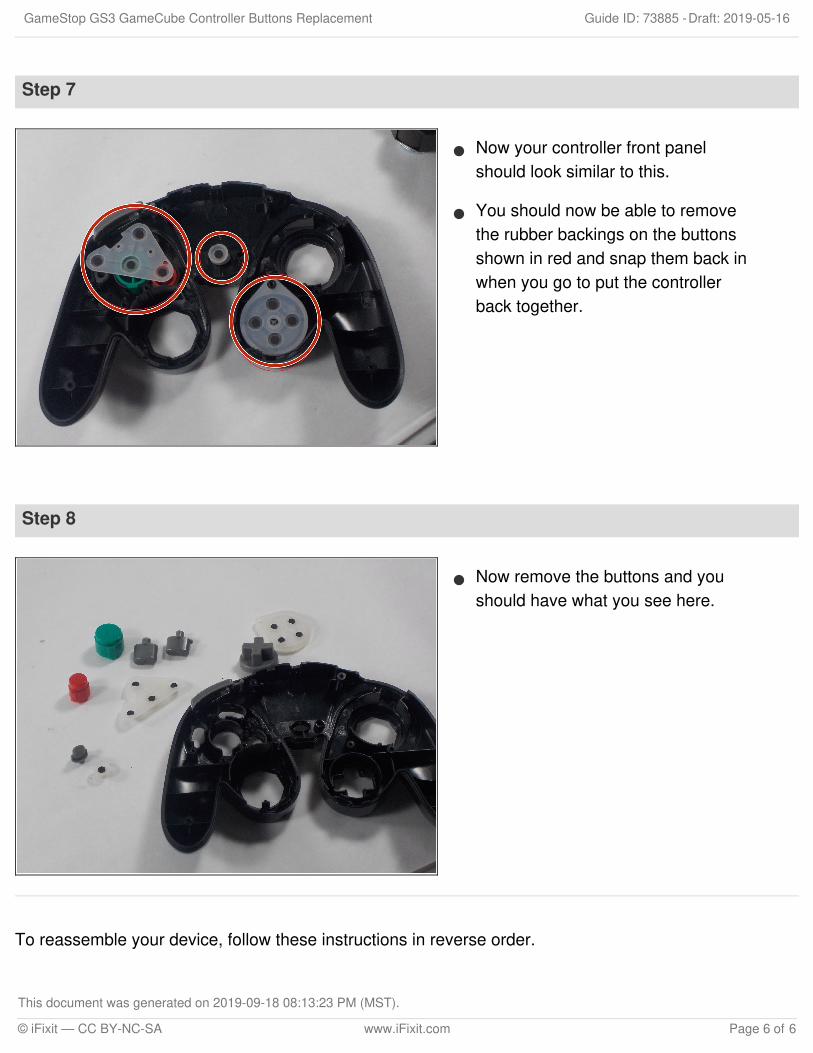
Step 7
Now your controller front panelshould look similar to this.
You should now be able to removethe rubber backings on the buttonsshown in red and snap them back inwhen you go to put the controllerback together.
Step 8
Now remove the buttons and youshould have what you see here.
GameStop GS3 GameCube Controller Buttons Replacement Draft: 2019-05-16Guide ID: 73885 -
This document was generated on 2019-09-18 08:13:23 PM (MST).
© iFixit — CC BY-NC-SA www.iFixit.com Page 6 of 6

![GS3 Weekly [9 14 Mar 2015] [The Undercover group ...forumias.com/portal/wp-content/uploads/2015/03/GS3-Weekly-9th-14th... · GS3 Weekly [9th – 14th Mar 2015] ... functioning, limitations,](https://static.documents.pub/doc/80x56/5aea4f827f8b9ae5318c47af/gs3-weekly-9-14-mar-2015-the-undercover-group-weekly-9th-14th-mar-2015.jpg)


![GS3 Weekly [2 7 Mar 2015] [The Undercover group ...forumias.com/portal/wp-content/uploads/2015/03/GS3-Weekly-2nd-7th... · GS3 Weekly [2nd – 7th Mar 2015] [The ... such case it](https://static.documents.pub/doc/80x56/5b09e21c7f8b9a604c8b9204/gs3-weekly-2-7-mar-2015-the-undercover-group-weekly-2nd-7th-mar-2015.jpg)