Page 1
Gap Light Analyzer (GLA):
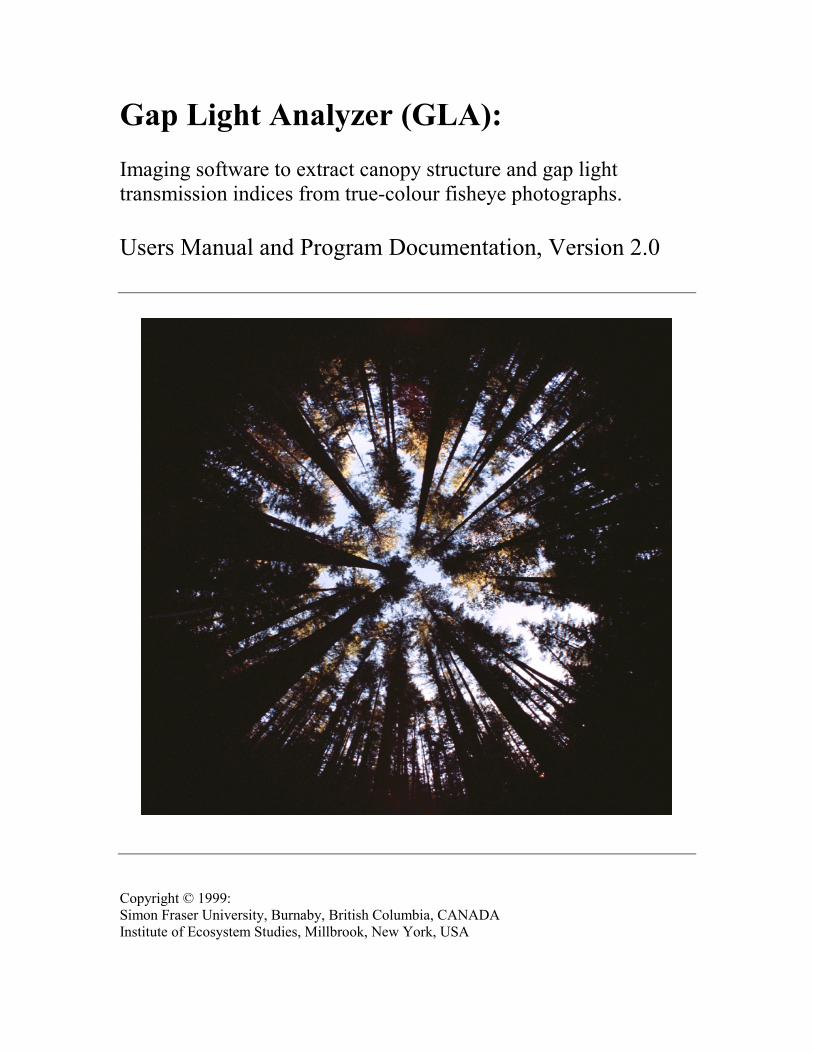
Imaging software to extract canopy structure and gap lighttransmission indices from true-colour fisheye photographs.
Users Manual and Program Documentation, Version 2.0
Copyright © 1999:Simon Fraser University, Burnaby, British Columbia, CANADAInstitute of Ecosystem Studies, Millbrook, New York, USA
Page 2
GLA Version 2.0, Users Manual and Program Documentation ii
Citation
Frazer, G.W., Canham, C.D., and Lertzman, K.P. 1999. Gap Light Analyzer (GLA), Version 2.0: Imagingsoftware to extract canopy structure and gap light transmission indices from true-colour fisheyephotographs, users manual and program documentation. Copyright © 1999: Simon Fraser University,Burnaby, British Columbia, and the Institute of Ecosystem Studies, Millbrook, New York.
Project Funding
The development and distribution of this software has been funded by a Forest Renewal BC ResearchGrant to:
Dr. Kenneth P. LertzmanSchool of Resource and Environmental ManagementSimon Fraser University8888 University DriveBurnaby, British ColumbiaCANADA V5A 1S6
Modelling and Application Design
Gordon W. FrazerSchool of Resource and Environmental ManagementSimon Fraser University8888 University DriveBurnaby, British ColumbiaCANADA V5A 1S6
Dr. Charles D. CanhamInstitute of Ecosystem StudiesP.O. Box AB, MillbrookNew York, 12545U.S.A
Software Engineering
Dr. Pamela SallawaySpatial Solutions, Inc.Victoria, British ColumbiaCANADA
Dimitri MarinakisDepartment of Computer ScienceUniversity of VictoriaVictoria, British ColumbiaCANADA
Copies of this document and the Gap Light Analyzer (Version 2.0) software may be obtainedfrom the authors, or downloaded via the Internet at:
http://www.rem.sfu.ca/forestry/index.htmhttp://www.ecostudies.org/
Page 3
GLA Version 2.0, Users Manual and Program Documentation iii
ACKNOWLEDGEMENTS
Forest Renewal BC Research Grant PA97735-ORE to Dr. K.P. Lertzman provided
funding for the development and distribution of this software. We would like to thank: the
Greater Victoria Capital Regional District for supplying solar radiation data and access into the
Sooke Lake Watershed; Dr. David Coates, BC Ministry of Forests, for providing field
instrumentation; Ross Benton, Bob Ferris, and Dr. Tony Trofymow, Canadian Forestry Service,
Pacific Forestry Centre, for their help with solar radiation monitoring and LAI measurements, site
access, and logistical support; Jamie MacDuff and Gary Myers, Atmospheric Environment
Service, for supplying solar radiation data; Dr. Daniel Mailly, Quebec Ministry of Natural
Resources, Dr. Richard Fournier, and Gérard Laroche, Laurentian Forestry Centre, Judit Gaspar
and Laura Paone, Department of Geography, Simon Fraser University, and Dr. Phil Comeau, BC
Ministry of Forests, for beta testing an earlier version of the software.
Page 4
GLA Version 2.0, Users Manual and Program Documentation iv
CONTENTS
ACKNOWLEDGEMENTS…………………………………………………………………….. iii
1.0 INTRODUCTION……………………………………………………………………….. 1
2.0 APPLICATION OVERVIEW…………………………………………………………… 22.1 Hardware Requirements……………………………………………………………. 32.2 Software Design……………………………………………………………………. 3
3.0 GETTING STARTED…………………………………………………………………… 4Step 1: Open an Image…………………………………………………………………… 4Step 2: Image Registration……………………………………………………………….. 4Step 3: Edit, Save, or Load a Configuration……………………………………………… 5Step 4: Image Classification……………………………………………………………… 6Step 5: Compute Results…………………………………………………………………. 7
4.0 NAVIGATING THE MAIN MENU…………………………………………………….. 74.1 File Menu…………………………………………………………………………….. 74.2 Edit Menu…………………………………………………………………………….. 84.3 View Menu…………………………………………………………………………… 94.4 Configure Menu……………………………………………………………………… 104.5 Image Menu………………………………………………………………………….. 114.6 Calculate Menu………………………………………………………………………. 134.7 Utilities Menu………………………………………………………………………… 13
5.0 UNDERSTANDING THE CONFIGURATION SETTINGS…………………………… 155.1 Image Tab…………………………………………………………………………… 155.2 Site Tab……………………………………………………………………………… 165.3 Resolution Tab………………………………………………………………………. 175.4 Radiation Tab………………………………………………………………………... 18
6.0 HOW TO GENERATE AND INTERPRET OUTPUT RESULTS……………………… 216.1 Calculation Report (Summary)……………………………………………………… 216.2 Calculation Report (Detailed)………………………………………………………. 22
7.0 HOW DOES GLA COMPARE TO GLI/C?……………………………………………… 26
8.0 HOW TO COMPUTE REGION-SPECIFIC MODEL PARMETERS…………………… 278.1 Cloudiness Index…………………………………………………………………….. 278.2 Spectral Fraction…………………………………………………………………….. 298.3 Beam Fraction……………………………………………………………………….. 32
REFERENCES…………………………………………………………………………………. 33
Page 5
GLA Version 2.0, Users Manual and Program Documentation 1
1.0 INTRODUCTION
The number, size, and location of gaps in a forest canopy have a direct influence on the
availability and distribution of understory light. The quantity and spectral quality of this incident
solar energy, in turn, plays a significant role in determining the abundance and diversity of
understory plants, the growth and mortality of seedlings, and the development, structure, and
species composition of the canopy trees (Canham et al. 1994, Gray and Spies 1996, Wright et al.
1998, Nicotra et al. 1999). Consequently, species, site, and age-related differences in the
architecture of canopies have created a patterning of gaps that is highly variable across space and
through time, leaving a complex mosaic of forest structure and light environments at many scales
across the landscape (Lertzman et al. 1996, Trichon et al. 1998, Frazer et al. 1999).
Interest in documenting the relationships between forest structure and the understory light
regime has converged on a few methodological approaches from two distinct lines of research.
On the one hand, community and population ecologists studying successional processes
associated with canopy gaps formed by patchy tree-mortality needed to quantify the
environmental conditions associated with those gaps (Rich et al. 1993, Canham et al. 1994, Easter
and Spies 1994). On the other, microclimatologists and production ecologists required easily
replicated and non-destructive methods for quantifying the leaf area borne by forest stands (Chen
et al. 1997). In both cases, the challenges and constraints of direct measurement of the variables
of interest — for instance, multiple light sensors running over several seasons or direct
destructive sampling of tree crowns — led to the development of faster, less direct methods,
which lend themselves more easily to spatial and temporal replication (Welles and Cohen 1996).
Hemispherical canopy photography is one indirect optical technique that has been widely
used in studies of canopy structure and forest light transmission. Photographs taken skyward from
the forest floor with a 180o hemispherical (fisheye) lens produce circular images that record the
size, shape, and location of gaps in the forest overstory. Digital scanners or cameras convert these
hemispherical images into bitmaps, which are then analyzed using specialized image analysis
software. Image processing involves the transformation of image pixel positions into angular
coordinates, the division of pixel intensities into sky and non-sky classes, and the computation of
sky-brightness distributions. These data are subsequently combined to produce estimates of
growing-season light transmission, as well as other measures more directly related to canopy
structure, such as openness, leaf area, and sunfleck frequency (Chazdon and Field 1987, Becker et
al. 1989, Rich 1990, Canham 1995, ter Steege 1996).
Page 6
GLA Version 2.0, Users Manual and Program Documentation 2
2.0 APPLICATION OVERVIEW
The Gap Light Analyzer (GLA) is a Windows-based software application designed to
import, display, and analyze digital hemispherical (fisheye) canopy photographs. GLA was
developed from an earlier true-colour imaging program, GLI/C, created by Dr. Charles Canham
at the Institute of Ecosystem Studies (IES), Millbrook, New York (Canham 1995). GLI/C — now
called GLA — has been completely re-engineered to include 1) a new Multiple Document
Interface (MDI), 2) a solar radiation model that takes into account the influences of topography
and seasonal patterns of cloudiness, 3) new spatial methods to extract beam transmission and
sunfleck-frequency distribution data, 4) a variety of stand-alone utilities that allow the user to
explore, extract, and display gap fraction, canopy openness, and gap light transmission
information, 5) TWAIN compliance to acquire digital data directly from scanners and cameras,
and 6) a suite of image processing tools for image modification.
GLA will compute canopy and site openness, effective leaf area index (Le), sunfleck-
frequency distribution and daily duration, and the amount of above- and below-canopy
(transmitted) direct, diffuse, and total solar radiation incident on a horizontal or arbitrarily
inclined receiving surface. Images can be imported in a variety of graphics formats or directly
from a scanner or digital camera. GLA includes a number of tools and image-processing
functions to register and manipulate these imported images. Image processing functions — such
as, image threshold, brightness, and contrast — can be used to affect the entire image or only a
select portion of it. Results from the GLA calculations are displayed on a separate form with an
option to append these data to a spreadsheet. There are a number of stand-alone utilities that will
compute and display total daily extraterrestrial radiation, sunfleck duration and frequency, solar
positions and intensities, and sky-region brightness. Other utilities can be used to display both
canopy openness (as equal intervals of zenith or area) and the amount of above- and below-
canopy solar radiation as a function of zenith angle.
GLA was designed to process large numbers of photographs taken from numerous sites.
Individual configurations settings can be created for different camera lenses and orientations,
regional climatic patterns and growing seasons, and topographic settings. These configuration
data can be saved to disk for later use, or loaded directly into the Windows system registry so that
each time the program is executed the configuration settings are already initialized. GLA supports
import, export, and editing of all configuration settings.
Page 7
GLA Version 2.0, Users Manual and Program Documentation 3
2.1 Hardware Requirements
Operating System, Processor, and Display Device
GLA is 32-bit application compiled to run under Microsoft Windows 95 or later, or
Windows NT 4.0 or later. The software was developed on a Dell Dimension XPS 266 with 64 Mb
of RAM and 4 Mb of video RAM, and has been tested on a Dell Dimension XPS 90 (48 Mb of
RAM, 2 Mb VRAM, Windows 95) and a Dell Dimension XPS R400 (64 Mb of RAM, 8 Mb
VRAM, Windows 98).
For optimum performance, we would recommend that GLA be installed on a recent
Pentium machine (266 MHz or faster) with at least 64 MB of RAM. The computer should also
have a graphics display device (video card) that has 4 MB of video memory or better, and is
capable of true-colour display at screen resolutions of 600 x 800 or better (application will
display best at 1024 x 768 or higher). GLA will support large or small display font sizes, but it
will not support any of the custom fonts.
Scanner
GLA should work with any TWAIN-compliant scanner or digital camera that uses a 32-
bit TWAIN driver. The software however, has only been tested with a Polaroid Sprint 35 film
scanner using the manufacturer’s 32-bit TWAIN driver.
Camera Lens Formats and Projections
GLA can be used to analyze any circular fisheye image that has been captured using a
short focal length (8 mm or less) hemispherical lens with a full 180o field of view (FOV) and a
known projection distortion. Fisheye lenses that have longer focal lengths (e.g., 16 mm) and a full
180o FOV create non-circular images that are cropped in either one or both dimensions of the
image. These images cannot be analyzed using GLA. Four standard projections (e.g., polar,
orthographic, stereographic, Lambert’s Equal Area) and any number of user-defined custom lens
distortions are supported by GLA.
2.2 Software Design
GLA consists of a graphical user interface (GUI) written in MS Visual Basic, and an
ActiveX module (CGACalc) developed in MS Visual C++. The GUI utilizes a single third-party
ActiveX component (LeadTools) to handle image scanning, import, display, and basic image
Page 8
GLA Version 2.0, Users Manual and Program Documentation 4
processing. Commercial chart (VCI First Impression) and data grid (VCI Formula One) objects
were also used for tabular and graphical display. The CGACalc ActiveX module is responsible
for receiving and processing numerical and image data input from the GUI, and computing each
of the various canopy structure and light transmission models. CGACalc passes all of the
processed data back to the GUI for final display.
3.0 GETTING STARTED
Five simple steps are necessary to analyze a fisheye photograph. The first step is to open an
existing image or scan in a new one. Second, register the image so that both the orientation and
circular extent of the exposure are known. Third, if necessary, edit the configuration settings to
reflect the site position and orientation, growing-season length, and atmospheric conditions.
Fourth, threshold the image so that the each pixel is accurately classified as either a sky (white) or
non-sky (black) pixel. Last, run the calculations to compute the canopy structure and/or gap light
transmission results.
Step 1: Open an Image
Image data can be imported directly from an existing graphics file or via a TWAIN-compliant
scanner or digital camera. Most common graphics formats (e.g., BMP, JPG, PCX, etc.) are
supported by GLA. Those formats that are not supported by the application are compressed
TIFF, GIF and some of the more recent graphics formats (e.g., FlashPix). Use the Open option
under the File menu or on the toolbar to import an existing image file. To obtain digital data
directly from a TWAIN-compliant device, first select the appropriate driver from the Select
TWAIN Source… option under the File Menu and then click Scan Image… under the same
menu or on the toolbar.
Step 2: Image Registration
Image registration is the process by which the user identifies the geographic orientation
and circular extent of the hemispherical image. To register an image, the user must identify two
known points on the image. The first point is termed the initial point in GLA and it determines
the geographic orientation of the image. The second point is located at an opposing azimuth (e.g.,
if the initial point is 0o north the second point will be 180o south) and marks the circular extent of
the image (Figure 1).
Page 9
GLA Version 2.0, Users Manual and Program Documentation 5
FIGURE 1. The single red dot at the top of the images identifies geographic north (0o),
and the two red dots at the bottom define south (180o). The photo on the right has been
accurately registered. The photograph was marked at the time of exposure using fibre
optics mounted at the edge of the fisheye lens.
To register an image in GLA, select Register Image from the Configure main menu or
the toolbar. Two techniques may be used to identify the two required registration points. First,
points maybe identified graphically by dragging the mouse from the initial point (left mouse
button down) to the last point (left mouse button up). Second, if the pixel coordinates of the
registration points are already known, then the two positions may be keyed in directly. If you
have keyed in the data points, click the Apply button on the Registration form to view the outer
ring and centre of the registration circle. Click on the OK button on the Registration form to
accept the registration. If you except the registration then the photo will be cropped and two
identical images will be posted side by side on the MDI form. The picture on the left is the
Registered Image and the one on the right is the Working Image.
Step 3: Edit, Save, or Load a Configuration
A configuration file contains the input data necessary to run the various models contained
in the CGACalc module. These input data include information on image orientation, projection
distortion, site location, growing-season length, sky-region brightness, and atmospheric
conditions. The configuration settings can be accessed from the Configure option on the main
menu or toolbar. Options exist to save, load or edit these configuration data. Since the application
Page 10
GLA Version 2.0, Users Manual and Program Documentation 6
is installed with default configuration settings, choose the Edit Configuration… option from the
main menu or toolbar to view the default settings.
The configuration form is displayed as a tab notebook composed of four separate tabs
including the Image, Site, Resolution, and Radiation tabs. The Image tab contains all of the
input that describes the geometric distortion and spatial orientation of the digital photograph. All
of the input related to the physical location where the photograph was taken (i.e., geographic
location, slope and aspect, and topographic shading) are found in the Site tab. Input parameters
stored under the Resolution tab are used to determine the detail with which gap fraction and light
transmission data are extracted from the images. Lastly, the Radiation tab contains all of the
numeric input required to compute the amount of above-canopy solar radiation received at the site
over the course of a growing season.
Once you have made changes to some or all of the configuration settings, click OK on
the Configuration Settings form to update all of the input data. If you want to save these settings
for future use, click Save As on the form and enter an appropriate filename (*.SCF) when the
common dialogue box appears. Choose Load Configuration… on the Configure menu to reload
a configuration file that had been previously saved.
Step 4: Image Classification
Image classification involves the separation of pixels within the image array into sky and
non-sky classes using the Threshold… function found under Image on the main menu or on the
toolbar. Image classification is relatively easy when the original photograph has a reasonable
degree of colour contrast between the sky and canopy. Often, however, there is an inadequate
amount of image contrast in certain portions of the photograph. For example, light scattering
around the zenith will sometimes blur the boundary between sky and foliage, and near the horizon
the low light tends to under-represent the number and size of gaps.
Two approaches can be used to improve the classification during image analysis. First, by
splitting a 24-bit colour image into separate RGB planes, it is possible to improve colour contrast
in at least one of the planes. For example, colour contrast sometimes improves in the blue plane,
because a clear sky tends to scatter blue light while a canopy absorbs it. To split a colour image
into its component parts, click on Choose a Colour Plane… under the Image menu or on the
toolbar. A second method is to use the “region of interest” capabilities (inside or outside) and
apply separate threshold values to sensitive regions within the image. To apply a threshold to only
a selected region of the image, click on Select Region under Edit on the main menu or Freehand
Page 11
GLA Version 2.0, Users Manual and Program Documentation 7
on the toolbar. Next, outline the region of interest on the Working Image and then apply an
appropriate threshold value for that selected area.
Step 5: Compute Results
The final step in the image analysis process is to generate output results. There are two
basic ways to do this. First, the user can compute canopy structure data alone (e.g., canopy
openness and effective LAI), or canopy structure and gap light transmission data together using
the Calculate option found on the main menu and toolbar. Results computed using either of these
two settings are displayed on a single form with options available to append the results into a
separate spreadsheet. To append these data to a default spreadsheet, click on the command button
labeled Append. Use the maximize button on the Calculation form (located in the bottom left-
hand corner of the MDI form) to view all of the appended data records. A second way to generate
output is to run any of the seven functions organized under Utilities on the main menu. These are
all stand-alone utilities that may be used to generate bitmaps, graphs, and tabular data.
4.0 NAVIGATING THE MAIN MENU
The main menu in the GLA application is composed of eight separate menu items: File,
Edit, View, Configure, Image, Calculate, Utilities, and Help. Contained within each of these
menu items is another list of program functions. The following information describes all of the
program functions found within the GLA application.
4.1 File Menu
The eleven functions found under the File Menu item are used for file management tasks
such as, opening, saving, and printing files, or exiting the program:
• Open Image… allows the user to open an existing graphics file.
• Save Image… is used to save either the original, registered, or working images. The
application will only save the image from the highlighted image form. Images will be saved
in the default graphics format.
• Save Image As… will save an image to another filename, image format, or colour resolution.
Note: the LEADTools common dialogue has its default colour depth set to 1 bit (2 colours).
To save your image as true colour (24 bit) you must first select this in the Save As Type box
found towards the bottom of the dialogue form.
Page 12
GLA Version 2.0, Users Manual and Program Documentation 8
• New Summary Data… loads an empty spreadsheet into the Calculation Summary Output
Data form, which is found minimized in the lower left-hand corner of the MDI at run time.
An empty spreadsheet is automatically loaded when you first start the program.
• Open Summary Data… is used to reload an existing summary output file (*.SUM), which
contains output data that was previously saved from an earlier session.
• File Info… displays filename, format, and file size information for any one of the highlighted
images. Note: file information will not be returned if the image data only resides in memory.
• Select TWAIN Source… is used to select an appropriate TWAIN-compliant peripheral (e.g.,
film scanner) and TWAIN driver. Once the Select Source dialogue appears, highlight the
required driver and then click on the Select button. Note: this only tells GLA the appropriate
driver to call when you want to scan another photograph. A TWAIN driver must be identified
before you can scan an image.
• Scan Image… can be used to transfer an image directly from a TWAIN-compliant scanner to
the GLA software. This function will only work if the scanner is turned on and connected,
and the appropriate 32-bit TWAIN driver has been identified using the Select TWAIN
Source… function.
• Print Setup… displays the standard Windows print setup options.
• Print… allows the user to scale the size of the image before printing. Clicking OK will send
the print job off to the selected printer.
• Exit is used to terminate the program. You will be prompted to save any unsaved data before
the application closes.
4.2 Edit Menu
Four separate edit functions can be found in the Edit Menu:
• Undo can only be used with the Working Image to undo the last change made. Note: if you
have made a number of changes to the working image and want to get back to the original
unmodified one, the easiest and fastest way is to click on the Register Image in the
Configure menu or on the toolbar.
• Copy will make a bitmap copy of the Registered or Working Image onto the Windows
clipboard.
• Turn Off Region will turn off the region of interest selection on the Working Image.
• Select Region (Free Hand, Ellipse, and Rectangle) can be used to identify a “region of
interest” on the Working Image. Image modification functions (e.g., threshold, colour fill,
Page 13
GLA Version 2.0, Users Manual and Program Documentation 9
etc.) will only work within the selected region. Three different methods can be used to
identify a region: freehand, ellipse, or rectangle.
4.3 View Menu
The eleven program functions located under the View Menu are used to alter the image
display (zooming), overlay a sky-region grid or topographic mask, and return image information
(e.g., pixel position, colour, sky position, etc.):
• Zoom to Point is used to zoom into a selected point on any of the images. To zoom in, click
on the left mouse button. To zoom out click on the right mouse button. Note: the image must
repaint each time the mouse is clicked. Therefore the zoom function will not keep pace with
mouse clicks that are repeated quickly.
• Zoom to Rectangle will zoom the image to a selected rectangular region on the image. To
use this function, select an initial corner of the rectangle by pressing down on the left mouse,
then drag the mouse cursor to the last corner and release.
• Actual Size will set the zoom factor to one and display the Original, Registered, or
Working Image in its true dimensions. When the Original Image is first opened, the display
size of the image is set according to the size of the MDI form. To view an image in its full
size, highlight the image of interest and click on Actual Size.
• Normal will return the Original, Registered, or Working Image to a size relative to the
MDI form. Use this function to return a zoomed or actual size image back to its original
display settings.
• Chain is used to lock the image containers of the Registered and Working Images together,
so that any time you zoom in on one image, the other follows and will display in the exact
same manner. Note: use the scroll bars to pan around the zoomed images. With an MS
IntelliMouse and IntelliPoint software, you can pan around the image by clicking the wheel
button and moving the mouse in the direction of interest.
• Return Projection Coordinates will display the angular coordinates (angle of zenith, angle
of azimuth) of any pixel when the mouse cursor is over the Registered Image. These
coordinate data are displayed in the two left-most panels of the status bar located at the
bottom of the MDI form. When the mouse falls outside the registration circle a value of –1 is
returned for both the angles of zenith and azimuth.
• Overlay Mask allows the user to overlay the topographic mask on the Registered Image. If
a mask has not been specified in the configuration settings, then the Overlay Mask function
Page 14
GLA Version 2.0, Users Manual and Program Documentation 10
will appear disabled in the main menu and on the toolbar. Note: turning the Overlay Mask
function off does not remove the mask from the calculations. To remove the mask from the
calculations, you must turn the mask off in the configuration settings.
• Overlay Sky-Region Grid will let the user overlay a vector grid, which divides the
hemispherical image into discrete azimuth-by-zenith regions based on equal-angular divisions
of the sky. Note: the numbers of azimuth and zenith divisions are defined in the configuration
settings under the Resolution tab.
• Return Pixel Value will return RGB (i.e., red plane, green plane, and blue plane) colour
values for any pixel within the Original, Registered, or Working Images.
• View Histogram will display a two-dimensional graph (number of pixels on the y-axis and
pixel intensity on the x-axis) showing the number of pixels that have a specific intensity value
in any or all of the RGB planes. Note: this function is sometimes useful to help find the best
intensity value that divides the sky and non-sky pixels during the threshold process.
• Count Unique Colours is used to return the number of unique colours contained in the
Original, Registered, or Working Images.
4.4 Configure Menu
Program functions contained within the Configure Menu allow the user to define how each
image will be processed. Two tasks are required before the user can analyze an image. First, the
image must be registered, and second, the configuration settings must be altered before the final
calculations are run. The following functions allow the user to do both:
• Register Image sets the application into registration mode, so that the user can identify two
points on the circular image that define its extent and geographic orientation. These two
points are then used to help convert each pixel contained in the image array into real world
coordinates based on a specific projection transformation (e.g., polar, orthographic, etc.).
These points may be entered graphically using the mouse (press left mouse button down and
drag), or keyed in directly on the Image Registration form found next to the Original
Image. The check box labeled Fix Registration for Next Image, which is located at the
bottom of the Image Registration form, should be checked if you wish to reuse the same
registration points for each image that is opened. Note: check the registration results using the
Overlay Sky-Region Grid and Return Projection Coordinates functions in the View
Menu. The Fix Registration for Next Image option should only be used with images that
have fixed resolutions and registration points (e.g., images captured with a digital camera).
Page 15
GLA Version 2.0, Users Manual and Program Documentation 11
• Load Configuration allows the user to load in a configuration file (*.SCN) that has been
previously saved. The configuration file contains all of the input necessary to run an analysis.
• Edit Configuration displays all of the configuration settings organized into a tab notebook.
There are four individual tabs: Image, Site, Resolution, and Radiation. Click on each of the
individual tabs to view the input organized under each of the headings. If you wish to include
any of your input changes in the current analysis, click on the OK button, or choose Cancel
to ignore any changes. To save your configuration settings to a file, click on the Save As
button.
• Define Default will write your current configuration settings into the Windows System
Registry, so that each time you load the application those same settings will appear. Note:
you should choose a default that reflects your current methods of image capture (for instance,
camera orientation, and lens projection) and the atmospheric conditions for your region.
• Configuration Summary displays a form summarizing all of the current settings in the
configuration. This form is automatically updated every time a change is made to the
configuration settings. Note: you should keep this form minimized on the screen when you
are analyzing a large number images that require many different configuration settings.
4.5 Image Menu
The Image Menu provides a number of image-processing functions, which are similar to the
ones found in most standard graphics application. These functions are used to alter the Working
Image, and are only available after the Original Image has been registered:
• Threshold… will convert the Working Image into a two-colour bitmap composed of black
and white pixels. The “threshold” is a pixel intensity between 0 and 255 that defines the
boundary at which image pixels will become white (represents sky) or black (represents
foliage). For example, at a threshold value of 200, pixel intensities less than or equal to 200
will convert to black, while the remaining pixels become white. Move the slide bar on the
Threshold form to change the intensity value interactively. Note: the image must have a
threshold value assigned before the final calculations can be run. Use the Select Region
function in the Edit Menu to threshold one region of the image different from another.
• Brightness… changes the intensity of the bitmap based on a flat scale.
• Contrast… modifies the contrast of a bitmap by brightening and darkening pixels with
intensity values above and below 128, respectively.
Page 16
GLA Version 2.0, Users Manual and Program Documentation 12
• Hue… changes the hue of colours in the bitmap by rotating the color wheel. This method can
rotate the colour wheel in either direction. A 180-degree rotation in either direction changes
each colour to its complement. Positive rotation changes red toward green, green toward blue,
and blue toward red. Negative rotation has the opposite effect.
• Saturation… increases or decreases the saturation of colours in the bitmap. Negative values
decrease the saturation of colours, while positive values increase them. The saturation level is
increased or decreased by a percentage of its present saturation level. This process is carried
out for every pixel.
• Histogram Contrast… increases or decreases the contrast of the pixels in a bitmap, using a
histogram to determine the median brightness. Pixel intensities above the median brightness
value are increased, while those below the median are darkened.
• Gamma Correct… adjusts the intensity of colours in the bitmap by changing the gamma
constant that is used to map the intensities.
• Sharpen… increases or decreases the sharpness of the image in the bitmap. Negative values
decrease the sharpness of the image, while positive values increase the sharpness.
• Emboss… is purely an aesthetic effect that allows you to better see the spatial arrangement
and size of the canopy gaps.
• Choose a Colour Plane… will allow the user to split a true-colour (24-bit) bitmap into
individual RGB planes. Certain colour planes will improve image contrast depending on the
film type, lens filter, species composition of the canopy, and sky conditions at the time of
exposure.
• Colour Fill will fill the entire Working Image or only a select region of it using the current
default colour defined in the Colour Palette.
• Draw sets the application into draw mode. The mouse cursor will change to a pen icon when
the cursor is placed over the Working Image. Note: the fill colour will be white or black on
an image that has been modified using the Threshold function.
• Colour Palette… displays a standard colour palette. Click on any colour to change the
default colour settings.
• Fill Area allows the user to define whether the area Inside or Outside the “region of
interest” is affected by any of the image modification functions. Note: the default is set to the
Inside option.
• Draw Width is used to set the thickness of the Draw function to Thin, Medium, or
Thick.
Page 17
GLA Version 2.0, Users Manual and Program Documentation 13
4.6 Calculate Menu
There is only one program function contained under the Calculate Menu:
• Run Calculations… allows the user to run two separate combinations of calculations. These
combinations are labeled Canopy Structure and Canopy Structure and Transmitted Gap
Light. The first option, Canopy Structure, will compute six different attributes: % Sky
Area, % Mask Area, % Canopy Openness, % Site Openness, LAI (4 Ring), and LAI (5
Ring). The second option, Canopy Structure and Transmitted Gap Light, will compute
each of the six attributes above, as well as 15 others that describe the amount of radiation
transmitted by a forest canopy; these are: the Beam Radiation Tilt Factor (RB), Diffuse
Radiation Tilt Factor (RD), Total Shortwave Extraterrestrial Radiation (Extra), the amount
of direct (Above Direct), diffuse (Above Diffuse), and total (Above Total) radiation incident
on a tilted or horizontal surface without any obstruction from the surrounding topography or
canopy foliage; the amount of transmitted direct (Above Direct Mask), diffuse (Above
Diffuse Mask), and total (Above Total Mask) radiation incident on a tilted or horizontal
surface when there is blockage of light from the surrounding topography; the amount of
transmitted direct (Transmitted Direct), diffuse (Transmitted Diffuse), and total
(Transmitted Total) radiation incident on a tilted or horizontal surface when there is
blockage of light from the surrounding topography and overlying forest canopy;
% Transmitted Direct, % Transmitted Diffuse, and % Transmitted Total. An option at
the bottom of the Calculations form labeled Log Details to File allows the user to create a
text file (semi-colon delimited) containing all of these attribute data for each sky region, for
each month (if input data are specified monthly), and for the complete growing season.
4.7 Utilities Menu
Within the Utilities Menu are seven program functions that allow the user to run a number of
utilities. Although these utilities are considered stand alone, each function relies on selected input
data stored in the configuration settings (e.g., site location, sky-region distribution, etc.):
• Compute Extraterrestrial Radiation… lets the user compute total daily or monthly mean
daily extraterrestrial solar radiation data in W/m2 or MJ/m2/d for the period of the growing
season. These data are output graphically, but may be saved into a delimited text file by
clicking on the Save As button. Note: this utility is useful for computing daily or monthly
mean daily Cloudiness Index (Kt) data when empirical global (total shortwave) radiation data
are available for a given region.
Page 18
GLA Version 2.0, Users Manual and Program Documentation 14
• Plot Sunpath… is a utility used to plot the position of the sun for each solar time step (in
minutes) during the growing season. The intensity of the dot marking each solar position is a
function of the sun’s brightness. Note: the image is a resized copy of the Registered Image.
If you want to add more spatial information to the sunpath bitmap, overlay the sky-region
grid and topographic mask before you click on the Plot Sunpath.
• Display Sky-Region Brightness… allows the user to create a bitmap that describes the
direct- and diffuse-brightness weightings assigned to each sky region. The brightness or
intensity of each sky region is a function of the geometrical relationships between the earth
and sun, and the diffuse-skylight distribution, relative area, and incidence angle for each sky
region.
• Plot Gap Fractions… extracts gap fraction (unweighted pixel counts) and openness (sine
weighted) data and plots them as a function of zenith angle. Both the gap fraction (ratio of
sky pixels to total pixels per sky-region segment) and openness data are expressed as
fractions, so that they can be plotted on the same graph. Openness however, is most often
expressed as a percentage (i.e., % canopy openness). Note: if you export a delimited file from
this utility you should convert the openness data to percentage openness by multiplying by
100 percent.
• Plot Solar Irradiance…will compute the amount of total (default), direct, and diffuse solar
radiation incident above and below the forest canopy as a function of zenith angle. After you
have run the function using the Calculate button, click on the three radio buttons at the top of
the Plot Solar Irradiance form to toggle between the different data sets. The Save As button
can be used to export the data as a delimited text file. Note: to change the resolution of the
graphical output, use the Edit Configuration (Resolution Tab) function to increase the
number of zenith regions.
• Plot Sunfleck Distribution… may be used to plot either sunfleck-frequency or daily
sunfleck-duration data. A sunfleck may be defined as the brief period for which a point on the
on the forest floor experiences direct sunlight. Over the course of a day, a site may experience
numerous sunflecks of variable length and intensity depending on the distribution and size of
canopy gaps. Sunfleck-frequency distribution, therefore, describes the frequency (number) of
sunflecks of a specific duration (measured in minutes) that a site could potentially experience
between the beginning and end dates of the growing season. Sunfleck duration, on the other
hand, describes the number of minutes of potential direct sun that a site could see over the
course of a day for each day of the growing season. Use the radio buttons at the top of the
form to toggle between these two different data sets. Note: to change the resolution of the
Page 19
GLA Version 2.0, Users Manual and Program Documentation 15
sunfleck data, use the Solar Time Step (in Minutes) setting under the Resolution tab of the
configuration notebook.
• Calculate Equal-Area Gap Fractions… will extract gap fraction and openness data from
images based on equal intervals of the cosine of the zenith angle. This method produces sky-
regions that have equal sky-area weightings.
5.0 UNDERSTANDING THE CONFIGURATION SETTINGS
All of the configuration settings necessary to successfully run the GLA application were
loaded into the Windows System Registry when the software was installed. These default settings
can be viewed by clicking on the Edit Configuration function located in the Configure Menu or
on the toolbar. However, before new images may be processed, the user must modify these
configuration settings to reflect the photographic equipment, field methods, location, and
atmospheric conditions associated with these new images. Although many of the settings are
straightforward and require very little explanation, some are more difficult to understand and
require some guidance. The following is a description of the input data found within the Image,
Site, Resolution, and Radiation tabs of the configuration notebook.
5.1 Image Tab
• Initial Cursor Point is the first point that the user identifies on the image during the
registration phase. This point is defined as one of four cardinal directions (e.g., north
(default), south, east, or west). Use the two radio buttons labeled Geographic North and
Magnetic North to identify whether the Initial Cursor Point corresponds to a geographic
meridian or a local magnetic meridian. For example, if the camera was aligned using a
compass that was not corrected for the local magnetic declination, then the radio button
marked Magnetic North should be checked and the appropriate magnetic declination entered
into the text boxes located next to it. Note: to determine the local magnetic declination for
any position on the globe, see http://www.geolab.nrcan.gc.ca/geomag/e_magdec.html.
• Projection Distortion settings define the way in which objects located in the hemispherical
object region are projected to points on the image plane. Four standard lens projections are
available in GLA: Polar, Orthographic, Lambert’s, and Stereographic (see Herbert 1987
for definitions). Note: check the manufacturer’s specifications to determine which projection
the camera lens should conform too.
Page 20
GLA Version 2.0, Users Manual and Program Documentation 16
• User-Defined projections are custom fisheye lens distortions that are manufacturer specific.
For example, the Nikkor 8-mm f/2.8 fisheye lens is manufactured to produce a standard polar
projection, but calibration data show that this lens deviates slightly from this geometric
pattern (Herbert 1987, Frazer et al. 1997). To define a custom lens distortion, first, click on
the Custom command button. Second, when the Custom Projection Transformation form
displays, click on the New button. Third, enter the name of the new lens in the Current Lens
Name text box. Fourth, enter your calibration points in the data grid (i.e., angular position in
the hemispherical object region versus the corresponding radial measure on the image plane –
see Nikkor data as an example). A linear interpolation is used to estimate the location of
objects between known points. Therefore, you must make sure that you enter an adequate
number of calibration points. Make sure also, that the last point entered is 90 degrees. Fifth,
press the View button at the bottom of the form to display the projection. Finally, press OK
to save the custom projection to the Windows system registry. Note: the Import and Export
buttons allow GLA users to exchange custom lens projection files (*.LNS) electronically.
5.2 Site Tab
• Location represents the position where the hemispherical photograph was taken, and is
entered as geographic coordinates in degrees, minutes, and seconds. The suffix north/south
for Latitude and east/west for Longitude defines the appropriate hemisphere in which the
geographic coordinates are found. The Elevation of the site is entered as metres above mean
sea level. Currently, GLA only makes use of the Latitude and Elevation, and therefore
Longitude is an optional input.
• Orientation is used to define the general slope and aspect of the site. Horizontal surfaces are
flat lying and typically found at valley bottoms or on plateaus in mountainous terrain.
Inclined sites have a Slope (degree of tilt) and Aspect (direction of tilt), measured in degrees,
and are generally found on mountain- and valley-side slopes. Micro-topography should be
ignored when considering these measurements in the field.
• Topographic Shading occurs when the surrounding terrain obstructs sun- and skylight
radiating from selected regions of the sky. In mountainous areas, incident solar radiation is
influenced not only by surface orientation but also by a reduced view of the sky hemisphere.
Ridgelines will therefore create an “effective” horizon that is reduced from the 90 degrees
characteristic of a flat site. In GLA, we call this topographic shading, and the angular
coordinates describing the position of the surrounding topography are called the topographic
Page 21
GLA Version 2.0, Users Manual and Program Documentation 17
mask. These data can be acquired manually in the field using a compass and clinometer, or
automatically from a digital elevation model (DEM) using a geographic information system
(GIS). To enter, edit, or view a topographic mask, click on the checkbox labeled Use
Topographic Mask Data and then click on the Edit… command button. To create a new
mask, click on Add Row as many times as there are points in your dataset. Once you have
enough rows, begin to enter your data. Azimuth is the geographic bearing of the data point,
and Zenith is the angular distance between the local zenith and the top of the ridgeline. A
bearing of 0o is valid but the duplicate azimuth of 360o is not. Click View to display the data
and OK to use the mask only for the session that you have GLA running. To save the mask
data, choose Export and save these data to a file. Use Import to load already existing mask
data.
5.3 Resolution Tab
• Solar Time Step (measured in minutes) describes the time interval for which the sun’s
position will be measured between sunrise and sunset for the full length of the growing
season. For example, a 2-minute time step causes the CGACalc module to compute the solar
position every 2 minutes between sunrise and sunset. Note: because GLA computes the
amount of beam radiation transmitted at each time step, it is best to use a smaller (< 5
minutes) time step value. Also, the resolution of the sunfleck data is affected by the solar time
step, so make sure that this input parameter is properly set before running the Plot Sunfleck
Distribution utility.
• Growing Season Start and Growing Season End define the starting and ending dates of the
growing season. These dates affect the range in the solar declination for the period of interest.
Note: to compute data for a single day, set the end date equal to the start date.
• Sky Regions are discrete areas of the sky hemisphere separated by equal-interval divisions of
azimuth and zenith. In an effort to model diffuse-light transmission, GLA breaks the sky
hemisphere into a finite number of discrete sky regions. Increasing the number of these sky
regions should, in theory, improve the quality of the gap light transmission results. Note:
when you increase the sky regions to a very large number, data generated by the Calculate
Equal-Area Gap Fractions utility takes a very long time to load due to limitations with the
control.
Page 22
GLA Version 2.0, Users Manual and Program Documentation 18
5.4 Radiation Tab
• Data Source tells the application how to derive monthly or growing season above-canopy
solar radiation data. Two possible sources may be specified: Modelled, or User-Defined. The
Modelled option tells the application that it should compute the appropriate above-canopy
estimates using the region-specific parameters displayed in the Model Parameters frame. If
the above-canopy solar radiation data are already known, then the user can choose the User-
Defined option instead, and enter these data directly within the User Defined frame.
• Modelled data are calculated using five different input parameters. The first parameter is the
Solar Constant, which is measured in W/m2. The solar constant is the total radiant flux of
the sun on a perpendicular surface located outside the earth’s atmosphere at the mean
distance of 1 astronomical unit (see Gates 1980, Iqbal 1983). This value is anything but
constant in the research literature, and will vary from 1350 to 1370 W/m2. The default solar
constant is set to 1367 W/m2 and should not require modification.
• Cloudiness Index (also known as Kt) is a site-specific measure of cloudiness. Kt can be
estimated for any time period (e.g., hourly, daily, or monthly, etc.) as the fraction of
extraterrestrial radiation that reaches the ground surface as total solar radiation (0.25 µm to
25.0 µm) for the specified period. For example, a Kt value of 0.5 tells us that exactly one-half
of the extraterrestrial radiation incident on a horizontal surface outside the earth’s atmosphere
would reach the ground as total solar radiation over the specified period. The default Kt value
has been set to 0.5, which is adequate to describe the annual cloudiness index for many parts
of North America. Keep in mind however, that certain regions, such as coastal British
Columbia, have significant seasonal shifts in cloudiness. Kt data constructed for southern
Vancouver Island, for example, indicate that mean monthly Kt values generally range from
0.55 to 0.65 during the clear months of July through September to a low of 0.25 to 0.35 in the
rainy period that stretches from mid-October to mid-March. Interestingly enough, these
maximum Kt values occur when the solar path is coincident with the greatest amount of
openness in coastal forests of southern Vancouver Island (i.e., 25 to 40o from the zenith). In
these situations, it is important to specify Kt by the month, otherwise the transmitted
irradiance values will be under- or overestimated for regions with distinct seasonal
differences in cloudiness (see section on How to Compute Region-Specific Model
Parameters for more information).
Page 23
GLA Version 2.0, Users Manual and Program Documentation 19
• Spectral Fraction is the fraction of global solar radiation (0.25 µm to 25.0 µm) incident on a
horizontal surface at the ground that falls within a limited range of the electromagnetic
spectrum. For example, the photosynthetically active (PAR) or visible wavelengths (400 to
700 nm) will, over the course of a year, account for approximately 45 percent of total
shortwave radiation incident on a horizontal surface (see Papaioannou et al. 1996). The
default setting for the growing-season spectral fraction has therefore been set to 0.45. Keep in
mind however, that the spectral fraction is also a function of cloud cover (Kt). Mean daily
PAR and total shortwave radiation data collected at a site on southern Vancouver Island
indicate that the ratio of PAR to total shortwave radiation (Rp/Rs) tends to remain relatively
stable for Kt values greater than 0.5 (Spectral Fraction = 0.43); however, as the cloud cover
increases and Kt falls below 0.5, there is an exponential increase in the Rp/Rs ratio (i.e.,
Spectral Fraction = 0.70 at Kt = 0.05), (see section on How to Compute Region-Specific
Model Parameters for more information).
• Units refers to the units of measure used to compute the incident radiant flux density data
output by the application. The default Units has been set for the incident photon flux density
of PAR (mols/m2/d). Note: if you are interested in transmitted PAR, set the growing-season
Spectral Fraction to 0.45 and the output Units to mols/m2/d. If you are interested in
transmitted total shortwave radiation, set the Spectral Fraction to 1.0 and the Units of
measure to MJ/m2/d.
• Beam Fraction is the ratio of direct (beam) to total (global) spectral radiation incident on a
horizontal surface at the ground over a specified period (e.g., hourly, daily, monthly, etc.).
This ratio is largely a function of cloud cover when the beam fraction is computed for periods
longer than a day. For example, when the sky is perfectly clear (no clouds) between sunrise
and sunset, approximately 85 to 90 percent of the incident total daily solar radiation is
received as direct or beam radiation. In contrast, under heavy cloud cover, all of the incident
total daily solar radiation will be in the form of diffuse radiation. For most regions of North
America, the beam fraction will be approximately 0.5, when computed for the entire year. In
climatic regions that experience significant seasonal shifts in cloud cover (e.g., coastal BC),
the beam fraction should be approximated for each month (see section on How to Compute
Region-Specific Model Parameters for more information).
• Use Input Data Specified by Month (Model Parameters) is a data grid used to enter the
monthly model parameters (i.e., Cloudiness Index (Kt), Beam Fraction, Spectral
Fraction). Note: input data are only required for the months that comprise the growing
season. Input data related to months outside the growing season are ignored.
Page 24
GLA Version 2.0, Users Manual and Program Documentation 20
• User Defined are above-canopy solar radiation data entered by the user. These data may be
obtained from solar radiation sensors (e.g., pyranometers or quantum sensors) or other more
sophisticated predictive models. Both Above-Canopy Direct and Below-Canopy Diffuse
data are required. Note: the application will assume that the user-defined data entered are
unaffected by topographic shading effects (i.e., the data have been collected at the tops of
ridges and not within narrow valley bottoms). If the empirical solar radiation data are strongly
influenced by topography, do not use a Topographic Mask in the analyses, since the
transmitted portions will be further underestimated. Also, enter a tilted site orientation only if
the above-canopy data reflects a similar alignment.
• Use Input Data Specified by Month (User Defined) allows the user to enter monthly mean
daily Above-Canopy Direct and Above-Canopy Diffuse user-defined data for individual
months of the growing season. Note: input data are only required for the months that
comprise the growing season. Input data related to months outside the growing season are
ignored.
• Sky-Region Brightness settings are used to describe the intensity of the solar disk and the
diffuse sky. Two standard models are used in this application to describe the intensity of a
diffuse sky: the Universal Overcast Sky (UOC), and the Standard Overcast Sky (SOC) (see
Hutchison et al. 1980). The UOC model considers all regions of the sky hemisphere to be
equally as bright, while the SOC assumes that the zenith is three times as bright as the
horizon. Note: the bitmap displayed on the form shows the spatial distribution of sky-region
intensity or brightness as a function of sky-region area and incidence angle. Use the Display
Sky-Region Brightness utility to look at the distribution when the receiving surface has been
tilted.
• Clear-Sky Transmission Coefficient is a factor that describes the regional clarity of the
atmosphere with respect to the instantaneous transmission of direct (beam) radiation. This
clear-sky coefficient will vary with geographic location and elevation, and will range from
0.4 to 0.8 (see Gates 1980). For most dust-free regions, including North America, this
coefficient will typically fall somewhere between 0.6 and 0.7. Black et al. (1991) estimated
the Clear-Sky Transmission Coefficient to be 0.65 on Vancouver Island, British Columbia.
Page 25
GLA Version 2.0, Users Manual and Program Documentation 21
6.0 HOW TO GENERATE AND INTERPRET OUTPUT RESULTS
A user may generate output from the application using either the Calculate Menu or the
Utilities Menu. The Calculate Menu allows the user to compute canopy openness, effective
LAI, and percentage light transmission. The Utilities Menu offers seven different program
functions, which are used to graph, plot, and display openness and solar radiation data (see
Utilities Menu under the Navigating the Main Menu section).
6.1 Calculation Report (Summary)
As many as twenty-two attributes will be displayed on the Calculation Report Summary
form when the Run Calculations command under the Calculate Menu is selected by the user.
Only the first 6 of these 22 attributes are displayed if the Canopy Structure option on the Run
Calculations form is checked. The report is divided into three sections: openness, effective LAI
(4 and 5 ring integrations), and above- and below-canopy irradiances. The following is a
description of each computed parameter:
• % Sky Area is the percent area of the sky hemisphere found above the effective horizon. If
the effective horizon is at 90o (i.e., no topographic mask), then % Sky Area will equal 100
percent. However, if the effective horizon is less than 90o, then the area of visible sky will be
less than 100 percent.
• % Mask Area is the percent area of the sky hemisphere that is obstructed by the surrounding
topography.
• % Canopy Openness is the percentage of open sky seen from beneath a forest canopy. This
measure is computed from the hemispherical photograph only, and does not take into account
the influence of the surrounding topography.
• % Site Openness is the percentage of open sky seen from beneath a forest canopy given the
additional influence of an effective horizon that is less than 90o (topographic shading).
• LAI 4 Ring is the effective leaf area index integrated over the zenith angles 0 to 60o (see
Stenberg et al. 1994).
• LAI 5 Ring is the effective leaf area index integrated over the zenith angle 0 to 75o (see
Welles and Norman 1991).
• Units is the unit of measure used to represent solar irradiance estimates for above and below
the forest canopy.
• RB is the beam tilt factor computed for an arbitrarily tilted surface (Iqbal 1983).
• RD is the diffuse tilt factor computed for an arbitrarily tilted surface (Iqbal 1983).
Page 26
GLA Version 2.0, Users Manual and Program Documentation 22
• Above Direct is the amount of direct (beam) radiation incident on a horizontal or tilted
surface located at the earth surface without any effect of topography or forest canopy.
• Above Diffuse is the amount of diffuse radiation incident on a horizontal or tilted surface
located at the earth surface without any effect of topography or forest canopy.
• Above Total is the sum of the Above Direct and Above Diffuse.
• Above Direct Mask is the amount of direct radiation incident on a horizontal or tilted surface
taking into account the effect of a topographic mask.
• Above Diffuse Mask is the amount of diffuse radiation incident on a horizontal or tilted
surface taking into account the effect of a topographic mask.
• Above Total Mask is the sum of Above Direct Mask and Above Diffuse Mask.
• Trans Direct is the amount of direct solar radiation transmitted by the canopy and
topographic mask (if one has been defined).
• Trans Diffuse is the amount of diffuse solar radiation transmitted by the canopy and
topographic mask (if one has been defined).
• Trans Total is the sum of Trans Direct and Trans Diffuse.
• % Trans Direct is the ratio of Trans Direct to Above Direct Mask multiplied by 100%.
• % Trans Diffuse is the ratio of Trans Diffuse to Above Diffuse Mask multiplied by 100%.
• % Trans Total is the ratio of Trans Total to Above Total Mask multiplied by 100%.
6.2 Calculation Report (Detailed)
The application can also generate a detailed report that shows much of the same information
displayed in the Calculation Report Summary; however, the information in the detailed report
is output on a sky region basis. This report will also include monthly information per sky region if
monthly input data are used in the configuration settings. To output a detailed report, place a
check in the box labeled Log Details to File… found at the bottom of the Run Calculations
form. The following is a list of the column definitions for the detailed output file:
• Month (Column 1) is the month number ranging from 1 to 12. The month number All refers
to the entire growing-season. If monthly input data were not provided in the configuration
settings, then individual month data will not be presented in the detailed output file.
• Alt Bin (Column 2) identifies the index value of the sky-region altitude bin. The index
increases as the angle of altitude increases from a minimum at 0o and a maximum at 90o.
Page 27
GLA Version 2.0, Users Manual and Program Documentation 23
• Azi Bin (Column 3) identifies the index value of sky-region azimuth bin. The index increases
as the angle of azimuth increases from a minimum at 0o and a maximum at 360o.
• Altitude (Column 4) is the mid-point angle of the sky-region. Altitude angle is the angular
distance measured from the horizon (zenith is the angular distance measured from the zenith).
• Azimuth (Column 5) is the mid-point angle of the sky region. Azimuth is the angular
distance measured clockwise from geographic north. Note: remember that east and west are
reversed on the fisheye photograph since the camera is looking skyward.
• Sky Sky Pixels (Column 6) is the number of overlapping pixels within a sky region, which
are open on the photograph and open on the topographic mask.
• Sky Top Pixels (Column 7) is the number of overlapping pixels within a sky region, which
are open on the photograph but closed on the topographic mask. Note: this field will always
be equal to 0 if a mask has not been used in the analysis.
• Fol Top Pixels (Column 8) is the number of overlapping pixels within a sky region, which
are closed on the photograph and closed on the topographic mask. Note: this field will always
be equal to 0 if a mask has not been used in the analysis.
• Fol Sky Pixels (Column 9) is the number of overlapping pixels within a sky region, which
are closed on the photograph but open on the topographic mask.
• Total Pixels (Column 10) is the total number of pixels contained in a sky region.
• Sky Area (Column 11) is the fraction of sky contained in each sky region that is not blocked
by the surrounding topography. Note: this measure is not to be confused with canopy
openness.
• Mask Area (Column 12) is the fraction of sky contained in each sky region that is blocked by
the surrounding topography. Note: if the Mask Area is greater than 0, Sky Area will be less
than 1.
• Total Area (Column 13) is the fraction of the sky hemisphere contained in each sky region.
• Gap Can Diffuse (Column 14) is the fraction of pixels in each sky region that are open
(white) on the fisheye photograph.
• Gap Topo Diffuse (Column 15) is the fraction of pixels in each sky region that are open
(white) on the topographic mask.
• Gap Both Diffuse (Column 16) is the fraction of overlapping pixels in each sky region that is
open (white) on both the topographic mask and the fisheye photograph.
• Gap Can Direct (Column 17) is the fraction of the total monthly or growing-season relative
beam intensity weightings found within canopy gaps in each sky region. Note: some sky
Page 28
GLA Version 2.0, Users Manual and Program Documentation 24
regions will have a Gap Can Direct value equal to 1 even though the sun’s path does not
pass through that part of the sky. This happens because the variable array holding these data
have been initialize using a value of 1 to avoid division by zero.
• Gap Topo Direct (Column 18) is the fraction of the total monthly or growing-season relative
beam intensity weightings, which is not blocked by the topographic mask in each sky region.
Note: some sky regions will have a Gap Topo Direct value equal to 1 even though the sun’s
path does not pass through that part of the sky. This happens because the variable array
holding these data have been initialize using a value of 1 to avoid division by zero.
• Gap Both Direct (Column 19) is the fraction of the total monthly or growing-season relative
beam intensity weightings found within overlapping gaps in the canopy and topographic
mask for each sky region. Note: some sky regions will have a Gap Both Direct value equal
to 1 even though the sun’s path does not pass through that part of the sky. This happens
because the variable array holding these data have been initialize using a value of 1 to avoid
division by zero.
• Canopy Openness (Column 20) is the percentage of the total sky area that is found in canopy
gaps for each sky region. Note: These are the Gap Can Diffuse data weighted by
hemispherical area and multiplied by 100%. Summing the All month data across all sky
regions is the percentage canopy openness for the site.
• Site Openness (Column 21) is the percentage of the total sky area that is found in
overlapping gaps in the canopy and mask for each sky region. Note: These are the Gap Both
Diffuse data weighted by hemispherical area and multiplied by 100%. Summing the All
month data across all sky regions is the percentage site openness for the site.
• Id_UOC (Column 22) is the monthly and or growing-season diffuse intensity weightings for
each sky region calculated according to the Universal Overcast Sky model (UOC). Note:
individual month weightings summed across all sky regions must equal 1.
• Id_SOC (Column 23) is the monthly and or growing-season diffuse intensity weightings for
each sky region calculated according to the Standard Overcast Sky model (SOC). Note:
individual month weightings summed across all sky regions must equal 1.
• Above Direct (Column 24) is the absolute amount (in mol/m2/d or MJ/m2/d) of monthly
and/or growing-season direct (beam) radiation found above the canopy that is contributed by
each sky region. This measure excludes the effect of topography and assumes that the
effective horizon is equal to 90o.
• Above Diffuse (Column 25) is the absolute amount (in mol/m2/d or MJ/m2/d) of monthly
and/or growing-season diffuse radiation found above the canopy that is contributed by each
Page 29
GLA Version 2.0, Users Manual and Program Documentation 25
sky region. This measure excludes the effect of topography and assumes that the effective
horizon is equal to 90o.
• Above Total (Column 26) is the absolute amount (in mol/m2/d or MJ/m2/d) of monthly
and/or growing-season total (direct plus diffuse) radiation found above the canopy that is
contributed by each sky region. This measure excludes the effect of topography and assumes
that the effective horizon is equal to 90o.
• Mask Direct (Column 27) is the absolute amount (in mol/m2/d or MJ/m2/d) of monthly
and/or growing-season direct (beam) radiation found above the canopy that is contributed by
each sky region. This measure includes the effect of topography if a mask has been
introduced. If a mask has not been defined, then Mask Direct will equal Above Direct.
• Mask Diffuse (Column 28) is the absolute amount (in mol/m2/d or MJ/m2/d) of monthly
and/or growing-season diffuse radiation found above the canopy that is contributed by each
sky region. This measure includes the effect of topography if a mask has been introduced. If a
mask has not been defined, then Mask Diffuse will equal Above Diffuse.
• Mask Total (Column 29) is the absolute amount (in mol/m2/d or MJ/m2/d) of monthly and/or
growing-season total (direct plus diffuse) radiation found above the canopy that is contributed
by each sky region. This measure includes the effect of topography if a mask has been
introduced. If a mask has not been defined, then Mask Total will equal Above Total.
• Trans Direct (Column 30) is the absolute amount (in mol/m2/d or MJ/m2/d) of monthly
and/or growing-season direct (beam) radiation found below the canopy and topographic mask
that is contributed by each sky region. Note: Trans Direct is equal to Mask Direct
multiplied by Gap Both Direct.
• Trans Diffuse is the absolute amount (in mol/m2/d or MJ/m2/d) of monthly and/or growing-
season diffuse radiation found below the canopy and topographic mask that is contributed by
each sky region. Note: Trans Diffuse is equal to Mask Diffuse multiplied by Gap Both
Diffuse.
• Trans Total is the absolute amount (in mol/m2/d or MJ/m2/d) of monthly and/or growing-
season total (direct plus diffuse) radiation found below the canopy and topographic mask that
is contributed by each sky region.
Page 30
GLA Version 2.0, Users Manual and Program Documentation 26
7.0 HOW DOES GLA COMPARE TO GLI/C?
The basic gap light transmission model in GLA is very similar to the gap light index (GLI)
used in GLI/C (see Canham 1988). There are however, a few differences that should be
identified. First, the user should remember that there are many ways to alter the way in which
GLA will compute the percentage of incident direct and diffuse radiation transmitted through
gaps. For example, a user may change the solar time step, the sky-brightness model, the
inclination angle of the receiving surface, or they may add a different projection distortion model,
or introduce a topographic mask. Any or all of these changes will impact on the degree of
similarity between the estimates produced by these two applications. For the nearest
approximation of GLI, set the GLA configurations settings to: 1) polar projection distortion, 2)
horizontal site orientation, 3) no topographic mask, 4) 2- or 3-minute solar time step, 5) use the
modelled data source with growing-season parameters, 6) use a UOC sky-brightness model, and
7) make sure that the beam fraction, clear-sky transmission coefficient, and number of sky
regions are set the same in both applications.
A second difference between GLA and GLI is the way in which each of these two models
computes transmitted direct (beam) radiation. Both programs use the same basic algorithm to
compute the relative intensity of the sun at any instance of time (see Spencer 1971, Gates 1980,
Iqbal 1983, Michalsky 1988). Although, a more recent approximation of the relative optical
airmass has been introduced in GLA (see Kasten and Young 1989). More significant, however, is
the way in which GLA estimates beam transmission through gaps. In GLA, the program
computes a solar position and relative intensity weighting for each solar time step, and at each of
these positions along the sun’s path also checks to see if the underlying pixel is opened or closed.
The ratio of the sum of the relative beam weightings found in gaps to the total relative beam
weightings for the entire sky hemisphere is used as a measure of percentage beam transmission.
GLI works in much the same way, except that the sum of the relative beam weighting found in
gaps is estimated as the sum of the relative beam weightings per sky region multiplied by the gap
fraction per sky region. This solution works well in all sky regions where the sun moves across all
parts it. An exception to this rule, however, can occur at the minimum and maximum solar
declinations when the sun may visit only a limited portion of a sky region. In this case, the GLI
percentage beam transmission estimates might be slightly greater than ones produced by GLA.
Increasing the number of sky regions in GLI should minimize any of this difference.
Page 31
GLA Version 2.0, Users Manual and Program Documentation 27
A third difference between the two programs is a change in the gap light index
nomenclature. In GLA, the relative gap light index is composed of percent-transmitted direct,
diffuse, and total solar radiation. These three output variables correspond directly to the % Beam,
% Diffuse, and % Global calculated by GLI. We changed the name from global to total, largely
because in mountainous areas, canopy gaps may transmit a significant amount solar radiation
reflected from the surrounding hillslopes. Since this form of gap light is completely ignored by
GLA, we have used the term “total” to denote the sum of only the direct and diffuse components
of gap light.
8.0 HOW TO COMPUTE REGION-SPECIFIC MODELPARAMETERS
GLA requires three different input parameters to estimate monthly mean daily or growing-
season mean daily estimates of above-canopy solar radiation: i.e., the Cloudiness Index (Kt),
Spectral Fraction, and the Beam Fraction. All of these parameters are region specific and can be
estimated from empirical meteorological data. In Canada, meteorological stations that monitor
incoming solar radiation are particularly sparse, both in their years of recorded data and
geographic distribution. Even more rare is the measurement of diffuse and photosynthetically
active radiation (400 to 700 nm). Deriving reliable parameter estimates for certain parts of
British Columbia and Canada may therefore be a difficult task. The following is a guideline for
constructing daily, monthly, and growing-season input parameters.
8.1 Cloudiness Index (Kt)
For any given time period, Kt can be computed as the ratio of global radiation incident on a
horizontal surface at the ground to the amount of extraterrestrial radiation incident on a horizontal
surface outside the earth’s atmosphere (Lui and Jordan 1960, Iqbal 1983):
oHHKt =
Where H is the amount of global radiation incident at the ground, and Ho is amount of
extraterrestrial radiation incident on a horizontal surface outside the earth’s atmosphere. Both
estimates must share the same units of measure and integration period (e.g., daily, monthly, etc.).
Global radiation data can be obtained directly from available solar radiation measurements or
estimated indirectly using the number of sunshine hours per day (Iqbal 1983). Total daily or
Page 32
GLA Version 2.0, Users Manual and Program Documentation 28
monthly mean daily extraterrestrial data (in W/m2 or MJ/m2/d) can be calculated using the
Compute Extraterrestrial Radiation in the Utilities Menu of GLA.
Total daily global radiation data collected at the Sooke Lake Dam on southern Vancouver
Island by the Greater Victoria Capital Regional District (CRD) and total daily extraterrestrial
insolation data estimated by GLA were used to construct daily Kt estimates for the period of
February 1998 to December 1998 (Figure 2). These data show two interesting patterns. First, Kt
varies significantly from day to day. For example, on clear days Kt reaches a maximum of
approximately 0.8, indicating that 80% of the mean daily extraterrestrial radiation incident on a
horizontal surface outside the atmosphere arrived at the ground as global solar radiation. In
contrast, daily Kt will be less than 0.1 on extremely overcast days. Second, there is a significant
seasonal pattern within the daily Kt data, which indicates that summers on the coast tend to be
mostly sunny and clear (monthly Kt averages 0.55 to 0.65), while winters are cloudy and rainy
(monthly Kt averages 0.25 to 0.35) (Figure 3).
Figure 2. Daily Kt data calculated for a site located at Sooke Lake, Vancouver
Island, British Columbia. Daily global solar radiation data were collected at a permanent
meteorological station operated by the Greater Victoria Capital Regional District (CRD).
Extraterrestrial insolation data were predicted using the GLA software program.
Page 33
GLA Version 2.0, Users Manual and Program Documentation 29
Figure 3. Box-and-whisker plot showing the distribution of daily Kt estimates
(collected at the Sooke Lake, BC) aggregated by individual months. Mean monthly Kt
estimates reach their maximum by late summer (July to September) when sky conditions
are generally clear, while cloudy late-fall and early-winter months (October to February)
show a significant decrease in Kt.
For regions that do not show significant shifts in seasonal cloudiness, it is unnecessary to
enter monthly Kt estimates into the GLA gap light model. However, for regions such as
Vancouver Island that do experience these distinct seasonal differences, it is advisable to compute
Kt on a monthly basis. To calculate monthly Kt values, divide the mean daily global radiation for
the month of interest by the mean daily extraterrestrial insolation for that same month.
8.2 Spectral Fraction (Rp/Rs)
The spectral fraction is the ratio of solar energy found in a limited part of the
electromagnetic spectrum to the total shortwave (broadband) radiation (Rs) contributed by all
wavelengths (0.25 µm to 25 µm). Photosynthetically active radiation (PAR), for example, is part
of the visible waveband between 400 and 700 nm (Rp). The ratio Rp/Rs computed for a single day
tells us the fraction of total daily global radiation incident on a horizontal surface that will be
received as PAR. The Rp/Rs ratio can be measured directly using a pyranometer and quantum
Page 34
GLA Version 2.0, Users Manual and Program Documentation 30
sensor mounted side by side. PAR and total shortwave radiation data collected at a
meteorological station located at Sooke Lake on southern Vancouver Island, indicate that the
daily Rp/Rs ratio remains fairly stable throughout most of the year averaging approximately 0.45
(Figure 4). A summary of published Rp/Rs data compiled by Papaioannou et al. (1996) for
different sites around the world indicate that this ratio averages 0.44 to 0.47 with slightly higher
averages reported for cloudy day observations (i.e., 0.483 to 0.69).
Figure 4. The ratio of PAR to total shortwave radiation (Rp/Rs) at Sooke Lake on
southern Vancouver Island remains fairly stable throughout the year. Rp/Rs ranges
between 0.4 and 0.72 and averages 0.45. Rp/Rs values less than 0.4 correspond to days
with incomplete hourly observations.
A similar rise in the Rp/Rs ratio under cloudy-sky conditions has also been noted for total
shortwave and PAR data collected at the meteorological station at Sooke Lake. The Rp/Rs ratio
tends to remain stable for Kt values greater than 0.5; however, as cloud cover increases and Kt
falls below 0.5, there is an exponential increase in the proportion of PAR (Figure 5). When
empirical data are unavailable, the negative relationship between the Rp/Rs ratio and Kt can be
reasonably predicted (R2 = 0.73) using the following exponential function:
Page 35
GLA Version 2.0, Users Manual and Program Documentation 31
( )219.0499.0exp1 −−−= KtRR sp
Where Rp/Rs is the ratio of total daily global PAR to total daily global (total shortwave) radiation,
and Kt is the fraction of total daily extraterrestrial radiation received at the ground surface as
global radiation.
Figure 5. The relationship between Kt and the Rp/Rs at the Sooke Lake watershed on
southern Vancouver Island. The Rp/Rs ratio remains relatively stable at Kt values greater
than 0.5. As skies become more cloudy (Kt < 0.5), the Rp/Rs ratio increases exponentially.
The line of points running through the observed data represents the predicted estimates
produced by the exponential function shown above.
To compute a monthly mean daily Rp/Rs ratio for a site, 1) calculate a daily Rp/Rs ratio using
daily Kt and the exponential function above, 2) multiple the predicted daily Rp/Rs ratio by the
mean daily global (total shortwave) solar radiation, 3) calculate mean daily global PAR and mean
daily global (total shortwave) solar radiation for each month, and 4) divide the monthly mean
daily global PAR by the monthly mean daily global (total shortwave) solar radiation to compute
monthly spectral fraction parameters.
Page 36
GLA Version 2.0, Users Manual and Program Documentation 32
8.3 Beam Fraction (Hb/H)
Solar radiation is composed direct (Hb) and diffuse (Hd) components. Direct (beam)
radiation is the energy that streams from the solar disk and is neither absorbed nor scattered by
the earth’s atmosphere. Diffuse radiation is the portion that is scattered towards the earth’s
surface from all regions of the sky. The amount of direct and diffuse radiation that reaches the
earth’s surface is a function of cloudiness (Kt). For example, under heavy cloud cover, all
incident solar radiation will be in the form of diffuse radiation. When the sky is cloud free,
approximately 85 to 90% of the incident solar radiation is received as direct or beam radiation
(Figure 6).
Figure 6. The relationship between Kt and the diffuse fraction at Port Hardy on
northern Vancouver Island, British Columbia. The daily diffuse fraction is the ratio of
total daily diffuse radiation (Hd) to total daily global radiation (H) incident on a
horizontal surface. These data show that as skies become clearer (Kt increases), more of
the incident global radiation is composed of direct (beam) radiation. The diffuse fraction
reaches a minimum of approximately 0.1 when Kt reaches its maximum around 0.8. The
beam fraction is equal to 1 minus the diffuse fraction. The line running through the data
points represents a set of values predicted according to the exponential function given
below.
Page 37
GLA Version 2.0, Users Manual and Program Documentation 33
A number of mathematical functions developed from empirical relationships between the
beam or diffuse fractions and Kt have been used to separate global radiation into direct and
diffuse components (Iqbal 1983, Spitters et al. 1986, Reindl et al. 1990). Fours years of total daily
diffuse and global solar radiation data published by the federal Atmospheric Environment Service
(AES) for Port Hardy, British Columbia, have been used to derive an approximation function
(R2 = 0.9, n = 1460), which can be used to separate daily global solar radiation into its direct and
diffuse components:
( )[ ]436.2044.3exp1 KtHH b −−=
Where Hb/H is the fraction of total daily global solar radiation incident on a horizontal surface
that is in the form of direct solar radiation, and Kt is the daily cloudiness index.
Ideally, the approximation function should be developed for the waveband of interest,
since specific wavelengths within the solar spectrum tend to be preferentially absorbed and
scattered by the earth’s atmosphere. Long-term daily Kt, diffuse PAR, and global PAR data
collected by the Institute of Ecosystem Studies in Millbrook, New York, indicate that the
relationship between daily Hd PAR/H PAR and daily Kt is not as easily predicted as it is for total
shortwave radiation. Nevertheless, the correlation using the above approximation function is still
quite good (R2 = 0.77, n = 730). Other approximation functions for total daily and monthly mean
daily diffuse radiation are given in Iqbal (1983).
To compute monthly mean beam fraction parameters, 1) use the predicted daily Rp/Rs
ratio to compute total daily global PAR, 2) multiple the predicted beam fraction (Hb/H) by the
total daily global PAR data to calculate the amount of direct and diffuse PAR, 3) compute mean
daily direct and global PAR for each month of the growing season, 4) divide the monthly mean
direct PAR by global PAR to compute monthly mean beam fraction data.
REFERENCES
Becker, P., Erhart, D.W., and Smith, A.P. 1989. Analysis of forest light environments Part 1.
Computerized estimation of solar radiation from hemispherical canopy photographs. Agric.
For. Meteorol. 44: 217-232.
Black, T.A, Chen, J.M., Lee, X., and Sagar, R.M. 1991. Characteristics of shortwave and
longwave irradiances under a Douglas-fir forest stand. Can. J. For. Res. 21: 1020-1028.
Page 38
GLA Version 2.0, Users Manual and Program Documentation 34
Canham, C.D. 1988. An index for understory light levels in and around canopy gaps. Ecology 69
(5): 1634-1638.
Canham, C.D. 1995. GLI/C: Software for calculation of light transmission through forest
canopies using colour fisheye photography. Copyright © 1995: Institute of Ecosystem
Studies, Millbrook, NY.
Canham, C.D., Finzi, A.C., Pacala, S.W., and Burbank, D.H. 1994. Causes and consequences of
resource heterogeneity in forests: interspecific variation in light transmission by canopy trees.
Can. J. For. Res. 24: 337-349.
Chazdon, R.L., and Field, C.B. 1987. Photographic estimation of photosynthetically active
radiation: evaluation of a computerized technique. Oecologia (Berlin) 73: 525-532.
Chen, J.M., Rich, P.M., Gower, S.T., Norman, J.M., and Plummer, S. 1997. Leaf area index of
boreal forests: theory, techniques, and measurements. J. Geophy. Res. 102 (D24): 29,429-
29,443.
Easter, M.J., and Spies, T.A. 1994. Using hemispherical photography for estimating
photosynthetic photon flux density under canopies and in gaps in Douglas-fir forests of the
Pacific Northwest. Can. J. For. Res. 24: 2050-2058.
Frazer, G.W., Trofymow, J.A., and Lertzman, K.P. 1997. A method for estimating canopy
openness, effective leaf area index, and photosynthetically active photon flux density using
hemispherical photography and computerized image analysis techniques. Natural Resources
Canada, Canadian Forestry Service, Forest Ecosystem Processes Network, Pacific Forestry
Centre, Information Report BC-X-373. 73 p.
Frazer, G.W., Trofymow, J.A., Lertzman, K.P. 1999. Canopy openness and leaf area index in
chronosequences of coastal temperate rainforests. Can. J. For. Res. In Press.
Gates, D.M. 1980. Biophysical ecology. Springer-Verlag, New York, NY.
Gray, A.N., and Spies, T.A. 1996. Gap size, within-gap position and canopy structure effects on
conifer seedling establishment. J. Ecol. 84: 635-645.
Herbert, T.J. 1987. Area projections of fisheye photographic lens. Agric. For. Meteorol. 39: 215-
223.
Hutchison, B.A., Matt, D.R., and McMillen, R.T. 1980. Effects of sky brightness distribution
upon penetration of diffuse radiation through canopy gaps in a deciduous forest. Agric. For.
Meteorol. 22: 137-147.
Iqbal, M. 1983. An introduction to solar radiation. Academic Press, Orlando, FL.
Kasten, F. and Young, A.T. 1989. Revised optical air mass tables and approximation formula.
Applied Optics 28 (22): 4735-4738.
Page 39
GLA Version 2.0, Users Manual and Program Documentation 35
Lertzman, K.P., Sutherland, G.D., Inselberg, A., and Saunders, S.C. 1996. Canopy gaps and the
landscape mosaic in a coastal temperate rain forest. Ecology 77(4): 1254-1270.
Lui, B.Y.H., and Jordan, R.C. 1960. The interrelationship and characteristic distribution of direct,
diffuse and total solar radiation. Sol. Energy 4 (3): 1-19.
Michalsky, J.J. 1988. The Astronomical Almanac’s algorithm for approximate solar position
(1950-2050). Sol. Energy 40 (3): 227-235.
Nicotra, A.B., Chazdon, R.L., and Iriarte, S.V.B. 1999. Spatial heterogeneity of light and woody
seedling regeneration in tropical wet forests. Ecology In Press.
Papaionnou, G., Nikolidakis, G., Asimakopoulos, D., and Retalis, D. 1996. Photosynthetically
active radiation in Athens. Agric. For. Meteorol. 81: 287-298.
Reindl, D.T., Beckman, W.A., and Duffie, J.A. 1990. Diffuse fraction correlations. Sol. Energy
45 (1): 1-7.
Rich, P.M. 1990. Characterizing plant canopies with hemispherical photographs. Remote Sensing
Reviews 5(1): 13-29.
Rich, P.M., Clark, D.B., Clark, D.A., and Oberbauer, S.F. 1993. Long-term study of solar
radiation regimes in a tropical wet forest using quantum sensors and hemispherical
photography. Agric. For. Meteorol. 65: 107-127.
Spencer, J.W. 1971. Fourier series representation of the position of the Sun. Search 2 (5): 172.
Spitters, C.J.T., Toussaint, A.J.M., and Goudriaan, J. 1986. Separating the diffuse and direct
component of global radiation and its implications for modeling canopy photosynthesis. Part
I. Components of incoming radiation. Agric. For. Meteorol. 38: 217-229.
Stenburg, P., Linder, S., Smolander, H., and Flower-Ellis, J. 1994. Performance of the LAI-2000
plant canopy analyzer in estimating leaf area index of some Scots pine stands. Tree
Physiology 14: 981-995.
ter Steege, H. 1996. WinPhot 5.0, a programme to analyze vegetation indices, light and light
quality from hemispherical photographs. Copyright © 1993: The Tropenbos Foundation,
Wageningen, The Netherlands.
Trichon, V., Walter, J.N., and Laumonier, Y. 1998. Identifying spatial patterns in the tropical rain
forest structure using hemispherical photographs. Plant Ecology 137: 227-244.
Welles, J.M. and Cohen, S. 1996. Canopy structure measurement by gap fraction analysis using
commercial instrumentation. J. Exp. Bot. 47(302): 1335-1342.
Welles, J.M. and Norman, J.M. 1991. Instrument for indirect measurement of canopy
architecture. Agronomy Journal 83: 818-825.
Page 40
GLA Version 2.0, Users Manual and Program Documentation 36
Wright, E.F., Coates, K.D., Canham, C.D., and Bartemucci, P. 1997. Species variability in growth
response to light across climatic regions in northwestern British Columbia. Can. J. For. Res.
28: 871-886.