C o m m u n i t y E x p e r i e n c e D i s t i l l e d Orchestrate and manage large-scale Docker deployments with Kubernetes to unlock greater control over your infrastructure and extend your containerization strategy Getting Started with Kubernetes Jonathan Baier Free Sample
Transcript
C o m m u n i t y E x p e r i e n c e D i s t i l l e d
Orchestrate and manage large-scale Docker deployments with Kubernetes to unlock greater control over your infrastructure and extend your containerization strategy
Getting Started with KubernetesJonathan Baier
Getting Started with Kubernetes
This book will show you how to extend the opportunities that containerization innovations have brought about in new and even more effective ways. It will get you started with the basics, exploring the fundamental elements of Kubernetes and show you how to install it on your system, before digging a little deeper into Kubernetes core constructs. Find out how to use Kubernetes pods, services, replication controllers, and labels to manage your clusters effectively and learn how to handle networking with Kubernetes.
Once you've got to grips with these core components, you'll begin to see how Kubernetes fi ts into your workfl ow. From basic updates to integrating Kubernetes with continuous delivery tools such as Jenkins and Gulp, the book demonstrates exactly how Kubernetes will transform the way you work. With further insights on how to install monitoring and security tools, this book provides you with a direct route through Kubernetes so you can take advantage of it, fast!
Who this book is written forIf you have some experience with Docker and want to get more from containerization, this book is the perfect place to start.
$ 34.99 US£ 22.99 UK
Prices do not include local sales tax or VAT where applicable
Jonathan Baier
What you will learn from this book
Download, install, and confi gure the latest version of Kubernetes
Perform smooth updates and patches with minimal downtime
Streamline the way you deploy and manage your applications with large-scale container orchestration
Find out how Kubernetes can simplify the way you confi gure your clusters and networks
Learn why the Open Container Initiative is so important to the future of your infrastructure
Discover third-party tools that can enhance your production operations
Explore and use persistent storage to manage state in your cluster
Integrate Kubernetes with continuous delivery tools such as Gulp and Jenkins
Getting Started w
ith Kubernetes
P U B L I S H I N GP U B L I S H I N G
community experience dist i l led
Visit www.PacktPub.com for books, eBooks, code, downloads, and PacktLib.
Free Sample
In this package, you will find: The author biography
A preview chapter from the book, Chapter 4 'Updates and Gradual Rollouts'
A synopsis of the book’s content
More information on Getting Started with Kubernetes
About the Author
Jonathan Baier is a senior cloud architect living in Brooklyn, NY. He has had a passion for technology since an early age. When he was 14 years old, he was so interested in the family computer (an IBM PCjr) that he poured through the several hundred pages of BASIC and DOS manuals. Then, he taught himself to code a very poorly-written version of Tic-Tac-Toe. During his teen years, he started a computer support business. Since then, he has dabbled in entrepreneurship several times throughout his life. He now enjoys working for Cloud Technology Partners, a cloud-focused professional service and application development fi rm headquartered in Boston.
He has over a decade of experience delivering technology strategies and solutions for both public and private sector businesses of all sizes. He has a breadth of experience working with a wide variety of technologies and with stakeholders from all levels of management.
Working in the areas of architecture, containerization, and cloud security, he has created strategic roadmaps to guide and help mature the overall IT capabilities of various enterprises. Furthermore, he has helped organizations of various sizes build and implement their cloud strategy and solve the many challenges that arise when "designs on paper" meet reality.
PrefaceThis book is a guide to getting started with Kubernetes and overall container management. We will walk you through the features and functions of Kubernetes and show how it fi ts into an overall operations strategy. You'll learn what hurdles lurk in moving container off the developer's laptop and managing them at a larger scale. You'll also see how Kubernetes is the perfect tool to help you face these challenges with confi dence.
What this book coversChapter 1, Kubernetes and Container Operations, provides a brief overview of containers and the how, what, and why of Kubernetes orchestration. It explores how it impacts your business goals and everyday operations.
Chapter 2, Kubernetes – Core Concepts and Constructs, will explore core Kubernetes constructs, such as pods, services, replication controllers, and labels using a few simple examples. Basic operations, including health checks and scheduling, will also be covered.
Chapter 3, Core Concepts – Networking, Storage, and Advanced Services, covers cluster networking for Kubernetes and the Kubernetes proxy, a deeper dive into services, storage concerns, persistent data across pods, and the container lifecycles. Finishing up, we will see a brief overview of some higher level isolation features for mutlitenancy.
Chapter 4, Updates and Gradual Rollouts, takes a quick look at how to roll out updates and new features with minimal disruption to uptime. We will also look at scaling the Kubernetes cluster.
Chapter 5, Continuous Delivery, will cover integration of Kubernetes into your continuous delivery pipeline. We will see how to use a K8s cluster with Gulp.js and Jenkins as well.
Preface
Chapter 6, Monitoring and Logging, teaches you how to use and customize built-in and third-party monitoring tools on your Kubernetes cluster. We will look at built-in logging and monitoring, the Google Cloud Logging service, and Sysdig.
Chapter 7, OCI, CNCF, CoreOS, and Tectonic, discovers how open standards benefi t the entire container ecosystem. We'll look at a few of the prominent standards organizations and cover CoreOS and Tectonic. Also, we will explore their advantages as a host OS and enterprise platform.
Chapter 8, Towards Production-Ready, shows some of the helpful tools and third-party projects available and where you can go to get more help.
[ 83 ]
Updates and Gradual Rollouts
This chapter will expand upon the core concepts, which show the reader how to roll out updates and test new features of their application with minimal disruption to uptime. It will cover the basics of doing application updates, gradual rollouts, and A/B testing. In addition, we will look at scaling the Kubernetes cluster itself.
This chapter will discuss the following topics:
• Application scaling• Rolling updates• A/B testing• Scaling up your cluster
Example set upBefore we start exploring the various capabilities built into Kubernetes for scaling and updates, we will need a new example environment. We are going to use a variation of our previous container image with a blue background (refer to Figure 4.2 for a comparison). We have the following code:
Create these services with the following commands:
$ kubectl create –f pod-scaling-controller.yaml
$ kubectl create –f pod-scaling-service.yaml
Scaling upOver time, as you run your applications in the Kubernetes cluster, you will fi nd that some applications need more resources, whereas others can manage with fewer resources. Instead of removing the entire RC (and associated pods), we want a more seamless way to scale our application up and down.
Chapter 4
[ 85 ]
Thankfully, Kubernetes includes a scale command, which is suited specifi cally to this purpose. In our new example, we have only one replica running. You can check this with a get pods command.
$ kubectl get pods -l name=node-js-scale
Let's try scaling that up to three with the following command:
$ kubectl scale --replicas=3 rc/node-js-scale
If all goes well, you'll simply see the word scaled on the output of your terminal window.
Optionally, you can specify the --current-replicas fl ag as a verifi cation step. The scaling will only occur if the actual number of replicas currently running matches this count.
After listing our pods once again, we should now see three pods running with a name similar to node-js-scale-XXXXX, where the Xs are a random string.
You can also use the scale command to reduce the number of replicas. In either case, the scale command adds or removes the necessary pod replicas, and the service automatically updates and balances across new or remaining replicas.
Smooth updatesThe scaling of our application up and down as our resource demands change is useful for many production scenarios, but what about simple application updates? Any production system will have code updates, patches, and feature additions. These could be occurring monthly, weekly, or even daily. Making sure that we have a reliable way to push out these changes without interruption to our users is a paramount consideration.
Once again, we benefi t from the years of experience the Kubernetes system is built on. There is a built-in support for rolling updates with the 1.0 version. The rolling-update command allows us to update entire RCs or just the underlying Docker image used by each replica. We can also specify an update interval, which will allow us to update one pod at a time and wait until proceeding to the next.
Let's take our scaling example and perform a rolling update to the 0.2 version of our container image. We will use an update interval of 2 minutes, so we can watch the process as it happens in the following way:
You should see some text about creating a new RC named node-js-scale-XXXXX, where the Xs will be a random string of numbers and letters. In addition, you will see the beginning of a loop that is starting one replica of the new version and removing one from the existing RC. This process will continue until the new RC has the full count of replicas running.
If we want to follow along in real time, we can open another terminal window and use the get pods command, along with a label fi lter, to see what's happening.
$ kubectl get pods -l name=node-js-scale
This command will fi lter for pods with node-js-scale in the name. If you run this after issuing the rolling-update command, you should see several pods running as it creates new versions and removes the old ones one by one.
The full output of the previous rolling-update command should look something like Figure 4.1, as follows:
Figure 4.1. The scaling output
As we can see here, Kubernetes is fi rst creating a new RC named node-js-scale-10ea08ff9a118ac6a93f85547ed28f6. K8s then loops through one by one. Creating a new pod in the new controller and removing one from the old. This continues until the new controller has the full replica count and the old one is at zero. After this, the old controller is deleted and the new one is renamed to the original controller name.
Chapter 4
[ 87 ]
If you run a get pods command now, you'll note that the pods still all have a longer name. Alternatively, we could have specifi ed the name of a new controller in the command, and Kubernetes will create a new RC and pods using that name. Once again, the controller of the old name simply disappears after updating is complete. I recommend specifying a new name for the updated controller to avoid confusion in your pod naming down the line. The same update command with this method would look like this:
Using the static external IP address from the service we created in the fi rst section, we can open the service in a browser. We should see our standard container information page. However, you'll note that the title now says Pod Scaling v0.2 and the background is light yellow.
Figure 4.2. v0.1 and v0.2 (side by side)
It's worth noting that during the entire update process, we've only been looking at pods and RCs. We didn't do anything with our service, but the service is still running fi ne and now directing to the new version of our pods. This is because our service is using label selectors for membership. Because both our old and new replicas use the same labels, the service has no problem using the new pods to service requests. The updates are done on the pods one by one, so it's seamless for the users of the service.
Updates and Gradual Rollouts
[ 88 ]
Testing, releases, and cutoversThe rolling update feature can work well for a simple blue-green deployment scenario. However, in a real-world blue-green deployment with a stack of multiple applications, there can be a variety of interdependencies that require in-depth testing. The update-period command allows us to add a timeout fl ag where some testing can be done, but this will not always be satisfactory for testing purposes.
Similarly, you may want partial changes to persist for a longer time and all the way up to the load balancer or service level. For example, you wish to A/B test a new user interface feature with a portion of your users. Another example is running a canary release (a replica in this case) of your application on new infrastructure like a newly added cluster node.
Let's take a look at an A/B testing example. For this example, we will need to create a new service that uses sessionAffinity. We will set the affi nity to ClientIP, which will allow us to forward clients to the same backend pod. This is a key if we want a portion of our users to see one version while others see another:
Create this service as usual with the create command as follows:
$ kubectl create -f pod-AB-service.yaml
Chapter 4
[ 89 ]
This will create a service that will point to our pods running both version 0.2 and 0.3 of the application. Next, we will create the two RCs which create two replicas of the application. One set will have version 0.2 of the application, and the other will have version 0.3, as shown here:
Note that we have the same service label, so these replicas will also be added to the service pool based on this selector. We also have livenessProbe and readinessProbe defi ned to make sure that our new version is working as expected. Again, use the create command to spin up the controller:
$ kubectl create -f pod-A-controller.yaml
$ kubectl create -f pod-B-controller.yaml
Now we have a service balancing to both versions of our app. In a true A/B test, we would now want to start collecting metrics on the visit to each version. Again, we have the sessionAffinity set to ClientIP, so all requests will go to the same pod. Some users will see v0.2, and some will see v0.3.
Because we have sessionAffinity turned on, your test will likely show the same version every time. This is expected, and you would need to attempt a connection from multiple IP addresses to see both user experiences with each version.
Since the versions are each on their own pod, one can easily separate logging and even add a logging container to the pod defi nition for a sidecar logging pattern. For brevity, we will not cover that setup in this book, but we will look at some of the logging tools in Chapter 6, Monitoring and Logging.
We can start to see how this process would be useful for a canary release or a manual blue-green deployment. We can also see how easy it is to launch a new version and slowly transition over to the new release.
Let's look at a basic transition quickly. It's really as simple as a few scale commands, which are as follows:
$ kubectl scale --replicas=3 rc/node-js-scale-b
$ kubectl scale --replicas=1 rc/node-js-scale-a
$ kubectl scale --replicas=4 rc/node-js-scale-b
$ kubectl scale --replicas=0 rc/node-js-scale-a
Use the get pods command combined with –l fi lter in between scale commands to watch the transition as it happens.
Updates and Gradual Rollouts
[ 92 ]
Now we have fully transitioned over to version 0.3 (node-js-scale-b). All users will now see the version 0.3 of the site. We have four replicas of version 0.3 and 0 of 0.2. If you run a get rc command, you will notice that we still have a RC for 0.2 (node-js-scale-a). As a fi nal cleanup, we can remove that controller completely as follows:
$ kubectl delete rc/node-js-scale-a
In the newly released version 1.1, K8s has a new "Horizontal Pod Autoscaler" construct which allows you to automatically scale pods based on CPU utilization.
Growing your clusterAll these techniques are great for the scaling of the application, but what about the cluster itself. At some point, you will pack the nodes full and need more resources to schedule new pods for your workloads.
When you create your cluster, you can customize the starting number of (minions) nodes with the NUM_MINIONS environment variable. By default, it is set to 4. The following example shows how to set it to 5 before running kube-up.sh:$ export NUM_MINIONS = 5
Bear in mind that changing this after the cluster is started will have no effect. You would need to tear down the cluster and create it once again. Thus, this section will show you how to add nodes to an existing cluster without rebuilding it.
Scaling up the cluster on GCEScaling up your cluster on GCE is actually quite easy. The existing plumbing uses managed instance groups in GCE, which allow you to easily add more machines of a standard confi guration to the group via an instance template.
You can see this template easily in the GCE console. First, open the console; by default, this should open your default project console. If you are using another project for your Kuberenetes cluster, simply select it from the project dropdown at the top of the page.
Chapter 4
[ 93 ]
On the side panel under Compute and then Compute Engine, select Instance templates. You should see a template titled kuberenetes-minion-template. Note that the name could vary slightly if you've customized your cluster naming settings. Click on that template to see the details. Refer to the following screenshot:
Figure 4.3. The GCE Instance template for minions
You'll see a number of settings, but the meat of the template is under Custom metadata. Here, you will see a number of environment variables and also a startup script that is run after a new machine instance is created. These are the core components that allow us to create new machines and have them automatically added to the available cluster nodes.
Updates and Gradual Rollouts
[ 94 ]
Because the template for new machines is already created, it is very simple to scale out our cluster in GCE. Simply go to the Instance groups located right above the Instance templates link on the side panel. Again, you should see a group titled kubernetes-minion-group or something similar. Click on that group to see the details, as shown in the following screenshot:
Figure 4.4. The GCE Instance group for minions
Chapter 4
[ 95 ]
You'll see a page with a CPU metrics graph and four instances listed here. By default, the cluster creates four nodes. We can modify this group by clicking the Edit group button at the top of the page.
Figure 4.5. The GCE Instance group edit page
You should see kubernetes-minion-template selected in Instance template that we reviewed a moment ago. You'll also see an Autoscaling setting, which is Off by default and an instance count of 4. Simply, increment this to 5 and click on Save. You'll be taken back to the group details page and see a pop-up dialog showing the pending changes.
In a few minutes, you'll have a new instance listed on the details page. We can test that this is ready by using the get nodes command from the command line:
$ kubectl get nodes
Updates and Gradual Rollouts
[ 96 ]
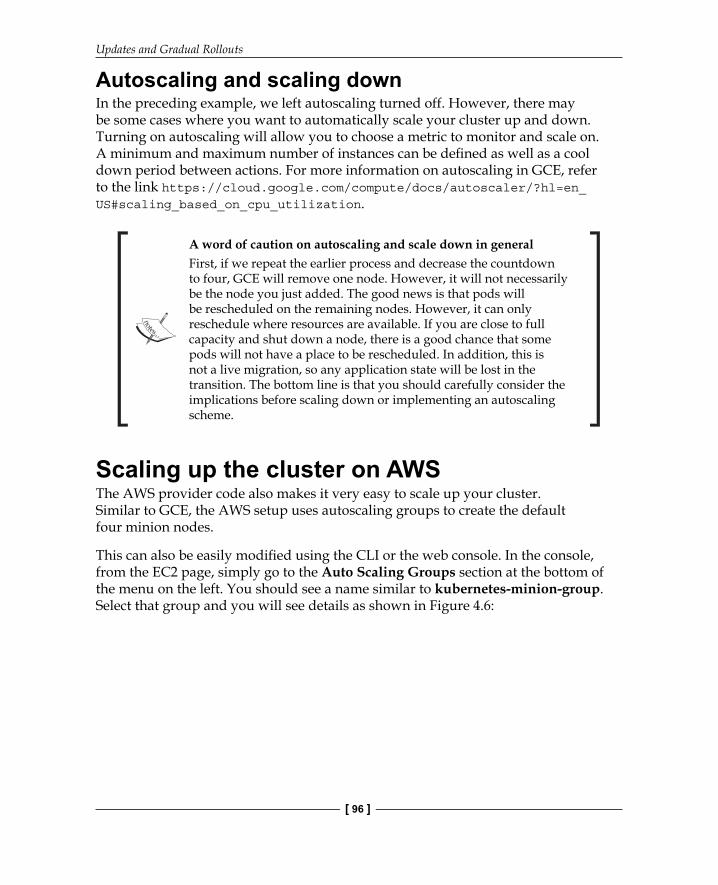
Autoscaling and scaling downIn the preceding example, we left autoscaling turned off. However, there may be some cases where you want to automatically scale your cluster up and down. Turning on autoscaling will allow you to choose a metric to monitor and scale on. A minimum and maximum number of instances can be defi ned as well as a cool down period between actions. For more information on autoscaling in GCE, refer to the link https://cloud.google.com/compute/docs/autoscaler/?hl=en_US#scaling_based_on_cpu_utilization.
A word of caution on autoscaling and scale down in generalFirst, if we repeat the earlier process and decrease the countdown to four, GCE will remove one node. However, it will not necessarily be the node you just added. The good news is that pods will be rescheduled on the remaining nodes. However, it can only reschedule where resources are available. If you are close to full capacity and shut down a node, there is a good chance that some pods will not have a place to be rescheduled. In addition, this is not a live migration, so any application state will be lost in the transition. The bottom line is that you should carefully consider the implications before scaling down or implementing an autoscaling scheme.
Scaling up the cluster on AWSThe AWS provider code also makes it very easy to scale up your cluster. Similar to GCE, the AWS setup uses autoscaling groups to create the default four minion nodes.
This can also be easily modifi ed using the CLI or the web console. In the console, from the EC2 page, simply go to the Auto Scaling Groups section at the bottom of the menu on the left. You should see a name similar to kubernetes-minion-group. Select that group and you will see details as shown in Figure 4.6:
Chapter 4
[ 97 ]
Figure 4.6. Kubernetes minion autoscaling details
We can scale this group up easily by clicking Edit. Then, change the Desired, Min, and Max values to 5 and click on Save. In a few minutes, you'll have the fi fth node available. You can once again check this using the get nodes command.
Scaling down is the same process, but remember that we discussed the same considerations in the previous Scaling the cluster on GCE section. Workloads could get abandoned or at the very least unexpectedly restarted.
Updates and Gradual Rollouts
[ 98 ]
Scalin g manuallyFor other providers, creating new minions may not be an automated process. Depending on your provider, you'll need to perform various manual steps. It can be helpful to look at the provider-specifi c scripts under the cluster directory.
SummaryWe should now be a bit more comfortable with the basics of application scaling in Kubernetes. We also looked at the built-in functions in order to roll updates as well a manual process for testing and slowly integrating updates. Finally, we took a look at scaling the nodes of our underlying cluster and increasing overall capacity for our Kubernetes resources.
Where to buy this book You can buy Getting Started with Kubernetes from the Packt Publishing website.
Alternatively, you can buy the book from Amazon, BN.com, Computer Manuals and most internet
book retailers.
Click here for ordering and shipping details.
www.PacktPub.com
Stay Connected:
Get more information Getting Started with Kubernetes