14
Getting started with Nestivity Community Owner Training Version 1.0
| Date post: | 15-May-2015 |
| Category: |
Technology |
| Upload: | nestivity |
| View: | 58 times |
| Download: | 4 times |

Getting startedwith Nestivity
Community Owner Training
Version 1.0
Things to Consider
Creating Your Account
Selecting a Premium Plan
Customizing your Nest
Adding Moderators
FAQs
Topics
3
4
8
11
12
13
How to Create a DiscussionHow to Create a Tweetcast
Additional Tutorial Resources
14
Things to Consider
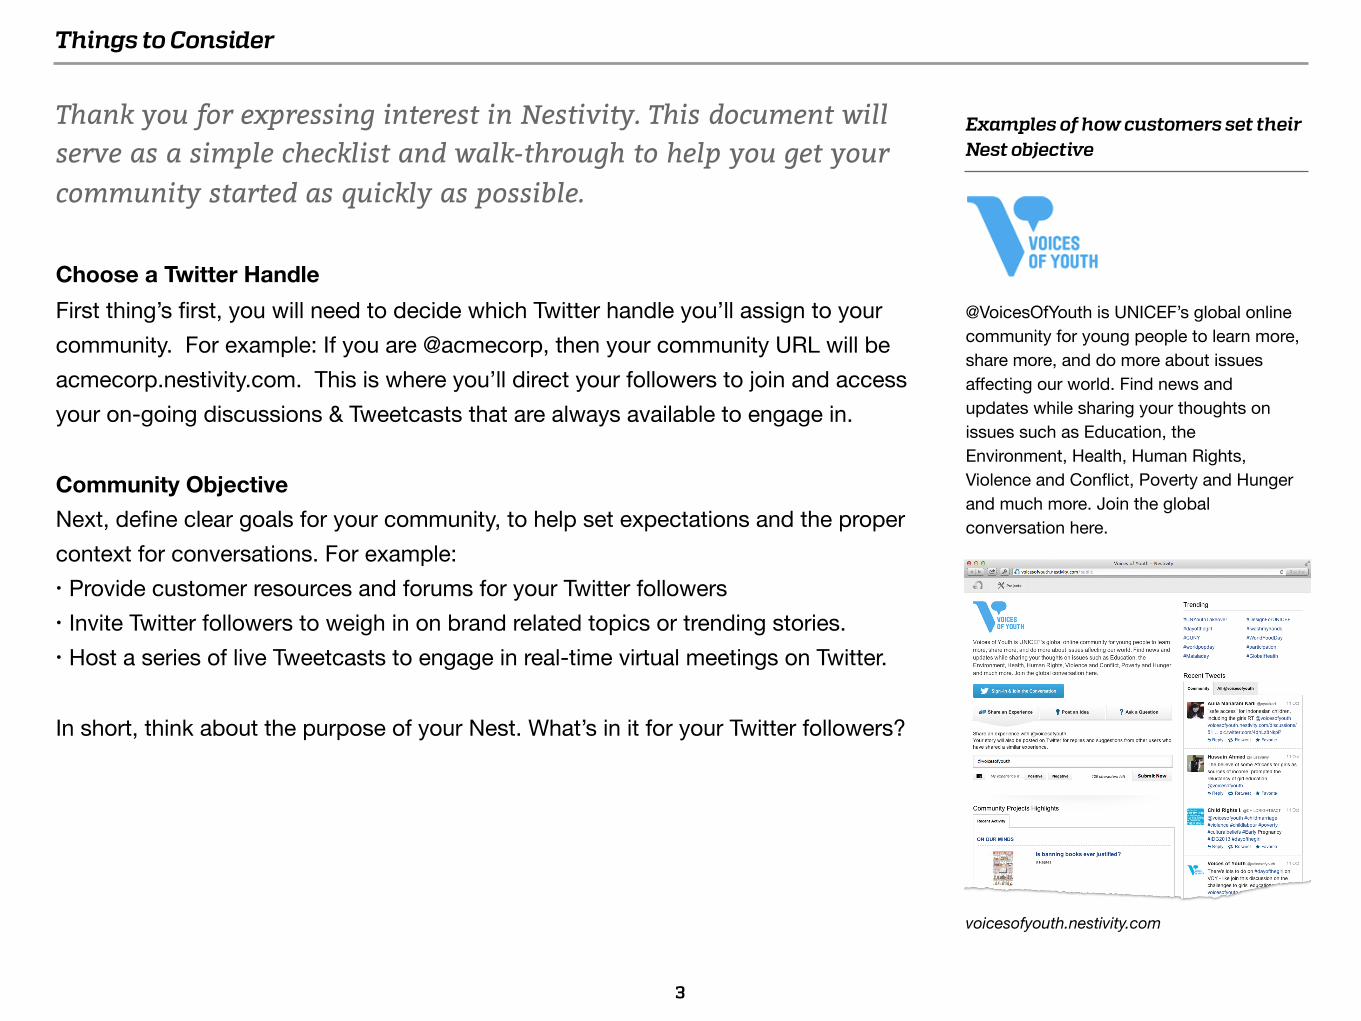
Thank you for expressing interest in Nestivity. This document will serve as a simple checklist and walk-through to help you get your community started as quickly as possible.
Choose a Twitter HandleFirst thing’s first, you will need to decide which Twitter handle you’ll assign to your community. For example: If you are @acmecorp, then your community URL will be acmecorp.nestivity.com. This is where you’ll direct your followers to join and access your on-going discussions & Tweetcasts that are always available to engage in.
Community ObjectiveNext, define clear goals for your community, to help set expectations and the proper context for conversations. For example: • Provide customer resources and forums for your Twitter followers• Invite Twitter followers to weigh in on brand related topics or trending stories.• Host a series of live Tweetcasts to engage in real-time virtual meetings on Twitter.
In short, think about the purpose of your Nest. What’s in it for your Twitter followers?
Examples of how customers set their Nest objective
@VoicesOfYouth is UNICEF’s global online community for young people to learn more, share more, and do more about issues affecting our world. Find news and updates while sharing your thoughts on issues such as Education, the Environment, Health, Human Rights, Violence and Conflict, Poverty and Hunger and much more. Join the global conversation here.
voicesofyouth.nestivity.com
3

Creating Your Account - Nestivity.com
Step 1 of 7: Visit Nestivity.com
Please visit our marketing website to get started. Our website provides more information about the benefits of the software, as well as information on features, pricing, and access to helpful blogs that we publish to help our customers. Click any of the big blue buttons that says, “Start Free Trial”.
4
Creating Your Account - Connecting with Twitter
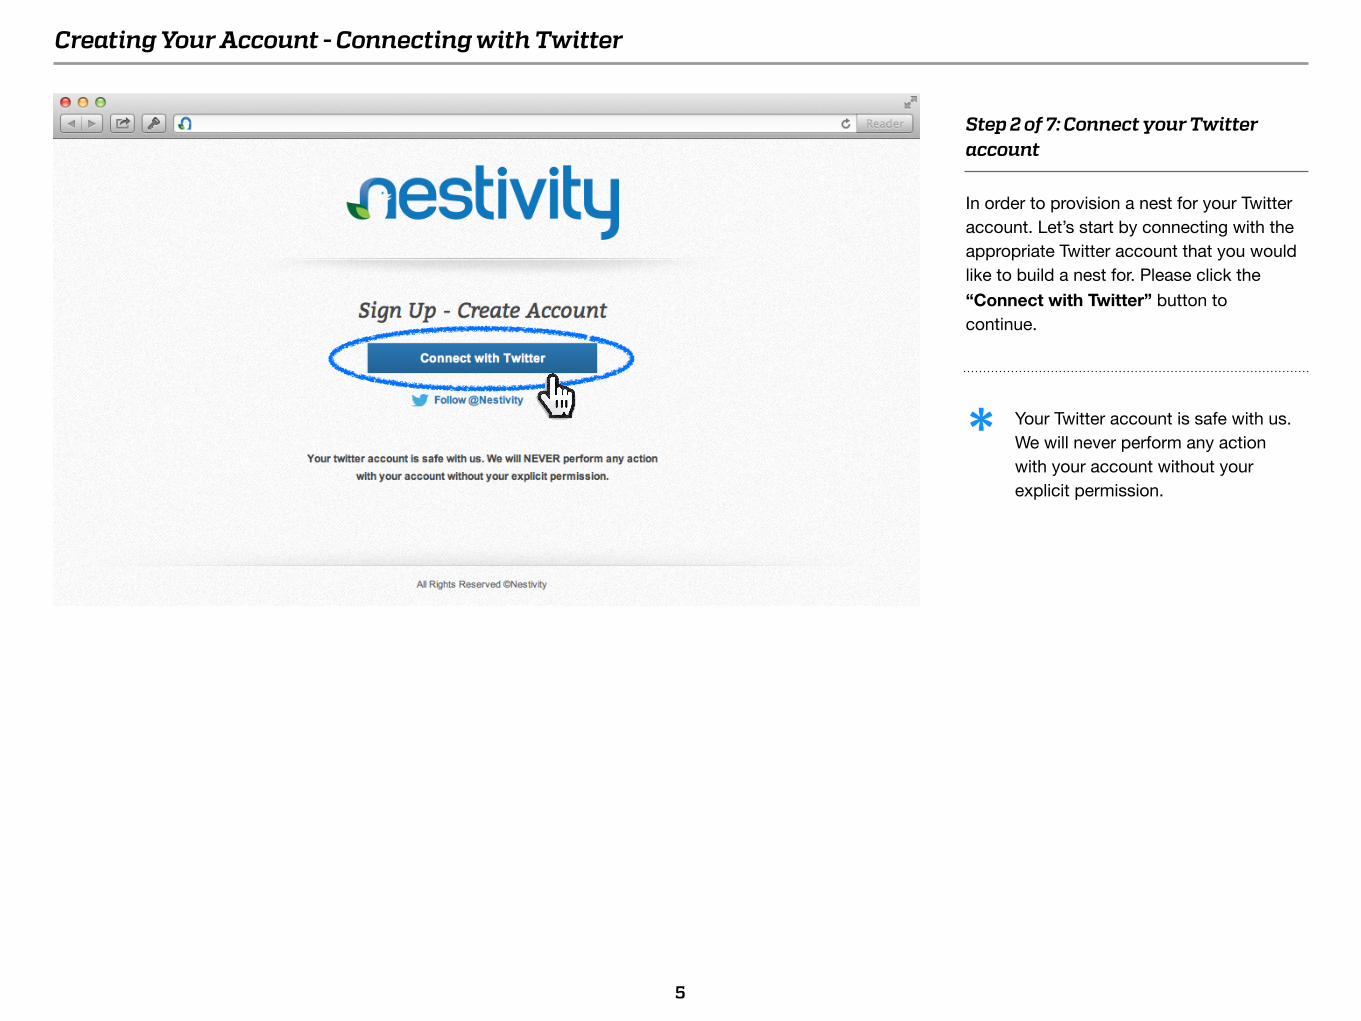
Step 2 of 7: Connect your Twitter account
In order to provision a nest for your Twitter account. Let’s start by connecting with the appropriate Twitter account that you would like to build a nest for. Please click the “Connect with Twitter” button to continue.
5
Your Twitter account is safe with us. We will never perform any action with your account without your explicit permission.
*
Creating Your Account - Authorization
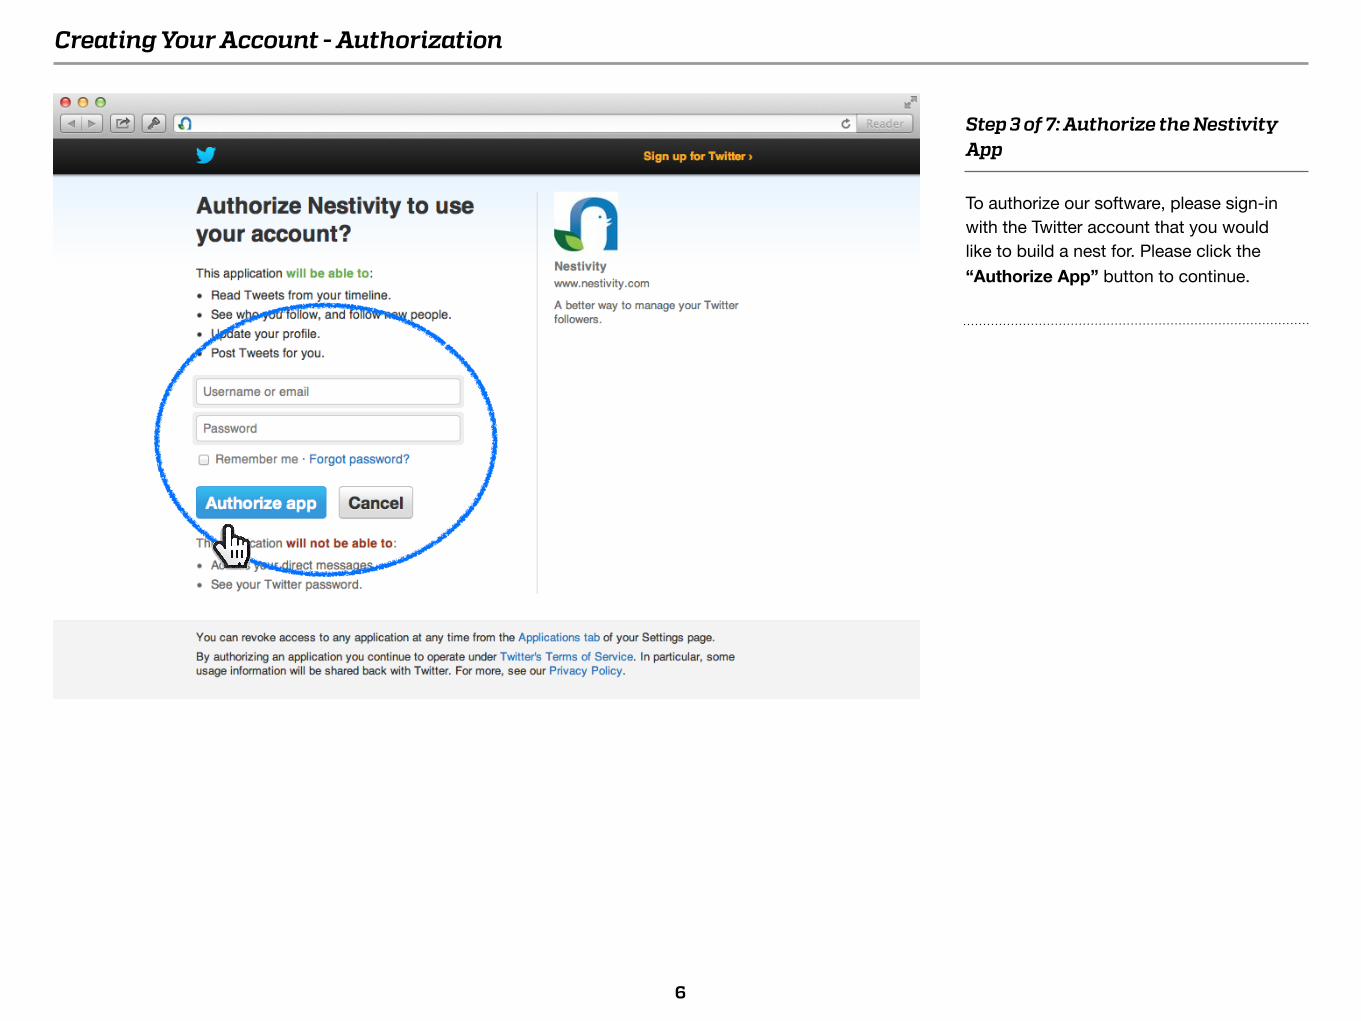
Step 3 of 7: Authorize the Nestivity App
To authorize our software, please sign-in with the Twitter account that you would like to build a nest for. Please click the “Authorize App” button to continue.
6

Creating Your Account - Account Information
Step 4 of 7: Basic Account Information
Please fill out the basic form for our customer account records so that you will receive proper account related correspondence and billing records.
7
Double check that the correct Twitter handle is authorized. Click the “Edit” button if you need to choose a different account.
1
1
2
3
4
5
6
7
Add your company name.2
Add your first name.3
Add your last name.4
Add your email address for all account and billing related emails to be sent to.
5
Read and accept the Nestivity Terms and Conditions.
6
Click the “Create My Account” once complete.7
Creating Your Account - Selecting a Premium Plan
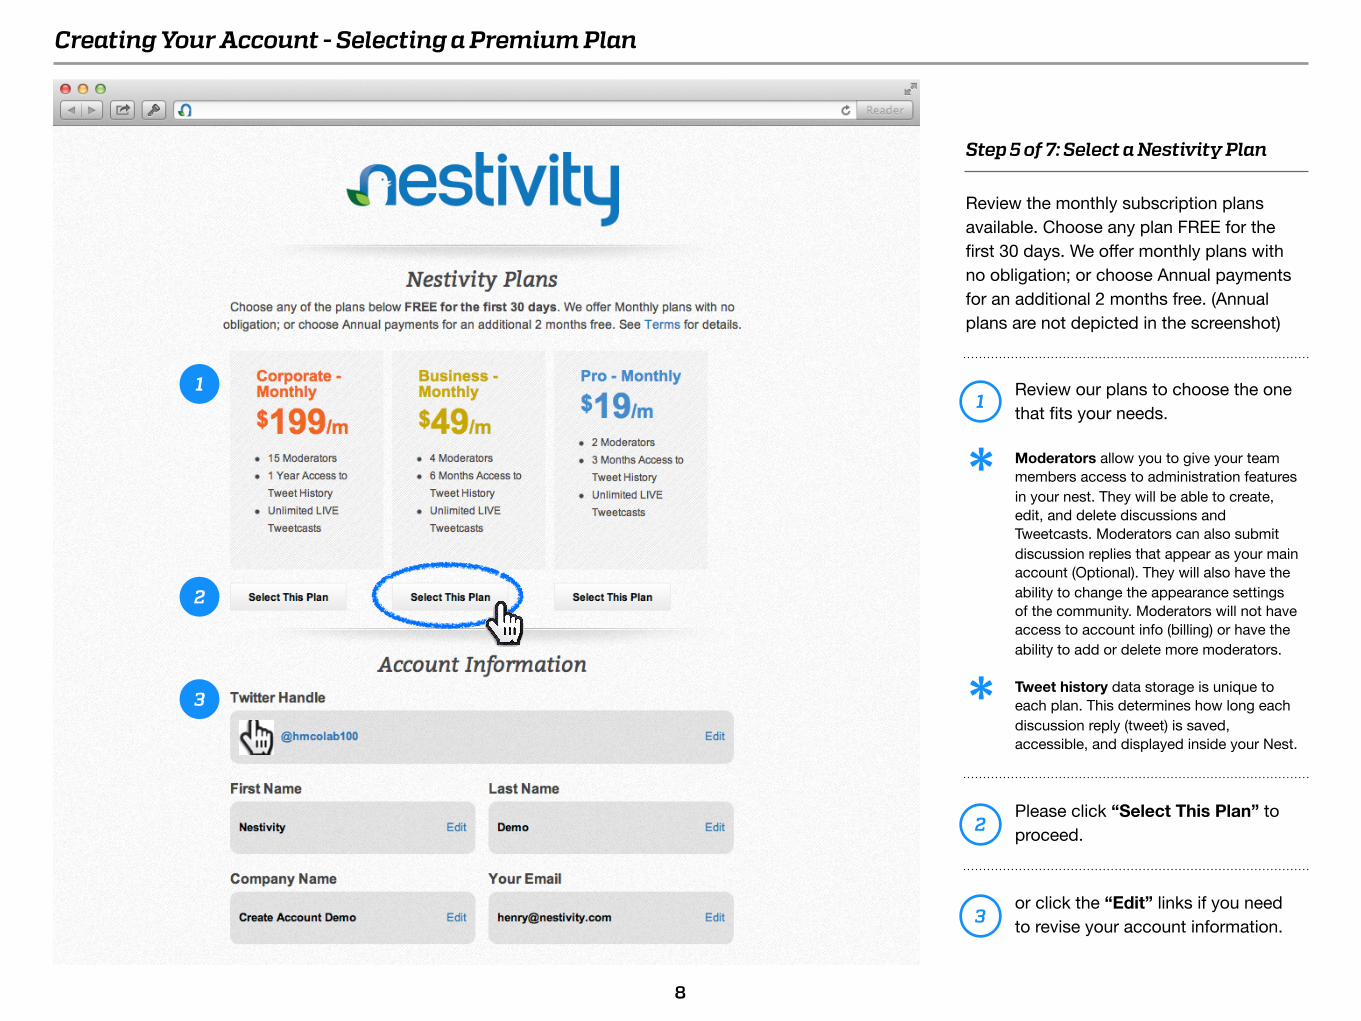
Step 5 of 7: Select a Nestivity Plan
Review the monthly subscription plans available. Choose any plan FREE for the first 30 days. We offer monthly plans with no obligation; or choose Annual payments for an additional 2 months free. (Annual plans are not depicted in the screenshot)
8
Review our plans to choose the one that fits your needs.1
1
3
2
Moderators allow you to give your team members access to administration features in your nest. They will be able to create, edit, and delete discussions and Tweetcasts. Moderators can also submit discussion replies that appear as your main account (Optional). They will also have the ability to change the appearance settings of the community. Moderators will not have access to account info (billing) or have the ability to add or delete more moderators.
*
Tweet history data storage is unique to each plan. This determines how long each discussion reply (tweet) is saved, accessible, and displayed inside your Nest.
*Please click “Select This Plan” to proceed.2
or click the “Edit” links if you need to revise your account information.3

Creating Your Account - Billing Information
Step 6 of 7: Billing Information
A credit card is required to activate your account with the FREE trial. All of our monthly plans are FREE for the first 30 days. We offer monthly plans with no obligation; or choose Annual payments for an additional 2 months free. (Annual plans are not depicted in the screenshot).
9
Confirm that your plan is correct.1
1
You can add any additional a’ la carte such as additional moderation seats or longer storage of tweet data history.*Confirm your contact info.2
Add your billing information and click the “Subscribe” button to continue.
3
2
3
Creating Your Account - Provision Complete
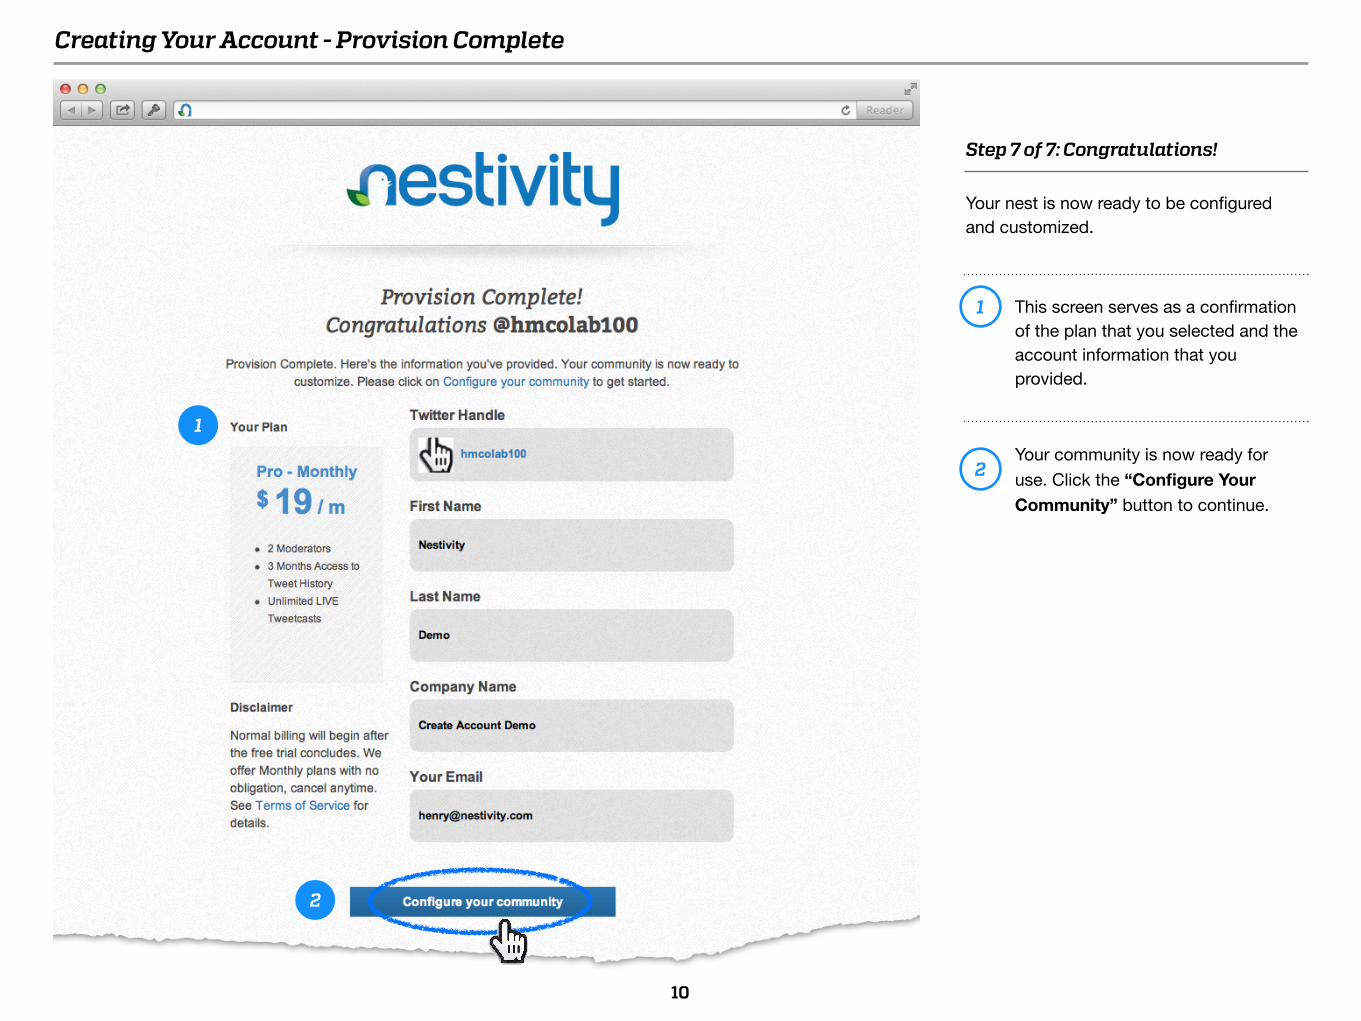
Step 7 of 7: Congratulations!
Your nest is now ready to be configured and customized.
10
This screen serves as a confirmation of the plan that you selected and the account information that you provided.
1
1Your community is now ready for use. Click the “Configure Your Community” button to continue.
2
2
Customizing Your Nest
1
11
2
3
4
5
6
7
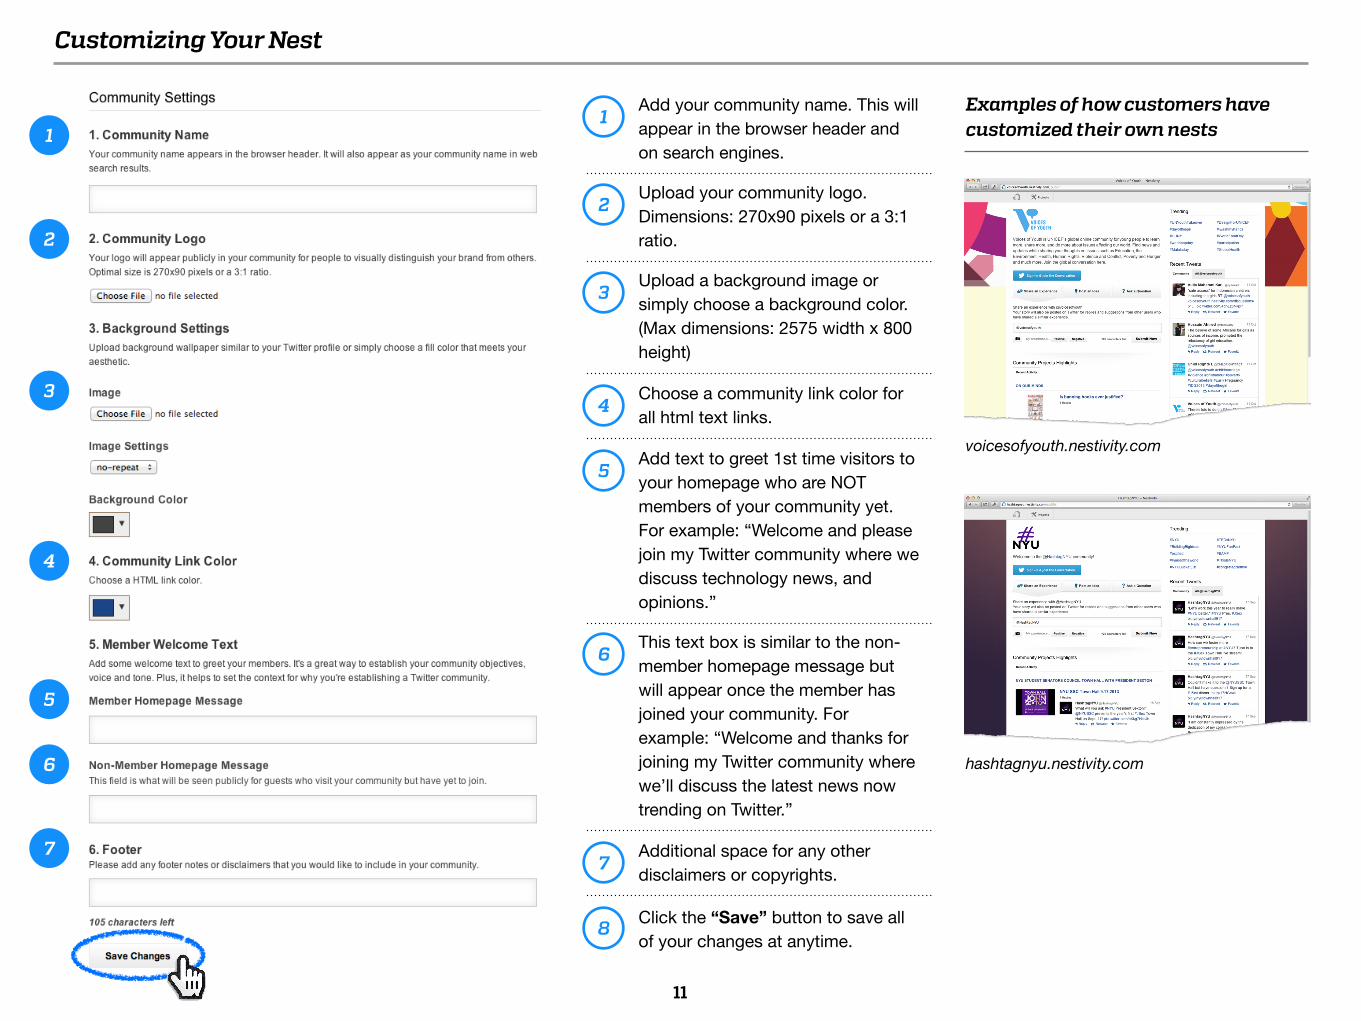
This text box is similar to the non-member homepage message but will appear once the member has joined your community. For example: “Welcome and thanks for joining my Twitter community where we’ll discuss the latest news now trending on Twitter.”
6
Add your community name. This will appear in the browser header and on search engines.
1
Upload your community logo. Dimensions: 270x90 pixels or a 3:1 ratio.
2
Upload a background image or simply choose a background color. (Max dimensions: 2575 width x 800 height)
3
Choose a community link color for all html text links.4
Additional space for any other disclaimers or copyrights.7
Add text to greet 1st time visitors to your homepage who are NOT members of your community yet. For example: “Welcome and please join my Twitter community where we discuss technology news, and opinions.”
5
Click the “Save” button to save all of your changes at anytime.
8
Examples of how customers have customized their own nests
voicesofyouth.nestivity.com
hashtagnyu.nestivity.com
Adding Moderators
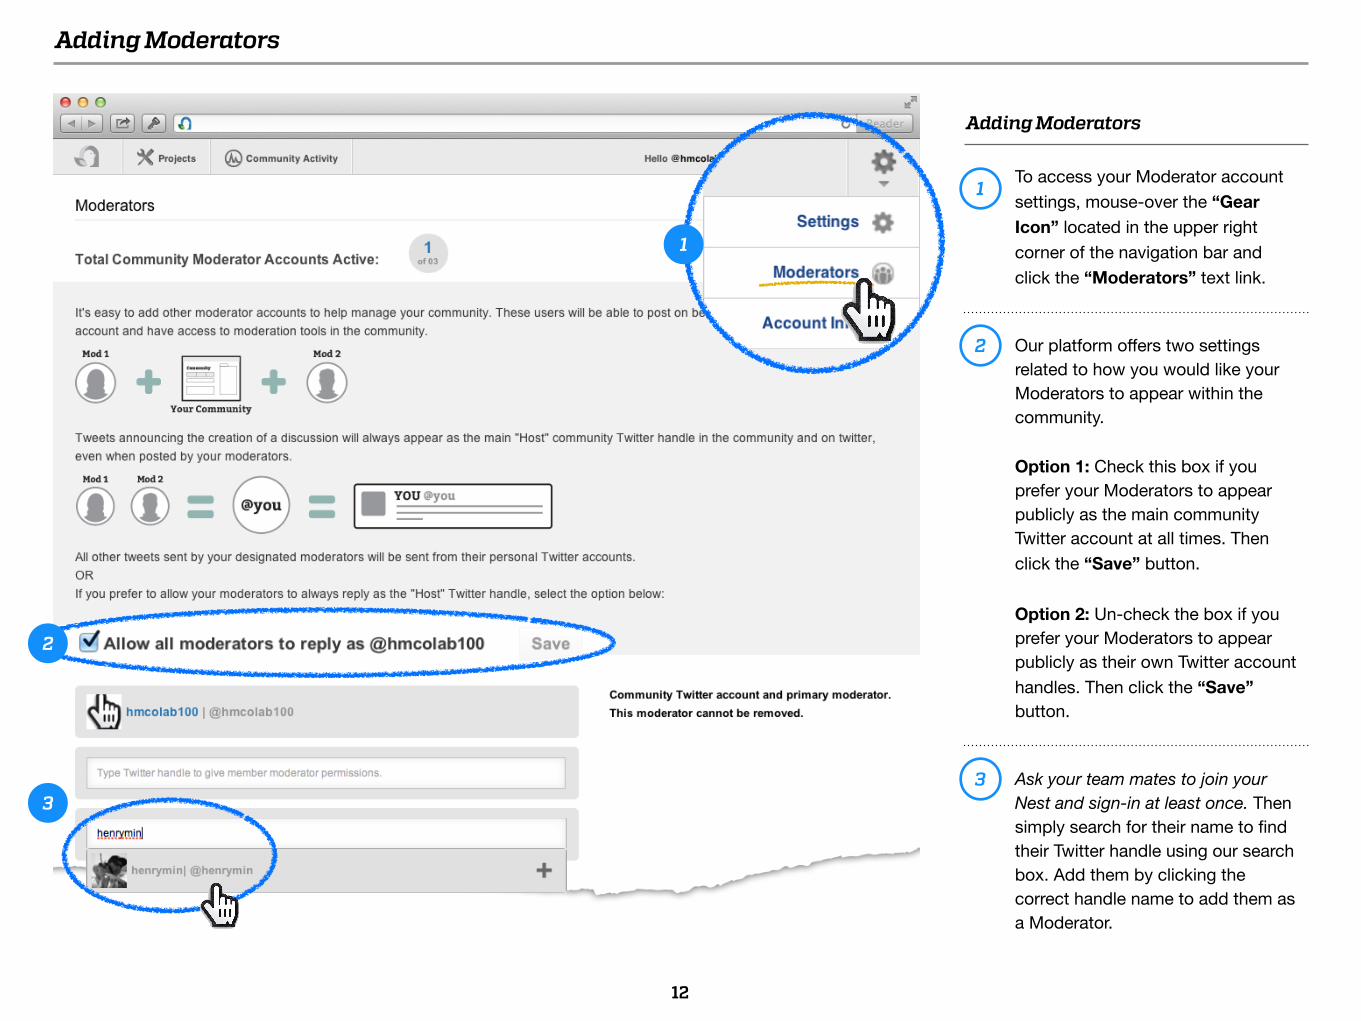
Adding Moderators
12
To access your Moderator account settings, mouse-over the “Gear Icon” located in the upper right corner of the navigation bar and click the “Moderators” text link.
1
Our platform offers two settings related to how you would like your Moderators to appear within the community.
Option 1: Check this box if you prefer your Moderators to appear publicly as the main community Twitter account at all times. Then click the “Save” button.
Option 2: Un-check the box if you prefer your Moderators to appear publicly as their own Twitter account handles. Then click the “Save” button.
2
3
1
2
Ask your team mates to join your Nest and sign-in at least once. Then simply search for their name to find their Twitter handle using our search box. Add them by clicking the correct handle name to add them as a Moderator.
3

For a complete list of Frequently Asked QuestionsPlease visit: n5t.co/faq
Frequently Asked Questions

How to Create a DiscussionPlease visit: n5t.co/disc
Additional Tutorial Resources
How to Create a TweetcastPlease visit: n5t.co/tc


