16
Handstand Module
| Date post: | 25-Oct-2014 |
| Category: |
Documents |
| Upload: | adam-stevenson |
| View: | 440 times |
| Download: | 45 times |
Handstand Module
GMB Handstand Module Training Manual©2011 Gold Medal Bodies, Super 301, Inc
Ryan C. Hurst, Jarlo L. Ilano, PT, MPT, OCS, & Andy Fossett
All rights reserved. Brief excerpts may be reproduced for review purposes, but other reproduction requires written permission from Super 301. Please contact us at GoldMedalBodies.com for more information.
The information in this book is presented in good faith, but no warranty is given, nor results guaranteed. Since we have no control over physical conditions surrounding the application of information in this book the author and publisher disclaim any liability for untoward results including (but not limited) any injuries or damages arising out of any person's attempt to rely upon any information herein con-tained. The exercises described in this book are for information purposes, and may be too strenuous or even dangerous for some peo-ple. The reader should consult a physician before starting this or any other exercise program.
When purchasing products from Gold Medal Bodies / Super 301, the purchaser understands the risk associated with using this type of product, and the purchaser understands the risk associated with following instructions from related products, and agrees not to hold Super 301, its agents and/or representatives responsible for injuries or damages resulting from use without proper supervision.
This course and its authors accept no responsibility for any liability, injuries or damages arising out of any person's attempt to rely upon any information contained herein. Consult your doctor before beginning training. Be sure to follow all safety and installation instructions included with your equipment carefully. The authors and publisher of this course are not responsible for problems related to the equip-ment you use to perform these exercises.
Please be sure to thoroughly read the instructions for all exercises in this course, paying particular attention to all cautions and warnings shown to ensure safety.
If you experience acute injury or persistent, chronic pains, consult a licensed health practitioner. Nothing in this document can be con-sidered a substitute for qualified medical advice.
Gold Medal Bodies
Handstand Module - 2
Contents.........................................................................................................Introduction 4
Types of Handstands 4
................................................................................................................Overview 6Basic Preparation 6
Body Position for Handstand Work 7
....................................................................................Initial Strength Building 9Core Strengthening 9
Core Strength Protocol 10
Arm Strengthening 11
Arm Strength Protocol 12
Wall Work 12
The Freestanding Handstand 13
.......................................................................Safety and Preventing Injuries 15
.........................................................................................................Conclusion 16
Gold Medal Bodies
Handstand Module - 3
IntroductionWelcome to the GMB Handstand Module. We’ve created this comprehensive program to achieving and perfecting a handstand because it is such an integral skill for complete body control and strength.
Intuitively, we seem to understand the high level of skill and strength it takes to perform a good handstand. It’s why we are so amazed by, and appreciate, acrobats and gymnasts at the peak of their form. It starts early in our days as children on the playground, when we used to get upside down on our hands because it was simply fun and challenging!
This GMB module was designed to give you everything you need to develop the best handstand possible. It will take you step by step from scratch to the point where you can hold a handstand for as long as you want, in perfect form and control.
Types of Handstands
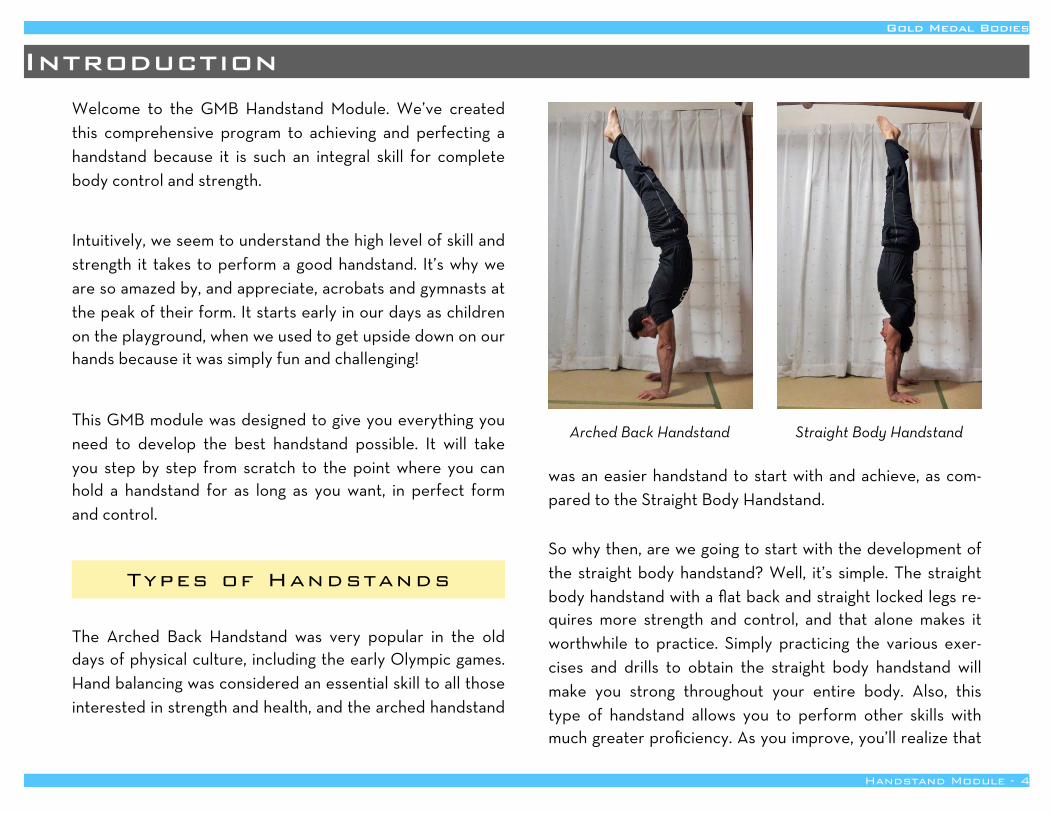
The Arched Back Handstand was very popular in the old days of physical culture, including the early Olympic games. Hand balancing was considered an essential skill to all those interested in strength and health, and the arched handstand
was an easier handstand to start with and achieve, as com-pared to the Straight Body Handstand.
So why then, are we going to start with the development of the straight body handstand? Well, it’s simple. The straight body handstand with a flat back and straight locked legs re-quires more strength and control, and that alone makes it worthwhile to practice. Simply practicing the various exer-cises and drills to obtain the straight body handstand will make you strong throughout your entire body. Also, this type of handstand allows you to perform other skills with much greater proficiency. As you improve, you’ll realize that
Gold Medal Bodies
Handstand Module - 4
Arched Back Handstand Straight Body Handstand
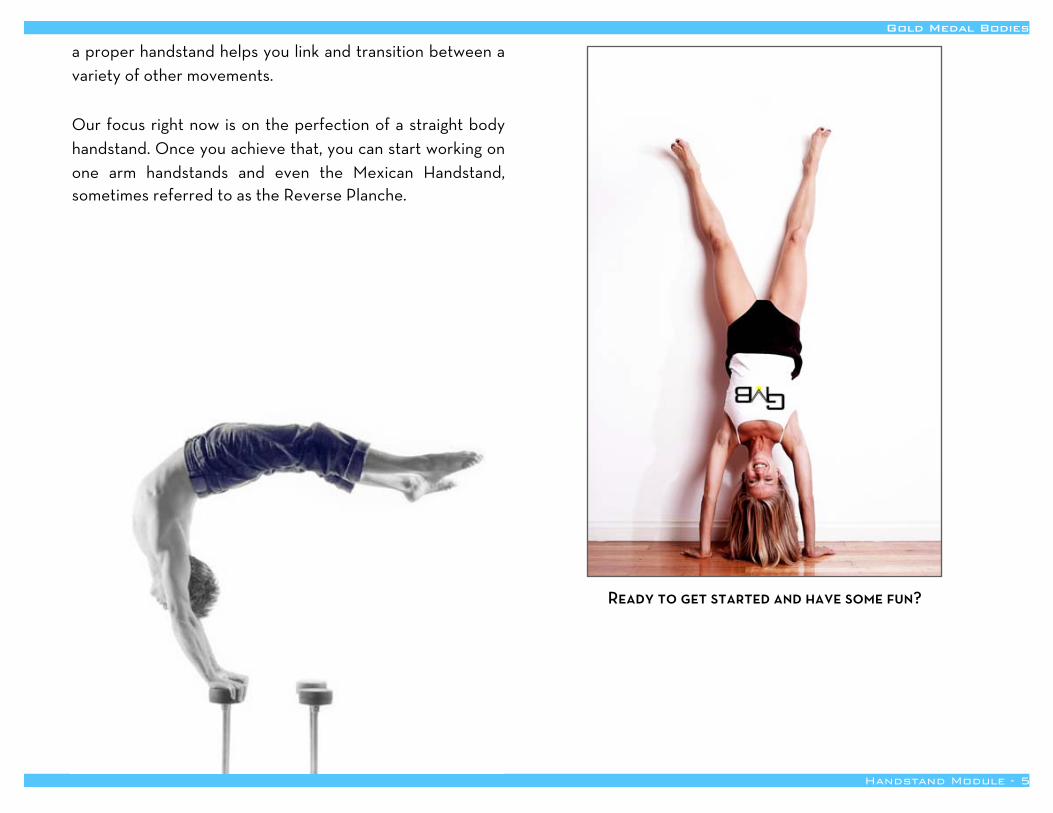
a proper handstand helps you link and transition between a variety of other movements.
Our focus right now is on the perfection of a straight body handstand. Once you achieve that, you can start working on one arm handstands and even the Mexican Handstand, sometimes referred to as the Reverse Planche.
Gold Medal Bodies
Handstand Module - 5
Ready to get started and have some fun?
OverviewBasic Preparation
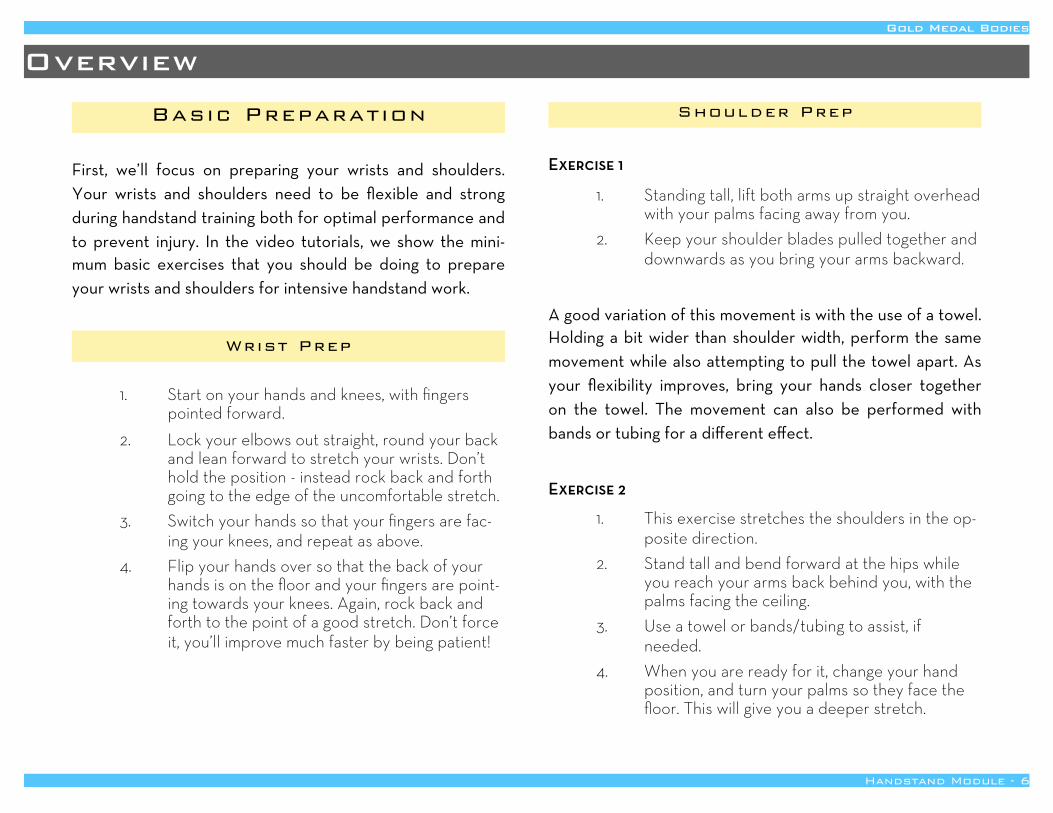
First, we’ll focus on preparing your wrists and shoulders. Your wrists and shoulders need to be flexible and strong during handstand training both for optimal performance and to prevent injury. In the video tutorials, we show the mini-mum basic exercises that you should be doing to prepare your wrists and shoulders for intensive handstand work.
Wrist Prep
1. Start on your hands and knees, with fingers pointed forward.
2. Lock your elbows out straight, round your back and lean forward to stretch your wrists. Don’t hold the position - instead rock back and forth going to the edge of the uncomfortable stretch.
3. Switch your hands so that your fingers are fac-ing your knees, and repeat as above.
4. Flip your hands over so that the back of your hands is on the floor and your fingers are point-ing towards your knees. Again, rock back and forth to the point of a good stretch. Don’t force it, you’ll improve much faster by being patient!
Shoulder Prep
Exercise 1
1. Standing tall, lift both arms up straight overhead with your palms facing away from you.
2. Keep your shoulder blades pulled together and downwards as you bring your arms backward.
A good variation of this movement is with the use of a towel. Holding a bit wider than shoulder width, perform the same movement while also attempting to pull the towel apart. As your flexibility improves, bring your hands closer together on the towel. The movement can also be performed with bands or tubing for a different effect.
Exercise 2
1. This exercise stretches the shoulders in the op-posite direction.
2. Stand tall and bend forward at the hips while you reach your arms back behind you, with the palms facing the ceiling.
3. Use a towel or bands/tubing to assist, if needed.
4. When you are ready for it, change your hand position, and turn your palms so they face the floor. This will give you a deeper stretch.
Gold Medal Bodies
Handstand Module - 6
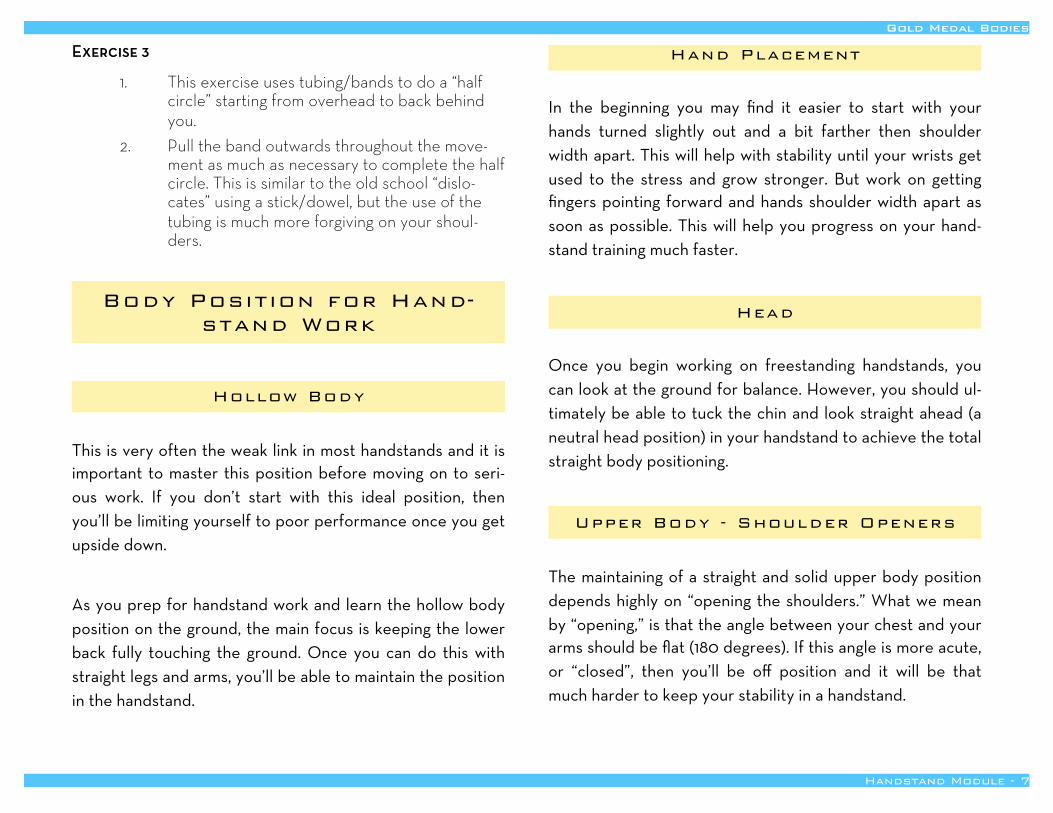
Exercise 3
1. This exercise uses tubing/bands to do a “half circle” starting from overhead to back behind you.
2. Pull the band outwards throughout the move-ment as much as necessary to complete the half circle. This is similar to the old school “dislo-cates” using a stick/dowel, but the use of the tubing is much more forgiving on your shoul-ders.
Body Position for Hand-stand Work
Hollow Body
This is very often the weak link in most handstands and it is important to master this position before moving on to seri-ous work. If you don’t start with this ideal position, then you’ll be limiting yourself to poor performance once you get upside down.
As you prep for handstand work and learn the hollow body position on the ground, the main focus is keeping the lower back fully touching the ground. Once you can do this with straight legs and arms, you’ll be able to maintain the position in the handstand.
Hand Placement
In the beginning you may find it easier to start with your hands turned slightly out and a bit farther then shoulder width apart. This will help with stability until your wrists get used to the stress and grow stronger. But work on getting fingers pointing forward and hands shoulder width apart as soon as possible. This will help you progress on your hand-stand training much faster.
Head
Once you begin working on freestanding handstands, you can look at the ground for balance. However, you should ul-timately be able to tuck the chin and look straight ahead (a neutral head position) in your handstand to achieve the total straight body positioning.
Upper Body - Shoulder Openers
The maintaining of a straight and solid upper body position depends highly on “opening the shoulders.” What we mean by “opening,” is that the angle between your chest and your arms should be flat (180 degrees). If this angle is more acute, or “closed”, then you’ll be off position and it will be that much harder to keep your stability in a handstand.
Gold Medal Bodies
Handstand Module - 7
Focus on opening up the shoulders without arching the back. In the beginning it will probably be very difficult for those if your shoulders are tight. The following shoulder stretches can help you to get that much needed flexibility.
Exercise 1
1. Lie on the ground with your elbows as close to-gether as possible, with palms facing you and little fingers touching.
2. The key here is to broaden your shoulders as much as possible (bring your shoulder blades apart) as you rock side to side. This is a decep-tively simple stretch that helps alleviate rotator cuff tightness.
Exercise 2
1. Lie on the ground, but this time stretch your hand out at approximately 45 degrees from ver-tical.
2. With your palm flat, and the other elbow bent for support, roll the front of your shoulder for-ward into the ground.
3. Switch arms to repeat on the other side.4. Place both arms out and alternate the rolling.
Exercise 3
1. This exercise is a modified Table Stretch. 2. Sitting on your butt with your legs straight in
front of you, place your hands flat right next to your hips. The action here is to to roll your el-
bows outward while keeping your hands flat on the ground.
3. Lift your hips up in the air for a deeper stretch. You’ll likely feel this strongly in either the front of your shoulders or your biceps, or both.
Legs
Contract your thighs strongly with knees straight and think about your body being one solid piece. We want to focus on straight legs from the very beginning. However, it is okay to straddle your legs for balance as long as they are straight, and as long as it doesn’t affect your hollow body/shoulder/head position. For some people this helps with their bal-ance, but it may be better to work on squeezing your legs together right from the start.
Gold Medal Bodies
Handstand Module - 8
Initial Strength BuildingCore Strengthening
We’ll begin from scratch and work to the full Hollow Body position. Even if you feel you have a strong core, it’s best to start from the beginning variation. If it’s too easy, it just means you’ll progress through it quickly, but start at the be-ginning and you’ll have a better foundation. Here are the dif-ferent stages of the Hollow Body progression.
#1 - Tuck
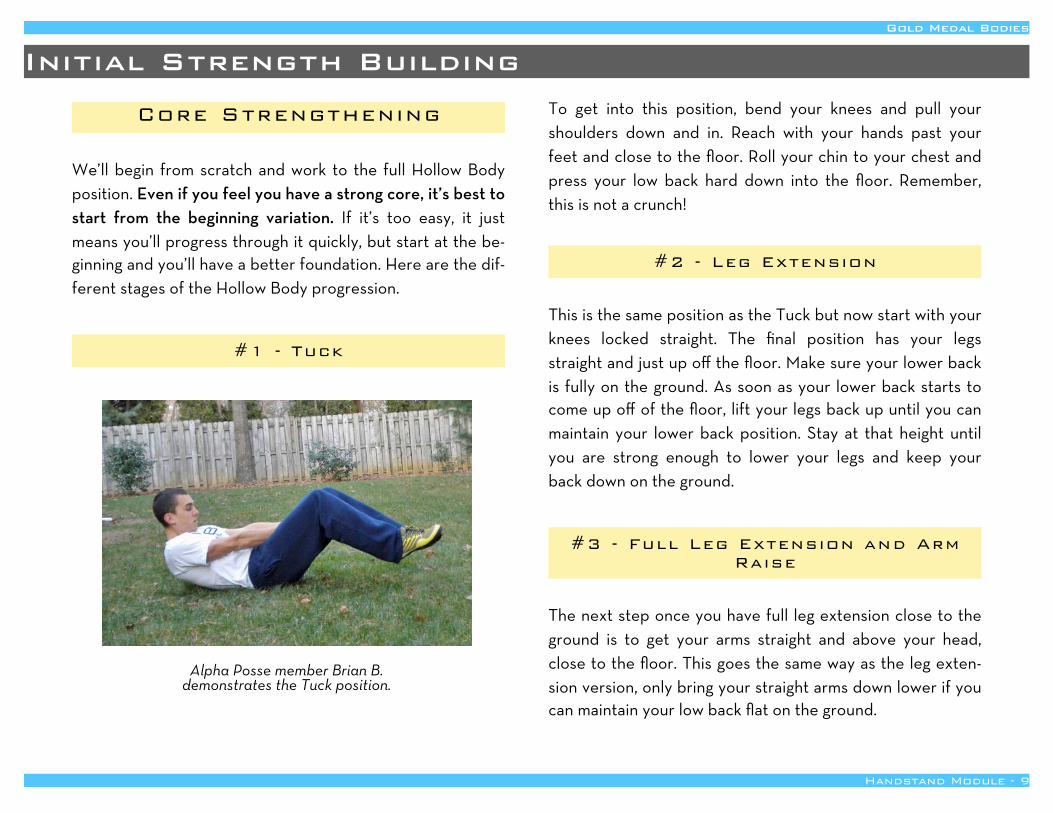
To get into this position, bend your knees and pull your shoulders down and in. Reach with your hands past your feet and close to the floor. Roll your chin to your chest and press your low back hard down into the floor. Remember, this is not a crunch!
#2 - Leg Extension
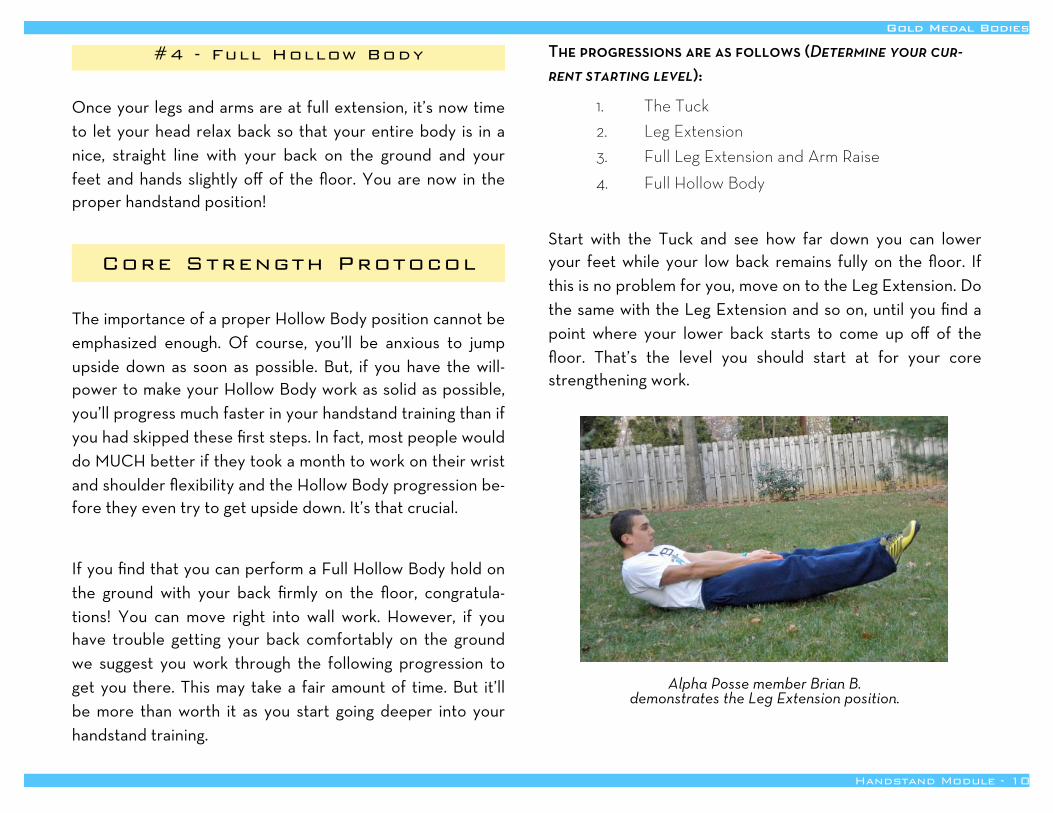
This is the same position as the Tuck but now start with your knees locked straight. The final position has your legs straight and just up off the floor. Make sure your lower back is fully on the ground. As soon as your lower back starts to come up off of the floor, lift your legs back up until you can maintain your lower back position. Stay at that height until you are strong enough to lower your legs and keep your back down on the ground.
#3 - Full Leg Extension and Arm Raise
The next step once you have full leg extension close to the ground is to get your arms straight and above your head, close to the floor. This goes the same way as the leg exten-sion version, only bring your straight arms down lower if you can maintain your low back flat on the ground.
Gold Medal Bodies
Handstand Module - 9
Alpha Posse member Brian B. demonstrates the Tuck position.
#4 - Full Hollow Body
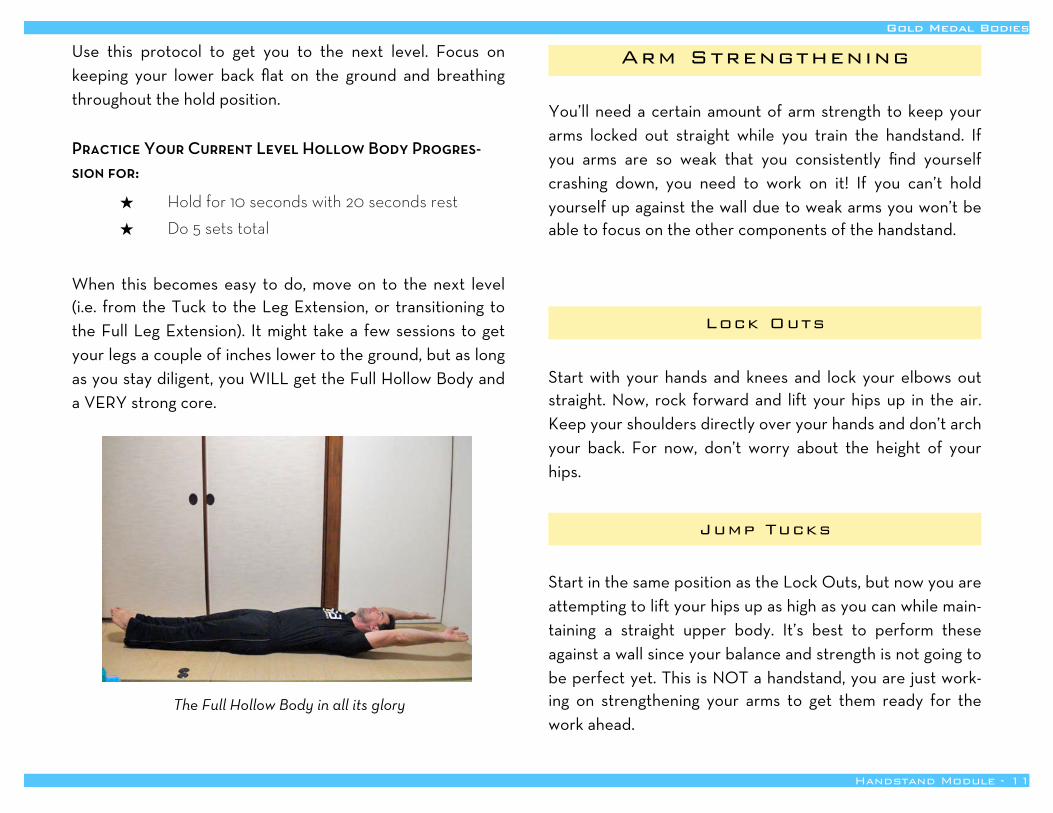
Once your legs and arms are at full extension, it’s now time to let your head relax back so that your entire body is in a nice, straight line with your back on the ground and your feet and hands slightly off of the floor. You are now in the proper handstand position!
Core Strength Protocol
The importance of a proper Hollow Body position cannot be emphasized enough. Of course, you’ll be anxious to jump upside down as soon as possible. But, if you have the will-power to make your Hollow Body work as solid as possible, you’ll progress much faster in your handstand training than if you had skipped these first steps. In fact, most people would do MUCH better if they took a month to work on their wrist and shoulder flexibility and the Hollow Body progression be-fore they even try to get upside down. It’s that crucial.
If you find that you can perform a Full Hollow Body hold on the ground with your back firmly on the floor, congratula-tions! You can move right into wall work. However, if you have trouble getting your back comfortably on the ground we suggest you work through the following progression to get you there. This may take a fair amount of time. But it’ll be more than worth it as you start going deeper into your handstand training.
The progressions are as follows (Determine your cur-rent starting level):
1. The Tuck2. Leg Extension3. Full Leg Extension and Arm Raise
4. Full Hollow Body
Start with the Tuck and see how far down you can lower your feet while your low back remains fully on the floor. If this is no problem for you, move on to the Leg Extension. Do the same with the Leg Extension and so on, until you find a point where your lower back starts to come up off of the floor. That’s the level you should start at for your core strengthening work.
Gold Medal Bodies
Handstand Module - 10
Alpha Posse member Brian B. demonstrates the Leg Extension position.
Use this protocol to get you to the next level. Focus on keeping your lower back flat on the ground and breathing throughout the hold position.
Practice Your Current Level Hollow Body Progres-
sion for:
Hold for 10 seconds with 20 seconds rest
Do 5 sets total
When this becomes easy to do, move on to the next level (i.e. from the Tuck to the Leg Extension, or transitioning to the Full Leg Extension). It might take a few sessions to get your legs a couple of inches lower to the ground, but as long as you stay diligent, you WILL get the Full Hollow Body and a VERY strong core.
Arm Strengthening
You’ll need a certain amount of arm strength to keep your arms locked out straight while you train the handstand. If you arms are so weak that you consistently find yourself crashing down, you need to work on it! If you can’t hold yourself up against the wall due to weak arms you won’t be able to focus on the other components of the handstand.
Lock Outs
Start with your hands and knees and lock your elbows out straight. Now, rock forward and lift your hips up in the air. Keep your shoulders directly over your hands and don’t arch your back. For now, don’t worry about the height of your hips.
Jump Tucks
Start in the same position as the Lock Outs, but now you are attempting to lift your hips up as high as you can while main-taining a straight upper body. It’s best to perform these against a wall since your balance and strength is not going to be perfect yet. This is NOT a handstand, you are just work-ing on strengthening your arms to get them ready for the work ahead.
Gold Medal Bodies
Handstand Module - 11
The Full Hollow Body in all its glory
Arm Strength Protocol
The following protocol is very good for strengthening your arms if you don’t feel you are strong enough for the work, or if you are nervous about being upside down.
Start with the Lock Outs and perform them along with your Hollow Body routine. Once they become easy for you move on to the Jump Tucks.
Do 3 - 5 reps for 5 setsRest up to 2 minutes between sets
Be sure to keep your arms locked out and get your butt up over your shoulders as high as possible.
Once you feel comfortable with Jump Tucks it is time to move on to Wall Work. However, you can still use Lock Outs and Jump Tucks as a warm up movement before your Hand-stand sessions.
Wall Work
Now, you’ve finally made it to the point where you’ll be get-ting upside down! Congratulations! You’ve built the proper foundation to get the most out of the practice ahead.
First, and very important, you’ll need to understand proper body alignment and hand placement. Without this it will be difficult to progress at a steady and safe pace. Proper form accelerates your progress and prevents injury. Injuries can occur from body strain from bad positioning and also from a fall that can happen when you lose your balance. Good form means you will often consistently fall/bail out in the same way, and that is much easier to control than the random po-sitions that can occur from bad form. So, protect yourself and progress faster by emphasizing proper form right from the start.
Rather than making tons of short videos, we’ve combined ‘facing the wall’ and ‘facing out’ when discussing body align-ment and hand placement. However, when you begin work-ing on the actual handstand, always start facing the wall.
Facing the Wall
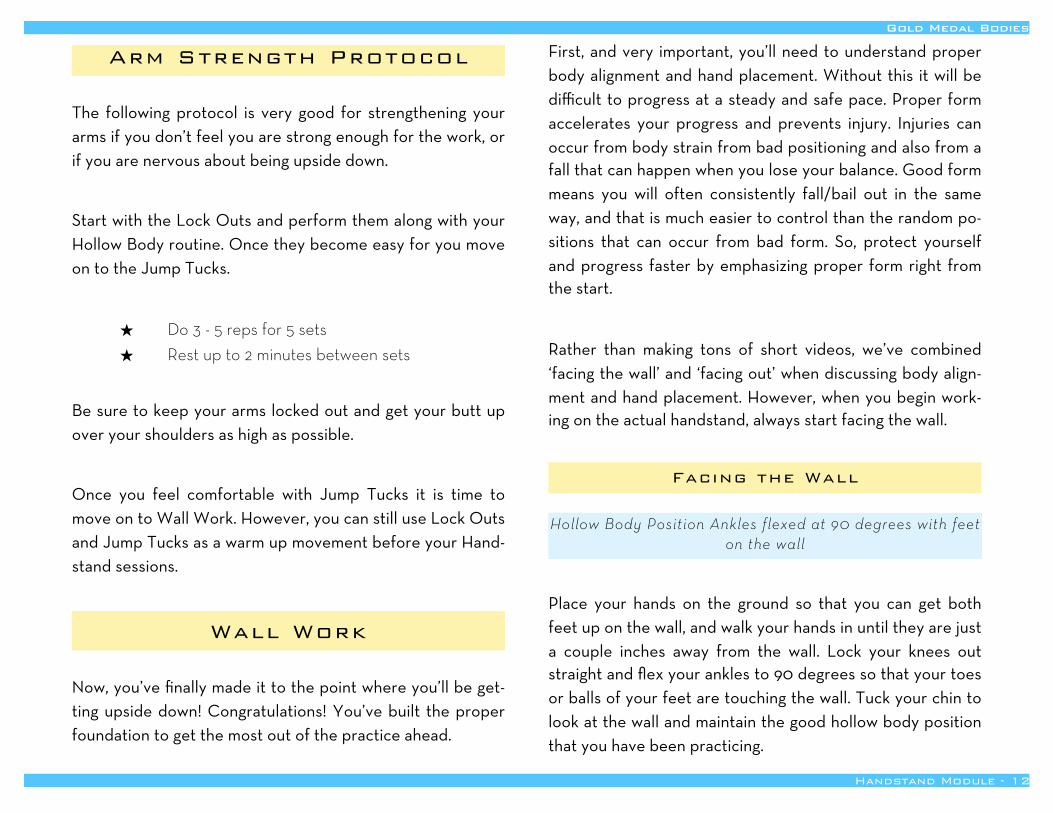
Hollow Body Position Ankles flexed at 90 degrees with feet on the wall
Place your hands on the ground so that you can get both feet up on the wall, and walk your hands in until they are just a couple inches away from the wall. Lock your knees out straight and flex your ankles to 90 degrees so that your toes or balls of your feet are touching the wall. Tuck your chin to look at the wall and maintain the good hollow body position that you have been practicing.
Gold Medal Bodies
Handstand Module - 12

Hollow Body Position Toes Pointed with feet on the wall
Once you’ve progressed to 8 sets of 30 second holds, go in the same position, but now point your toes so that the top or your toes or instep is on the wall.
Facing Out
Hollow Body Position Heel against the wall and toes pointed
Now that you are facing away from the wall, your hands will need to be a bit further out than before, so that your hips/butt won’t be against the wall. Maintain the same hollow body positioning as before, focusing on being as tight as possible throughout your body. Your goal here is 8 sets of 30 seconds for at least three sessions before progressing.
The Freestanding Hand-stand
Using the L-Stand
The L-Stand is a great place to start getting away from the wall. The key point in the L-stand is keep your hips/butt over your shoulders and your shoulders over your hands. This position locks your upper body in the proper support for your lower body. Look straight back towards the wall as
you kick one leg straight up in the air. Then lightly push off from the wall to get both legs up above you. This is a great movement to test your overall body strength in the hand-stand and will let you know how much more work you need to do!
Controlling Falling
In the videos we share how to roll or cartwheel out of the handstand. These are both smooth ways to exit the hand-stand and also are the safest ways to go so you don’t injure yourself.
It’s best to start close to a mat or other soft surface, until your form improves. Work on these slowly and don’t rush. A high comfort level in these moves means you’ll be able to spend a lot of time practicing your handstand without a fear of falling.
The key point in rolling is to TUCK! Tuck your chin, round your back and bend your knees. If you don’t do this you’ll land flat on your back. You’ll only need to do that once be-fore you realize that’s a bad idea!
The key point in a cartwheel is to keep your elbows locked out straight and fold at your hips. If your elbows bend, you’ll crash and hit your head. This is obviously not a good idea!
Gold Medal Bodies
Handstand Module - 13
Whichever method you use, please do not crash out of a handstand. It’s dangerous and a bad habit to start with. If you are consistently crashing you are probably rushing your progression, and it’s in your best interest to go back to work-ing your L-stand. Your body will thank you later.
Extending Your Time Upside Down
When you begin your work on freestanding handstands, you must fully understand the role of your hands. The best way to describe it is that you must think of your hands as feet and your fingers as toes. Gripping the ground with your fin-gers and shifting the weight from the front to back or back to front of your hands with your finger strength is the key to balance and controlling your handstand.
When you feel yourself falling over your head, push your fingers into the floor. This will help stabilize you as long as you hold the hollow body position.
When you feel that you are falling back, drive the heels of your hands into the floor and tuck your chin. This will help you keep your position.
Of course, if your hollow body position falters or your legs aren’t squeezed tightly, you will more than likely come down and out of the handstand. So be sure to keep your legs held tightly together and hold that hollow body position!
Opening the Shoulders
As we mentioned earlier, one problem that prevents many people from achieving the straight body handstand is not being able to fully open their shoulders. This is why you should spend a good deal of time working on warming up your shoulders. If you have trouble with tight shoulders be sure to spend extra time on the exercises we’ve provided to help you stretch out and strengthen your shoulders.
Spotting
If you are lucky enough to work with a training partner, you’ll want to spot each other in the best way possible. You shouldn’t be trying to “catch.” Instead, have one arm ex-tended out and be as close to your partner as possible. You’ll have more control and better balance. In the begin-ning most people will over kick into the handstand and start to fall over their head. So be ready to steady your partner’s legs. Remember, the spotter’s job is to help the person stay upside down longer with PERFECT form.
Gold Medal Bodies
Handstand Module - 14
Safety and Preventing InjuriesHandstand work can be dangerous and just like any other physical training, injuries are possible. But, as long as you fol-low what we are prescribing in this module, serious issues will be very rare.
Here are a few pointers that bear repeating.
Be sure to warm up. Your wrists and shoulders take the bulk of the weight in handstand work so make sure that you spend the proper amount of time warming them up. That goes for strengthening them as well. Don’t skimp on your warm up and strength work!
Don’t be stupid! Follow this manual the way that we presented it. Don’t skip to the free-standing handstand work until you can do eve-rything else leading up to it. You are only wast-ing your time as well as setting yourself up for unnecessary harm. No drunk handstands. Sure, handstands are a really cool party trick. Let’s just be sure to show them off on the ground before we transition into keg stands.
Gold Medal Bodies
Handstand Module - 15
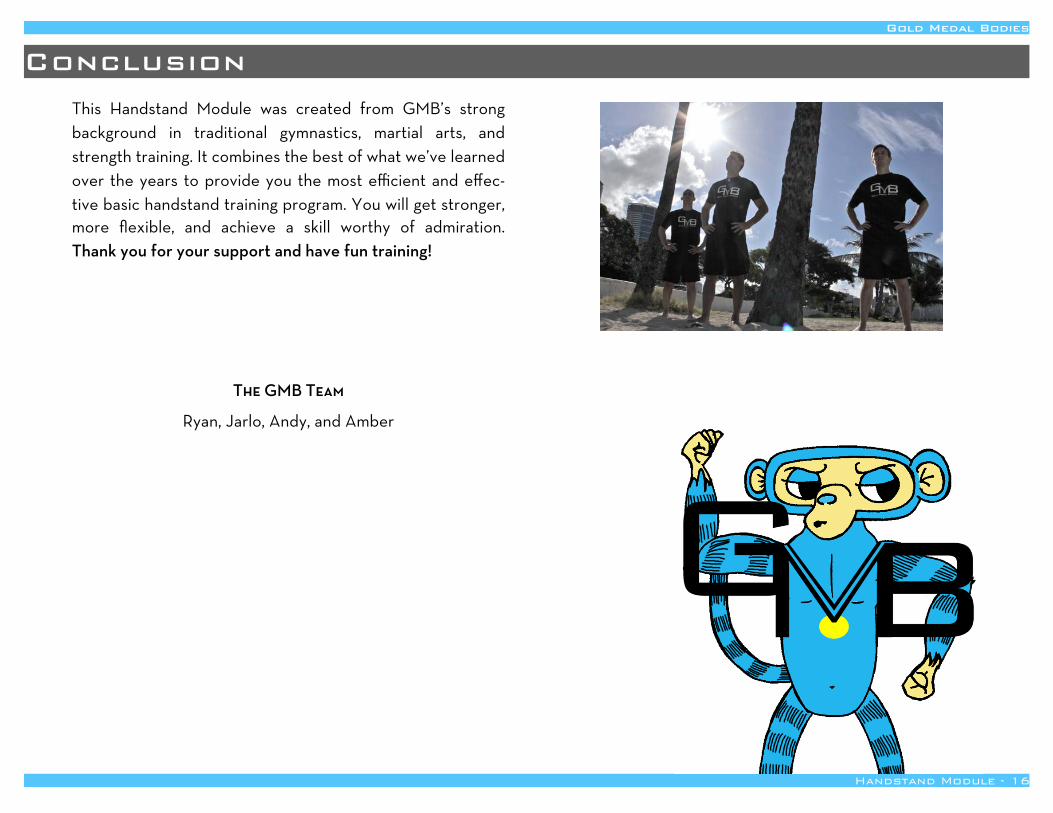
ConclusionThis Handstand Module was created from GMB’s strong background in traditional gymnastics, martial arts, and strength training. It combines the best of what we’ve learned over the years to provide you the most efficient and effec-tive basic handstand training program. You will get stronger, more flexible, and achieve a skill worthy of admiration. Thank you for your support and have fun training!
The GMB Team
Ryan, Jarlo, Andy, and Amber
Gold Medal Bodies
Handstand Module - 16


