86
Manual miraysoftware.com Copy | Backup | Migration | Rescue HDClone
Copyright © 2002-2014 by Miray Software. All rights reserved.
Miray Software AGGaissacher Str. 1881371 MunichGermany
Manual
miraysoftware.com
Copy | Backup | Migration | Rescue
Homepage: miraysoftware.comProduct page: miraysoftware.com/HDCloneOnline shop: miraysoftware.com/shopEmail contact: [email protected]
HDClone
HDClone
Manual
HDClone
Table of Contents 3
Table of Contents
1 Introduction . . . . . . . . . . . . . . . . . . . . . . . . . . . . . . . . . . . . . . . . . . . . . . . . . . 91.1 Brief description. . . . . . . . . . . . . . . . . . . . . . . . . . . . . . . . . . . . . . . . . . . . . 91.2 Chapter summary . . . . . . . . . . . . . . . . . . . . . . . . . . . . . . . . . . . . . . . . . . . 91.3 Character conventions . . . . . . . . . . . . . . . . . . . . . . . . . . . . . . . . . . . . . . . 101.4 Edition summary . . . . . . . . . . . . . . . . . . . . . . . . . . . . . . . . . . . . . . . . . . . . 101.5 New in HDClone 5 . . . . . . . . . . . . . . . . . . . . . . . . . . . . . . . . . . . . . . . . . . 12
1.5.1 Main screen . . . . . . . . . . . . . . . . . . . . . . . . . . . . . . . . . . . . . . . . . 121.5.2 Program screens . . . . . . . . . . . . . . . . . . . . . . . . . . . . . . . . . . . . . 121.5.3 Boot Setup . . . . . . . . . . . . . . . . . . . . . . . . . . . . . . . . . . . . . . . . . . 12
2 Fields of application . . . . . . . . . . . . . . . . . . . . . . . . . . . . . . . . . . . . . . . . . . . 132.1 Upgrading hard disks & migrating an OS . . . . . . . . . . . . . . . . . . . . . . . . 13
2.1.1 Unused disk space . . . . . . . . . . . . . . . . . . . . . . . . . . . . . . . . . . . 132.1.2 Smaller target medium. . . . . . . . . . . . . . . . . . . . . . . . . . . . . . . . 14
2.2 Data rescue . . . . . . . . . . . . . . . . . . . . . . . . . . . . . . . . . . . . . . . . . . . . . . . . 142.3 Installation backup. . . . . . . . . . . . . . . . . . . . . . . . . . . . . . . . . . . . . . . . . . . 142.4 Mass copying . . . . . . . . . . . . . . . . . . . . . . . . . . . . . . . . . . . . . . . . . . . . . . . 152.5 Master installations . . . . . . . . . . . . . . . . . . . . . . . . . . . . . . . . . . . . . . . . . . 152.6 Proprietary hard disk formats . . . . . . . . . . . . . . . . . . . . . . . . . . . . . . . . . 152.7 Forensic examination . . . . . . . . . . . . . . . . . . . . . . . . . . . . . . . . . . . . . . . . 152.8 Image files. . . . . . . . . . . . . . . . . . . . . . . . . . . . . . . . . . . . . . . . . . . . . . . . . . 162.9 HotCopy & LiveImage . . . . . . . . . . . . . . . . . . . . . . . . . . . . . . . . . . . . . . . 16
3 Supported hardware . . . . . . . . . . . . . . . . . . . . . . . . . . . . . . . . . . . . . . . . . . 173.1 HDClone/W . . . . . . . . . . . . . . . . . . . . . . . . . . . . . . . . . . . . . . . . . . . . . . . . 17
3.1.1 Supported systems . . . . . . . . . . . . . . . . . . . . . . . . . . . . . . . . . . . 173.1.2 Supported controllers and adapter cards . . . . . . . . . . . . . . . . 173.1.3 Supported devices and media . . . . . . . . . . . . . . . . . . . . . . . . . 17
3.2 HDClone/S . . . . . . . . . . . . . . . . . . . . . . . . . . . . . . . . . . . . . . . . . . . . . . . . . 173.2.1 Supported Systems . . . . . . . . . . . . . . . . . . . . . . . . . . . . . . . . . . . 183.2.2 Supported controllers . . . . . . . . . . . . . . . . . . . . . . . . . . . . . . . . . 183.2.3 Supported media. . . . . . . . . . . . . . . . . . . . . . . . . . . . . . . . . . . . . 18
3.3 Compatibility . . . . . . . . . . . . . . . . . . . . . . . . . . . . . . . . . . . . . . . . . . . . . . . 193.3.1 Compatibility check . . . . . . . . . . . . . . . . . . . . . . . . . . . . . . . . . . 193.3.2 Standards . . . . . . . . . . . . . . . . . . . . . . . . . . . . . . . . . . . . . . . . . . . 193.3.3 Speed . . . . . . . . . . . . . . . . . . . . . . . . . . . . . . . . . . . . . . . . . . . . . . 19
3.4 SCSI and SAS. . . . . . . . . . . . . . . . . . . . . . . . . . . . . . . . . . . . . . . . . . . . . . . . 193.5 USB. . . . . . . . . . . . . . . . . . . . . . . . . . . . . . . . . . . . . . . . . . . . . . . . . . . . . . . . 20

4 Table of Contents
3.6 Firewire (IEEE1394) . . . . . . . . . . . . . . . . . . . . . . . . . . . . . . . . . . . . . . . . . . 20
4 Quickstart . . . . . . . . . . . . . . . . . . . . . . . . . . . . . . . . . . . . . . . . . . . . . . . . . . . 214.1 Windows – HDClone/W . . . . . . . . . . . . . . . . . . . . . . . . . . . . . . . . . . . . . 214.2 Self-booting – HDClone/S . . . . . . . . . . . . . . . . . . . . . . . . . . . . . . . . . . . . 21
5 Installation . . . . . . . . . . . . . . . . . . . . . . . . . . . . . . . . . . . . . . . . . . . . . . . . . . . 225.1 Setup for Windows . . . . . . . . . . . . . . . . . . . . . . . . . . . . . . . . . . . . . . . . . . 22
5.1.1 Miray Virtual Disk . . . . . . . . . . . . . . . . . . . . . . . . . . . . . . . . . . . . 225.2 Boot-Setup . . . . . . . . . . . . . . . . . . . . . . . . . . . . . . . . . . . . . . . . . . . . . . . . . 235.3 Bootable Windows CD. . . . . . . . . . . . . . . . . . . . . . . . . . . . . . . . . . . . . . . 24
5.3.1 BartPE (Windows XP) . . . . . . . . . . . . . . . . . . . . . . . . . . . . . . . . . 245.3.2 Windows PE . . . . . . . . . . . . . . . . . . . . . . . . . . . . . . . . . . . . . . . . . 255.3.3 Windows HotCopy . . . . . . . . . . . . . . . . . . . . . . . . . . . . . . . . . . . 25
5.4 ISO image . . . . . . . . . . . . . . . . . . . . . . . . . . . . . . . . . . . . . . . . . . . . . . . . . . 26
6 Program startup . . . . . . . . . . . . . . . . . . . . . . . . . . . . . . . . . . . . . . . . . . . . . . 276.1 Windows – HDClone/W . . . . . . . . . . . . . . . . . . . . . . . . . . . . . . . . . . . . . 276.2 Self-booting – HDClone/S . . . . . . . . . . . . . . . . . . . . . . . . . . . . . . . . . . . . 276.3 Quit program . . . . . . . . . . . . . . . . . . . . . . . . . . . . . . . . . . . . . . . . . . . . . . . 27
7 Program functions . . . . . . . . . . . . . . . . . . . . . . . . . . . . . . . . . . . . . . . . . . . . 287.1 Cloning . . . . . . . . . . . . . . . . . . . . . . . . . . . . . . . . . . . . . . . . . . . . . . . . . . . . 28
7.1.1 Cloning disks. . . . . . . . . . . . . . . . . . . . . . . . . . . . . . . . . . . . . . . . . 287.1.2 Cloning Partitions. . . . . . . . . . . . . . . . . . . . . . . . . . . . . . . . . . . . . 297.1.3 BitCopy . . . . . . . . . . . . . . . . . . . . . . . . . . . . . . . . . . . . . . . . . . . . . 29
7.2 Data backup. . . . . . . . . . . . . . . . . . . . . . . . . . . . . . . . . . . . . . . . . . . . . . . . 307.2.1 Backup . . . . . . . . . . . . . . . . . . . . . . . . . . . . . . . . . . . . . . . . . . . . . 307.2.2 Recovery. . . . . . . . . . . . . . . . . . . . . . . . . . . . . . . . . . . . . . . . . . . . 31
7.3 File images . . . . . . . . . . . . . . . . . . . . . . . . . . . . . . . . . . . . . . . . . . . . . . . . . 317.3.1 Disk Image . . . . . . . . . . . . . . . . . . . . . . . . . . . . . . . . . . . . . . . . . . 327.3.2 BitImage . . . . . . . . . . . . . . . . . . . . . . . . . . . . . . . . . . . . . . . . . . . . 327.3.3 VM-Image. . . . . . . . . . . . . . . . . . . . . . . . . . . . . . . . . . . . . . . . . . . 33
7.4 MultiCopy . . . . . . . . . . . . . . . . . . . . . . . . . . . . . . . . . . . . . . . . . . . . . . . . . . 337.4.1 Multi-SmartCopy . . . . . . . . . . . . . . . . . . . . . . . . . . . . . . . . . . . . . 337.4.2 Multi-BitCopy. . . . . . . . . . . . . . . . . . . . . . . . . . . . . . . . . . . . . . . . 347.4.3 Multi-Deploy . . . . . . . . . . . . . . . . . . . . . . . . . . . . . . . . . . . . . . . . 34
7.5 Tools. . . . . . . . . . . . . . . . . . . . . . . . . . . . . . . . . . . . . . . . . . . . . . . . . . . . . . . 347.5.1 SpeedTest . . . . . . . . . . . . . . . . . . . . . . . . . . . . . . . . . . . . . . . . . . . 347.5.2 DiskView . . . . . . . . . . . . . . . . . . . . . . . . . . . . . . . . . . . . . . . . . . . . 35
8 Controls . . . . . . . . . . . . . . . . . . . . . . . . . . . . . . . . . . . . . . . . . . . . . . . . . . . . . 368.1 General operation . . . . . . . . . . . . . . . . . . . . . . . . . . . . . . . . . . . . . . . . . . . 36
8.1.1 Title bar . . . . . . . . . . . . . . . . . . . . . . . . . . . . . . . . . . . . . . . . . . . . . 37
Table of Contents 5
8.1.1.1 System status . . . . . . . . . . . . . . . . . . . . . . . . . . . . . . . . 378.1.1.2 Toolbox . . . . . . . . . . . . . . . . . . . . . . . . . . . . . . . . . . . . . 378.1.1.3 License information . . . . . . . . . . . . . . . . . . . . . . . . . . . 37
8.1.2 Control panel . . . . . . . . . . . . . . . . . . . . . . . . . . . . . . . . . . . . . . . . 378.1.3 Status panel . . . . . . . . . . . . . . . . . . . . . . . . . . . . . . . . . . . . . . . . . 388.1.4 Graphical controls . . . . . . . . . . . . . . . . . . . . . . . . . . . . . . . . . . . . 388.1.5 Mouse operation. . . . . . . . . . . . . . . . . . . . . . . . . . . . . . . . . . . . . 388.1.6 Keyboard operation . . . . . . . . . . . . . . . . . . . . . . . . . . . . . . . . . . 388.1.7 Help & closing . . . . . . . . . . . . . . . . . . . . . . . . . . . . . . . . . . . . . . . 39
8.2 Main screen . . . . . . . . . . . . . . . . . . . . . . . . . . . . . . . . . . . . . . . . . . . . . . . . 398.2.1 Program functions . . . . . . . . . . . . . . . . . . . . . . . . . . . . . . . . . . . . 398.2.2 Quitting & powering off . . . . . . . . . . . . . . . . . . . . . . . . . . . . . . . 39
8.3 Program screens . . . . . . . . . . . . . . . . . . . . . . . . . . . . . . . . . . . . . . . . . . . . 408.3.1 Selecting a disk . . . . . . . . . . . . . . . . . . . . . . . . . . . . . . . . . . . . . . 408.3.2 Selecting a partition . . . . . . . . . . . . . . . . . . . . . . . . . . . . . . . . . . 408.3.3 Selecting an image . . . . . . . . . . . . . . . . . . . . . . . . . . . . . . . . . . . 418.3.4 Options . . . . . . . . . . . . . . . . . . . . . . . . . . . . . . . . . . . . . . . . . . . . . 41
8.3.4.1 General options . . . . . . . . . . . . . . . . . . . . . . . . . . . . . . 428.3.4.2 Cloning options. . . . . . . . . . . . . . . . . . . . . . . . . . . . . . . 438.3.4.3 Backup options . . . . . . . . . . . . . . . . . . . . . . . . . . . . . . . 438.3.4.4 Restore options. . . . . . . . . . . . . . . . . . . . . . . . . . . . . . . 438.3.4.5 Options for source and target . . . . . . . . . . . . . . . . . . 43
8.3.5 Copying data . . . . . . . . . . . . . . . . . . . . . . . . . . . . . . . . . . . . . . . . 448.3.5.1 Status indication . . . . . . . . . . . . . . . . . . . . . . . . . . . . . . 448.3.5.2 Percentage indication . . . . . . . . . . . . . . . . . . . . . . . . . 458.3.5.3 Progress bar. . . . . . . . . . . . . . . . . . . . . . . . . . . . . . . . . . 458.3.5.4 Copying sequence. . . . . . . . . . . . . . . . . . . . . . . . . . . . 458.3.5.5 Cancellation . . . . . . . . . . . . . . . . . . . . . . . . . . . . . . . . . 458.3.5.6 Regular termination . . . . . . . . . . . . . . . . . . . . . . . . . . . 45
8.4 Popup windows . . . . . . . . . . . . . . . . . . . . . . . . . . . . . . . . . . . . . . . . . . . . . 468.4.1 Image browser. . . . . . . . . . . . . . . . . . . . . . . . . . . . . . . . . . . . . . . 468.4.2 PartitionSelect . . . . . . . . . . . . . . . . . . . . . . . . . . . . . . . . . . . . . . . 468.4.3 Adjusting partitions . . . . . . . . . . . . . . . . . . . . . . . . . . . . . . . . . . . 47
8.4.3.1 Keep original sizes . . . . . . . . . . . . . . . . . . . . . . . . . . . . 488.4.3.2 Automatic adjustment. . . . . . . . . . . . . . . . . . . . . . . . . 488.4.3.3 Free adjustment . . . . . . . . . . . . . . . . . . . . . . . . . . . . . . 48
8.4.4 Security query . . . . . . . . . . . . . . . . . . . . . . . . . . . . . . . . . . . . . . . 498.4.5 Adjust boot data . . . . . . . . . . . . . . . . . . . . . . . . . . . . . . . . . . . . . 498.4.6 Final report . . . . . . . . . . . . . . . . . . . . . . . . . . . . . . . . . . . . . . . . . . 508.4.7 SpeedTest result . . . . . . . . . . . . . . . . . . . . . . . . . . . . . . . . . . . . . 518.4.8 DiskView sector data . . . . . . . . . . . . . . . . . . . . . . . . . . . . . . . . . 52
6 Table of Contents
9 Mode of operation . . . . . . . . . . . . . . . . . . . . . . . . . . . . . . . . . . . . . . . . . . . . 539.1 Copy modes. . . . . . . . . . . . . . . . . . . . . . . . . . . . . . . . . . . . . . . . . . . . . . . . 53
9.1.1 FullCopy . . . . . . . . . . . . . . . . . . . . . . . . . . . . . . . . . . . . . . . . . . . . 539.1.2 SmartCopy . . . . . . . . . . . . . . . . . . . . . . . . . . . . . . . . . . . . . . . . . . 539.1.3 BitCopy . . . . . . . . . . . . . . . . . . . . . . . . . . . . . . . . . . . . . . . . . . . . . 54
9.2 Size differences . . . . . . . . . . . . . . . . . . . . . . . . . . . . . . . . . . . . . . . . . . . . . 549.2.1 Equal size . . . . . . . . . . . . . . . . . . . . . . . . . . . . . . . . . . . . . . . . . . . 549.2.2 Small to large . . . . . . . . . . . . . . . . . . . . . . . . . . . . . . . . . . . . . . . . 559.2.3 Large to small . . . . . . . . . . . . . . . . . . . . . . . . . . . . . . . . . . . . . . . . 55
9.3 Verification . . . . . . . . . . . . . . . . . . . . . . . . . . . . . . . . . . . . . . . . . . . . . . . . . 559.4 Automatic troubleshooting . . . . . . . . . . . . . . . . . . . . . . . . . . . . . . . . . . . 55
9.4.1 Intensive reading/writing . . . . . . . . . . . . . . . . . . . . . . . . . . . . . . 559.4.2 Read errors . . . . . . . . . . . . . . . . . . . . . . . . . . . . . . . . . . . . . . . . . . 569.4.3 Write errors . . . . . . . . . . . . . . . . . . . . . . . . . . . . . . . . . . . . . . . . . 569.4.4 Verification errors . . . . . . . . . . . . . . . . . . . . . . . . . . . . . . . . . . . . 56
9.5 Area copy . . . . . . . . . . . . . . . . . . . . . . . . . . . . . . . . . . . . . . . . . . . . . . . . . . 579.5.1 Usage . . . . . . . . . . . . . . . . . . . . . . . . . . . . . . . . . . . . . . . . . . . . . . 579.5.2 Mode of operation . . . . . . . . . . . . . . . . . . . . . . . . . . . . . . . . . . . 57
9.6 MultiCopy . . . . . . . . . . . . . . . . . . . . . . . . . . . . . . . . . . . . . . . . . . . . . . . . . . 579.6.1 Mode of operation . . . . . . . . . . . . . . . . . . . . . . . . . . . . . . . . . . . 579.6.2 Speed . . . . . . . . . . . . . . . . . . . . . . . . . . . . . . . . . . . . . . . . . . . . . . 589.6.3 Different media . . . . . . . . . . . . . . . . . . . . . . . . . . . . . . . . . . . . . . 58
9.7 PartitionSelect . . . . . . . . . . . . . . . . . . . . . . . . . . . . . . . . . . . . . . . . . . . . . . 589.8 File images . . . . . . . . . . . . . . . . . . . . . . . . . . . . . . . . . . . . . . . . . . . . . . . . . 59
9.8.1 FullImage. . . . . . . . . . . . . . . . . . . . . . . . . . . . . . . . . . . . . . . . . . . . 599.8.2 SmartImage . . . . . . . . . . . . . . . . . . . . . . . . . . . . . . . . . . . . . . . . . 599.8.3 RAW images . . . . . . . . . . . . . . . . . . . . . . . . . . . . . . . . . . . . . . . . . 599.8.4 VM-Images (VMDK, VHD/VHDX, VDI) . . . . . . . . . . . . . . . . . . 599.8.5 Usage . . . . . . . . . . . . . . . . . . . . . . . . . . . . . . . . . . . . . . . . . . . . . . 609.8.6 Compressed Images . . . . . . . . . . . . . . . . . . . . . . . . . . . . . . . . . . 619.8.7 Password-Protection . . . . . . . . . . . . . . . . . . . . . . . . . . . . . . . . . . 619.8.8 Encryption . . . . . . . . . . . . . . . . . . . . . . . . . . . . . . . . . . . . . . . . . . 619.8.9 Images from CD/DVD/BD . . . . . . . . . . . . . . . . . . . . . . . . . . . . . 62
9.9 Defragmentation . . . . . . . . . . . . . . . . . . . . . . . . . . . . . . . . . . . . . . . . . . . . 62
10 Command line (CLI) . . . . . . . . . . . . . . . . . . . . . . . . . . . . . . . . . . . . . . . . . . . 6410.1 Command line interface . . . . . . . . . . . . . . . . . . . . . . . . . . . . . . . . . . . . . 64
10.1.1 Start Menu . . . . . . . . . . . . . . . . . . . . . . . . . . . . . . . . . . . . . . . . . . 6510.1.2 Program call . . . . . . . . . . . . . . . . . . . . . . . . . . . . . . . . . . . . . . . . . 6510.1.3 Drive identification . . . . . . . . . . . . . . . . . . . . . . . . . . . . . . . . . . . 6610.1.4 File image paths. . . . . . . . . . . . . . . . . . . . . . . . . . . . . . . . . . . . . . 6610.1.5 Network shares . . . . . . . . . . . . . . . . . . . . . . . . . . . . . . . . . . . . . . 66
Table of Contents 7
10.1.6 Optional parameters. . . . . . . . . . . . . . . . . . . . . . . . . . . . . . . . . . 6710.1.7 Return values . . . . . . . . . . . . . . . . . . . . . . . . . . . . . . . . . . . . . . . . 6810.1.8 Resizing . . . . . . . . . . . . . . . . . . . . . . . . . . . . . . . . . . . . . . . . . . . . . 6910.1.9 Examples of use. . . . . . . . . . . . . . . . . . . . . . . . . . . . . . . . . . . . . . 70
10.2 Store final report . . . . . . . . . . . . . . . . . . . . . . . . . . . . . . . . . . . . . . . . . . . . 70
11 Troubleshooting . . . . . . . . . . . . . . . . . . . . . . . . . . . . . . . . . . . . . . . . . . . . . . 7111.1 General . . . . . . . . . . . . . . . . . . . . . . . . . . . . . . . . . . . . . . . . . . . . . . . . . . . . 71
11.1.1 Retry . . . . . . . . . . . . . . . . . . . . . . . . . . . . . . . . . . . . . . . . . . . . . . . 7111.1.2 System-Log . . . . . . . . . . . . . . . . . . . . . . . . . . . . . . . . . . . . . . . . . . 71
11.2 Create a bootable HDClone medium . . . . . . . . . . . . . . . . . . . . . . . . . . 7211.2.1 USB key not working. . . . . . . . . . . . . . . . . . . . . . . . . . . . . . . . . . 7211.2.2 CD/DVD writer not selectable . . . . . . . . . . . . . . . . . . . . . . . . . 72
11.3 Booting HDClone . . . . . . . . . . . . . . . . . . . . . . . . . . . . . . . . . . . . . . . . . . . 7211.3.2.1 . . . . . . . . . . . . . . . . . . . . . . . . . . . . . . . . . . . . . . . . . . . . . . . .BIOS-USB-Boot . . . . . . . . . . . . . . . . . . . . . . . . . . . . . . . . . . . . . . . 7211.3.2.2 . . . . . . . . . . . . . . . . . . . . . . . . . . . . . . . . . . . . . . . . . . . . . . . .UEFI-Boot and SecureBoot . . . . . . . . . . . . . . . . . . . . . . . . . . . . 72
11.4 Input devices . . . . . . . . . . . . . . . . . . . . . . . . . . . . . . . . . . . . . . . . . . . . . . . 7311.4.1 General . . . . . . . . . . . . . . . . . . . . . . . . . . . . . . . . . . . . . . . . . . . . . 7311.4.2 Bluetooth devices . . . . . . . . . . . . . . . . . . . . . . . . . . . . . . . . . . . . 7311.4.3 Problem devices . . . . . . . . . . . . . . . . . . . . . . . . . . . . . . . . . . . . . 73
11.5 Copied disk . . . . . . . . . . . . . . . . . . . . . . . . . . . . . . . . . . . . . . . . . . . . . . . . . 7311.5.1 Clone not booting. . . . . . . . . . . . . . . . . . . . . . . . . . . . . . . . . . . . 7311.5.2 Decelerated system . . . . . . . . . . . . . . . . . . . . . . . . . . . . . . . . . . 74
11.6 Copying process . . . . . . . . . . . . . . . . . . . . . . . . . . . . . . . . . . . . . . . . . . . . 7411.6.1 Read, write and verification errors . . . . . . . . . . . . . . . . . . . . . . 7411.6.2 Copying performance . . . . . . . . . . . . . . . . . . . . . . . . . . . . . . . . 74
11.7 Mass storage. . . . . . . . . . . . . . . . . . . . . . . . . . . . . . . . . . . . . . . . . . . . . . . . 7511.7.1 SCSI . . . . . . . . . . . . . . . . . . . . . . . . . . . . . . . . . . . . . . . . . . . . . . . . 75
11.8 USB. . . . . . . . . . . . . . . . . . . . . . . . . . . . . . . . . . . . . . . . . . . . . . . . . . . . . . . . 7611.8.1 Hubs . . . . . . . . . . . . . . . . . . . . . . . . . . . . . . . . . . . . . . . . . . . . . . . 7611.8.2 USB 3. . . . . . . . . . . . . . . . . . . . . . . . . . . . . . . . . . . . . . . . . . . . . . . 76
11.9 Mapped network drives . . . . . . . . . . . . . . . . . . . . . . . . . . . . . . . . . . . . . . 76
12 Miray Virtual Disk . . . . . . . . . . . . . . . . . . . . . . . . . . . . . . . . . . . . . . . . . . . . . 7712.1 Installation. . . . . . . . . . . . . . . . . . . . . . . . . . . . . . . . . . . . . . . . . . . . . . . . . . 7712.2 Program startup . . . . . . . . . . . . . . . . . . . . . . . . . . . . . . . . . . . . . . . . . . . . . 77
12.2.1 Program window . . . . . . . . . . . . . . . . . . . . . . . . . . . . . . . . . . . . . 7712.2.2 Image list. . . . . . . . . . . . . . . . . . . . . . . . . . . . . . . . . . . . . . . . . . . . 7812.2.3 Tray icon . . . . . . . . . . . . . . . . . . . . . . . . . . . . . . . . . . . . . . . . . . . . 79
12.3 Operation . . . . . . . . . . . . . . . . . . . . . . . . . . . . . . . . . . . . . . . . . . . . . . . . . . 79

8 Table of Contents
12.3.1 Adding an image . . . . . . . . . . . . . . . . . . . . . . . . . . . . . . . . . . . . . 7912.3.2 Removing an image . . . . . . . . . . . . . . . . . . . . . . . . . . . . . . . . . . 8012.3.3 Empty image list . . . . . . . . . . . . . . . . . . . . . . . . . . . . . . . . . . . . . 8012.3.4 Mounting an image. . . . . . . . . . . . . . . . . . . . . . . . . . . . . . . . . . . 8012.3.5 Persistent mounting . . . . . . . . . . . . . . . . . . . . . . . . . . . . . . . . . . 8112.3.6 Drive unmounting . . . . . . . . . . . . . . . . . . . . . . . . . . . . . . . . . . . . 8212.3.7 Autostart . . . . . . . . . . . . . . . . . . . . . . . . . . . . . . . . . . . . . . . . . . . . 8212.3.8 Close program window . . . . . . . . . . . . . . . . . . . . . . . . . . . . . . . 8312.3.9 Quit program . . . . . . . . . . . . . . . . . . . . . . . . . . . . . . . . . . . . . . . . 83
12.4 Drive not visible . . . . . . . . . . . . . . . . . . . . . . . . . . . . . . . . . . . . . . . . . . . . . 8312.5 Modes of operation . . . . . . . . . . . . . . . . . . . . . . . . . . . . . . . . . . . . . . . . . 83
12.5.1 Write-protected access . . . . . . . . . . . . . . . . . . . . . . . . . . . . . . . 8412.5.2 Read/write access (default) . . . . . . . . . . . . . . . . . . . . . . . . . . . 8412.5.3 Direct read/write access . . . . . . . . . . . . . . . . . . . . . . . . . . . . . . 84
12.6 Converting to RAW image . . . . . . . . . . . . . . . . . . . . . . . . . . . . . . . . . . . . 8512.7 Copy to other Image formats . . . . . . . . . . . . . . . . . . . . . . . . . . . . . . . . . 85
13 Miscellaneous . . . . . . . . . . . . . . . . . . . . . . . . . . . . . . . . . . . . . . . . . . . . . . . . 8613.1 Disclaimer . . . . . . . . . . . . . . . . . . . . . . . . . . . . . . . . . . . . . . . . . . . . . . . . . . 8613.2 Feedback. . . . . . . . . . . . . . . . . . . . . . . . . . . . . . . . . . . . . . . . . . . . . . . . . . . 8613.3 Support . . . . . . . . . . . . . . . . . . . . . . . . . . . . . . . . . . . . . . . . . . . . . . . . . . . . 86
Chapter summary 9
1 Introduction
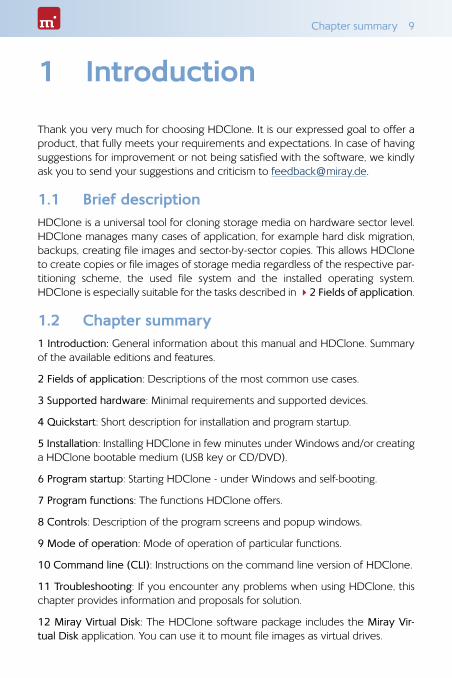
Thank you very much for choosing HDClone. It is our expressed goal to offer a product, that fully meets your requirements and expectations. In case of having suggestions for improvement or not being satisfied with the software, we kindly ask you to send your suggestions and criticism to [email protected].
1.1 Brief descriptionHDClone is a universal tool for cloning storage media on hardware sector level. HDClone manages many cases of application, for example hard disk migration, backups, creating file images and sector-by-sector copies. This allows HDClone to create copies or file images of storage media regardless of the respective par-titioning scheme, the used file system and the installed operating system. HDClone is especially suitable for the tasks described in 42 Fields of application.
1.2 Chapter summary1 Introduction: General information about this manual and HDClone. Summary of the available editions and features.
2 Fields of application: Descriptions of the most common use cases.
3 Supported hardware: Minimal requirements and supported devices.
4 Quickstart: Short description for installation and program startup.
5 Installation: Installing HDClone in few minutes under Windows and/or creating a HDClone bootable medium (USB key or CD/DVD).
6 Program startup: Starting HDClone - under Windows and self-booting.
7 Program functions: The functions HDClone offers.
8 Controls: Description of the program screens and popup windows.
9 Mode of operation: Mode of operation of particular functions.
10 Command line (CLI): Instructions on the command line version of HDClone.
11 Troubleshooting: If you encounter any problems when using HDClone, this chapter provides information and proposals for solution.
12 Miray Virtual Disk: The HDClone software package includes the Miray Vir-tual Disk application. You can use it to mount file images as virtual drives.
10 Introduction
13 Miscellaneous: Legal disclaimer and feedback.
1.3 Character conventionsIn this manual, keys on the keyboard are printed with an inverted background, for example Esc for the escape key or Return for the return key. Some keys are represented by a corresponding symbol, for example for the ’up’-key. Vi-sual controls on the screen, particularly buttons are represented over- and un-derlined with italic font, for example next, back.
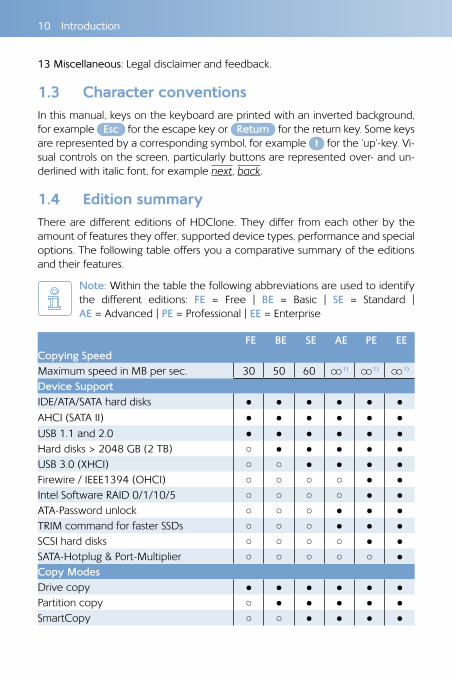
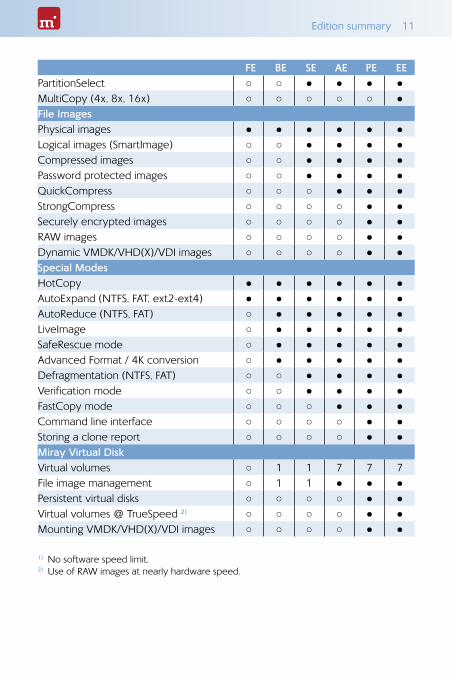
1.4 Edition summaryThere are different editions of HDClone. They differ from each other by the amount of features they offer, supported device types, performance and special options. The following table offers you a comparative summary of the editions and their features.
Note: Within the table the following abbreviations are used to identify the different editions: FE = Free | BE = Basic | SE = Standard | AE = Advanced | PE = Professional | EE = Enterprise
FE BE SE AE PE EECopying SpeedMaximum speed in MB per sec. 30 50 60 ○○1) ○○1) ○○1)
Device SupportIDE/ATA/SATA hard disks ● ● ● ● ● ●
AHCI (SATA II) ● ● ● ● ● ●
USB 1.1 and 2.0 ● ● ● ● ● ●
Hard disks > 2048 GB (2 TB) ○ ● ● ● ● ●
USB 3.0 (XHCI) ○ ○ ● ● ● ●
Firewire / IEEE1394 (OHCI) ○ ○ ○ ○ ● ●
Intel Software RAID 0/1/10/5 ○ ○ ○ ○ ● ●
ATA-Password unlock ○ ○ ○ ● ● ●
TRIM command for faster SSDs ○ ○ ○ ● ● ●
SCSI hard disks ○ ○ ○ ○ ● ●
SATA-Hotplug & Port-Multiplier ○ ○ ○ ○ ○ ●
Copy ModesDrive copy ● ● ● ● ● ●
Partition copy ○ ● ● ● ● ●
SmartCopy ○ ○ ● ● ● ●
Edition summary 11
FE BE SE AE PE EEPartitionSelect ○ ○ ● ● ● ●
MultiCopy (4x, 8x, 16x) ○ ○ ○ ○ ○ ●
File ImagesPhysical images ● ● ● ● ● ●
Logical images (SmartImage) ○ ○ ● ● ● ●
Compressed images ○ ○ ● ● ● ●
Password protected images ○ ○ ● ● ● ●
QuickCompress ○ ○ ○ ● ● ●
StrongCompress ○ ○ ○ ○ ● ●
Securely encrypted images ○ ○ ○ ○ ● ●
RAW images ○ ○ ○ ○ ● ●
Dynamic VMDK/VHD(X)/VDI images ○ ○ ○ ○ ● ●
Special ModesHotCopy ● ● ● ● ● ●
AutoExpand (NTFS, FAT, ext2-ext4) ● ● ● ● ● ●
AutoReduce (NTFS, FAT) ○ ● ● ● ● ●
LiveImage ○ ● ● ● ● ●
SafeRescue mode ○ ● ● ● ● ●
Advanced Format / 4K conversion ○ ● ● ● ● ●
Defragmentation (NTFS, FAT) ○ ○ ● ● ● ●
Verification mode ○ ○ ● ● ● ●
FastCopy mode ○ ○ ○ ● ● ●
Command line interface ○ ○ ○ ○ ● ●
Storing a clone report ○ ○ ○ ○ ● ●
Miray Virtual DiskVirtual volumes ○ 1 1 7 7 7File image management ○ 1 1 ● ● ●
Persistent virtual disks ○ ○ ○ ○ ● ●
Virtual volumes @ TrueSpeed 2) ○ ○ ○ ○ ● ●
Mounting VMDK/VHD(X)/VDI images ○ ○ ○ ○ ● ●
1) No software speed limit. 2) Use of RAW images at nearly hardware speed.
12 Introduction
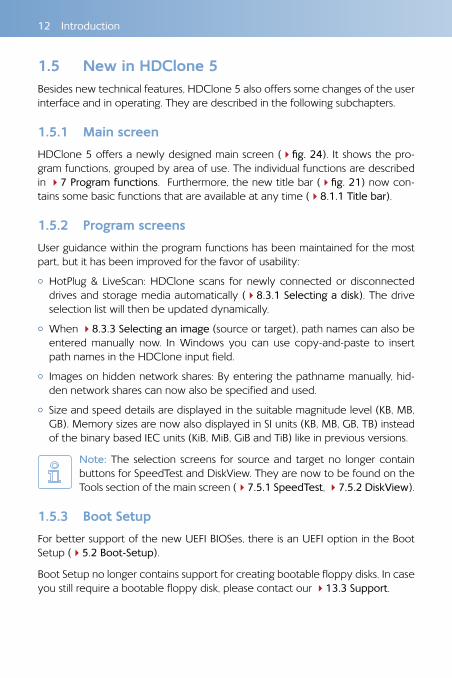
1.5 New in HDClone 5Besides new technical features, HDClone 5 also offers some changes of the user interface and in operating. They are described in the following subchapters.
1.5.1 Main screen
HDClone 5 offers a newly designed main screen (4fig. 24). It shows the pro-gram functions, grouped by area of use. The individual functions are described in 47 Program functions. Furthermore, the new title bar (4fig. 21) now con-tains some basic functions that are available at any time (48.1.1 Title bar).
1.5.2 Program screens
User guidance within the program functions has been maintained for the most part, but it has been improved for the favor of usability:
{ HotPlug & LiveScan: HDClone scans for newly connected or disconnected drives and storage media automatically (48.3.1 Selecting a disk). The drive selection list will then be updated dynamically.
{ When 48.3.3 Selecting an image (source or target), path names can also be entered manually now. In Windows you can use copy-and-paste to insert path names in the HDClone input field.
{ Images on hidden network shares: By entering the pathname manually, hid-den network shares can now also be specified and used.
{ Size and speed details are displayed in the suitable magnitude level (KB, MB, GB). Memory sizes are now also displayed in SI units (KB, MB, GB, TB) instead of the binary based IEC units (KiB, MiB, GiB and TiB) like in previous versions.
Note: The selection screens for source and target no longer contain buttons for SpeedTest and DiskView. They are now to be found on the Tools section of the main screen (47.5.1 SpeedTest, 47.5.2 DiskView).
1.5.3 Boot Setup
For better support of the new UEFI BIOSes, there is an UEFI option in the Boot Setup (45.2 Boot-Setup).
Boot Setup no longer contains support for creating bootable floppy disks. In case you still require a bootable floppy disk, please contact our 413.3 Support.
Upgrading hard disks & migrating an OS 13
2 Fields of application
HDClone is specialized on creating physical copies. Therefore HDClone offers particular advantages for copying and respectively rescuing defective media (42.2 Data rescue). In addition, HDClone can work independently from parti-tioning scheme, file system and operating system. This allows you to copy entire operating system installations (42.1 Upgrading hard disks & migrating an OS) or to be able to create an exact copy in case of unknown/proprietary file systems (42.6 Proprietary hard disk formats). Altogether, HDClone covers a wide spec-trum of possible applications by its universal copying technology. In the following text you will find descriptions of the most common areas of the application of HDClone. The individual chapters offer instructions as well as further tips regard-ing the execution of the application.
Hint: HDClone allows you to copy data arbitrarily between all types of media recognized, particularly between different types of drives.
2.1 Upgrading hard disks & migrating an OSBecause HDClone works independently of file system formats and operating systems, you can use it to migrate entire installations, including the installed op-erating system, to another hard disk. This is especially useful if you want to mi-grate an existing installation to a new hard disk without having to install the op-erating system and applications again. For this type of application, the 47.1.1 Cloning disks mode is most suitable. Use the PartitionSelect feature (49.7 Parti-tionSelect) to choose individual partitions to be cloned.
Note: Please take care to have only one hard disk connected after completing the copy and before starting the operating system. It should be plugged to the same channel as the original. Hence, either remove
the copy or connect it instead of the original medium.
2.1.1 Unused disk space
Free disk space on the target medium can be converted into a partition and used as an additional drive from within Windows by using the fdisk tool or the Windows Computer Management (C:\WINDOWS\system32\compmgmt.msc).
14 Fields of application
2.1.2 Smaller target medium
In general, you can also copy from a larger to a smaller medium. HDClone can decrease your NTFS and FAT partition size automatically on the fly during copy-ing. For other file systems, you may downsize the partitions on the source medi-um before cloning, using appropriate third-party tools before cloning.
2.2 Data rescueIn case of hard disks with defective areas it is especially important that they are being rescued to an intact medium before starting any recovery attempts. Oth-erwise, depending on the kind of defect, the recovery procedure may cause further defects resulting from the inherent exposure of this procedure. Of course, using HDClone also causes exposure to the hard disk. But the physical copying causes much less exposure than any other usage due to its linear operation, i.e. only linear movement of the disk’s heads. Furthermore, the option SafeRescue (48.3.4.1 General options) is able to reduce exposure to an absolute minimum. In very critical cases, you can also just copy single partitions to reduce exposure for the medium even more (47.1.2 Cloning Partitions). After having rescued the data from the defective hard disk, you can then perform a recovery on the (func-tional) target medium without having to fear any further damages.
Important: For the purpose of data rescue, create a 49.1.1 FullCopy or 49.1.3 BitCopy of the entire hard disk at first (or a 49.8.1 FullImage or 49.8.3 RAW images respectively). This clone then can be used to con-
duct recovery attempts without any risk for the original data.
Note: Only a physical copy allows you to rescue all of the data (except irrecoverable areas), even if there are logical errors resulting from de-fective areas. For this reason, never use SmartCopy mode (49.1.2
SmartCopy) for rescuing data.
Hint: Alternatively, you may create a RAW image, or a physical image. You can then restore the image to another hard disk later, or perform the recovery directly on the image by mounting it as a virtual drive us-
ing 412 Miray Virtual Disk.
2.3 Installation backupHDClone can also create a local backup of an entire system installation. If re-quired, a simple restore from the backup partition brings the system installation back into its original state – without the previous affliction of faulty program instal-lations, viruses etc. For this purpose, create an unused partition in addition to the system partition of at least the same size to serve as a backup partition. Then cre-
Forensic examination 15
ate a file image and restore the original system from that image when needed.
Note: Before restoring from the backup partition, save your work files and other data from the system partition or store them somewhere else, since they otherwise will be overwritten.
2.4 Mass copyingHDClone Enterprise Edition is specially designed for creating up to 16 copies at a time. This makes it especially suitable for industrial duplication of pre-installed software (e.g. on hard disks or on CompactFlash media etc.) or for creating sev-eral identical operating system installations (42.5 Master installations)
2.5 Master installationsHDClone is also suitable for duplicating (deployment) system installations (42.4 Mass copying). Copying an entire master directly or from a file image to the tar-get medium to use it directly from there.
Note: For duplicating Windows installations, we recommend to run the Microsoft tool sysprep before cloning. Further information is to be found at http://www.microsoft.com, search for ‘sysprep’.
2.6 Proprietary hard disk formatsHDClone is capable of copying arbitrary hard disk formats. Especially for hard disks installed in proprietary systems (e.g. studio technology, medical technology etc.) there are often no programs besides system software, which can read the data on these media. HDClone can rescue this data and transfer it to a new medium without any problem. The best way is to copy the original medium to a target medium of the same or larger size. A target medium smaller than the original medium should not be used, as it cannot be assured that all relevant user data will be transferred in this case.
Note: In case of unknown or proprietary (non-standardized) formats, always copy the entire original medium. You should only use the mode 47.1.2 Cloning Partitions if you know for sure that the partitions are
reported correctly.
2.7 Forensic examinationHDClone is also suitable for securing data for forensic purposes, as all data from a disk is copied completely, including data that has possibly been hidden or de-leted. This data cannot be reached any more via the usual file system mecha-
16 Fields of application
nisms. Therefore it will be useful to create a copy in BitCopy mode (47.1.1 Cloning disks) or a RAW image (49.8.3 RAW images) before performing a de-tailed forensic examination of secured disks. This allows you to make changes to the copy during analysis without altering and thus endangering the original con-tent of the medium.
Note: When backing up data for forensic examination, hidden and de-leted files can be located anywhere on the medium, it is always re-quired to create a copy of the entire medium to a target medium of the
same or larger size. Never use SmartCopy mode (49.1.2 SmartCopy) for this type of application.
2.8 Image filesIn HDClone, working with physical and logical images follows the same basic logic as physical and logical copies, which are performed directly from storage medium to storage medium. File images offer the following advantages:
{ Simple storing and managing in your file system
{ Optional compression for minimum space required
{ Password protection and AES encryption to protect data
{ Use arbitrary storage media for exchange
{ Distributing without physical media via networks and the Internet
{ Accessing individual files via virtual drives (412 Miray Virtual Disk)
{ Virtual machines (49.8.4 VM-Images (VMDK, VHD/VHDX, VDI))
Example: To rescue a defective hard disk, you may create a physical 49.1.1 FullCopy instead of a physical 49.8.1 FullImage. Both cases will result in a bit-wise identical clone of the master hard disk.
2.9 HotCopy & LiveImageHDClone supports creating clones or images of a Windows drive while Windows is working - even of the Windows system partition itself. To use this feature, it is not necessary to take certain steps. When using HDClone/W, the appropriate mechanisms for using HotCopy and LiveImage will be activated automatically.
HDClone/S 17
3 Supported hardware
This section contains information on the hardware supported when using HDClone/W (Windows) and HDClone/S (self-booting).
3.1 HDClone/WUnder Windows, HDClone can use all devices that are supported by Windows natively or that have a specific Windows driver installed.
3.1.1 Supported systems
HDClone/W runs on PCs (x86 + x64) with the following versions of Windows:
Workstation
{ Windows XP (32+64 Bit)
{ Windows Vista (32+64 Bit)
{ Windows 7 (32+64 Bit)
{ Windows 8 (32+64 Bit)
{ Windows 8.1 (32+64 Bit)
Server
{ Windows Server 2003 (32+64 Bit)
{ Windows Server 2008 (32+64 Bit)
{ Windows Server 2008 R2 (64 Bit)
{ Windows Server 2012 (64 Bit)
{ Windows Server 2012 R2 (64 Bit)
3.1.2 Supported controllers and adapter cards
All controllers and adapter cards supported by Windows.
3.1.3 Supported devices and media
All devices and mass storage media supported by Windows.
3.2 HDClone/SThe self-booting version of HDClone runs on PCs (x86) and supports a wide range of hardware. Details about the supported systems, controllers and devices are listed in the following subchapters.
Note: The devices listed below represent the entire spectrum of hard-ware supported by HDClone. Which of them can be used with a cer-tain edition is listed in 41.4 Edition summary.
18 Supported hardware
3.2.1 Supported Systems { PC 80586 or higher, 500 MHz, 128 MB RAM, VGA (optimal: VESA support)
{ Keyboard & mouse: PS/2 or USB
{ Bootable CD drive or USB bootable medium
3.2.2 Supported controllers { PCI-IDE controller and Bus Master IDE controller
{ Adaptec PCI-SCSI host adapter (43.3 Compatibility)
{ SATA controller with IDE interface
{ SATA-II controller with AHCI interface
{ USB 1.1 (UHCI & OHCI controller)
{ USB 2.0 (EHCI controller)
{ USB 3.0 (XHCI controller)
{ Firewire (IEEE1394 OHCI controller)
{ Intel Onboard RAID Controller (SATA-RAID)
3.2.3 Supported media { IDE/ATA hard disks, CompactFlash via IDE 1)
{ SATA hard disks (internal & external)
{ Intel Software RAID (0, 1, 10, 5)
{ SCSI hard disks (internal & external)
{ USB hard disks (internal & external)
{ Firewire hard disks (internal & external)
{ USB keys 2)
{ SD 3), microSD 3), SDHC 3) and MMC 3)
{ CompactFlash I 3), CompactFlash II 3)
{ MicroDrive 3), xD-Picture Card 3)
{ Memory Stick 3), Memory Stick PRO 3), Memory Stick DUO 3)
1) CompactFlash media with TrueIDE support2) must support the USB-Mass-Storage-Class protocol3) connected over a USB card reader or an equivalent adaptor
SCSI and SAS 19
3.3 CompatibilityHDClone is developed to support general hardware standards. It has been tested on a large number of devices. (43.2 HDClone/S ,43.3.1 Compatibility check)
3.3.1 Compatibility check
You can use HDClone Free Edition to check in advance and for free if your de-vices are supported. Start HDClone Free Edition on the particular PC, select 47.5.1 SpeedTest function from the Tools group. Select the desired drive list entry. The edition required for the listed disks will be shown in the info box right of the list field (4fig. 20) at the caption Supported.
3.3.2 Standards
To support a wide spectrum of devices, HDClone/S implements the official inter-face standards for the particular device types. In addition, we perform extensive tests with each device type. If you experience an issue, though, it can be solved in most cases by setting the options appropriately (48.3.4 Options and 411 Troubleshooting). In case of even this does not work, our Support Team (413.3 Support) will be glad to help you.
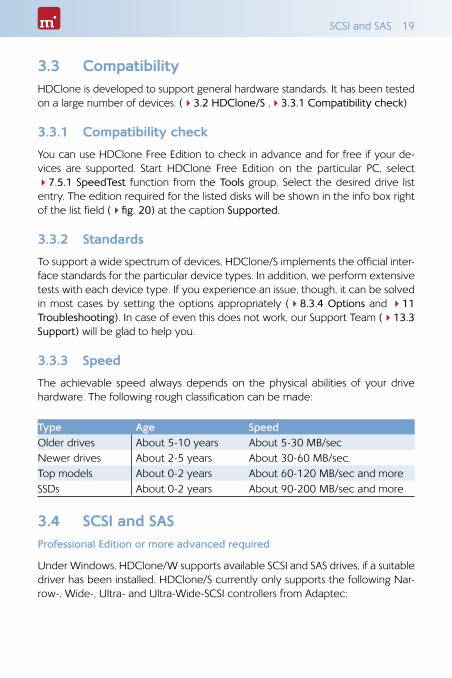
3.3.3 Speed
The achievable speed always depends on the physical abilities of your drive hardware. The following rough classification can be made:
Type Age SpeedOlder drives About 5-10 years About 5-30 MB/secNewer drives About 2-5 years About 30-60 MB/sec.Top models About 0-2 years About 60-120 MB/sec and moreSSDs About 0-2 years About 90-200 MB/sec and more
3.4 SCSI and SASProfessional Edition or more advanced required
Under Windows, HDClone/W supports available SCSI and SAS drives, if a suitable driver has been installed. HDClone/S currently only supports the following Nar-row-, Wide-, Ultra- and Ultra-Wide-SCSI controllers from Adaptec:
20 Supported hardware
AHA-2930UAHA-2944UWASC-29160N
AHA-2940 Ultra ASC-19160ASC-39160
AHA-2940UW ASC-29160
AHA-2940AU ASC-29160LP
Hint: Use the Free Edition to determine whether your SCSI/SAS control-ler is supported (43.3.1 Compatibility check). If HDClone recognizes the connected drive, the SCSI/SAS controller is supported.
3.5 USBHDClone can be used with USB devices of the USB versions 1.1 (UHCI, OHCI), 2.0 (EHCI) and 3.0 (XHCI). HDClone supports USB mass storage media (USB Mass Storage Class), USB keyboards and mice (HID) and USB hubs.
3.6 Firewire (IEEE1394)Professional Edition or more advanced required
HDClone works with any Firewire drive or Firewire card reader that supports the Serial-Bus-Protocol (SBP).
Note: Please take care to connect Firewire devices prior to starting HDClone and if possible directly to the PC or to the Firewire controller.
Self-booting – HDClone/S 21
4 Quickstart
You can use HDClone in two variants: HDClone/W as a Windows application and HDClone/S as a self-booting program.
Note: Further information on launching the program is to be found at 45 Installation and 46 Program startup. Information on how to use the HDClone is to be found in 47 Program functions and 438 Controls.
4.1 Windows – HDClone/WPlease take the following steps to start HDClone in Windows:
1. Start the setup for Windows (setup.exe) and follow the instructions. Accept the default settings.
2. When setup is finished, HDClone will be started automatically. Otherwise you can start HDClone from the Desktop or the Windows Start Menu.
3. After starting HDClone, select the desired function and follow the course of the program. For further information, please refer to 47 Program functions and 48 Controls.
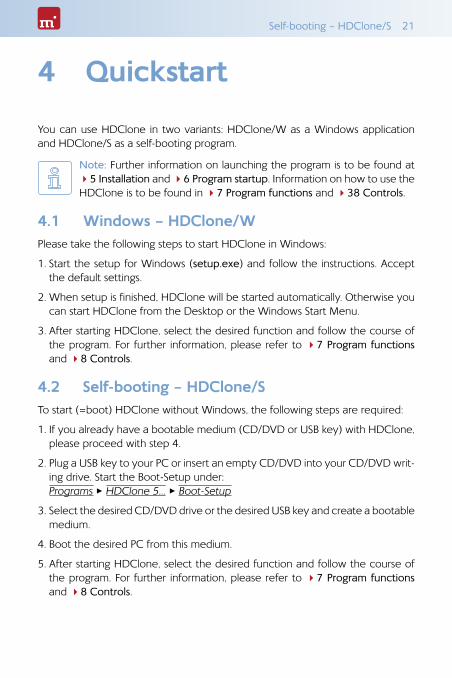
4.2 Self-booting – HDClone/STo start (=boot) HDClone without Windows, the following steps are required:
1. If you already have a bootable medium (CD/DVD or USB key) with HDClone, please proceed with step 4.
2. Plug a USB key to your PC or insert an empty CD/DVD into your CD/DVD writ-ing drive. Start the Boot-Setup under: Programs ▸ HDClone 5... ▸ Boot-Setup
3. Select the desired CD/DVD drive or the desired USB key and create a bootable medium.
4. Boot the desired PC from this medium.
5. After starting HDClone, select the desired function and follow the course of the program. For further information, please refer to 47 Program functions and 48 Controls.

22 Installation
5 Installation
HDClone has two variants, HDClone/W (Windows program) and HDClone/S (self-booting program). Use 45.1 Setup for Windows to install HDClone/W in Windows and/or create a bootable medium (HDClone/S) with 45.2 Boot-Setup or as described in 45.4 ISO image.
Note: In case you have obtained HDClone on a medium (CD/DVD or USB key), you can start HDClone/W and/or HDClone/S directly from there in many cases (46 Program startup).
5.1 Setup for WindowsSetup will install HDClone on your Win-dows PC. Start setup.exe and select the desired option on the first screen (4fig. 1). Then click Next and follow the course of the Setup. After finishing, you can start HDClone/W immediately.
5.1.1 Miray Virtual Disk
Some editions of HDClone also contain the software 412 Miray Virtual Disk. To have it not installed, please deselect it in the first installation screen (4fig. 1).
Miray Virtual Disk also includes a device driver (Miray Storage Controller), en-abling Windows to present virtual drives as real drives. For this reason the Win-dows Security popup (4fig. 2) opens at the end of the installation process. Click on Install in order to confirm device driver installation.
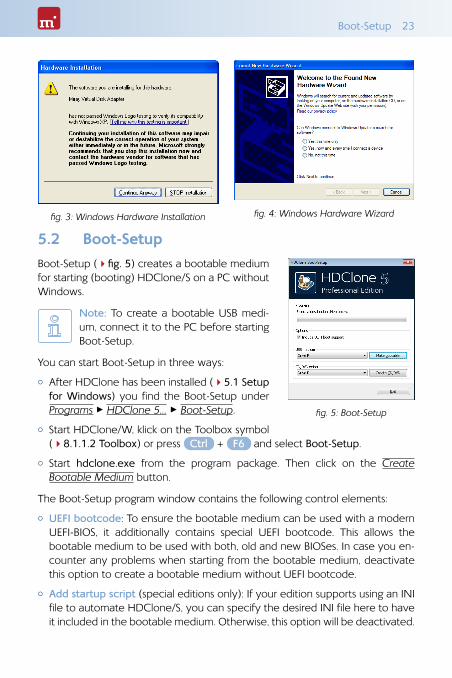
In Windows XP, confirm the Hardware Installation popup (4fig. 3) with Continue Anyway. If Windows opens the Found New Hardware Wizard (4fig. 4), close it with Cancel.
fig. 1: HDClone Setup start screen
fig. 2: HDClone Setup start screen
Boot-Setup 23
5.2 Boot-SetupBoot-Setup (4fig. 5) creates a bootable medium for starting (booting) HDClone/S on a PC without Windows.
Note: To create a bootable USB medi-um, connect it to the PC before starting Boot-Setup.
You can start Boot-Setup in three ways:
{ After HDClone has been installed (45.1 Setup for Windows) you find the Boot-Setup under Programs ▸ HDClone 5... ▸ Boot-Setup.
{ Start HDClone/W, klick on the Toolbox symbol (48.1.1.2 Toolbox) or press Ctrl + F6 and select Boot-Setup.
{ Start hdclone.exe from the program package. Then click on the Create Bootable Medium button.
The Boot-Setup program window contains the following control elements:
{ UEFI bootcode: To ensure the bootable medium can be used with a modern UEFI-BIOS, it additionally contains special UEFI bootcode. This allows the bootable medium to be used with both, old and new BIOSes. In case you en-counter any problems when starting from the bootable medium, deactivate this option to create a bootable medium without UEFI bootcode.
{ Add startup script (special editions only): If your edition supports using an INI file to automate HDClone/S, you can specify the desired INI file here to have it included in the bootable medium. Otherwise, this option will be deactivated.
fig. 3: Windows Hardware Installation fig. 4: Windows Hardware Wizard
fig. 5: Boot-Setup
24 Installation
{ Create bootable USB key: Connect the desired USB medium to the PC before starting Boot-Setup. Then select the medium from the list and click on Make bootable.
{ Create bootable CD/DVD: Select the desired CD/DVD drive from the list, in-sert an empty medium and click on Create CD/DVD.
Follow the instructions and wait for the program reporting successful completion. Then click on Exit. Continue at 46 Program startup or 44 Quickstart.
Note: When creating a CD/DVD, please always use a new, empty writeable CD/DVD. Otherwise there may be problems when starting HDClone.
5.3 Bootable Windows CDWhen using HDClone with storage devices or controllers, which require special Windows drivers, it has to be used directly on Windows. If there is no Windows installation available, the options you to create a bootable Windows CD which includes the required drivers are described in the following paragraphs.
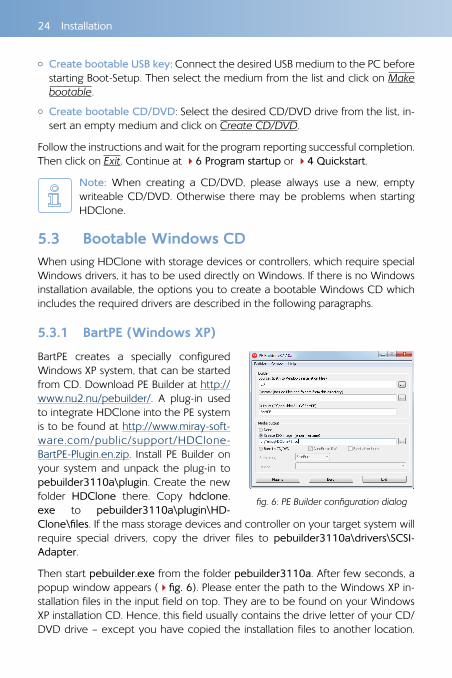
5.3.1 BartPE (Windows XP)
BartPE creates a specially configured Windows XP system, that can be started from CD. Download PE Builder at http://www.nu2.nu/pebuilder/. A plug-in used to integrate HDClone into the PE system is to be found at http://www.miray-soft-ware.com/public/support/HDClone-BartPE-Plugin.en.zip. Install PE Builder on your system and unpack the plug-in to pebuilder3110a\plugin. Create the new folder HDClone there. Copy hdclone.exe to pebuilder3110a\plugin\HD-Clone\files. If the mass storage devices and controller on your target system will require special drivers, copy the driver files to pebuilder3110a\drivers\SCSI-Adapter.
Then start pebuilder.exe from the folder pebuilder3110a. After few seconds, a popup window appears (4fig. 6). Please enter the path to the Windows XP in-stallation files in the input field on top. They are to be found on your Windows XP installation CD. Hence, this field usually contains the drive letter of your CD/DVD drive – except you have copied the installation files to another location.
fig. 6: PE Builder configuration dialog
Bootable Windows CD 25
You can now choose a name and a location for the boot image by clicking on Create ISO image in the box Media output. If another CD/DVD writer is avail-able, you can immediately create a CD by clicking on Burn to CD/DVD. Other-wise create an ISO image first.
After clicking on Start, PE Builder creates the CD. Depending on your system, this may take a few minutes. If you did not select Burn to CD/DVD in the previous step, it is necessary to write the newly created ISO image to CD with your re-cording software. Please note that the file has to be written to CD directly as an image. Normal writing will not be sufficient in this case. Instead, please start your recording software and choose Create from image file (or similar description, depending on the recording software used).
Start your PC from the CD created. HDClone is to be found at Go ▸ Programs.
5.3.2 Windows PE
You may also create a bootable CD version of Windows Vista, Windows 7, or Windows 8/8.1. For this purpose, we recommend the freely available projects of CWCodes under http://www.cwcodes.net/.
You will find the projects for Windows Vista PE, Windows 7 PE and Windows 8 PE and Windows 8.1 at the following URLs:
{ Windows Vista PE (VistaPE): http://vistape-capi.cwcodes.net/
{ Windows 7 PE (Win7PE SE): http://w7pese.cwcodes.net/
{ Windows 8 PE (Win8PE SE): http://w8pese.cwcodes.net/
{ Windows 8 .1 PE (Win8.1 SE): http://win81se.cwcodes.net/
Along with HDClone, you may then also integrate additional device drivers; for example for RAIDs into the ISO image. After booting the Windows PE CD, these drivers will be available for HDClone as well.
5.3.3 Windows HotCopy
There is a practical alternative to creating a 45.3.1 BartPE (Windows XP) or 45.3.2 Windows PE to obtain a independently bootable Windows, for example to use special Windows drivers for RAIDs or SCSI/SAS. Simply create a temporary clone of an existing Windows Installation. Install additionally required drivers be-fore or after creating the clone. This clone then offers you a Windows that can be booted independent from the installed operating system and start HDClone/W there, similar to a BartPE or Windows PE.
26 Installation
5.4 ISO imageThe HDClone software package contains an ISO image (hdclone.iso):
{ After installing with 45.1 Setup for Windows in the Start menu: Programs ▸ HDClone 5... ▸ Boot-Setup.
{ In a program package in ZIP format as hdclone.iso.
{ On the genuine medium (CD/DVD or USB key) as hdclone.iso.
It can be used to create a bootable HDClone-CD in any operating system and with any software supporting creation of CDs/DVDs from ISO images. Further information can be found in the manual of your CD/DVD authoring software.
1. Extract the file hdclone.iso from the HDClone software package.
2. Start your CD writing software and choose Create CD from image file (or sim-ilar caption, according to the respective CD writing software).
3. Specify the file hdclone.iso as an image file.
4. Insert a blank CD into the drive and write the CD.
Hint: The easiest way of creating a bootable HDClone CD under Linux is using the software tool cdrecord with the following syntax: cdrecord hdclone.iso
After having accomplished these steps you have created a bootable HDClone CD. From this CD you can start HDClone directly on any PC with a bootable CD/DVD drive as described in 46 Program startup.
Note: CD/DVD writing software may refuse writing an ISO image to a DVD. The HDClone installation program writes DVDs without any prob-lem. Booting from a DVD created this way also works smoothly.
Quit program 27
6 Program startup
6.1 Windows – HDClone/WAfter installing (45.1 Setup for Windows), you may start HDClone from the Win-dows start menu under Program ▸ HDClone 5… ▸ Start HDClone. Alternatively HDClone can be started by invoking the file hdclone.exe from the genuine HDClone medium or directly from the software package (ZIP archive).
6.2 Self-booting – HDClone/SConnect the bootable USB key or insert the bootable CD/DVD (45.2 Boot-Set-up). Start the PC and ensure that BIOS will boot from the desired medium. HDClone will then be launched from the bootable medium.
Note: In case your PC does not boot from the HDClone boot medium, press F8 , F11 or F12 (BIOS dependent) immediately after turn-ing on the PC to enter the boot menu and select the bootmedium.
6.3 Quit programIn the lower right of the Main Screen (48.2 Main screen) you find a symbol for closing the application (HDClone/W, 4fig. 24) or for powering off the PC (HDClone/S, 4fig. 20). Click on this symbol or press the Esc key to quit HD-Clone.
If there is still a program function open, you can return to the main screen by clicking on the Close-symbol X in the upper right corner of the Control panel (4fig. 20) or pressing the Esc key. A process still running has to be finished or cancelled at first.
Note: (HDClone/S only) If you do not want to start HDClone when starting the computer for the next time, remember to remove the HDClone boot medium from the boot drive first.
28 Program functions
7 Program functions
The 48.2 Main screen contains several function groups, where the symbols for the individual program functions. The following chapters contain a description of these functions and the steps required. There is also a detailed description of the individual steps in 48 Controls.
7.1 CloningThis function group contains functions to create an identical copy (clone) of a disk or selected partitions.
7.1.1 Cloning disks
FullCopy requires Free Edition SmartCopy requires Standard Edition
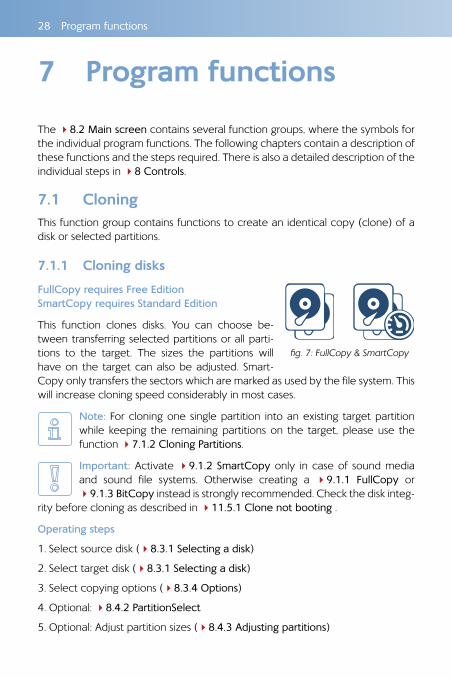
This function clones disks. You can choose be-tween transferring selected partitions or all parti-tions to the target. The sizes the partitions will have on the target can also be adjusted. Smart-Copy only transfers the sectors which are marked as used by the file system. This will increase cloning speed considerably in most cases.
Note: For cloning one single partition into an existing target partition while keeping the remaining partitions on the target, please use the function 47.1.2 Cloning Partitions.
Important: Activate 49.1.2 SmartCopy only in case of sound media and sound file systems. Otherwise creating a 49.1.1 FullCopy or 49.1.3 BitCopy instead is strongly recommended. Check the disk integ-
rity before cloning as described in 411.5.1 Clone not booting .
Operating steps
1. Select source disk (48.3.1 Selecting a disk)
2. Select target disk (48.3.1 Selecting a disk)
3. Select copying options (48.3.4 Options)
4. Optional: 48.4.2 PartitionSelect
5. Optional: Adjust partition sizes (48.4.3 Adjusting partitions)
fig. 7: FullCopy & SmartCopy
Cloning 29
6. 48.3.5 Copying data
7. Optional: 48.4.5 Adjust boot data
8. Final report/Finish (48.4.6 Final report)
7.1.2 Cloning Partitions
FullCopy (Partition) requires Free Edition SmartCopy (Partition) requires Standard Edition
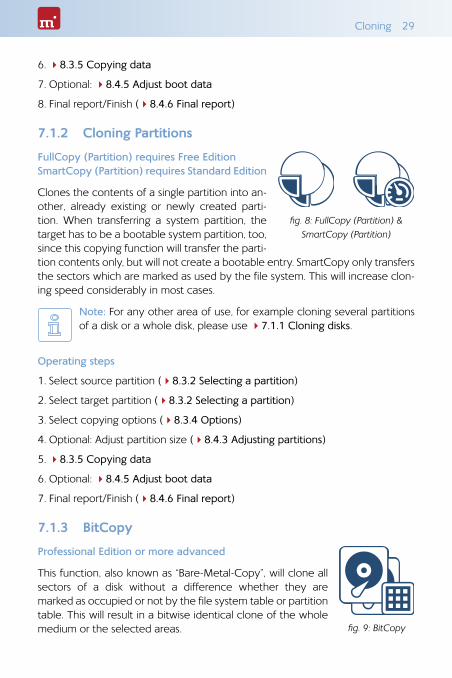
Clones the contents of a single partition into an-other, already existing or newly created parti-tion. When transferring a system partition, the target has to be a bootable system partition, too, since this copying function will transfer the parti-tion contents only, but will not create a bootable entry. SmartCopy only transfers the sectors which are marked as used by the file system. This will increase clon-ing speed considerably in most cases.
Note: For any other area of use, for example cloning several partitions of a disk or a whole disk, please use 47.1.1 Cloning disks.
Operating steps
1. Select source partition (48.3.2 Selecting a partition)
2. Select target partition (48.3.2 Selecting a partition)
3. Select copying options (48.3.4 Options)
4. Optional: Adjust partition size (48.4.3 Adjusting partitions)
5. 48.3.5 Copying data
6. Optional: 48.4.5 Adjust boot data
7. Final report/Finish (48.4.6 Final report)
7.1.3 BitCopy
Professional Edition or more advanced
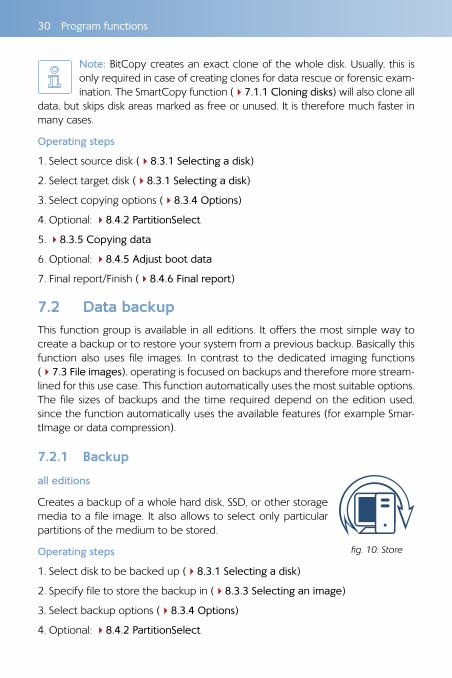
This function, also known as “Bare-Metal-Copy”, will clone all sectors of a disk without a difference whether they are marked as occupied or not by the file system table or partition table. This will result in a bitwise identical clone of the whole medium or the selected areas.
fig. 8: FullCopy (Partition) & SmartCopy (Partition)
fig. 9: BitCopy
30 Program functions
Note: BitCopy creates an exact clone of the whole disk. Usually, this is only required in case of creating clones for data rescue or forensic exam-ination. The SmartCopy function (47.1.1 Cloning disks) will also clone all
data, but skips disk areas marked as free or unused. It is therefore much faster in many cases.
Operating steps
1. Select source disk (48.3.1 Selecting a disk)
2. Select target disk (48.3.1 Selecting a disk)
3. Select copying options (48.3.4 Options)
4. Optional: 48.4.2 PartitionSelect
5. 48.3.5 Copying data
6. Optional: 48.4.5 Adjust boot data
7. Final report/Finish (48.4.6 Final report)
7.2 Data backupThis function group is available in all editions. It offers the most simple way to create a backup or to restore your system from a previous backup. Basically this function also uses file images. In contrast to the dedicated imaging functions (47.3 File images), operating is focused on backups and therefore more stream-lined for this use case. This function automatically uses the most suitable options. The file sizes of backups and the time required depend on the edition used, since the function automatically uses the available features (for example Smar-tImage or data compression).
7.2.1 Backup
all editions
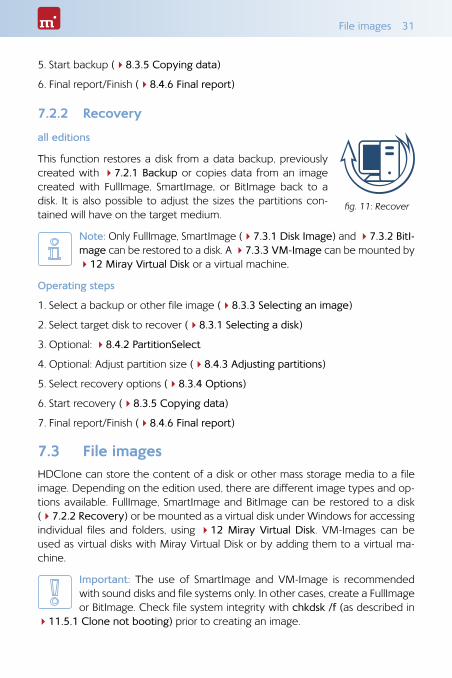
Creates a backup of a whole hard disk, SSD, or other storage media to a file image. It also allows to select only particular partitions of the medium to be stored.
Operating steps
1. Select disk to be backed up (48.3.1 Selecting a disk)
2. Specify file to store the backup in (48.3.3 Selecting an image)
3. Select backup options (48.3.4 Options)
4. Optional: 48.4.2 PartitionSelect
fig. 10: Store
File images 31
5. Start backup (48.3.5 Copying data)
6. Final report/Finish (48.4.6 Final report)
7.2.2 Recovery
all editions
This function restores a disk from a data backup, previously created with 47.2.1 Backup or copies data from an image created with FullImage, SmartImage, or BitImage back to a disk. It is also possible to adjust the sizes the partitions con-tained will have on the target medium.
Note: Only FullImage, SmartImage (47.3.1 Disk Image) and 47.3.2 BitI-mage can be restored to a disk. A 47.3.3 VM-Image can be mounted by 412 Miray Virtual Disk or a virtual machine.
Operating steps
1. Select a backup or other file image (48.3.3 Selecting an image)
2. Select target disk to recover (48.3.1 Selecting a disk)
3. Optional: 48.4.2 PartitionSelect
4. Optional: Adjust partition size (48.4.3 Adjusting partitions)
5. Select recovery options (48.3.4 Options)
6. Start recovery (48.3.5 Copying data)
7. Final report/Finish (48.4.6 Final report)
7.3 File imagesHDClone can store the content of a disk or other mass storage media to a file image. Depending on the edition used, there are different image types and op-tions available. FullImage, SmartImage and BitImage can be restored to a disk (47.2.2 Recovery) or be mounted as a virtual disk under Windows for accessing individual files and folders, using 412 Miray Virtual Disk. VM-Images can be used as virtual disks with Miray Virtual Disk or by adding them to a virtual ma-chine.
Important: The use of SmartImage and VM-Image is recommended with sound disks and file systems only. In other cases, create a FullImage or BitImage. Check file system integrity with chkdsk /f (as described in
411.5.1 Clone not booting) prior to creating an image.
fig. 11: Recover
32 Program functions
Operating steps
1. Select source disk (48.3.1 Selecting a disk)
2. Specify file image to store the data in (48.3.3 Selecting an image)
3. Optional: 48.4.2 PartitionSelect
4. Select file image options (48.3.4 Options)
5. Start file image creation (48.3.5 Copying data)
6. Final report/Finish (48.4.6 Final report)
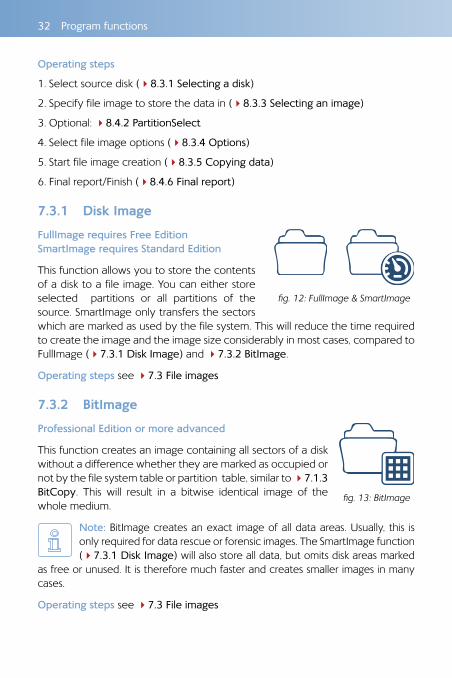
7.3.1 Disk Image
FullImage requires Free Edition SmartImage requires Standard Edition
This function allows you to store the contents of a disk to a file image. You can either store selected partitions or all partitions of the source. SmartImage only transfers the sectors which are marked as used by the file system. This will reduce the time required to create the image and the image size considerably in most cases, compared to FullImage (47.3.1 Disk Image) and 47.3.2 BitImage.
Operating steps see 47.3 File images
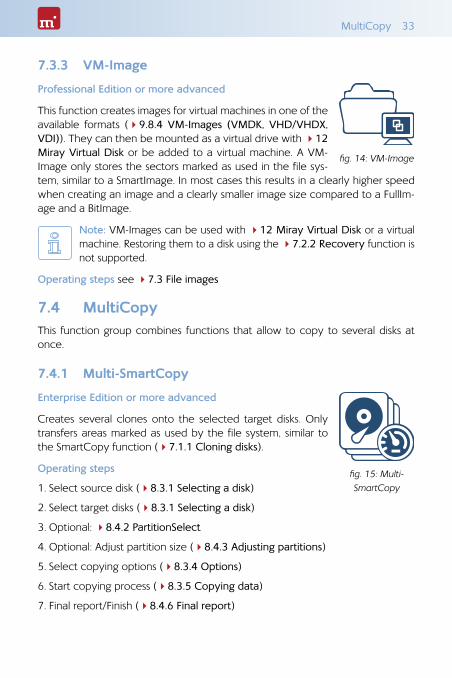
7.3.2 BitImage
Professional Edition or more advanced
This function creates an image containing all sectors of a disk without a difference whether they are marked as occupied or not by the file system table or partition table, similar to 47.1.3 BitCopy. This will result in a bitwise identical image of the whole medium.
Note: BitImage creates an exact image of all data areas. Usually, this is only required for data rescue or forensic images. The SmartImage function (47.3.1 Disk Image) will also store all data, but omits disk areas marked
as free or unused. It is therefore much faster and creates smaller images in many cases.
Operating steps see 47.3 File images
fig. 12: FullImage & SmartImage
fig. 13: BitImage
MultiCopy 33
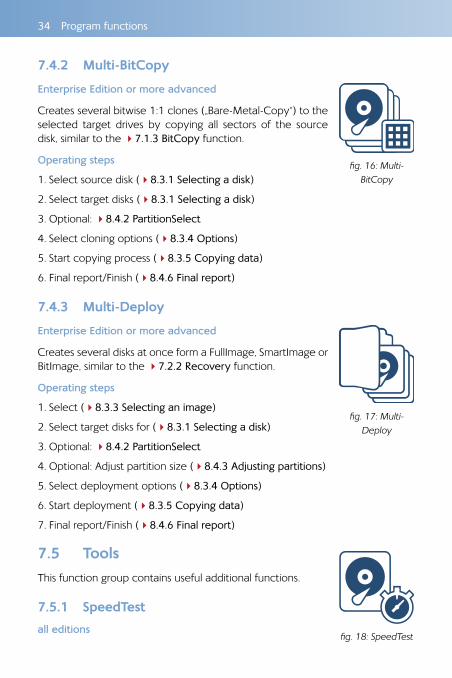
7.3.3 VM-Image
Professional Edition or more advanced
This function creates images for virtual machines in one of the available formats (49.8.4 VM-Images (VMDK, VHD/VHDX, VDI)). They can then be mounted as a virtual drive with 412 Miray Virtual Disk or be added to a virtual machine. A VM-Image only stores the sectors marked as used in the file sys-tem, similar to a SmartImage. In most cases this results in a clearly higher speed when creating an image and a clearly smaller image size compared to a FullIm-age and a BitImage.
Note: VM-Images can be used with 412 Miray Virtual Disk or a virtual machine. Restoring them to a disk using the 47.2.2 Recovery function is not supported.
Operating steps see 47.3 File images
7.4 MultiCopyThis function group combines functions that allow to copy to several disks at once.
7.4.1 Multi-SmartCopy
Enterprise Edition or more advanced
Creates several clones onto the selected target disks. Only transfers areas marked as used by the file system, similar to the SmartCopy function (47.1.1 Cloning disks).
Operating steps
1. Select source disk (48.3.1 Selecting a disk)
2. Select target disks (48.3.1 Selecting a disk)
3. Optional: 48.4.2 PartitionSelect
4. Optional: Adjust partition size (48.4.3 Adjusting partitions)
5. Select copying options (48.3.4 Options)
6. Start copying process (48.3.5 Copying data)
7. Final report/Finish (48.4.6 Final report)
fig. 14: VM-Image
fig. 15: Multi-SmartCopy
34 Program functions
7.4.2 Multi-BitCopy
Enterprise Edition or more advanced
Creates several bitwise 1:1 clones („Bare-Metal-Copy“) to the selected target drives by copying all sectors of the source disk, similar to the 47.1.3 BitCopy function.
Operating steps
1. Select source disk (48.3.1 Selecting a disk)
2. Select target disks (48.3.1 Selecting a disk)
3. Optional: 48.4.2 PartitionSelect
4. Select cloning options (48.3.4 Options)
5. Start copying process (48.3.5 Copying data)
6. Final report/Finish (48.4.6 Final report)
7.4.3 Multi-Deploy
Enterprise Edition or more advanced
Creates several disks at once form a FullImage, SmartImage or BitImage, similar to the 47.2.2 Recovery function.
Operating steps
1. Select (48.3.3 Selecting an image)
2. Select target disks for (48.3.1 Selecting a disk)
3. Optional: 48.4.2 PartitionSelect
4. Optional: Adjust partition size (48.4.3 Adjusting partitions)
5. Select deployment options (48.3.4 Options)
6. Start deployment (48.3.5 Copying data)
7. Final report/Finish (48.4.6 Final report)
7.5 ToolsThis function group contains useful additional functions.
7.5.1 SpeedTest
all editions
fig. 16: Multi- BitCopy
fig. 17: Multi- Deploy
fig. 18: SpeedTest
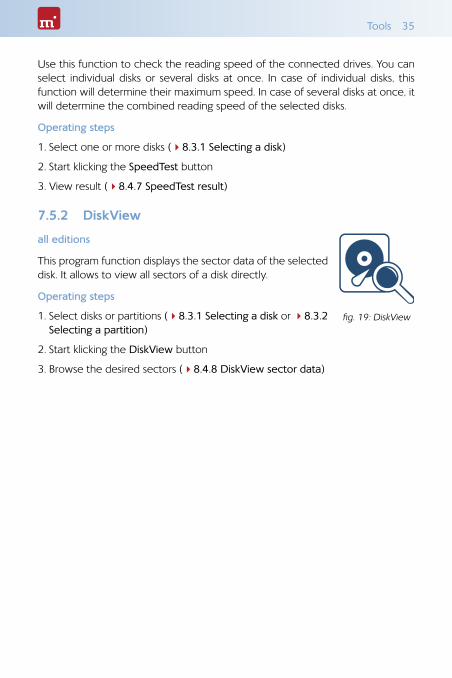
Tools 35
Use this function to check the reading speed of the connected drives. You can select individual disks or several disks at once. In case of individual disks, this function will determine their maximum speed. In case of several disks at once, it will determine the combined reading speed of the selected disks.
Operating steps
1. Select one or more disks (48.3.1 Selecting a disk)
2. Start klicking the SpeedTest button
3. View result (48.4.7 SpeedTest result)
7.5.2 DiskView
all editions
This program function displays the sector data of the selected disk. It allows to view all sectors of a disk directly.
Operating steps
1. Select disks or partitions (48.3.1 Selecting a disk or 48.3.2 Selecting a partition)
2. Start klicking the DiskView button
3. Browse the desired sectors (48.4.8 DiskView sector data)
fig. 19: DiskView
36 Controls
8 Controls
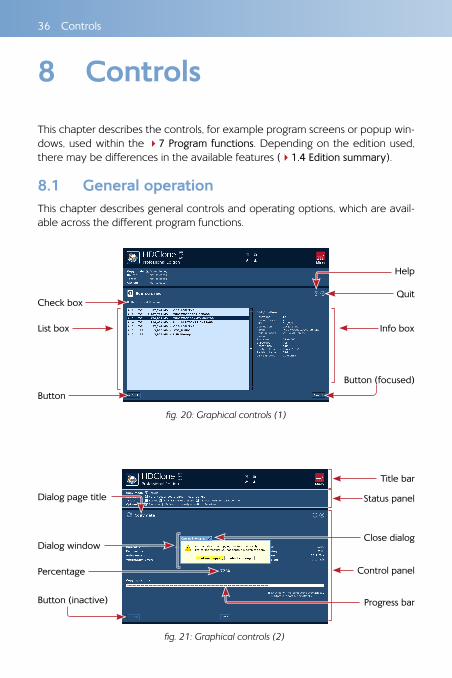
This chapter describes the controls, for example program screens or popup win-dows, used within the 47 Program functions. Depending on the edition used, there may be differences in the available features (41.4 Edition summary).
8.1 General operationThis chapter describes general controls and operating options, which are avail-able across the different program functions.
Check box
List box
Button
Info box
Button (focused)
fig. 20: Graphical controls (1)
Quit
Help
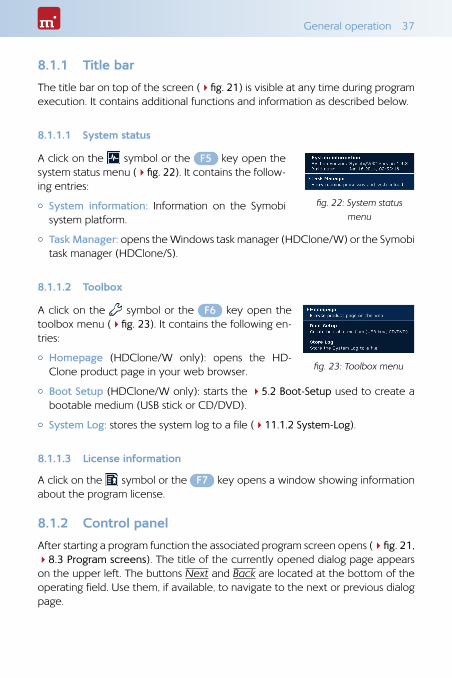
Dialog window
Percentage
Button (inactive)
Close dialog
Progress bar
fig. 21: Graphical controls (2)
Dialog page title Status panel
Control panel
Title bar
General operation 37
8.1.1 Title bar
The title bar on top of the screen (4fig. 21) is visible at any time during program execution. It contains additional functions and information as described below.
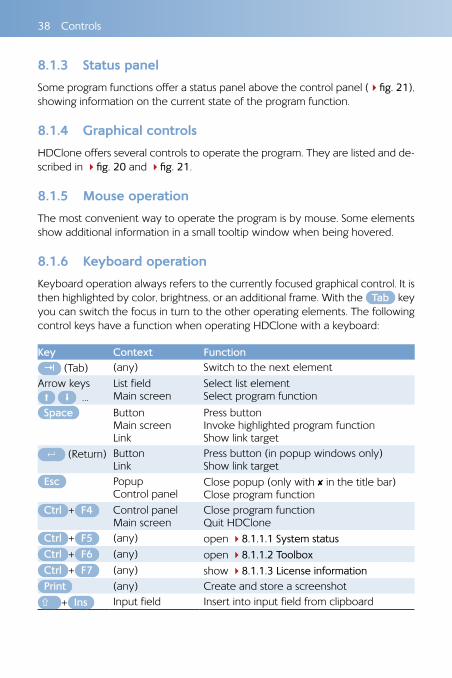
8.1.1.1 System status
A click on the symbol or the F5 key open the system status menu (4fig. 22). It contains the follow-ing entries:
{ System information: Information on the Symobi system platform.
{ Task Manager: opens the Windows task manager (HDClone/W) or the Symobi task manager (HDClone/S).
8.1.1.2 Toolbox
A click on the symbol or the F6 key open the toolbox menu (4fig. 23). It contains the following en-tries:
{ Homepage (HDClone/W only): opens the HD-Clone product page in your web browser.
{ Boot Setup (HDClone/W only): starts the 45.2 Boot-Setup used to create a bootable medium (USB stick or CD/DVD).
{ System Log: stores the system log to a file (411.1.2 System-Log).
8.1.1.3 License information
A click on the symbol or the F7 key opens a window showing information about the program license.
8.1.2 Control panel
After starting a program function the associated program screen opens (4fig. 21, 48.3 Program screens). The title of the currently opened dialog page appears on the upper left. The buttons Next and Back are located at the bottom of the operating field. Use them, if available, to navigate to the next or previous dialog page.
fig. 22: System status menu
fig. 23: Toolbox menu
38 Controls
8.1.3 Status panel
Some program functions offer a status panel above the control panel (4fig. 21), showing information on the current state of the program function.
8.1.4 Graphical controls
HDClone offers several controls to operate the program. They are listed and de-scribed in 4fig. 20 and 4fig. 21.
8.1.5 Mouse operation
The most convenient way to operate the program is by mouse. Some elements show additional information in a small tooltip window when being hovered.
8.1.6 Keyboard operation
Keyboard operation always refers to the currently focused graphical control. It is then highlighted by color, brightness, or an additional frame. With the Tab key you can switch the focus in turn to the other operating elements. The following control keys have a function when operating HDClone with a keyboard:
Key Context Function ⇥ (Tab) (any) Switch to the next elementArrow keys …
List field Main screen
Select list element Select program function
Space Button Main screen Link
Press button Invoke highlighted program function Show link target
↵ (Return) Button Link
Press button (in popup windows only) Show link target
Esc Popup Control panel
Close popup (only with ✘ in the title bar) Close program function
Ctrl + F4 Control panel Main screen
Close program function Quit HDClone
Ctrl + F5 (any) open 48.1.1.1 System status Ctrl + F6 (any) open 48.1.1.2 Toolbox Ctrl + F7 (any) show 48.1.1.3 License information Print (any) Create and store a screenshot + Ins Input field Insert into input field from clipboard
Main screen 39
8.1.7 Help & closing
At the upper right of the control panel there are two controls (4fig. 20): the help-symbol ? or F1 open help. It offers information on the current program screen. Using the text links in the help window, displayed underlined, you can switch to other help topics. The close-button X or Ctrl + F4 close the current program function or quit the program (48.2.2 Quitting & powering off).
Note: Program help is designed to give you useful hints when using the program. Please use this user‘s manual when encountering problems or requiring more information on a topic.
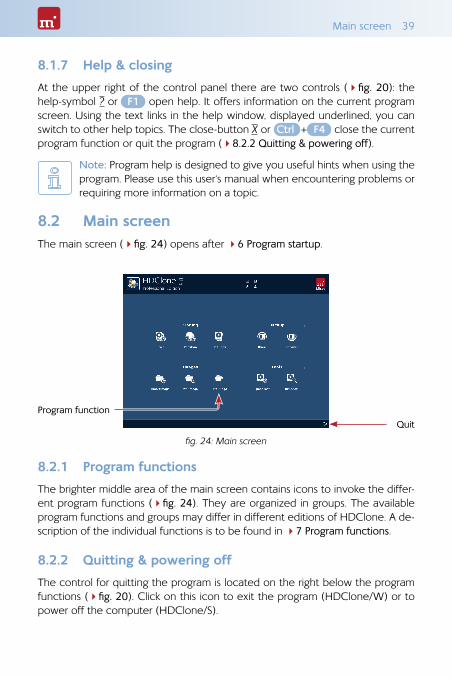
8.2 Main screenThe main screen (4fig. 24) opens after 46 Program startup.
8.2.1 Program functions
The brighter middle area of the main screen contains icons to invoke the differ-ent program functions (4fig. 24). They are organized in groups. The available program functions and groups may differ in different editions of HDClone. A de-scription of the individual functions is to be found in 47 Program functions.
8.2.2 Quitting & powering off
The control for quitting the program is located on the right below the program functions (4fig. 20). Click on this icon to exit the program (HDClone/W) or to power off the computer (HDClone/S).
fig. 24: Main screen
Program functionQuit
40 Controls
8.3 Program screens
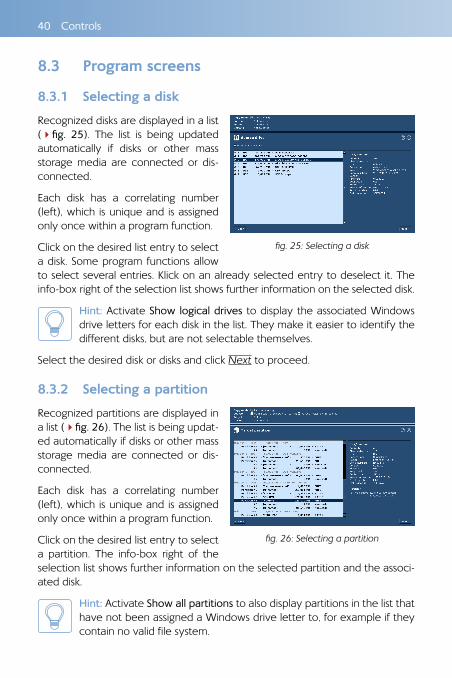
8.3.1 Selecting a disk
Recognized disks are displayed in a list (4fig. 25). The list is being updated automatically if disks or other mass storage media are connected or dis-connected.
Each disk has a correlating number (left), which is unique and is assigned only once within a program function.
Click on the desired list entry to select a disk. Some program functions allow to select several entries. Klick on an already selected entry to deselect it. The info-box right of the selection list shows further information on the selected disk.
Hint: Activate Show logical drives to display the associated Windows drive letters for each disk in the list. They make it easier to identify the different disks, but are not selectable themselves.
Select the desired disk or disks and click Next to proceed.
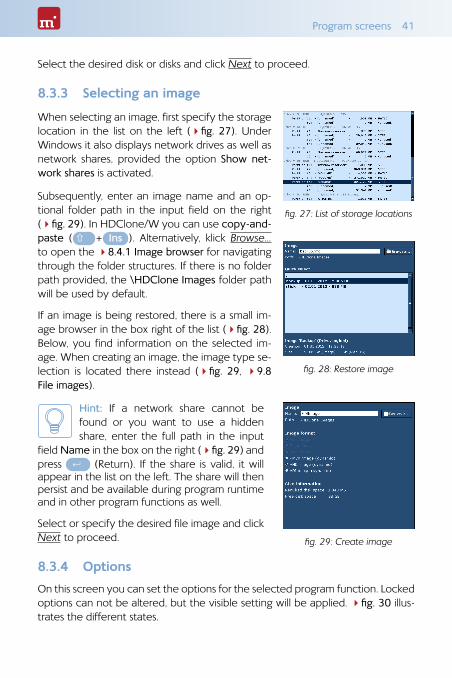
8.3.2 Selecting a partition
Recognized partitions are displayed in a list (4fig. 26). The list is being updat-ed automatically if disks or other mass storage media are connected or dis-connected.
Each disk has a correlating number (left), which is unique and is assigned only once within a program function.
Click on the desired list entry to select a partition. The info-box right of the selection list shows further information on the selected partition and the associ-ated disk.
Hint: Activate Show all partitions to also display partitions in the list that have not been assigned a Windows drive letter to, for example if they contain no valid file system.
fig. 25: Selecting a disk
fig. 26: Selecting a partition
Program screens 41
Select the desired disk or disks and click Next to proceed.
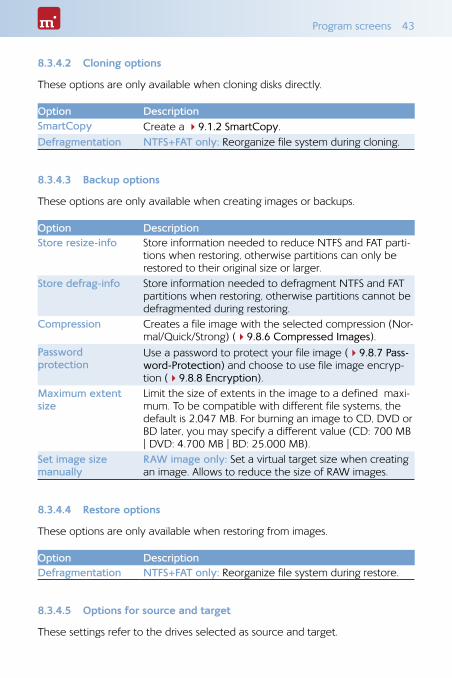
8.3.3 Selecting an image
When selecting an image, first specify the storage location in the list on the left (4fig. 27). Under Windows it also displays network drives as well as network shares, provided the option Show net-work shares is activated.
Subsequently, enter an image name and an op-tional folder path in the input field on the right (4fig. 29). In HDClone/W you can use copy-and-paste ( + Ins ). Alternatively, klick Browse… to open the 48.4.1 Image browser for navigating through the folder structures. If there is no folder path provided, the \HDClone Images folder path will be used by default.
If an image is being restored, there is a small im-age browser in the box right of the list (4fig. 28). Below, you find information on the selected im-age. When creating an image, the image type se-lection is located there instead (4fig. 29, 49.8 File images).
Hint: If a network share cannot be found or you want to use a hidden share, enter the full path in the input
field Name in the box on the right (4fig. 29) and press ↵ (Return). If the share is valid, it will appear in the list on the left. The share will then persist and be available during program runtime and in other program functions as well.
Select or specify the desired file image and click Next to proceed.
8.3.4 Options
On this screen you can set the options for the selected program function. Locked options can not be altered, but the visible setting will be applied. 4fig. 30 illus-trates the different states.
fig. 27: List of storage locations
fig. 28: Restore image
fig. 29: Create image

42 Controls
Select the desired options and click Next to proceed.
8.3.4.1 General options
These options are generally available in all copying and imaging functions.
Option DescriptionVerifying Compares the data of source and target after copying.
Not to be used for data rescue, as it yields unnecessary additional stress on a damaged disk (49.3 Verification).
FastCopy Special copy algorithm. May increase the regular copy speed up to twice as fast.
SafeRescue Special algorithm for data recovery. Tries to recover large areas first. Can also stay turned on for normal copies.
Copy free areas FullCopy/SmartCopy only: On a partly partitioned source, HDClone works faster if free areas are not includ-ed. In case of special media (for example dynamic disks, RAID) it may be required to include free areas though.
HotCopy LiveImage
HDClone/W only: This option allows for clones or file images of the system drive or of disks, which are current-ly also in use by other programs.
Avoid exclusive read access
HDClone/W only: In Windows, HDClone usually tries to reserve the source drive for exclusive access at first. If this option is selected, HDClone will try to use HotCopy mode or LiveImage mode first.
Copy swap files Creating images only: Usually, it is not necessary to store the files pagefile.sys and hiberfil.sys in the file image. For cloning, this option is always activated.
inactive & locked
active inactive
fig. 30: Selecting the options (creating an image)
Program screens 43
8.3.4.2 Cloning options
These options are only available when cloning disks directly.
Option DescriptionSmartCopy Create a 49.1.2 SmartCopy.Defragmentation NTFS+FAT only: Reorganize file system during cloning.
8.3.4.3 Backup options
These options are only available when creating images or backups.
Option DescriptionStore resize-info Store information needed to reduce NTFS and FAT parti-
tions when restoring, otherwise partitions can only be restored to their original size or larger.
Store defrag-info Store information needed to defragment NTFS and FAT partitions when restoring, otherwise partitions cannot be defragmented during restoring.
Compression Creates a file image with the selected compression (Nor-mal/Quick/Strong) (49.8.6 Compressed Images).
Password protection
Use a password to protect your file image (49.8.7 Pass-word-Protection) and choose to use file image encryp-tion (49.8.8 Encryption).
Maximum extent size
Limit the size of extents in the image to a defined maxi-mum. To be compatible with different file systems, the default is 2,047 MB. For burning an image to CD, DVD or BD later, you may specify a different value (CD: 700 MB | DVD: 4.700 MB | BD: 25.000 MB).
Set image size manually
RAW image only: Set a virtual target size when creating an image. Allows to reduce the size of RAW images.
8.3.4.4 Restore options
These options are only available when restoring from images.
Option DescriptionDefragmentation NTFS+FAT only: Reorganize file system during restore.
8.3.4.5 Options for source and target
These settings refer to the drives selected as source and target.
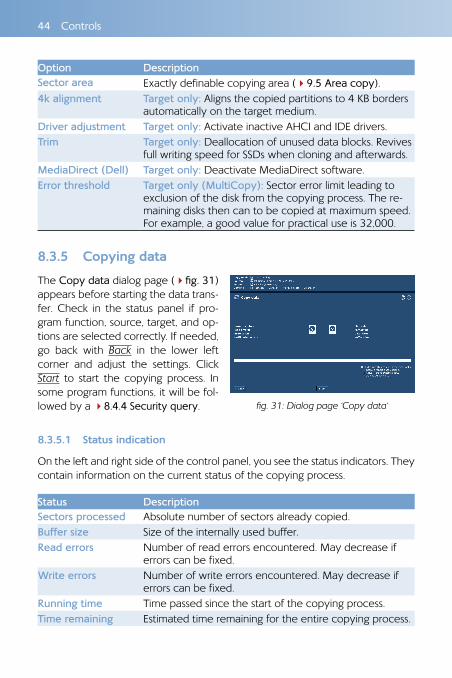
44 Controls
Option DescriptionSector area Exactly definable copying area (49.5 Area copy).4k alignment Target only: Aligns the copied partitions to 4 KB borders
automatically on the target medium.Driver adjustment Target only: Activate inactive AHCI and IDE drivers.Trim Target only: Deallocation of unused data blocks. Revives
full writing speed for SSDs when cloning and afterwards.MediaDirect (Dell) Target only: Deactivate MediaDirect software.Error threshold Target only (MultiCopy): Sector error limit leading to
exclusion of the disk from the copying process. The re-maining disks then can to be copied at maximum speed. For example, a good value for practical use is 32,000.
8.3.5 Copying data
The Copy data dialog page (4fig. 31) appears before starting the data trans-fer. Check in the status panel if pro-gram function, source, target, and op-tions are selected correctly. If needed, go back with Back in the lower left corner and adjust the settings. Click Start to start the copying process. In some program functions, it will be fol-lowed by a 48.4.4 Security query.
8.3.5.1 Status indication
On the left and right side of the control panel, you see the status indicators. They contain information on the current status of the copying process.
Status DescriptionSectors processed Absolute number of sectors already copied.Buffer size Size of the internally used buffer.Read errors Number of read errors encountered. May decrease if
errors can be fixed.Write errors Number of write errors encountered. May decrease if
errors can be fixed.Running time Time passed since the start of the copying process.Time remaining Estimated time remaining for the entire copying process.
fig. 31: Dialog page ‘Copy data‘
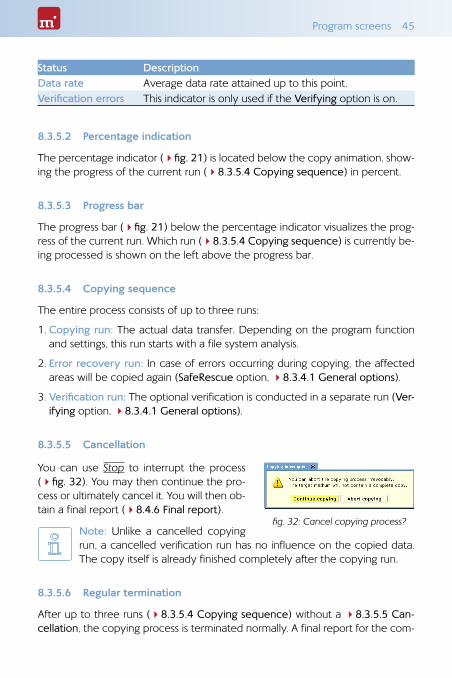
Program screens 45
Status DescriptionData rate Average data rate attained up to this point.Verification errors This indicator is only used if the Verifying option is on.
8.3.5.2 Percentage indication
The percentage indicator (4fig. 21) is located below the copy animation, show-ing the progress of the current run (48.3.5.4 Copying sequence) in percent.
8.3.5.3 Progress bar
The progress bar (4fig. 21) below the percentage indicator visualizes the prog-ress of the current run. Which run (48.3.5.4 Copying sequence) is currently be-ing processed is shown on the left above the progress bar.
8.3.5.4 Copying sequence
The entire process consists of up to three runs:
1. Copying run: The actual data transfer. Depending on the program function and settings, this run starts with a file system analysis.
2. Error recovery run: In case of errors occurring during copying, the affected areas will be copied again (SafeRescue option, 48.3.4.1 General options).
3. Verification run: The optional verification is conducted in a separate run (Ver-ifying option, 48.3.4.1 General options).
8.3.5.5 Cancellation
You can use Stop to interrupt the process (4fig. 32). You may then continue the pro-cess or ultimately cancel it. You will then ob-tain a final report (48.4.6 Final report).
Note: Unlike a cancelled copying run, a cancelled verification run has no influence on the copied data. The copy itself is already finished completely after the copying run.
8.3.5.6 Regular termination
After up to three runs (48.3.5.4 Copying sequence) without a 48.3.5.5 Can-cellation, the copying process is terminated normally. A final report for the com-
fig. 32: Cancel copying process?
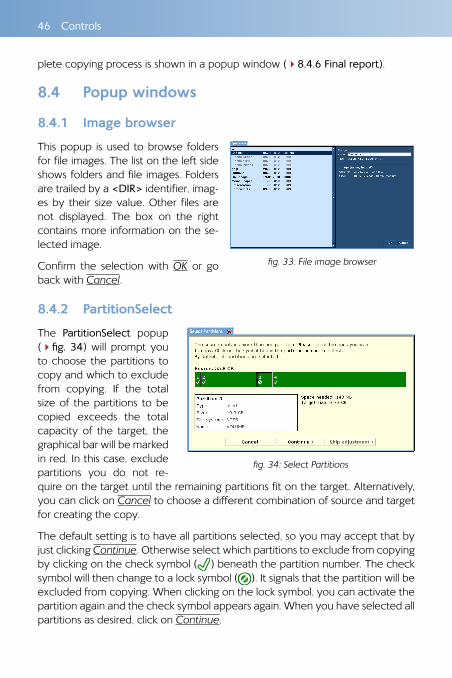
46 Controls
plete copying process is shown in a popup window (48.4.6 Final report).
8.4 Popup windows
8.4.1 Image browser
This popup is used to browse folders for file images. The list on the left side shows folders and file images. Folders are trailed by a <DIR> identifier, imag-es by their size value. Other files are not displayed. The box on the right contains more information on the se-lected image.
Confirm the selection with OK or go back with Cancel.
8.4.2 PartitionSelect
The PartitionSelect popup (4fig. 34) will prompt you to choose the partitions to copy and which to exclude from copying. If the total size of the partitions to be copied exceeds the total capacity of the target, the graphical bar will be marked in red. In this case, exclude partitions you do not re-quire on the target until the remaining partitions fit on the target. Alternatively, you can click on Cancel to choose a different combination of source and target for creating the copy.
The default setting is to have all partitions selected, so you may accept that by just clicking Continue. Otherwise select which partitions to exclude from copying by clicking on the check symbol ( ) beneath the partition number. The check symbol will then change to a lock symbol ( ). It signals that the partition will be excluded from copying. When clicking on the lock symbol, you can activate the partition again and the check symbol appears again. When you have selected all partitions as desired, click on Continue.
fig. 33: File image browser
fig. 34: Select Partitions
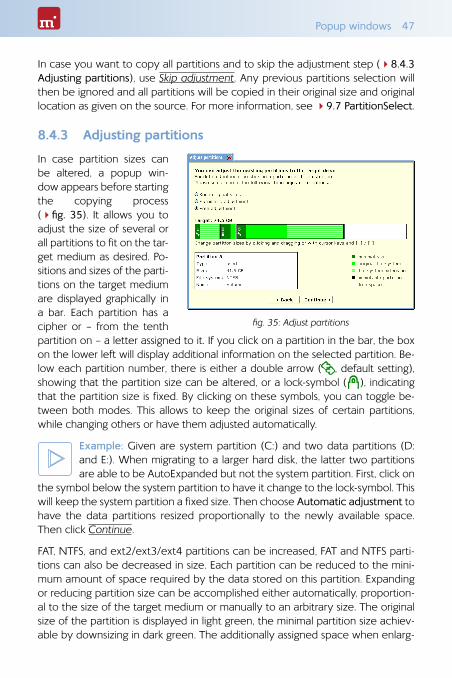
Popup windows 47
In case you want to copy all partitions and to skip the adjustment step (48.4.3 Adjusting partitions), use Skip adjustment. Any previous partitions selection will then be ignored and all partitions will be copied in their original size and original location as given on the source. For more information, see 49.7 PartitionSelect.
8.4.3 Adjusting partitions
In case partition sizes can be altered, a popup win-dow appears before starting the copying process (4fig. 35). It allows you to adjust the size of several or all partitions to fit on the tar-get medium as desired. Po-sitions and sizes of the parti-tions on the target medium are displayed graphically in a bar. Each partition has a cipher or – from the tenth partition on – a letter assigned to it. If you click on a partition in the bar, the box on the lower left will display additional information on the selected partition. Be-low each partition number, there is either a double arrow ( , default setting), showing that the partition size can be altered, or a lock-symbol ( ), indicating that the partition size is fixed. By clicking on these symbols, you can toggle be-tween both modes. This allows to keep the original sizes of certain partitions, while changing others or have them adjusted automatically.
Example: Given are system partition (C:) and two data partitions (D: and E:). When migrating to a larger hard disk, the latter two partitions are able to be AutoExpanded but not the system partition. First, click on
the symbol below the system partition to have it change to the lock-symbol. This will keep the system partition a fixed size. Then choose Automatic adjustment to have the data partitions resized proportionally to the newly available space. Then click Continue.
FAT, NTFS, and ext2/ext3/ext4 partitions can be increased, FAT and NTFS parti-tions can also be decreased in size. Each partition can be reduced to the mini-mum amount of space required by the data stored on this partition. Expanding or reducing partition size can be accomplished either automatically, proportion-al to the size of the target medium or manually to an arbitrary size. The original size of the partition is displayed in light green, the minimal partition size achiev-able by downsizing in dark green. The additionally assigned space when enlarg-
fig. 35: Adjust partitions
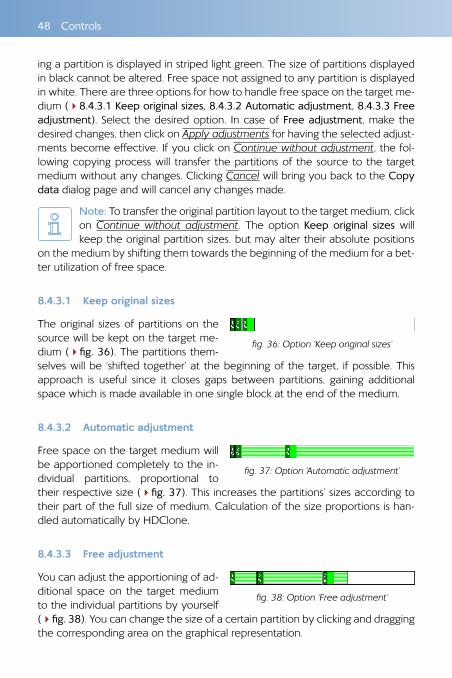
48 Controls
ing a partition is displayed in striped light green. The size of partitions displayed in black cannot be altered. Free space not assigned to any partition is displayed in white. There are three options for how to handle free space on the target me-dium (48.4.3.1 Keep original sizes, 8.4.3.2 Automatic adjustment, 8.4.3.3 Free adjustment). Select the desired option. In case of Free adjustment, make the desired changes, then click on Apply adjustments for having the selected adjust-ments become effective. If you click on Continue without adjustment, the fol-lowing copying process will transfer the partitions of the source to the target medium without any changes. Clicking Cancel will bring you back to the Copy data dialog page and will cancel any changes made.
Note: To transfer the original partition layout to the target medium, click on Continue without adjustment. The option Keep original sizes will keep the original partition sizes, but may alter their absolute positions
on the medium by shifting them towards the beginning of the medium for a bet-ter utilization of free space.
8.4.3.1 Keep original sizes
The original sizes of partitions on the source will be kept on the target me-dium (4fig. 36). The partitions them-selves will be ‘shifted together’ at the beginning of the target, if possible. This approach is useful since it closes gaps between partitions, gaining additional space which is made available in one single block at the end of the medium.
8.4.3.2 Automatic adjustment
Free space on the target medium will be apportioned completely to the in-dividual partitions, proportional to their respective size (4fig. 37). This increases the partitions’ sizes according to their part of the full size of medium. Calculation of the size proportions is han-dled automatically by HDClone.
8.4.3.3 Free adjustment
You can adjust the apportioning of ad-ditional space on the target medium to the individual partitions by yourself (4fig. 38). You can change the size of a certain partition by clicking and dragging the corresponding area on the graphical representation.
fig. 36: Option ‘Keep original sizes’
fig. 37: Option ‘Automatic adjustment’
fig. 38: Option ‘Free adjustment’
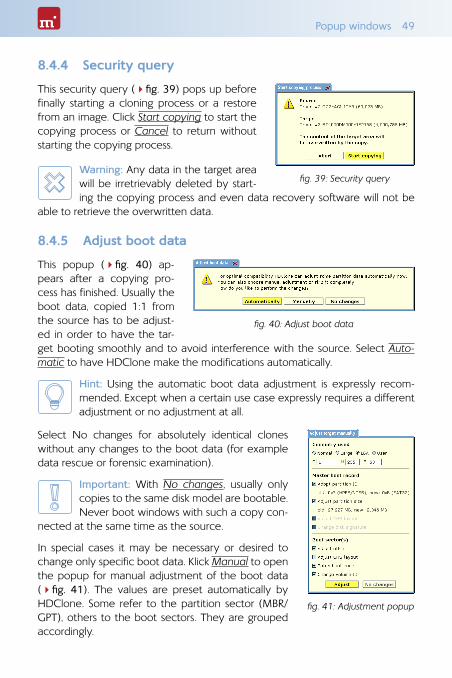
Popup windows 49
8.4.4 Security query
This security query (4fig. 39) pops up before finally starting a cloning process or a restore from an image. Click Start copying to start the copying process or Cancel to return without starting the copying process.
Warning: Any data in the target area will be irretrievably deleted by start-ing the copying process and even data recovery software will not be
able to retrieve the overwritten data.
8.4.5 Adjust boot data
This popup (4fig. 40) ap-pears after a copying pro-cess has finished. Usually the boot data, copied 1:1 from the source has to be adjust-ed in order to have the tar-get booting smoothly and to avoid interference with the source. Select Auto-matic to have HDClone make the modifications automatically.
Hint: Using the automatic boot data adjustment is expressly recom-mended. Except when a certain use case expressly requires a different adjustment or no adjustment at all.
Select No changes for absolutely identical clones without any changes to the boot data (for example data rescue or forensic examination).
Important: With No changes, usually only copies to the same disk model are bootable. Never boot windows with such a copy con-
nected at the same time as the source.
In special cases it may be necessary or desired to change only specific boot data. Klick Manual to open the popup for manual adjustment of the boot data (4fig. 41). The values are preset automatically by HDClone. Some refer to the partition sector (MBR/GPT), others to the boot sectors. They are grouped accordingly.
fig. 39: Security query
fig. 40: Adjust boot data
fig. 41: Adjustment popup
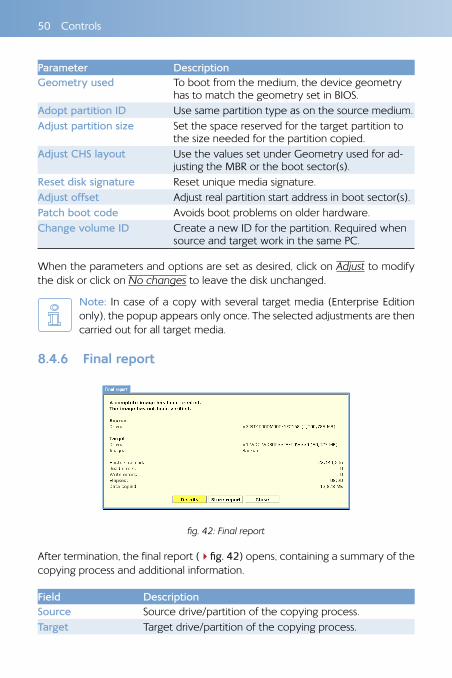
50 Controls
Parameter DescriptionGeometry used To boot from the medium, the device geometry
has to match the geometry set in BIOS.Adopt partition ID Use same partition type as on the source medium.Adjust partition size Set the space reserved for the target partition to
the size needed for the partition copied.Adjust CHS layout Use the values set under Geometry used for ad-
justing the MBR or the boot sector(s). Reset disk signature Reset unique media signature.Adjust offset Adjust real partition start address in boot sector(s).Patch boot code Avoids boot problems on older hardware.Change volume ID Create a new ID for the partition. Required when
source and target work in the same PC.
When the parameters and options are set as desired, click on Adjust to modify the disk or click on No changes to leave the disk unchanged.
Note: In case of a copy with several target media (Enterprise Edition only), the popup appears only once. The selected adjustments are then carried out for all target media.
8.4.6 Final report
After termination, the final report (4fig. 42) opens, containing a summary of the copying process and additional information.
Field DescriptionSource Source drive/partition of the copying process.Target Target drive/partition of the copying process.
fig. 42: Final report
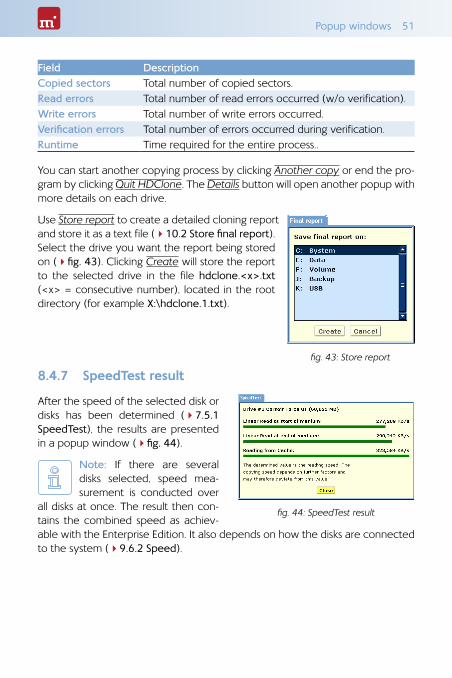
Popup windows 51
Field DescriptionCopied sectors Total number of copied sectors.Read errors Total number of read errors occurred (w/o verification).Write errors Total number of write errors occurred.Verification errors Total number of errors occurred during verification.Runtime Time required for the entire process..
You can start another copying process by clicking Another copy or end the pro-gram by clicking Quit HDClone. The Details button will open another popup with more details on each drive.
Use Store report to create a detailed cloning report and store it as a text file (410.2 Store final report). Select the drive you want the report being stored on (4fig. 43). Clicking Create will store the report to the selected drive in the file hdclone.<x>.txt (<x> = consecutive number), located in the root directory (for example X:\hdclone.1.txt).
8.4.7 SpeedTest result
After the speed of the selected disk or disks has been determined (47.5.1 SpeedTest), the results are presented in a popup window (4fig. 44).
Note: If there are several disks selected, speed mea-surement is conducted over
all disks at once. The result then con-tains the combined speed as achiev-able with the Enterprise Edition. It also depends on how the disks are connected to the system (49.6.2 Speed).
fig. 43: Store report
fig. 44: SpeedTest result

52 Controls
8.4.8 DiskView sector data
This popup (4fig. 45) displays the sectors data of the selected disk (47.5.2 DiskView). Klicking Go will display the sector with the number specified in the input field (Sector). The bar below al-lows to quickly navigate through all sectors of the disk. Close the popup with X in the title bar or with the Esc key.
fig. 45: DiskView sector data
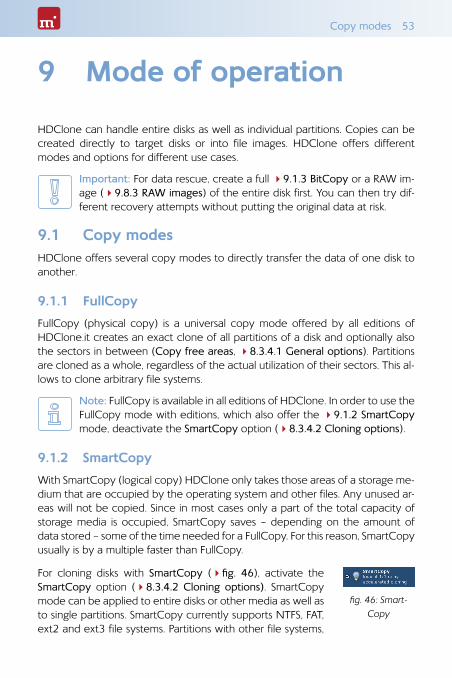
Copy modes 53
9 Mode of operation
HDClone can handle entire disks as well as individual partitions. Copies can be created directly to target disks or into file images. HDClone offers different modes and options for different use cases.
Important: For data rescue, create a full 49.1.3 BitCopy or a RAW im-age (49.8.3 RAW images) of the entire disk first. You can then try dif-ferent recovery attempts without putting the original data at risk.
9.1 Copy modesHDClone offers several copy modes to directly transfer the data of one disk to another.
9.1.1 FullCopy
FullCopy (physical copy) is a universal copy mode offered by all editions of HDClone.it creates an exact clone of all partitions of a disk and optionally also the sectors in between (Copy free areas, 48.3.4.1 General options). Partitions are cloned as a whole, regardless of the actual utilization of their sectors. This al-lows to clone arbitrary file systems.
Note: FullCopy is available in all editions of HDClone. In order to use the FullCopy mode with editions, which also offer the 49.1.2 SmartCopy mode, deactivate the SmartCopy option (48.3.4.2 Cloning options).
9.1.2 SmartCopy
With SmartCopy (logical copy) HDClone only takes those areas of a storage me-dium that are occupied by the operating system and other files. Any unused ar-eas will not be copied. Since in most cases only a part of the total capacity of storage media is occupied, SmartCopy saves – depending on the amount of data stored – some of the time needed for a FullCopy. For this reason, SmartCopy usually is by a multiple faster than FullCopy.
For cloning disks with SmartCopy (4fig. 46), activate the SmartCopy option (48.3.4.2 Cloning options). SmartCopy mode can be applied to entire disks or other media as well as to single partitions. SmartCopy currently supports NTFS, FAT, ext2 and ext3 file systems. Partitions with other file systems,
fig. 46: Smart-Copy
54 Mode of operation
will be copied in FullCopy mode, even if the SmartCopy option is activated.
Note: SmartCopy evaluates the file system and depends on file system data being consistent and free of errors. Otherwise the copy may con-tain errors as well. In case you are not sure, you may check the source
with chkdsk /f before cloning.
SmartCopy also creates an exact clone, but in contrast to 49.1.1 FullCopy, only copying the used areas of the medium. For many cases of use, this mode is pref-erable, since it delivers the same result in less time.
Hint: Since it is only a clone, you can always try SmartCopy mode first. If it turns out not to be sufficient for your individual case of use, you can still create a FullCopy.
Warning: Never use SmartCopy mode for 42.2 Data rescue, for copy-ing defective or inconsistent file systems, or for 42.7 Forensic examina-tion. Rather create a FullCopy or 49.1.3 BitCopy in these cases.
9.1.3 BitCopy
BitCopy (bitwise physical copy) creates a complete or partial (49.5 Area copy) clone of a storage medium. This clone is bit by bit identical with the source, since each sector of the source will be copied exactly to the same sector on the tar-get. This is the main difference between BitCopy and 49.1.1 FullCopy.
Important: For a complete BitCopy of all areas of the source, also select the Copy free areas option. This is especially required when performing data rescue or forensic examination.
9.2 Size differencesTo create a real BitCopy, source and target must have exactly the same size. HDClone is also capable to create physical copies if the size of source and target differs. But the result will not be an absolutely identical clone.
Hint: The following subchapters refer to the usage of 49.1.3 BitCopy. With 49.1.2 SmartCopy the contents of the source can usually be ad-justed automatically to the size of the target.
9.2.1 Equal size
If source and target have exactly the same size and 47.1.3 BitCopy mode is se-lected, HDClone creates an identical copy. On this clone – provided there were no errors – all sectors on the target are 100% identical with the source.
Automatic troubleshooting 55
9.2.2 Small to large
If the source is smaller than the target, HDClone clones all source data, from the beginning of the source, onto the target medium. The area at the end of the tar-get medium, which is larger than the source, remains unaffected. The unaffected area remains possibly unused during a later usage, such a copy is usually compa-rable to a real clone as far as the capacity of use is concerned because the target contains entirely all data of the source (in contrast to 49.2.3 Large to small).
9.2.3 Large to small
If the source is bigger than the target, HDClone copies only the data which also fits onto the target. This data is copied from the beginning of the source to the beginning of the target medium. The data, which is larger than the target, is not copied and is missing on the target. Generally, such a copy is unusable or only very restrictedly usable because possibly necessary data can be missing. How-ever, if you make sure before copying (e.g. by defragmentation), that all valid or necessary data is in the front part of the source medium and that this area is not larger than the target medium, a copy onto a smaller target medium can also be successfully used. This also applies if you have copied a smaller source onto a larger target (49.2.2 Small to large) and if you copy back the (unchanged) data onto the original medium or onto a target of the corresponding size.
9.3 VerificationThe Verifying option (48.3.4.1 General options) allows to compare source and target after the copying process. The entire process including copying and veri-fication requires about twice the time. Select this option according to your re-quirements and the available time.
Warning: When copying defective disks (data rescue), do not activate verification. The additional exposure may increase existing defects. And a verification has virtually no significance in case of defective disks.
9.4 Automatic troubleshootingHDClone tries to troubleshoot occurring sector errors automatically in the best possible way. If this is not possible, the errors will be counted in a corresponding error statistic.
9.4.1 Intensive reading/writing
In case of read errors, HDClone uses different strategies in order to recover these sectors. The time used for this depends on the type and size of medium
56 Mode of operation
used. For each sector, several seconds up to minutes can be needed for the re-covery attempts. Therefore, it is recommended to always activate the option SafeRescue (48.3.4.1 General options) since handling of defective sectors will then be done after the copying of all intact areas has been finished. The process can then be cancelled if it takes too long without losing the data of the intact areas.
9.4.2 Read errors
During the copying process, read errors can only occur on the source medium. HDClone then tries to read the defective areas immediately after the termina-tion of the copying process (option SafeRescue, 48.3.4.1 General options) within a separate error recovery run (48.3.5.4 Copying sequence). During the error recovery run, the number of the indicated read errors can reduce depend-ing on the areas on the source which could be recovered.
Note: Read errors occurring during verification are counted as verifica-tion errors (48.3.5.1 Status indication). Since at verification time cloning has been finished already, there will be no further error recovery.
9.4.3 Write errors
Write errors can only occur during the copying process and only on the target medium. HDClone then tries to read the defective areas immediately after the termination of the copying process (with the option SafeRescue, 48.3.4.1 Gen-eral options) with the help of special data recovery strategies within a separate error recovery run (48.3.5.4 Copying sequence). During the error recovery run, the number of the indicated write errors can decrease depending on the recov-erable areas on the target.
9.4.4 Verification errors
When the option Verifying (49.3 Verification) is activated, HDClone executes a verification run (48.3.5.4 Copying sequence) after the copying process. A veri-fication error is counted if the data of two sectors on source and target do not correspond. Furthermore, read errors, which occur during the verification run in one or both of the areas to be compared, are also counted as verification errors. The number of verification errors gives you absolute information on how exact source and target correspond to each other after cloning.
Note: Verification will only be performed on sectors that have been copied previously. Since SmartCopy only will copy data from used sec-tors, verification will only compare these sectors.
MultiCopy 57
9.5 Area copyIn case of an area copy, not the entire storage medium (drive/partition) of source or target (or both) will be used, but only a partial area.
9.5.1 Usage
The dialog page Options provides the possibility to specify an exactly definable sector area for source and target (48.3.4.2 Cloning options). To specify a sector area, activate the check box Sector area and enter the starting (from) and the ending (to) sector of the area. These sectors are interpreted as the first and the last sector of the area, i.e. they are included with the area.
Note: Counting starts with ‘0’ (= 1st sector of the medium), so all further sector numbers have to be decreased by 1 (e.g. from = 0, to = 99999 defines the first 100000 sectors on the medium as an area).
Warning: Only use area copy if you are completely aware of its func-tioning. A sector area, which has not been defined properly, may lead to data loss or render the result unusable.
9.5.2 Mode of operation
Sector area means a contiguous area of sectors on a storage medium. In the case of partitions, it is specified relative to their starting positions. HDClone will then copy the first sector of the source, to the first sector of the target area and so on. Compared to a normal BitCopy, the main difference is that the defined partial area is cloned instead of the entire drive or partition.
Example: Sector area from = 0, to = 31. For drives, this defines the (ab-solute) first 32 sectors. The absolute position of the first 32 sectors of a partition depends on its (absolute) start on the drive.
9.6 MultiCopyIn case of a MultiCopy (mass copy) the contents of the source are copied on multiple targets at the same time. As a result there is a huge benefit regarding time and performance, since the source data only has to be read once and the data can be written on multiple targets at the same time.
9.6.1 Mode of operation
When selecting a program function from the MultiCopy group (47.4 MultiCo-py), the target selection dialog page (48.3.1 Selecting a disk) allows to select
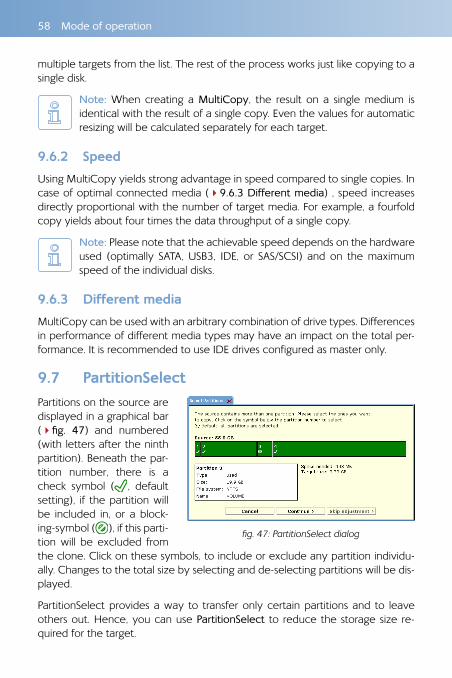
58 Mode of operation
multiple targets from the list. The rest of the process works just like copying to a single disk.
Note: When creating a MultiCopy, the result on a single medium is identical with the result of a single copy. Even the values for automatic resizing will be calculated separately for each target.
9.6.2 Speed
Using MultiCopy yields strong advantage in speed compared to single copies. In case of optimal connected media (49.6.3 Different media) , speed increases directly proportional with the number of target media. For example, a fourfold copy yields about four times the data throughput of a single copy.
Note: Please note that the achievable speed depends on the hardware used (optimally SATA, USB3, IDE, or SAS/SCSI) and on the maximum speed of the individual disks.
9.6.3 Different media
MultiCopy can be used with an arbitrary combination of drive types. Differences in performance of different media types may have an impact on the total per-formance. It is recommended to use IDE drives configured as master only.
9.7 PartitionSelectPartitions on the source are displayed in a graphical bar (4fig. 47) and numbered (with letters after the ninth partition). Beneath the par-tition number, there is a check symbol ( , default setting), if the partition will be included in, or a block-ing-symbol ( ), if this parti-tion will be excluded from the clone. Click on these symbols, to include or exclude any partition individu-ally. Changes to the total size by selecting and de-selecting partitions will be dis-played.
PartitionSelect provides a way to transfer only certain partitions and to leave others out. Hence, you can use PartitionSelect to reduce the storage size re-quired for the target.
fig. 47: PartitionSelect dialog
File images 59
9.8 File imagesBesides direct clones, HDClone is also capable of storing images of a medium into a file. An image contains the same data as a clone. When an image has been restored to another medium, the result is the same as if it had been copied di-rectly from the original source.
9.8.1 FullImage
A FullImage (physical Image) stores – similar to a 49.1.1 FullCopy – all sectors of the disk or selected partitions and optionally all sectors in between (Copy free areas, 48.3.4.1 General options) in a file image.
Note: FullImage is available in all editions. In editions, which also support other image types, explicitly select FullImage if desired when creating an image (48.3.3 Selecting an image).
9.8.2 SmartImage
A SmartImage (logical Image) stores – analog to a 49.1.2 SmartCopy – only the areas of a medium that are occupied with file system data. A SmartImage usu-ally requires much less disk space and time for creation than a 49.8.1 FullImage.
9.8.3 RAW images
RAW images are also physical images. They contain the same data like FullImages (including Copy free areas, 48.3.4.1 General options). HDClone just uses a spe-cial file format for FullImages, which optimally supports HDClone specific fea-tures (e.g. SafeRescue). RAW images contain data in the same linear order as it is stored on a medium. This makes it faster and easier to process image files with third party programs, especially when mounting them in 412 Miray Virtual Disk.
Hint: RAW images created by HDClone automatically contain a VMDK file required to mount them directly as virtual drives in VMware or oth-er virtual machines (49.8.4 VM-Images (VMDK, VHD/VHDX, VDI)).
9.8.4 VM-Images (VMDK, VHD/VHDX, VDI)
In addition to its native image formats, HDClone is also able to create dynamic VM-Images to be used in virtual machines. It offers the following formats: VMDK (VMware), VHD/VHDX (Virtual PC) and VDI (VirtualBox). They only contain ac-tually used areas of the source and therefore are usually much smaller than 49.8.3 RAW images – similar to a 49.8.2 SmartImage. Due to their technical characteristics, VM-Images are slightly larger than SmartImages. And it is not pos-
60 Mode of operation
sible to exactly calculate their final size in advance. During creation, this may lead to a deviation from the predicted size.
Note: Compression and encryption are not available for VM-Images. In this case, select a SmartImage and the appropriate options instead (48.3.4.3 Backup options).
VM-Images created with HDClone can be used as virtual drives in virtual ma-chines. For further information, please refer to the manual of your version of VM-ware, VirtualPC, or VirtualBox. From Windows 7 and Windows Server 2008 on, you can also mount VHD/VHDX images as virtual drives using the Windows Disk Management tool (diskmgmt.msc).
412 Miray Virtual Disk can mount both formats under Windows as virtual drives. This allows you to access the files and folders stored in them without opening the image in a virtual machine.
Note: A virtual VM-Image drive mounted with Miray Virtual Disk can be read AND written, but changes are not stored directly in the image. But you can use the virtual drive to create a new image including all chang-
es made (412.7 Copy to other Image formats).
When creating 49.8.3 RAW images, a VMDK file will be created automatically. Opening the HDClone file image with VMware, you will be displayed a VMDK file of the same name. You then can select and use the file. The VMDK files HDClone creates comply with HWversion=4 and are specified to be used with the following versions of VMware:
{ VMware Player starting from version 1.x
{ VMware Workstation starting from version 5.x
{ VMware Server starting from version 1.x
{ VMware ESXi starting from version 3
9.8.5 Usage
When 48.3.3 Selecting an image you can specify the type of the image to be created. FullImages can be created from any supported disk type. For creating SmartImages, the source disk has to be formatted with FAT, NTFS, ext2/ext3. With HDClone/S you can use FAT32 or NTFS formatted disks for reading and writing image files. HDClone/W also supports network dives and network shares.
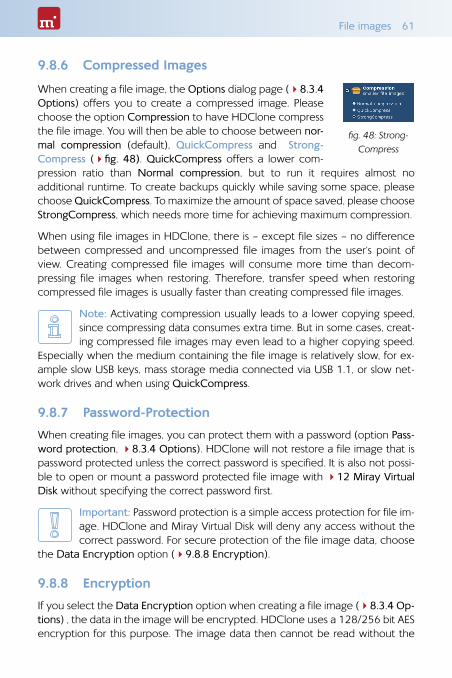
File images 61
9.8.6 Compressed Images
When creating a file image, the Options dialog page (48.3.4 Options) offers you to create a compressed image. Please choose the option Compression to have HDClone compress the file image. You will then be able to choose between nor-mal compression (default), QuickCompress and Strong-Compress (4fig. 48). QuickCompress offers a lower com-pression ratio than Normal compression, but to run it requires almost no additional runtime. To create backups quickly while saving some space, please choose QuickCompress. To maximize the amount of space saved, please choose StrongCompress, which needs more time for achieving maximum compression.
When using file images in HDClone, there is – except file sizes – no difference between compressed and uncompressed file images from the user‘s point of view. Creating compressed file images will consume more time than decom-pressing file images when restoring. Therefore, transfer speed when restoring compressed file images is usually faster than creating compressed file images.
Note: Activating compression usually leads to a lower copying speed, since compressing data consumes extra time. But in some cases, creat-ing compressed file images may even lead to a higher copying speed.
Especially when the medium containing the file image is relatively slow, for ex-ample slow USB keys, mass storage media connected via USB 1.1, or slow net-work drives and when using QuickCompress.
9.8.7 Password-Protection
When creating file images, you can protect them with a password (option Pass-word protection, 48.3.4 Options). HDClone will not restore a file image that is password protected unless the correct password is specified. It is also not possi-ble to open or mount a password protected file image with 412 Miray Virtual Disk without specifying the correct password first.
Important: Password protection is a simple access protection for file im-age. HDClone and Miray Virtual Disk will deny any access without the correct password. For secure protection of the file image data, choose
the Data Encryption option (49.8.8 Encryption).
9.8.8 Encryption
If you select the Data Encryption option when creating a file image (48.3.4 Op-tions) , the data in the image will be encrypted. HDClone uses a 128/256 bit AES encryption for this purpose. The image data then cannot be read without the
fig. 48: Strong-Compress
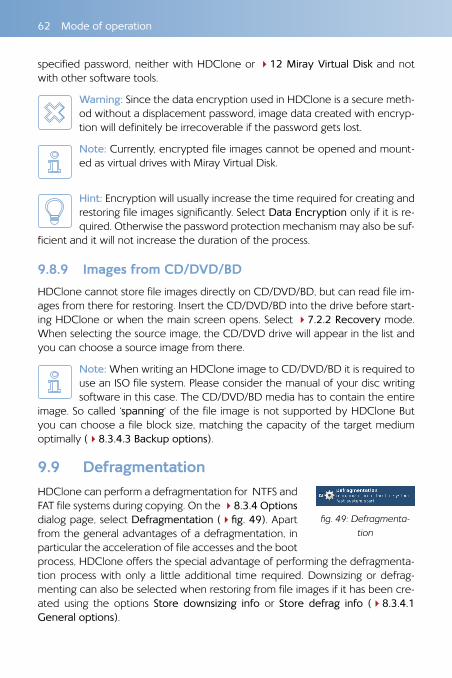
62 Mode of operation
specified password, neither with HDClone or 412 Miray Virtual Disk and not with other software tools.
Warning: Since the data encryption used in HDClone is a secure meth-od without a displacement password, image data created with encryp-tion will definitely be irrecoverable if the password gets lost.
Note: Currently, encrypted file images cannot be opened and mount-ed as virtual drives with Miray Virtual Disk.
Hint: Encryption will usually increase the time required for creating and restoring file images significantly. Select Data Encryption only if it is re-quired. Otherwise the password protection mechanism may also be suf-
ficient and it will not increase the duration of the process.
9.8.9 Images from CD/DVD/BD
HDClone cannot store file images directly on CD/DVD/BD, but can read file im-ages from there for restoring. Insert the CD/DVD/BD into the drive before start-ing HDClone or when the main screen opens. Select 47.2.2 Recovery mode. When selecting the source image, the CD/DVD drive will appear in the list and you can choose a source image from there.
Note: When writing an HDClone image to CD/DVD/BD it is required to use an ISO file system. Please consider the manual of your disc writing software in this case. The CD/DVD/BD media has to contain the entire
image. So called ‘spanning‘ of the file image is not supported by HDClone But you can choose a file block size, matching the capacity of the target medium optimally (48.3.4.3 Backup options).
9.9 DefragmentationHDClone can perform a defragmentation for NTFS and FAT file systems during copying. On the 48.3.4 Options dialog page, select Defragmentation (4fig. 49). Apart from the general advantages of a defragmentation, in particular the acceleration of file accesses and the boot process, HDClone offers the special advantage of performing the defragmenta-tion process with only a little additional time required. Downsizing or defrag-menting can also be selected when restoring from file images if it has been cre-ated using the options Store downsizing info or Store defrag info (48.3.4.1 General options).
fig. 49: Defragmenta-tion
Defragmentation 63
Important: Use defragmentation on healthy file systems only, meaning only those file systems being declared flawless by programs like chkdsk.exe (under Windows).
Note: When downsizing partitions, HDClone may also shift data blocks. This shifting aims to reduce the file system‘s size in as few steps as pos-sible. For a real defragmentation select the option Defragmentation ex-
plicitly, even when downsizing a file system.
64 Command line (CLI)
10 Command line (CLI)
You can include HDClone in automated workflows like shell scripts or time-trig-gered tasks. For this kind of usage, there is a command line version of HDClone (hdclone-cl.bat), to be found in the program folder of HDClone. It is especially suitable for the following fields of application:
{ Calling it from shell scripts or batch files.
{ Creating a permanent link on the Desktop or in the Start menu.
{ Creating time triggered tasks by calling HDClone through the Task Scheduler.
This allows to integrate HDClone seamless into existing scripts or batch process-es. You can also create Desktop links for frequently used cloning configurations to easily call them manually or automatically on demand. Usage of hdclone-cl.exe is described in detail in 410.1 Command line interface.
10.1 Command line interfaceTo use HDClone for automated processes or time-triggered calls, there is the ad-ditional file hdclone-cl.bat for calling HDClone from the Windows command line. This program is destined to be called by shell scripts or program links. It handles user input and output exclusively via the command line and calling parameters.
This allows to use the command line version for areas of application, for which the graphical version is not suitable, like the following examples:
{ Time-triggered calling: Scheduled calls of HDClone by the Windows Task Manager to start copying processes automatically, for example backups.
{ Script integration: Calling HDClone from scripts for integrating it into auto-mated processes, for example for mass installation (deployment).
{ Programmed processes: For recurring copying processes, you can create links in the Start Menu, the Quick Launch bar, or on the Desktop to allow these pro-grammed processes to be called quickly and easily at any time.
Hint: When calling hdclone-cl -help or without any parameters, a list of supported parameters in combination with a short description of their usage will be displayed.
The following chapters list and explain the supported parameters. The order of individual parameters when calling hdclone-cl is arbitrary.
Command line interface 65
10.1.1 Start Menu
To facilitate the use of the command line version, it has its own Start Menu entry. Under the HDClone entry, you find the sub-folder CLI. It contains two subitems:
{ HDClone CLI: Opens a privileged Windows Shell in the program folder, so you can directly start the command line version from here.
{ Scripting templates: Opens a folder with templates for batch scripts in the Windows Explorer. You may customize them according to your needs.
Important: Along with the scripting templates there is an hdclone-cl.bat file. Use it instead of calling hdclone.exe cl, especially in complex scripts to ensure you obtain the correct result values (410.1.7 Return values).
Replace the call of hdclone-cl.exe from earlier versions with hdclone-cl.bat.
10.1.2 Program call
The command line version of HDClone expects the following calling syntax:
{ D2D – Copying an entire drive hdclone-cl -mode:d2d -srcdrv:[source] -dstdrv:[target]
{ P2P – Copying a single partition hdclone-cl -mode:p2p -srcvol:[source] -dstvol:[target]
{ D2I – Creating a file image of an entire drive hdclone-cl -mode:d2i -srcdrv:[source] -dstvol:[target] -dstimg:[image]
{ P2I – Creating a file image of a single partition hdclone-cl -mode:p2i -srcvol:[source] -dstvol:[target] -dstimg:[image]
{ I2D – Restoring a file image to an entire drive hdclone-cl -mode:i2d -srcvol:[source] -srcimg:[image] -dstdrv:[target]
{ I2P – Restoring a file image to a single partition hdclone-cl -mode:i2p -srcvol:[source] -srcimg:[image] -dstvol:[target]
Note: When using Enterprise Edition with more than one target, the calling syntax is extended as follows: the parameter combinations -dstdrv:[target], -dstvol:[target] or -dstvol:[target] -dstimg:[filename]
have to be specified iteratively, one for each copying target.
Providing the parameters described above is mandatory. If one of the parame-ters is missing or has an invalid value, the call will be canceled with an error.
Note: Drive-to-Partition and Partition-to-Drive modes are not available in the command line version. Please use the functions for creating and restoring file images instead.
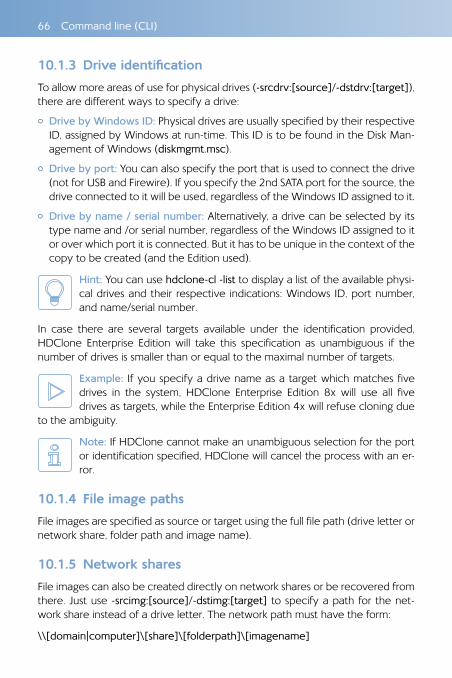
66 Command line (CLI)
10.1.3 Drive identification
To allow more areas of use for physical drives (-srcdrv:[source]/-dstdrv:[target]), there are different ways to specify a drive:
{ Drive by Windows ID: Physical drives are usually specified by their respective ID, assigned by Windows at run-time. This ID is to be found in the Disk Man-agement of Windows (diskmgmt.msc).
{ Drive by port: You can also specify the port that is used to connect the drive (not for USB and Firewire). If you specify the 2nd SATA port for the source, the drive connected to it will be used, regardless of the Windows ID assigned to it.
{ Drive by name / serial number: Alternatively, a drive can be selected by its type name and /or serial number, regardless of the Windows ID assigned to it or over which port it is connected. But it has to be unique in the context of the copy to be created (and the Edition used).
Hint: You can use hdclone-cl -list to display a list of the available physi-cal drives and their respective indications: Windows ID, port number, and name/serial number.
In case there are several targets available under the identification provided, HDClone Enterprise Edition will take this specification as unambiguous if the number of drives is smaller than or equal to the maximal number of targets.
Example: If you specify a drive name as a target which matches five drives in the system, HDClone Enterprise Edition 8x will use all five drives as targets, while the Enterprise Edition 4x will refuse cloning due
to the ambiguity.
Note: If HDClone cannot make an unambiguous selection for the port or identification specified, HDClone will cancel the process with an er-ror.
10.1.4 File image paths
File images are specified as source or target using the full file path (drive letter or network share, folder path and image name).
10.1.5 Network shares
File images can also be created directly on network shares or be recovered from there. Just use -srcimg:[source]/-dstimg:[target] to specify a path for the net-work share instead of a drive letter. The network path must have the form:
\\[domain|computer]\[share]\[folderpath]\[imagename]
Command line interface 67
For example ‘\\MyComputer\sharedfolder\backup\latest\mypc.img’.
10.1.6 Optional parameters
There are a number of further, optional parameters, allowing you to enable or disable certain features of HDClone for the copying process. They are provided in the form
-[option]:[on|off] or -[option]:[<choice1>|<choice2>|...]
The following table lists the available options. The values printed in capital letters (ON or OFF) represents the default value for the respective parameter. This val-ue will be used if you do not explicitly provide this parameter. The individual op-tions correspond to the options of the graphical HDClone program.
Option Description-verify:[on|OFF] Perform an additional verification (49.3 Verification).-smart:[ON|off] Faster copies by using logical file system information
(49.1.2 SmartCopy).-freespace:[on|OFF] Copy unused areas (48.3.4.1 General options).-swapfiles:[on|OFF] Copy pagefile.sys and hiberfil.sys (48.3.4.1 General
options).-defrag:[on|OFF] NTFS+FAT only: Also perform a defragmentation when
copying or storing defragmentation information when creating a file image (48.3.4.3 Backup options).
-imagetype: [full|SMART|raw| vmdk|vhd]
Image type to be created, according to the available image formats (49.8 File images).
-timestamp:[ON|off] Automatically extends the names of file images by a time-stamp. For labeling periodic backups and to avoid identical naming of file images. Without this option, the command line version will cancel the process in case of identical names.
-compression: [on|OFF|quick|strong]
Create a compressed image, ‘on’ for standard com-pression, ‘quick’ for QuickCompress, and ‘strong’ for StrongCompress (49.8.6 Compressed Images).
-resizeinfo:[ON|off] NTFS+FAT only: Store information for reducing parti-tion size when creating file images (48.3.4.3 Backup options).
-password:<password> Specify a password to protect the file image.-encrypt:[AES128|aes256]
Encrypt image (only in combination with -password).
68 Command line (CLI)
Option Description-extentsize:<size> Limit the size extents in the image folder to a maxi-
mum. Value for size plus K/M/G/T for magnitude, for example 650M, 4G, default is 2G.
-targetsize:<size> Virtual target size when creating images. Value for size plus K/M/G/T for magnitude, for example 20G, 1T.
-skip:[pnr]:[pnr]... Copy and create image only: Numbers of the parti-tions to be excluded from the copy or not stored if an image is created. Numbering starts with 1, the parti-tion order equals the order listed by the command hdclone-cl -list.
-resize-resize:<size>-resize:fixed-resize:skip-resize:AUTO-resize:[p1]:[p2]:[p3]...
NTFS+FAT+ext with copy and image restore only: Resizing partitions automatically or manually when copying or restoring from a file image (410.1.8 Resiz-ing), excluding individual partitions (49.7 PartitionSe-lect). <size> = value for size plus K/M/G/T for magni-tude, for example 650M, 4G, default is 2G.
-adjust:[ON|off] Automatic adjustment of disk parameters.-preferlock Reserve source for exclusive access, otherwise VSS
(42.9 HotCopy & LiveImage) will be used.-allowlock Only use exclusive source access if VSS (42.9 HotCo-
py & LiveImage) is not available.-allowlazy Use unsecured drive access, if exclusive access or VSS
are both not available.-report:[drvletter] Generate a report and store it to the specified drive
(410.2 Store final report).-shutdown Shut down the PC after successful completion.-timeout:<sec> HDClone will cancel drive recognition after this period
in seconds has passed, default = 10.-list Lists all drives and partitions recognized as well as their
internal numbering, port number, name, and serial number (410.1.3 Drive identification).
10.1.7 Return values
The command line version (CLI) of HDClone returns result values in the environ-ment variable ERRORLEVEL. This allows to evaluate and to react to the copying result automatically, for example by using batch files.
Command line interface 69
Option Description0 Copying process finished successfully with no errors of
any kind or the program was called using parameters -help or -list.
1 Errors in call (missing/duplicate/invalid parameters).2 Invalid license or license expired.3 At least one ‘resize’ parameter (410.1.6 Optional pa-
rameters) is invalid, does not match the target size or contains invalid characters.
4 Could not access source or target properly, for exam-ple device or file image not found/access denied.
5 Password not specified or invalid password.6 Cancelled by user ( Ctrl + C ).7 Copying finished with verification errors.8 Copying finished with read/write errors (overrides 7).9 Some other error occurred. A specific error code, is
displayed with the console output of HDClone.10 Another instance of HDClone is already running.
10.1.8 Resizing
In the case of copying or restoring, you can use the resize option (410.1.6 Op-tional parameters) to specify how to adjust the sizes of individual partitions on the target medium. The resize option without any further parameters will cause all partitions to be resized proportionally to their original size. You can specify one or more additional parameters to specify the resizing for individual partitions in their natural order on the medium. These parameters are:
<size>: Increases or reduces the size of a partition to the size value specified. The values may be specified in sectors (S), bytes (B), kilobytes (K), megabytes (M), gigabytes (G), or terabytes (T). The desired numeric value has to be spec-ified, immediately followed (without spaces) by one of the unit specifiers above (for example: 10G = 10 gigabytes or 500M = 500 megabytes).
fixed: Keeps the partition size without any changes
skip: Skips the partition, meaning it will not be copied (49.7 PartitionSelect).
auto: Adjusts the partition size automatically and proportionally to its share of the entire medium.
The parameters for resizing (<size>, fixed, skip, auto) may be specified repeat-edly, separated by a colon. The parameters will be applied to the partitions in the specified order. In the case where there are more partitions than parameters
70 Command line (CLI)
specified, the default parameter auto will be applied to the remaining partitions. If there are more parameters specified than partitions available, the remaining parameters are ignored. This option works similar to 48.4.3 Adjusting partitions.
Example: There are four partitions on the drive, but only two size values are specified. The first two partitions will be adjusted as specified. The two remaining partitions will be resized automatically, just as if the pa-
rameter auto was used for them.
10.1.9 Examples of use
Examples for different use cases are to be found in the CLI subfolder of the pro-gram path after installing HDClone, or via Start ▸ Programs ▸ HDClone... ▸ CLI ▸ Sample scripts
Hint: Call hdclone-cl -list to find out, which drive numbers are assigned to which physical drives. You will be displayed a list of the available physical drives in the system.
10.2 Store final reportAfter the process has been finished, you can generate and store a detailed final report in a text file to document and analyze the cloning processes. The report contains the following Information:
{ Program and license
{ Device data (CPU, memory, etc.)
{ Copying mode
{ Source and target(s) including device details
{ Option settings
{ Duration and result including errors
General 71
11 Troubleshooting
This paragraph describes possible problems when using HDClone and offers pro-posals for a solution. If there not a proposal given for a solution to a problem, you can gladly contact our 413.3 Support.
11.1 General
11.1.1 Retry
In case that something does not run as expected or desired at the first attempt, a trivial but often effective solution is to give it a second try. Especially in case of hardware issues this saves time, as many problems will be gone when connect-ing hardware a second time or using a different port.
11.1.2 System-Log
In case of any problems, even if they can be solved with the instructions follow-ing, but especially when contacting our 413.3 Support, please create a System Log first and send it to us. Just like a flight recorder, it contains information about program internal activities, which will lead us to a solution much faster – and you as well. Store the System Log when HDClone is running as follows:
1. HDClone/S: If you have not booted HDClone from a USB key, please connect one to store the System Log to.
2. Klick on the Toolbox symbol (48.1.1.2 Toolbox).
3. Select the “Store System Log” option. HDClone/S: If you have booted HDClone from a USB key, the System Log will be stored to it automatically. Otherwise, a popup will open and prompt you to select a storage medium. HDClone/W: The System Log will be stored on the Public Desktop. If it is not visible on your desktop, press F5 or open the path C:\Users\Public\Desktop (hidden folder) in Windows Explorer.
4. A popup window appears, showing the storing progress as well as the storage location and the file name.
If an older System Log is found at the storage location, the number contained in the file name will be increased automatically. The latest System Log is always the one with the highest number.
72 Troubleshooting
11.2 Create a bootable HDClone mediumThis chapter describes potential issues when creating a bootable medium for the self-booting version of HDClone.
11.2.1 USB key not working
If creating a bootable USB key or booting from this USB key fails, the USB key may lack a partition table. In this case, use a different USB key instead or format the USB key using the HP USB Disk Storage Format Tool (freeware). Download it at http://www.miray-software.com/public/tools/HPUSBFW_v2.2.3.exe. After-wards, start 45.2 Boot-Setup again with this USB key.
11.2.2 CD/DVD writer not selectable
In no drive is offered for selection at CD/DVD writer although a CD/DVD writer is available on the system, the installed CD/DVD writing software may be the reason. It may reserve the drive exclusively, so that Boot-Setup cannot access it. Deactivate or uninstall the CD/DVD writer software in this case or create a bootable CD/DVD with your CD/DVD writing software the 45.4 ISO image con-tained in the software package.
11.3 Booting HDCloneIf there are issues when booting HDClone from USB key or CD/DVD (for exam-ple black screen or startup screen freezes), the following chapters provide suit-able solutions.
11.3.2.1 BIOS-USB-Boot
If the HDClone bootable medium (USB key or USB CD/DVD drive) is not listed in the BBS menu (46.2 Self-booting – HDClone/S), activate USB boot support in the BIOS setup first. Press F2 , Del , or F10 (depending on BIOS) to enter BIOS setup. The setting is to be found under different names and menu items, depending on the BIOS version. In most cases it is to be found under labels like USB, Boot and Legacy. In BIOS setup you can also select to boot from USB per-manently, usually under the menu item Boot.
11.3.2.2 UEFI-Boot and SecureBoot
Current PC models often have a modern UEFI-BIOS. HDClone supports booting with UEFI. Some of these BIOSes also offer the SecureBoot function, which is not yet supported by HDClone/S for booting. Deactivate SecureBoot while using
Copied disk 73
HDClone/S. You can activate SecureBoot again afterwards. In case there is an is-sue when booting with UEFI or SecureBoot, please create the HDClone bootable medium again (45.2 Boot-Setup). with the “Include UEFI boot support” option disabled. Start HDClone/S again from this bootable medium.
11.4 Input devicesIf there is no reaction on mouse or keyboard input after starting HDClone/S, the following subchapters render further information and a solution.
11.4.1 General
A solution that is generally very successful when having issues with input devices is to connect an alternative USB input device of the same type.
11.4.2 Bluetooth devices
HDClone/S support USB mice and keyboards (43 Supported hardware). This also covers many cordless devices, if they are connected as USB devices. Blue-tooth input devices are currently not supported. In this case, please connect an alternative USB device of the same type.
11.4.3 Problem devices
Few USB mice and keyboards contain a flawed implementation of the USB stan-dard. Those devices may though work with Windows, since vendors usually test against Windows, but will not work with other operating systems. In this case, please use a different USB device temporarily. Create a 411.1.2 System-Log and send it, together with information about vendor and device type of the non-working device to our 413.3 Support.
11.5 Copied disk
11.5.1 Clone not booting
If the clone (or restored image) of a bootable disk does not boot as expected, please consider the following notes:
{ Does the source boot correctly? If not, the problem is located here,
{ Ensure that the automatic boot data adjustment (48.4.5 Adjust boot data) is applied to the target after the copying process has been finished.
{ Is the file system of the source defective? Check this before creating a copy by running chkdsk /f on the source. Errors on the source file system may yield
74 Troubleshooting
problems on the target, even if the source seems to boot and work correctly. Otherwise use FullyCopy (47.1.1 Cloning disks) or 47.1.3 BitCopy.
{ Is the disk connected to the target system in the same way as the source in the original system? In case of an SATA port, a frequent mistake is to have it configured as AHCI in the BIOS of the first system and as IDE in the other sys-tem. Some versions of Windows refuse booting then. Change the BIOS setting as required in this case.
{ Usually, Windows is not able to boot from USB disks. If you have created a copy of a Windows system to USB, connect the disk as an internal drive before attempting to boot Windows from it.
11.5.2 Decelerated system
If the performance of the target disk is clearly decreased after cloning or restor-ing from an image, the drive may use 4K sectors internally. Create another copy or restore the disk again and ensure that the 4K alignment option (48.3.4.5 Op-tions for source and target) is selected for the target disk.
11.6 Copying process
11.6.1 Read, write and verification errors
When HDClone reports errors, this usually results from defective areas on the corresponding disk. General hardware problems can also cause read and write errors, usually indicated by a very high number of errors. In this case, cancel the copying process, connect the affected disk to another port or check if it may be defective. Restart the copying process then.
Note: In case of disks connected over USB, use a different USB port and ensure the power supply is sufficient. When using USB cases for SATA or IDE hard disks, please check if the case is working properly first.
11.6.2 Copying performance
If the copying performance of HDClone does not achieve the expected value, please consider the following notes:
{ Does the disk work without an issue? Please use the 47.5.1 SpeedTest func-tion to check if source and target achieve the expected speed or which of them probably shows a lack of transfer speed.
{ When using USB cases for SATA and IDE hard disks, please consider that the maximum transfer speed is much lower for USB 2 than for SATA or IDE.
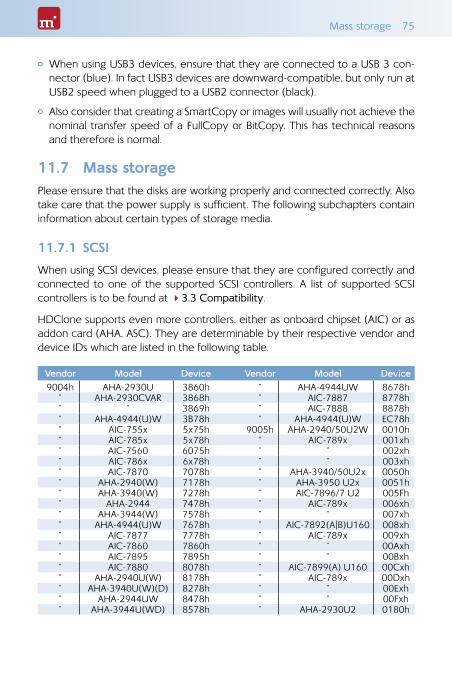
Mass storage 75
{ When using USB3 devices, ensure that they are connected to a USB 3 con-nector (blue). In fact USB3 devices are downward-compatible, but only run at USB2 speed when plugged to a USB2 connector (black).
{ Also consider that creating a SmartCopy or images will usually not achieve the nominal transfer speed of a FullCopy or BitCopy. This has technical reasons and therefore is normal.
11.7 Mass storagePlease ensure that the disks are working properly and connected correctly. Also take care that the power supply is sufficient. The following subchapters contain information about certain types of storage media.
11.7.1 SCSI
When using SCSI devices, please ensure that they are configured correctly and connected to one of the supported SCSI controllers. A list of supported SCSI controllers is to be found at 43.3 Compatibility.
HDClone supports even more controllers, either as onboard chipset (AIC) or as addon card (AHA, ASC). They are determinable by their respective vendor and device IDs which are listed in the following table.
Vendor Model Device Vendor Model Device9004h AHA-2930U 3860h ” AHA-4944UW 8678h
” AHA-2930CVAR 3868h ” AIC-7887 8778h” ” 3869h ” AIC-7888 8878h” AHA-4944(U)W 3B78h ” AHA-4944(U)W EC78h” AIC-755x 5x75h 9005h AHA-2940/50U2W 0010h” AIC-785x 5x78h ” AIC-789x 001xh” AIC-7560 6075h ” ” 002xh” AIC-786x 6x78h ” ” 003xh” AIC-7870 7078h ” AHA-3940/50U2x 0050h” AHA-2940(W) 7178h ” AHA-3950 U2x 0051h” AHA-3940(W) 7278h ” AIC-7896/7 U2 005Fh” AHA-2944 7478h ” AIC-789x 006xh” AHA-3944(W) 7578h ” ” 007xh” AHA-4944(U)W 7678h ” AIC-7892(A|B)U160 008xh” AIC-7877 7778h ” AIC-789x 009xh” AIC-7860 7860h ” ” 00Axh” AIC-7895 7895h ” ” 00Bxh” AIC-7880 8078h ” AIC-7899(A) U160 00Cxh” AHA-2940U(W) 8178h ” AIC-789x 00Dxh” AHA-3940U(W)(D) 8278h ” ” 00Exh” AHA-2944UW 8478h ” ” 00Fxh” AHA-3944U(WD) 8578h ” AHA-2930U2 0180h
76 Troubleshooting
11.8 USB
11.8.1 Hubs
USB devices can either be connected directly or over a USB hub. In order to achieve as high transfer rates as possible, it is recommended to connect them directly to the PC or the USB controller.
11.8.2 USB 3
Always ensure that you connect USB3 devices to a proper USB3 connector (blue) in order to utilize the full performance of USB3.
11.9 Mapped network drivesWhen using mapped drives in Windows, HDClone may not find the mapped drives in some cases, since HDClone is running in administrator mode. To use the established mapped drives, a small change to the Windows Registry is required. Usually, 45.2 Boot-Setup will handle this automatically. But you can also make the change manually, as described below:
{ Open the registry editor (regedit.exe)
{ Move to the following registry key in the tree structure HKEY_LOCAL_MACHINE\SOFTWARE\Microsoft\Windows\CurrentVersion\Policies\System
{ Create the DWORD value EnableLinkedConnections
{ Set its value data to 1 and restart your computer
Note: To undo the changes, simply delete the registry value.
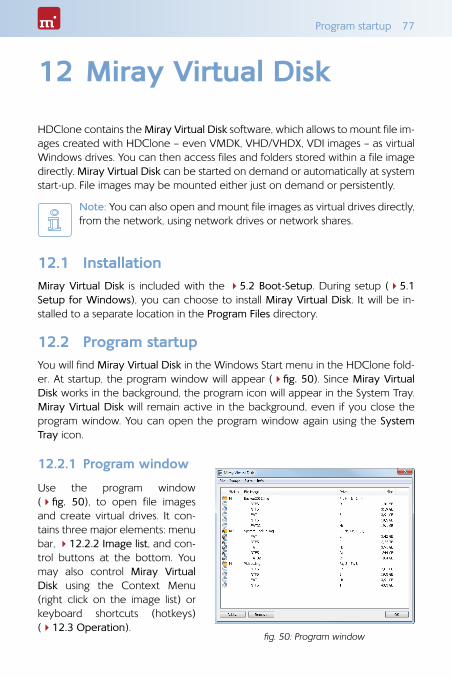
Program startup 77
12 Miray Virtual Disk
HDClone contains the Miray Virtual Disk software, which allows to mount file im-ages created with HDClone – even VMDK, VHD/VHDX, VDI images – as virtual Windows drives. You can then access files and folders stored within a file image directly. Miray Virtual Disk can be started on demand or automatically at system start-up. File images may be mounted either just on demand or persistently.
Note: You can also open and mount file images as virtual drives directly, from the network, using network drives or network shares.
12.1 InstallationMiray Virtual Disk is included with the 45.2 Boot-Setup. During setup (45.1 Setup for Windows), you can choose to install Miray Virtual Disk. It will be in-stalled to a separate location in the Program Files directory.
12.2 Program startupYou will find Miray Virtual Disk in the Windows Start menu in the HDClone fold-er. At startup, the program window will appear (4fig. 50). Since Miray Virtual Disk works in the background, the program icon will appear in the System Tray. Miray Virtual Disk will remain active in the background, even if you close the program window. You can open the program window again using the System Tray icon.
12.2.1 Program window
Use the program window (4fig. 50), to open file images and create virtual drives. It con-tains three major elements: menu bar, 412.2.2 Image list, and con-trol buttons at the bottom. You may also control Miray Virtual Disk using the Context Menu (right click on the image list) or keyboard shortcuts (hotkeys) (412.3 Operation).
fig. 50: Program window

78 Miray Virtual Disk
You can use the control buttons to add an Image (Add..., see 412.3.1 Adding an image) to or to remove an Image (Remove, see 412.3.2 Removing an image) from the image list. Press OK to close the program window. Miray Virtual Disk will continue to stay active in the background (412.2.3 Tray icon).
Note: Adding an image to the image list does not automatically create a virtual drive. The image list shows the partitions an image contains, so you can mount them separately (412.3.4 Mounting an image).
Hint: If you have several images in the list, you may want to resize the program window freely by clicking and dragging the lower right corner.
12.2.2 Image list
The image list serves to manage the images added before and offers an over-view of the partitions they may contain. Partitions are always displayed right be-low the image they belong to. To distinguish the individual entries in the image list, there are different symbols as listed below:
File imageImage is not mounted
File imageImage could not be found
File imageImage is mounted
File imageImage is mounted perma-nently
SuperFloppy (no MBR)Volume is not mounted
PartitionPartition is not mounted
SuperFloppy (no MBR)Volume is mounted
PartitionPartition is mounted
SuperFloppy (no MBR)Volume is mounted perma-nently
PartitionPartition is mounted perma-nently
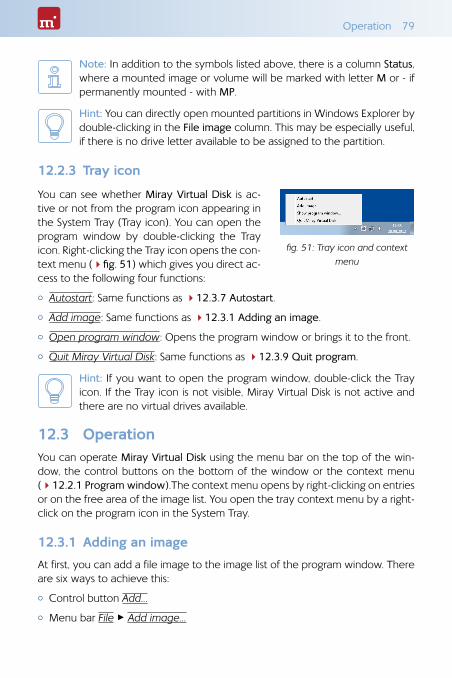
Operation 79
Note: In addition to the symbols listed above, there is a column Status, where a mounted image or volume will be marked with letter M or - if permanently mounted - with MP.
Hint: You can directly open mounted partitions in Windows Explorer by double-clicking in the File image column. This may be especially useful, if there is no drive letter available to be assigned to the partition.
12.2.3 Tray icon
You can see whether Miray Virtual Disk is ac-tive or not from the program icon appearing in the System Tray (Tray icon). You can open the program window by double-clicking the Tray icon. Right-clicking the Tray icon opens the con-text menu (4fig. 51) which gives you direct ac-cess to the following four functions:
{ Autostart: Same functions as 412.3.7 Autostart.
{ Add image: Same functions as 412.3.1 Adding an image.
{ Open program window: Opens the program window or brings it to the front.
{ Quit Miray Virtual Disk: Same functions as 412.3.9 Quit program.
Hint: If you want to open the program window, double-click the Tray icon. If the Tray icon is not visible, Miray Virtual Disk is not active and there are no virtual drives available.
12.3 OperationYou can operate Miray Virtual Disk using the menu bar on the top of the win-dow, the control buttons on the bottom of the window or the context menu (412.2.1 Program window).The context menu opens by right-clicking on entries or on the free area of the image list. You open the tray context menu by a right-click on the program icon in the System Tray.
12.3.1 Adding an image
At first, you can add a file image to the image list of the program window. There are six ways to achieve this:
{ Control button Add...
{ Menu bar File ▸ Add image...
fig. 51: Tray icon and context menu
80 Miray Virtual Disk
{ Context menu Add image...
{ Tray context menu Add image...
{ Hotkey F2
{ Drag-and-drop from any Explorer window
The image list also displays information on the partitions and file systems of each file image in the list (4fig. 50).
Note: Depending on the version of the program, you will be allowed to add one or more images. When you quit the program, Miray Virtual Disk will memorize these images for the next program startup.
12.3.2 Removing an image
Select one or more file images that you want to remove from the image list. There are four ways to remove them:
{ Control button Remove
{ Menu bar File ▸ Remove image
{ Context menu Remove image
{ Hotkey Shift + F2
Note: If images or individual partitions you want to remove are still mounted as virtual drives, the file image cannot be removed. A corre-sponding message will appear.
12.3.3 Empty image list
There are three ways to remove all images from the image list:
{ Menu bar File ▸ Empty image list
{ Context menu Empty image list
{ Hotkey Ctrl + Shift + F2
Note: If one or more file images to be removed from the image list (or individual partitions thereof) are still mounted as virtual drives, the im-age list cannot be emptied.
12.3.4 Mounting an image
You can mount previously added file images or individual data areas (volumes) as Windows drives. When mounting an image, it will be made available as a Win-

Operation 81
dows disk and will behave just like a physical disk. When mounting an entire file image which contains several partitions, you obtain several drive letters, one for each partition containing a file system Windows is able to access. When mount-ing an individual partition, you may obtain one drive letter for this partition if Windows supports the file system it contains.
There are three ways to mount an entire file image or an individual partition. Se-lect one or more images or partitions first:
{ Menu bar Image ▸ Mount
{ Context menu Mount image
{ Hotkey F8
As soon as an image or a partition has been mounted successfully, this will be displayed in the image list as follows:
{ The icon of the image or partition mounted will be displayed in color.
{ The capital M is displayed in the column next to the icon.
{ The drive letter(s) assigned to the virtual drives will be displayed in the row of the mounted image or partition.
Note: The capital M always appears in the row of the object which has actually been mounted. For example, mounting an image containing two partitions, M will appear in the row of the image. If mounting both
partitions individually, the capital M appears in both partition rows.
12.3.5 Persistent mounting
You can make mounted virtual drives persistent. This means that these virtual drivers will be mounted automatically with any start of Miray Virtual Disk. They will remain mounted as long as the program is active. In case this feature is used in combination with the option 412.3.7 Autostart, the respective virtual drives will be available at any time while Windows is running.
Note: Password protected images cannot be mounted permanently, since the password would have to be stored. This would compromise password security and therefor is not supported.
If you want to mount images or partitions permanently, there are three ways to achieve this. Select one or more images or partitions first:
{ Menu bar Image ▸ Mount permanently
{ Context menu Mount image permanently / Mount volume permanently (right-click on the desired image or partition in the image list)
82 Miray Virtual Disk
{ Hotkey Ctrl + F8
Persistent mounting can be applied to mounted and unmounted images or parti-tions. As soon as an image or a partition has been successfully mounted persis-tently, this will be displayed in the image list as follows:
{ A small green point appears in the icon of the mounted image/partition.
{ The capitals MP are displayed in the column next to the icon
Note: To cancel persistent mounting, mount the regarding image or partition normally (412.3.4 Mounting an image) or unmount it com-pletely (412.3.6 Drive unmounting).
12.3.6 Drive unmounting
There are three ways mounted images and partitions and the regarding virtual drives can be unmounted. Select one or more images or partitions first:
{ Menu bar Image ▸ Unmount
{ Context menu Unmount image / Unmount volume
{ Hotkey Shift + F8
As soon as an image or an individual partition have been unmounted, the re-spective icon in the image list will be displayed in gray and the capitals M or MP in the column next to the icon as well as the related drive letters will disappear.
12.3.7 Autostart
You can select to start Miray Virtual Disk automatically at system startup (Auto-start). This allows you to have persistently mounted drives permanently available without having to start Miray Virtual Disk manually.
There are two ways to switch the Autostart function on or off:
{ Menu bar Image ▸ Autostart
{ Tray context menu Autostart
The menu item indicates whether the Autostart function is currently active. If the menu item Autostart is displayed with a leading check mark, the Autostart func-tion is already activated. Without a check mark, the Autostart function is not ac-tive.
Note: If Miray Virtual Disk is started automatically at system startup, only the 412.2.3 Tray icon will appear. Double-click it to open the pro-gram window.
Modes of operation 83
12.3.8 Close program window
You can close the program window at any time. Miray Virtual Disk will continue to stay active in the background. There are two ways to close the window:
{ Menu bar File ▸ Close window
{ Hotkey Ctrl + W
12.3.9 Quit program
To quit Miray Virtual Disk completely, there are three ways:
{ Menu bar File ▸ Quit Miray Virtual Disk
{ Tray context menu Quit Miray Virtual Disk
{ Hotkey Ctrl + Q
Note: When quitting Miray Virtual Disk, all active virtual drives will be unmounted after a corresponding popup has been confirmed. They will be unavailable until next program startup.
12.4 Drive not visibleIf there are no drive letters or less drive letters than partitions displayed after mounting an image, there may be several reasons:
{ Windows drive recognition of one or more virtual drives has been delayed. In this case, they have a drive letter assigned, but Miray Virtual Disk does not display it yet. Press the F5 key or select Image ▸ Refresh list from the main menu to update the image list.
{ One or more partitions contain file systems Windows is unable to use (e.g. Linux file systems). In this case, the behavior is normal, since Windows is not able to use these file systems.
{ There are no more Windows drive letters available. Windows recognizes the mounted partitions, but cannot assign drive letters to them. In this case, free one or more of the drive letters currently in use.
{ If there is a drive letter displayed, but the drive has no content or Windows prompts to format that drive, the file system is damaged. The image may have been created from an inconsistent or damaged file system.
12.5 Modes of operationThere are three different ways to mount file images in Miray Virtual Disk:
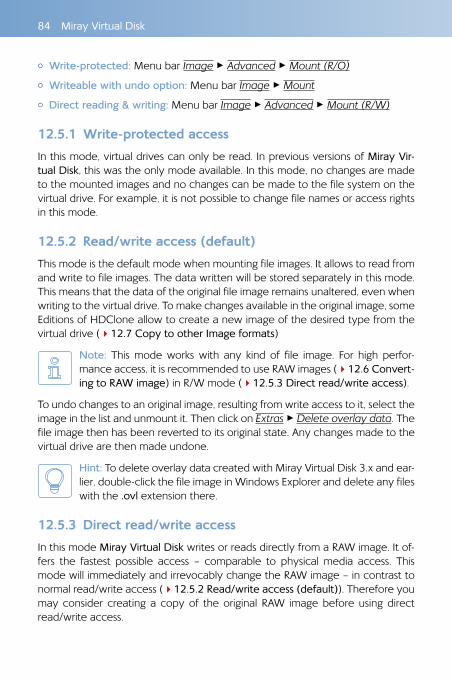
84 Miray Virtual Disk
{ Write-protected: Menu bar Image ▸ Advanced ▸ Mount (R/O)
{ Writeable with undo option: Menu bar Image ▸ Mount
{ Direct reading & writing: Menu bar Image ▸ Advanced ▸ Mount (R/W)
12.5.1 Write-protected access
In this mode, virtual drives can only be read. In previous versions of Miray Vir-tual Disk, this was the only mode available. In this mode, no changes are made to the mounted images and no changes can be made to the file system on the virtual drive. For example, it is not possible to change file names or access rights in this mode.
12.5.2 Read/write access (default)
This mode is the default mode when mounting file images. It allows to read from and write to file images. The data written will be stored separately in this mode. This means that the data of the original file image remains unaltered, even when writing to the virtual drive. To make changes available in the original image, some Editions of HDClone allow to create a new image of the desired type from the virtual drive (412.7 Copy to other Image formats)
Note: This mode works with any kind of file image. For high perfor-mance access, it is recommended to use RAW images (412.6 Convert-ing to RAW image) in R/W mode (412.5.3 Direct read/write access).
To undo changes to an original image, resulting from write access to it, select the image in the list and unmount it. Then click on Extras ▸ Delete overlay data. The file image then has been reverted to its original state. Any changes made to the virtual drive are then made undone.
Hint: To delete overlay data created with Miray Virtual Disk 3.x and ear-lier, double-click the file image in Windows Explorer and delete any files with the .ovl extension there.
12.5.3 Direct read/write access
In this mode Miray Virtual Disk writes or reads directly from a RAW image. It of-fers the fastest possible access – comparable to physical media access. This mode will immediately and irrevocably change the RAW image – in contrast to normal read/write access (412.5.2 Read/write access (default)). Therefore you may consider creating a copy of the original RAW image before using direct read/write access.

Copy to other Image formats 85
Note: This mode can only be applied to RAW images. If required, you can convert other image types into RAW images (412.6 Converting to RAW image).
12.6 Converting to RAW imageOne main advantage of SmartImages is the greatly reduced size they require for storing. When using Miray Virtual Disk, RAW images offer a clearly higher access performance of the virtual drive. If required, you can convert a SmartImage to a RAW image via Extra ▸ Create RAM image....
12.7 Copy to other Image formatsUse HDClone to create a copy of a virtual drive into a new image of any format required (Full, Smart, RAW, VMDK, VHD), independent of the original image for-mat the virtual drive is based on.
Especially in cases where an image has been mounted with 412.5.2 Read/write access (default), the changes made on the virtual drive are not stored in the original image. In this case, you can use such a copy to create a new image of the desired type, which will then contain all changes made to the virtual drive.
86 Miscellaneous
13 Miscellaneous
13.1 DisclaimerParts of this product are based on works licensed under the GNU General Public License (GPL). The appropriate license is to be found at http://www.gnu.org/co-pyleft/gpl.html. On request to [email protected] we will send you a copy of the source code.
Although HDClone was programmed and tested with the largest possible cau-tion, please understand that we cannot assume any liability for the proper func-tionality of the program and that we are not liable for damages resulting from its usage, subject to gross negligence and intention.
13.2 FeedbackWe are highly interested in your feedback. If you encounter any program errors or if you have any improvement ideas, we will always try to fix the errors and implement or integrate your ideas. If you only want to tell us your opinions on this software, we would look forward to receiving such information from you.
Internet miray-software.com
Email [email protected]
Fax +49 (0)89 72013-647
Postal address Miray Software AG Gaissacher Str. 18 81371 Munich Germany
13.3 SupportIf you encounter any problems with one of our products, our support team is gladly at your disposal. Please send us your inquiry through our homepage at miray-software.com/support or email us at [email protected].


