48
Trend Micro Incorporated reserves the right to make changes to this document and to the products described herein without notice. Before using this service, please review the latest version of the applicable user documentation, which is available from the Help drop-down list at the top of the screen (Help > Download Manual).
Trend Micro, the Trend Micro t-ball logo, and TrendLabs are trademarks or registered trademarks of Trend Micro, Incorporated. All other product or company names may be trademarks or registered trademarks of their owners.
Copyright© 2013 Trend Micro Incorporated. All rights reserved. No part of this publication may be reproduced, photocopied, stored in a retrieval system, or transmitted without the express prior written consent of Trend Micro Incorporated.
Document part No. EREM05936/130415
Release date: May 2013
Document Version No.: 3.00
Protected by U.S. patent No. 7,606,214; 7,926,108; 7,814,540
The Trend Micro™ Email Reputation Services Administrator’s Guide is intended to introduce the main features of the service. You should read through it prior to using the service.
Detailed information about how to use specific features within the software are available in the online help file and the online Knowledge Base at Trend Micro’s Web site.
Trend Micro always seeks to improve its documentation. If you have questions, comments, or suggestions about this or any Trend Micro document, please contact us at [email protected].
Please evaluate this documentation on the following site: http://www.trendmicro.com/download/documentation/rating.asp

Contents
Contents
PrefaceDocumentation ...................................................................................................4
Audience ...............................................................................................................4
Document Conventions .....................................................................................5
Chapter 1: Introducing Email Reputation ServicesTrend Micro Email Reputation Services ..................................................... 1-2
Types of Service ......................................................................................... 1-2Trend Micro Threat Prevention Network ............................................. 1-4Trend Micro Threat Analysis Team ........................................................ 1-4
How It Works .................................................................................................. 1-6
Chapter 2: Getting StartedMinimum Requirements ................................................................................ 2-2
Configuring Email Reputation Services ...................................................... 2-2Creating an Account .................................................................................. 2-2Request Trial Account ............................................................................... 2-4Configuring Your MTA ............................................................................ 2-5
Logging On to the Console ........................................................................... 2-6Forgot Password ........................................................................................ 2-6
Chapter 3: Using the Administrative ConsoleEmail Reputation Services Console ............................................................. 3-2
Global Spam Threats ................................................................................. 3-2Your Network ............................................................................................ 3-3
IP Reputation ................................................................................................... 3-4Look Up IP Addresses .............................................................................. 3-4Global Approved List ............................................................................... 3-5
1
Trend Micro™ OfficeScan™ Administrator’s Guide
Managing the Policy ........................................................................................3-7Approved Lists ...........................................................................................3-7Blocked Lists ...............................................................................................3-8Reputation Settings ..................................................................................3-10
Administration ...............................................................................................3-13Changing Account Details ......................................................................3-13Changing the Activation Code ...............................................................3-14
Chapter 4: Getting HelpGetting Help with the Administrative Console ..........................................4-2
Contacting Technical Support .......................................................................4-2The Trend Micro Knowledge Base .........................................................4-3TrendLabs ....................................................................................................4-3Sending Suspicious Files to Trend Micro ...............................................4-4
Security Information Center ..........................................................................4-5
Documentation Feedback ..............................................................................4-5
Appendix A: Glossary
2
Preface
Preface
Welcome to the Trend Micro™ Email Reputation Services Administrator’s Guide. The guide introduces the main features of the service and configuration instructions for your production environment. Please read through this guide before configuring the service.
Topics in this chapter:• Documentation on page 4• Audience on page 4• Document Conventions on page 5
3
Trend Micro™ Email Reputation Services Administrator’s Guide
DocumentationThe Trend Micro Email Reputation Services documentation consists of the following:• Online Help: Helps you configure all features through the user interface. You can
access the online help by opening the Web console and then clicking the help ( ) icon.
• Getting Started Guide: Helps you to plan for deployment and to configure all service settings.
AudienceThe Email Reputation Services documentation is written for IT managers and email administrators in medium and large enterprises. The documentation assumes that the reader has in-depth knowledge of email messaging networks, including details related to the following:• SMTP protocol• Message transfer agents (MTAs)
Note: You have to know how to configure your MTA to make a DNS RBL query before you change the settings for Email Reputation Services.
The documentation does not assume the reader has any knowledge of antivirus or anti-spam technology.
4

Preface
Document ConventionsTo help you locate and interpret information easily, the Email Reputation Services documentation uses the following conventions:
TABLE P-1. Document conventions
CONVENTION DESCRIPTION
ALL CAPITALS Acronyms, abbreviations, and names of certain commands and keys on the keyboard
Bold Menus and menu commands, command buttons, tabs, options, and tasks
Italics References to other documentation or new technology components
<Text> Indicates that the text inside the angle brackets should be replaced by actual data. For example, C:\Program Files\<file_name> can be C:\Program Files\sample.jpg.
Note: textProvides configuration notes or recommendations
Tip: textProvides best practice information and Trend Micro recommendations
WARNING! textProvides warnings about activities that may harm computers on your network
5
Trend Micro™ Email Reputation Services Administrator’s Guide
6
Chapter 1
Introducing Email Reputation Services
Trend Micro™ Email Reputation Services delivers high-performance, cost-effective hosted security services, helping protect businesses against spam, viruses, and inappropriate content before they reach your network.
Topics in this chapter:• Trend Micro Email Reputation Services on page 1-2• How It Works on page 1-6
1-1
Trend Micro™ Email Reputation Services Administrator’s Guide
Trend Micro Email Reputation ServicesAs the first line of defense, Trend Micro™ Email Reputation Services helps stop more than 80% of spam before it can flood your network, overload email gateway security, and burden your system resources.
OverviewWhen your email server accepts an initial connection from another email server, your email server records the IP address of the computer requesting the connection. Your email server then queries its DNS server, which in turn queries the Trend Micro reputation database(s) to determine if there is a record for the IP address of the requesting computer.
If the host is listed in a database, Email Reputation Services recommends an appropriate action. You can also customize actions.
Types of ServiceTrend Micro offers two levels of Email Reputation Services service: Standard and Advanced.
StandardThis service helps block spam by validating requested IP addresses against the Trend Micro reputation database, powered by the Trend Micro Threat Prevention Network.
This ever-expanding database currently contains over 1 billion IP addresses with reputation ratings based on spamming activity. Trend Micro spam investigators continuously review and update these ratings to ensure accuracy.
1-2
Introducing Email Reputation Services
Email Reputation Services Standard Service is a DNS single-query-based service. Your designated email server makes a DNS query to the standard reputation database server whenever it receives an email message from an unknown host. If the host is listed in the standard reputation database, Email Reputation Services reports that email message as spam. You can set up your Message Transfer Agent (MTA) to take the appropriate action on that message based on the Email Reputation Services results.
Note: Trend Micro recommends that you configure your MTA to block an email message from an IP address that is on the standard reputation database.
AdvancedThis service identifies and stops sources of spam while they are in the process of sending millions of messages.
This is a dynamic, real-time anti-spam solution. To provide this service, the Trend Micro network of automated expert systems along with Trend Micro spam experts continuously monitor network and traffic patterns and immediately update the dynamic reputation database as new spam sources emerge, often within minutes of the first sign of spam. As evidence of spam activity increases or decreases, the dynamic reputation database is updated accordingly.
Like Standard, Advanced is a DNS query-based service, but separate queries can be made to the standard reputation database and the dynamic reputation database (a database updated dynamically in real time). These databases have distinct entries, allowing Trend Micro to maintain an efficient and effective database that can quickly respond to highly dynamic sources of spam.
Email Reputation Services Advanced Service has blocked more than 80% of total incoming connections in customer networks. Results will vary depending on how much of your incoming email stream is spam. The more spam you receive, the higher the percentage of blocked connections you will see.
1-3
Trend Micro™ Email Reputation Services Administrator’s Guide
Trend Micro Threat Prevention NetworkEmail Reputation Services is powered by the Trend Micro Threat Prevention Network, a global network operated by highly trained spam investigators who research, collect, process, and distribute reputation ratings on IP addresses. These specialists monitor spam activity, develop information on spam sources, verify the accuracy of reputation ratings, and work with organizations to ensure that the service is tracking spammers correctly.
Working around the clock to assure availability and quick response times, the Threat Prevention Network delivers real-time updates to the database for immediate availability. This high level of service is the key component for building and maintaining a reliable reputation database.
Trend Micro Threat Analysis TeamAs part of the Threat Prevention Network, the Trend Micro Threat Analysis Team maintains the reputation databases to ensure that ratings are accurate and up-to-date. Every rating includes comprehensive spamming histories and spam samples for complete transparency into the databases. This service is unique because it is fully auditable by anyone with questions regarding an assigned rating.
Reputation AssignmentThe investigators on the threat analysis team follow stringent policies and guidelines for the nomination and removal of IP addresses from the databases that are part of the Email Reputation Services Standard level of service. An IP address receives a reputation assignment if it:• Sent spam or in some way has supported the sending of spam (for example, offering
services to spammers or allowing their resources to be used by those who send spam).
• Is an unsecured email server (“open relay”) that has been used to send spam.• Is an unsecured port on a machine (“open proxy”) that has been used to send spam.• Is a dynamically assigned address that should not be used as an email server.
1-4
Introducing Email Reputation Services
Before processing an IP address, the Threat Prevention Network categorizes it according to careful guidelines. The same investigator who assigned the reputation can also check any requests to change the assigned reputation. Every effort is made to make sure the reputation record is accurate and that changes are made in a timely manner.
Each reputation record includes samples of the actual spam received from the IP address, the history of spamming behavior, a record of any correspondence regarding mediation, any resolution of issues, and other related information. For dynamically assigned IP addresses that were submitted to the standard reputation database by the ISP, the reputation record will include submission dates and any limitations that the ISP placed upon it.
To check the reputation of an IP address, refer to Look Up IP Addresses on page 3-4.
Delivery InfrastructureTrend Micro has built some of the largest IP networks and data centers in the world. The Trend Micro network DNS and database servers are geographically distributed in major facilities worldwide, and continuously monitor and tune the network to assure the highest availability possible for Email Reputation Services customers.
1-5
Trend Micro™ Email Reputation Services Administrator’s Guide
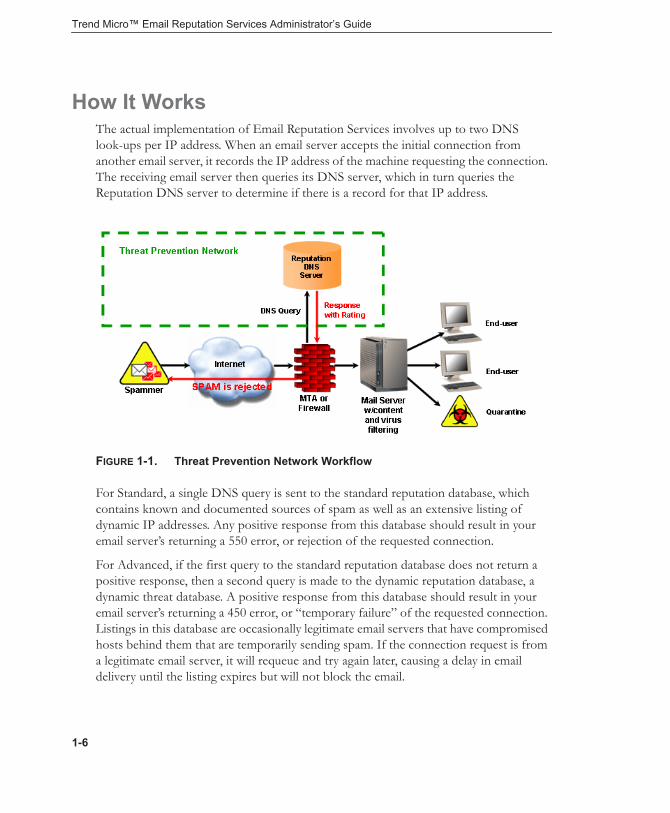
How It WorksThe actual implementation of Email Reputation Services involves up to two DNS look-ups per IP address. When an email server accepts the initial connection from another email server, it records the IP address of the machine requesting the connection. The receiving email server then queries its DNS server, which in turn queries the Reputation DNS server to determine if there is a record for that IP address.
FIGURE 1-1. Threat Prevention Network Workflow
For Standard, a single DNS query is sent to the standard reputation database, which contains known and documented sources of spam as well as an extensive listing of dynamic IP addresses. Any positive response from this database should result in your email server’s returning a 550 error, or rejection of the requested connection.
For Advanced, if the first query to the standard reputation database does not return a positive response, then a second query is made to the dynamic reputation database, a dynamic threat database. A positive response from this database should result in your email server’s returning a 450 error, or “temporary failure” of the requested connection. Listings in this database are occasionally legitimate email servers that have compromised hosts behind them that are temporarily sending spam. If the connection request is from a legitimate email server, it will requeue and try again later, causing a delay in email delivery until the listing expires but will not block the email.
1-6
Introducing Email Reputation Services
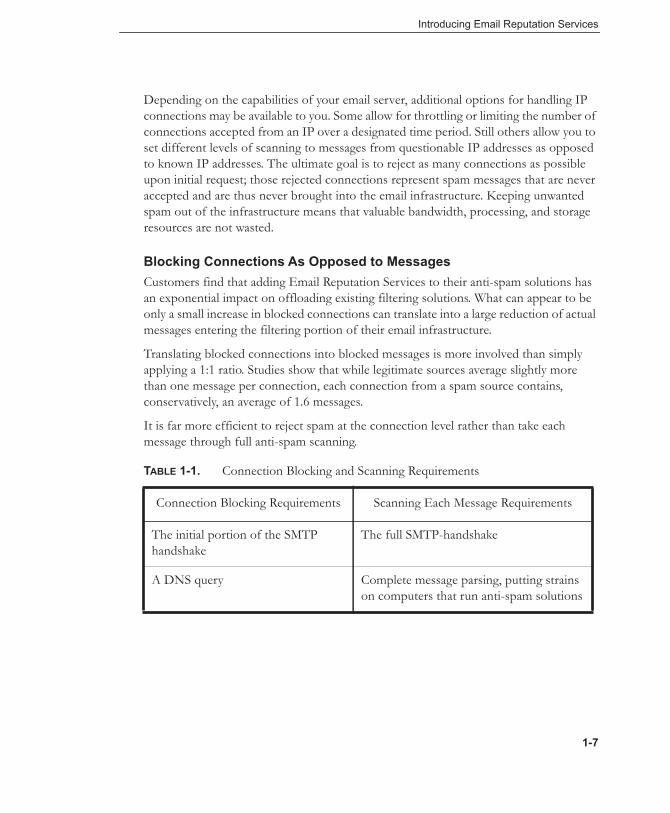
Depending on the capabilities of your email server, additional options for handling IP connections may be available to you. Some allow for throttling or limiting the number of connections accepted from an IP over a designated time period. Still others allow you to set different levels of scanning to messages from questionable IP addresses as opposed to known IP addresses. The ultimate goal is to reject as many connections as possible upon initial request; those rejected connections represent spam messages that are never accepted and are thus never brought into the email infrastructure. Keeping unwanted spam out of the infrastructure means that valuable bandwidth, processing, and storage resources are not wasted.
Blocking Connections As Opposed to MessagesCustomers find that adding Email Reputation Services to their anti-spam solutions has an exponential impact on offloading existing filtering solutions. What can appear to be only a small increase in blocked connections can translate into a large reduction of actual messages entering the filtering portion of their email infrastructure.
Translating blocked connections into blocked messages is more involved than simply applying a 1:1 ratio. Studies show that while legitimate sources average slightly more than one message per connection, each connection from a spam source contains, conservatively, an average of 1.6 messages.
It is far more efficient to reject spam at the connection level rather than take each message through full anti-spam scanning.
TABLE 1-1. Connection Blocking and Scanning Requirements
Connection Blocking Requirements Scanning Each Message Requirements
The initial portion of the SMTP handshake
The full SMTP-handshake
A DNS query Complete message parsing, putting strains on computers that run anti-spam solutions
1-7

Trend Micro™ Email Reputation Services Administrator’s Guide
1-8
Chapter 2
Getting Started
This chapter includes information on how to get started using Trend Micro™ Email Reputation Services.
Topics in this chapter:• Minimum Requirements on page 2-2• Configuring Email Reputation Services on page 2-2• Logging On to the Console on page 2-6
2-1
Trend Micro™ Email Reputation Services Administrator’s Guide
Minimum RequirementsTo view the Trend Micro™ Email Reputation Services Web console, use one of the following browsers:• Microsoft™ Internet Explorer™ 7.0• Mozilla™ Firefox™ 3.0
Configuring Email Reputation ServicesEmail Reputation Services is most effective when it is the first line of defense in your messaging infrastructure. Trend Micro recommends that you remove any other DNS blocking techniques after you enable Email Reputation Services.
To enable and configure Email Reputation Services see the following:• Creating an Account on page 2-2• Configuring Your MTA on page 2-5
Creating an AccountCreate an account to sign up. You can try Email Reputation Services (refer to Request Trial Account on page 2-4) or purchase the full service. After signing up, you will receive an email with instructions on how to proceed.
If you sign up for a trial, you need to complete the request form appropriate to the service level that you wish to evaluate. If you purchase the full service, Trend Micro provides you with instructions on creating a customer account. Afterwards, Trend Micro sends you an Activation Code by email.
The Activation Code allows you access to only the level of service to which you are registered (Standard or Advanced).
Note: The Activation Code for Email Reputation Services Advanced includes access to Email Reputation Services Standard, which is a subcomponent.
It may take up to one hour from when your Activation Code is issued before it is recognized by the Trend Micro Email Reputation Services systems.
2-2
Getting Started
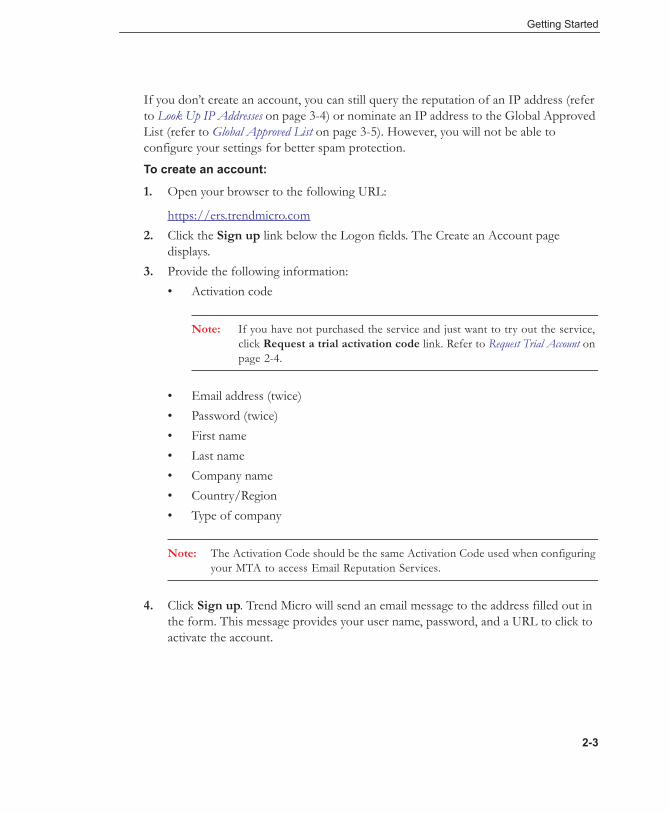
If you don’t create an account, you can still query the reputation of an IP address (refer to Look Up IP Addresses on page 3-4) or nominate an IP address to the Global Approved List (refer to Global Approved List on page 3-5). However, you will not be able to configure your settings for better spam protection.
To create an account:
1. Open your browser to the following URL:
https://ers.trendmicro.com2. Click the Sign up link below the Logon fields. The Create an Account page
displays.3. Provide the following information:
• Activation code
Note: If you have not purchased the service and just want to try out the service, click Request a trial activation code link. Refer to Request Trial Account on page 2-4.
• Email address (twice)• Password (twice)• First name• Last name• Company name• Country/Region• Type of company
Note: The Activation Code should be the same Activation Code used when configuring your MTA to access Email Reputation Services.
4. Click Sign up. Trend Micro will send an email message to the address filled out in the form. This message provides your user name, password, and a URL to click to activate the account.
2-3
Trend Micro™ Email Reputation Services Administrator’s Guide
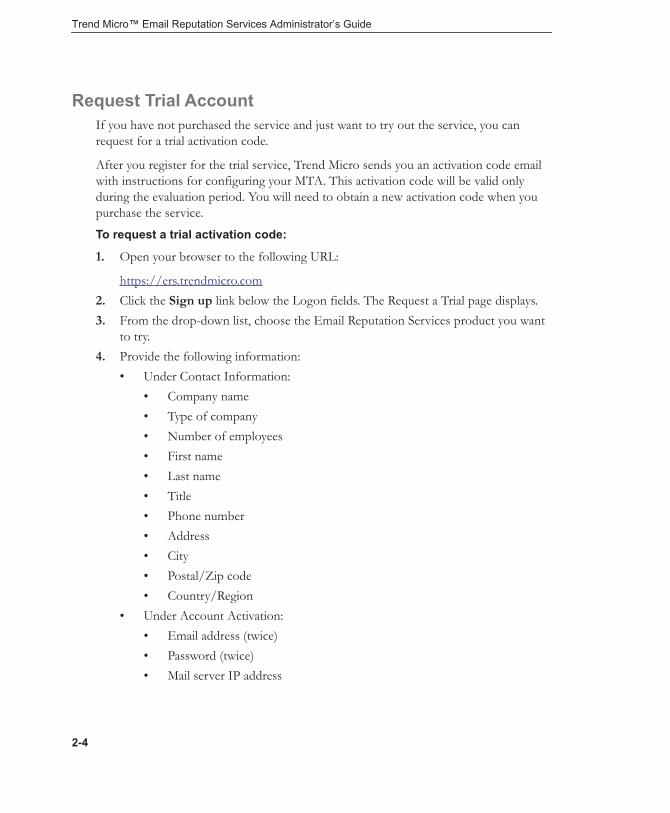
Request Trial AccountIf you have not purchased the service and just want to try out the service, you can request for a trial activation code.
After you register for the trial service, Trend Micro sends you an activation code email with instructions for configuring your MTA. This activation code will be valid only during the evaluation period. You will need to obtain a new activation code when you purchase the service.
To request a trial activation code:
1. Open your browser to the following URL:
https://ers.trendmicro.com2. Click the Sign up link below the Logon fields. The Request a Trial page displays.3. From the drop-down list, choose the Email Reputation Services product you want
to try.4. Provide the following information:
• Under Contact Information:• Company name• Type of company• Number of employees• First name• Last name• Title• Phone number• Address• City• Postal/Zip code• Country/Region
• Under Account Activation:• Email address (twice)• Password (twice)• Mail server IP address
2-4

Getting Started
• Mail Transfer Agent (MTA)• Time to buy• Preferred reseller
5. Type the captcha code.6. Click Request. You will receive an email with the trial activation code.
Configuring Your MTAThe next step is to configure your MTA to perform the appropriate DNS queries for the type of Email Reputation Service to which you subscribed: • Standard: Reject connections with a 550 level error code (“connection refused”).
Your MTA returns this error code to the server initiating the connection because the IP address is in the Standard Reputation database as a known spammer.
• Advanced: Configure your MTA to make two DNS queries. If the first query indicates that the IP address is not in the Standard Reputation database as a known spammer, the MTA needs to make a second query to the dynamic reputation database. Your MTA should return a temporarily deny connection 450 level error code (“server temporarily unavailable, please retry”) the IP address is in the dynamic reputation database.
Legitimate email servers that may have compromised hosts that are temporarily sending spam may be listed in the dynamic reputation database. If the connection request is from a legitimate email server, it will requeue and try sending the message later. This process will cause a short delay in mail delivery until the listing expires but will not permanently block the email.
Some servers may have additional options for handling questionable IP connections. These options include throttling or routing messages for more detailed scanning.
For detailed configuration and set-up options, refer to your product manuals and/or technical support organization. You can also refer to:
http://esupport.trendmicro.com/solution/en-us/1053980.aspx
2-5
Trend Micro™ Email Reputation Services Administrator’s Guide
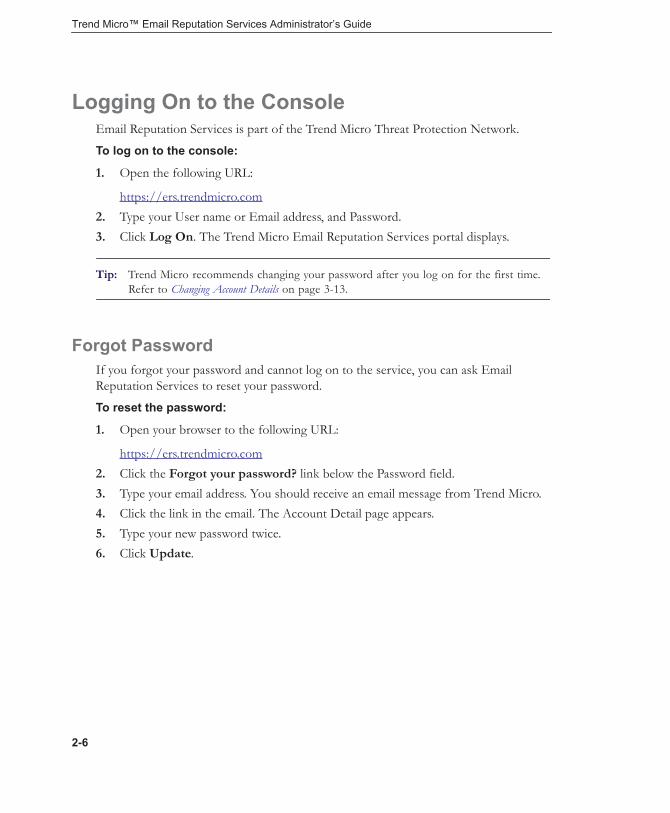
Logging On to the ConsoleEmail Reputation Services is part of the Trend Micro Threat Protection Network.
To log on to the console:
1. Open the following URL:
https://ers.trendmicro.com2. Type your User name or Email address, and Password.3. Click Log On. The Trend Micro Email Reputation Services portal displays.
Tip: Trend Micro recommends changing your password after you log on for the first time. Refer to Changing Account Details on page 3-13.
Forgot PasswordIf you forgot your password and cannot log on to the service, you can ask Email Reputation Services to reset your password.
To reset the password:
1. Open your browser to the following URL:
https://ers.trendmicro.com2. Click the Forgot your password? link below the Password field. 3. Type your email address. You should receive an email message from Trend Micro.4. Click the link in the email. The Account Detail page appears.5. Type your new password twice.6. Click Update.
2-6
Chapter 3
Using the Administrative Console
After you create an Trend Micro™ Email Reputation Services account, log on to the administrative console and begin configuring your settings.
Topics in this chapter:• Email Reputation Services Console on page 3-2• IP Reputation on page 3-4• Managing the Policy on page 3-7• Administration on page 3-13
3-1
Trend Micro™ Email Reputation Services Administrator’s Guide
Email Reputation Services ConsoleThe large map and accompanying chart on this screen display spam statistics gathered from data centers worldwide.
From this dashboard, you can:• View the Global Spam Threat statistics, refer to Global Spam Threats on page 3-2.• View Your Network statistics, refer to Your Network on page 3-3.
Note: You can only view Your Network statistics from the dashboard after you have logged on.
• Look up an IP address reputation, refer to Look Up IP Addresses on page 3-4.• Nominate an IP address to the Global Approved List database, refer to Global
Approved List on page 3-5.• Click the link to Global spam news, which features the latest notable spam attacks
showcasing screenshots and solution details for Trend Micro users.
Global Spam ThreatsYou can see two kinds of statistics from this tab:• Global Spam Threat statistics, by country
The darker the color, the higher the spam rate of a country. Trend Micro computes the spam rate from the email messages that pass through its network, and the spam blocked by Email Reputation Services. To view more information, you can:• Mouse-over a given country and a balloon icon will appear showing the current
statistics.• Use the left-side slider to zoom in or out of the map for a closer look. • Click the Home icon to revert to the original size. • Click and drag to reposition the map or the chart information.
3-2

Using the Administrative Console
• A visual chart of spam dataThe Spam index shows the current spam trends derived from monitoring the volume of spam sent to Email Reputation servers all over the world.You can filter the spam trends by clicking Week, Month, or Year.
Your NetworkAfter you’ve logged in, you can see two kinds of statistics from this tab:• Spam statistics for your network
To view the current statistics for your network on the map, the flashing globe “MY ERS” icon for a given country. A panel displays with the name of the country. To view more information, you can:• Mouse-over a given country and a balloon icon will appear showing the current
statistics.• Use the left-side slider to zoom in or out of the map for a closer look. • Click the Home icon to revert to the original size. • Click and drag to reposition the map or the chart information.
• A visual chart of all email messages your network received and blockedEmail Reputation Services protects against known and unknown sources of spam by blocking spam messages at the SMTP connection level. When a mail server attempts to connect to an MTA that is protected by Email Reputation Services, your DNS resolver queries the Email Reputation Services lists using the criteria associated with your account.If Email Reputation Services reports that the mail server is listed on one of the Email Reputation Services reputation lists, then that connection attempt is added to the “Blocked Spam messages” number.You can filter the spam trends by clicking Day, Week, or Month.
3-3
Trend Micro™ Email Reputation Services Administrator’s Guide
IP ReputationIn this section, you can:• Look Up IP Addresses on page 3-4• Nominate an IP address to the Global Approved List on page 3-5
Look Up IP AddressesIf you suspect that your IP address is being blocked by Email Reputation Services, please look up the full IP address and determine which database it is listed in.
Note: This lookup tool is based on IP addresses and does not use host or domain names.
To look up an IP address:
1. Open the following URL:
https://ers.trendmicro.com2. Go to IP Reputation > Lookup.3. Type the IP address.4. Click Check. Depending on the results, you can do one of the following:
• If the IP address is not in one of the Email Reputation Services databases, the IP address comes from a reputable source. You can ask Trend Micro to add this IP address to the Global Approved List (refer to Global Approved List on page 3-5).
• If it is unlisted but you think the IP address sends spam and you doubt the integrity of the IP address, you can block the IP address from your network (refer to Blocked Lists on page 3-8).
• If it is listed, you can request to temporarily remove it from the Global Blocked List.
3-4
Using the Administrative Console
Global Approved ListTrend Micro maintains several databases that are either approved or blocked IP addressed, based on their behavior. One such database is the Global Approved List. IP addresses in this list are IP addresses that have been authenticated and are known to come from approved senders. IP addresses in this list are automatically approved and pass through the network.
While Trend Micro maintains this database, you can also nominate your IP address to be added to this list. Trend Micro will then conduct their investigation and determine if the IP address you nominated should indeed be a part of this database.
To nominate an IP address to the Global Approved List:
1. Open the following URL:
https://ers.trendmicro.com2. Go to IP Reputation > Global Approved List. 3. Read through the Global Approved List description. If you agree, click I
Understand and Agree.
Note: Provide all the necessary information on each of the following tabs to ensure that Trend Micro can conduct a full investigation. You may also be asked to provide more information if the provided information are not enough.
4. From the Mail Transfer Agent tab:• To add one (1) or two (2) entries:
i. Provide the following:• IP• FQDN• Email domain name• Company name• Country/Region• Type of company
ii. To add another entry, click Add an entry.• To add more Mail Transfer Agent entries:
3-5
Trend Micro™ Email Reputation Services Administrator’s Guide
i. Download a sample csv file.ii. Provide the necessary information and save the file.iii. Import the file to the site.
5. From the HELO/EHLO Checking tab: • To add one (1) or two (2) entries, provide the HELO/EHLO string. You can
also click Add an entry to add another file.• To add more HELO/EHLO string entries:
i. Download a sample csv file.ii. Provide the necessary information and save the file.iii. Import the file to the site.
6. From the Contact Information tab, provide your email address, first and last name.
7. Click Nominate. Trend Micro will investigate and determine if the IP address can be added to the Global Approved List. If the IP address does not fulfill the criteria to be added to the Global Blocked List, you can still add the IP address to your internal Approved lists (Approved Lists on page 3-7).
3-6
Using the Administrative Console
Managing the PolicyIn the Policy section you can: • Create an Approved Sender list to always receive email messages from certain
trusted countries and IP addresses.• Create a Blocked Sender list to always block email messages from certain countries
and IP addresses.• Adjust Dynamic Reputation settings.
You can define the lists by individual IPv4 or IPv6 IP addresses, or by country.
Approved ListsApproved lists allow messages from approved senders to bypass IP-level filtering. The Approved lists are not applied to your MTA, but you can set up additional approved or blocked senders, or perform additional filtering at your MTA. The trade-off for bypassing IP filtering is the additional resources that are needed to process, filter, and store the higher levels of spam messages that would otherwise have been blocked.
In the case of a standard reputation (RBL) service lookup, the order of the evaluation hierarchy is:1. Approved IP2. Blocked IP3. Approved country4. Blocked country
For dynamic reputation (QIL) service lookup, the customer-defined “blocked policy lists” (IP, Country) are ignored and only the Approved lists are checked. Otherwise, the order of policy lookup (first IP, then country) is the same as for standard reputation (RBL) service.
To add to the Approved list:
1. Open your browser to the following URL:
https://ers.trendmicro.com2. Click Policy > Approved Lists.
3-7
Trend Micro™ Email Reputation Services Administrator’s Guide
3. Select the country and click Add >. The name of the chosen country should move to the right frame.
WARNING! Be very selective when adding a country as you might also be adding known spammers to the approved list.
4. Specify the IPv4 or IPv6 address and click Add >. The IP address should move to the right frame. When specifying the IP address, you can use either of the following:• Standard IPv4 format: 123.123.123.123• Standard IPv4 address range: 123.123.123.123-223.223.223.223• IPv4 IP address range in CIDR notation: 123.123.123.123/24• Standard IPv6 format:
• 2001:0db7:85a3:0000:0000:8a2e:0370:7334• 2001:db7:85a3:0:0:8a2e:370:7334• 2001:db7:85a3::8a2e:370:7334
5. Click Save.
Blocked ListsBlocked lists stop messages from the blocked senders, bypassing IP-level filtering. The Blocked lists are not applied to your MTA, but you can set up additional blocked or approved senders, or perform additional filtering at your MTA. The trade-off for bypassing IP filtering are the additional resources that are needed to process, filter, and store the higher levels of spam messages that would otherwise have been blocked. When using the Blocked lists, you may experience lower overall spam catch rates.
In the case of a standard reputation (RBL) service lookup, the order of the evaluation hierarchy is:1. Approved IP2. Blocked IP3. Approved country4. Blocked country
3-8
Using the Administrative Console
For dynamic reputation (QIL) service lookup, the customer-defined “blocked policy lists” (IP, Country) are ignored; only the Approved lists are checked. Otherwise, the order of policy lookup (first IP, then country) is the same as for standard reputation (RBL) service.
To add to the Blocked list:
1. Open your browser to the following URL:
https://ers.trendmicro.com2. Click Policy > Blocked Lists.3. Select the country and click Add >. The name of the chosen country should move
to the right frame.4. Specify the IPv4 or IPv6 address and click Add >. The IP address should move to
the right frame. When specifying the IP address, you can use either of the following:• Standard IPv4 format: 123.123.123.123• Standard IPv4 address range: 123.123.123.123-223.223.223.223• IPv4 IP address range in CIDR notation: 123.123.123.123/24• Standard IPv6 format:
• 2001:0db7:85a3:0000:0000:8a2e:0370:7334• 2001:db7:85a3:0:0:8a2e:370:7334• 2001:db7:85a3::8a2e:370:7334
5. Click Save.
3-9
Trend Micro™ Email Reputation Services Administrator’s Guide
Reputation SettingsYou can choose which lists to enable from those that make up the Standard Reputation database. By default, all lists are enabled. The default setting is the most effective combination for reducing spam levels, and it meets the needs of most customers. You can also use the dynamic reputation slider to adjust how aggressively Email Reputation Services blocks email connections.
WARNING! If you disable some lists from the Standard database, you may see an increase in the amount of spam messages that reach your internal mail server for additional content filtering.
Standard Reputation Services DatabaseThe Standard Reputation Services includes a database with the following lists:• The Real-time Blackhole List (RBL) or Known spam source is a list of IP
addresses of mail servers that are known to be sources of spam.• The Dynamic User List (DUL) or Dynamic IP addresses is a list of dynamically
assigned IP addresses, or those with an Acceptable Use Policy (AUP) that prohibits public mail servers. Most entries are maintained in cooperation with the ISP owning the network space. IP addresses in this list should not be sending email directly but should be using the mail servers of their ISP.
For the Standard section:• You can enable or disable the lookup of selected lists by using the check boxes.
• Select the check box to enable the list.• Clear the check box to turn off the list. The Email Reputation Services system
will skip that list during a lookup request.• Click the Save button to save new settings.
3-10
Using the Administrative Console
Dynamic Reputation SliderUse the dynamic reputation slider to set blocking levels as follows:• More aggressive: If too much spam is reaching your network, select a more
aggressive setting. However, this setting might also block connections from legitimate email senders.
• Less aggressive: If legitimate email is being blocked, select a less aggressive setting.
Tip: Trend Micro recommends that you make changes to the Dynamic Settings carefully and in small increments. You can then fine-tune your settings by measuring the increased amount of spam and legitimate messages received and making additional small changes.
If you are receiving many spam messages and want to block as many as possible, use the most aggressive level. If this setting blocks too many legitimate messages, you can reduce this setting by one level and evaluate it based on the resulting proportion of spam messages received.
To configure reputation settings:
1. Open your browser to the following URL:
https://ers.trendmicro.com2. Go to Policy > Reputation Settings.3. Enable or disable one of the Standard Reputation Services list.4. Under Advanced Reputation Service, move the slider to one of the following
points:Level 4: The most aggressive setting. If Email Reputation Services detects even a single spam message from a sender IP address, it adds the sender address into the dynamic reputation database. The length of time that the IP address stays in the database depends on whether Email Reputation Services detects additional spam from the sender.Level 3: A moderately aggressive setting. Email Reputation Services allows a small volume of spam from senders with a good rating. However, if Email Reputation Services detects an increase in spam beyond the allowable threshold from such a sender, it adds the sender to the dynamic reputation database. The length of time that the IP address stays in the database depends on whether Email Reputation Services detects additional spam from the sender. The length of time may be extended up to maximum as in Level 4.
3-11
Trend Micro™ Email Reputation Services Administrator’s Guide
Level 2: A moderately tolerant setting. Email Reputation Services allows a larger volume of spam from a sender with a good rating. However, if Email Reputation Services detects an increase in spam above the allowable threshold from such a sender, it adds the sender to the dynamic reputation database. The length of time that the IP address stays in the database is generally shorter than the time for level 3.
Note: The default setting is Level 2.
Level 1: The least aggressive setting. Email Reputation Services allows the same amount of spam from a sender with a good rating, as in level 2. The length of time that an IP address stays in the database is shorter, in general, than that for level 2.
5. Click Save.
3-12
Using the Administrative Console
AdministrationIn the Administration section, you can do the following: • Change the administrative console user name and password• Change the Activation Code
Changing Account DetailsYou can change your account ID email address and password. To protect your account, Trend Micro recommends changing the password regularly. The password must be between eight (8) and thirty-two (32) alphanumeric characters.
To change the Account ID:
1. Open your browser to the following URL:
https://ers.trendmicro.com2. Go to Administration > Account Details.3. Click the Account ID tab.4. Type the new Account ID twice.5. Type your password.6. Click Update.
To change the password:
1. Open your browser to the following URL:
https://ers.trendmicro.com2. Go to Administration > Account Details.3. Click the Password tab.4. Type the old password once and the new password, twice.5. Click Update.
3-13
Trend Micro™ Email Reputation Services Administrator’s Guide
Changing the Activation CodeTo upgrade, reactivate, or continue using your service, provide the new Activation Code you received from Trend Micro on the license screen. If your new Activation Code validates correctly, then it will be saved and used immediately.
To change your Activation Code, type your new Activation Code and then click Activate.
3-14
Chapter 4
Getting Help
This chapter describes how to get additional help for issues that may arise and how to contact support.
Topics in this chapter:• Getting Help with the Administrative Console on page 4-2• Contacting Technical Support on page 4-2• Security Information Center on page 4-5• Documentation Feedback on page 4-5
4-1
Trend Micro™ Email Reputation Services Administrator’s Guide
Getting Help with the Administrative ConsoleFor detailed information about working with the administrative console, see the help files. You can access page-level help for a particular screen by clicking the help icon near the upper-right corner of each screen.
Contacting Technical SupportFor registered users, Trend Micro provides technical support, virus pattern downloads, and program updates for one year. Afterwards, you can purchase a maintenance renewal.
The latest technical support contact information can be found here:• List of the worldwide support offices:
http://esupport.trendmicro.com/• Latest Trend Micro product documentation:
http://downloadcenter.trendmicro.com/
In the United States, you can reach the Trend Micro representatives through phone, fax, or email:
Trend Micro, Inc.
10101 North De Anza Blvd., Cupertino, CA 95014
Toll free: +1 (800) 228-5651 (sales)
Voice: +1 (408) 257-1500 (main)
Fax: +1 (408) 257-2003
Web address:
http://www.trendmicro.com
Email: [email protected]
Please provide the following information in your correspondence:
Speeding Up Your Support CallTo speed up your problem resolution, when you contact Trend Micro, make sure that you have the following details available:
4-2
Getting Help
• Company name• Administrator account name (only the account user name; do not send your
password in an email)• Your contact information:
• Name• Email address (if different)• A brief description of your issue• Exact text of any error message given• Steps to reproduce the problem
The Trend Micro Knowledge BaseThe Trend Micro Knowledge Base, maintained at the Trend Micro Web site, has the most up-to-date answers to product questions. You can also use the Knowledge Base to submit a question if you cannot find the answer in the product documentation. Access the Knowledge Base at:
http://esupport.trendmicro.com
Trend Micro continuously updates the contents of the Knowledge Base and adds new solutions daily. If you are unable to find an answer, you can also describe the problem in an email and send it directly to a Trend Micro support engineer who will investigate the issue and respond as soon as possible.
TrendLabsTrendLabsSM is the global antivirus research and support center of Trend Micro. Located on three continents, TrendLabs has a staff of more than 250 researchers and engineers who operate around the clock to provide you, and every Trend Micro customer, with service and support.
You can rely on the following post-sales service:• Regular virus pattern updates for all known "zoo" and "in-the-wild" computer
viruses and malicious codes• Emergency virus outbreak support• Email access to antivirus engineers
4-3
Trend Micro™ Email Reputation Services Administrator’s Guide
• Knowledge Base, the Trend Micro online database of technical support issues
TrendLabs has achieved ISO 9002 quality assurance certification.
Sending Suspicious Files to Trend MicroYou can send your viruses, infected files, Trojans, suspected worms, spyware, and other suspicious files to Trend Micro for evaluation. For more information, refer to the following site:
http://subwiz.trendmicro.com/subwiz
Provide the following information:• Email: Your email address where you would like to receive a response from the
antivirus team.• Product: The product you are currently using. If you are using multiple Trend
Micro products, select the product that has the most effect on the problem submitted, or the product that is most commonly in use.
• Number of Infected Seats: The number of users in your organization that are infected.
• Upload File: Trend Micro recommends that you create a password-protected zip file of the suspicious file, using the word “virus” as the password, and then select the protected zip file in the Upload File field.
• Description: Please include a brief description of the symptoms you are experiencing. Our team of virus engineers will “dissect” the file to identify and characterize any risks it may contain and return the cleaned file to you, usually within 48 hours.
Note: Submissions made through the submission wizard/virus doctor are addressed promptly and are not subject to the policies and restrictions set forth as part of the Trend Micro Virus Response Service Level Agreement.
When you click Next, an acknowledgement screen displays. This screen also displays a Tracking Number for the problem that you submitted.
4-4

Getting Help
Alternatively, you can also send Trend Micro the URL of any Web site you suspect of being a phish site, or other so-called "disease vector" (the intentional source of Internet threats such as spyware and viruses).• Send an email to the following address and specify "Phish or Disease Vector" as the
subject.
[email protected]• In the United States, you can also call the following toll-free telephone number:
(877) TRENDAV, or 877-873-6328
Security Information CenterComprehensive security information is available at the Trend Micro Web site.
http://about-threats.trendmicro.com/us/threatencyclopedia
Information available:• List of viruses and malicious mobile code currently "in the wild," or active• Computer virus hoaxes• Internet threat advisories• Virus weekly report• Virus Encyclopedia, which includes a comprehensive list of names and symptoms
for known viruses and malicious mobile code• Glossary of terms
Documentation FeedbackTrend Micro always seeks to improve its documentation. If you have questions, comments, or suggestions about this or any Trend Micro document, please go to the following site:
http://www.trendmicro.com/download/documentation/rating.asp
4-5

Trend Micro™ Email Reputation Services Administrator’s Guide
4-6

Appendix A
Glossary
Dynamic User List (DUL)
Dynamic User List (DUL) includes IP addresses in dynamic ranges identified by ISPs. Most legitimate mail sources have static IP addresses.
False Positive
A false positive occurs when an email sender is incorrectly labeled a spammer. If you subscribed to the advanced version of Email Reputation Services, you can adjust how strict Email Reputation Services is with servers attempting to establish email connections with your network.
If you select a setting that is too strict, you could block connections from senders trying to deliver legitimate email.
HTTP
Hypertext Transfer Protocol (HTTP) is a standard protocol used for transporting Web pages (including graphics and multimedia content) from a server to a client over the Internet.
HTTPS
Hypertext Transfer Protocol using Secure Socket Layer (SSL). HTTPS is a variant of HTTP used for handling secure transactions.
A-1
Trend Micro™ Email Reputation Services Administrator’s Guide
IP
"The internet protocol (IP) provides for transmitting blocks of data called datagrams from sources to destinations, where sources and destinations are hosts identified by fixed length addresses." (RFC 791)
Marketing Mail List
Marketing Mail List (MML) includes legitimate mail sources historically known to send extensive marketing messages.
Phish Attack
Phish, or phishing, is a rapidly growing form of fraud that seeks to fool Web users into divulging private information by mimicking a legitimate Web site.
In a typical scenario, unsuspecting users get an urgent sounding (and authentic looking) email telling them there is a problem with their account that they must immediately fix to avoid account termination. The email will include a URL to a Web site that looks exactly like the real thing. It is simple to copy a legitimate email and a legitimate Web site but then change the so-called backend, which receives the collected data.
The email tells the user to log on to the site and confirm some account information. A hacker receives data a user provides, such as a logon name, password, credit card number, or social security number.
Phish fraud is fast, cheap, and easy to perpetuate. It is also potentially quite lucrative for those criminals who practice it. Phish is hard for even computer-savvy users to detect. And it is hard for law enforcement to track down. Worse, it is almost impossible to prosecute.
Please report to Trend Micro any Web site you suspect to be a phishing site. See Sending Suspicious Files to Trend Micro on page 4-4 for more information.
Ping
Ping is a utility that sends an ICMP echo request to an IP address and waits for a response. The Ping utility can determine if the computer with the specified IP address is online or not.
A-2
Glossary
Dynamic Reputation Database (QIL)
The Dynamic Reputation Database or Quick IP List is a highly dynamic list and uses advanced detection techniques for attacks caused by botnets (zombie networks, SMTP malware, spyware). IP addresses are added and removed quickly due to the nature of the threat.
Real-time Blackhole List (RBL)
Real-time Blackhole List (RBL) includes IP addresses historically associated with sending spam.
SOCKS 4
SOCKS 4 is a TCP protocol used by proxy servers to establish a connection between clients on the internal network or LAN and computers or servers outside the LAN. The SOCKS 4 protocol makes connection requests, sets up proxy circuits and relays data at the Application layer of the OSI model.
Global Approved List
The Global Approved List includes legitimate mail sources collected by Email Reputation Sources and the Threat Protection Network.
TCP
Transmission Control Protocol (TCP) is a connection-oriented, end-to-end reliable protocol designed to fit into a layered hierarchy of protocols that support multi-network applications. TCP relies on IP datagrams for address resolution. Refer to DARPA Internet Program RFC 793 for information.
A-3

Trend Micro™ Email Reputation Services Administrator’s Guide
A-4