Page 1 INSTALLATION AND USER GUIDE FOR HIC ONLINE WITH PRACSOFT 3 Before you begin Before you begin to set-up HIC Online, ensure that: 1. You have successfully completed the standard installation of PracSoft 3. (Please ensure that you have received your registration key from PracSoft Sales prior to commencing your upgrade to PracSoft 3); 2. You have the necessary PKI certificates and associated Personal Identification Codes (PICs) from HeSA. Practices can use either: (a) Location certificate only; or (b) Location certificate plus individual certificates (iKeys/smartcard - tokens) for each practitioner. 3. All practitioners planning to use HIC Online have enrolled with HIC via the HeSA Web Page (http://www.hesa.com.au/HIC_online.htm )
Transcript
Page 1
INSTALLATION AND USER GUIDE FOR HIC ONLINE WITH PRACSOFT 3
Before you begin
Before you begin to set-up HIC Online, ensure that:
1. You have successfully completed the standard installation of PracSoft 3. (Please ensure that you have received your registration key from PracSoft Sales prior to commencing your upgrade to PracSoft 3);
2. You have the necessary PKI certificates and associated Personal Identification Codes (PICs) from HeSA. Practices can use either:
(a) Location certificate only; or
(b) Location certificate plus individual certificates (iKeys/smartcard - tokens) for each practitioner.
3. All practitioners planning to use HIC Online have enrolled with HIC via the HeSA Web Page (http://www.hesa.com.au/HIC_online.htm)
Page 2
Summary of Instructions/Steps to Follow
Step 1. Import Location Certificates into a store (called a PSI store) on your machine.
Step 2. Set-up Location Certificate details in PracSoft 3.
Step 3. Set-up a Practitioner to use HIC Online in PracSoft 3.
Steps 4 & 5 are optional and only necessary if the Practitioner wants to individually sign each claim (i.e. use individual ikey)
Step 4. Load Rainbow iKey drivers.
Step 5. Set-up a Practitioner to individually sign Claims in PracSoft 3.
Page 3
Step 1 – Importing the Location Certificate and Creating the PSI Store (PKI Security Interface)
1. Open Windows Explorer and locate the directory C:\Program Files\HIC\PKI (please ensure you have “view hidden files and folders” enabled as some vital extensions/files may be hidden by default). This folder will have been created on each workstation on which PracSoft 3 has been installed.
Double click on the 'PsiSetup.exe' file
2. A PSI Setup Wizard window is displayed.
Select the Next button to continue or the Cancel button to cancel the installation.
3. Read the HIC’s Software License Agreement.
If you accept the agreement, select the “YES, I accept the Agreement” box and click the Next button to continue.
Page 4
4. The Diskette or Token selection screen is displayed.
Insert your HeSA-issued Location Certificate (floppy disk) into your floppy disk drive, select the “Do you have a Diskette to Load” option and click the Next button to continue.
5. The PSI Setup Wizard identifies each of the required Encryption and Signing files for your Location Certificate.
Enter the PIC (pass phrase) associated with the Location Certificate (issued by HeSA) then click the Next button to continue.
The PIC for the location certificate will have been provided to your practice by HeSA over the telephone after you faxed to them confirmation of receipt of your floppy disk containing the location certificate, (there is a four hour window between faxing and retrieving the PIC).
Please ensure that you retain the original pass phrase (HeSA-issued PIC) in a safe place in case of a system failure and/or a need to reinstall the certificate at a later date.
Note: PracSoft 3 will allow you to change the original pass phrase upon install, however this only changes it for the PSI Store within your PC – not on the floppy disk itself.
Page 5
6. The PSI setup screen will be displayed.
(a) If you have installed PracSoft onto a single workstation:
Enter “C:\Program Files\HIC\PKI\hic.psi” as the File Name.
Check the “Create a new Store” box.
Enter your preferred password and confirm, for this Psi Store. This is a password of your choice. It does not need to be the same as the PIC you entered on the previous screen.
Click the Finish button.
(b) If you have installed PracSoft onto a network/server.
Create a directory on the computer on which the common database resides called:
“X:\Program Files\HIC\PKI” where X is the letter that corresponds to the relevant mapped drive; or
“\\SERVER\Program Files\HIC\PKI” where SERVER is the name of the computer on which the common database resides.
Ensure that full read/write access to this directory is enabled for all workstations on which PracSoft 3 will be installed.
Enter “X:\Program Files\HIC\PKI\hic.psi” or “\\SERVER\Program Files\HIC\PKI\hic.psi” as the File Name.
Check the “Create a new Store” box.
Enter your preferred pass phrase and confirm, for this Psi Store. This is a password of your choice.
Click the Finish button.
Page 6
Step 2 – Set-up Location Certificate details in PracSoft 3
1. Launch PracSoft 3.
You may at this point see an error message (ID 1005). Don’t Worry! Simply proceed to the next Step.
2. Select Setup | Workstation Settings from the PracSoft 3 toolbar to display the following screen:
(a) If you have installed PracSoft onto a single workstation:
Enter “C:\Program Files\HIC\PKI\hic.psi” as the Store Location, providing “C” is your local system directory/drive.
Enter the PSI Store password that you created in Step 1.6 and Click the Save button.
(b) If you have installed PracSoft onto a server/network:
Enter either:
“X:\Program Files\HIC\PKI\hic.psi” where X is the letter of the relevant mapped network drive on which you created the PSI Store in Step 1.6; or
“\\SERVER\Program Files\HIC\PKI\hic.psi” where SERVER is the name of the computer on which you created the PSI Store in Step 1.6.
as the “Store Location”.
Enter the PSI Store password that you created in Step 1.6 and click Save.
Page 7
3. Select Setup | Global Settings from the PracSoft 3 toolbar to display the following screen:
Check the “Use HIC Online” box.
Unless otherwise directed by HIC or PracSoft support, ensure that:
• “www2.hic.gov.au/pext” is entered as the “HIC Server”. (This may require “/pext” to be added manually); and
It is recommended that you also check the “Auto-Claim No. generation” box. Claim numbers will be automatically incremented and displayed.
Click the Save button.
Page 8
Step 3 – Set-up a Practitioner to use HIC Online in PracSoft 3
1. Select Admin | Doctors from the PracSoft 3 toolbar to display the Registered Practitioners screen:
Highlight the practitioner you wish to Edit from the list displayed and click the Edit button.
2. The Practitioner Details screen is displayed:
Check the box for “HIC Online Agreement Signed” to confirm that this practitioner has signed the HIC Online Agreement and returned it to HIC. Once this Practitioner has been flagged to use HIC Online all batched Claims will now only appear in HIC Online.
Click the Save button.
3. Repeat for other practitioners who will be claiming through HIC Online.
Page 9
Note: Steps 4 & 5 are optional and only required if the Practitioner wants to individually sign each claim using their ikeys.
Step 4 – Load Rainbow iKey Drivers
This step should be completed on each workstation into which practitioners will be inserting their iKeys/Smartcards - tokens.
1. Ensure that the PracSoft 3 CD-ROM is in your CD-ROM drive. Use Windows Explorer to find the file “setup.exe” which is contained in the “Rainbow ikey” folder. Ensure that any other applications are closed, and then double-click to run this file.
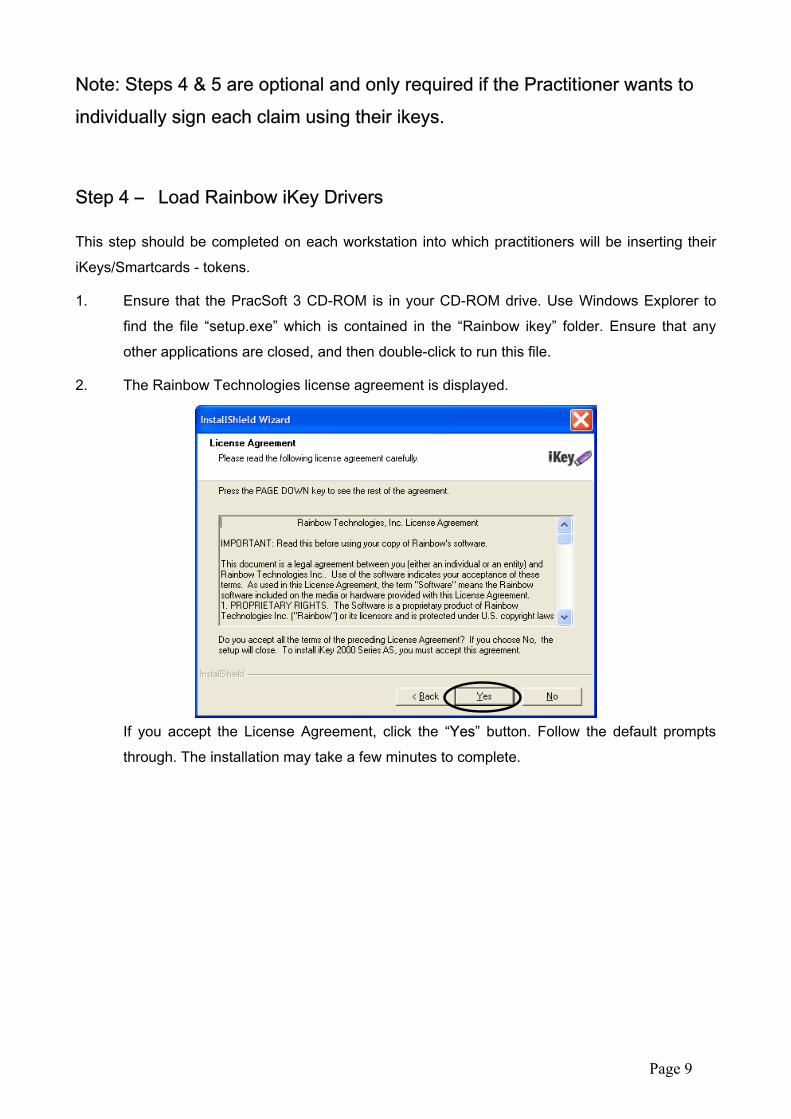
2. The Rainbow Technologies license agreement is displayed.
If you accept the License Agreement, click the “Yes” button. Follow the default prompts through. The installation may take a few minutes to complete.
Page 10
3. Once the installation is complete, the following screen is displayed.
Check “Yes, I want to restart my computer now” and click the “Finish” button.
4. Once the PC has rebooted, you may wish to change the Passphrase for each iKey. If so, insert the relevant iKey, navigate to the Start menu\Programs\Rainbow Technologies\iKey 2000 Series Software and click on Passphrase Utility. Follow the prompts.
The iKeys are used during the Preparation/Authorisation of the claims. The Practitioners will be prompted to insert their keys into a USB port on the computer. This will automatically register their iKeys.
Step 5 – Set-up a Practitioner to individually sign claims in PracSoft 3
1. Select Admin | Doctors from the PracSoft toolbar to display the Registered Practitioners screen:
Highlight the practitioner you wish to Edit from the list displayed and click the Edit button.
Page 11
2. The Practitioner Details screen is displayed:
Check the box for “HIC Online Agreement Signed” to confirm that this practitioner has signed the HIC Online Agreement and returned it to HIC.
Check the box for “Individual Signing” to confirm that this practitioner will individually sign each voucher to be submitted to HIC in his/her name using the iKey/Smartcard token.
Click the Save button.
3. Repeat for other practitioners who will be claiming through HIC Online.
Page 12
USING HIC ONLINE WITH PRACSOFT
The process to follow is:
1. Select a claim.
2. Prepare and authorise the claim data.
3. Transmit the authorised claim to HIC.
4. At a later date Request the Processing and Payment reports.
5. Resolve and Receipt off Claim.
Important
Before using HIC Online it is strongly recommended that: • All outstanding claims have been either receipted off or processed via Medclaims. Any
claims sent using Medclaims cannot be processed within HIC Online.
1. Click Processing | Batch Bulk Claims | Medicare/Veteran Affairs from the Main menu to batch bulk claims ready for processing.
Page 13
2. Once you have selected Process and Send, the PracSoft HIC Online window is displayed.
This screen displays all claims batched for Practitioners registered to use HIC Online. Within the Practitioners window there is a field "HIC Agreement signed" that indicates if this Doctor is using HIC Online.
Any claims listed in the left window will be prepared in step 2.
The right window lists all Claims that have been prepared and are available for re-preparation.
Note: This window ONLY displays claims for Practitioners flagged as using HIC ONLINE. This does NOT display any “Medclaims” claims already prepared or transmitted in Medclaims.
It also lists transmitted claims (i.e. claims sent to the HIC ready to be processed) these claims cannot be re-prepared. Only if there has been a problem at the HIC and you are directed by the HIC to resend the claim should the claim status be reset to allow resending of the claim.
3. Click the > or < buttons to move the claims between Selected to Prepare section and Claims Prepared/Transmitted section.
OR
Double-click the claim.
OR
Hold down the CTRL or SHIFT key while selecting a group of claims and selecting the > or < button.
Page 14
4. There is a right click option in this window to perform the following tasks, however great care must be taken especially renaming or resetting a claims status.
Print the claim details - a report is generated of all vouchers details within the selected claim.
Change the claim number - the claim number can be changed using this menu option however this is not recommended especially if the claim has already been sent to the HIC.
Reset the claim status - if the claim has been transmitted to HIC, the claim status may need to be reset. This may only be performed by Full Access users and only in circumstances whereby the HIC have cancelled the claim at their end.
5. To prepare and authorise the claims to send to the HIC, and click the Next Step button to continue. The Prepare Claim Data tab is displayed.
6. Each prepared claim must be authorised before being sent to HIC. At this stage further validation of the claim details is performed. If any problems are found they will be displayed on this tab as well in being recorded in a log file (called hiconline.log and found in the PracSoft home directory).
The way the claims are signed will depend on the agreement signed between the Practitioner and the HIC. If the Practitioner has decided to individually sign each claim then they will be required at this point to enter their HCI token or ikey (blue key) into the USB port.
Otherwise the authorisation will be performed automatically using the location certificate loaded when HIC Online was initially installed.
Click the Prepare button to prepare the claim data.
Page 15
7. The following message is displayed.
Click the Yes button to proceed.
At this point the claim will be prepared and authorised. If the Practitioner has selected individual signing then the DB1 Declaration is displayed and they are prompted to enter their ikey Passphrase.
The HIC token for Dr. screen appears and the user is prompted to enter their Passphrase then click Sign.
Note: Within the Doctors screen in PracSoft, they will need to have selected the “Individual signing" flag to use this functionality.
Page 16
8. The following screen is displayed.
Click the Next Step button to proceed.
9. The following screen is displayed.
The printing of Claim reports is only essential for DVA Claims. All DVA Claims require the claim reports to be sent as accompanying documentation to the HIC. No documents are required to be sent to the HIC for Bulk Bill claims.
These claim reports provide a summary of each claim including total number of vouchers and total amount claimed as well as details of all vouchers included in the claim.
Click the Print button to print claim reports.
Page 17
10. The following message is displayed.
Note: To change your default printer settings, click Setup Printer Setup from the Main menu.
Click Yes if you wish to print reports or No to continue without printing then click Next Step.
11. The following screen is displayed.
One or more claims can be transmitted to the HIC using an Internet connection. It is important that an Internet connection be available at this point.
The transmission of claims does not need to be performed at the same time, as the claims are prepared. These processes are now separate.
Click the Transmit button to transmit the claims.
Page 18
12. The Transmit Claims window is displayed.
Select the claims to be included in this transmission, and click the Transmit button to transmit to HIC Online. The Clear All button allows the de-selection of the claims you do not wish to transmit. Only the ticked claims will be sent when you click on Transmit.
A message appears in both the Main window and in the HIC Online log to indicate the success/failure of the transmissions.
13. Where claims have previously been submitted to HIC using HIC Online, reports can be requested through the “5. Request HIC Results” tab as shown on the following screen:
Reports for all outstanding claims can be requested at this point. This includes all claims requiring processing, (that is exceptions) and payment reports.
Click the Request button to request claim report information from the HIC. Any claims that have exceptions will have reports printed and must be resolved before the claim can be receipted off.
Page 19
Payment reports are printed for the relevant claims and any claims that have been paid by the HIC are automatically receipted off in your PracSoft 3 accounts.
All report output can also be found in the View Payment/Processing Log from the View drop down box in the above screen.
14. Click the Resolve button to resolve claims. The Resolving Claim Exceptions window is displayed.
It is important to note that all exceptions must be resolved before the claim can be receipted off. Vouchers can be either re-submitted or the amount paid by the HIC accepted.
Select the claim to resolve from the list of claims and click the Resubmit button to remove the voucher from this claim. The voucher can then be edited, batched again and resent to the HIC. Any voucher when an amount has been paid by the HIC cannot be re-submitted – it must be accepted.
To accept the payment from HIC on a particular voucher, select the voucher from the Exceptions to Resolve list and click the Accept button.
Once the exceptions are resolved, the payment reports can then be requested through the “Request” button in step 13 “Request HIC Results”. The requesting of payment reports for each claim is now a separate process and will only happen when all exceptions have been resolved. If a claim is part of a payment with other claims – all claims must have their exceptions resolved before the claims can be auto-receipted off.
Page 20
15. To view the status of a claim, click the Status button. The Status of Transmitted Claims window is displayed.
Click the Status Type to filter the list displayed, and click the Print button to print the list.
Click the Close button to return to Request HIC Results.
Click the Close button to close the HIC Online window.