How to Replace the Alternator and Install a Splash Guard Step by Step By Chirpz (c) Tom Croley 2016 The following step by step guide represents how I changed my alternator. I do not claim that it is the best way or the right way. I only claim that it worked for me and I hope that it will be a help to you should you need to do the same. Use this guide at your own risk. You should not be doing this unless you have a basic set of tools. Nothing special is required, just some metric wrenches, sockets, and a few torx tools. So relax you can do it, but it will be a fight at times.
Transcript
How to Replace the Alternatorand Install a Splash Guard
Step by Step
By Chirpz
(c) Tom Croley 2016
The following step by step guide represents how I changed my alternator. I do not claim that it is the best way or the right way. I only claim that it worked for me and I hope that it will be a help to you should you need to do the same. Use this guide at your own risk.
You should not be doing this unless you have a basic set of tools. Nothing special is required, just some metric wrenches, sockets, and a few torx tools. So relax you can do it, but it will be a fight at times.
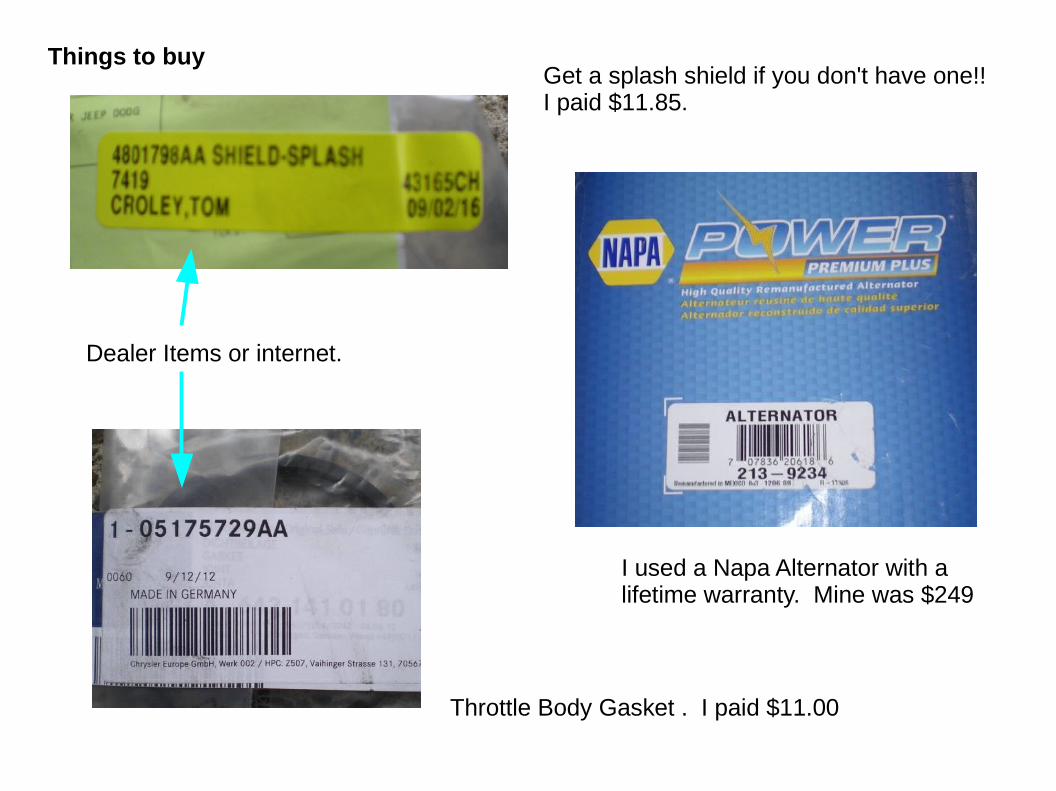
Things to buy
Dealer Items or internet.
I used a Napa Alternator with alifetime warranty. Mine was $249
Throttle Body Gasket . I paid $11.00
Get a splash shield if you don't have one!!I paid $11.85.
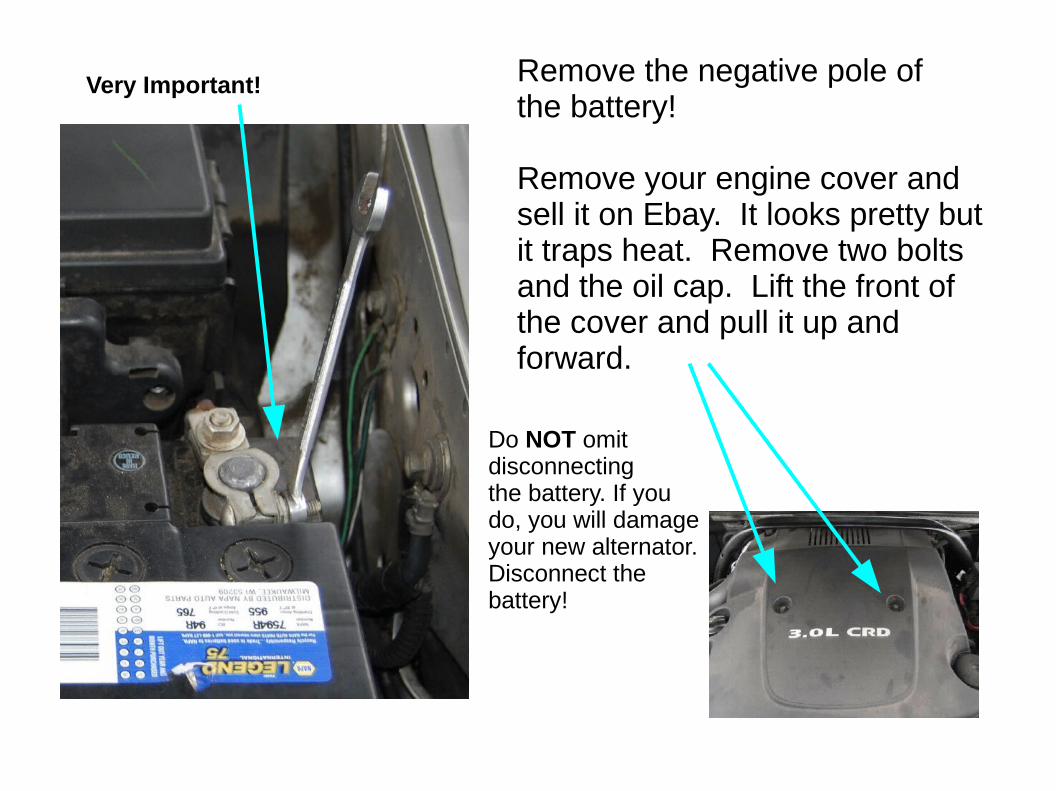
Remove the negative pole ofthe battery!
Remove your engine cover andsell it on Ebay. It looks pretty but it traps heat. Remove two boltsand the oil cap. Lift the front ofthe cover and pull it up andforward.
Do NOT omitdisconnectingthe battery. If you do, you will damage your new alternator.Disconnect thebattery!
Very Important!
Remove front skid if you have one.4 bolts hold mine on.
Remove engine skid plateif you have one. Mine is afactory skid held on with4 bolts. Loose the two inthe front. Remove the twoin the back.
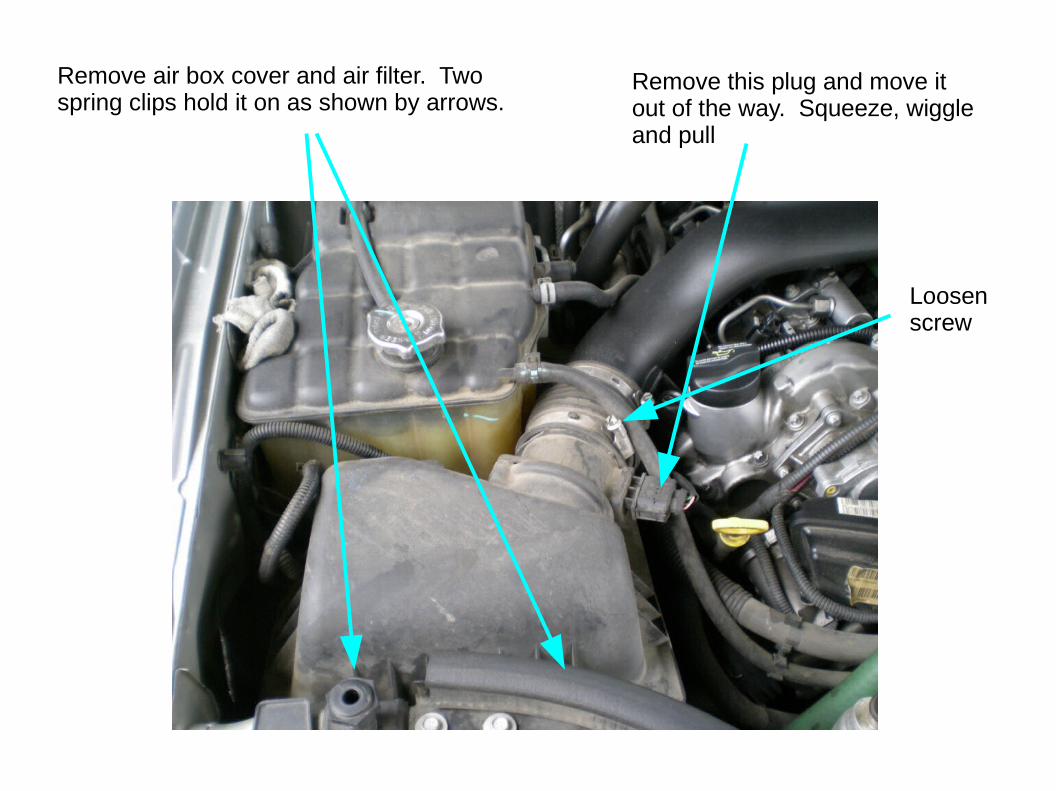
Remove this plug and move itout of the way. Squeeze, wiggle and pull
Remove air box cover and air filter. Twospring clips hold it on as shown by arrows.
Loosenscrew
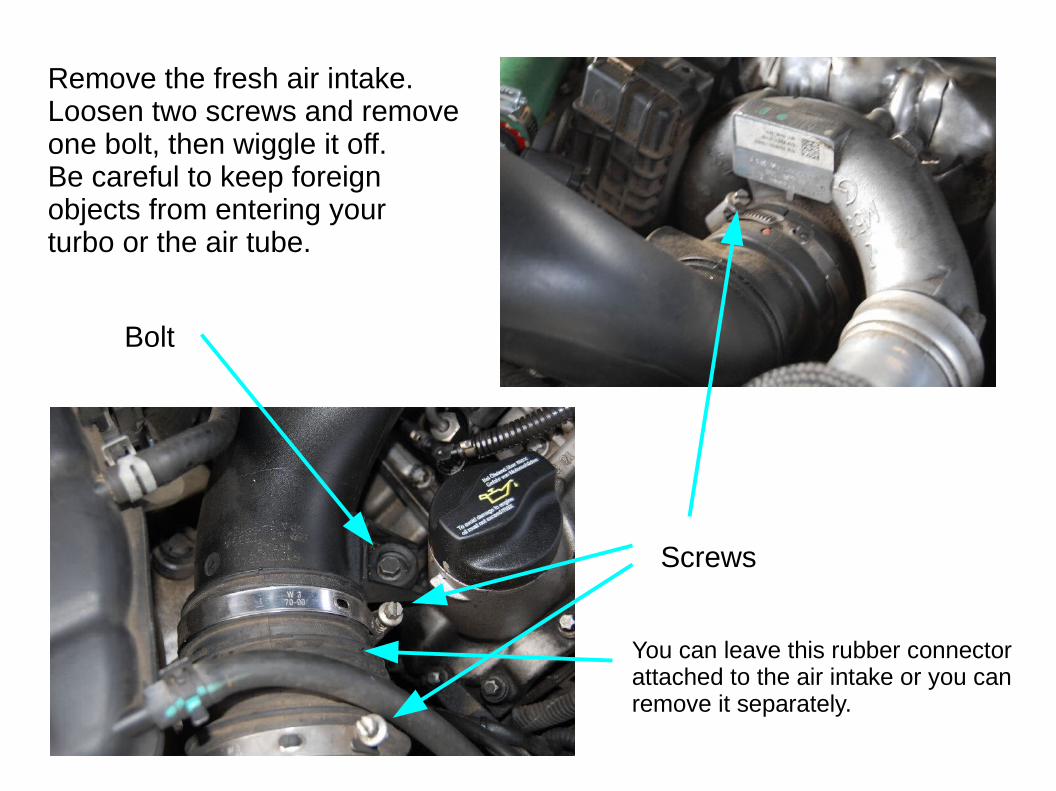
Remove the fresh air intake.Loosen two screws and removeone bolt, then wiggle it off.Be careful to keep foreignobjects from entering yourturbo or the air tube.
Screws
Bolt
You can leave this rubber connectorattached to the air intake or you canremove it separately.
Remove the end of the air tube from the air box and then rotate the tubeupward. Then wiggle it off of the turbo inlet. (You can leave it attached to the turbo if you want and just swing it up out of the way.)
If you have the oldertype orange gasketwhere the intakemeets the turbo,this would be agood time to inspectand maybe replace it.
If it is all gunky in thereconsider doing theElephant Hose Modsomeday soon.
My Elephant Hose
Remove this screw that holdsthe dip stick tube in place.You want to be able to wigglethe dip stick tube a small amount when pulling thealternator out of the hole.
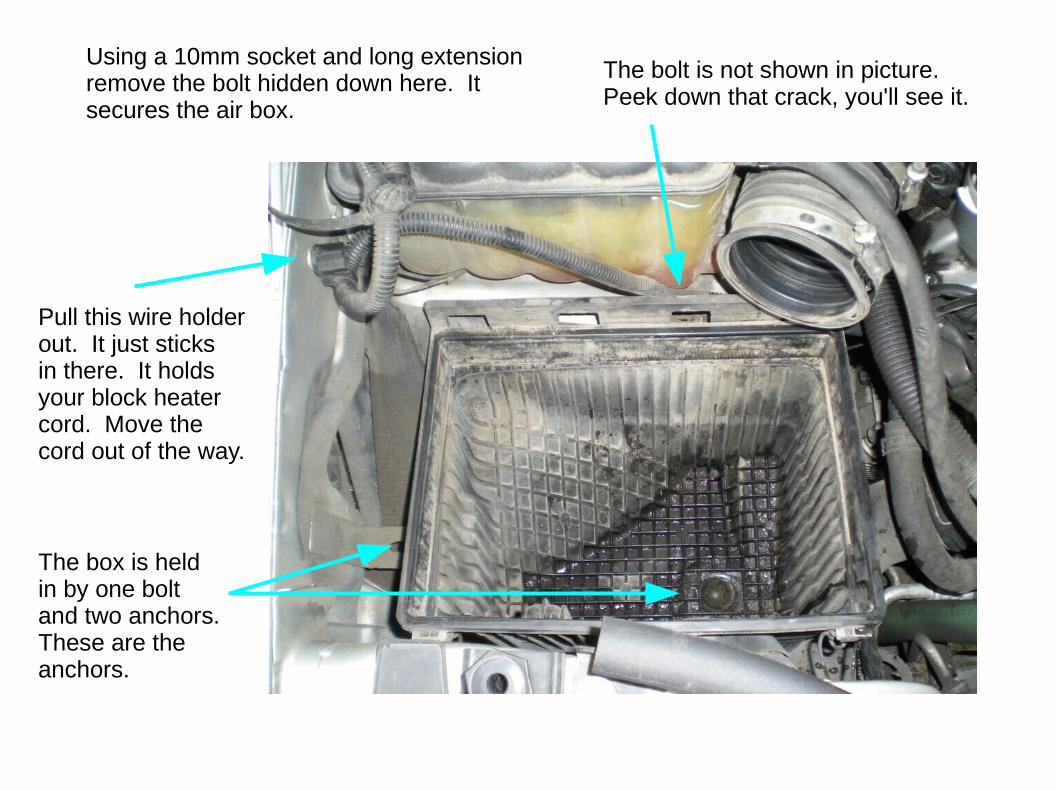
Using a 10mm socket and long extensionremove the bolt hidden down here. Itsecures the air box.
The bolt is not shown in picture.Peek down that crack, you'll see it.
Pull this wire holderout. It just sticksin there. It holdsyour block heatercord. Move the cord out of the way.
The box is held in by one bolt and two anchors.These are theanchors.
Loosen the air intake pipe and slide it forward and out of the way. A plastictab secures it loosely to the air box. Now the box can be removed.
Crawl under the car and look up at the bottom of the air box. The center anchoris very tight. It is a plastic spike sticking into a rubber grommet. You can justmuscle it out from the top and risk breaking it or you can use a pry bar and easeit off from below. I used the crooked angle of this pry bar. Place the pry bar betweenthe flange and the box. The box spike will pop right out of the grommet. Try not to bend the flange that holds the grommet. Oil the grommet lightly afterwardto help replace the box.
Place bar hereUnder the flange
Now you can see it, but you can't get it out yet. You have to get the throttle bodyand its hose out of the way. You don't have to fully remove the hose!
Carefully remove this clip. Grasp the rubber hose and slide it out of the throttle body. The hose has a metal end on it. Be very careful not todamage the plug that is connected to the plastic throttle body extension.
Clip
Sensor Plug
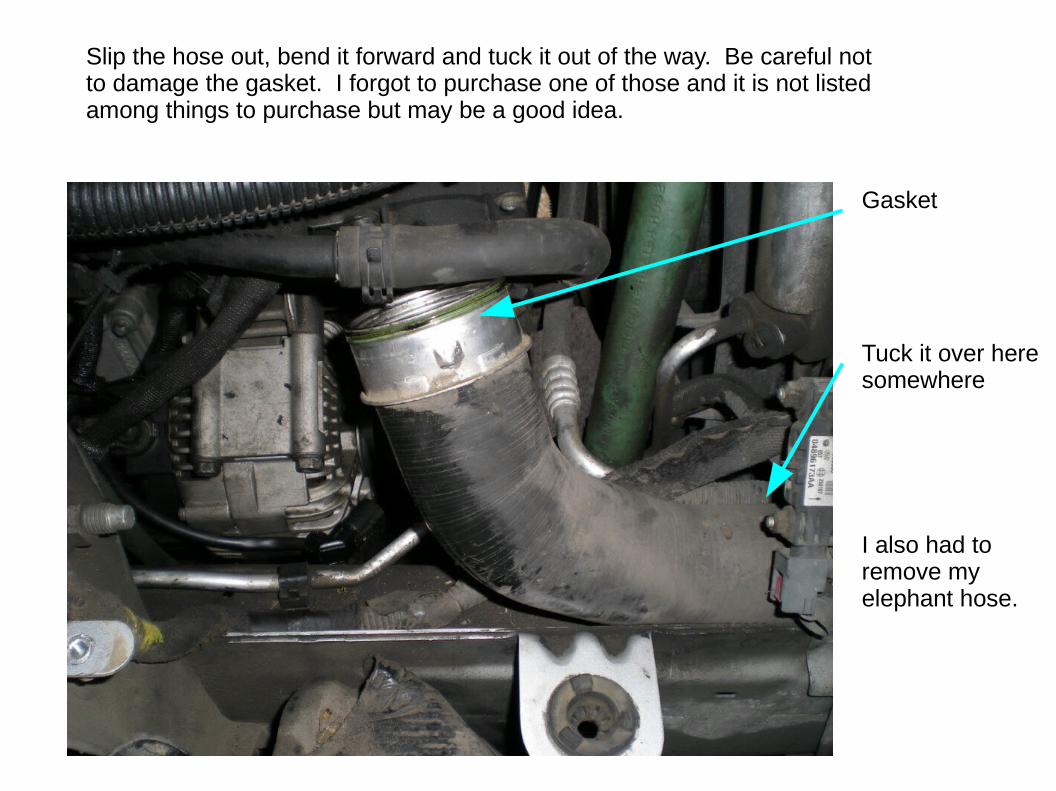
Slip the hose out, bend it forward and tuck it out of the way. Be careful notto damage the gasket. I forgot to purchase one of those and it is not listedamong things to purchase but may be a good idea.
Gasket
Tuck it over heresomewhere
I also had toremove myelephant hose.
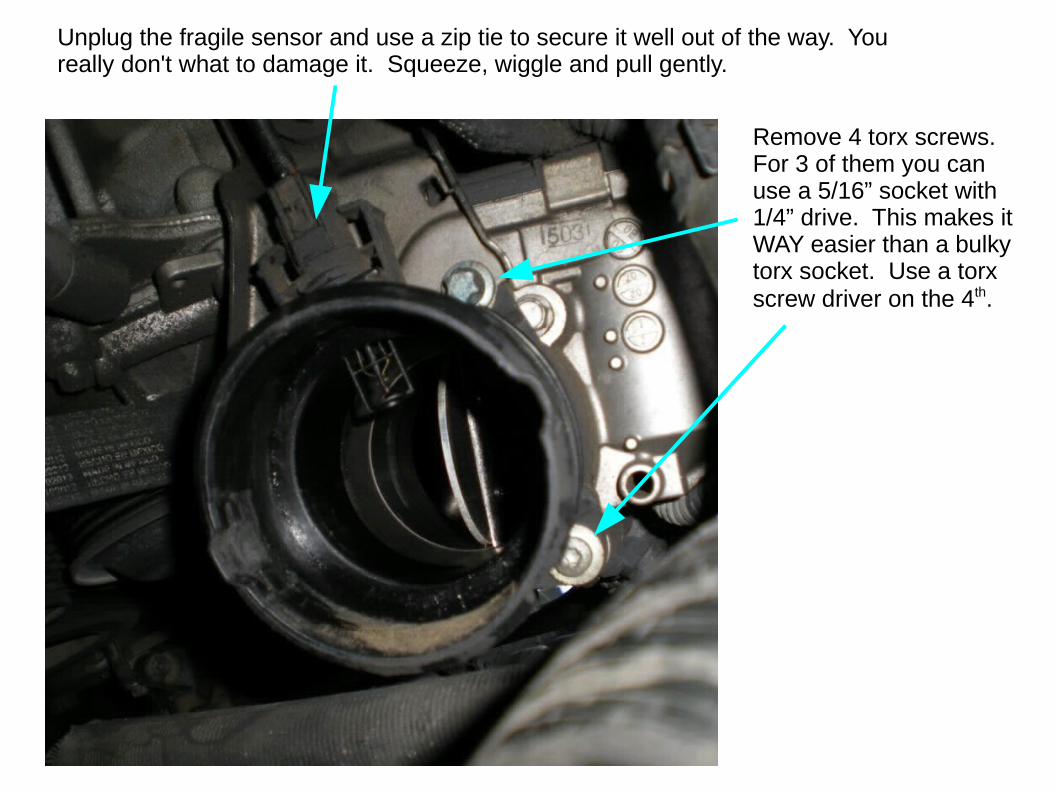
Unplug the fragile sensor and use a zip tie to secure it well out of the way. You really don't what to damage it. Squeeze, wiggle and pull gently.
Remove 4 torx screws.For 3 of them you can use a 5/16” socket with 1/4” drive. This makes it WAY easier than a bulky torx socket. Use a torxscrew driver on the 4th.
You do not have to remove the entirethrottle body, just this plastic extensiontube. Replace the gasket with the new one if you purchased it.
Gasket
This is what the fragilewhatchamacallit plug looks like.Looks pretty fragile to me.Probably expensive too.
See how I kinked the hose outof the way?
Remove this bolt to loosen this gizmo. Make nohissing sounds. Don't remove the gizmo! Just thebolt. The AC line is connected to this gizmo alongwith other lines. It needs to be loose enough towiggle but you don't want to abuse it.
Loosen the AC line by pulling this anchor out of its hole. The anchor is tough but it just pulls out. No need to detach it from the AC line.
Gizmo Bolt
Close up of anchor
Loosen the belt tensioner. Use a 17mm socket 1/2” drive and a breaker bar. Iconverted my socket to 1/2” with an adapter. Use the back side of a drill bit that is close to thesize of the hole to hold the tensioner open. You want the bit to be a close fit. You haveto crawl under the car to do this.
Hole
Put socket here
Don't mess withthis!
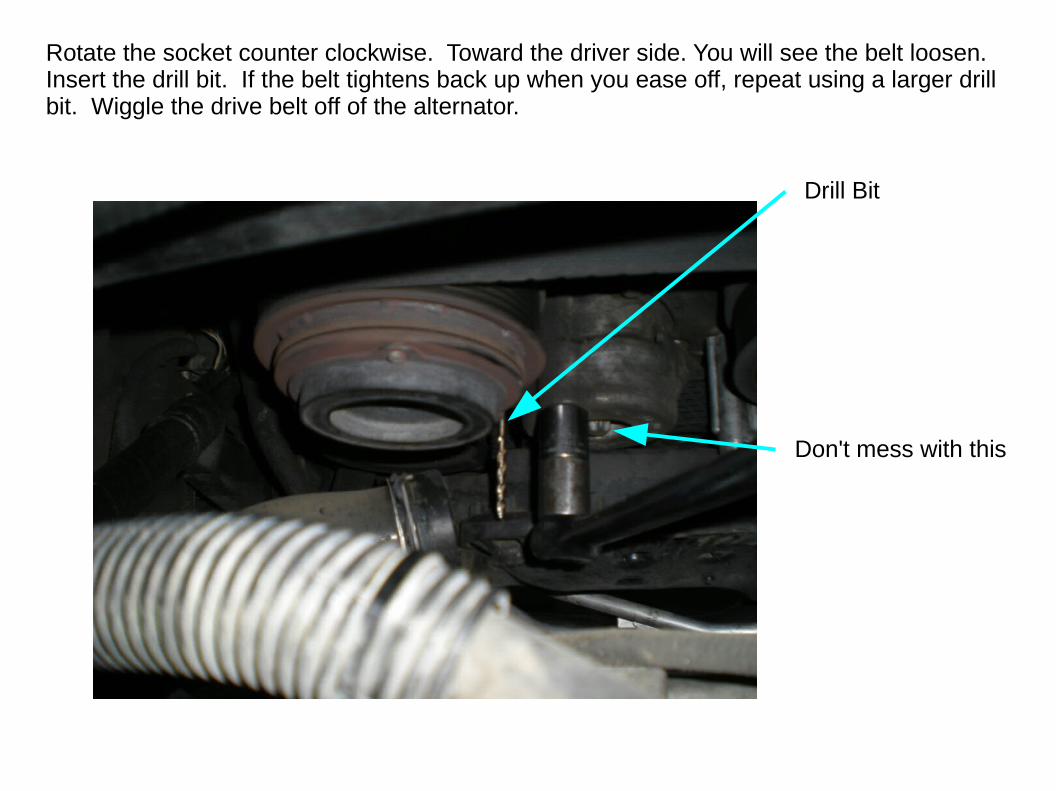
Rotate the socket counter clockwise. Toward the driver side. You will see the belt loosen. Insert the drill bit. If the belt tightens back up when you ease off, repeat using a larger drill bit. Wiggle the drive belt off of the alternator.
Drill Bit
Don't mess with this
Here is another view of the tension device. Socket goes here.
Arrow indicates direction Locking hole
Tension device
I had to slip the belt off of pulley 6 and 8 inorder to remove it from the alternator.Try not to let the belt slip off of anything else.
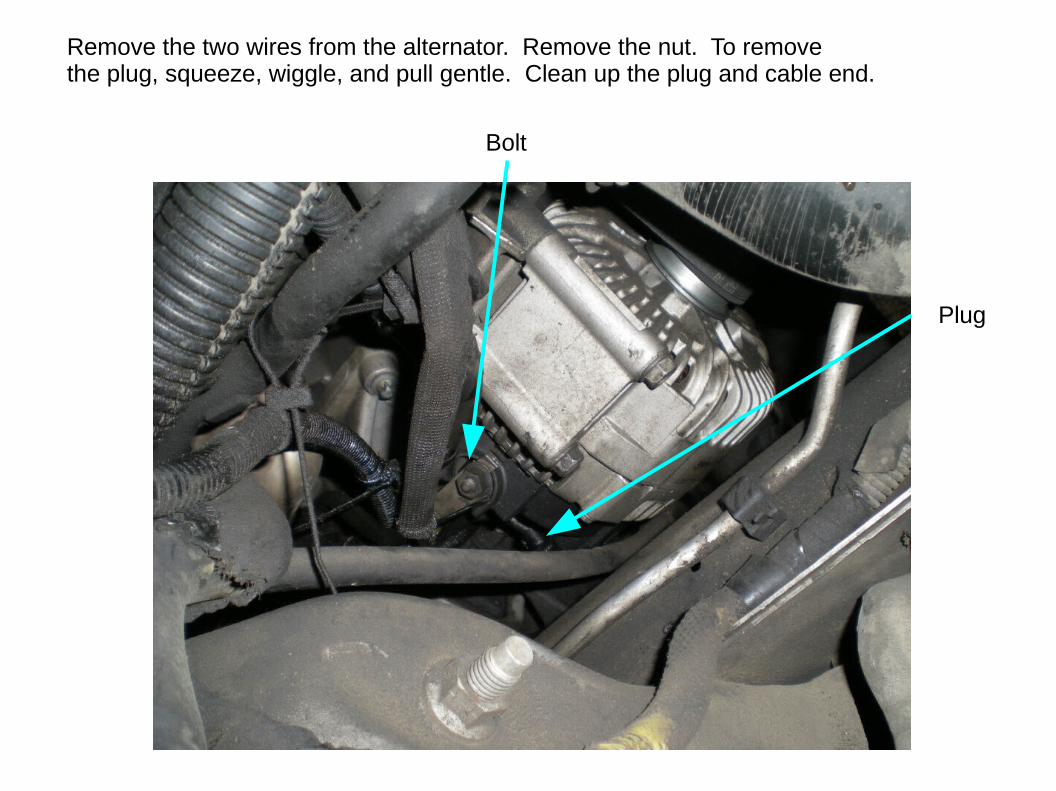
Remove the two wires from the alternator. Remove the nut. To removethe plug, squeeze, wiggle, and pull gentle. Clean up the plug and cable end.
Bolt
Plug
Loosen the top two alternator bolts alittle bit, but do not remove them yet.
From down below, reach up and removethe bottom two bolts. Try to get themout but you probably can not. The body isin the way.
Remove the top two bolts and the alternatorwill be loose. By wiggling it around, you canget all of the bolts completely out withouthaving to raise the engine up. Make it so.
If you have a splash guard, remove it.
Now for the big fight. Move the alternator forwardto clear the throttle body and nose it down whilerotating it to clear the AC line. Gently pull the ACline a little and keep wiggling around until you canback the alternator out of the hole. Keep workingit. It IS possible. I did this by my self without ahelper. Its heavy and it is a very tight fit but keepat it and you will get it.
Pay close attention to the exact position that it isin when you succeed.
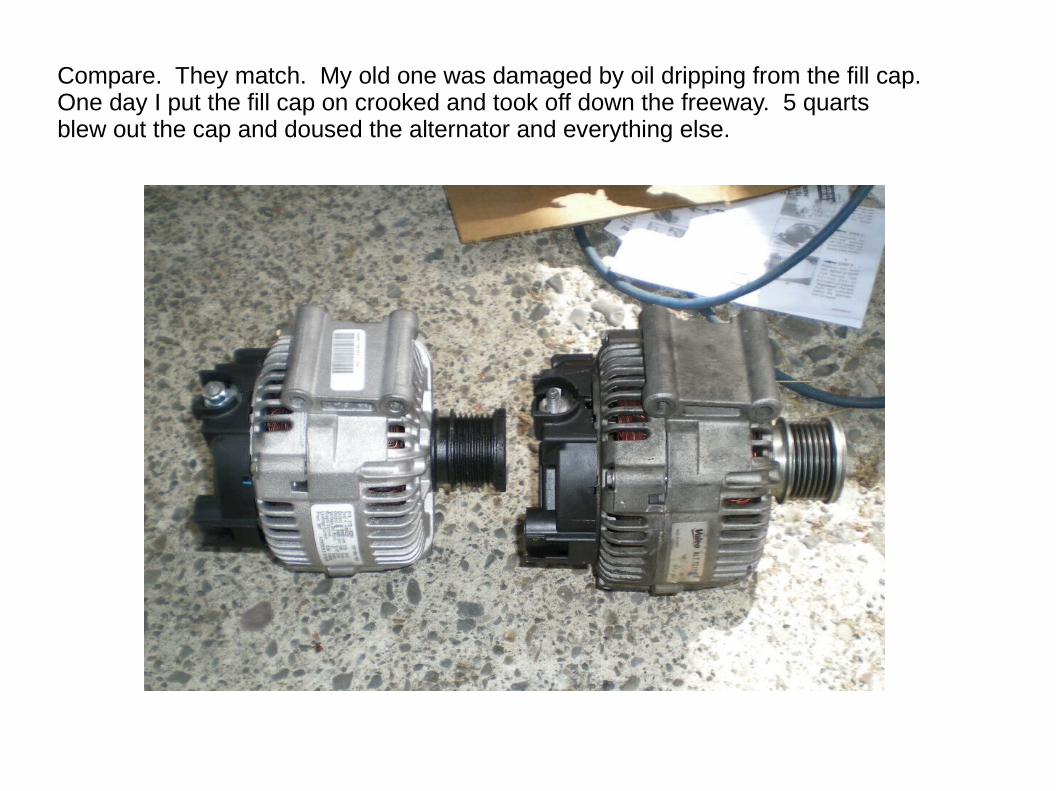
Compare. They match. My old one was damaged by oil dripping from the fill cap.One day I put the fill cap on crooked and took off down the freeway. 5 quartsblew out the cap and doused the alternator and everything else.
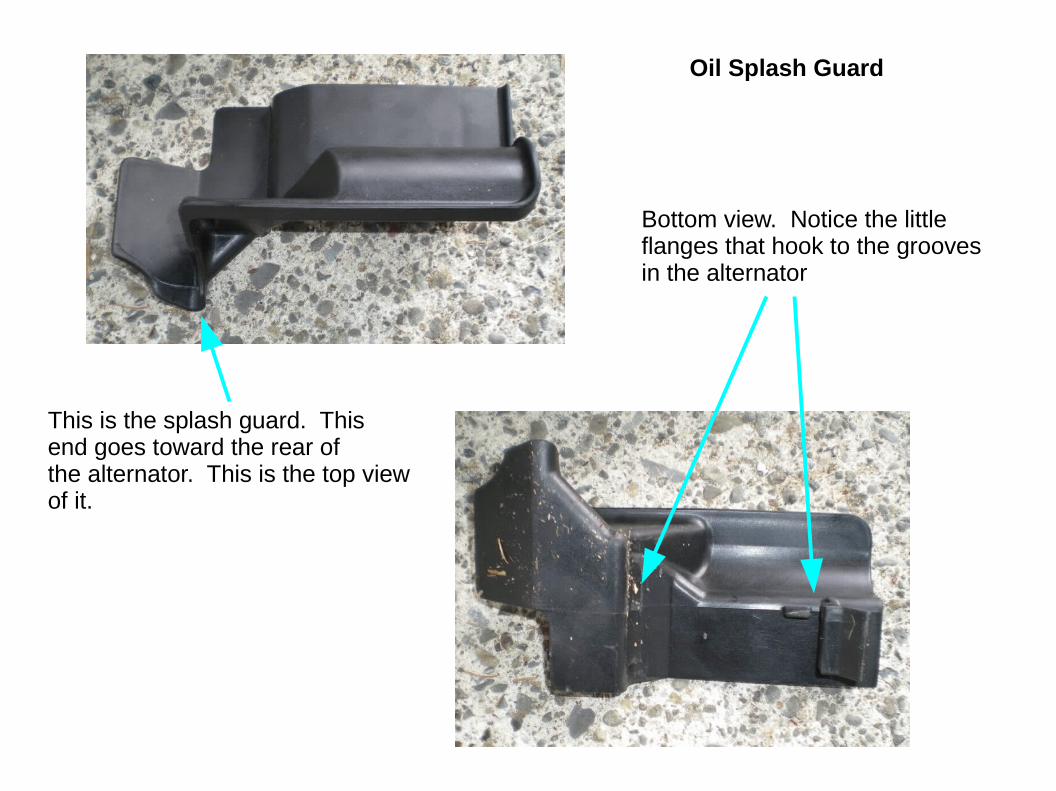
This is the splash guard. Thisend goes toward the rear ofthe alternator. This is the top viewof it.
Bottom view. Notice the littleflanges that hook to the groovesin the alternator
Oil Splash Guard
The splash guard fits like this.
Hook it in the back first, then snap the front down. It is easy to remove so feelfree to practice snapping it on beforeyou install the new alternator. To removeit unsnap the front first.
Don't install it yet... just practice.You can't get the alternator back inthe hole with the guard in place.
Wrestle the beast back into place starting withthe position that you carefully noted when youremoved it. I goofed and put mine in upside down, then it was very hard to rotate it...but possible.
Place the all the bolts in the their holes bywiggling the beast around to get them in.When they are all in, barely start the twotop ones. Then start the bottom ones.Then tighten them all evenly. I do not havethe torque but they were very tight. Use a short 13mm wrench to tighten them. Don't overdo it.
Snap the splash guard into place.Replace the drive belt and takethe drill bit out of the tensioner.
Put everything back in reverse order.
Pat yourself on the back. You probablysaved about $400.00.