254
Oracle Project Resource Management Implementation and Administration Guide Release 1.0 May, 2001 Part No. A90320-01

Oracle Project Resource Management
Implementation and Administration Guide
Release 1.0
May, 2001
Part No. A90320-01

Oracle Project Resource Management Implementation and Administration Guide, Release 1.0
Part No. A90320-01
Copyright © 2001, Oracle Corporation. All rights reserved.
Primary Author: Juli Anne Tolley
Contributing Authors: Nalin Chouhan, Jason Hardy-Smith, Dinakar Hituvalli, Shreekar Inamdar, Sanjay Kumar Kannojia, Ramesh Krishnamurthy, John D. May, Hamid Mirlohi, Vijay Ranganathan, Emma Selby, Selva Sivaramakrishnan, Mary Sun, Abhishek Uppal, Tianyi Wang
Contributors: Janet Buchbinder, Angela Chen, Rupal Fadia, Neeraj Garg, Danielle Hafdal, Jeanne Lowell, Johnson Paulraj, Mark Rowe
The Programs (which include both the software and documentation) contain proprietary information of Oracle Corporation; they are provided under a license agreement containing restrictions on use and disclosure and are also protected by copyright, patent, and other intellectual and industrial property laws. Reverse engineering, disassembly, or decompilation of the Programs is prohibited.
The information contained in this document is subject to change without notice. If you find any problems in the documentation, please report them to us in writing. Oracle Corporation does not warrant that this document is error free. Except as may be expressly permitted in your license agreement for these Programs, no part of these Programs may be reproduced or transmitted in any form or by any means, electronic or mechanical, for any purpose, without the express written permission of Oracle Corporation.
If the Programs are delivered to the U.S. Government or anyone licensing or using the programs on behalf of the U.S. Government, the following notice is applicable:
Restricted Rights Notice Programs delivered subject to the DOD FAR Supplement are "commercial computer software" and use, duplication, and disclosure of the Programs, including documentation, shall be subject to the licensing restrictions set forth in the applicable Oracle license agreement. Otherwise, Programs delivered subject to the Federal Acquisition Regulations are "restricted computer software" and use, duplication, and disclosure of the Programs shall be subject to the restrictions in FAR 52.227-19, Commercial Computer Software - Restricted Rights (June, 1987). Oracle Corporation, 500 Oracle Parkway, Redwood City, CA 94065.
The Programs are not intended for use in any nuclear, aviation, mass transit, medical, or other inherently dangerous applications. It shall be the licensee's responsibility to take all appropriate fail-safe, backup, redundancy, and other measures to ensure the safe use of such applications if the Programs are used for such purposes, and Oracle Corporation disclaims liability for any damages caused by such use of the Programs.
Oracle is a registered trademark, and Oracle Project Resource Management, Oracle Projects, Oracle Human Resources, and Oracle Internet Expenses are trademarks or registered trademarks of Oracle Corporation. Other names may be trademarks of their respective owners.
Contents
Send Us Your Comments .................................................................................................................. xiii
Preface........................................................................................................................................................... xv
1 Introduction
Key Features......................................................................................................................................... 1-2Required Technology Stack .............................................................................................................. 1-3Implementation Planning ................................................................................................................. 1-4Determining the Deployment Method........................................................................................... 1-5
2 User Process Flows and Concepts
Defining a Project Team .................................................................................................................... 2-2Standard Task Flows .......................................................................................................................... 2-3Application Process Flows ................................................................................................................ 2-5
Creating Requirements ................................................................................................................ 2-5Performing a Resource Search .................................................................................................... 2-5Filling Requirements .................................................................................................................... 2-5Adding Assignments to Projects ................................................................................................ 2-6Creating Administrative Assignments...................................................................................... 2-6
3 Establishing Your Enterprise Structure
Setting Up Your Business Group Model ........................................................................................ 3-2Defining Organizations..................................................................................................................... 3-3
Understanding the Resource Operating Unit ................................................................... 3-3
iii
Defining Organizational Hierarchies ............................................................................................. 3-4Defining Jobs and Job Mapping ...................................................................................................... 3-5
Determining the Master Job Level ...................................................................................... 3-6Using the Job Level in Resource Searches.......................................................................... 3-6
4 Defining Your People
Understanding Resource Pool Benefits .......................................................................................... 4-2Defining Employees and Employee Assignments ....................................................................... 4-2
Defining Employees .............................................................................................................. 4-2Defining Employee Assignments........................................................................................ 4-3Defining Locations ................................................................................................................ 4-3
Setting Up Competencies .................................................................................................................. 4-4Defining Your Competence Structure ....................................................................................... 4-4Assigning Competencies ............................................................................................................. 4-6
Job Competencies .................................................................................................................. 4-6Role Competencies ................................................................................................................ 4-6Requirement Competencies ................................................................................................. 4-7Resource Competencies ........................................................................................................ 4-7Matching Resource and Requirement Competencies ...................................................... 4-7
5 Configuring Your Organization Security
Defining Your Security Strategy ...................................................................................................... 5-2Understanding Responsibility-Based Security............................................................................. 5-3
Defining User Level Access......................................................................................................... 5-3Project Members .................................................................................................................... 5-3Cross-Project User with View Access ................................................................................. 5-3Cross-Project User with Update Access ............................................................................. 5-4Authority at the Organization Level .................................................................................. 5-4
Understanding Role-Based Security ............................................................................................... 5-5Levels of Role-Based Security ..................................................................................................... 5-5Confirming Role-Related Profile Option Settings.................................................................... 5-5Seeded Roles .................................................................................................................................. 5-6
Project Manager ..................................................................................................................... 5-6Project Authority ................................................................................................................... 5-6Resource Authority ............................................................................................................... 5-6
iv

Utilization Authority ............................................................................................................ 5-7Forecast Authority................................................................................................................. 5-7
Seeded Responsibilities ............................................................................................................... 5-7Overview of Seeded Responsibility Function and Menu Access .......................................... 5-9Detailed Seeded Function Access by Responsibility ............................................................. 5-10Seeded Function Access by Menu............................................................................................ 5-12
Defining Organizational Authority .............................................................................................. 5-17Defining a Primary Contact ............................................................................................... 5-18Assigning Organizational Authority................................................................................ 5-18
Demonstrating a Security Check ................................................................................................... 5-19
6 Defining Your Project Roles
Defining Role Lists............................................................................................................................. 6-2Defining Role Controls ..................................................................................................................... 6-2Defining Roles .................................................................................................................................... 6-3
7 Defining Calendars and Schedules
Setting Up Calendars ......................................................................................................................... 7-2Creating Calendars and Defining Calendar Attributes .......................................................... 7-2
Defining Calendar Types ..................................................................................................... 7-2Defining Shift and Shift Patterns......................................................................................... 7-3Creating Calendar Exceptions ............................................................................................. 7-4Creating a Calendar .............................................................................................................. 7-4Assigning Shifts and Exceptions to Calendar ................................................................... 7-4
Changing the Calendar ................................................................................................. 7-4Establishing Default Calendars .................................................................................................. 7-5
Defining the Default Calendar for the Site ........................................................................ 7-5Defining Default Calendars for Organizations................................................................. 7-5
Assigning Calendars .................................................................................................................... 7-5Assigning Calendars to Projects.......................................................................................... 7-5Assigning Calendars to Resources...................................................................................... 7-6
Establishing the Availability Calculation ...................................................................................... 7-7Defining Timeline Options.......................................................................................................... 7-7
v

8 Defining the Project Environment
Creating Project Attributes ............................................................................................................... 8-2Establishing Probability Information............................................................................................. 8-3Defining Statuses and Status Profile Options .............................................................................. 8-4
Seeded Project Status Controls ................................................................................................... 8-5Seeded Requirement Statuses and Status Controls ................................................................. 8-5Seeded Assignment Statuses and Status Controls ................................................................... 8-6Seeded Candidate Statuses and Status Controls...................................................................... 8-7Seeded Assignment Approval Statuses..................................................................................... 8-8Status Profile Options .................................................................................................................. 8-9
PA: Starting Requirement Status......................................................................................... 8-9PA: Starting Assignment Status .......................................................................................... 8-9PA: Default Filled Requirement Status .............................................................................. 8-9PA: Default Starting Candidate Status ............................................................................... 8-9PA: Default Cancelled Requirement Status ....................................................................... 8-9PA: Default Cancelled Assignment Status......................................................................... 8-9
Overview of Predefined Workflows ............................................................................................. 8-10Initiating Deferred Workflow Processes ................................................................................. 8-10Seeded Assignment Approval Workflow Process................................................................. 8-11
Assignment Approval Workflow Item Type and Processes ......................................... 8-12Assignment Approval Workflow Notification Messages.............................................. 8-13
Assignment Schedule Statuses ................................................................................................. 8-14Assignment Approval Workflow Extensions......................................................................... 8-15
Assignment Approval Changes Extension...................................................................... 8-15Assignment Approval Notification Extensions .............................................................. 8-16
Seeded Candidate Workflow Processes .................................................................................. 8-19New Candidate .................................................................................................................... 8-19Candidate Declined............................................................................................................. 8-20
Candidate Notification Workflow Extension ......................................................................... 8-20Setting Up Your Self-Service Environment ................................................................................. 8-23
9 Implementing Resource Utilization
Defining Your Utilization Strategy ................................................................................................. 9-2Utilization Time Periods .............................................................................................................. 9-3Utilization Views .......................................................................................................................... 9-3
vi

Utilization Methods...................................................................................................................... 9-4Utilization Reporting ................................................................................................................... 9-4
Implementing Your Utilization Strategy........................................................................................ 9-5Determining Utilization Jobs ...................................................................................................... 9-5Establishing Utilization Categories and Work Types ............................................................. 9-6
Defining Utilization Categories........................................................................................... 9-6Creating Utilization Categories.................................................................................... 9-6Using Utilization Categories ........................................................................................ 9-6
Defining Work Types............................................................................................................ 9-7Creating Work Types..................................................................................................... 9-7Using Work Types ......................................................................................................... 9-8
Implementing Utilization Forecasting Functionality .............................................................. 9-9Establishing Unassigned Time Tracking................................................................................... 9-9Choosing Your Reporting Time Period..................................................................................... 9-9Granting Utilization Authority................................................................................................. 9-10
Review of Responsibilities ................................................................................................. 9-10Granting Organization Utilization Authority ................................................................. 9-11
Defining the Utilization Profile Options..................................................................................... 9-12
10 Implementing Financial Forecasting
Overview of the Financial Forecast Process and Calculations................................................. 10-2Financial Forecast Process ......................................................................................................... 10-2Forecast Calculations ................................................................................................................. 10-3
Calculating Revenue ........................................................................................................... 10-3Revenue Calculation for Projects Using Work-Based Distribution Rule ............. 10-4Revenue Calculation for Projects Using Cost-Based Distribution Rule............... 10-4Revenue Calculation for Projects Using Event-Based Distribution Rule............. 10-5
Implementing the Forecast Functionality .................................................................................... 10-6Defining a Job-Based Cost Rate Schedule ............................................................................... 10-6Defining Bill Rate Schedules ..................................................................................................... 10-7Updating Project Types with Employee and Job-Based Bill Rate Schedules .................... 10-7Defining Forecast-Related Profile Option............................................................................... 10-7Defining Periods ......................................................................................................................... 10-7Defining Unassigned Time Tracking....................................................................................... 10-8Defining Forecasting Options................................................................................................... 10-9
vii

Required Project Hours by GL Period: Team Role Detail ........................................... 11-15Required Project Hours by PA Period............................................................................ 11-16Required Project Hours by PA Period: Team Role Detail ........................................... 11-17Required Project Hours by Global Week ....................................................................... 11-17Required Project Hours by Global Week: Team Role Detail ...................................... 11-18Resource Capacity by GL Period .................................................................................... 11-19Resource Capacity by PA Period .................................................................................... 11-19Resource Capacity by Global Week................................................................................ 11-20Resource Schedule by GL Period .................................................................................... 11-21Resource Schedule by GL Period: Team Role Detail.................................................... 11-21Resource Schedule by PA Period .................................................................................... 11-22Resource Schedule by PA Period: Team Role Detail.................................................... 11-23Resource Schedule by Global Week ............................................................................... 11-24Resource Schedule by Global Week: Team Role Detail ............................................... 11-25
List of Financial Business Area Folders................................................................................. 11-27Financial Organization Rollup Groups .......................................................................... 11-27Project Managers ............................................................................................................... 11-27Fiscal Years ......................................................................................................................... 11-28Fiscal Quarter Numbers ................................................................................................... 11-28Sales Pipeline by GL Period............................................................................................. 11-28Sales Pipeline by PA Period............................................................................................. 11-29Lookup for Class Categories............................................................................................ 11-30
List of Business Views.............................................................................................................. 11-31Security Overview .......................................................................................................................... 11-32Discoverer Workbooks .................................................................................................................. 11-33
Required Project Hours (PAREQPRJ).................................................................................... 11-33Required Project Hours by GL Period............................................................................ 11-34Required Project Hours by PA Period............................................................................ 11-35Required Project Hours by Global Week ....................................................................... 11-37
Scheduled Resource Hours (PASCHRES)............................................................................. 11-39Scheduled Resource Hours by GL Period ..................................................................... 11-39Scheduled Resource Hours by PA Period ..................................................................... 11-41Scheduled Resource Hours by Global Week................................................................. 11-44
Available Resource Hours (PAAVLRES).............................................................................. 11-46Available Resource Hours by GL Period....................................................................... 11-47
ix

Available Resource Hours by PA Period ....................................................................... 11-48Available Resource Hours by Global Week .................................................................. 11-50
Overcommitted Resource Hours (PAOVCRES)................................................................... 11-52Overcommitted Resource Hours by GL Period ............................................................ 11-53Overcommitted Resource Hours by PA Period ............................................................ 11-55Overcommitted Resource Hours by Global Week ....................................................... 11-58
Sales Pipeline Workbook (PASALPIP) .................................................................................. 11-60Sales Pipeline by Fiscal Year ............................................................................................ 11-61 Sales Pipeline by Fiscal Quarter ..................................................................................... 11-62Sales Pipeline by GL Period ............................................................................................. 11-64Sales Pipeline by PA Period ............................................................................................. 11-66
Discoverer Query Tips ................................................................................................................... 11-68
12 Maintaining Your Data
Understanding Data Processing..................................................................................................... 12-2Deferred Forecast Item Creation Process ................................................................................ 12-3
Understanding the Impact of Changes to HRMS-Based Information ................................... 12-4Changing Job Information......................................................................................................... 12-4
Utilization Calculation................................................................................................. 12-4Changing Organization Information ....................................................................................... 12-4Changing Organizational Hierarchy Information ................................................................. 12-5Changing Resource Information .............................................................................................. 12-5Changing an Assignment .......................................................................................................... 12-5
Maintaining PRM Resources .......................................................................................................... 12-6Running a Process to Copy Resources..................................................................................... 12-6
Maintaining Schedules .................................................................................................................... 12-7Updating Schedules with Calendar Changes......................................................................... 12-7Updating Schedules and Timelines to Reflect a New Calendar .......................................... 12-8
Maintaining Utilization Values...................................................................................................... 12-9Maintaining Forecast Information .............................................................................................. 12-10
Running a List of Forecast Exceptions................................................................................... 12-10Reprocess Forecast Exceptions ............................................................................................... 12-11
A Implementation Steps Checklist
Overview of the Implementation Environment ........................................................................... A-2
x

Oracle Applications Implementation Wizard .......................................................................... A-2Setting Up Underlying Oracle Applications Technology....................................................... A-2
Implementation Considerations ...................................................................................................... A-3Overview of the Oracle Projects Implementation Checklists.................................................... A-4Oracle Projects Implementation Checklist .................................................................................... A-5Oracle Applications Implementation Checklist for Oracle Projects Integration................. A-24
Glossary
Index
xi

xii
Send Us Your Comments
Oracle Project Resource Management Implementation and Administration Guide, Release 1.0
Part No. A90320-01
Oracle Corporation welcomes your comments and suggestions on the quality and usefulness of this document. Your input is an important part of the information used for revision.
■ Did you find any errors?■ Is the information clearly presented?■ Do you need more information? If so, where?■ Are the examples correct? Do you need more examples?■ What features did you like most?
If you find any errors or have any other suggestions for improvement, please indicate the document title and part number, and the chapter, section, and page number (if available). You can send com-ments to us in the following ways:
■ FAX: (650) 506-7862 Attn: Oracle Financial Applications Documentation■ Postal service:
Oracle Corporation Financial Applications Documentation, Oracle Project Resource Management500 Oracle Parkway, M/S 3op11Redwood Shores, CA 94065USA
If you would like a reply, please give your name, address, telephone number, and (optionally) elec-tronic mail address.
If you have problems with the software, please contact your local Oracle Support Services.
xiii

xiv

Preface
This preface provides you with information on the organization of this guide.
Intended AudienceThe intended audience for the material presented in this guide is system administrators and persons responsible for performing the duties of implementing, configuring, and administrating the Oracle Project Resource Management application.
StructureThe organization of this guide is as follows:
Chapter 1, "Introduction" describes the purpose and key features of the product. It also covers the required technology stack and implementation considerations.
Chapter 2, "User Process Flows and Concepts" discusses the various user and process flows within Oracle Project Resource Management.
Chapter 3, "Establishing Your Enterprise Structure" covers how to set up your organization and its various components such as business groups and organizational hierarchies.
Chapter 4, "Defining Your People" discusses how to define the various resource attributes and how to establish your resource pool.
Chapter 5, "Configuring Your Organization Security" describes responsibility-based security and how to establish a security structure for your organization.
Chapter 6, "Defining Your Project Roles" discusses how to define roles and role attributes.
xv

Chapter 7, "Defining Calendars and Schedules" describes calendars and schedules, and covers how to define the associated attributes. It also describes how to maintain the calendars and schedules so they stay current.
Chapter 8, "Defining the Project Environment" describes the attributes associated with projects, setting up probability, establishing the status and workflow structures, and setting up the self-service environment.
Chapter 9, "Implementing Resource Utilization" describes how to set up utilization functions for tracking your resource utilization.
Chapter 10, "Implementing Financial Forecasting" describes how to set up forecasting functions so you can perform forecasting on your project resources.
Chapter 11, "Setting Up for Reporting Capabilities" covers how to set up reporting functions in order for you to perform reporting on your projects and resources. This chapter also describes the seeded reports.
Chapter 12, "Maintaining Your Data" discusses the various processes you must run in order to maintain accuracy in your data.
Appendix A, "Implementation Steps Checklist" provides a step-by-step checklist for implementing the Oracle Project Resource Management application.
This guide also includes a Glossary and an Index.
Related DocumentsThe chapters of this guide provide basic and product-related information for setting up, configuring, and maintaining information such as your enterprise structure, resources, calendars, and schedules. For additional information, you are referred to other sources of information as appropriate for the topic. Depending upon which application you are using to perform the set up, your reference source may differ.
These sources include:
■ Oracle Projects User Guide
■ Implementing Oracle HRMS
■ Oracle Projects 11i Release 11.5.3/Mini Pack B User Guide Supplement
■ Documentation Update for Patch Numbers 1383905 and 1377992 - Global Competencies
■ Oracle Applications System Administrator’s Guide
■ Oracle Applications Developer’s Guide
xvi

Documentation AccessibilityOracle’s goal is to make our products, services, and supporting documentation accessible to the disabled community with good usability. To that end, our documentation includes features that make information available to users of assistive technology. This documentation is available in HTML format, and contains markup to facilitate access by the disabled community. Standards will continue to evolve over time, and Oracle is actively engaged with other market-leading technology vendors to address technical obstacles so that our documentation can be accessible to all of our customers. For additional information, visit the Oracle Accessibility Program web site at http://www.oracle.com/accessibility/.
ConventionsThe following conventions are used in this guide:
Since Oracle Project Resource Management is a self-service application, references to a page within the application are specific to a self-service Web page. Any references to forms refers to forms within the Oracle Projects, Oracle Human Resources Management System (HRMS), or Oracle CRM applications.
Convention Meaning
. . .
Vertical ellipsis points in an example mean that information not directly related to the example has been omitted.
. . . Horizontal ellipsis points in statements or commands mean that parts of the statement or command not directly related to the example have been omitted
boldface text Boldface type in text indicates a term defined in the text, the glossary, or in both locations.
< > Angle brackets enclose user-supplied names.
[ ] Brackets enclose optional clauses from which you can choose one or none.
xvii

xviii
Introduc
1
IntroductionOracle Project Resource Management is a self-service application to manage the deployment and capacity of your resources in a global environment. You use this application to manage your project resource needs, project profitability, and organization utilization, by locating and deploying qualified and available resources to your projects across your global, extended enterprise.
Using this application, project managers, resource managers, and staffing managers throughout your enterprise can manage their resources and more effectively communicate their needs to one another.
This chapter discusses the key features of the Oracle Project Resource Management application and considerations to review in your implementation process through the following topics:
■ Key Features
■ Required Technology Stack
■ Implementation Planning
■ Determining the Deployment Method
tion 1-1
Key Features
Key FeaturesThe Oracle Project Resource Management application includes features such as:
■ Role-based security
■ Detailed requirement definition
■ Search functions for:
■ matching qualified resources to open requirements
■ locating requirements for which resources may nominate themselves
■ Tracking candidates for filling requirements
■ Automated approval processing
■ Detailed schedule management of your project team, including timeline views
■ Utilization reporting on your resource assignments from the individual resource level to the organization level
■ Capabilities for performing analysis and financial forecasts on your projects
■ Simple Web interface for easy access by all project stakeholders
1-2 Oracle Project Resource Management Implementation and Administration Guide

Required Technology Stack
Required Technology StackPrior to installing the Oracle Project Resource Management application, you must install other software components that build a base. This base provides the structure for the Oracle Project Resource Management application.
The required base installation prior to applying the PRM v1.0 patch is:
■ Oracle Applications 11.5.3
■ Oracle Applications Self-Service Framework 5.2.3
You must upgrade your Oracle Applications Web Tier environment to include the Self-Service Framework technology stack. The instructions for upgrading your Oracle Applications Environment to use the Oracle Applications Self-Service Framework are included with the framework patch in README-Config-FAQ-Apps-HTTPServer.html located under the top level patch directory. Please complete all steps in those instructions before proceeding with the installation of Oracle PRM.
For additional information on installing these products and patches, you can refer to the following sources:
■ Installing Oracle Applications, Release 11i
■ Associated readme files for each patch
Introduction 1-3

Implementation Planning
Implementation PlanningSince Oracle Project Resource Management is integrated with Oracle Projects, Oracle Human Resources Management System (HRMS), and Oracle CRM, many interdependencies exist. A large portion of the information you must enter for your implementation is actually loaded through these applications. Therefore, you should map out your implementation plan. You can use the checklist provided in Appendix A as a starting point for this plan.
If this is also your initial implementation of Oracle Projects or Oracle HRMS, you must determine your strategy for setting up the organization of your enterprise from top down prior to actually implementing any part of Oracle Project Resource Management.
All organization and resource-specific data is stored in Oracle HRMS tables. As most of these tables are shared, you can enter this information using Oracle HRMS and access the information through other Oracle application such as Oracle Projects.
However, if your business does not currently use Oracle HRMS, you can define the resource data through Oracle Projects. For more information, see Chapter 17, "Oracle Projects Setup and Implementation," in the Oracle Projects User Guide, Volume 3.
1-4 Oracle Project Resource Management Implementation and Administration Guide
Determining the Deployment Method
Determining the Deployment MethodPrior to implementing Oracle Project Resource Management, you must determine how you want to handle project staffing. You have three possible approaches in addressing who manages the task of project staffing:
■ Centralized
The centralized approach uses staffing analysts (resource analysts.) These analysts are responsible for managing requirements and assignments for all the projects of an organization.
■ Decentralized
The decentralized approach uses project managers, or project assistants, who work with resource managers to fill project requirements.
■ Combination
The combination approach is used by companies who have all these roles interacting in the effort to fill project requirements and to obtain the highest utilization of the available resources.
The method you choose effects how you roll out the implementation of the application, how you establish training plans, and determines your security strategy.
Introduction 1-5

Determining the Deployment Method
1-6 Oracle Project Resource Management Implementation and Administration Guide

User Process Flows and Con
2
User Process Flows and ConceptsThe Oracle Project Resource Management application provides functionality to meet the needs of several key user scenarios, each with its own set of responsibilities and related task flows. You can adapt these scenarios into your environment, or modify them accordingly.
Understanding the process flows and user concepts of the application provides you with the appropriate knowledge for making key decisions in for your implementation.
This chapter covers the following topics:
■ Defining a Project Team
■ Standard Task Flows
■ Application Process Flows
cepts 2-1

Defining a Project Team
Defining a Project TeamA project team has two layers: the delivery team and the extended team. The delivery team consists of all the key members who perform the project tasks. These members are scheduled and tracked within the organization that owns the project. The extended team consists of team players outside of the project team such as individuals within the organization performing administrative duties and client participants. These players interact with the team members, but are not managed within the organization owning the project.
The following diagram demonstrates how the delivery team and extended team own requirements and assignments.
Administrative assignments are not included in the domain of the delivery team as these assignments are typically tracked on an indirect/administrative project. Therefore, to distinguish these assignments from delivery assignments, they are shown outside the framework of the project team. Administrative projects can have project managers who manage these assignments, but having a project manager is not a requirement.
Delivery Team (Scheduled Members)
Extended Team (Non-Scheduled Members)
RequirementsDeliveryAssignments
Administrative Assignments
2-2 Oracle Project Resource Management Implementation and Administration Guide

Standard Task Flows
Standard Task FlowsYou can divide the overall process flow of Oracle Project Resource Management into three segments: Demand, Supply, and Financial Management. The borders dividing these segments are not definite. In fact, many of the tasks are shared between segments.
The segments demonstrate how Oracle Project Resource Management addresses the different, but related, tasks and viewpoints needing access to project staffing data. Different needs coming together to use the same data.
The following diagram illustrates how the different needs of the users can use the same data through process flows. It also provides the segment division of task flows and the various user roles that might use these segments.
The objectives of the role a user is playing on a project drives the tasks the user must perform. The implementation of Oracle Project Resource Management provides seeded roles to which you can add your own to suit your business needs.
Create Project
ManageAdministrativeAssignments
NominateCandidates
ManageResourceSchedules
SearchRequirements
AssignResourceConfirmed
ApproveResource
Requirements
AssignResource
Provisional
CreateCandidates
ResourceSearch
Create /Maintain
Requirement
MaintainAssignment
Generate Forecast
MaintainResource
Repository
StaffingManager
Team Member
ResourceManager
ProjectManager
BusinessManager
User Process Flows and Concepts 2-3

Standard Task Flows
In the above diagram, typical user roles are associated with the applicable process segments. For example, a Financial Analyst will perform tasks related to financial management, and a Project Manager will concentrate on tasks relating to project staffing from the demand side.
In general, you have the following typical user roles in addressing the issues of project staffing:
■ Project Manager
A project manager initiates the creation of the project and requirements. In order to fill the requirements, the project manager must perform searches from which candidates can be identified. Once a candidate is selected, a provisional assignment is created for the resource. The provisional assignment is forwarded to the resource manager for approval. If the project manager wants specific persons to fill requirements, the search step can be bypassed and direct provisional assignments can be made.
■ Staffing Manager
Staffing managers generally fill the supply side of the task flows as they have the access to all the resource data and manage the schedules and utilization of the resources. Therefore, these persons know the availability of their resources. Staffing managers can approve assignments given the proper authority, as well as, search for candidates, and fill open requirements.
■ Resource Manager
Resource managers confirm or deny resource assignments, and manages the schedules and utilization of their direct reports (resources.)
■ Team Member
Team members are the resources. They can manage their own competence profiles and work information through the shared professional model of Self-Service Human Resources. Team members can also view their schedule of project assignments and search for requirements to nominate themselves as candidates.
2-4 Oracle Project Resource Management Implementation and Administration Guide

Application Process Flows
Application Process FlowsThe process flows of the Oracle Project Resource Management application entail activities such as creating a requirement, electing a person as a candidate, and creating assignments. Based on the responsibility of the user, these process flows may vary.
This section describes some of the basic process flows of the application.
Creating RequirementsThrough Oracle Project Resource Management, you have the ability to define the requirements for a given project. The purpose of these requirements is to provide a representation of the resources that are needed to complete the project. For example, you have a project to install a product at a customer site. This project may require two DBAs and two Implementation Consultants skilled in the product to be installed. Without knowing the specific individuals that will fill these required roles, you can identify information such as what level of experience is necessary, where the work will be carried out, and approximately how long each position is required. You define this information for each requirement which simplifies the process of identifying potential resources to fill these roles.
Performing a Resource SearchWhen performing a resource search for a requirement, the dates of the requirement are compared with the availability of the resource. If these time periods match, the resource is considered a candidate for the requirement given the other search criteria for the requirement also matches.
Filling RequirementsFilling a requirement involves either directly identifying a known resource, or searching the resource repository to find suitable resources.
When a requirement is filled, an assignment is created. The assignment identifies the period of time a specific resource will fill a specific role. However, a provisional assignment must go through an approval process that you configure as workflow-enabled. Approved assignments appear on the schedules of the assigned resource and the project. This assignment to the resource reduces the capacity and availability of the resource.
User Process Flows and Concepts 2-5
Application Process Flows
Adding Assignments to ProjectsAn assignment is a filled work position on a project associated with a specific resource for a designated period of time. An assignment can have various statuses as required such as proposed, provisional, and confirmed.
Upon selecting the team role for the assignment, default values are provided for the assignment name and job levels. Values for the assignment location and calendar are retrieved from the associated project. You can change any of these defaults as necessary.
After you have entered all the desired assignments, click Save and Submit to submit the assignments for approval. This process prompts you for the approvers of the assignment and then, forwards the assignment through the approval process.
Creating Administrative AssignmentsAn administrative assignment represents a non-work activity and is tracked against an administrative project. You can use such assignments to block off time on your resource schedules. The following examples demonstrate the functionality of administrative assignments:
■ vacation time
■ internal training
■ project management duties
■ personal holiday
■ sick time
■ jury duty
You may want to track such assignments because they consume the work hours of your resources, and therefore, affect availability, financial forecasting, and resource utilization.
2-6 Oracle Project Resource Management Implementation and Administration Guide
Establishing Your Enterprise Stru
3
Establishing Your Enterprise StructureThe structure of your enterprise determines how to define your business groups, organizations, hierarchies, jobs, and job groups. You must establish these key pieces of information prior to implementing Oracle Project Resource Management.
If you have already set up some of these features in a previous implementation of Oracle Projects or Oracle Human Resources, you can skip the respective sections of this chapter. However, you may want to review the information to ensure it corresponds to the data you want to use with Oracle Project Resource Management.
This chapter covers the following topics:
■ Setting Up Your Business Group Model
■ Defining Organizations
■ Defining Organizational Hierarchies
■ Defining Jobs and Job Mapping
cture 3-1
Setting Up Your Business Group Model
Setting Up Your Business Group ModelA Business Group is a special class of organization. Every business group can have its own set of default values, with its own internal organizations, grades, jobs, positions, payrolls, employees, applicants, compensations, competence structures, and benefits.
In setting up your enterprise structure, you can establish one business group or divide it into multiple business groups. If you set up more than one business group, the associated data, such as organizations and employees, is partitioned accordingly. Establishing an organization as a business group is not reversible, therefore, you should plan your business group setup carefully.
For more information on business groups and structuring your enterprise, see "Adapting or Creating a New Business Group," in Using Oracle HRMS – The Fundamentals.
PrerequisitesYour enterprise structure strategy plan outlines your business groups. Prior to actually setting up your business groups, you must complete the following tasks:
■ Set the HR: Cross Business Group Profile as described in the Oracle Projects 11i Release 11.5.3/Mini Pack B User Guide Supplement.
■ Define the six key flexfield structures outlined in "Implementation Steps" in Documentation Update for Patch Numbers 1383905 and 1377992 - Global Competencies.
Note: If you plan to set up project roles to use default jobs, you must enable CBGA.
3-2 Oracle Project Resource Management Implementation and Administration Guide

Defining Organizations
Defining OrganizationsOrganizations are the basic work structure of any enterprise. They represent the functional, management, or reporting groups for individual business groups or globally for your entire enterprise.
You can choose any organization, but typically, you use expenditure organizations to track project resource-related expenses. Expenditure/Event organizations can own project events, incur expenditures, and hold budgets for projects. To enable these capabilities in the organization, you must perform the following tasks when defining an organization:
■ Enable the Project Expenditure/Event organization classification.
■ Define a default operating unit for the organization in the Additional Information section. This step causes all resources belonging to this organization to inherit the specified operating unit and calendar as their default operating unit and calendar.
■ Enable the HR Organization classification. This task is necessary in order to have the ability to assign resources (people) to the organization.
■ Attach the organization to the Expenditure hierarchy assigned to the operating unit using the Setup Implementation Options form.
For instructions on performing these tasks, refer to the following sources:
■ "Creating an Organization" in Using Oracle HRMS – The Fundamentals.
■ "Entering Organization Classifications" in Using Oracle HRMS – The Fundamentals
■ "Entering Additional Information" in Using Oracle HRMS – The Fundamentals
Understanding the Resource Operating UnitEvery resource, employees and contractors alike, is associated with an operating unit for security and forecasting reasons. This operating unit is derived from the organization operating unit. The operating unit of the resource is active for the duration of an assignment. It drives forecasting based on the transfer price defined for the operating unit if the resource is assigned on a project under a different operating unit, in other words, a borrowed resource.
Each time the employee assignment changes or if the default operating unit originally set up for the employee changes, the Project Resource Management application updates the resource operating unit. A history is maintained for
Establishing Your Enterprise Structure 3-3

Defining Organizational Hierarchies
record-keeping purposes and allows date-specific operating unit defaults for the resource.
Defining Organizational HierarchiesAn organization hierarchy provides the structure of the relationships between your organizations. Depending on your business needs, you can define one hierarchy or multiple hierarchies for the following purposes:
■ project-owning organizations
■ expenditures
■ reporting
■ project burdening hierarchies for each business group
You can also set up global organization hierarchies spanning across multiple business groups if you are operating in a cross-business group environment (the HR: Cross Business Group profile option is set to yes.)
For more information on organization hierarchies, refer to the following sources:
■ "Organization Hierarchy" in the Oracle Projects User Guide
■ "Define Global Organization Hierarchies" in the Oracle Projects 11i Release 11.5.3/Mini Pack B User Guide Supplement)
■ "Creating Organization Hierarchies" in Using Oracle HRMS - The Fundamentals
3-4 Oracle Project Resource Management Implementation and Administration Guide

Defining Jobs and Job Mapping
Defining Jobs and Job MappingEach person in Oracle HRMS can have only one primary job assignment. However, HR jobs are often too granular for the purposes of project jobs. For example, you may have an HR job defined as Consultant - Level 2, but for the purposes of making project assignments, you only want to see Consultant. Oracle Projects provides you with the ability to map the HR-defined jobs to the project-related jobs.
The following table provides the tasks you should complete categorized by the associated Oracle application.
You can enter this information directly through Project Resource Management using the Project Super User responsibility, if you do not have Oracle HRMS or Oracle Projects.
For more information and instructions for setting up these job-related attributes, refer to the following sources:
■ Implementing Oracle HRMS
■ Oracle Projects User Guide
■ the Oracle Projects 11i Release 11.5.3/Mini Pack B User Guide Supplement
Application Task
In Oracle HRMS ... ■ Define Job Groups in Oracle HRMS. Job groups enable you to classify certain types of work.
■ Define Jobs in Oracle HRMS. Jobs are the precise assignment the employee fills.
Note: If you have shared HR, you can access these forms in Oracle Projects.
In Oracle Projects ... ■ Define Job Relationships (Job Mapping) in Oracle Projects. Job Mapping enables you to link similar jobs in different job groups. (For details on mapping, see the Oracle Projects 11i Release 11.5.3/Mini Pack B User Guide Supplement.)
■ Select Job Groups for Resource Lists in Oracle Projects.
■ Select Job Groups for Project Templates in Oracle Projects. You can assign a Billing Job Group to contract projects and project templates.
Note: Jobs and job groups are business group-specific.
Establishing Your Enterprise Structure 3-5

Defining Jobs and Job Mapping
Determining the Master Job LevelValid job levels are defined through the sequence number of grades associated to the master jobs in the master job group. Each master job has a job level which is derived from the job grade. Each HR job of the resource maps back to a master job and retrieves the job level of the master job as well. This job level defaults to the employee (resource) through the HR primary assignment.
You can have multiple job levels of a master job by assigning multiple grades. However, since Project Resource Management uses the job level for resource searches, you should only define one job level for each master job. If multiple levels for a master job are defined, the resources assigned HR jobs which map to the master job will inherit the highest job level.
Using the Job Level in Resource SearchesEach project requirement has defined minimum and maximum job levels for the purpose of resource searching. During a search, the job levels of the resources are compared to the minimum and maximum job levels of the requirement. If the job level of a resource falls between the minimum and maximum job levels of the requirement, the resource is considered a possible match for the requirement given other search criteria are met.
3-6 Oracle Project Resource Management Implementation and Administration Guide

Defining Your Pe
4
Defining Your PeopleManaging your resource pool not only includes understanding the organization, the people, and their assignments, it begins to enter the realm of performing project forecasts and managing resource utilization. The skill sets and availability of your resources compose the basic foundation you need in order to perform these valuable management functions. All this information developed properly can offer you the ability to manage your resources effectively and efficiently.
The structure of your enterprise determines how your resources are distributed, how competencies are shared and tracked, and how calendars and schedules are created and maintained. Therefore, you should establish this structure in your system before you delve into setting up your resources. For more information on the organization structure, see Chapter 3, "Establishing Your Enterprise Structure".
This chapter provides information and instructions on establishing the resource building blocks through the following topics:
■ Understanding Resource Pool Benefits
■ Defining Employees and Employee Assignments
■ Setting Up Competencies
ople 4-1

Understanding Resource Pool Benefits
Understanding Resource Pool BenefitsEach individual within your resource pool has various attributes such as personal information, work patterns, location and competencies defined. Through entering this information as accurately as possible, you gain the following benefits:
■ A single resource pool
■ Secured single-source access to information such as personal information, resume, and competencies
■ Precise requirement matching capabilities
■ Forecasting based on resource needs
■ Resource utilization manageability
Defining Employees and Employee AssignmentsAfter establishing your enterprise structure, you can add your employees and their respective primary assignments.
Resources are assigned to organizations by creating assignments. You can use these date-specific assignments to define future assignments.
Defining EmployeesOracle Project Resource Management requires the following employee information:
■ Last Name
■ First Name
■ Employee Number
■ Start Date
■ Organization (Expenditure/Event organizations only)
■ Job (HR job)
■ Supervisor (for workflow approval processes)
Note: In Oracle HRMS, contractors are set up as employees (system person type) and are created under the user person type of Contractor.
4-2 Oracle Project Resource Management Implementation and Administration Guide
Defining Employees and Employee Assignments
■ Billing Title
■ Location (Address)
■ Home Address
■ Calendar
You can enter your employee information manually, or most of the information in a bulkload through the use of an Application Programming Interface (API). For technical information about using the HRMS APIs, see "Technical Essays" in Implementing Oracle HRMS.
For instructions on entering employee information, see Managing People Using Oracle HRMS.
For instructions on assigning a calendar to a resource, see "Assigning Calendars to Resources" in Chapter 7, "Defining Calendars and Schedules".
Defining Employee AssignmentsEmployee assignments, also called primary assignments, describe the role of the person within your organization. Every employee, including contractors, must have a primary assignment. For instructions on creating and assigning employee assignments, see Managing People Using Oracle HRMS.
Defining LocationsThe Locations table is populated as you add the employee locations, or any locations, in the free text fields through the Project Resource Management application. Users can reuse previous entries. For example, if you enter the following as a new location:
City: San FranciscoState: CaliforniaCountry: United States
Any user can access this location information when prompted for location anywhere in the application.
Note: Each employee must have a defined home address. This address is used by the search functions within Oracle Project Resource Management. If the address information is missing, the employee cannot be created as a PRM resource.
Defining Your People 4-3

Setting Up Competencies
Setting Up CompetenciesCompetence management encompasses a full cycle of events, from designing your competence structure to performing project resource matching. Once established, you can use your competencies for various activities such as determining the competence profiles of your resources, staffing projects using skill matching, and searching your staff for specific skills.
Defining Your Competence StructureIn defining your competence structure and competencies, you must first decide if the competencies should be shared across business groups. This decision determines if you will setup global competencies and local competencies for each business group.
Oracle Project Resource Management recognizes all competencies regardless of whether they are flagged as global or local. However, you can only establish global competencies if the HR: Cross Business Group profile option is set to Yes. If you are not in cross-business group mode, you can only view the local competencies for your business group. This exclusion eliminates viewing any competencies that belong exclusively to other business groups.
Your competence structure can reflect skills or measurable behaviors broken down into multiple levels. The number of levels you want to set up determines how you should set up your key flexfield structures.
The following table provides an example of how a competence of language expertise can be broken down into multiple levels:
Note: You must make a decision on your competence structure in the planning stage because once you set up the competencies, you cannot change the structure.
Competence - Level 1 Level 2 Level 3 Level 4
Language Indo-Iranian Indic ■ Assamese
■ Bengali
■ Sindhi
■ Hindi
■ Urdu
4-4 Oracle Project Resource Management Implementation and Administration Guide

Setting Up Competencies
Unless your business is very specific about linguistics, you most likely would not categorize the languages into such detail. However, the example does demonstrate how you might use the various levels of competencies to categorize the skills.
Using a different example, you may have a competence such as knowledge of Oracle Projects application. As your business may have many software skills you want to track, you might want to set up a higher competence level labeled ’Knowledge of Software Applications’. The following table provides an overview of how you might breakdown the competence levels:
For more information and instructions on setting up competencies, refer to the following sources:
■ Documentation Update for Patch Numbers 1383905 and 1377992 - Global Competencies
■ "Career and Succession Management" in Implementing Oracle HRMS
■ "Creating a Competence" in Managing People Using Oracle HRMS
Language Indo-Iranian Iranian ■ Persian
■ Kurdish
Language Germanic West Germanic ■ English
■ Dutch
■ German
Language Germanic North Germanic ■ Icelandic
■ Norwegian
■ Swedish
■ Danish
Competence - Level 1 Level 2 Level 3 Level 4
Knowledge of Software Applications
Oracle Projects Projects Costing ■ Implementing Product
■ Using Product
Knowledge of Software Applications
Oracle Projects Projects Billing ■ Implementing Product
■ Using Product
Competence - Level 1 Level 2 Level 3 Level 4
Defining Your People 4-5
Setting Up Competencies
■ "Planning Your Descriptive Flexfields" in the Oracle Applications Descriptive Flexfields Guide
■ "Defining Descriptive Flexfields" in the Oracle Applications Descriptive Flexfields Guide
Assigning CompetenciesYou can assign competencies to the following objects:
■ Resources (people)
■ Jobs
■ Roles
■ Requirements
When defined for all of these objects, you have a structure in which you can perform competence matching.
Job CompetenciesYou define jobs through the Oracle HRMS application. For each job, you can assign required and desired competencies. For more information on defining jobs, see Implementing Oracle HRMS.
Role CompetenciesWhen you define a requirement, you must associate a role to it. This role determines the default competencies for the requirement which are used for performing searches to fill the requirement.
You define roles using the Define Project Roles form in Oracle Projects. For each role, you define a default job. All job-associated competencies are automatically copied over to the role. You can add, modify, or delete competencies and their
Note: When creating your competencies, you must define proficiency levels in order for the competencies to be recognized in Oracle Project Resource Management resource requirement searches. The Oracle HRMS application does not require you to complete this information.
4-6 Oracle Project Resource Management Implementation and Administration Guide

Setting Up Competencies
associated proficiency levels as suits your needs. For information on creating roles, see Chapter 6, "Defining Your Project Roles".
Requirement CompetenciesYou define project requirements using the Requirement Detail page. When you create a requirement, you must specify a role. The system copies the competencies of the role to the requirement to which you can add, modify, or delete as suits your needs. For each competence you determine to be mandatory for the requirement, you must specify the required range of proficiency in that skill. This range is used for comparison during a resource search.
Resource CompetenciesYou can define the competencies of a resource either in Oracle HRMS using the Career Management form, or through the Competence Profile page in Oracle Project Resource Management. Resources can update their own competence profiles as well through Oracle Project Resource Management. This action initiates a workflow approval process to the resource manager. These competencies, in addition to other pertinent information, are compared to the competencies of a requirement when performing resource searches.
Matching Resource and Requirement CompetenciesWhen a user performs a resource search to fill a requirement, the system compares all the mandatory competencies of the requirement to those of the resource. Each resource produced from the search must have these mandatory competencies at a level within the specified for the requirement. If the requirement also has specified optional competencies, the search results display the competence match comparison.
For example, you have a requirement has three mandatory competencies and two optional competencies. When you perform a search, the results display all resources with the mandatory competencies. The results also display any optional competencies matches as follows: 0/2, 1/2, or 2/2. The first number indicates the
Note: You can only assign global competencies to a role.
Note: You can assign to a requirement global competencies, as well as local competencies belonging to the business group of the requirement.
Defining Your People 4-7

Setting Up Competencies
number of matches, and the second number refers to the actual number of optional competencies of the requirement.
For resources, you can assign global competencies and local competencies for the business group of the resource. For requirements, you can assign any combination of competencies, either global or local from any business group.
However, in order to obtain a match for a requirement, do not assign mandatory local competencies from multiple business groups to a requirement. A resource match for a such a requirement cannot be found because resources are restricted to having competencies from a single business group. Therefore, you should make such local competencies optional for the requirement, or only select global competencies.
4-8 Oracle Project Resource Management Implementation and Administration Guide

Configuring Your Organization Se
5
Configuring Your Organization SecurityThe Oracle HRMS and Oracle Projects applications provide the setup for the core security of your enterprise structure. You define this responsibility-based security structure based on your organization structure and user responsibilities.
With Oracle Project Resource Management, you have an extended project security structure based on project roles. Role-based security enables users to have multiple levels of function access depending upon the assigned roles they have for each given project. For more information on role-based security, see Chapter 6, "Defining Your Project Roles".
This chapter discusses the project security models through the following topics:
■ Defining Your Security Strategy
■ Understanding Responsibility-Based Security
■ Understanding Role-Based Security
■ Defining Organizational Authority
■ Demonstrating a Security Check
curity 5-1

Defining Your Security Strategy
Defining Your Security StrategyYour security structure depends heavily on how you manage your projects, and what type of access you want to provide your users. You should determine this information prior to setting up any of the security features. The following table describes some of the basic differences between the responsibility-based and role-based security models:
Each of these models has its own benefits and is described in further detail in the sections to follow.
Basic Function
Responsibility-Based Security Model
Role-Based Security Model
Project List The project list displays all projects for the given operating unit.
The project list displays all projects for the given operating unit where the user is an active member of has project authority over the project organization.
View Project Information
The user can view project information except for labor costs for any of the projects appearing on the project list. A user can view the labor costs for a project if this function has been assigned to the responsibility of the user.
■ If the project member on a project has been assigned to roles with function security enabled, then the member can view the project attributes as allowed by the roles. For users with project authority on a project organization, the user can view all attributes as allowed by the project authority menu. If the member has been assigned to a role with function security disabled, then the member can view the project attributes as allowed by the responsibility level function security.
■ The projects that a user can view are limited the by the project list of the user.
Update Project Attributes
Active key members or users with profile PA: Cross Project responsibility enabled (at the responsibility level) can update the project attributes as allowed by the responsibility level function security.
■ If the project member on a project has been assigned to roles with function security enabled, then the member can update the project attributes as allowed by the roles. For users with project authority on a project organization, the user can update all attributes as allowed by the project authority menu. If the member has been assigned to a role with function security disabled, then the member can update the project attributes as allowed by the responsibility level function security.
■ The projects that a user can view are limited the by the project list of the user.
5-2 Oracle Project Resource Management Implementation and Administration Guide

Understanding Responsibility-Based Security
Understanding Responsibility-Based SecurityWithin the responsibility-based security structure, users have viewing access to the projects for the operating unit associated to their respective responsibilities. Only project members and cross-project users can update project information or view labor costs (given the appropriate authority.)
You associate functions to menus and the menus to responsibilities. Therefore, the responsibility of a user determines what functions the user can perform.
For further information and instruction, refer to the following sources:
■ Implementing Oracle HRMS
■ the Security chapter in Customizing, Reporting and System Administration in Oracle HRMS
■ User Guide Supplement for Oracle Projects Minipack B (Release 11i Mandatory Patch)
■ "Project and Labor Cost Security" in Chapter 15, "Advanced Topics and Essays," in the Oracle Projects User Guide.
Defining User Level AccessOracle Project Resource Management has four levels of users with different access to projects. Regardless of the permissions a user has, the role controls what functions the user can perform.
Project MembersA project member is a user who is explicitly defined as a member of a project team. Since project members have roles to fill on the project, they must have assigned role with role-based security. For more information on role-based security, see "Understanding Role-Based Security" later in this chapter.
Project members include extended members (key members) who have administrative access and team members who have scheduled assignments on the project.
Cross-Project User with View AccessCross-project users with view access can view all projects across multiple operating units whether or not they are defined as a project member or have project authority. You can provide view access by setting the profile option called PA: Cross-Project User - View to Yes.
Configuring Your Organization Security 5-3


Understanding Role-Based Security
Understanding Role-Based SecurityRole-based security provides a means of controlling user access based upon the role the user is currently playing on a project team. Every project member is assigned a role. The access levels of that role are bestowed upon the user for the duration of the role assignment. A user can play different roles on different project teams. For example, you may assign a user a project lead role for a particular project in the first half of the year and then, a consultant role on another project for the second half of the year. These roles have completely different project security access and controls. Responsibilities allow access to the overall application and determine the menus and functions to which a user has access.
With role-based security, you assign the menus to roles. This level of assignment offers more flexibility than the responsibility-based security structure.
Levels of Role-Based SecurityRole-based security offers multiple levels of control. You determine how detailed you want your security levels. The available levels are as follows:
■ Roles
You assign menus to roles to determine the menu and function access for each role.
■ Menus
You assign functions to menus, roles, and responsibilities.
■ Functions
You can attach the desired functions (access to pages or actions) to the individual menus.
Confirming Role-Related Profile Option SettingsTwo profile options are available for determining the viewing and updating access your users have on projects regardless of what role they are playing on various projects:
■ PA: Cross-Project User - View
Note: You define project roles for your entire enterprise. They are not specific to any operating group or business group.
Configuring Your Organization Security 5-5
Understanding Role-Based Security
The default setting for this profile option is Yes.
■ PA: Cross-Project User - Update
If you want to provide your users with access to update projects within their entire organization, set this profile option to Yes at the responsibility and user level.
You can override the settings of both profile options at the responsibility and user levels.
Seeded RolesOracle Project Resource Management provides the following seeded roles. For more information on the individual authorities, see "Defining Organizational Authority".
Project ManagerThe Project Manager role provides access to all security access functions for the project.
Project AuthorityProject Authority is an internal role at the organization level. A user with project authority on an organization can view all projects in that organization. The Staffing Analyst menu is assigned to this role as seeded data. Therefore, a user with project authority is by default a staffing analyst for all projects within the organization of the user.
Resource AuthorityResource Authority is an internal role at the organization level. A user with Resource Authority can manage all of the resources for that organization. This role provides access to all resource information within the given organization including any project-related information for that resource.
Note: If you have an existing Oracle Projects base, these profile options replace the profile option called PA: Cross Project Responsibility in order to separate the viewing and updating function abilities.
5-6 Oracle Project Resource Management Implementation and Administration Guide

Understanding Role-Based Security
Utilization AuthorityUtilization Authority is an internal role at the organization level. A user with Utilization Authority can calculate and view utilization for an organization.
Forecast AuthorityForecast Authority is an internal role at the organization level. A user with Forecast Authority can generate and view forecast information for all projects in an organization.
Seeded Responsibilities You have the following classes of users who typically need access to project resourcing information:
■ Business Manager (Organization Manager)
■ Project Manager
■ Resource Manager
■ Staffing Manager
■ Resource (Team Member)
■ Project Resource Management Super User
The implementation of Oracle Project Resource Management provides these user classes as predefined responsibilities on the home page of Oracle Project Resource Management. The seeded responsibilities have the following associated default functions:
Business Manager■ Project reviews
■ Team reviews
■ Forecast generation and review
■ Resource utilization generation and review
Project Manager■ Project creation and maintenance
■ Project schedule creation and maintenance for own projects
Configuring Your Organization Security 5-7

Understanding Role-Based Security
■ Resource searching
■ View resource details
■ Requirement searching
■ Setup of project subteam
■ Access notifications
Staffing Manager■ Project schedule creation and maintenance for own resources on own projects
■ Resource searching
■ View resource details
■ Requirement searching
■ Resource schedule creation and maintenance for own resources (on own projects)
■ Access notifications
Resource■ View their own schedule
■ Enter their own administrative assignments
■ Requirement searching
■ View and update their own resource details
■ Access notifications
Resource Manager ■ Perform a requirement search
■ View the schedules of resources for which they are responsible
■ Enter administrative assignments for resources for which they are responsible
■ View and update resource details for resources for which they are responsible
■ Access notifications
5-8 Oracle Project Resource Management Implementation and Administration Guide

Understanding Role-Based Security
Project Resource Management Super User The Project Resource Management Super User can access (view and edit) everything on all projects and everything related to all resources.
Overview of Seeded Responsibility Function and Menu AccessThe following table indicates whether or not certain function access is enabled for each seeded responsibility:
The following table indicates whether or not the menu access is enabled for each seeded responsibility:
Seeded FunctionProject Manager
Resource Manager
Staffing Manager Resource
Project Super User
Create Project Yes No No No Yes
Project List Yes No Yes Yes Yes
My Details (Schedule) No No No Yes No
My Competence Profile No No No Yes No
Requirement Search Yes Yes Yes Yes Yes
Define Team Template No No No No Yes
Workflow Notifications Yes Yes Yes Yes Yes
Staffing Home No Yes Yes No Yes
Utilization No Yes Yes Yes Yes
Reports Yes Yes Yes No Yes
Seeded MenuProject Manager
Resource Manager
Staffing Manager Resource
Project Super User
Project Manager Yes No No No No
Project Authority No No No No Yes
Resource Authority No Yes No No Yes
Resource No No No Yes No
Resource Pool Yes Yes Yes Yes Yes
Configuring Your Organization Security 5-9

Understanding Role-Based Security
Detailed Seeded Function Access by ResponsibilityThis section provides seeded function access grouped by responsibility as well as the menus associated to each responsibility. A list of the seeded menus and their respective functions are provided in the section titled "Seeded Function Access by Menu" later in this chapter.
Project Manager Responsibility The seeded functions are:
■ Create Project
■ Project List
■ Requirement Search
■ Workflow Notifications
■ Reports
The following menus are associated with this responsibility:
■ Project Manager
■ Resource Pool
Staffing Manager Responsibility The seeded functions are:
■ Project List
■ Staffing Home
■ Requirement Search
■ Workflow Notifications
■ Resource Utilization
■ Reports
The following menu is associated with this responsibility:
■ Resource Pool
Project Resource Management Super User Responsibility The seeded functions are:
■ Create Project
5-10 Oracle Project Resource Management Implementation and Administration Guide
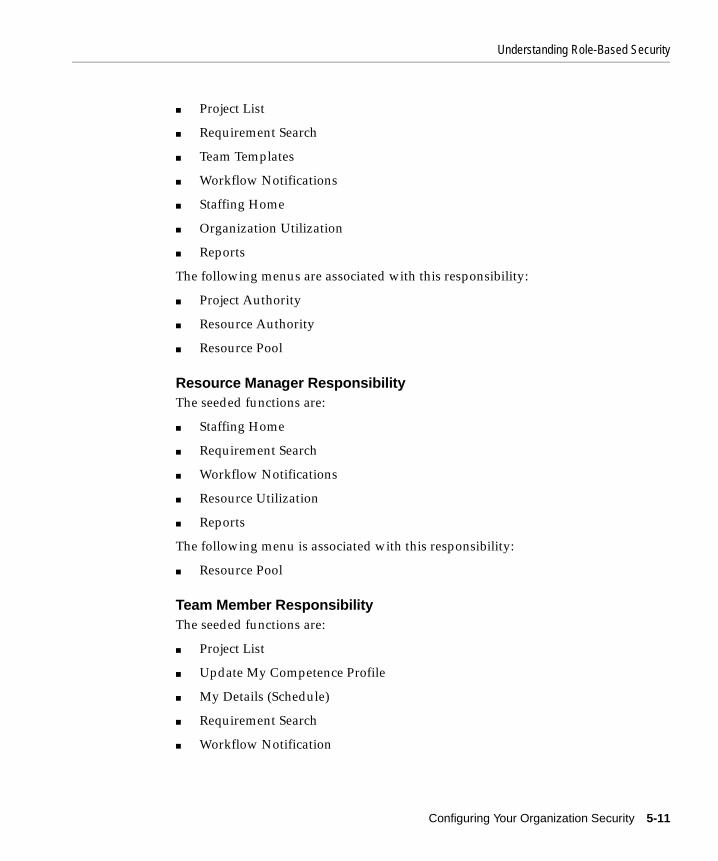
Understanding Role-Based Security
■ Project List
■ Requirement Search
■ Team Templates
■ Workflow Notifications
■ Staffing Home
■ Organization Utilization
■ Reports
The following menus are associated with this responsibility:
■ Project Authority
■ Resource Authority
■ Resource Pool
Resource Manager Responsibility The seeded functions are:
■ Staffing Home
■ Requirement Search
■ Workflow Notifications
■ Resource Utilization
■ Reports
The following menu is associated with this responsibility:
■ Resource Pool
Team Member Responsibility The seeded functions are:
■ Project List
■ Update My Competence Profile
■ My Details (Schedule)
■ Requirement Search
■ Workflow Notification
Configuring Your Organization Security 5-11

Understanding Role-Based Security
■ My Utilization
The following menu is associated with this responsibility:
■ Resource
Organization Manager Responsibility The seeded functions are:
■ Organization Utilization
■ Reports
The following menu is associated with this responsibility:
■ Utilization Authority
Seeded Function Access by MenuThe seeded menus are as follows:
■ Project Manager
■ Resource
■ Resource Pool
■ Project Authority
■ Resource Authority
■ Utilization Authority
■ Forecast Authority
This section provides a list of the seeded functions for each menu.
Project ManagerThe seeded functions for this menu are:
■ Projects > Identification > Resource Search
■ Projects > Team > View
■ Projects > Requirement/Assignment
■ Create and Delete
■ View and Edit Basic Information
5-12 Oracle Project Resource Management Implementation and Administration Guide
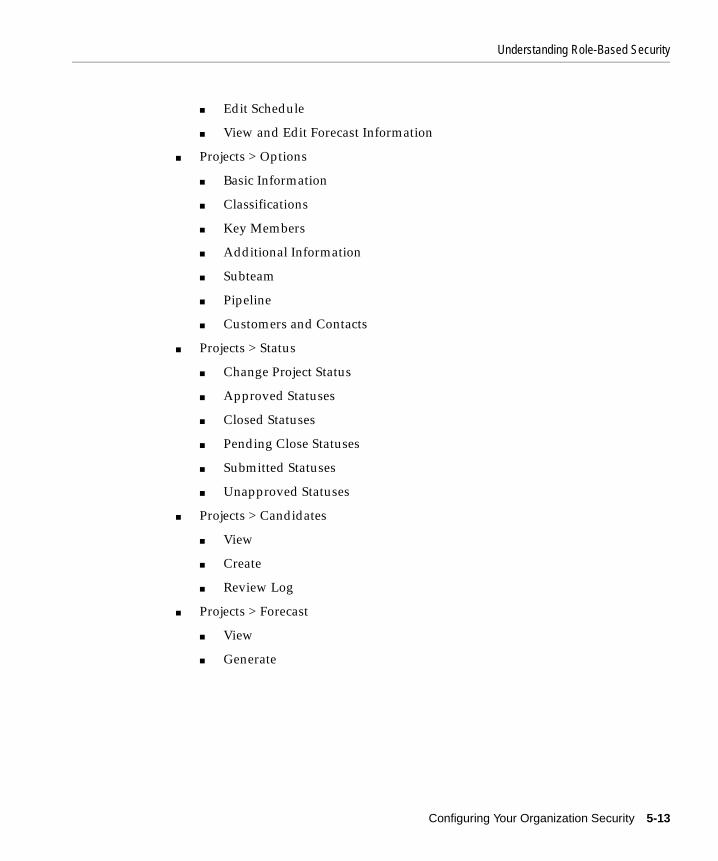
Understanding Role-Based Security
■ Edit Schedule
■ View and Edit Forecast Information
■ Projects > Options
■ Basic Information
■ Classifications
■ Key Members
■ Additional Information
■ Subteam
■ Pipeline
■ Customers and Contacts
■ Projects > Status
■ Change Project Status
■ Approved Statuses
■ Closed Statuses
■ Pending Close Statuses
■ Submitted Statuses
■ Unapproved Statuses
■ Projects > Candidates
■ View
■ Create
■ Review Log
■ Projects > Forecast
■ View
■ Generate
Configuring Your Organization Security 5-13

Understanding Role-Based Security
ResourceThe seeded functions for this menu are:
■ Projects > Assignment > View Basic Information
■ Projects > Administrative Assignment
■ Create and Delete
■ Edit Basic Information
■ Edit Schedule
■ View Basic Information
■ Projects > Requirement Search
■ Nominate Self
■ Projects > Resource Candidacy
■ View
■ Withdraw Self
■ Projects > Identification
■ Requirement Search
Resource PoolThe seeded functions for this menu are:
■ Projects > Administrative Assignment
■ View Basic Information
■ Projects > Resource Pool
■ View Schedule
■ View Competencies
■ View Work Information
Project Authority The seeded functions for this menu are:
■ Projects > Identification > Resource Search
■ Projects > Team > View
5-14 Oracle Project Resource Management Implementation and Administration Guide

Understanding Role-Based Security
■ Projects > Requirement/Assignment
■ Create and Delete
■ View and Edit Basic Information
■ Edit Schedule
■ View and Edit Forecast Information
■ Projects > Options
■ Basic Information
■ Classifications
■ Project Members
■ Additional Information
■ Subteam
■ Pipeline
■ Customers and Contacts
■ Projects > Status
■ Change Project Status
■ Approved Statuses
■ Closed Statuses
■ Pending Close Statuses
■ Submitted Statuses
■ Unapproved Statuses
■ Projects > Candidates
■ View
■ Create
■ Review Log
■ Projects > Forecast
■ View
■ Generate
Configuring Your Organization Security 5-15
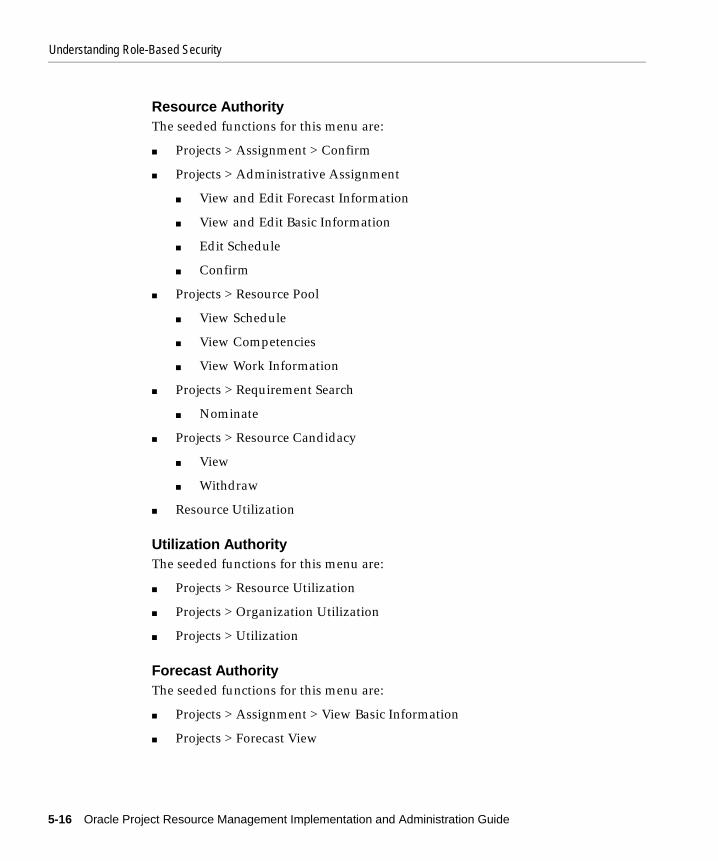
Understanding Role-Based Security
Resource AuthorityThe seeded functions for this menu are:
■ Projects > Assignment > Confirm
■ Projects > Administrative Assignment
■ View and Edit Forecast Information
■ View and Edit Basic Information
■ Edit Schedule
■ Confirm
■ Projects > Resource Pool
■ View Schedule
■ View Competencies
■ View Work Information
■ Projects > Requirement Search
■ Nominate
■ Projects > Resource Candidacy
■ View
■ Withdraw
■ Resource Utilization
Utilization AuthorityThe seeded functions for this menu are:
■ Projects > Resource Utilization
■ Projects > Organization Utilization
■ Projects > Utilization
Forecast AuthorityThe seeded functions for this menu are:
■ Projects > Assignment > View Basic Information
■ Projects > Forecast View
5-16 Oracle Project Resource Management Implementation and Administration Guide

Defining Organizational Authority
Defining Organizational AuthorityEstablishing organizational authority enables you to specify the authority for a resource at an organizational level. The key benefit is you do not have to assign roles for people with organizational authority because it provides access to all projects, resources, forecasting and utilization information for the specified organization.
However, you must specify each organization that a user should have authority over. This authority does not acknowledge organizational hierarchies. For example, if you have resource authority over a top organization, you do not automatically have resource authority for all subordinate organization. You have to individually specify each organization to which you want resource authority. This division provides greater flexibility, especially in the case of a reorganization or change in the organizational hierarchy.
You have four levels of organizational authority providing different access:
■ Project Authority
This authority level enables a user to perform staffing functions on a project. The difference between this authority and the Project Manager role is the Project Manager role only applies to assigned projects. A user with project authority can perform staffing functions on all projects within the organization.
■ Resource Authority
This authority level provides a user security access similar to the access you would require as a resource manager. You have the ability to perform tasks, such as confirm assignments, for resources for the entire organization.
■ Utilization Authority
This authority level enables a user to calculate and view utilization for the specified organization.
■ Forecast Authority
This authority level enables a user to generate and view forecast information for projects within the specified organization.
Configuring Your Organization Security 5-17

Defining Organizational Authority
Defining a Primary ContactFor Resource Authority and Forecast Authority, you can specify a primary contact to handle cases where you have more than one person who has authority for an organization. Specifying the primary contact determines to whom to route workflow approvals for assignments or forecasts.
Assigning Organizational AuthorityTo establish organizational authority for your users, select the following menu path:
Setup > Organization > Organizational Authority
You can search for organizations based on the following three fields:
■ Resource Name
Select the resource for which you want to establish organizational authority.
■ Hierarchy
Select the hierarchy in order to establish a list of resource organizations. This field defaults to the expenditure hierarchy of the operating unit of the resource.
■ Start Organization
Select the organization to use as the start organization in order to provide a list of subordinate organizations.
You must at least select the name of the resource to perform a search. After you make your entries, click Find Organizations. The search produces all organizations for which the specified resource has organizational authority.
If you selected a hierarchy or organization as criteria for the search, the results display all qualifying organizations. Any organization for which the resource has authority displays with a checkmark. To grant authority over the organization to this resource, click the checkbox next to the desired organization and click Save. You can assign one or more of the following authorities to a resource for each organizations:
■ Project Authority
■ Resource Authority
■ Utilization Authority
■ Forecasting Authority
Note: You can only assign one primary contact per organization.
5-18 Oracle Project Resource Management Implementation and Administration Guide

Demonstrating a Security Check
Demonstrating a Security CheckWhen a user initiates an action by attempting to perform a function in Oracle Project Resource Management, a security check process is invoked. This process searches for the appropriate permissions to allow the user to perform the requested action. The logic of the security checks is as follows:
Check to see if the selected function is for a project.
■ If the answer is no, check if the user has the appropriate function security under the assigned responsibility.
■ If the answer is no, end the process.
■ If the answer is yes, perform the action.
■ If the answer is yes, check if the user has any secured roles on the project that would allow the user to perform this function.
■ If the answer is yes, perform the action.
■ If the answer is no, check if the user has only secured roles on the project.
– If the answer is yes, end the process. The process ends here because it has been determined that the user does not have access to this functions through any of the assigned secured roles.
– If the answer is no, check the client extension called PA_SECURITY.ALLOW_UPDATE. If the client extension is set to No, end the process. If it is set to Yes, check if the user has the appropriate function security under the assigned responsibility.
–If the answer is no, end the process.
–If the answer is yes, perform the action.
Figure 5–1, "Security Check Process Flow" demonstrates this process flow.
Note: A secured role is a role with defined function security. When the system performs a check for secured roles, it also performs a check on whether or not the user has project authority. If this check returns a true value, then the whole check is considered true.
Configuring Your Organization Security 5-19
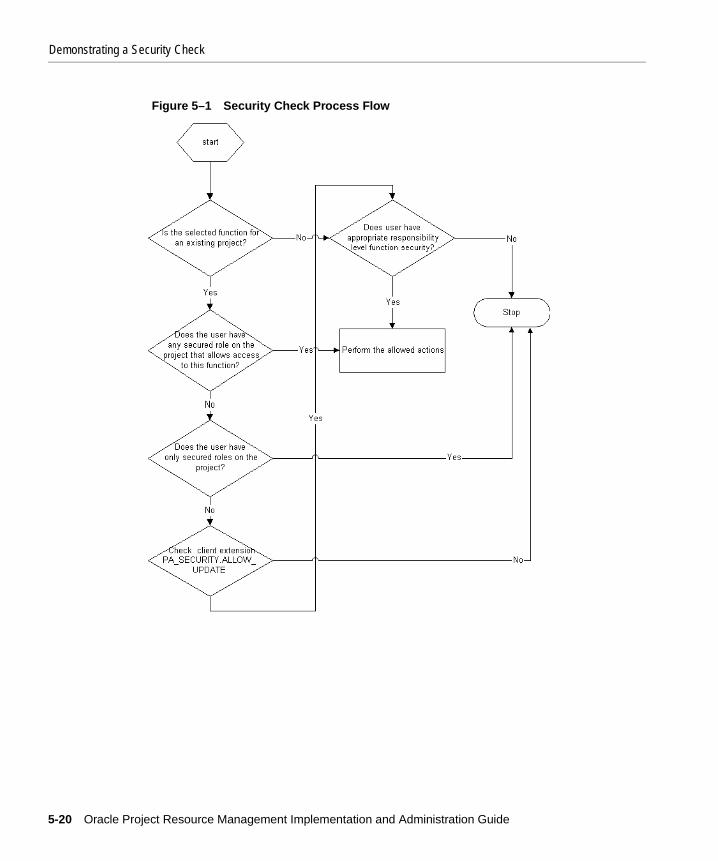
Demonstrating a Security Check
Figure 5–1 Security Check Process Flow
5-20 Oracle Project Resource Management Implementation and Administration Guide

Defining Your Project
6
Defining Your Project RolesProject roles provide you the ability to establish defaults for each user you add to the system. These defaults include competencies, jobs, and security measures. Each role also defines default project requirements.
Each role has a security structure determining the features users can access and the functions they can perform. This security structure is referred to as role-based security. Though role-based security is optional, it offers you more flexibility than responsibility-based security because the role of a user can change from project to project. Therefore, the function access a user may require can change from project to project. For more information on security, see Chapter 5, "Configuring Your Organization Security".
This chapter covers defining project roles and associated attributes through the following topics:
■ Defining Role Lists
■ Defining Role Controls
■ Defining Roles
Roles 6-1

Defining Role Lists
Defining Role ListsYou use role lists to categorize your roles into logical groupings. For example, you may have a role list called Consulting to which all roles relating to consulting are assigned.
To add, modify, or delete role lists, use the Role Lists form under Setup. In this form, you can specify the name, description, and effective dates for a role list. After you define these parameters, you can select the roles you want assigned to this role list.
Defining Role ControlsYou use role controls to define an additional dimension of security layering. These controls determine how you (or other users) can use the role. The following predefined controls are available:
■ Allow as Scheduled Member
■ Allow as Task Member
■ Allow as Project Member
■ Allow as Contract Member
■ Allow View Labor Costs
You can assign as many of these controls to roles as necessary. For example, the control Allow as Scheduled Member indicates that you can schedule any person assigned to the role as their availability permits. You want to assign this control to any role that should be available for scheduling resources on projects. Since role assignments occur at the project level, you must, at a minimum, assign the role control Allow as Project Member to each role.
Note: A role list can not be deleted once it has been associated with a project.
Note: The role controls Allow as Task Member and Allow as Contract Member are not currently enabled. These two controls will be activated as the appropriate associated functionality is added to Oracle Project Resource Management.
6-2 Oracle Project Resource Management Implementation and Administration Guide

Defining Roles
Defining RolesPrior to setting up roles, you must first establish the following items within the system:
■ Competencies
■ Jobs
■ Role Lists
You use each of these items in defining your roles.
The following table lists the information you should define for each role:
After you have identified all the roles and outlined the required role data for your enterprise, you can create the roles in Oracle Projects through the Define Roles form under Setup.
Prompt Description
Role Lists Identify the role lists to which the role should be assigned.
Access Menu Identify a security menu that the role can perform on a given project.
Default Competencies Identify all default competencies required for the role. These competencies are used for requirement definition.
Default Job and Job Group
Identify the default job and job group for the role.
Calculations for costing, billing, and transfer pricing use the default job to forecast project resource requirements. This default job can be overridden by a Project Cost Job, Project Billing, and Project Transfer Price Job. You can use job mapping logic to map the default job of the role to the master job if they are in different job groups.
Default Minimum and Maximum Job Levels
Determine the minimum and maximum job levels for this role.
The job levels of a requirement are compared to these levels when performing candidate (resource) searches.
Effective Dates Identify the date range the specified role is effective.
In some cases, you may not know the ending effective date because it has not been determined. Therefore, only a start date is required.
Defining Your Project Roles 6-3

Defining Roles
6-4 Oracle Project Resource Management Implementation and Administration Guide

Defining Calendars and Sched
7
Defining Calendars and SchedulesDefined calendars are the basis of all schedules. You establish resource schedules based on the calendar assigned to the resource. You can assign a calendar to a resource, or accept the default calendar from the site, organization, or project.
This chapter provides information creating calendars and maintaining schedules through the following topics:
■ Setting Up Calendars
■ Establishing the Availability Calculation
ules 7-1

Setting Up Calendars
5. Enter dates in the From Effective Date and To Effective Date fields, if applicable.
You can now use this new calendar type to create a calendar.
Defining Shift and Shift Patterns Shifts define the daily work hours in a week and are defined for a given range of dates. The effective dates of the shift or shift pattern override any other preset effective dates when used on a schedule.
For example, if a shift or shift pattern is not effective for the period or part of the period for which requirement or assignment schedules are created, then the schedule is not created for that period.
To create shifts and shift patterns:
1. Select Setup > Schedule Management > Scheduling Calendar > Define Calendar.
2. Select the Define Shifts tab.
3. Enter the name of the shift.
4. Enter the shift description.
5. Enter the effective dates of the shift.
To create shift patterns:
1. Select the desired weekdays.
2. Enter the From and To time range.
3. Enter the effective dates.
Only the total hours for the day are considered for Oracle Project Resource Management. The specific time values do not have any effect.
Note: A day with zero hours specified in the shift is considered a non-working day.
Defining Calendars and Schedules 7-3

Setting Up Calendars
Creating Calendar Exceptions Exceptions define holidays and are considered non-working days.
To create calendar exceptions, perform the following steps:
1. Select Setup > Schedule Management > Scheduling Calendar > Define Calendar.
2. Select the Calendar Exceptions tab.
3. Complete the fields as necessary for the specific calendar exception.
You must create calendar exceptions for public holidays and general holidays for every year that they occur. For all other types of exceptions, make administrative assignments. As described for shifts, only the total number of hours are considered for Oracle Project Resource Management, not the actual time segments.
Creating a Calendar To create a calendar, perform the following steps:
1. Select Setup > Schedule Management > Scheduling Calendar > Define Calendar.
2. Select the Define Calendar tab.
3. Complete the required information for the calendar.
Assigning Shifts and Exceptions to Calendar To assign shifts and exceptions to a calendar, perform the following steps:
1. Select Setup > Schedule Management > Scheduling Calendar > Define Calendar > Calendar Shift/Exceptions.
2. Select the desired calendar.
3. Use the Shifts Tab to assign Shifts to the calendar.
4. Use the Exceptions Tab to assign Exceptions to the calendar.
Changing the Calendar Any changes to the calendar are applied to the schedule work patterns by a periodic process. The changes to calendar will affect the future schedule creations and updates. For more information, see "Updating Schedules with Calendar Changes" in Chapter 12, "Maintaining Your Data".
7-4 Oracle Project Resource Management Implementation and Administration Guide
Setting Up Calendars
Establishing Default CalendarsYou can set up default calendars at two levels:
■ the site level
■ the organization level
Defining the Default Calendar for the SiteYou can select any defined calendar as the default calendar at the site level using the PA: Default Calendar profile option in Oracle Project Resource Management.
This profile option indicates the default calendar for projects, project assignments, and resources in the Oracle Project Resource Management application. You can only update this profile option at the site level.
Defining Default Calendars for OrganizationsThe calendar assignment at the organization level overrides the calendar assignment at the system site level. You can set up a calendar for a project organization using the Define Organization form in the Additional Information section for the project Expenditure/Event organization classification. This calendar becomes the default calendar for all resources within the organization.
Assigning CalendarsThe default calendars you specify for the site and organizations carry down to the projects and resources. You can override these defaults by assigning a calendar directly to the project or resource.
Assigning Calendars to ProjectsAssigning a calendar to a project overrides the default calendar retrieved from the project organization or site. To modify the default calendar on a project, use the Project Details page.
Defining Calendars and Schedules 7-5

Setting Up Calendars
Assigning Calendars to ResourcesEvery resource must have an associated calendar for scheduling purposes. The calendar determines the capacity of the resource. During implementation, you use a process called PRC: Maintain Project Resources to pull the resources from HR tables into Oracle Project Resource Management. This process assigns all resources a default calendar. For more information on this process, see "Maintaining PRM Resources" in Chapter 12, "Maintaining Your Data".
The default calendar for the resource can come from various sources depending upon how you have set up your system. Oracle Project Resource Management uses the calendar defined for a resource in CRM. If the resource does not have a defined calendar in CRM, the calendar for the resource defaults from the organization. If you do not define a default calendar for the organization, then the calendar for the resource defaults to the entry in the Calendar profile for the site. You can override all these defaults at any time and assign a specific calendar to a resource.
To assign a default calendar to the resource, complete the following steps:
1. Select Setup > Schedule Management > Scheduling Calendar > Define Calendar.
2. Select the Assign Resources tab.
3. Complete the required information on the screen.
7-6 Oracle Project Resource Management Implementation and Administration Guide

Establishing the Availability Calculation
Establishing the Availability CalculationYou determine availability of a resource by subtracting the scheduled assigned hours of the resource from the capacity of the resource. The calendar to which the resource is assigned determines the capacity of the resource.
Oracle Project Resource Management calculates resource availability based on a predefined number of years. You set the number of years for availability calculation in a profile option called PA: Availability Duration. Availability from today’s date through to the end of the time period you specify. For example, if you enter 2 as the value of this profile option, the availability of your resources is calculated from today to the end of two years.
Resource availability is recalculated every time a new assignment for a resource is made. Therefore, using the above example, if you make an assignment on a resource until the end of April, the availability is recalculated to move out for two years from the end of April.
If you create an assignment for a resource outside of the availability period, such as 10 years in the future, the availability is not recalculated because it is outside of the range defined in the above profile option. If this is a real assignment, then you must break it up into segments of two years. Leaving it at 10 years causes the availability of the resource to get bypassed for recalculation and eliminates the resource as a possibility for resource searches.
The PA: Availability Calculation Period profile option builds the availability hours for each resource. Resource searches use these hours to determine if the resource is a candidate to fill a requirement.
Defining Timeline OptionsYou must set up the following profile options to establish your timelines for scheduling:
■ PA: Availability Calculation Period
This profile option enables you to determine the time period segment to use in calculating the availability. Valid choices are Daily or Weekly, and the default value is Weekly.
■ PA: Availability Duration
This profile option determines the length of time (in years) for which the application should create timeline availability records. The availability for a
Defining Calendars and Schedules 7-7

Establishing the Availability Calculation
resource is recalculated every time a new assignment is created for the resource. The default value for this profile option is 2.
■ PA: Percentage of Resource’s Capacity
This profile option specifies the lowest percentage threshold in determining availability. The default value is 100.
7-8 Oracle Project Resource Management Implementation and Administration Guide

Defining the Project Environ
8
Defining the Project EnvironmentThe definition of your project environment includes the setup of all the attributes used for creating projects, tracking pipeline projects, and staffing project roles. It also includes the implementation of your approval and notification processes defined through automated Oracle Workflow processes. You define these features using Oracle Projects, Oracle Project Resource Management, and Oracle Workflow.
This chapter elaborates on the definition and usage of these attributes through the following sections:
■ Creating Project Attributes
■ Establishing Probability Information
■ Defining Statuses and Status Profile Options
■ Overview of Predefined Workflows
■ Setting Up Your Self-Service Environment
ment 8-1

Creating Project Attributes
Creating Project AttributesIn creating a project, your users will use a variety of attributes to define the behavior and future processing of the project. To define the following attributes, you use the Oracle Projects forms:
■ work types
■ class categories
■ class codes
■ project statuses
■ project types
■ project templates
■ service types
■ customer contact types
■ customer relationship codes
■ customers and customer addresses
■ billing schedules
■ pipeline information
This list is a subset of the required project attributes. For a complete list, refer to Appendix A, "Implementation Steps Checklist". For information on defining work types, see Chapter 9, "Implementing Resource Utilization".
For information on defining the remaining attributes, see "Project Definition" in Chapter 17, "Oracle Projects Setup and Implementation," in the Oracle Projects User Guide and the Oracle Projects 11i Release 11.5.3/Mini Pack B User Guide Supplement.
Note: You must set up customers in Oracle Projects (or in Oracle Accounts Receivables) in order to assign them to projects.
8-2 Oracle Project Resource Management Implementation and Administration Guide

Establishing Probability Information
Establishing Probability InformationWhen defining a potential project, you can enter pipeline information such as the probability percentage of winning the project, the project value, and the expected approval date. This information is used for calculations such as determining the weighted (discounted) value of all projects in your pipeline. If a project has no defined probability percentage, then it is assumed to be 100% for all calculations performed on the project.
You have control over how percentage values are used on a project through the creation of Probability Lists. The probability list is a list of percentages with descriptions. For example, you create a list called "Quarters" with the following percentages:
■ 25% Talks Initiated
■ 50% Negotiation
■ 75% Contract Proposed
■ 100% Approved
You can attach this list to any project type. When you create a project and using a particular project type, these are the values available for selection in the Probability field.
For more information and setup instructions, see the Oracle Projects 11i Release 11.5.3/Mini Pack B User Guide Supplement.
Defining the Project Environment 8-3
Defining Statuses and Status Profile Options
Defining Statuses and Status Profile OptionsA status is the state of an object. Objects can only have one status at a time. With your implementation of Oracle Project Resource Management, you are provided with basic predefined statuses for the following objects:
■ projects
■ requirements
■ assignments
■ candidates
■ assignment approval
You can modify the default status controls for each existing user status. You can also create new user statuses based on the available system statuses to meet your business needs and create process flows that support those needs.
However, for each existing user status, you must define the next allowable statuses. Defining the next allowable statuses determines the process flow for your objects. For example, you can specify that a requirement with the user status of Open can have its status changed to the user statuses of either Filled or Cancelled. This example shows that you have just determined two possible process flows of a requirement:
■ Open -> Filled
■ Open -> Cancelled
The following sections provide new seeded status controls for existing project statuses, as well as the seeded status values for requirements, assignments, assignment approvals, and candidates.
For more information on project status values and status setup instructions, see the Oracle Projects 11i Release 11.5.3/Mini Pack B User Guide Supplement.
Note: Statuses are available for your entire enterprise, and are not specific to any business group or operating unit.
8-4 Oracle Project Resource Management Implementation and Administration Guide
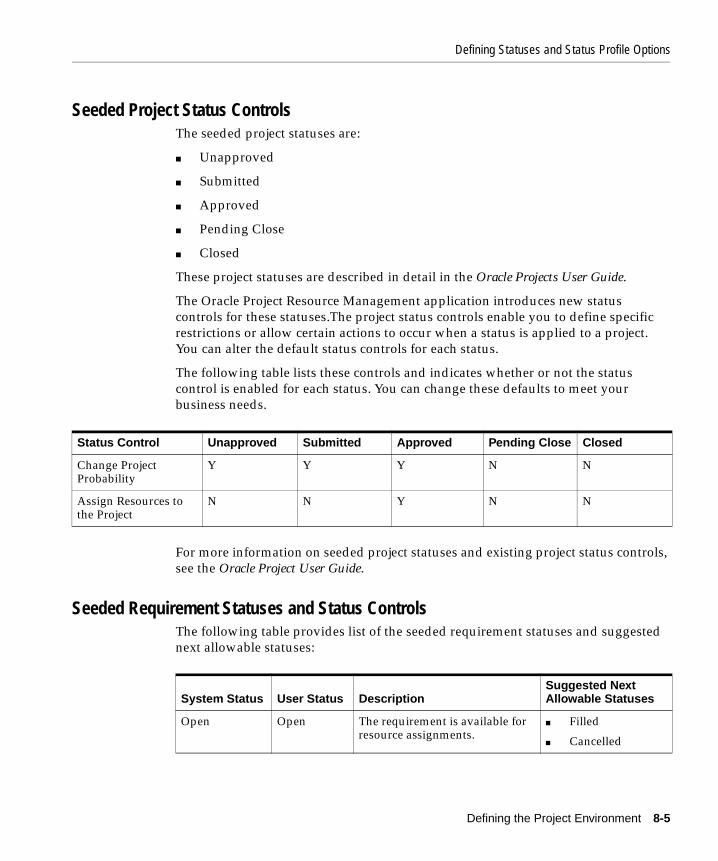
Defining Statuses and Status Profile Options
Seeded Project Status ControlsThe seeded project statuses are:
■ Unapproved
■ Submitted
■ Approved
■ Pending Close
■ Closed
These project statuses are described in detail in the Oracle Projects User Guide.
The Oracle Project Resource Management application introduces new status controls for these statuses.The project status controls enable you to define specific restrictions or allow certain actions to occur when a status is applied to a project. You can alter the default status controls for each status.
The following table lists these controls and indicates whether or not the status control is enabled for each status. You can change these defaults to meet your business needs.
For more information on seeded project statuses and existing project status controls, see the Oracle Project User Guide.
Seeded Requirement Statuses and Status ControlsThe following table provides list of the seeded requirement statuses and suggested next allowable statuses:
Status Control Unapproved Submitted Approved Pending Close Closed
Change Project Probability
Y Y Y N N
Assign Resources to the Project
N N Y N N
System Status User Status DescriptionSuggested Next Allowable Statuses
Open Open The requirement is available for resource assignments.
■ Filled
■ Cancelled
Defining the Project Environment 8-5

Defining Statuses and Status Profile Options
Three status controls exist for the requirement statuses:
■ Include in Project Forecasts
■ Visible in Requirement Searches
■ Assign Resources to the Requirement
Use these status controls to restrict allowable actions on requirements based on status.
Seeded Assignment Statuses and Status ControlsThe following table provides a list of seeded assignment system statuses with suggested next allowable statuses:
Only one status control exists for the assignment statuses:
■ Include in Project Forecasts
Use this status control to include assignments in project forecasts based on the status.
Filled Filled The requirement has an assigned resource.
■ Cancelled
Cancelled Cancelled The requirement was cancelled. None
System Status User Status DescriptionSuggested Next Allowable Statuses
Provisional Provisional A resource is assigned to the assignment on a provisional basis.
■ Confirmed
■ Cancelled
Confirmed Confirmed The resource is confirmed and scheduled for the assignment.
■ Cancelled
Cancelled Cancelled The assignment was cancelled. None
System Status User Status DescriptionSuggested Next Allowable Statuses
8-6 Oracle Project Resource Management Implementation and Administration Guide

Defining Statuses and Status Profile Options
Seeded Candidate Statuses and Status ControlsThe following table provides a list of the seeded candidate statuses with suggested next allowable statuses:
You can define your own user statuses based on these system statuses, except for the Assigned system status. This system status is reserved for internal processes.
System Status User Status DescriptionSuggested Next Allowable Statuses
Pending Review
Pending Review
The candidate is nominated for the requirement and is ready for review.
■ Suitable
■ Under Review
■ Declined
■ Withdrawn
■ Assigned
Under Review Under Review
The candidate is currently in the review process.
■ Suitable
■ Declined
■ Withdrawn
■ Assigned
Suitable Suitable The candidate is a suitable match for the requirement.
■ Under Review
■ Declined
■ Withdrawn
■ Assigned
Declined Declined The candidate is unsuitable for the requirement. The default status control "Requires Change Reason" requires the user declining the candidate to enter a reason.
■ Under Review
■ Suitable
Withdrawn Withdrawn The candidate has withdrawn from consideration for the requirement.
■ Under Review
Assigned Assigned The candidate is assigned to fill the requirement. This status is used only by the workflow process once the candidate has been approved to fill the requirement.
None
Defining the Project Environment 8-7

Defining Statuses and Status Profile Options
Only one status control exists for the candidate statuses:
■ Requires Change Reason
Use this status control to require the user to enter a reason for changing the status of a candidate.
Seeded Assignment Approval StatusesAssignment approval statuses are used by workflow processes. You cannot add, modify, or delete these statuses. In addition, users cannot manually change these statuses. The status is applied to an assignment based on the action being undertaken.
The following table provides a list of the seeded assignment approval statuses with their associated next allowable status:
System Status DescriptionNext Allowable Statuses
Working The assignment is new and has not yet been submitted, or the assignment has been changed and is waiting to be resubmitted for approval.
■ Submitted
Submitted The assignment is submitted for approval. Approval can be sought either manually or through an automated workflow process.
■ Approved
■ Rejected
Approved The assignment is approved and the resource is confirmed.
■ Requires Resubmission
Cancelled The assignment is cancelled. None
Rejected The assignment is rejected. The user can choose to modify the assignment and resubmit it for approval.
■ Requires Resubmission
Requires Resubmission
The assignment has been changed and requires a resubmission for approval.
■ Submitted
8-8 Oracle Project Resource Management Implementation and Administration Guide
Defining Statuses and Status Profile Options
Status Profile OptionsYou must define the following profile options to set the status defaults for the respective objects. Each profile option is set at the site level only.
PA: Starting Requirement StatusThis profile option defines the default status of newly created requirements.
PA: Starting Assignment StatusThis profile option defines the default status of newly created assignments.
PA: Default Filled Requirement StatusThis profile option defines the status of all filled requirements.
PA: Default Starting Candidate StatusThis profile option defines the status of all newly nominated candidates.
PA: Default Cancelled Requirement StatusThis profile option defines the status of cancelled requirements.
PA: Default Cancelled Assignment StatusThis profile option defines the status of cancelled assignments.
Defining the Project Environment 8-9

Overview of Predefined Workflows
Overview of Predefined WorkflowsWith Oracle Workflow, you can set up automated approval and notification processes. The workflow processes depend on actions, such as a status change to trigger the steps of the process. You can customize the messages and approval system using the Oracle Workflow Builder.
The implementation of Oracle Project Resource Management includes default workflow processes. Most of these workflow processes are used for updating information and are invisible to your users. However, the workflow processes described in this section are specifically for providing communication among your users and you can modify them as appropriate for your business.
These workflow processes include the following seeded workflow extension packages:
■ Assignment Approval Workflow Extensions
■ Candidate Notification Workflow Extension
These extension packages are described in this section in relation to the process to which they belong. For more information on defining and modifying workflow processes and modifying client extensions, refer to the following sources:
■ Chapter 13, "Integration with Other Oracle Applications," in the Oracle Projects User Guide
■ Chapter 19, "Client Extensions," in the Oracle Projects User Guide
■ Oracle Workflow Guide, Release 2.5.2
Initiating Deferred Workflow ProcessesDeferred workflow processes handle time-consuming tasks that can be automated and placed in the background so that users can continue working in the application without waiting for the requested task to complete. For example, applying the requirements of a team template to a project uses a deferred workflow process and when the task is completed, a notification is sent to the user who initiated the action.
These deferred workflow processes need at least one background engine to monitor background activities in order to ensure consistent processing. Therefore, you must submit a request to enable a concurrent program for workflow background processing.
To submit a request, complete the following steps:
8-10 Oracle Project Resource Management Implementation and Administration Guide

Overview of Predefined Workflows
1. Navigate to the Submit Requests form.
2. Submit the Workflow Background Process concurrent program as a request.
3. Schedule the process to repeat itself at appropriate intervals.
For more information, see "Submitting a Request" in the Oracle Applications Users Guide and "Setting Up Oracle Workflow" in the Oracle Workflow Guide, Release 2.5.2.
Seeded Assignment Approval Workflow ProcessThis workflow process begins when an assignment is created for a resource and is submitted for approval by a person that does not have the authority to approve the resource assignment. This workflow process progresses as the status of the assignment changes. The approvers for this process can include the staffing manager and the resource manager. Upon approval or rejection, FYI notifications are sent to the resource, the resource manager, staffing manager, and the project manager.
The predefined status flows for assignment approval are:
■ Working -> Submitted -> Approved
■ Working -> Submitted -> Rejected -> Requires Resubmission -> Submitted -> Approved
Actions invoke changes in the assignment approval status. The following table describes how the default assignment approval workflow changes the status based on actions:
Action Status Change
Assignment is created Working
Assignment is submitted for approval Submitted
Assignment is approved Approved
Assignment is cancelled Cancelled
Assignment is rejected Rejected
Assignment is changed Working
Assignment is resubmitted and the changes do not require approval
Approved
Assignment is resubmitted and the changes require approval Submitted
Defining the Project Environment 8-11

Overview of Predefined Workflows
The following changes on an assignment require an approval:
■ a change in duration because it affects the schedule and availability of the resource, such as any extension, shortening or moving the start dates forward
■ a change in work type because it affects billability or utilization percentage
You can change the order of the status flow for your business using these predefined statuses and creating your own processes. For more information, see "Assignment Approval Workflow Item Type and Processes" later in this chapter.
The automated Oracle Workflow-based approval process is enabled if the assignment approval status Submitted has been workflow-enabled. Oracle Workflow FYI notifications for Approved and Rejected statuses are enabled if Workflow is enabled for the assignment approval status of Approved or Rejected.
If you do not enable the workflow-based approval process, assignments retain the Submitted status until a user with authority over the resources manually logs in and approves or rejects each assignment. Due to the enforcement of project security, the person logging in should also have authority over the project in order to approve or reject a given assignment. The approver can only be the primary contact or the resource manager.
Assignment Approval Workflow Item Type and ProcessesThe assignment approval workflow process includes one predefined workflow item type: PA: Project Assignments. This item type includes the following workflow processes:
■ PA: Project Assignment Approval - main approval process
■ PA: Assignment Approval Notification - approval notification process
■ PA: Assignment Rejection Notification - rejected notification process
■ PA: Assignment Cancellation Notification - cancelled notification process
These processes activate based on the status of the assignment. The following table provides the default workflow setup of these statuses:
Rejected assignment is changed Requires Resubmission
Action Status Change
8-12 Oracle Project Resource Management Implementation and Administration Guide
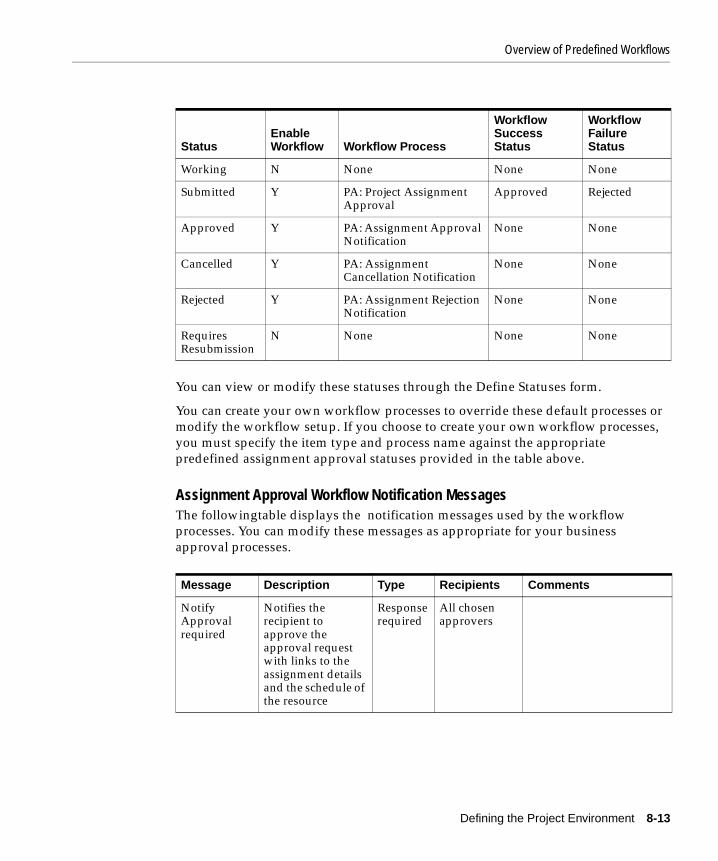
Overview of Predefined Workflows
You can view or modify these statuses through the Define Statuses form.
You can create your own workflow processes to override these default processes or modify the workflow setup. If you choose to create your own workflow processes, you must specify the item type and process name against the appropriate predefined assignment approval statuses provided in the table above.
Assignment Approval Workflow Notification MessagesThe followingtable displays the notification messages used by the workflow processes. You can modify these messages as appropriate for your business approval processes.
StatusEnable Workflow Workflow Process
Workflow Success Status
Workflow Failure Status
Working N None None None
Submitted Y PA: Project Assignment Approval
Approved Rejected
Approved Y PA: Assignment Approval Notification
None None
Cancelled Y PA: Assignment Cancellation Notification
None None
Rejected Y PA: Assignment Rejection Notification
None None
Requires Resubmission
N None None None
Message Description Type Recipients Comments
Notify Approval required
Notifies the recipient to approve the approval request with links to the assignment details and the schedule of the resource
Response required
All chosen approvers
Defining the Project Environment 8-13

Overview of Predefined Workflows
For more information on defining notification messages, see the Oracle Workflow Guide.
Assignment Schedule StatusesRequirement and assignment statuses are referred to as assignment schedule statuses because they reflect the status of the schedule for particular days. The following table provides the default settings for these statuses:
Assignment schedule statuses do not launch approval workflow and you cannot enable workflow processes on these statuses. However, you can specify the workflow success and failure statuses for each assignment schedule status. Specifying the success and failure statuses are important because the schedules and
Notification of assignment approval
Notifies the recipient that the approval request has been approved
FYI only ■ Resource
■ Resource Manager
■ Staffing Manager
■ Project Manager
Any comments by the approvers are suppressed in the notification to the resource.
Notification of assignment rejection
Notifies the recipient that the approval request has been rejected
FYI only ■ Resource
■ Resource Manager
■ Staffing Manager
■ Project Manager
All comments by the approvers are suppressed in the notification to the resource.
User Status System Status Success Status Failure Status
Proposed Provisional Confirmed Rejected
Provisional Provisional Confirmed Rejected
Confirmed Confirmed None None
Cancelled Cancelled None None
Rejected Cancelled None None
Message Description Type Recipients Comments
8-14 Oracle Project Resource Management Implementation and Administration Guide
Overview of Predefined Workflows
timelines reflect all Confirmed and Provisional assignments. Therefore, the provisional assignment schedule status must be set to a confirmed status upon the completion of an approval process whether manual or automated through Oracle Workflow. Since all assignment schedule statuses are user-defined, you must specify the success and failure statuses for each user-defined Provisional status.
Assignment Approval Workflow ExtensionsClient extensions relating to the approval of assignments are as follows:
■ Assignment Approval Changes Extension
■ Assignment Approval Notification Extensions
This section covers each extension providing detail on the package and related functions and procedures. For more information on client extensions, see Chapter 19, "Client Extensions," in the Oracle Projects User Guide.
Assignment Approval Changes ExtensionThis client extension enforces the following conditions to determine whether or not an approval is required for an assignment:
■ Change in Duration
Any extension, shortening, or changing the dates of an assignment requires approval as it effects the schedule and availability of the resource.
■ Change in Work Type
Any change in the work type on an assignment can have an effect on the billability and utilization percentage of the resource and therefore, requires approval.
Oracle Project Resource Management provides a template package called PA_CLIENT_EXTN_ASGNMT_APPRVL. If you choose to write your own extensions, print out the following files first. These files are located in the Oracle Project Resource Management admin/sql directory:
■ PARAAPCB.pls
This file contains the procedures that you can modify to implement the extension.
■ PARAAPCS.pls
This file contains the specifications of the extension package. If you create procedures outside of the predefined procedure within the PA_CLIENT_EXTN_
Defining the Project Environment 8-15

Overview of Predefined Workflows
ASGNMT_APPRVL package, you must also modify this file to include those new procedures.
This package has a function called IS_ASGMT_APPR_ITEMS_CHANGED. This function can return a VARCHAR2 value of either Y or N. The description of the data type for this function are listed in the following table:
Assignment Approval Notification ExtensionsThe circulation of notifications is controlled by the predefined workflow processes. These processes use workflow extensions to provide the lists of contacts for each notification. The client extensions obtain the list of default contacts (recipients) from the workflow process and makes any modifications to the list that the user may have specified through the Oracle Project Resource Management application. The end result is a customized list of recipients for the notification or approval request which the workflow process uses.
Oracle Project Resource Management provides a template package called PA_CLIENT_EXTN_ASGNMT_WF. If you choose to write your own extensions, print out the following files first. The files are located in the Oracle Project Resource Management admin/sql directory:
■ PARAWFCB.pls
This file contains the procedures that you can modify to implement the extension.
■ PARAWFCS.pls
This file contains the specifications of the extension package. If you create procedures outside of the predefined procedure within the PA_CLIENT_EXTN_ASGNMT_WF package, you must also modify this file to include those new procedures.
The description of the USERS_LIST_TBLTYP parameters for this package are listed in the following table:
Parameter Name Data Type Description Mandatory
P_ASSIGNMENT_ID NUMBER The identifier of the assignment Yes
Parameter Name Data Type Description Mandatory
USER_NAME VARCHAR2 The workflow user name of the approver
Yes
8-16 Oracle Project Resource Management Implementation and Administration Guide
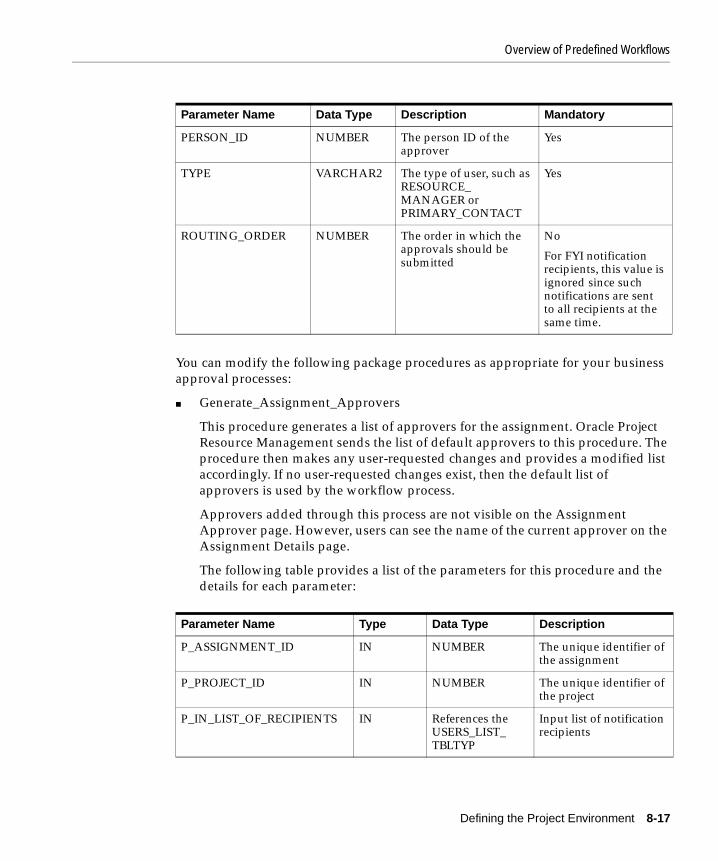
Overview of Predefined Workflows
You can modify the following package procedures as appropriate for your business approval processes:
■ Generate_Assignment_Approvers
This procedure generates a list of approvers for the assignment. Oracle Project Resource Management sends the list of default approvers to this procedure. The procedure then makes any user-requested changes and provides a modified list accordingly. If no user-requested changes exist, then the default list of approvers is used by the workflow process.
Approvers added through this process are not visible on the Assignment Approver page. However, users can see the name of the current approver on the Assignment Details page.
The following table provides a list of the parameters for this procedure and the details for each parameter:
PERSON_ID NUMBER The person ID of the approver
Yes
TYPE VARCHAR2 The type of user, such as RESOURCE_MANAGER or PRIMARY_CONTACT
Yes
ROUTING_ORDER NUMBER The order in which the approvals should be submitted
No
For FYI notification recipients, this value is ignored since such notifications are sent to all recipients at the same time.
Parameter Name Type Data Type Description
P_ASSIGNMENT_ID IN NUMBER The unique identifier of the assignment
P_PROJECT_ID IN NUMBER The unique identifier of the project
P_IN_LIST_OF_RECIPIENTS IN References the USERS_LIST_TBLTYP
Input list of notification recipients
Parameter Name Data Type Description Mandatory
Defining the Project Environment 8-17

Overview of Predefined Workflows
■ Generate_NF_Recipients
This client extension procedure generates a list of recipients for the various notifications. Oracle Project Resource Management sends the list of default approvers to this procedure. The procedure then makes any user-requested changes and provides a modified list accordingly. If no user-requested changes exist, then the default list of recipients is used by the workflow process. This client extension procedure is used by the following FYI notifications:
– Assignment Approval Notification
– Assignment Rejection Notification
– Assignment Cancellation Notification
The following table provides a list of the parameters for this procedure and the details for each parameter:
X_OUT_LIST _OF_RECIPIENTS
OUT References the USERS_LIST_TBLTYP
Output list of notification recipients
X_NUMBER_OF_RECIPIENTS OUT NUMBER Number of recipients
Parameter Name Type Data Type Description
P_ASSIGNMENT_ID IN NUMBER The unique identifier of the assignment
P_PROJECT_ID IN NUMBER The unique identifier of the project
P_NOTIFICATION_TYPE IN VARCHAR2 Type of notification; valid values are:
■ APPROVAL_FYI
■ REJECTION_FYI
P_IN_LIST_OF_RECIPIENTS IN References the USERS_LIST_TBLTYP
Input list of notification recipients
X_OUT_LIST _OF_RECIPIENTS
OUT References the USERS_LIST_TBLTYP
Output list of notification recipients
X_NUMBER_OF_RECIPIENTS OUT NUMBER Number of recipients
Parameter Name Type Data Type Description
8-18 Oracle Project Resource Management Implementation and Administration Guide

Overview of Predefined Workflows
■ Set_Timeout_And_Reminders
This client extension procedure provides the reminder parameters, such as the waiting period between reminders and the number of reminders before the workflow process is cancelled.
The following table provides a list of the parameters for this procedure and the details for each parameter:
Seeded Candidate Workflow ProcessesOracle Project Resource Management has two seeded notification workflow processes relating to a status change on candidates. These processes are optional.
New CandidateAs a candidate is nominated for a requirement, the candidate is initially given a status of Pending Review. This status invokes a notification process. This process notifies the resource, the manager of the resource, and their staffing manager of the nomination. The person that nominated the candidate does not receive a notification. Therefore, if the nomination was made by the resource, resource manager, or staffing manager, then that person is excluded from the notification process.
Parameter Name Type Data Type Description
P_ASSIGNMENT_ID IN NUMBER The unique identifier of the assignment
P_PROJECT_ID IN NUMBER The unique identifier of the project
X_WAITING_TIMES OUT NUMBER The maximum amount of time to wait before sending a reminder
X_NUMBER_OF_REMINDERS OUT NUMBER The maximum number of reminders to send before aborting the process
Defining the Project Environment 8-19

Overview of Predefined Workflows
Candidate DeclinedWhen a resource is declined as a candidate on a project, the status of the candidate is changed to any user status with a system status of Declined. This status initiates a notification process. This process notifies the candidate, the manager of the resource, and their staffing manager of the change in status. However, a notification is not sent to the person who declined the candidate, if that person is one of these individuals.
Candidate Notification Workflow ExtensionThe candidate workflow processes use a template package called PA_CLIENT_EXTN_CAND_WF. If you choose to write your own extensions, print out the following files first. The files are located in the Oracle Project Resource Management admin/sql directory:
■ PARCWFCB.pls
This file contains the procedures that you can modify to implement the extension.
■ PARCWFCS.pls
This file contains the specifications of the extension package. If you create procedures outside of the predefined procedure within the PA_CLIENT_EXTN_CAND_WF package, you must also modify this file to include those new procedures.
The description of the USERS_LIST_TBLTYP parameters for this package are listed in the following table:
Parameter Name Data Type Description Mandatory
USER_NAME VARCHAR2 The workflow user name of the approver
Yes
PERSON_ID NUMBER The person ID of the approver Yes
TYPE VARCHAR2 The type of user, such as RESOURCE_MANAGER or PRIMARY_CONTACT
Yes
8-20 Oracle Project Resource Management Implementation and Administration Guide

Overview of Predefined Workflows
This package contains one procedure. You can modify the following package procedure as appropriate for your business notification processes:
■ Generate_NF_Recipients
This client extension procedure generates a list of recipients for the various notifications. Oracle Project Resource Management sends the list of default approvers to this procedure. The procedure then makes any user-requested changes and provides a modified list accordingly. If no user-requested changes exist, then the default list of recipients is used by the workflow process. This client extension procedure is used by the following FYI notifications:
– Candidate Nominated Notification
– Candidate Declined Notification
The following table provides a list of the parameters for this procedure and the details for each parameter:
ROUTING_ORDER NUMBER The order in which the approvals should be submitted
No
For FYI notification recipients, this value is ignored since such notifications are sent to all recipients at the same time.
Parameter Name Type Data Type Description
P_PROJECT_ID IN NUMBER The unique identifier of the project
P_ASSIGNMENT_ID IN NUMBER The unique identifier of the assignment
P_CANDIDATE_NUMBER IN NUMBER The unique identifier of the candidate
P_NOTIFICATION_TYPE IN VARCHAR2 Type of notification; valid values are:
■ PENDING_REVIEW_FYI
■ DECLINED_FYI
Parameter Name Data Type Description Mandatory
Defining the Project Environment 8-21

Overview of Predefined Workflows
P_IN_LIST_OF_RECIPIENTS IN References the USERS_LIST_TBLTYP
Input list of notification recipients
X_OUT_LIST _OF_RECIPIENTS
OUT References the USERS_LIST_TBLTYP
Output list of notification recipients
X_NUMBER_OF_RECIPIENTS OUT NUMBER Number of recipients
Parameter Name Type Data Type Description
8-22 Oracle Project Resource Management Implementation and Administration Guide

Setting Up Your Self-Service Environment
Setting Up Your Self-Service EnvironmentYou can set up your self-service environment to accommodate your business needs and the needs of your users. For complete instructions, see the Oracle Self-Service Web Applications Implementation Manual for instructions.
The following table lists the required Self-Service Web Applications profiles for the home page setup:
Profile Description Value Example Value
Applications Web Agent
Identifies the location of the Web agent
http://your_web_server: port/<plsql cartridge virtual path>/
http://ap242sun.us.oracle.com: 8000/bis115/plsql/
ICX: Language Determines the default language
Language American English
ICX: Date language Determines the default language in which dates are displayed.
Language American English
ICX: Date format mask
Determines the date format mask to use
Date Format Mask The American English default is DD-MON-YYYY; for example, 12-NOV-1997
ICX: Numeric characters
Determines the characters to use to delimit numbers
., .,
ICX: Territory Geographical area Geographical area America
ICX: Discoverer Launcher
Identifies the Discoverer Server that runs reports and produces HTML output
http://your_discover_server:port/webdis/html/ english/welcome.htm? Connect=[AP PS_SECURE]
http://AP4811PC.us.oracle. com/webdis/html/english/ welcome.htm?Connect=[APPS_SECURE]
ICX: Discoverer End User Layer Schema Prefix
This in combination with the Language code make up the EUL Owner at runtime.
For example:
If your EUL owner is EUL_US, then your ICX_DEFAULT_EU L profile should be EUL
(The language code to derive the complete EUL owner is automatically added).
EUL EUL
Defining the Project Environment 8-23

Setting Up Your Self-Service Environment
8-24 Oracle Project Resource Management Implementation and Administration Guide
Implementing Resource Utiliza
9
Implementing Resource UtilizationThe utilization functionality of Oracle Projects and Oracle Project Resource Management enables you to generate actual and forecast totals of your resource utilization. In addition, you can classify your resource hours to calculate utilization percentages for:
■ Actual hours based on time card expenditures
■ Forecast hours based on schedule assignments
Oracle Project Resource Management generates forecasts for both provisional and confirmed assignments enabling you to distinguish between real work hours and potential work hours. This chapter discusses the business considerations and setup requirements for resource utilization through the following topics:
■ Defining Your Utilization Strategy
■ Implementing Your Utilization Strategy
■ Defining the Utilization Profile Options
Note: Implementing Oracle Project Resource Management in standalone mode enables you to generate and report the forecast utilization totals. However, if you want to generate actual utilization totals, you must also implement Oracle Projects Costing. For more information on implementing Oracle Projects Costing, see the Oracle Projects User Guide.
tion 9-1
Defining Your Utilization Strategy
Defining Your Utilization StrategyPrior to implementing utilization for your enterprise, you should understand how the Oracle Project Resource Management application generates the utilization totals and evaluate what you want these totals to represent. Through these considerations, you must decide:
■ which resources should be included for reporting utilization
■ what reporting time periods you want to use
■ who will have access to the utilization totals
■ how resource hours are summarized for reporting purposes
The actual utilization totals are generated for all hours reported through employee timecards. Forecast utilization totals are generated based on provisional and confirmed assignments entered through Oracle Project Resource Management.
The utilization functionality classifies actual and forecast hours by work types which enables you to:
■ identify each work type as Billable/Capitalizable or Non-Billable/Non-Capitalizable
■ determine if specific non-billable/capitalizable work types will reduce capacity
■ define a weighting percentage for each Work Type for all capacity work types.
The weighting percentage is applied to resource hours when summarizing those hours for the utilization percentage calculation. Two utilization percentages are calculated for both resource utilization categories and organization utilization categories. The calculation for generating these percentages is as follows:
■ Capacity Method = sum of weighted hours / sum of unweighted capacity hours
■ Total Worked Hours = sum of weighted hours /total weighted hours
Capacity hours are the total number of hours for the specified time period based on the resource calendar. Actual calendar capacity is modified by subtracting any recorded hours against the project tasks with non-capacity work types. Forecast
Note: Work types defined as Non-Capacity always carry a 0% weighting percentage.
9-2 Oracle Project Resource Management Implementation and Administration Guide

Defining Your Utilization Strategy
capacity is modified by any forecast hours from assignments with non-capacity work types.
Utilization Time PeriodsThe utilization totals are provided for one or more of the following time periods:
■ Global Start Week
■ PA Period
■ GL Period
■ Quarter
■ Year
Utilization ViewsResource hours are summarized into two distinct groups of utilization reporting categories. These category groupings are used to create the following two utilization views:
■ Resource Utilization View
This view summarizes actual and forecast utilization hours by Resource Utilization Categories. The resource utilization percentage is calculated by dividing the weighted resource utilization category hours by the specified utilization method.
■ Organization Utilization View
This view summarizes actual and forecast hours by Organization Resource Categories. The organization utilization percentage is calculated by dividing the weighted organization utilization category hours by the specified utilization method.
These utilization views provide you with two distinct managerial views of the work that resources and their organizations have performed or will perform.
Implementing Resource Utilization 9-3

Defining Your Utilization Strategy
Utilization MethodsThe method you select determines the denominator for the utilization percentage calculation.
■ Capacity
This method uses the capacity hours as the denominator for the utilization percentage calculation.
■ Total Worked Hours
This method uses the total number of hours recorded by time cards or scheduled on assignments as the denominator.
Utilization ReportingUtilization totals are reported to three types of organization roles:
■ Organization Manager
Organization utilization reports for all resource hours for the selected time period a resource is assigned to the specific organization.
■ Resource Manager
Resource utilization reports for all resource hours for the selected time period where the resource is currently assigned to the resource manager regardless of organization assignment.
■ Individual Resource
Resources can monitor their personal performances through viewing all their reported and assigned hours for a selected time period.
9-4 Oracle Project Resource Management Implementation and Administration Guide
Implementing Your Utilization Strategy
Implementing Your Utilization StrategyImplementation options and functions are available for you to tailor the utilization calculations to your business needs as well as provide viewing ability to your users. These options include:
■ Determining Utilization Jobs
■ Establishing Utilization Categories and Work Types
■ Implementing Utilization Forecasting Functionality
■ Establishing Unassigned Time Tracking
■ Choosing Your Reporting Time Period
■ Granting Utilization Authority
Determining Utilization JobsAll HR jobs have a flag which indicates whether or not the job is tracked for utilization. As resources are assigned to these jobs, you can track their hours in the utilization reports.
To include jobs in utilization, complete the following steps:
1. Login as the Project Resource Management Super User.
2. Navigate to the Jobs form:
Setup > Human Resources > Jobs
3. Select the desired HR Job Group
4. For each job, select Others, then Extra Information.
5. In the Job Category Details window, select Yes or No for Include in Utilization.
Note: The Billable choice is used only for financial forecast reporting. See Chapter 10, "Implementing Financial Forecasting" for implementation and usage information.
Implementing Resource Utilization 9-5

Implementing Your Utilization Strategy
Establishing Utilization Categories and Work TypesIn order to use the utilization functionality, you must define work types and utilization categories. These attributes provide a means of classifying and sorting the work into logical and meaningful utilization reports.
Defining Utilization CategoriesUtilization categories are classifications of work types for reporting purposes. Work types are summarized into utilization categories and can carry different weighting percentages to provide two distinct Utilization Views:
■ Resource Utilization View - to provide a utilization view for resources and their managers
■ Organization Utilization View - to provide business managers a utilization view for their organizations and related resources
These utilization views enable you to create two distinct managerial views of the work that resources and their organizations have performed or will perform. You can use each utilization category for one or both utilization views.
Creating Utilization Categories To create your utilization categories, use the following menu path:
Projects Menu > Setup > Utilization > Utilization Categories
When you define a utilization category, you assign a code, a meaning, and description, as well as the attributes as applicable to the category listed in the following table:
Using Utilization Categories The effectiveness of utilization categories is best illustrated through an example. In the following example, a resource has performed warranty work which is not billable. The challenge is how to reflect that in your utilization reporting so that it does not inflate your revenue-generating utilization.
Attribute Description
Description Enter a long description for the utilization category. This field is optional.
Reporting Order Determine the display order for the categories on the screens and reports.
Effective Dates Enter the beginning and ending date for which the utilization category is effective.
9-6 Oracle Project Resource Management Implementation and Administration Guide
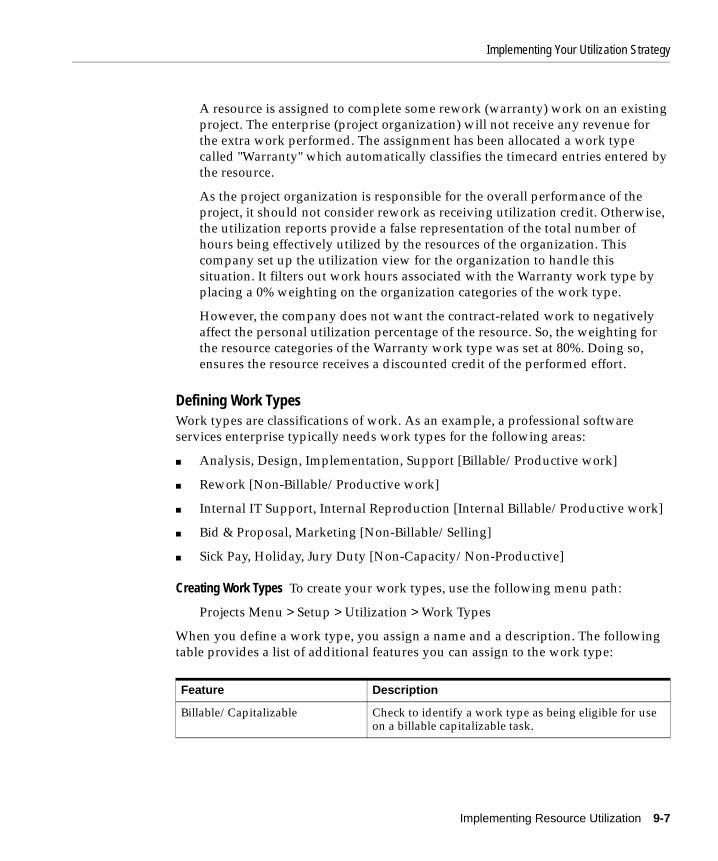
Implementing Your Utilization Strategy
A resource is assigned to complete some rework (warranty) work on an existing project. The enterprise (project organization) will not receive any revenue for the extra work performed. The assignment has been allocated a work type called "Warranty" which automatically classifies the timecard entries entered by the resource.
As the project organization is responsible for the overall performance of the project, it should not consider rework as receiving utilization credit. Otherwise, the utilization reports provide a false representation of the total number of hours being effectively utilized by the resources of the organization. This company set up the utilization view for the organization to handle this situation. It filters out work hours associated with the Warranty work type by placing a 0% weighting on the organization categories of the work type.
However, the company does not want the contract-related work to negatively affect the personal utilization percentage of the resource. So, the weighting for the resource categories of the Warranty work type was set at 80%. Doing so, ensures the resource receives a discounted credit of the performed effort.
Defining Work TypesWork types are classifications of work. As an example, a professional software services enterprise typically needs work types for the following areas:
■ Analysis, Design, Implementation, Support [Billable/Productive work]
■ Rework [Non-Billable/Productive work]
■ Internal IT Support, Internal Reproduction [Internal Billable/Productive work]
■ Bid & Proposal, Marketing [Non-Billable/Selling]
■ Sick Pay, Holiday, Jury Duty [Non-Capacity/Non-Productive]
Creating Work Types To create your work types, use the following menu path:
Projects Menu > Setup > Utilization > Work Types
When you define a work type, you assign a name and a description. The following table provides a list of additional features you can assign to the work type:
Feature Description
Billable/Capitalizable Check to identify a work type as being eligible for use on a billable capitalizable task.
Implementing Resource Utilization 9-7

Implementing Your Utilization Strategy
Using Work Types You assign work types to project types, projects, tasks, and assignments. The implementation process initially assigns default work types to existing project types. You can modify these defaults as appropriate for your business needs. Work types assigned to project types default to associated projects and templates, and eventually, to the tasks and assignments of the project. You can override a work type at the project, assignment, and task levels. However, an override does not carry down to existing child tasks or assignments. You must update each existing task and assignment individually.
To assign work types for forecast items on assignments, navigate to the Add Assignment page.
To assign work types to tasks for actual items, navigate to:
Project > Task > Options > Task Detail
Non-Capacity Check to calculate capacity summarization by subtracting the work type hours from the total capacity and total work hours. Only Non-Billable/Capitalizable work types may select this option.
Resource Utilization Category Select the utilization category in which the work type should be considered for resource utilization calculations.
Resource Weighting Percentage Enter a value between 0 and 100. The utilization functionality uses this value to define utilization calculations. The default value is 100% if the work type is billable or capitalizable, otherwise, it defaults to 0.
Organization Utilization Category
Select the utilization category in which the work type should be considered for organization utilization calculations.
Organization Weighting Percentage
Enter a value between 0 and 100. The utilization functionality uses this value to define utilization calculations. The default value is 100% if the work type is billable or capitalizable, otherwise, it defaults to 0.
Standard Effective Dates Enter the date range for which the work type is effective.
Note: You can assign Billable/Capitalizable work types only to billable tasks (tasks which have the Billable flag checked.)
Feature Description
9-8 Oracle Project Resource Management Implementation and Administration Guide

Implementing Your Utilization Strategy
Implementing Utilization Forecasting FunctionalityOracle Project Resource Management creates the forecast utilization totals for both both provisional and confirmed assignments. These totals are based on forecast items. Forecast items are generated for each day of an assignment or requirement.
The implementation options determine how forecast items are generated and their default attributes. For more information on the Forecast Implementation Options, see "Defining Forecasting Options" in Chapter 10, "Implementing Financial Forecasting".
Establishing Unassigned Time TrackingOracle Project Resource Management automatically generates totals for unassigned time for all utilization jobs. The calculation for unassigned time subtracts both provisional and confirmed assignment hours from the total capacity for each available day. Any remaining hours generated from this calculation are assigned to projects specifically implemented for the purpose of tracking unassigned hours.
For more instructions on how to establish unassigned time tracking, see "Defining Unassigned Time Tracking" in Chapter 10, "Implementing Financial Forecasting".
Choosing Your Reporting Time PeriodYou have three reporting periods on which you can perform utilization reporting: GL Period, PA Period, and Global Week.The GL Period option summarizes the utilization totals into financial general ledger period totals. The PA Period option summarizes the utilization totals in periods distinctly different from your GL Period. The Global Week option summarizes utilization totals by weeks (7 day periods). This particular option is useful for calculation totals across the organization which have different financial calendar periods. It helps provide an accurate picture of the totals on a enterprise basis.
You have a choice on which periods you want to summarize your enterprise and organization utilization totals.
To define your utilization time periods, complete the following steps:
1. Login as Project Resource Management Super User.
2. Navigate to the Utilization Options form.
Implementing Resource Utilization 9-9

Implementing Your Utilization Strategy
3. Select at least one of the following options:
■ PA period
■ GL Period
■ Global Week
Granting Utilization AuthorityYou can provide your users the ability to view resource or organization utilization totals through:
■ assigning specific responsibilities
■ assigning HR supervisors to employee assignments
■ granting Organization Utilization Authority
Review of ResponsibilitiesThe following predefined responsibilities allow different levels of access to the utilization information:
■ Organization Manager Responsibility
This responsibility provides access to the Organization Utilization page. This page displays utilization totals for the organizations for which the business manager oversees. It also provides the ability to drill-down to individual summary amounts for resources assigned to the organization or suborganization.
■ Resource Manager Responsibility
This responsibility provides access to the Resource Utilization page. This page displays utilization totals for all resources reporting to the manager. These resources include any person who has the Resource Manager currently assigned as their supervisor in their HR assignment. It also provides the ability to drill-down to resources who are subordinates to direct reports.
■ Team Member Responsibility
This responsibility provides access to the My Utilization page to view personal utilization totals.
9-10 Oracle Project Resource Management Implementation and Administration Guide
Implementing Your Utilization Strategy
Granting Organization Utilization AuthorityThe Organization Utilization Authority enables a user to view the utilization amounts for an organization, all direct resources of the organization, all the suborganizations, and the resources of those suborganizations.
To grant this authority to individual users, navigate to:
Projects menu > Human Resources > Organization Authority
For more information on this authority, see "Assigning Organizational Authority" in Chapter 5, "Configuring Your Organization Security".
Implementing Resource Utilization 9-11

Defining the Utilization Profile Options
Defining the Utilization Profile OptionsYou have control over how utilization totals are processed through the following profile options:
■ PA: Global Week Start Day
■ PA: Utilization Records Per Set
■ PA: Utilization Manager Default Period Type
■ PA: Organization Utilization Default Calculation Method
■ PA: Resource Utilization Period Type
■ PA: Resource Utilization Calculation Method
■ PA: Utilization Calculation Begin Date
Each profile option provides a different control on how your utilization totals are calculated and processed. All utilization profile options are set at the site level.
PA: Global Week Start DayThis profile option specifies the weekday you want recognized as the beginning of the week. Set this profile option at the site level. Valid values are 1 through 7 representing the days of the week. The definition of the numeric values are:
1 = Sunday
2 = Monday
3 = Tuesday
4 = Wednesday
5 = Thursday
6 = Friday
7 = Saturday
Note: Global weeks use the date of the first day of the defined week as the name of the period. For example, the name of the global week for the week of April 1st through the 7th or the year 2001 is 01-APR-2001.
9-12 Oracle Project Resource Management Implementation and Administration Guide

Defining the Utilization Profile Options
PA: Utilization Records Per SetThis profile option determines the number of transactions to process in each set during the PRC: Generate Utilization process. The default value is set to 5000 records. You can change this number under the following restrictions:
■ the number cannot make the process exceed system memory
■ the number cannot exceed the database rollback segment size
■ the number must be large enough to avoid unnecessary database accesses
PA: Utilization Manager Default Period TypeThis profile option determines the default period type used when initially entering an organization or resource utilization reporting screen. Your choices are: PA Period, GL Period, Global Week, Quarter, and Year.
PA: Organization Utilization Default Calculation MethodThis profile option determines the default utilization percentage to show when initially entering an organization utilization reporting screen. Your choices are Capacity or Total Worked Hours.
PA: Resource Utilization Period TypeThis profile option determines the default period type used when initially entering a resource utilization reporting screen. Your choices are PA Period, GL Period, and Global Week.
PA: Resource Utilization Calculation MethodThis profile option determines the default period type used when initially entering a resource utilization reporting screen for an individual. Your choices are Capacity or Total Worked Hours.
PA: Utilization Calculation Begin DateThis profile option determines the date to begin calculating the utilization hours for both actuals and forecast amounts. No resource hours prior to this date will be included in any of the generated totals.
After setting this particular profile option, you must run a concurrent process called PRC: Identify Transactions for Actuals Utilization to flag all transactions that should be excluded from the summarization of actual utilization hours. When this process is run, any transaction with a date prior to the date specified in this profile option
Implementing Resource Utilization 9-13

Defining the Utilization Profile Options
will be flagged as a non-utilization transaction. Therefore, these transactions are ignored when the utilization totals are generated.
This process is an optional one-time implementation step and does not have to be repeated unless you change the date in the PA: Utilization Calculation Begin Date profile option.
Note: Setting this profile option and running the related concurrent process is optional. Only use this profile option and process if you want to exclude a major portion of existing data from the utilization totals.
9-14 Oracle Project Resource Management Implementation and Administration Guide

Implementing Financial Forec
10
Implementing Financial ForecastingOracle Project Resource Management can produce financial forecasts for your projects based on existing staffing plans. This self-service financial forecast functionality enables you to:
■ perform forecasts based on single or multiple projects
■ drilldown to find out the distribution of the forecast totals
■ regenerate forecasts on adjusted staffing plans
This chapter describes how to set up the required elements for performing forecasting activities through the following topics:
■ Overview of the Financial Forecast Process and Calculations
■ Implementing the Forecast Functionality
■ Establishing Security on Forecast Functionality
asting 10-1

Overview of the Financial Forecast Process and Calculations
Overview of the Financial Forecast Process and CalculationsOracle Project Resource Management provides a financial forecast process which use calculations based on your predefined bill and cost rates. These rates are evaluated within the time frame of the assignments and requirements and the scheduled work patterns to provide you forecast totals. This section describes the process and calculations used to generate these forecast totals.
Financial Forecast ProcessWhen you invoke the action to generate a forecast, the process evaluates for the project the daily hours of the staffed labor (assignments) and open requirements. The daily hours of the assignments and requirements are summarized based on the time period (GL Period or PA Period) for the life of the project.
These totals are used to derive your total estimated cost, revenue, margin, and margin percentage for the project. For requirements, the forecast cost and bill rates are obtained from the job assigned to the role in Project Resource Management. For assignments, this information is obtained directly from the assigned employee.
After the forecast generation completes, a notification is sent to the user who invoked the process. This notification indicates whether or not the forecast totals were generated successfully. On the Project Forecast page, an indicator appears next to the role or project for which errors on forecast items occurred. A link to the forecast error page is provided on the Project Forecast page. This page provides an explanation of the errors encountered for each assignment or requirement for the project. The user can regenerate the forecast after the errors have been corrected..
Note: The generation of forecast totals is handled through deferred Oracle Workflow processes. As the volume of the forecast items can be large, these processes can require a substantial amount of time to complete the processing of forecast items. You can increase the processing performance by creating additional background process dedicated only to processing the forecast items. For more information, see"Understanding Data Processing" in Chapter 12, "Maintaining Your Data".
10-2 Oracle Project Resource Management Implementation and Administration Guide

Overview of the Financial Forecast Process and Calculations
Forecast CalculationsEach forecast page provides totals for labor hours, cost, revenue, margin, and margin percentage. These totals can vary depending upon how you implement the forecast options. Therefore, it is helpful to review the calculations for each of these totals to assist you with making your implementation decisions.
The calculations used to derive the forecast totals are as follows:
■ Hours = The number of hours for each requirement or assignment in the Project Resource Management staffing plan, by role and period.
■ Cost = The labor raw cost represents for each role the cost of the requirements and assignments.
The cost rates for assignments are based on the employee cost rates. The cost rates for requirements is based on the cost rate of the job associated with the role of the requirement.
The burden schedule for the project is applied to the raw cost rates to provide the burdened costs which are reflected in the forecast. The formula to derive the cost rate is as follows:
■ Average Cost Rate = Total Burdened Cost / Total Hours
This amount appears in the Average Rate column when you select Cost as the Show Amount.
■ Margin = Revenue - Cost
Margin is calculated at the same level as Revenue for each project.
■ Margin % =[ (Revenue - Cost) / Revenue ] * 100%
Margin % is calculated at the same level as Revenue for each project.
Calculating RevenueRevenue is calculated differently based on the distribution rule assigned to your projects. Using the work-based distribution rule, the revenue for time and material projects is calculated by role. Using the cost and event-based distribution rules, the revenue for fixed-price projects is displayed as one line for the entire project. The formulas for generating the displayed totals are provided below grouped by the distribution rules.
The following sections describe the revenue calculations for each distribution rule. For more information regarding forecasting and the distribution rules, see the Oracle Projects User Guide.
Implementing Financial Forecasting 10-3

Overview of the Financial Forecast Process and Calculations
Revenue Calculation for Projects Using Work-Based Distribution Rule For projects with a work-based distribution rule, the revenue is derived as follows:
■ Revenue = Hours * Bill Rate
The bill rate is derived from any project-level bill rate overrides. If no overrides exist, then the bill rate is derived from one of the following based upon how your project has been defined:
■ Rate Schedules
The rate schedules for both assignments and requirements are retrieved from the associated job. For assignments, the rate schedule is overridden if the assigned employee has a rate in the defined employee-based rate schedule.
■ Burden Schedules
If a burden schedule is associated with the project, then it is used to determine the revenue by marking up the cost.
After the bill rate is determined, any defined project-level discount percentages are applied. You can set a project-level discount to any project using the following navigation path from the individual project:
Project Options > Bill Rates and Overrides > Standard Billing Schedules
The rates and discount percentage displayed in the forecast pages are derived using the following calculations:
■ Standard Rate = Job-based bill rate schedule (as of the start of the assignment)
■ Average Rate = Total Revenue / Total Hours
■ Effective Discount % = [ (Standard Rate - Average Rate) / Standard rate ] * 100%
Revenue Calculation for Projects Using Cost-Based Distribution Rule For projects with a cost-based distribution rule, the revenue is calculated as follows:
■ Revenue (For period X) = [ (A / B) * C ] - D
Where:
X = Current PeriodA = Inception to Period X Total CostB = Total Project CostC = Total Project Value D = Inception to Prior Period End (X-1) Revenue
10-4 Oracle Project Resource Management Implementation and Administration Guide

Overview of the Financial Forecast Process and Calculations
Revenue Calculation for Projects Using Event-Based Distribution Rule For projects with a event-based distribution rule, the revenue is calculated as follows:
■ Revenue = Total Project Value
This total appears in the last period of the project. All other periods of the project reflect a zero dollar value. If the project does not have an end date, the last period with an assignment or requirement is used
Implementing Financial Forecasting 10-5

Implementing the Forecast Functionality
Implementing the Forecast FunctionalityIn order to generate forecasts totals, you have to define specific information on which the forecasts are based. This section provides details for the following implementation steps to establish the forecast feature:
■ Defining a Job-Based Cost Rate Schedule
■ Defining Bill Rate Schedules
■ Updating Project Types with Employee and Job-Based Bill Rate Schedules
■ Defining Forecast-Related Profile Option
■ Defining Periods
■ Defining Unassigned Time Tracking
■ Defining Forecasting Options
As the forecast totals for requirements depend upon the job bill and cost rates of the requirement, each role within Project Resource Management must have a job associated with it.
For more information on defining roles, see "Defining Roles" in Chapter 6, "Defining Your Project Roles". See "Defining Jobs and Job Mapping" in Chapter 3, "Establishing Your Enterprise Structure" for more information regarding jobs.
Defining a Job-Based Cost Rate ScheduleDefine a job-based cost rate schedule to enable the generation of forecasts on the cost of staffing requirements. To define this schedule, complete the following steps:
1. Navigate to the Rate Schedules form using the following menu path:
Setup > Expenditures > Rate Schedules
2. Enter a schedule name and a description of the schedule.
3. Select the organization that uses the schedule.
You can enter any organization from your hierarchy regardless of classification or start and end dates.
4. Select the Job tab.
5. Select the appropriate jobs and enter their rates.
10-6 Oracle Project Resource Management Implementation and Administration Guide

Implementing the Forecast Functionality
6. Save your work.
Defining Bill Rate SchedulesCreate a job-based bill rate schedule in Oracle Projects to enable the forecast generation of revenue from staffing requirements. You can include bill rate overrides in your forecasts. If you plan to utilize bill rate overrides, you will establish them as they are needed.
For more information on bill rate overrides, see the Oracle Projects User Guide.
Updating Project Types with Employee and Job-Based Bill Rate SchedulesFor any new project types, manually enter the appropriate job-based bill rate schedule in the remaining field (either Job or employee-based) for each project type.
Defining Forecast-Related Profile OptionDefine the profile option PA: Forecasting Period Type as either GL Period or PA Period as applicable to your business using the following menu path through the System Administrator responsibility:
Profile > System
This profile option is set only at the site level and determines the period type for which you will generate forecast totals and the number of periods to display on the forecast screens:
■ 13 periods for PA Period
■ 6 for GL Period
Defining PeriodsIn order to create forecast totals for the life of a project, you must define an appropriate number of periods that span the life of your projects. These periods are also necessary to create assignments for time periods in the future. You create these periods through Oracle General Ledger tables and migrate them to Oracle Projects tables.
Note: Forecasts must be regenerated to reflect retroactively changed cost rates.
Implementing Financial Forecasting 10-7

Implementing the Forecast Functionality
For more information on defining the time periods, see the Oracle General Ledger User Guide or the Oracle Projects User Guide.
Defining Unassigned Time TrackingOracle Project Resource Management automatically generates totals for unassigned time for all utilization jobs. The calculation for unassigned time subtracts both provisional and confirmed assignment hours from the total capacity for each available day. Any remaining hours generated from this calculation are assigned to projects specifically implemented for the purpose of tracking unassigned hours.
To define unassigned time tracking projects, complete the following steps:
1. Login as Project Resource Management Super User.
2. Navigate to the Project Type form:
Setup > Projects > Project Types
3. Create a project type using the indirect project type class.
4. In the Details window, select the following options:
■ Administrative
■ Unassigned Time
5. Create a project template using the unassigned project type using the following path:
Setup > Projects > Project Templates
6. Create a project using the unassigned project template.
Projects > Find Projects
Optionally, you can create two unassigned projects: one for billable jobs and one for non-billable jobs.
7. Complete the options on the Unassigned Time Options tab. For more information, see "Unassigned Time Options".
10-8 Oracle Project Resource Management Implementation and Administration Guide

Implementing the Forecast Functionality
Defining Forecasting OptionsThe Forecast Implementation Options provide implementation settings for both resource utilization and financial forecasting at the operating unit level. You can access these options using the following menu path:
Setup > Forecasting > Options
You have a choice of two tabs: Options and Unassigned Time Options. Complete the options as follows:
1. In the Options tab, select the following options:
a. Check Include Admin Projects.
b. Enter a value in Max Historical Versions (suggested starting value: 5).
c. Enter the desired Utilization Calculation Method (suggested starting entry: By Resource Capacity Hours).
d. Select at least one period type.
e. Enter the defaults for the Team Role Forecasting Options.
2. Select the Unassigned Time Options tab.
3. In the Billable People region, check Include in Forecast if you want to summarize billable unassigned time in the financial forecasting reports. If you select this option, enter values for the related fields (Unassigned Time Project, Expenditure Type Class, and Expenditure Type.)
4. In the Non-Billable People region, check Include in Forecast if you want to summarize billable unassigned time in the financial forecasting reports. If you select this option, enter values for the related fields (Unassigned Time Project, Expenditure Type Class, and Expenditure Type.)
The following sections provide details on the individual options.
Note: All forecast and unassigned time options must be defined for each operating unit.
Implementing Financial Forecasting 10-9

Implementing the Forecast Functionality
Implementation OptionsThe following graphic depicts the Options tab:
Some of the fields are not currently in use, but have been provided for features scheduled for future releases. The following table provides a list of fields and their descriptions in the order they appear on the tab:
Field Description
Include Admin Projects Check to indicate that you want to include administrative projects in project forecast totals. This field is scheduled for future use in the forecasting functionality.
Note: Although this option is for future functionality, you must enable this option for this release in order to avoid errors because the application cannot yet exclude administrative projects.
10-10 Oracle Project Resource Management Implementation and Administration Guide

Implementing the Forecast Functionality
Max Historical Versions Enter the maximum number of historical forecast versions that you want to store. This field is scheduled for future use in the forecasting functionality.
Note: At minimum, you must enter a value of 1.
Utilization Calculation Method
Enter the desired method of calculating your resource utilization. This field is scheduled for future use in the forecasting functionality only and does not have any affect utilization summarization or reporting.
Note: Although this option is for future functionality, a selection is required. Capacity is the recommended selection.
Period Type Check the desired period type (GL Period or PA Period) that the forecasting process should use to generate the forecast totals. This field is scheduled for future use in the forecasting functionality.
Expenditure Type Class Select the Expenditure Type Class to classify the forecast items.
Expenditure Type Select the desired Expenditure Type to apply to all generated forecast items.
Transfer Price Amount Type
For future use in forecasting functionality
Project Role Enter the role to display as the project owner. This value is displayed in the Project Forecast List page.
Note: Defining this value is optional. If you leave this field blank, the Project Owner column is hidden in the Project Forecast List page.
Job-Based Cost Rate Schedule
Select the job-based cost rate schedule to use for assignments.
Classification Select the classification for which you want to generate forecast totals. You can only select a classification where only one value is allowed. The corresponding class code for each project is displayed in the Project Forecast List page. Only those classifications which are defined as mandatory in the project template appear as choices for this field.
Note: Defining this value is optional. If you leave this field blank, the Classification column is hidden in the Project Forecast List page.
Field Description
Implementing Financial Forecasting 10-11

Implementing the Forecast Functionality
For more information on expenditure types and project classifications, see Chapter 17, "Oracle Projects Setup and Implementation," in the Oracle Project User Guide.
Unassigned Time Options The following graphic depicts the Unassigned Time Options tab:
This tab has two regions pertaining to the setup of billable people and non-billable people respectively. The fields are the same for both regions. The following table provides a list of the fields and their descriptions in the order they appear within a region:
Field Description
Include in Forecast Check to indicate that you want to summarize unassigned time in the project financial forecast totals.
Unassigned Time Project Enter the name of the project to which unassigned time should be reported.
10-12 Oracle Project Resource Management Implementation and Administration Guide
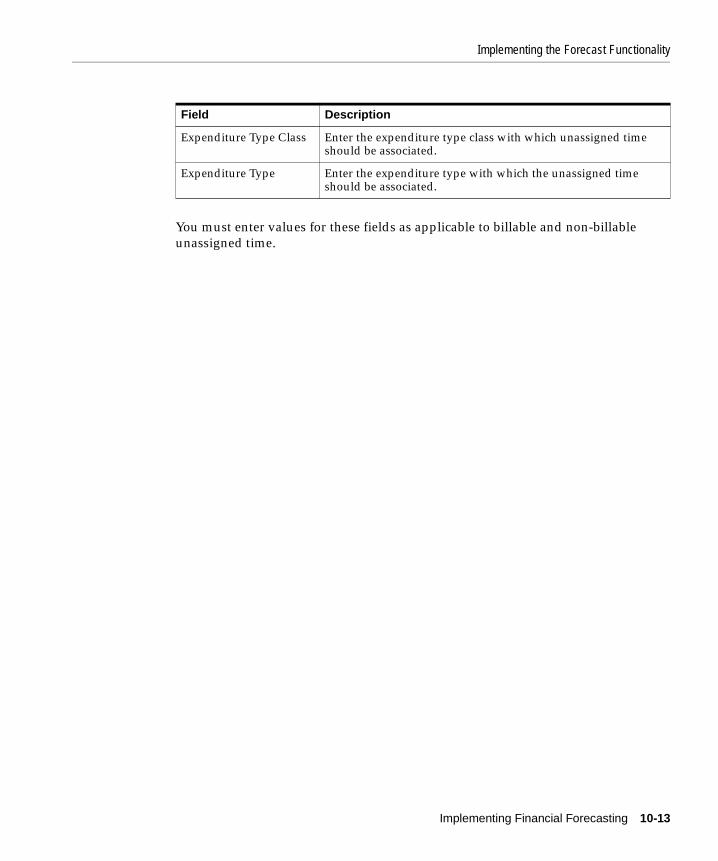
Implementing the Forecast Functionality
You must enter values for these fields as applicable to billable and non-billable unassigned time.
Expenditure Type Class Enter the expenditure type class with which unassigned time should be associated.
Expenditure Type Enter the expenditure type with which the unassigned time should be associated.
Field Description
Implementing Financial Forecasting 10-13

Establishing Security on Forecast Functionality
Establishing Security on Forecast FunctionalityUsers can view forecast hour and revenue totals for any project on which they are active key members. You can provide viewing access to other users as well. Key members and other users with the appropriate authority or security access can also view project cost, margin, and margin percentage totals and generate project forecast totals.
You can establish security for these features and functionality through granting roles cost viewing access, granting forecast authority, and providing functions and menu access.
Granting Cost Viewing Access to RolesTo grant a specific role the ability to view cost, margin, and margin percentage totals, you can check the View Labor Cost checkbox on the Role Types form. To access this form, use the Project Super User responsibility and follow this menu path:
Setup > Project > Role Types
Granting Forecast AuthorityYou can grant a user forecast authority. This authority provides users the ability to view all projects in an organization through the Multiple Project Forecast List. Users can drill down on a project to view all amounts for hours, cost, revenue, margin and margin percentage. Labor cost authority is assumed for users assigned this authority. You can grant this authority using the following menu path:
Setup > Human Resources > Organization Authority
Business managers are likely candidates for these authority levels. You may grant users these authorities at the organization level.
Granting Forecast Function AccessYou can add functions to menus associated with user roles to provide access to forecast functionality. The forecast-related functions are:
■ Project Level View Forecast Security
This function provides users the ability to view existing project forecasts.
■ Project Level Edit Forecast Security
This function provides users the ability to generate project forecasts.
10-14 Oracle Project Resource Management Implementation and Administration Guide

Establishing Security on Forecast Functionality
Typical users of the functionality that these security levels provide are project managers or sales directors. For more information on how to edit menu and function access, see "Understanding Role-Based Security" in Chapter 5, "Configuring Your Organization Security".
Implementing Financial Forecasting 10-15

Establishing Security on Forecast Functionality
10-16 Oracle Project Resource Management Implementation and Administration Guide

Setting Up for Reporting Capa
11
Setting Up for Reporting CapabilitiesOracle Project Resource Management (PRM) transactional reporting is supported by a web-based Oracle Discoverer solution. The predefined workbooks, worksheets and End User Layer (EUL) provide you and your users the ability to query and manipulate transactional data to proactively measure and analyze corporate performance.
After you implement the reporting solution, users can access the predefined Oracle Discoverer reports from the self-service Project Resource Management menu structure.
This chapter covers the setup and usage of the PRM reporting solution through the following topics:
■ Oracle Discoverer Postinstallation Tasks
■ Test Your Installation and Set Up
■ Overview of the Business Areas and Business Views
■ Security Overview
■ Discoverer Workbooks
bilities 11-1

Oracle Discoverer Postinstallation Tasks
Oracle Discoverer Postinstallation TasksThis section describes the Oracle Discoverer install and setup tasks for integration with Oracle Project Resource Management. To set up the PRM reporting solution, you must use the Administrator Edition or client/server version of Discoverer. To set up the User Edition, you must use the Web Discoverer version, with a few exceptions, which are noted accordingly.
Before you start, you must complete the following activities:
1. Install Oracle Discoverer Administration Edition.
To access the Discoverer workbooks provided with Oracle Project Resource Management, install Oracle Discoverer. For installation instructions, see the Oracle Discoverer 3.1 Administration Guide.
2. Install Oracle Web Discoverer.
For installation instructions, see the Oracle Discoverer 3.1 Installation and Administration Guide.
Oracle Discoverer Postinstallation Tasks ChecklistThe following tasks are covered in this section:
1. Create the End User Layer.
2. Modify the End User Layer Owner’s Indexes.
3. Copy files to Discoverer Administration Tier.
4. Connect to Discoverer Administration Edition.
5. Import the End User Layer EEX File.
6. Set up access to Business Areas and End User Discoverer Edition.
7. Refresh Business Areas.
8. Connect to Discoverer User Edition.
9. Install the PRM Reporting workbooks.
When you have completed these steps, verify that:
■ The EUL owner (database user) id has a suffix corresponding to the end user language, for example:
EUL_US
11-2 Oracle Project Resource Management Implementation and Administration Guide
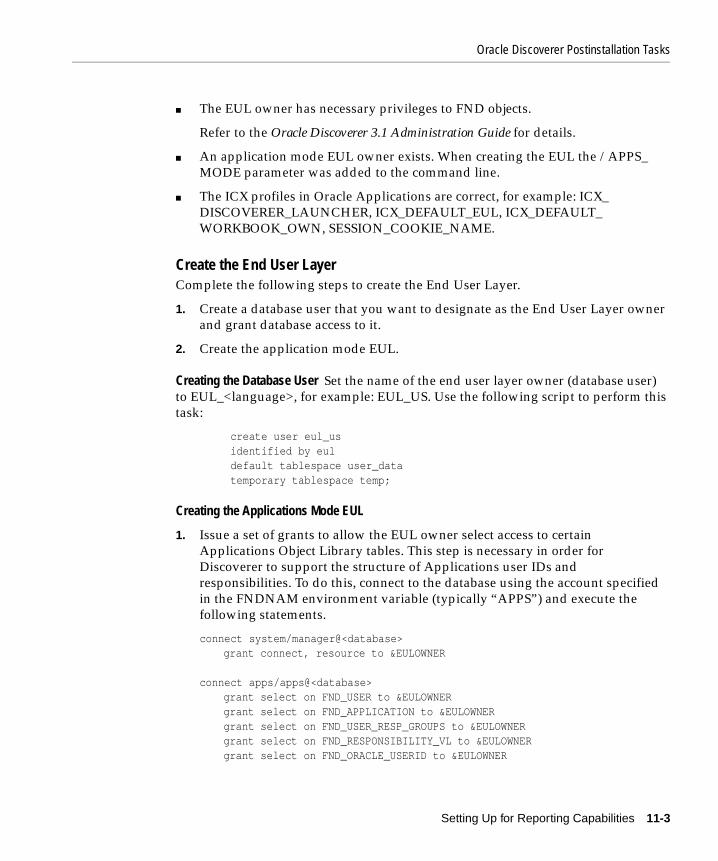
Oracle Discoverer Postinstallation Tasks
■ The EUL owner has necessary privileges to FND objects.
Refer to the Oracle Discoverer 3.1 Administration Guide for details.
■ An application mode EUL owner exists. When creating the EUL the /APPS_MODE parameter was added to the command line.
■ The ICX profiles in Oracle Applications are correct, for example: ICX_DISCOVERER_LAUNCHER, ICX_DEFAULT_EUL, ICX_DEFAULT_WORKBOOK_OWN, SESSION_COOKIE_NAME.
Create the End User LayerComplete the following steps to create the End User Layer.
1. Create a database user that you want to designate as the End User Layer owner and grant database access to it.
2. Create the application mode EUL.
Creating the Database User Set the name of the end user layer owner (database user) to EUL_<language>, for example: EUL_US. Use the following script to perform this task:
create user eul_us identified by eul default tablespace user_data temporary tablespace temp;
Creating the Applications Mode EUL
1. Issue a set of grants to allow the EUL owner select access to certain Applications Object Library tables. This step is necessary in order for Discoverer to support the structure of Applications user IDs and responsibilities. To do this, connect to the database using the account specified in the FNDNAM environment variable (typically “APPS”) and execute the following statements.
connect system/manager@<database> grant connect, resource to &EULOWNER
connect apps/apps@<database> grant select on FND_USER to &EULOWNERgrant select on FND_APPLICATION to &EULOWNERgrant select on FND_USER_RESP_GROUPS to &EULOWNERgrant select on FND_RESPONSIBILITY_VL to &EULOWNERgrant select on FND_ORACLE_USERID to &EULOWNER
Setting Up for Reporting Capabilities 11-3

Oracle Discoverer Postinstallation Tasks
grant select on FND_DATA_GROUP_UNITS to &EULOWNERgrant select on FND_PRODUCT_INSTALLATIONS to &EULOWNERgrant select on FND_SECURITY_GROUPS_VL to &EULOWNERgrant execute on FND_CLIENT_INFO to &EULOWNER
2. Create an Applications mode from the Discoverer Administration Edition.
An Applications mode EUL is one that can be administered using the Oracle Applications security model in place of the database security model. There are two ways of doing this, both invoking the Administration edition from the command line:
DIS31ADM.exe /APPS_MODE
Starts the Administration Edition in Applications mode. Any EULs created will by default be Applications mode EULs.
DIS31ADM.exe /APPS_MODE /CREATE_EUL /CONNECT eul_owner/password@database
This command creates an Applications mode EUL from the command line in batch mode.
3. Note that the EUL owner must be an Oracle database userid, not an Oracle Applications userid. The easiest way to create an EUL with a new database userid as the owner is to log onto the Discoverer Administration edition as the SYSTEM user, and in step two of the Create EUL Wizard choose “Create a new user.” It is recommended that you create the EUL in a separate schema from the APPS schema that contains the Oracle Applications tables and views. The primary reason for this is that by creating the EUL in a separate schema it is easier to migrate the EUL from test environment to production environment using database import/export.
4. Next you need to ensure that the EUL owner has select access to the appropriate Applications tables and views where the data is stored. If you are interested in creating Discoverer folders that span multiple tables you may want to grant select any table privilege to the EUL owner. Otherwise, grant select access to just the tables you wish to create Discoverer folders on.
Modify the Indexes of the End User Layer Owner
Complete the following steps from the R11 Admin tier to modify the maximum extents of the indexes in the End User Layer.
1. Connect to your database server using SQL/Plus as the End User Layer (for example, EUL_US) owner.
11-4 Oracle Project Resource Management Implementation and Administration Guide
Oracle Discoverer Postinstallation Tasks
2. At the SQL prompt, enter
$BIS_TOP/admin/sql/BISALTIN.sql
Copy Files to Discoverer Administration Tier
In order to access Discoverer-related files through the Discoverer Administration and End User Editions, they must be copied to the Discoverer Administration Tier. The file PAPRMEUL.eex is created in the $AU_TOP/discover/<language>/ directory when you install the Oracle PRM Reporting product.
1. Copy the file PAPRMEUL.eex from the $AU_TOP/discover/<language>/ directory to an appropriate directory from where it can be imported into the Discoverer Administration Edition.
2. Copy the sql script BISEULBA.sql from the $BIS_TOP/admin/sql/ directory into the same temporary directory you used in step 1. Optionally, mount the $AU_TOP/discover/<language> directory on to the Discovery Administration Tier.
3. Copy the Discoverer Workbooks from the $AU_TOP/discover/<language>/ directory to a new directory where they can be saved to the database using the Discoverer User Edition. The workbooks installed are:
■ PASCHRES.dis
■ PAAVLRES.dis
■ PAOVCRES.dis
■ PASALPIP.dis
■ PAREQPRJ.dis
Connect to Discoverer Administration Edition1. Log in to the Discoverer Administration Edition in application mode, for
example:
D:\orant\DISCVR31\DIS31ADM.EXE /APPS_MODE
2. Connect to the database, for example:
eul_us/eul@cus115
3. Select File > Set Default EUL.
Setting Up for Reporting Capabilities 11-5

Oracle Discoverer Postinstallation Tasks
Import the End User Layer EEX FileThe PRM EEX file must be imported into the Discoverer End User Layer. Select the EUL for which you want the EEX file to be imported, for example, EUL_US.
To import the EEX file, complete the following steps:
1. Open an MS-DOS command window and navigate to the directory in which the EEX file is located. Enter the following commands at the command prompt:
start /wait <ORACLE_HOME>\discvr31\dis31adm /APPS_MODE /CONNECT <EUL_Owner>/EUL_Owner_password>@<Connect_string> /IMPORT paprmeul.eex /eul<EUL_Owner_in_uppercase> /log eulimport.log
Where:
■ <ORACLE_HOME> is the top directory for Oracle products installed on the NT server
■ <EUL Owner> is the database user created above
■ <EUL Owner password> is the database owner password
■ <Connect_string> is SQL*Net database connect string
■ <EUL_Owner_in_uppercase>
.
For example:
start /wait d:\orant\discvr31\dis31amd /APPS_MODE/CONNECT eul_us/eul@apps /IMPORT PAPRMEUL.eex /eul EUL_US/log eulimport.log
2. Check on the progress of the import process by pointing to the Discoverer icon in the right lower corner of your toolbar.
Note: Before beginning the import process, increase the size of the Rollback Segments to a minimum of 10 megabytes. After the import has been completed, reset the Rollback Segments to their original sizes.
Note: Enter the EUL owner schema in uppercase after the key/EUL when invoking the second command.
11-6 Oracle Project Resource Management Implementation and Administration Guide

Oracle Discoverer Postinstallation Tasks
Inspect the eulimport.log file to ensure that the PRM EEX file was imported into the End User Layer successfully.
Alternatively, you can log in to the Discoverer Administration Edition and select File > Import. Specify the location of the PAPRMEUL.eex file to complete the import.
Set Up Access to Business Areas and End User Discoverer EditionYou must grant users access to the Discoverer Administrator and User Editions in order for the users to open these applications. However, the users also need user and responsibility access to the Business Areas in order to perform any reporting activities on the PRM data.
To grant user access to Oracle Discover Administration and User Editions:
1. Log in to the Discoverer Administration Edition in application mode, for example:
D:\orant\DISCVR31\DIS31ADM.EXE/APPS_MODE
2. Select Tools > Privileges.
3. Select the user/responsibility (role) to which you need to grant access, for example, Project Resource Management Super User.
4. Grant the responsibility, either the User Edition or the Administration Edition access.
To grant user/responsibilities access to Business Areas:
1. Log in to the Discoverer Administration Edition in application mode, for example:
D:\orant\DISCVR31\DIS31ADM.EXE/APPS_MODE
2. Select Tools > Security.
3. Select the user/responsibility (role) to which you need to grant access, for example, Project Resource Management Super User.
Reminder: If this responsibility is not a Self-Service Responsibility, it cannot be accessed through the Self-Service logon.
Setting Up for Reporting Capabilities 11-7

Oracle Discoverer Postinstallation Tasks
4. Select the business areas to which you want to grant this user/responsibility access.
5. Check the Allow Administration checkbox for the business areas if this responsibility needs administration access for tasks such as Refresh from the database.
Refresh Business AreasThe following steps synchronize the information in the Discoverer End User Layer and the underlying Oracle Applications data model.
1. Connect to Discoverer Administration Edition by invoking from the command line D:\orant\DISCVR31\DIS31ADM.EXE /APPS_MODE
2. Connect to the database as an application user, for example:
SERVICES:Project Resource Management Super User:Standard/welcome@cus115
3. Set Default EUL.
4. Select all your business areas.
5. Select File > Refresh
6. Verify that the folders refresh is successful.
Connect to Discoverer User EditionTo invoke Discoverer User Edition:
1. Log in to the Discoverer User Edition in application mode, for example:
\orant\DISCVR31\DIS31USR.EXE
2. Connect to the database, for example:
SERVICES:Project Resource Management Super User:Standard/welcome@cus115
3. Select Tools > Options.
4. Select the EUL tab and check the default EUL, for example, EUL_US.
Install the PRM Reporting Workbooks for Discoverer
The following steps explain how to save the workbooks to your database so that users can access the workbooks through Oracle Web Discoverer.
1. Log in to the Discoverer User Edition in application mode, for example:
11-8 Oracle Project Resource Management Implementation and Administration Guide

Oracle Discoverer Postinstallation Tasks
D:\orant\DISCVR31\DIS31USR.EXE
When asked for the login information, select Cancel.
2. While in Discoverer 3.1 User Edition, select Tools > Options and ensure that the checkbox labeled “Display warning when opening workbook saved in a different database account” is checked.
3. Exit from the Discoverer User Edition.
4. To save the Discoverer workbooks from the temporary staging area into the database, open an MS-DOS window and change directories to the staging area where the workbooks were saved. Refer to the section “To copy files to the Discoverer Administration Tier” for more information.
5. Execute the following command from the command prompt:
start /wait for %%f in (*.dis) do<ORACLE_HOM>\discvr31\dis31usr /connect"<EUL_Owner>"/EUL_Owner_password>@<Connect_string>/savedb %%f /batch
For example:
start /wait for %%f in (*dis) doc:\orant\discvr31\dis31usr /connect"SERVICES:Project Resource Management Super User:Standard”/welcome@apps/savedb %%f /batch
Alternatively, log in to the Discoverer User Edition and select File > Open > My computer. Specify the location of the workbook file. After the workbook opens, select File > Save As > Database to save the workbook in the database. You must repeat this step for all workbooks.
Once the workbooks are saved in the database, change the EUL Owner (eul_us) End User Layer (eul) password from the default password to a new, secure password.
Important: Use quotation marks when you enter the EUL_Owner parameter in the command string.
Setting Up for Reporting Capabilities 11-9

Test Your Installation and Set Up
Set Up Access to PRM Reporting Workbooks
The following steps instruct you on how to set up access to Discoverer workbooks through the Discoverer User Edition.
1. Log in to the Discoverer User Edition in application mode, for example:
D:\orant\DISCVR31\DIS31USR.EXE
2. Open the workbook to which you need to grant other users/responsibilities access.
3. Select File > Manage Workbooks > Sharing.
4. Select User > Workbook tab.
5. Select the user/responsibility to grant access.
6. Select the workbooks you need to grant access to and move them to the Shared section of the Share workbook dialog box.
Test Your Installation and Set UpOnce you have finished installing the Oracle Project Resource Management Reporting and performing all the postinstallation tasks, you want to verify that the installation was successful. Check to see that you can access Discoverer Workbooks by selecting any workbook from the Self-Service Applications menu.
If you have any problems, review the installation steps to ensure that you have completed all of them correctly.
11-10 Oracle Project Resource Management Implementation and Administration Guide

Overview of the Business Areas and Business Views
Overview of the Business Areas and Business ViewsThis section provides details on the Business Areas and Folders contained within the Oracle Project Resource Management Discoverer reporting solution in the following sections
■ List of Business Areas
■ List of Staffing Business Area Folders
■ List of Financial Business Area Folders
■ List of Business Views
List of Business AreasThe predefined business areas are:
■ Staffing
■ Financial
Staffing Business AreaThe staffing business area provides general staffing information about resources, projects, and organizations. From a supply perspective, you can identify information regarding resource/organization capacity, availability, over-commitment and overall schedule through these folders. From a demand perspective, you can identify information regarding project/organization requirements.
Folders available within the Staffing business area are:
■ Staffing Organization Rollup Groups
■ Resource Managers
■ Fiscal Years
■ Fiscal Quarter Numbers
■ Calendar Years
■ Calendar Months
■ Required Project Hours by GL Period
■ Required Project Hours by GL Period: Team Role Detail
■ Required Project Hours by PA Period
Setting Up for Reporting Capabilities 11-11

Overview of the Business Areas and Business Views
■
11-12 Oracle Project Resource Management Implementation and Administration Guide

Overview of the Business Areas and Business Views
List of Staffing Business Area FoldersThis section provides descriptions for each of the folders within the Staffing business area.
Staffing Organization Rollup GroupsThis folder provides a simplified view of the reporting hierarchy (the hierarchy specified as the default reporting hierarchy). The organizations are secured by operating unit.
Although the hierarchy may be n level, this folder flattens the hierarchy out into two levels. For example, if the original hierarchy is as follows:
Organization 1
Organization 2
Organization 4
Organization 3
Organization 5
it will be represented in this folder as follows:
Organization 1
Organization 2
Organization 3
Organization 4
Organization 5
This folder includes the items listed in the following table:
Item Description
Rollup Organization The name of the rollup organization
Suborganization The name of the suborganization
Setting Up for Reporting Capabilities 11-13

Overview of the Business Areas and Business Views
Resource ManagersThis folder provides all of the managers of people over whom the user has authority. In other words, a user can see all the managers that report to them (directly and indirectly) and, if they have resource authority over an organization, all the managers of people within that organization.
This folder includes the item listed in the following table:
Fiscal YearsThis folder provides the Fiscal Years in the format YYYY ranging from five Fiscal Years in the past to five Fiscal Years in the future.
It includes the item listed in the following table:
Fiscal Quarter NumbersThis folder provides the Fiscal Quarter numbers.
It includes the item listed in the following table:
Calendar YearsThis folder provides the calendar years in the format YYYY ranging from five years in the past to five years in the future.
It includes the item listed in the following table:
Item Description
Resource Manager The full name of the resource manager
Item Description
Fiscal Year The fiscal year
Item Description
Fiscal Quarter The fiscal quarter
Item Description
Calendar Year The calendar year
11-14 Oracle Project Resource Management Implementation and Administration Guide

Overview of the Business Areas and Business Views
Calendar MonthsThis folder provides the calendar month name and number for the twelve months of the year.
It includes the items listed in the following table:
Required Project Hours by GL PeriodFor each GL period, this folder contains the total number of hours that remain unfilled on requirements within PRM. Hours scheduled in a cancelled status are not included.
This folder includes the items listed in the following table:
Required Project Hours by GL Period: Team Role DetailFor each GL period, this folder contains the total number of hours that remain unfilled on requirements within PRM. This folder contains more detailed team role information. Hours scheduled in a cancelled status are not included.
This folder includes the items listed in the following table:
Item Description
Calendar Month Name The name of the calendar month
Calendar Month Numbers
The number of the calendar month
Item Description
Fiscal Year The fiscal year
Fiscal Quarter The fiscal quarter
GL Period The GL Period for which the requirement hours are calculated
Project Manager The project manager as of the current date
Project Name (Number) The project of the requirement
Team Role The team role name of the requirement
Required Hours The total schedule, in hours, for the GL Period of the requirement
Setting Up for Reporting Capabilities 11-15

Overview of the Business Areas and Business Views
Required Project Hours by PA PeriodFor each PA period, this folder contains the total number of hours that remain unfilled on requirements within Project Resource Management. Hours scheduled in a cancelled status are not included.
This folder includes the items listed in the following table:
Item Description
Fiscal Year The fiscal year
Fiscal Quarter The fiscal quarter
GL Period The GL Period for which the requirement hours are calculated
Project Manager The project manager as of the current date
Project Name (Number) The project of the requirement
Team Role The team role name of the requirement
Probability The probability of the project
Start Date The start date of the requirement
End Date The end date of the requirement
Minimum Job Level The minimum job level of the requirement
Maximum Job Level The maximum job level of the requirement
Required Hours The total schedule, in hours, for the GL Period of the requirement
Item Description
Fiscal Year The fiscal year
Fiscal Quarter The fiscal quarter
PA Period The PA Period for which the requirement hours are calculated
Project Manager The project manager as of the current date
Project Name (Number) The project of the requirement
Team Role The team role name of the requirement
Required Hours The total schedule, in hours, for the PA Period of the requirement
11-16 Oracle Project Resource Management Implementation and Administration Guide
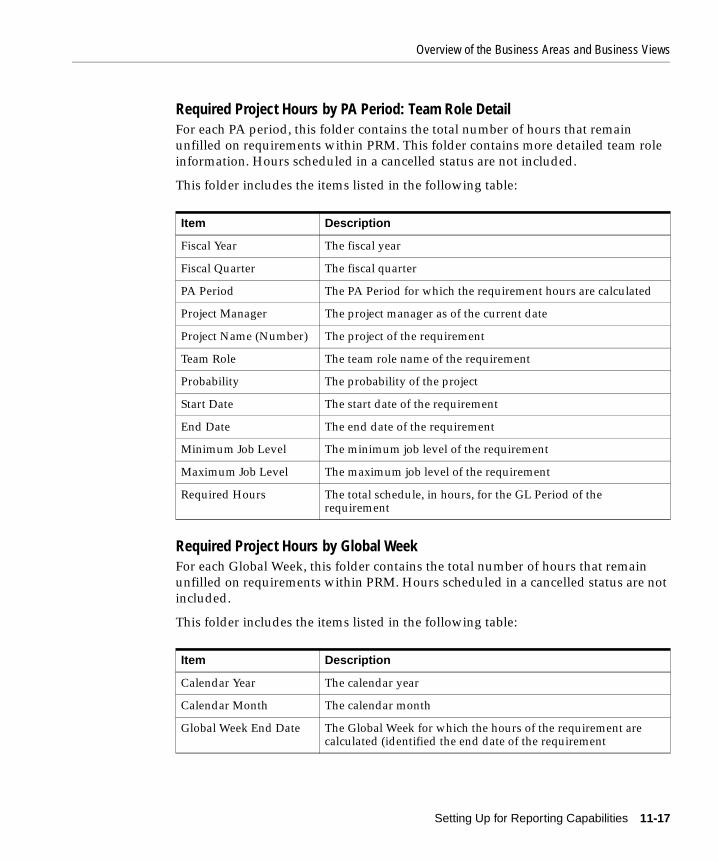
Overview of the Business Areas and Business Views
Required Project Hours by PA Period: Team Role DetailFor each PA period, this folder contains the total number of hours that remain unfilled on requirements within PRM. This folder contains more detailed team role information. Hours scheduled in a cancelled status are not included.
This folder includes the items listed in the following table:
Required Project Hours by Global WeekFor each Global Week, this folder contains the total number of hours that remain unfilled on requirements within PRM. Hours scheduled in a cancelled status are not included.
This folder includes the items listed in the following table:
Item Description
Fiscal Year The fiscal year
Fiscal Quarter The fiscal quarter
PA Period The PA Period for which the requirement hours are calculated
Project Manager The project manager as of the current date
Project Name (Number) The project of the requirement
Team Role The team role name of the requirement
Probability The probability of the project
Start Date The start date of the requirement
End Date The end date of the requirement
Minimum Job Level The minimum job level of the requirement
Maximum Job Level The maximum job level of the requirement
Required Hours The total schedule, in hours, for the GL Period of the requirement
Item Description
Calendar Year The calendar year
Calendar Month The calendar month
Global Week End Date The Global Week for which the hours of the requirement are calculated (identified the end date of the requirement
Setting Up for Reporting Capabilities 11-17

Overview of the Business Areas and Business Views
Required Project Hours by Global Week: Team Role DetailFor each Global Week, this folder contains the total number of hours that remain unfilled on requirements within PRM. This folder contains more detailed team role information. Hours scheduled in a cancelled status are not included.
This folder includes the items listed in the following table:
Day of Week The name of the day for which the hours of the requirement are calculated
Date The date for which the of the requirement are calculated
Project Manager The project manager as of the current date
Project Name (Number) The project of the requirement
Team Role The team role name of the requirement
Required Hours The total schedule, in hours, for the Global Week of the requirement
Item Description
Calendar Year The calendar year
Calendar Month The calendar month
Global Week End Date The Global Week for which the hours of the requirement are calculated (identified the end date of the requirement
Day of Week The name of the day for which the hours of the requirement are calculated
Date The date for which the of the requirement are calculated
Project Manager The project manager as of the current date
Project Name (Number) The project of the requirement
Team Role The team role name of the requirement
Probability The probability of the project
Start Date The start date of the requirement
End Date The end date of the requirement
Minimum Job Level The minimum job level of the requirement
Maximum Job Level The maximum job level of the requirement
Item Description
11-18 Oracle Project Resource Management Implementation and Administration Guide
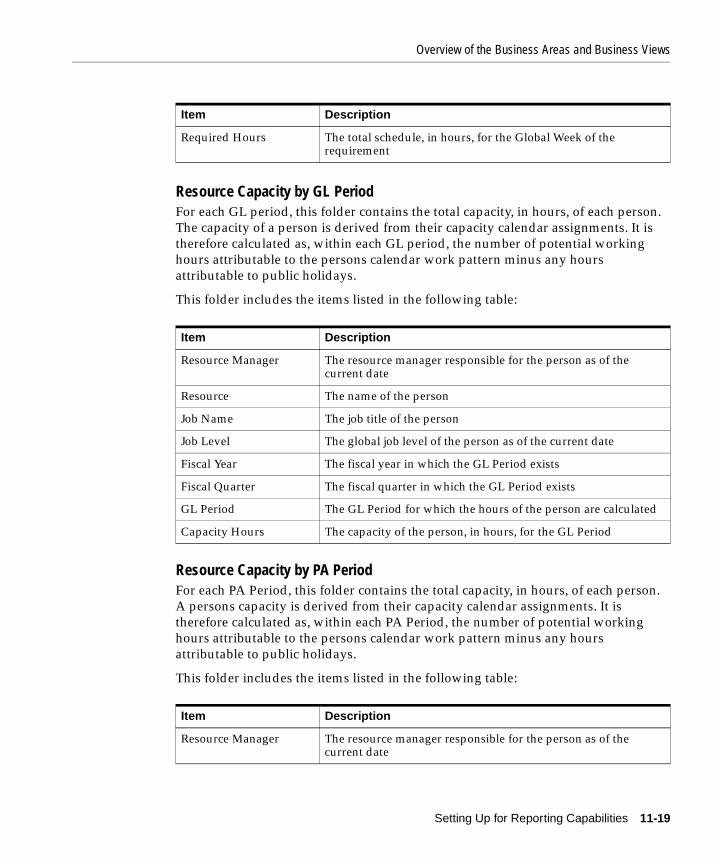
Overview of the Business Areas and Business Views
Resource Capacity by GL PeriodFor each GL period, this folder contains the total capacity, in hours, of each person. The capacity of a person is derived from their capacity calendar assignments. It is therefore calculated as, within each GL period, the number of potential working hours attributable to the persons calendar work pattern minus any hours attributable to public holidays.
This folder includes the items listed in the following table:
Resource Capacity by PA PeriodFor each PA Period, this folder contains the total capacity, in hours, of each person. A persons capacity is derived from their capacity calendar assignments. It is therefore calculated as, within each PA Period, the number of potential working hours attributable to the persons calendar work pattern minus any hours attributable to public holidays.
This folder includes the items listed in the following table:
Required Hours The total schedule, in hours, for the Global Week of the requirement
Item Description
Resource Manager The resource manager responsible for the person as of the current date
Resource The name of the person
Job Name The job title of the person
Job Level The global job level of the person as of the current date
Fiscal Year The fiscal year in which the GL Period exists
Fiscal Quarter The fiscal quarter in which the GL Period exists
GL Period The GL Period for which the hours of the person are calculated
Capacity Hours The capacity of the person, in hours, for the GL Period
Item Description
Resource Manager The resource manager responsible for the person as of the current date
Item Description
Setting Up for Reporting Capabilities 11-19
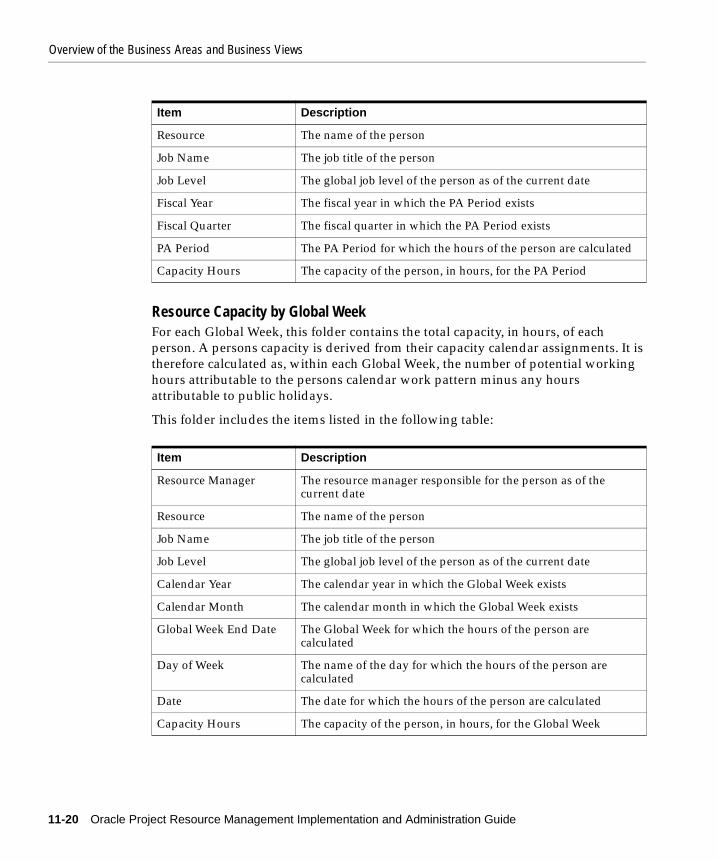
Overview of the Business Areas and Business Views
Resource Capacity by Global WeekFor each Global Week, this folder contains the total capacity, in hours, of each person. A persons capacity is derived from their capacity calendar assignments. It is therefore calculated as, within each Global Week, the number of potential working hours attributable to the persons calendar work pattern minus any hours attributable to public holidays.
This folder includes the items listed in the following table:
Resource The name of the person
Job Name The job title of the person
Job Level The global job level of the person as of the current date
Fiscal Year The fiscal year in which the PA Period exists
Fiscal Quarter The fiscal quarter in which the PA Period exists
PA Period The PA Period for which the hours of the person are calculated
Capacity Hours The capacity of the person, in hours, for the PA Period
Item Description
Resource Manager The resource manager responsible for the person as of the current date
Resource The name of the person
Job Name The job title of the person
Job Level The global job level of the person as of the current date
Calendar Year The calendar year in which the Global Week exists
Calendar Month The calendar month in which the Global Week exists
Global Week End Date The Global Week for which the hours of the person are calculated
Day of Week The name of the day for which the hours of the person are calculated
Date The date for which the hours of the person are calculated
Capacity Hours The capacity of the person, in hours, for the Global Week
Item Description
11-20 Oracle Project Resource Management Implementation and Administration Guide

Overview of the Business Areas and Business Views
Resource Schedule by GL PeriodFor each GL period, this folder contains the total number of hours each person is scheduled within PRM. No details of the actual assignments on which the people are scheduled are available in this folder - the lowest level of data is scheduled hours by person by GL period.
Hours scheduled on either delivery assignments and administrative assignments are included in these totals. Hours scheduled in a provisional status and hours scheduled in a confirmed status are totaled separately (hours scheduled in a cancelled status are not included).
Data is only available for people who have a current and valid employment record in Oracle Human Resources.
Historical data is available for either the previous two Fiscal Quarters or for the whole of the current Fiscal Year (whichever provides more data).
Future data is available from the current date until the end of the forecasting duration defined in the site level profile option PA: Availability Duration (the default duration is two years).
This folder includes the items listed in the following table:
Resource Schedule by GL Period: Team Role DetailFor each GL period, this folder contains the total number of hours each person is scheduled on each of their assignments within PRM. To view details of the actual assignments making up a persons schedule the user should query this folder - the lowest level of data is scheduled hours by assignment by GL period.
The scheduled hours of both delivery assignments and administrative assignments can be viewed. Hours scheduled in a provisional status and hours scheduled in a confirmed status are totaled separately (hours scheduled in a cancelled status are not included).
Item Description
GL Period The GL Period for which the assignment hours are calculated
Total Hours The total schedule hours of the person, including both provisional and confirmed, for the GL Period
Confirmed Hours The confirmed schedule hours of the person for the GL Period
Provisional Hours The provisional schedule hours of the person for the GL Period
Setting Up for Reporting Capabilities 11-21

Overview of the Business Areas and Business Views
Data is only available for people who have a current and valid employment record in Oracle Human Resources.
Historical data is available for either the previous two Fiscal Quarters or for the whole of the current Fiscal Year (whichever provides more data).
Future data is available from the current date until the end of the forecasting duration defined in the site level profile option PA: Availability Duration (the default duration is two years).
This folder includes the items listed in the following table:
Resource Schedule by PA PeriodFor each PA period, this folder contains the total number of hours each person is scheduled within PRM. No details of the actual assignments on which the people are scheduled are available in this folder - the lowest level of data is scheduled hours by person by PA period.
Hours scheduled on either delivery assignments and administrative assignments are included in these totals. Hours scheduled in a provisional status and hours scheduled in a confirmed status are totaled separately (hours scheduled in a cancelled status are not included).
Data is only available for people who have a current and valid employment record in Oracle Human Resources.
Item Description
GL Period The GL Period for which the assignment hours are calculated
Project Name (Number) The project to which the assignment belongs
Project Manager The project manager as of the current date
Probability The probability of the project
Team Role The team role name of the assignment
Start Date The start date of the assignment
End Date The end date of the assignment
Total Hours The total schedule hours of the person, including both provisional and confirmed, for the GL Period
Confirmed Hours The confirmed schedule hours of the person for the GL Period
Provisional Hours The provisional schedule hours of the person for the GL Period
11-22 Oracle Project Resource Management Implementation and Administration Guide

Overview of the Business Areas and Business Views
Historical data is available for either the previous two Fiscal Quarters or for the whole of the current Fiscal Year (whichever provides more data).
Future data is available from the current date until the end of the forecasting duration defined in the site level profile option PA: Availability Duration (the default duration is two years).
This folder includes the items listed in the following table:
Resource Schedule by PA Period: Team Role DetailFor each PA period, this folder contains the total number of hours each person is scheduled on each of their assignments within PRM. To view details of the actual assignments making up a persons schedule the user should query this folder - the lowest level of data is scheduled hours by assignment by PA period.
The scheduled hours of both delivery assignments and administrative assignments can be viewed. Hours scheduled in a provisional status and hours scheduled in a confirmed status are totaled separately (hours scheduled in a cancelled status are not included).
Data is only available for people who have a current and valid employment record in Oracle Human Resources.
Historical data is available for either the previous two Fiscal Quarters or for the whole of the current Fiscal Year (whichever provides more data).
Future data is available from the current date until the end of the forecasting duration defined in the site level profile option PA: Availability Duration (the default duration is two years).
This folder includes the items listed in the following table:
Item Description
PA Period The GL Period for which the assignment hours are calculated
Total Hours The total schedule hours of the person, including both provisional and confirmed, for the PA Period
Confirmed Hours The confirmed schedule hours of the person for the PA Period
Provisional Hours The provisional schedule hours of the person for the PA Period
Item Description
PA Period The PA Period for which the assignment hours are calculated
Setting Up for Reporting Capabilities 11-23
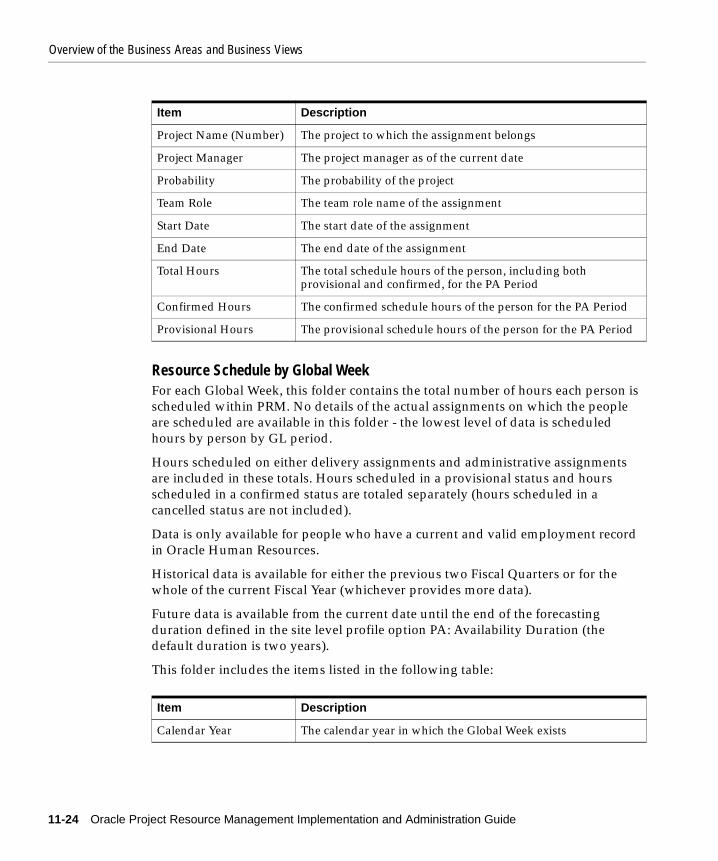
Overview of the Business Areas and Business Views
Resource Schedule by Global WeekFor each Global Week, this folder contains the total number of hours each person is scheduled within PRM. No details of the actual assignments on which the people are scheduled are available in this folder - the lowest level of data is scheduled hours by person by GL period.
Hours scheduled on either delivery assignments and administrative assignments are included in these totals. Hours scheduled in a provisional status and hours scheduled in a confirmed status are totaled separately (hours scheduled in a cancelled status are not included).
Data is only available for people who have a current and valid employment record in Oracle Human Resources.
Historical data is available for either the previous two Fiscal Quarters or for the whole of the current Fiscal Year (whichever provides more data).
Future data is available from the current date until the end of the forecasting duration defined in the site level profile option PA: Availability Duration (the default duration is two years).
This folder includes the items listed in the following table:
Project Name (Number) The project to which the assignment belongs
Project Manager The project manager as of the current date
Probability The probability of the project
Team Role The team role name of the assignment
Start Date The start date of the assignment
End Date The end date of the assignment
Total Hours The total schedule hours of the person, including both provisional and confirmed, for the PA Period
Confirmed Hours The confirmed schedule hours of the person for the PA Period
Provisional Hours The provisional schedule hours of the person for the PA Period
Item Description
Calendar Year The calendar year in which the Global Week exists
Item Description
11-24 Oracle Project Resource Management Implementation and Administration Guide

Overview of the Business Areas and Business Views
Resource Schedule by Global Week: Team Role DetailFor each Global Week, this folder contains the total number of hours each person is scheduled on each of their assignments within PRM. To view details of the actual assignments making up a persons schedule the user should query this folder - the lowest level of data is scheduled hours by assignment by GL period.
The scheduled hours of both delivery assignments and administrative assignments can be viewed. Hours scheduled in a provisional status and hours scheduled in a confirmed status are totaled separately (hours scheduled in a cancelled status are not included).
Data is only available for people who have a current and valid employment record in Oracle Human Resources.
Historical data is available for either the previous two Fiscal Quarters or for the whole of the current Fiscal Year (whichever provides more data).
Future data is available from the current date until the end of the forecasting duration defined in the site level profile option PA: Availability Duration (the default duration is two years).
This folder includes the items listed in the following table:
Calendar Month The calendar month in which the Global Week exists
Global Week End Date The end date of the Global Week for which the hours of the person are calculated
Global Week End Day The week day name of the end date of the Global Week
Date The date for which the hours of the person are calculated
Total Hours The total schedule hours of the person, including both provisional and confirmed, for the Global Week
Confirmed Hours The confirmed schedule hours of the person for the Global Week
Provisional Hours The provisional schedule hours of the person for the Global Week
Item Description
Calendar Year The calendar year in which the Global Week exists
Calendar Month The calendar month in which the Global Week exists
Item Description
Setting Up for Reporting Capabilities 11-25
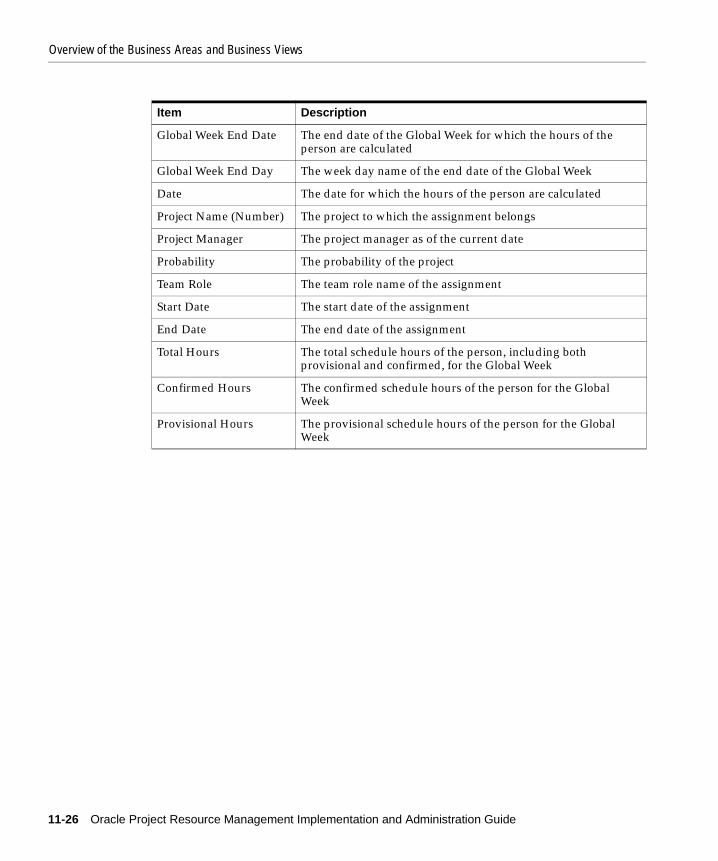
Overview of the Business Areas and Business Views
Global Week End Date The end date of the Global Week for which the hours of the person are calculated
Global Week End Day The week day name of the end date of the Global Week
Date The date for which the hours of the person are calculated
Project Name (Number) The project to which the assignment belongs
Project Manager The project manager as of the current date
Probability The probability of the project
Team Role The team role name of the assignment
Start Date The start date of the assignment
End Date The end date of the assignment
Total Hours The total schedule hours of the person, including both provisional and confirmed, for the Global Week
Confirmed Hours The confirmed schedule hours of the person for the Global Week
Provisional Hours The provisional schedule hours of the person for the Global Week
Item Description
11-26 Oracle Project Resource Management Implementation and Administration Guide

Overview of the Business Areas and Business Views
List of Financial Business Area FoldersThis section provides descriptions for each of the folders within the Financial business area.
Financial Organization Rollup GroupsShows a simplified view of the reporting hierarchy (the hierarchy specified as the default reporting hierarchy). The organizations are secured by operating unit and forecasting authority.
Although the hierarchy may be n level, this folder flattens the hierarchy out into just two levels. For example, if the original hierarchy is as follows:
Organization 1
Organization 2
Organization 4
Organization 3
Organization 5
and the user does not have forecasting authority over organization 2 or 5, this folder will represent the following:
Organization 1
Organization 3
Organization 4
This folder includes the items listed in the following table:
Project ManagersThis folder provides all people who have or have had the role of a project manager. It includes the item listed in the following table:
Item Description
Rollup Organization The name of the rollup organization
Suborganization The name of the suborganization
Item Description
Project Manager The full name of the project manager
Setting Up for Reporting Capabilities 11-27

Overview of the Business Areas and Business Views
Fiscal YearsThis folder provides the Fiscal Years in the format YYYY ranging from five Fiscal Years in the past to five Fiscal Years in the future. It includes the item listed in the following table:
Fiscal Quarter NumbersThis folder provides the Fiscal Quarter numbers. It includes the item listed in the following table:
Sales Pipeline by GL PeriodFor each GL Period, this folder lists projects that are expecting approval and the values associated with them. Both total project value and discounted amount (total project value times project probability) are given.
Only projects with a status of unapproved or submitted and a probability of less than 100 are included in this folder.
This folder lists projects by classification category. Therefore, if a project is classified in two categories, it will appear twice in this folder. Therefore, to avoid double counting project values, it is recommended that queries on this folder should be performed for one classification category at a time.
Historical data is available for either the previous two Fiscal Quarters or for the whole of the current Fiscal Year (whichever provides more data).
Future data is available from the current date until the end of the forecasting duration defined in the site level profile option PA: Availability Duration (the default duration is two years).
This folder includes the items listed in the following table:
Item Description
Fiscal Year The fiscal year
Item Description
Fiscal Quarter Number The number of the fiscal quarter
Item Description
Classification Category The category by which the project is classified
11-28 Oracle Project Resource Management Implementation and Administration Guide

Overview of the Business Areas and Business Views
Sales Pipeline by PA PeriodFor each PA Period, this folder lists projects that are expecting approval and the values associated with them. Both total project value and discounted amount (total project value times project probability) are given.
Only projects with a status of unapproved or submitted and a probability of less than 100 are included in this folder.
This folder lists projects by classification category. Therefore, if a project is classified in two categories, it will appear twice in this folder. Therefore, to avoid double counting project values, it is recommended that queries on this folder should be performed for one classification category at a time.
Historical data is available for either the previous two Fiscal Quarters or for the whole of the current Fiscal Year (whichever provides more data).
Future data is available from the current date until the end of the forecasting duration defined in the site level profile option PA: Availability Duration (the default duration is two years).
This folder includes the items listed in the following table:
Classification Code The code by which the project is classified
Project The name of the project
Project Manager The current project manager
Probability The probability of the project
Type The type of the project
Status The status of the project
Expected Approval Date The expected approval date of the project
Fiscal Year The Fiscal Year in which the GL Period exists
Fiscal Quarter The Fiscal Quarter in which the GL Period exists
GL Period The GL Period in which the project is expecting approval
Total Project Value The total value of the project
Discounted Amount The total project value multiplied by the probability of the project
Item Description
Setting Up for Reporting Capabilities 11-29

Overview of the Business Areas and Business Views
Lookup for Class CategoriesThis folder [provides all class categories currently available within the system. It includes the item listed in the following table:
Item Description
Classification Category The category by which the project is classified
Classification Code The code by which the project is classified
Project The name of the project
Project Manager The current project manager
Probability The probability of the project
Type The type of the project
Status The status of the project
Expected Approval Date The expected approval date of the project
Fiscal Year The Fiscal Year in which the PA Period exists
Fiscal Quarter The Fiscal Quarter in which the PA Period exists
PA Period The PA Period in which the project is expecting approval
Total Project Value The total value of the project
Discounted Amount The total project value multiplied by the probability of the project
Item Description
Classification Category The name of the classification category
11-30 Oracle Project Resource Management Implementation and Administration Guide

Overview of the Business Areas and Business Views
List of Business ViewsEach folder within the EUL maps to a business view on the database. If you need direct access to these views, the following table provides view and folder mapping:
View Name Folder Name
pa_rep_proj_reghrs_gl_v Required Project Hours by GL Period
pa_rep_proj_reghrs_gld_v Required Project Hours by GL Period: Team Role Detail
pa_rep_proj_reghrs_pa_v Required Project Hours by PA Period
pa_rep_proj_reghrs_pad_v Required Project Hours by PA Period: Team Role Detail
pa_rep_proj_reghrs_wk_v Required Project Hours by Global Week
pa_rep_proj_reghrs_wkd_v Required Project Hours by Global Week: Team Role Detail
pa_rep_res_cap_gl_v Resource Capacity by GL Period
pa_rep_res_cap_pa_v Resource Capacity by PA Period
pa_rep_res_cap_wkd_v Resource Capacity by Global Week
pa_rep_res_schhrs_gl_v Resource Schedule by GL Period
pa_rep_res_schhrs_gld_v Resource Schedule by GL Period: Team Role Detail
pa_rep_res_schhrs_pa_v Resource Schedule by PA Period
pa_rep_res_schhrs_pad_v Resource Schedule by PA Period: Team Role Detail
pa_rep__res_schhrs_wk_v Resource Schedule by Global Week
pa_rep_res_schhrs_wkd_v Resource Schedule by Global Week: Team Role Detail
pa_rep_proj_sp_gl_v Sales Pipeline by GL Period
pa_rep_proj_sp_pa_v Sales Pipeline by PA Period
pa_rep_all_rep_org_v Staffing Organization Rollup Groups
pa_rep_forecast_org_v Financial Organization Rollup Groups
pa_proj_manager_v Project Managers
pa_rep_all_mgr_v Resource Managers
pa_rep_year_gl_v Fiscal Years
pa_rep_quarter_gl_v Fiscal Quarter Numbers
pa_rep_year_cal_v Calendar Years
Setting Up for Reporting Capabilities 11-31

Security Overview
Security OverviewSecurity is handled using the standard Oracle Applications security model meaning that security is tied to the Applications responsibility that the user selects at login. The user can then only view data and run reports as designated by the profile options, reports, menus, and organizations the responsibility has assigned to it.
Organization SecurityA user will only be able to run financial workbooks for organizations that they have forecast authority over.
Resource Manager SecurityA user will only be able to run staffing workbooks for resource managers that either report to them or manage people that they have resource authority over.
pa_rep_month_v Calendar Months
pa_rep_proj_sp_cc_v Lookup for Class Categories
View Name Folder Name
11-32 Oracle Project Resource Management Implementation and Administration Guide

Discoverer Workbooks
Discoverer WorkbooksThis chapter contains descriptive information for the following predefined Discoverer workbooks included in the PRM reporting solution:
■ Required Project Hours (PAREQPRJ)
■ Scheduled Resource Hours (PASCHRES)
■ Available Resource Hours (PAAVLRES)
■ Overcommitted Resource Hours (PAOVCRES)
■ Sales Pipeline Workbook (PASALPIP)
You may find reference to the following Discoverer features:
Null Data DisplayDiscoverer displays a blank in a dropdown selection box when the field on which the selection is made contains null values. To select a null value, click on the blank in the same way that you select other, non-null values.
Optional ParametersAs is noted below, worksheet parameters can be switched on or off by the user at runtime. For example, to run a report that has a resource manager parameter for all resource managers, the resource manager parameter can be switched off.
Required Project Hours (PAREQPRJ)The required project hours workbook allows you to evaluate the number of hours currently required within Project Resource Management by project. You can view this information by Organization and/or Project Manager.
Worksheets included in this workbook are:
■ Required Project Hours by GL Period
■ Required Project Hours by PA Period
■ Required Project Hours by Global Week
Note: While using such parameters is common practice, you should note that your system may experience a decrease in performance when certain parameters are removed from a worksheet.
Setting Up for Reporting Capabilities 11-33
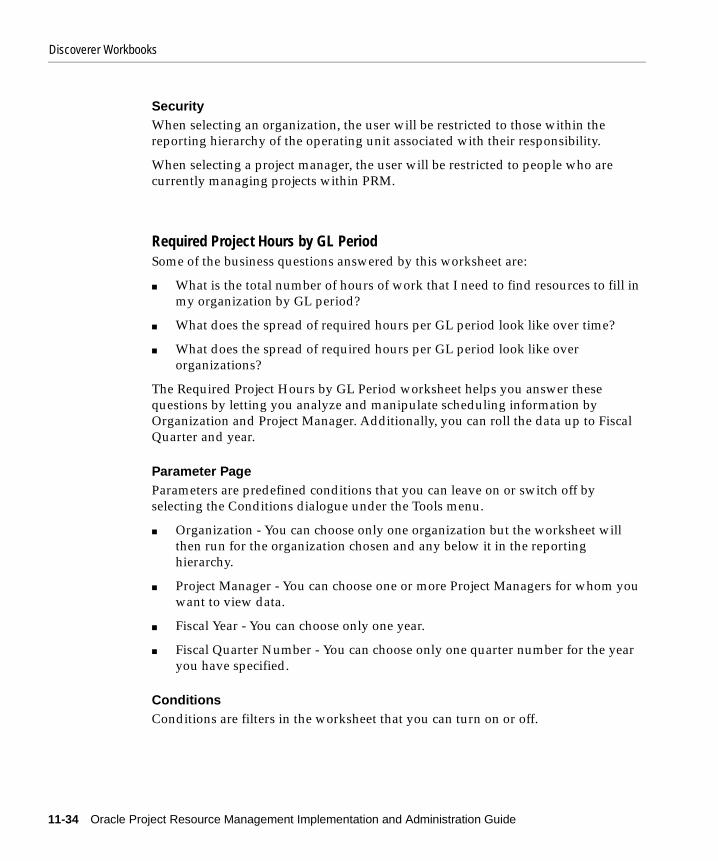
Discoverer Workbooks
SecurityWhen selecting an organization, the user will be restricted to those within the reporting hierarchy of the operating unit associated with their responsibility.
When selecting a project manager, the user will be restricted to people who are currently managing projects within PRM.
Required Project Hours by GL PeriodSome of the business questions answered by this worksheet are:
■ What is the total number of hours of work that I need to find resources to fill in my organization by GL period?
■ What does the spread of required hours per GL period look like over time?
■ What does the spread of required hours per GL period look like over organizations?
The Required Project Hours by GL Period worksheet helps you answer these questions by letting you analyze and manipulate scheduling information by Organization and Project Manager. Additionally, you can roll the data up to Fiscal Quarter and year.
Parameter PageParameters are predefined conditions that you can leave on or switch off by selecting the Conditions dialogue under the Tools menu.
■ Organization - You can choose only one organization but the worksheet will then run for the organization chosen and any below it in the reporting hierarchy.
■ Project Manager - You can choose one or more Project Managers for whom you want to view data.
■ Fiscal Year - You can choose only one year.
■ Fiscal Quarter Number - You can choose only one quarter number for the year you have specified.
ConditionsConditions are filters in the worksheet that you can turn on or off.
11-34 Oracle Project Resource Management Implementation and Administration Guide

Discoverer Workbooks
There are no conditions (other than those defined for the parameters listed above) predefined on this worksheet.
Column Dimensions■ Fiscal Year - the name of a Fiscal Year
■ Fiscal Quarter - the name of a Fiscal Quarter
■ GL Period - the name of a GL period
■ Required Hours - number of hours required
Row Dimensions■ Organization - the name of an organization.
■ Project - the name of a project.
■ Team Role - the team role name of the requirement.
Additional InformationIf the worksheet returns a value that requires further investigation the user should create a more detailed worksheet based on the folder Required Project Hours by GL Period: Team Role Detail. Using this folder more detailed information about the requirement can be found. The data you can view includes:
■ Probability - the probability of the project.
■ Start Date - the start date of the assignment.
■ End Date - the end date of the assignment.
■ Minimum Job Level - the minimum job level of the requirement.
■ Maximum Job Level - the maximum job level of the requirement.
Required Project Hours by PA PeriodSome of the business questions answered by this worksheet are:
■ What is the total number of hours of work that I need to find resources to fill in my organization by PA period?
■ What does the spread of required hours per PA period look like over time?
Setting Up for Reporting Capabilities 11-35

Discoverer Workbooks
■ What does the spread of required hours per PA period look like over organizations?
The Required Project Hours by PA Period worksheet helps you answer these questions by letting you analyze and manipulate scheduling information by Organization and Project Manager. Additionally, you can roll the data up to Fiscal Quarter and year.
Parameter PageParameters are predefined conditions that you can leave on or switch off by selecting the Conditions dialogue under the Tools menu.
■ Organization - You can choose only one organization but the worksheet will then run for the organization chosen and any below it in the reporting hierarchy.
■ Project Manager - You can choose one or more Project Managers for whom you want to view data.
■ Fiscal Year - You can choose only one year.
■ Fiscal Quarter Number - You can choose only one quarter number for the year you have specified.
ConditionsConditions are filters in the worksheet that you can turn on or off.
There are no conditions (other than those defined for the parameters listed above) predefined on this worksheet.
Column Dimensions■ Fiscal Year - the name of a Fiscal Year
■ Fiscal Quarter - the name of a Fiscal Quarter
■ PA Period - the name of a PA period
■ Required Hours - number of hours required
Row Dimensions■ Organization - the name of an organization.
■ Project - the name of a project.
■ Team Role - the team role name of the requirement.
11-36 Oracle Project Resource Management Implementation and Administration Guide

Discoverer Workbooks
Additional InformationIf the worksheet returns a value that requires further investigation the user should create a more detailed worksheet based on the folder Required Project Hours by PA Period: Team Role Detail. Using this folder more detailed information about the requirement can be found. The data you can view includes:
■ Probability - the probability of the project.
■ Start Date - the start date of the assignment.
■ End Date - the end date of the assignment.
■ Minimum Job Level - the minimum job level of the requirement.
■ Maximum Job Level - the maximum job level of the requirement.
Required Project Hours by Global WeekSome of the business questions answered by this worksheet are:
■ What is the total number of hours of work that I need to find resources to fill in my organization by Global Week?
■ What does the spread of required hours per Global Week look like over time?
■ What does the spread of required hours per Global Week period look like over organizations?
The Required Project Hours by Global Week worksheet helps you answer these questions by letting you analyze and manipulate scheduling information by Organization and Project Manager.
Parameter PageParameters are predefined conditions that you can leave on or switch off by selecting the Conditions dialogue under the Tools menu.
■ Organization - You can choose only one organization but the worksheet will then run for the organization chosen and any below it in the reporting hierarchy.
■ Project Manager - You can choose one or more Project Managers for whom you want to view data.
■ Calendar Year - You can choose only one year.
Setting Up for Reporting Capabilities 11-37

Discoverer Workbooks
■ Calendar Month - You can choose only one calendar month for the year you have specified.
ConditionsConditions are filters in the worksheet that you can turn on or off. There are no conditions (other than those defined for the parameters listed above) predefined on this worksheet.
Column Dimensions■ Calendar Year - the name of a calendar year
■ Calendar Month - the name of a calendar month
■ Global Week - the name of a global week
■ Day - the name of a day
■ Required Hours - number of hours required
Row Dimensions■ Organization - the name of an organization.
■ Project - the name of a project.
■ Team Role - the team role name of the requirement.
Additional InformationIf the worksheet returns a value that requires further investigation the user should create a more detailed worksheet based on the folder Required Project Hours by Global Week: Team Role Detail. Using this folder, you can find more detailed information about the requirement. The data you can view includes:
■ Probability - the probability of the project.
■ Start Date - the start date of the assignment.
■ End Date - the end date of the assignment.
■ Minimum Job Level - the minimum job level of the requirement.
■ Maximum Job Level - the maximum job level of the requirement.
11-38 Oracle Project Resource Management Implementation and Administration Guide

Discoverer Workbooks
Scheduled Resource Hours (PASCHRES)The scheduled resource hours workbook allows you to evaluate the number of hours currently scheduled within Project Resource Management by person. You can view this information by Organization and Resource Manager.
Worksheets included in this workbook are:
■ Scheduled Resource Hours by GL Period
■ Scheduled Resource Hours by PA Period
■ Scheduled Resource Hours by Global Week
Restrictions■ When selecting an organization, the user is restricted to those within the
reporting hierarchy of the operating unit associated with their responsibility.
■ When selecting a resource manager, the user is restricted to those individuals that report to them or manage people they have resource authority over.
Scheduled Resource Hours by GL PeriodThis worksheet addresses business questions such as:
■ What is the total number of hours scheduled for the people in my organization per GL period?
■ What are the total number of hours scheduled for individuals in my organization per GL period?
■ What does the spread of scheduled hours per GL period look like over time?
■ If there is an issue with a persons scheduled hours, what projects are they assigned to?
The Scheduled Resource Hours by GL Period worksheet helps you answer these questions by letting you analyze and manipulate scheduling information by Organization, Resource Manager and Person. Additionally, you can roll the data up to Fiscal Quarter and year.
Parameter PageParameters are predefined conditions that you can leave on or switch off by selecting the Conditions dialogue under the Tools menu.
Setting Up for Reporting Capabilities 11-39
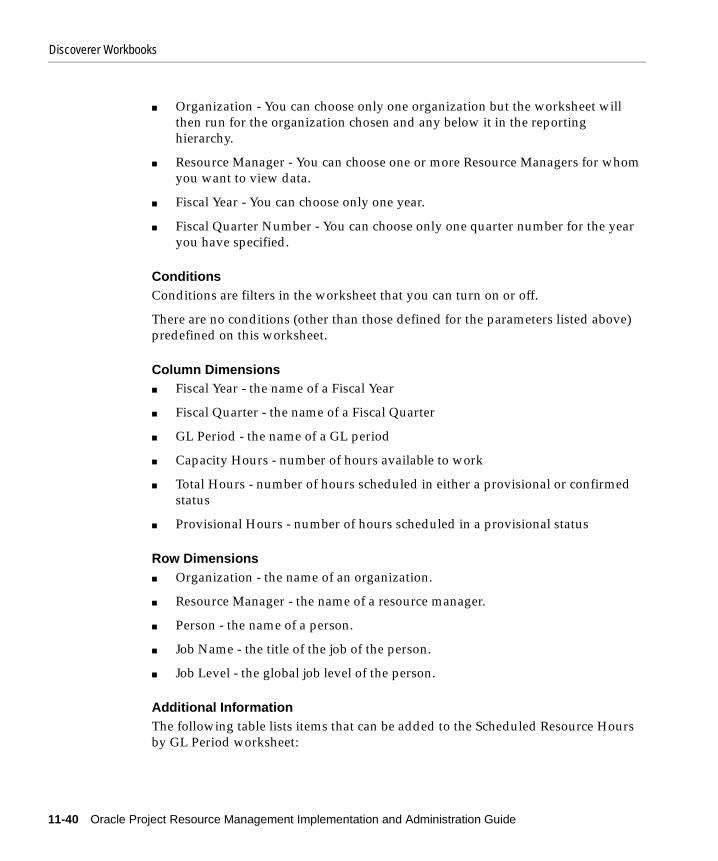
Discoverer Workbooks
■ Organization - You can choose only one organization but the worksheet will then run for the organization chosen and any below it in the reporting hierarchy.
■ Resource Manager - You can choose one or more Resource Managers for whom you want to view data.
■ Fiscal Year - You can choose only one year.
■ Fiscal Quarter Number - You can choose only one quarter number for the year you have specified.
ConditionsConditions are filters in the worksheet that you can turn on or off.
There are no conditions (other than those defined for the parameters listed above) predefined on this worksheet.
Column Dimensions■ Fiscal Year - the name of a Fiscal Year
■ Fiscal Quarter - the name of a Fiscal Quarter
■ GL Period - the name of a GL period
■ Capacity Hours - number of hours available to work
■ Total Hours - number of hours scheduled in either a provisional or confirmed status
■ Provisional Hours - number of hours scheduled in a provisional status
Row Dimensions■ Organization - the name of an organization.
■ Resource Manager - the name of a resource manager.
■ Person - the name of a person.
■ Job Name - the title of the job of the person.
■ Job Level - the global job level of the person.
Additional InformationThe following table lists items that can be added to the Scheduled Resource Hours by GL Period worksheet:
11-40 Oracle Project Resource Management Implementation and Administration Guide
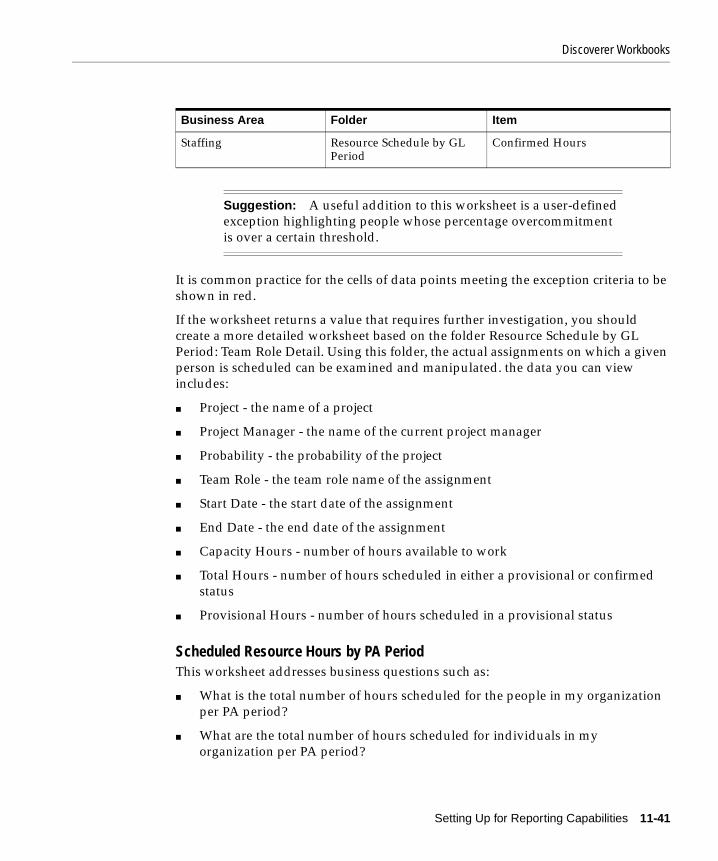
Discoverer Workbooks
It is common practice for the cells of data points meeting the exception criteria to be shown in red.
If the worksheet returns a value that requires further investigation, you should create a more detailed worksheet based on the folder Resource Schedule by GL Period: Team Role Detail. Using this folder, the actual assignments on which a given person is scheduled can be examined and manipulated. the data you can view includes:
■ Project - the name of a project
■ Project Manager - the name of the current project manager
■ Probability - the probability of the project
■ Team Role - the team role name of the assignment
■ Start Date - the start date of the assignment
■ End Date - the end date of the assignment
■ Capacity Hours - number of hours available to work
■ Total Hours - number of hours scheduled in either a provisional or confirmed status
■ Provisional Hours - number of hours scheduled in a provisional status
Scheduled Resource Hours by PA PeriodThis worksheet addresses business questions such as:
■ What is the total number of hours scheduled for the people in my organization per PA period?
■ What are the total number of hours scheduled for individuals in my organization per PA period?
Business Area Folder Item
Staffing Resource Schedule by GL Period
Confirmed Hours
Suggestion: A useful addition to this worksheet is a user-defined exception highlighting people whose percentage overcommitment is over a certain threshold.
Setting Up for Reporting Capabilities 11-41

Discoverer Workbooks
■ What does the spread of scheduled hours per PA period look like over time?
■ If there is an issue with a persons scheduled hours, what projects are they assigned to?
The Scheduled Resource Hours by PA Period worksheet helps you answer these questions by letting you analyze and manipulate scheduling information by Organization, Resource Manager and Person. Additionally, you can roll the data up to Fiscal Quarter and year.
Parameter PageParameters are predefined conditions that you can leave on or switch off by selecting the Conditions dialogue under the Tools menu.
■ Organization - You can choose only one organization but the worksheet will then run for the organization chosen and any below it in the reporting hierarchy.
■ Resource Manager - You can choose one or more Resource Managers for whom you want to view data.
■ Fiscal Year - You can choose only one year.
■ Fiscal Quarter Number - You can choose only one quarter number for the year you have specified.
ConditionsConditions are filters in the worksheet that you can turn on or off.
There are no conditions (other than those defined for the parameters listed above) predefined on this worksheet.
Column Dimensions■ Fiscal Year - the name of a Fiscal Year
■ Fiscal Quarter - the name of a Fiscal Quarter
■ PA Period - the name of a PA period
■ Capacity Hours - number of hours available to work
■ Total Hours - number of hours scheduled in either a provisional or confirmed status
■ Provisional Hours - number of hours scheduled in a provisional status
11-42 Oracle Project Resource Management Implementation and Administration Guide

Discoverer Workbooks
Row Dimensions■ Organization - the name of an organization.
■ Resource Manager - the name of a resource manager.
■ Person - the name of a person.
■ Job Name - the title of the job of the person.
■ Job Level - the global job level of the person.
Additional InformationThe following table lists items that can be added to the Scheduled Resource Hours by PA Period worksheet:
It is common practice for the cells of data points meeting the exception criteria to be shown in red.
If the worksheet returns a value that requires further investigation, you should create a more detailed worksheet based on the folder Resource Schedule by PA Period: Team Role Detail. Using this folder, the actual assignments on which a given person is scheduled can be examined and manipulated. The data you can view includes:
■ Project - the name of a project.
■ Project Manager - the name of the current project manager.
■ Probability - the probability of the project.
■ Team Role - the team role name of the assignment.
■ Start Date - the start date of the assignment.
■ End Date - the end date of the assignment.
Business Area Folder Item
Staffing Resource Schedule by PA Period
Confirmed Hours
Suggestion: A useful addition to this worksheet is a user-defined exception highlighting people whose percentage over-commitment is over a certain threshold.
Setting Up for Reporting Capabilities 11-43

Discoverer Workbooks
■ Capacity Hours - number of hours available to work
■ Total Hours - number of hours scheduled in either a provisional or confirmed status
■ Provisional Hours - number of hours scheduled in a provisional status
Scheduled Resource Hours by Global WeekThis worksheet addresses business questions such as:
■ What is the total number of hours scheduled for the people in my organization per Global Week?
■ What are the total number of hours scheduled for individuals in my organization per Global Week?
■ What does the spread of scheduled hours per Global Week look like over time?
■ If there is an issue with a persons scheduled hours, what projects are they assigned to?
The Scheduled Resource Hours by Global Week worksheet helps you answer these questions by letting you analyze and manipulate scheduling information by Organization, Resource Manager and Person. Additionally, you can drill down to view the data by day (to view the hours per day).
Parameter PageParameters are predefined conditions that you can leave on or switch off by selecting the Conditions dialogue under the Tools menu.
■ Organization - You can choose only one organization but the worksheet will then run for the organization chosen and any below it in the reporting hierarchy.
■ Resource Manager - You can choose one or more Resource Managers for whom you want to view data.
■ Calendar Year - You can choose only one year.
■ Calendar Month - You can choose only one calendar month for the year you have specified.
ConditionsConditions are filters in the worksheet that you can turn on or off.
11-44 Oracle Project Resource Management Implementation and Administration Guide
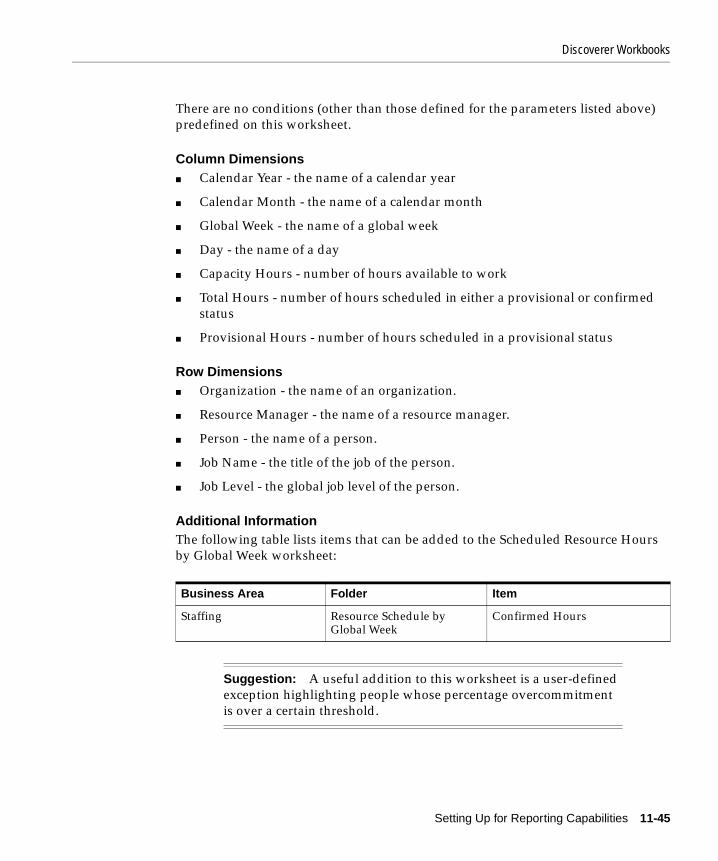
Discoverer Workbooks
There are no conditions (other than those defined for the parameters listed above) predefined on this worksheet.
Column Dimensions■ Calendar Year - the name of a calendar year
■ Calendar Month - the name of a calendar month
■ Global Week - the name of a global week
■ Day - the name of a day
■ Capacity Hours - number of hours available to work
■ Total Hours - number of hours scheduled in either a provisional or confirmed status
■ Provisional Hours - number of hours scheduled in a provisional status
Row Dimensions■ Organization - the name of an organization.
■ Resource Manager - the name of a resource manager.
■ Person - the name of a person.
■ Job Name - the title of the job of the person.
■ Job Level - the global job level of the person.
Additional InformationThe following table lists items that can be added to the Scheduled Resource Hours by Global Week worksheet:
Business Area Folder Item
Staffing Resource Schedule by Global Week
Confirmed Hours
Suggestion: A useful addition to this worksheet is a user-defined exception highlighting people whose percentage overcommitment is over a certain threshold.
Setting Up for Reporting Capabilities 11-45
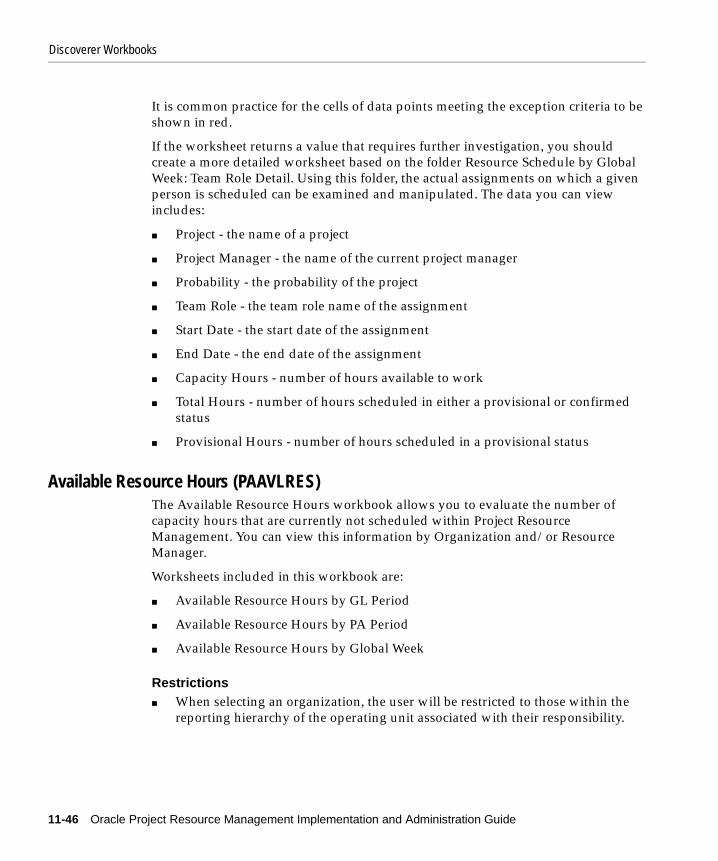
Discoverer Workbooks
It is common practice for the cells of data points meeting the exception criteria to be shown in red.
If the worksheet returns a value that requires further investigation, you should create a more detailed worksheet based on the folder Resource Schedule by Global Week: Team Role Detail. Using this folder, the actual assignments on which a given person is scheduled can be examined and manipulated. The data you can view includes:
■ Project - the name of a project
■ Project Manager - the name of the current project manager
■ Probability - the probability of the project
■ Team Role - the team role name of the assignment
■ Start Date - the start date of the assignment
■ End Date - the end date of the assignment
■ Capacity Hours - number of hours available to work
■ Total Hours - number of hours scheduled in either a provisional or confirmed status
■ Provisional Hours - number of hours scheduled in a provisional status
Available Resource Hours (PAAVLRES)The Available Resource Hours workbook allows you to evaluate the number of capacity hours that are currently not scheduled within Project Resource Management. You can view this information by Organization and/or Resource Manager.
Worksheets included in this workbook are:
■ Available Resource Hours by GL Period
■ Available Resource Hours by PA Period
■ Available Resource Hours by Global Week
Restrictions■ When selecting an organization, the user will be restricted to those within the
reporting hierarchy of the operating unit associated with their responsibility.
11-46 Oracle Project Resource Management Implementation and Administration Guide

Discoverer Workbooks
■ When selecting a resource manager, the user will be restricted to those that report to them or manage people they have resource authority over.
Available Resource Hours by GL PeriodThis worksheet addresses business questions such as:
■ What is the total number of hours, per GL period, that people in my organization are available to work but are not scheduled?
■ What are the total number of hours, per GL period, that people who report to me are available to work but are not scheduled?
■ What does the spread of availability look like over time?
The Available Resource Hours by GL Period worksheet helps you answer these questions by letting you analyze and manipulate availability information by Organization, Resource Manager and Person. Additionally, you can roll the data up to Fiscal Quarter and year.
Parameter PageParameters are predefined conditions that you can leave on or switch off by selecting the Conditions dialogue under the Tools menu.
■ Organization - You can choose only one organization but the worksheet will then run for the organization chosen and any below it in the reporting hierarchy.
■ Resource Manager - You can choose one or more Resource Managers for whom you want to view data.
■ Fiscal Year - You can choose only one year.
■ Fiscal Quarter Number - You can choose only one quarter number for the year you have specified.
ConditionsConditions are filters in the worksheet that you can turn on or off.
There are no conditions (other than those defined for the parameters listed above) predefined on this worksheet.
Column Dimensions■ Fiscal Year - the name of a Fiscal Year
Setting Up for Reporting Capabilities 11-47

Discoverer Workbooks
■ Fiscal Quarter - the name of a Fiscal Quarter
■ GL Period - the name of a GL period
■ Available Hours (Potential) - the number of hours unscheduled or scheduled in a provisional status
■ Available Hours (Definite) - the number of hours unscheduled
■ Availability % (Potential) - the number of hours unscheduled or scheduled in a provisional status divided by the capacity
■ Availability % (Definite) - the number of hours unscheduled divided by capacity
Row Dimensions■ Organization - the name of an organization.
■ Resource Manager - the name of a resource manager.
■ Person - the name of a person.
■ Job Name - the title of the job of the person.
■ Job Level - the global job level of the person.
Additional InformationThe following table lists items that can be added to the Available Resource Hours by GL Period worksheet:
Available Resource Hours by PA PeriodThis worksheet addresses business questions such as:
Business Area Folder Item
Staffing Resource Schedule by GL Period
Confirmed Hours
Staffing Resource Schedule by GL Period
Provisional Hours
Staffing Resource Schedule by GL Period
Total Hours
Staffing Resource Capacity by GL Period
Capacity Hours
11-48 Oracle Project Resource Management Implementation and Administration Guide
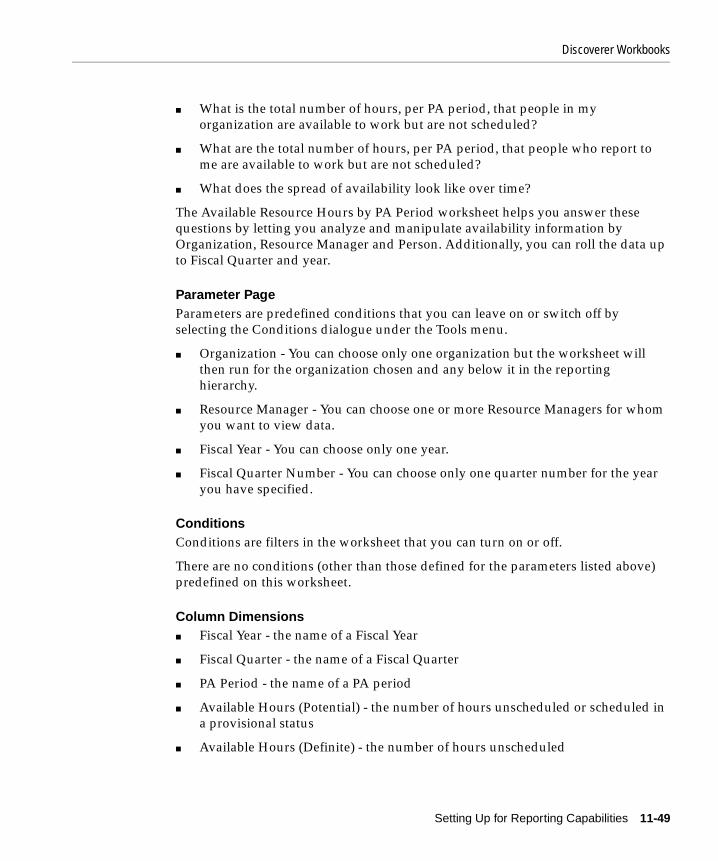
Discoverer Workbooks
■ What is the total number of hours, per PA period, that people in my organization are available to work but are not scheduled?
■ What are the total number of hours, per PA period, that people who report to me are available to work but are not scheduled?
■ What does the spread of availability look like over time?
The Available Resource Hours by PA Period worksheet helps you answer these questions by letting you analyze and manipulate availability information by Organization, Resource Manager and Person. Additionally, you can roll the data up to Fiscal Quarter and year.
Parameter PageParameters are predefined conditions that you can leave on or switch off by selecting the Conditions dialogue under the Tools menu.
■ Organization - You can choose only one organization but the worksheet will then run for the organization chosen and any below it in the reporting hierarchy.
■ Resource Manager - You can choose one or more Resource Managers for whom you want to view data.
■ Fiscal Year - You can choose only one year.
■ Fiscal Quarter Number - You can choose only one quarter number for the year you have specified.
ConditionsConditions are filters in the worksheet that you can turn on or off.
There are no conditions (other than those defined for the parameters listed above) predefined on this worksheet.
Column Dimensions■ Fiscal Year - the name of a Fiscal Year
■ Fiscal Quarter - the name of a Fiscal Quarter
■ PA Period - the name of a PA period
■ Available Hours (Potential) - the number of hours unscheduled or scheduled in a provisional status
■ Available Hours (Definite) - the number of hours unscheduled
Setting Up for Reporting Capabilities 11-49

Discoverer Workbooks
■ Availability % (Potential) - the number of hours unscheduled or scheduled in a provisional status divided by the capacity
■ Availability % (Definite) - the number of hours unscheduled divided by capacity
Row Dimensions■ Organization - the name of an organization.
■ Resource Manager - the name of a resource manager.
■ Person - the name of a person.
■ Job Name - the title of the job of the person.
■ Job Level - the global job level of the person.
Additional InformationThe following table lists items that can be added to the Available Resource Hours by PA Period worksheet:
Available Resource Hours by Global WeekSome of the business questions answered by this worksheet are:
■ What is the total number of hours, per Global Week, that people in my organization are available to work but are not scheduled?
■ What are the total number of hours, per Global Week, that people who report to me are available to work but are not scheduled?
■ What does the spread of availability look like over time?
Business Area Folder Item
Staffing Resource Schedule by PA Period
Confirmed Hours
Staffing Resource Schedule by PA Period
Provisional Hours
Staffing Resource Schedule by PA Period
Total Hours
Staffing Resource Capacity by PA Period
Capacity Hours
11-50 Oracle Project Resource Management Implementation and Administration Guide

Discoverer Workbooks
The Available Resource Hours by Global Week worksheet helps you answer these questions by letting you analyze and manipulate availability information by Organization, Resource Manager and Person. Additionally, you can drill down to view availability by day.
Parameter PageParameters are predefined conditions that you can leave on or switch off by selecting the Conditions dialogue under the Tools menu.
■ Organization - You can choose only one organization but the worksheet will then run for the organization chosen and any below it in the reporting hierarchy.
■ Resource Manager - You can choose one or more Resource Managers for whom you want to view data.
■ Calendar Year - You can choose only one year.
■ Calendar Month - You can choose only one month for the year you have specified.
ConditionsConditions are filters in the worksheet that you can turn on or off.
There are no conditions (other than those defined for the parameters listed above) predefined on this worksheet.
Column Dimensions■ Calendar Year - the name of a calendar year
■ Calendar Month - the name of a Fiscal Quarter
■ Global Week - the name of a Global Week
■ Day - the name of a day
■ Available Hours (Potential) - the number of hours unscheduled or scheduled in a provisional status
■ Available Hours (Definite) - the number of hours unscheduled divided by capacity
■ Availability % (Potential) - the number of hours unscheduled or scheduled in a provisional status divided by the capacity
Setting Up for Reporting Capabilities 11-51

Discoverer Workbooks
■ Availability % (Definite) - the number of hours unscheduled divided by capacity
Row Dimensions■ Organization - the name of an organization
■ Resource Manager - the name of a resource manager
■ Person - the name of a person
■ Job Name - the title of the job of the person
■ Job Level - the global job level of the person
Additional InformationThe following table lists items that can be added to the Available Resource Hours by Global Week worksheet in the Staffing business area:
Overcommitted Resource Hours (PAOVCRES)The overcommitted resource hours workbook allows you to evaluate the number of hours people are currently scheduled over their capacity. You can view this information by Organization and Resource Manager.
Worksheets included in this workbook are:
■ Overcommitted Resource Hours by GL Period
■ Overcommitted Resource Hours by PA Period
■ Overcommitted Resource Hours by Global Week
Folder Item
Resource Schedule by Global Week Confirmed Hours
Resource Schedule by Global Week Provisional Hours
Resource Schedule by Global Week Total Hours
Resource Capacity by Global Week Capacity Hours
11-52 Oracle Project Resource Management Implementation and Administration Guide
Discoverer Workbooks
Restrictions■ When selecting an organization, the user will be restricted to those within the
reporting hierarchy of the operating unit associated with their responsibility.
■ When selecting a resource manager, the user will be restricted to those that report to them or manage people they have resource authority over.
Overcommitted Resource Hours by GL PeriodThis worksheet addresses business questions such as:
■ What is the total number of overcommitted hours for the people in my organization per GL period?
■ What are the total number of overcommitted hours for individuals in my organization per GL period?
■ What does the spread of overcommitted hours per GL period look like over time?
■ If a person is overcommitted, what assignments have caused this?
The Overcommitted Resource Hours by GL Period worksheet helps you answer these questions by letting you analyze and manipulate capacity and overcommitment information by Organization, Resource Manager and Person. Additionally, you can roll the data up to Fiscal Quarter and year.
Parameter PageParameters are predefined conditions that you can leave on or switch off by selecting the Conditions dialogue under the Tools menu.
■ Organization - You can choose only one organization but the worksheet will then run for the organization chosen and any below it in the reporting hierarchy.
■ Resource Manager - You can choose one or more Resource Managers for whom you want to view data.
■ Fiscal Year - You can choose only one year.
■ Fiscal Quarter Number - You can choose only one quarter number for the year you have specified.
ConditionsConditions are filters in the worksheet that you can turn on or off.
Setting Up for Reporting Capabilities 11-53

Discoverer Workbooks
There are no conditions (other than those defined for the parameters listed above) predefined on this worksheet.
Column Dimensions■ Fiscal Year - the name of a Fiscal Year
■ Fiscal Quarter - the name of a Fiscal Quarter
■ GL Period - the name of a GL period
■ Capacity Hours - number of hours available to work
■ Confirmed Hours - number of hours scheduled with a confirmed status
■ Overcommitted Hours - number of hours scheduled with a confirmed status minus capacity
■ Overcommitted percentage - number of over-committed hours divided by capacity
Row Dimensions■ Organization - the name of an organization.
■ Resource Manager - the name of a resource manager.
■ Person - the name of a person.
■ Job Name - the title of the job of the person.
■ Job Level - the global job level of the person.
Additional InformationThe table that follows lists items that can be added to the Scheduled Resource Hours by GL Period worksheet in the Staffing business area:
Folder Item
Resource Schedule by GL Period Total Hours
Resource Schedule by GL Period Provisional Hours
Suggestion: A useful addition to this worksheet is a user-defined exception highlighting people whose percentage overcommitment is over a certain threshold.
11-54 Oracle Project Resource Management Implementation and Administration Guide

Discoverer Workbooks
It is common practice for the cells of data points meeting the exception criteria to be shown in red.
If the worksheet returns a value that requires further investigation, you should create a more detailed worksheet based on the folder Resource Schedule by GL Period: Team Role Detail. Using this folder, the actual assignments on which a given person is scheduled can be examined and manipulated. The data you can view includes:
■ Project - the name of a project.
■ Project Manager - the name of the current project manager
■ Probability - the probability of the project
■ Team Role - the team role name of the assignment
■ Start Date - the start date of the assignment
■ End Date - the end date of the assignment
■ Confirmed Hours - number of hours scheduled in a confirmed status
Overcommitted Resource Hours by PA PeriodThis worksheet addresses business questions such as:
■ What is the total number of overcommitted hours for the people in my organization per PA period?
■ What are the total number of overcommitted hours for individuals in my organization per PA period?
■ What does the spread of overcommitted hours per PA period look like over time?
■ If a person is overcommitted, what assignments have caused this?
The Resource Hours by PA Period worksheet helps you answer these questions by letting you analyze and manipulate capacity and overcommitment information by Organization, Resource Manager and Person. Additionally, you can roll the data up to Fiscal Quarter and year.
Parameter PageParameters are predefined conditions that you can leave on or switch off by selecting the Conditions dialogue under the Tools menu.
Setting Up for Reporting Capabilities 11-55
Discoverer Workbooks
■
11-56 Oracle Project Resource Management Implementation and Administration Guide

Discoverer Workbooks
Additional InformationThe following table lists items that can be added to the Overcommitted Resource Hours by PA Period worksheet in the Staffing business area:
It is common practice for the cells of data points meeting the exception criteria to be shown in red.
If the worksheet returns a value that requires further investigation, you should create a more detailed worksheet based on the folder Resource Schedule by PA Period: Team Role Detail. Using this folder, the actual assignments on which a given person is scheduled can be examined and manipulated. The data you can view includes:
■ Project - the name of a project
■ Project Manager - the name of the current project manager
■ Probability - the probability of the project
■ Team Role - the team role name of the assignment
■ Start Date - the start date of the assignment
■ End Date - the end date of the assignment
■ Confirmed Hours - number of hours scheduled in a confirmed status
Folder Item
Resource Schedule by GL Period Total Hours
Resource Schedule by GL Period Provisional Hours
Suggestion: A useful addition to this worksheet is a user-defined exception highlighting people whose percentage over-commitment is over a certain threshold.
Setting Up for Reporting Capabilities 11-57

Discoverer Workbooks
Overcommitted Resource Hours by Global WeekThis worksheet addresses business questions such as:
■ What is the total number of overcommitted hours for the people in my organization per Global Week or Day?
■ What are the total number of overcommitted hours for individuals in my organization per Global Week or Day?
■ What does the spread of overcommitted hours per Global Week or Day look like over time?
■ If a person is overcommitted, what assignments have caused this?
The Overcommitted Resource Hours by Global Week worksheet helps you answer these questions by letting you analyze and manipulate capacity and overcommitment information by Organization, Resource Manager and Person. Additionally, you can drill down to view the data by day (to view the hours per day).
Parameter PageParameters are predefined conditions that you can leave on or switch off by selecting the Conditions dialogue under the Tools menu.
■ Organization - You can choose only one organization but the worksheet will then run for the organization chosen and any below it in the reporting hierarchy.
■ Resource Manager - You can choose one or more Resource Managers for whom you want to view data.
■ Calendar Year - You can choose only one year.
■ Calendar Month - You can choose only one calendar month for the year you have specified.
ConditionsConditions are filters in the worksheet that you can turn on or off.
There are no conditions (other than those defined for the parameters listed above) predefined on this worksheet.
11-58 Oracle Project Resource Management Implementation and Administration Guide
Discoverer Workbooks
Column Dimensions■ Calendar Year - the name of a calendar year
■ Calendar Month - the name of a calendar month
■ Global Week - the name of a global week
■ Day - the name of a day
■ Capacity Hours - number of hours available to work
■ Confirmed Hours - number of hours scheduled with a confirmed status
■ Overcommitted Hours - number of hours scheduled with a confirmed status minus capacity
■ Overcommitted percentage - number of over-committed hours divided by capacity
Row Dimensions■ Organization - the name of an organization.
■ Resource Manager - the name of a resource manager.
■ Person - the name of a person.
■ Job Name - the title of the job of the person.
■ Job Level - the global job level of the person.
Additional InformationThe following table lists items that you can add to the Over-committed Resource Hours by Global Week worksheet in the Staffing business area:
Folder Item
Resource Schedule by GL Period Total Hours
Resource Schedule by GL Period Provisional Hours
Suggestion: A useful addition to this worksheet is a user-defined exception highlighting people whose percentage over-commitment is over a certain threshold.
Setting Up for Reporting Capabilities 11-59

Discoverer Workbooks
It is common practice for the cells of data points meeting the exception criteria to be shown in red.
■ If the worksheet returns a value that requires further investigation, you should create a more detailed spreadsheet based on the folder Resource Schedule by Global Week: Team Role Detail. Using this folder, the actual assignments on which a given person is scheduled can be examined and manipulated. The data you can view includes:
■ Project - the name of a project
■ Project Manager - the name of the current project manager
■ Probability - the probability of the project
■ Team Role - the team role name of the assignment
■ Start Date - the start date of the assignment
■ End Date - the end date of the assignment
■ Confirmed Hours - number of hours scheduled in a confirmed status
Sales Pipeline Workbook (PASALPIP)The Sales Pipeline workbook allows you to view the value of projects currently within your pipeline (those that are in an unapproved status and have a probability of less than 100%). You can view this information by Organization and/or Resource Manager.
Worksheets included in this workbook are:
■ Sales Pipeline by Fiscal Year
■ Sales Pipeline by Fiscal Quarter
■ Sales Pipeline by GL Period
■ Sales Pipeline by PA Period
In all worksheets, null values are displayed as 0.
Restrictions
■ When selecting an organization, the user is restricted to those they have forecasting authority over and that are also within the reporting hierarchy of the operating unit associated with their responsibility.
11-60 Oracle Project Resource Management Implementation and Administration Guide

Discoverer Workbooks
Sales Pipeline by Fiscal YearThis worksheet addresses business questions such as:
■ What is my organization’s total/discounted Sales Pipeline up to and including a particular Fiscal Year?
■ What is the total/discounted Sales Pipeline of project’s I will manage up to and including a particular Fiscal Year?
■ How is the sales pipeline spread across all industries up to and including a particular Fiscal Year?
The Sales Pipeline by Fiscal Year worksheet helps you answer these questions by letting you analyze and manipulate project value and probability information by Class Category, Organization and/or Project Manager.
Parameter PageParameters are predefined conditions that you can leave on or switch off by selecting the Conditions dialogue under the Tools menu.
■ Organization - You can choose only one organization but the worksheet will then run for the organization chosen and any below it in the reporting hierarchy.
■ Classification Category - You can choose only one classification category. Your sales pipeline will then be displayed by the classification codes within the category chosen.
■ Fiscal Year - You can choose only one year but the worksheet will also include any projects still in the pipeline that have expected approval dates prior to the year specified.
■ Project Manager - You can choose one or more project managers. Sales pipeline will only be shown for projects managed by the project managers selected.
■ Include Values Over - a currency value that the total sales pipeline figure must be greater than in order for the project to be displayed.
ConditionsConditions are filters in the worksheet that you can turn on or off.
■ Include Probabilities Under - a numeric value that the project probability must be less than in order for the project to be displayed. Defaults to 100.
Setting Up for Reporting Capabilities 11-61
Discoverer Workbooks
Column Dimensions■ Fiscal Year - the name of the Fiscal Year
■ Total Value - the total project value
■ Discounted Value - the total project value multiplied by the probability of the project.
Row Dimensions■ Organization - the name of an organization.
■ Classification Code - the classification code within the classification category.
■ Project - the name of a project.
■ Project Manager - the name of the current project manager.
■ Project Probability - the current project probability.
■ Type - the name of the project type on which the project is based.
■ Status - the status of the project
■ Expected Approval Date - the date on which the project approval is expected
Sales Pipeline by Fiscal QuarterThis worksheet addresses business questions such as:
■ What is my organization’s total/discounted Sales Pipeline up to and including a particular Fiscal Quarter?
■ What is the total/discounted Sales Pipeline of project’s I will up to and including a particular Fiscal Quarter?
■ How is the sales pipeline spread across all industries up to and including a particular Fiscal Quarter?
The Sales Pipeline by Fiscal Quarter worksheet helps you answer these questions by letting you analyze and manipulate project value and probability information by Class Category, Organization and/or Project Manager.
Parameter PageParameters are predefined conditions that you can leave on or switch off by selecting the Conditions dialogue under the Tools menu.
11-62 Oracle Project Resource Management Implementation and Administration Guide

Discoverer Workbooks
■ Organization - You can choose only one organization but the worksheet will then run for the organization chosen and any below it in the reporting hierarchy.
■ Classification Category - You can choose only one classification category. Your sales pipeline will then be displayed by the classification codes within the category chosen.
■ Fiscal Year - You can choose only one year but the worksheet will also include any projects still in the pipeline that have expected approval dates prior to the year specified.
■ Fiscal Quarter Number - You can choose only one quarter number but the worksheet will also include any projects still in the pipeline that have expected approval dates prior to the quarter specified.
■ Project Manager - You can choose one or more project managers. Sales pipeline will only be shown for projects managed by the project managers selected.
■ Include Values Over - a currency value that the total sales pipeline figure must be greater than in order for the project to be displayed.
ConditionsConditions are filters in the worksheet that you can turn on or off.
■ Include Probabilities Under - a numeric value that the project probability must be less than in order for the project to be displayed. Defaults to 100.
Column Dimensions■ Fiscal Year - the name of the Fiscal Year
■ Fiscal Quarter - the name of the Fiscal Quarter
■ Total Value - the total project value
■ Discounted Value - the total project value multiplied by the probability of the project.
Row Dimensions■ Organization - the name of an organization.
■ Classification Code - the classification code within the classification category.
■ Project - the name of a project.
■ Project Manager - the name of the current project manager.
Setting Up for Reporting Capabilities 11-63

Discoverer Workbooks
■ Project Probability - the current project probability.
■ Type - the name of the project type on which the project is based.
■ Status - the status of the project
Sales Pipeline by GL PeriodThis worksheet addresses business questions such as:
■ What is my organization’s total/discounted Sales Pipeline up to and including a particular GL period?
■ What is the total/discounted Sales Pipeline of project’s I will manage up to and including a particular GL period?
■ How is the sales pipeline spread across all industries up to and including a particular GL period?
The Sales Pipeline by GL period worksheet helps you answer these questions by letting you analyze and manipulate project value and probability information by Class Category, Organization and/or Project Manager.
Parameter PageParameters are predefined conditions that you can leave on or switch off by selecting the Conditions dialogue under the Tools menu.
■ Organization - You can choose only one organization but the worksheet will then run for the organization chosen and any below it in the reporting hierarchy.
■ Classification Category - You can choose only one classification category. Your sales pipeline will then be displayed by the classification codes within the category chosen.
■ Fiscal Year - You can choose only one year but the worksheet will also include any projects still in the pipeline that have expected approval dates prior to the year specified.
■ Fiscal Quarter Number - You can choose only one quarter number but the worksheet will also include any projects still in the pipeline that have expected approval dates prior to the quarter specified.
■ Project Manager - You can choose one or more project managers. Sales pipeline will only be shown for projects managed by the project managers selected.
11-64 Oracle Project Resource Management Implementation and Administration Guide

Discoverer Workbooks
■ Include Values Over - a currency value that the total sales pipeline figure must be greater than in order for the project to be displayed.
ConditionsConditions are filters in the worksheet that you can turn on or off.
■ Include Probabilities Under - a numeric value that the project probability must be less than in order for the project to be displayed. Defaults to 100.
Column Dimensions■ Fiscal Year - the name of the Fiscal Year
■ Fiscal Quarter - the name of the Fiscal Quarter
■ GL Period - the name of the GL period
■ Total Value - the total project value
■ Discounted Value - the total project value multiplied by the probability of the project.
Row Dimensions■ Organization - the name of an organization.
■ Classification Code - the classification code within the classification category.
■ Project - the name of a project.
■ Project Manager - the name of the current project manager.
■ Project Probability - the current project probability.
■ Type - the name of the project type on which the project is based.
■ Status - the status of the project
Setting Up for Reporting Capabilities 11-65
Discoverer Workbooks
Sales Pipeline by PA PeriodThis worksheet addresses business questions such as:
■ What is my organization’s total/discounted Sales Pipeline up to and including a particular PA period?
■ What is the total/discounted Sales Pipeline of project’s I will manage up to and including a particular PA period?
■ How is the sales pipeline spread across all industries up to and including a particular PA period?
The Sales Pipeline by PA period worksheet helps you answer these questions by letting you analyze and manipulate project value and probability information by Class Category, Organization and Project Manager.
Parameter PageParameters are predefined conditions that you can leave on or switch off by selecting the Conditions dialog under the Tools menu.
■ Organization - You can choose only one organization but the worksheet will then run for the organization chosen and any below it in the reporting hierarchy.
■ Classification Category - You can choose only one classification category. Your sales pipeline will then be displayed by the classification codes within the category chosen.
■ Fiscal Year - You can choose only one year but the worksheet will also include any projects still in the pipeline that have expected approval dates prior to the year specified.
■ Fiscal Quarter Number - You can choose only one quarter number but the worksheet will also include any projects still in the pipeline that have expected approval dates prior to the quarter specified.
■ Project Manager - You can choose one or more project managers. Sales pipeline will only be shown for projects managed by the project managers selected.
■ Include Values Over - a currency value that the total sales pipeline figure must be greater than in order for the project to be displayed.
ConditionsConditions are filters in the worksheet that you can turn on or off.
11-66 Oracle Project Resource Management Implementation and Administration Guide

Discoverer Workbooks
■ Include Probabilities Under - a numeric value that the project probability must be less than in order for the project to be displayed. Defaults to 100.
Column Dimensions■ Fiscal Year - the name of the Fiscal Year
■ Fiscal Quarter - the name of the Fiscal Quarter
■ PA Period - the name of the PA period
■ Total Value - the total project value
■ Discounted Value - the total project value multiplied by the probability of the project.
Row Dimensions■ Organization - the name of an organization
■ Classification Code - the classification code within the classification category
■ Project - the name of a project
■ Project Manager - the name of the current project manager
■ Project Probability - the current project probability
■ Type - the name of the project type on which the project is based
■ Status - the status of the project
■ Expected Approval Date - the date on which the project approval is expected
Setting Up for Reporting Capabilities 11-67

Discoverer Query Tips
Discoverer Query TipsThe following suggestions provide you with guidance while you are performing reporting activities.
Avoid Blind QueriesA blind query is a query that selects most or all of the items from a business view folder without specifying any conditions.
Why avoid Blind Queries? Since no condition is specified in a blind query, the query is not able to efficiently use the indexes created for the underlying tables. You may encounter poor query performance if your database contains a large amount of data.
Capacity, Schedule and Sales Pipeline ViewsWhen you create a workbook using any of the folders listed below, we suggest that you create the conditions outlined below. In particular, by restricting the time period for which the workbook is run it’s performance will be improved.
Sales Pipeline Folders■ Always join to the Classification Categories folder and specify one particular
category
■ Always specify a period of time (such as a quarter, period, or month)
Resource Schedule Folders■ Always specify a period of time (such as a quarter, period, or month)
Use the OR statement in your condition rather than the IN statement. For example, you should use:
Period Name = Feb-99 OR Period Name = Mar-99
instead of:
Period Name IN (Feb-99, Mar-99)
11-68 Oracle Project Resource Management Implementation and Administration Guide
Maintaining You
12
Maintaining Your DataAs your data increases and changes to meet the demands of your projects, maintaining data integrity becomes more imperative. In order to ensure the accuracy of your data as changes are made, you should understand how additions and changes affect the overall structure of your data.
This chapter discusses the impact of specific data modifications. It also describes the built-in administrative processes that when run ensure that these changes are reflected throughout the application. In order to run any of the processes described in this chapter, you must have Project Super User responsibility.
The covered topics are:
■ Understanding Data Processing
■ Understanding the Impact of Changes to HRMS-Based Information
■ Maintaining PRM Resources
■ Maintaining Schedules
■ Maintaining Utilization Values
■ Maintaining Forecast Information
Note: If you make changes to information through Oracle forms that you want reflected in a poplist, you must stop and restart the Web server.
r Data 12-1

Understanding Data Processing
Understanding Data ProcessingOracle Project Resource Management uses deferred workflow processes and administrative processes to manage changes to your data. You must configure and manage the engines for both types of processes in order to handle the volume of changes happening within your system. For more information on these technologies, refer to:
■ Oracle Workflow User Guide
■ Oracle Application Object Library User Guide
Most of the changes you make to your data automatically update related information within the application. These changes occur without any intervention on your part. However, some changes require the use of administrative processes to ensure that the change is reflected accurately. In particular, two situations require this level of maintenance:
■ If the automatic processes encounter errors due to missing or invalid setup information, or due to technical failures
In this case, an administrative user is notified of the problem, and advised to run an administrative process to complete the changes.
■ If the changed information is not expected to be done frequently enough to warrant an automatic process
For example, if a change is made to a calendar, you must run the Create Calendar Schedules process to reflect the calendar change throughout the system.
Note: You must assign at least one user to the seeded application user Projects Application Administrator. This user receives notifications regarding any encountered workflow processing errors. This user should also have the appropriate authority to run the administrative processes which assist in the correction of some of the errors.
12-2 Oracle Project Resource Management Implementation and Administration Guide

Understanding Data Processing
Deferred Forecast Item Creation ProcessOne of the activities deferred to the background is the creation of forecast items for assignments and requirements. Since the volume of transactions can be large, this processing task can require a substantial amount of time to complete. You can improve the performance of this task by adding a background process dedicated solely to the task of generating forecast items.
To submit a request, complete the following steps:
1. Navigate to the Submit Requests form.
2. Submit the Workflow Background Process concurrent program as a request.
3. Enter in the Item Type parameter: PA Forecast Item Generation Workflow.
4. Schedule the process to repeat itself at appropriate intervals.
For more information, see "Submitting a Request" in the Oracle Applications Users Guide.
Maintaining Your Data 12-3
Understanding the Impact of Changes to HRMS-Based Information
Understanding the Impact of Changes to HRMS-Based InformationYou will modify various setup and transaction data during the course of using the Oracle Project Resource Management application. Changes on the following data items automatically trigger deferred workflow processes to complete the update. These workflow processes migrate the changes throughout your data set.
Changing Job InformationChanging job information such as job levels, billability, or utilization can have a direct impact on utilization reporting and forecast results.
Job Levels Job levels determine the experience level of a particular job. For example, you can have three engineers with varying levels of experience and skill. You can change job levels by:
■ changing the sequence (level) associated with the grade
■ assigning a new grade to a job
■ mapping a job to a new master job with a higher sequence
As you have the ability to search for resources by job levels, the job levels must be reflected accurately on the resources. Therefore, any changes to the job levels will also occur on the job levels assigned to the resources.
Job Billability Oracle Project Resource Management uses the HR jobs entities to indicate whether or not jobs are billable. This billable status also determines the billability of resources based on their assignments. Therefore, project forecasting is affected by changes to the billability status of a job.
Utilization Calculation You can indicate whether or not to include a resource during the calculation of utilization. If you change the value of this checkbox, the utilization totals will reflect your change the next time the utilization totals are recalculated.
Changing Organization InformationThe default operating unit (OU) and the default calendar are stored at the organization level. All resources, as well as their assignments, inherit these defaults. Therefore, if the default operating unit of the organization changes during the active
12-4 Oracle Project Resource Management Implementation and Administration Guide

Maintaining PRM Resources
Maintaining PRM ResourcesOracle Project Resource Management acquires information from the HRMS people tables for resources assigned to Expenditure organizations and all people acting as key members on a project. This acquisition occurs automatically whenever changes are made to the resource name or address. It also occurs when a person that exists in the HRMS system is not yet established as a PRM resource and this person is being added as a project member on a project within PRM. This acquisition is in the form of a deferred workflow process to synchronize the Oracle HRMS data with the Oracle Project Resource Management data. The following criteria must be met in order for a person to be acquired from the HRMS system:
1. The resource must have an active and current primary assignment.
2. The organization of the primary assignment must have a classification of Project Expenditure/Event Organization.
3. The primary assignment must have a defined job.
4. The primary assignment organization must:
■ have a default operating unit; this operating unit must implement Oracle Projects
■ have a specified default calendar or, the profile option PA: Default Calendar must have a defined value
■ belong to the project expenditure hierarchy
Running a Process to Copy ResourcesA process called PRC: Maintain Project Resources is available to copy your resources and their associated attributes from the Oracle HRMS tables to Oracle Project Resource Management data tables. This process identifies valid resources and project-related information that are set up or modified in the Oracle HRMS Assignment forms and the CRM resource calendar forms.
Run this process for upgrades or when you encounter workflow processing errors. To run this process, complete the following steps:
1. Navigate to the Submit Request screen.
2. Choose Submit > PRC: Maintain Project Resources.
3. Enter the desired organization.
4. Click Submit.
12-6 Oracle Project Resource Management Implementation and Administration Guide

Maintaining Schedules
Maintaining SchedulesEvery resource, requirement, and assignment has a schedule. The schedules are comprised of work patterns that include working hours and exceptions, such as vacation days. Each schedule is based on the master calendar for the organization or an individually assigned calendar.
Changes to these calendars impact the schedules of the resources, requirements, and assignments differently. Oracle Project Resource Management provides the following two administrative processes to help manage these changes and to maintain consistent schedule information throughout the application:
■ PRC: Generate Calendar Schedules
■ PRC: Rebuild Resource Timeline
These processes update the schedules and timelines tables with changes to the calendars. For more information on setting up calendars and schedules, see Chapter 7, "Defining Calendars and Schedules".
Updating Schedules with Calendar ChangesChanges to the master calendar appear on the schedules and timelines of the resources, requirements, and assignments only after you run a process called PRC: Generate Calendar Schedules.
Existing assignments on resource calendars are not impacted. For example, if you add a holiday to the master calendar and run the PRC: Generate Calendar Schedules, you might notice that the change reflects differently on various resource calendars.
The calendar of a person with a current assignment over the holiday date does not change. However, the availability of a person who has no assignment over the holiday is reduced by the number of hours in the holiday period.
You can run the PRC: Generate Calendar Schedules process for a single calendar or a range of calendars. You should run this process each time one or more of the following events occur:
■ a new calendar is created
■ the work pattern for an existing calendar has changed, such as different working days or hours
■ new exceptions have been applied to an existing calendar, such as the addition or deletion of a public holiday
Maintaining Your Data 12-7

Maintaining Schedules
To run this process, complete the following steps:
1. Navigate to the Submit Request screen.
2. Choose Submit and select either PRC: Generate Calendar Schedule for a Single Calendar or PRC: Generate Calendar Schedule for a Range of Calendars.
3. Enter the calendar name. If you are running the process for a range of calendars, enter the starting and ending calendar names, or leave blank to process all calendars.
4. Click Submit.
Updating Schedules and Timelines to Reflect a New CalendarTimeline data is transformed schedule data. Therefore, the timeline data is stored in separate tables. Most processes automatically update both the schedule and timeline tables without your interference.
However, changing the calendar on a resource requires assistance in this synchronization process. You must first run the PRC: Generate Calendar Schedules administrative process in order to reflect the new calendar in the schedules of the resources, requirements, and assignments as is appropriate. Then, you can run a process called PRC: Rebuild Resource Timeline to reflect the change in calendar and resource availability in the timeline. This process rebuilds the timeline data of one or more resources incorporating changes made to the calendar or schedule.
To run this process, complete the following steps:
1. Navigate to the Submit Request screen.
2. Choose Submit and select either PRC: Rebuild Resource Timeline for a Single Resource or PRC: Rebuild Timeline for a Range of Resources.
3. Enter the resource name. If you want to run the process for a range of resources, enter the starting and ending resource names, or leave the fields blank to run the process for all resources.
4. Click Submit.
12-8 Oracle Project Resource Management Implementation and Administration Guide

Maintaining Utilization Values
Maintaining Utilization ValuesThe utilization screens provide totals on your resource utilization hours. These totals are derived from the resource schedules. In order to view updated totals, you must run a batch process called PRC: Generate Utilization on a regular basis.
To run this process, complete the following steps:
1. Navigate to the Submit Request screen.
2. Choose Submit > PRC: Generate Utilization.
3. Enter the desired Actuals date range.
4. Enter the desired Forecast date range.
5. Enter the desired summary method for your organization.
6. Click Submit.
Maintaining Your Data 12-9

Maintaining Forecast Information
Maintaining Forecast InformationOracle Project Resource Management creates forecast information based on schedule assignments and requirements through workflow processes. Each day of an assignment is treated as a potential forecast transaction and is considered for forecast calculation based on the defined calculation period such as GL Period or PA Period. An error is generated for each assignment that does not have a defined calculation period.
These transactions are excluded from the project forecast values during the forecast generation process. You can review and correct these forecast exceptions through the following two processes:
■ FLW: Forecast Exceptions Report
■ PRC: Generate Forecast Item Exception Process
Running a List of Forecast ExceptionsThe PRC: List Forecast Exceptions process produces a report listing all requirement and assignment forecast items that are excluded from the project forecast. The requirement and assignment forecast items appearing on this report have either experienced a processing error or determined not to be valid items for the project forecast.
To run this process, complete the following steps:
1. Navigate to the Submit Request screen.
2. Choose Submit > FLW: Forecast Exceptions Report.
3. Enter the desired organization.
4. Enter the desired forecast date range.
5. Click Submit.
12-10 Oracle Project Resource Management Implementation and Administration Guide

Maintaining Forecast Information
Reprocess Forecast ExceptionsAfter you run your list of exceptions and make the appropriate corrections, you want to update your forecast amounts to include the corrected transactions. A process called PRC: Generate Forecast Item Exception Process evaluates eligible forecast items and recreates the item for inclusion in the project forecast. Eligibility criteria for forecast items are as follows:
■ forecast item date is between the specified forecast from and to date parameters
If the forecast item is not included in the current project forecast, a new forecast item is created for that period. If the forecast item has been previously summarized, the item is reversed and the rate is recalculated.
To run this process, complete the following steps:
1. Navigate to the Submit Request screen.
2. Choose Submit > PRC: Generate Forecast Item Exception Process.
3. Enter the desired organization.
4. Enter the desired forecast date range.
5. Click Submit.
Maintaining Your Data 12-11

Maintaining Forecast Information
12-12 Oracle Project Resource Management Implementation and Administration Guide

Implementation Steps Chec
A
Implementation Steps ChecklistThe Oracle Projects products include Oracle Projects Costing, Oracle Projects Billing, and Oracle Project Resource Management (PRM). Each of these products require a set of implementation steps, some of which are optional. Since these products share functionality and data, this appendix provides checklists that include all the tasks to complete the implementation of all three products.
This appendix covers the following topics:
■ Overview of the Implementation Environment
■ Implementation Considerations
■ Overview of the Oracle Projects Implementation Checklists
■ Oracle Projects Implementation Checklist
■ Oracle Applications Implementation Checklist for Oracle Projects Integration
klist A-1
Overview of the Implementation Environment
Overview of the Implementation EnvironmentPrior to beginning the implementation process, you should define Oracle Applications responsibilities and users for the implementation. Oracle Projects provides a seeded super user responsibility for each of the three related applications as follows:
■ Projects Costing Super User
■ Projects Billing Super User
■ Project Resource Management Super User
You can assign this responsibility to users as appropriate for your implementation needs. For more information, see "Defining a Responsibility" in the Oracle Applications System Administrator’s Guide.
Oracle Applications Implementation WizardIf you are implementing more than one Oracle Applications product, you can use the Oracle Applications Implementation Wizard to coordinate your setup activities. the Implementation Wizard guides you through the setup steps for the applications you have installed, suggesting a logical sequence that satisfies cross-product implementation dependencies and reduces redundant setup steps. The wizard also identifies steps that can be completed independently, by several teams working in parallel, to help you manage your implementation process most efficiently.
You can use the implementation wizard as a resource center to see a graphical overview of setup steps, read online help for a setup activity, and to open the appropriate setup window. You can also document your implementation for future reference or review using the wizard to record your comments for each step.
For more information, refer to the Oracle Applications Implementation Wizard User’s Guide.
Setting Up Underlying Oracle Applications TechnologyThe setup steps in the Oracle Projects Implementation Checklist guide you through implementing the parts of Oracle Applications specific to the Oracle Projects products. The Oracle Applications Implementation Wizard guides you through the entire Oracle Applications setup, including system administration. However, if you do not use the Wizard, you must complete several other setup steps, including:
■ performing system-wide setup tasks such as configuring concurrent managers and printers
A-2 Oracle Project Resource Management Implementation and Administration Guide
Implementation Considerations
■ managing data security, which includes setting up responsibilities to allow access to a specific set of business data and complete a specific set of transactions, and assigning individual users to one or more of these responsibilities
For more information, see Oracle Applications System Administrator’s Guide
Also, if your implementation uses Oracle Workflow to manage data changes, you must set up Oracle Workflow processes. For more information, refer to the Oracle Workflow User’s Guide. For information relating to PRM-specific deferred or approval processes, refer to Chapter 8, "Defining the Project Environment".
Implementation ConsiderationsAs you determine your implementation data, you should consider the AutoAccounting feature if you are implementing Oracle Project Costing or Oracle Project Billing. The AutoAccounting feature in Oracle Projects derives values for account combinations based on project information for all accounting transactions in Oracle Projects. Consequently, the way you organize your chart of accounts affects your implementation data. For example, if you charge several expense accounts for varied expenditures such as meals, travel and lodging, and airfare, then you need to implement an expenditure type that corresponds to each expense account. You can use most of the implementation data that you define for Oracle Projects as inputs to the Auto Accounting rules that you define.
After you complete most implementation steps, you can submit reports to review your work and confirm that you have successfully completed the step. For example, after you complete entering Agreement types, you can submit the Agreement Types Listing. See "Implementation Listings" in the Oracle Projects User Guide for more information.
To aid you with your implementation of either Projects Costing or Projects Billing, you can refer to "About Fremont Corporation: An Example of Setting Up Oracle Projects" in Chapter 17 of the Oracle Project User Guide.
Note: Fremont Corporation may not have implemented all the features available in the current release of Oracle Projects.
Implementation Steps Checklist A-3

Overview of the Oracle Projects Implementation Checklists
Overview of the Oracle Projects Implementation Checklists Two checklists are provided for your implementation:
■ Oracle Projects Implementation Checklist
■ Oracle Applications Implementation Checklist for Oracle Projects Integration
Each checklist indicates, for each step, whether it is required, optional, or conditional. Required indicates that the step is necessary for the implementation of the product to be successful. Optional indicates that you can determine whether or not the step applies to your particular implementation. Conditional indicates that the step is required to use a feature of the product, and the related feature is provided in the step description.
The implementation checklists summarize the steps for implementing products in the Oracle Projects suite. You can implement any of the Projects products individually. However, the following products are dependent on Oracle Projects Costing:
■ Oracle Projects Billing
■ Oracle Activity Management Gateway
■ Oracle Project Connect
The checklists include setup steps for data that may be shared with other Oracle Applications, but are required by the Oracle Projects products. If you have already defined this information when setting up other Oracle Applications, you can skip those steps. This shared data includes:
■ Set of Books
■ Employees and Organizations
■ Customers
Since some implementation steps build upon information you define in other implementation steps, you should perform the steps in the order listed.
A-4 Oracle Project Resource Management Implementation and Administration Guide

Oracle Projects Implementation Checklist
Oracle Projects Implementation ChecklistThe following table provides the Oracle Projects implementation checklist:
Step Number Step Description
Project Costing
Project Billing PRM
Licensing
Step 1 Set the profile option PA: Licensed to Use Project Billing. See: PA: Licensed to Use Project Billing (Oracle Projects User Guide)
n/a Required n/a
Step 2 Set the profile option PA: Licensed to Use Project Resource Management.
n/a n/a Required
Step 3 Specify additional profile option values. See: Profile Options (in Chapter 17 of the Oracle Projects User Guide)
Optional Optional Optional
Set of Books and Currencies
Step 4 Define your set of books. See Oracle Applications Set of Books (Oracle General Ledger User Guide)
Required Required Required
Step 5 Enable additional currencies that you plan to use. See Currencies Window (Oracle General Ledger User Guide)
Required to use multiple currencies.
Conditional Conditional Conditional
Human Resources – Work Structures
Step 6 Set the profile option HR: Cross Business Group. See: HR: Cross Business Group (in Appendix B of the Oracle Projects User Guide)
Required to use Cross Business Group Access.
Conditional Conditional Conditional
Step 7 Define locations. See: Locations (in Chapter 17 of the Oracle Projects User Guide)
Required Required Required
Step 8 Define organizations. See: Organizations (in Chapter 17 of the Oracle Projects User Guide)
Required Required Required
Step 9 Define default operating unit for the project and expenditure organizations. See Chapter 3, "Establishing Your Enterprise Structure".
n/a n/a Required
Step 10 Define organization hierarchies and global organization hierarchies. See: Organization Hierarchies (in Chapter 17 of the Oracle Projects User Guide).
Required Required Required
Implementation Steps Checklist A-5

Oracle Projects Implementation Checklist
Step 11 Specify a project burdening hierarchy for each business group. See: Specifying Project Burdening Hierarchies (in Chapter 17 of the Oracle Projects User Guide).
Conditional Conditional Conditional
Step 12 Define job groups. See: Define Job Groups (Oracle Projects 11i Release 11.5.3/Mini Pack B User Guide Supplement) and "Define Job Groups" in Implementing Oracle HRMS.
Required to process labor.
Conditional Conditional Required
Step 13 Define jobs. See: Define Jobs (in Chapter 17 of the Oracle Projects User Guide) and "Define Jobs" in the Implementing Oracle HRMS.
Required to process labor.
Conditional Conditional Required
Step 14 Define job levels. See: Defining Job Levels (Implementing Oracle HRMS).
n/a n/a Required
Step 15 Define job mapping. See: Job Mapping (in Chapter 17 of the Oracle Projects User Guide).
Required to use project jobs.
Conditional Conditional Required
Step 16 Define competencies. See: Competencies (Oracle Human Resources Documentation Update for Patch Numbers 1383905 and 1377992 Global Competencies).
n/a n/a Required
Step 17 Define rating scales. See: Define Rating Scales (Implementing Oracle HRMS).
n/a n/a Required
Step 18 Assign competencies to resources. See: "Assigning Competencies" in Chapter 4, "Defining Your People".
n/a n/a Required
Calendars for Schedule and Capacity Management
Step 19 Define calendar types. See: "Defining Calendar Types" in Chapter 7, "Defining Calendars and Schedules".
n/a n/a Required
Step 20 Define calendar shift and shift patterns. See: "Defining Shift and Shift Patterns" in Chapter 7, "Defining Calendars and Schedules".
n/a n/a Required
Step 21 Define calendar exceptions. See: "Creating Calendar Exceptions" in Chapter 7, "Defining Calendars and Schedules".
n/a n/a Required
Step 22 Define calendars. See: "Creating a Calendar" in Chapter 7, "Defining Calendars and Schedules".
n/a n/a Required
A-6 Oracle Project Resource Management Implementation and Administration Guide

Oracle Projects Implementation Checklist
Step 23 Assign calendar shifts. See: "Assigning Shifts and Exceptions to Calendar" in Chapter 7, "Defining Calendars and Schedules".
n/a n/a Required
Step 24 Set the following profile options:
PA: Default Calendar in PRM
PA: Global Week Start Day
PA: Availability Calculation Period
PA: Percentage of Resource’s Capacity
PA: Availability Duration
See: Chapter 7, "Defining Calendars and Schedules".
n/a n/a Required
Step 25 Run calendar generation process: PRC: Generate Calendar Schedule for a Range of Calendars. See Chapter 7, "Defining Calendars and Schedules".
n/a n/a Required
Step 26 Define default calendar for the project and expenditure organizations. See Chapter 3, "Establishing Your Enterprise Structure".
n/a n/a Required
Employees
Step 27 Define employees, including address, assignment, job, and supervisor. See: Chapter 4, "Defining Your People" and "Employees" (in Chapter 17 of the Oracle Projects User Guide)
Required Required Required
Step 28 Run project resource program: PRC: Maintain Project Resources. See: Chapter 4, "Defining Your People" and "Maintaining PRM Resources" in Chapter 12, "Maintaining Your Data".
n/a n/a Required
Implementation Options and PA Periods
Step 29 Define implementation options. See: Implementation Options (Oracle Projects User Guide).
Required Required Required
Step 30 Define PA periods. See: PA Periods (Oracle Projects User Guide).
Required Required Required
Project Staffing
Step 31 Define requirement, candidate, assignment approval, and assignment scheduling statuses. See: "Defining Statuses and Status Profile Options" in Chapter 8, "Defining the Project Environment".
n/a n/a Required
Implementation Steps Checklist A-7

Oracle Projects Implementation Checklist
Step 32 Set the following profile options:
■ PA: Starting Requirement Status
■ PA: Starting Assignment Status
■ PA: Default Filled Requirement Status
■ PA: Default Starting Candidate Status
See: "Defining Statuses and Status Profile Options" in Chapter 8, "Defining the Project Environment".
n/a n/a Required
Step 33 Define team templates. See: "Creating and Applying Team Templates" in Oracle PRM online help.
n/a n/a Optional
Step 34 Define staffing priority codes. n/a n/a Optional
Expenditure Setup
Step 35 Define expenditure categories. See: Expenditure Categories (Oracle Projects User Guide).
Required if you use financial forecasting.
Required Required Conditional
Step 36 Define revenue categories. See: Revenue Categories (Oracle Projects User Guide).
Required to use financial forecasting.
Required Required Conditional
Step 37 Define units. See: Units (Oracle Projects User Guide.) Required Required n/a
Step 38 Define expenditure types. See: Expenditure Types (Oracle Projects User Guide).
Required to use financial forecasting.
Required Required Conditional
Step 39 Define non-labor resources. See: Non-Labor Resources (Oracle Projects User Guide).
Required to use Usages.
Conditional Conditional n/a
Step 40 Define transaction sources. See: Transaction Sources (Oracle Projects User Guide).
Required to use Transaction Import.
Conditional Conditional n/a
Step 41 Implement transaction control extension. See: Transaction Control Extensions (Oracle Projects User Guide).
Optional Optional n/a
Step 42 Implement AutoApproval extension. See: AutoApproval Extension (Oracle Projects User Guide).
Optional Optional n/a
A-8 Oracle Project Resource Management Implementation and Administration Guide

Oracle Projects Implementation Checklist
Non-Labor Costing Setup
Step 43 Define cost rates for expenditure types. See: Cost Rates for Expenditure Types (Oracle Projects User Guide).
Conditional Conditional n/a
Step 44 Define usage cost rate overrides. See: Usage Cost Rate Overrides (Oracle Projects User Guide).
Optional Optional n/a
Labor Costing Setup
Step 45 Define compensation rules. See: Compensation Rules (Oracle Projects User Guide).
Required to process labor.
Conditional Conditional Conditional
Step 46 Define employee cost rates. See: Employee Cost Rates (Oracle Projects User Guide).
Required to process labor.
Conditional Conditional Conditional
Step 47 Define labor cost multipliers. See: Labor Cost Multipliers (Oracle Projects User Guide).
Optional Optional n/a
Step 48 Implement labor costing extension (advanced implementation step). See: Labor Costing Extensions (Oracle Projects User Guide).
Optional Optional Optional
Step 49 Implement labor transaction extension (advanced implementation step). See: Labor Transaction Extensions (Oracle Projects User Guide).
Optional Optional n/a
Step 50 Implement overtime processing (advanced implementation step). See: Overview of Implementing Overtime (Oracle Projects User Guide).
Optional Optional n/a
Step 51 Implement the overtime calculation extension. See: Overtime Calculation Extension (Oracle Projects User Guide).
Optional Optional n/a
Budget Setup
Step 52 Define additional budget types. See: Budget Types (Oracle Projects User Guide).
Required to use budgeting.
Conditional Conditional n/a
Step 53 Define budget entry methods. See: Budget Entry Methods (Oracle Projects User Guide).
Required to use budgeting.
Conditional Conditional n/a
Step 54 Define budget change reasons. See: Budget Change Reasons (Oracle Projects User Guide).
Optional Optional n/a
Implementation Steps Checklist A-9

Oracle Projects Implementation Checklist
Step 55 Define resource lists. See: Resources and Resource Lists (Oracle Projects User Guide).
Required to use budgeting.
Conditional Conditional n/a
Step 56 Implement budget calculation extension. See: Budget Calculation Extensions (Oracle Projects User Guide).
Optional Optional n/a
Step 57 Implement budget verification extension. See: Budget Verification Extension (Oracle Projects User Guide).
Optional Optional n/a
Step 58 Implement budget workflow extension. See: Budget Workflow Extension (Oracle Projects User Guide).
Optional Optional n/a
Burden Costing Setup
Step 59 Define cost bases and cost base types. See: Cost Bases and Cost Base Amount Types (Oracle Projects User Guide).
Required to use burdening.
Conditional Conditional Conditional
Step 60 Define burden cost codes. See: Burden Cost Codes (Oracle Projects User Guide).
Required to use burdening.
Conditional Conditional Conditional
Step 61 Define burden structures. See: Burden Structures (Oracle Projects User Guide).
Required to use burdening.
Conditional Conditional Conditional
Step 62 Define burden schedules. See: Burden Schedules (Oracle Projects User Guide).
Required to use burdening.
Conditional Conditional Conditional
Step 63 Implement burden costing extension. See: Burden Costing Extension (Oracle Projects User Guide).
Optional Optional Optional
Billing Setup
Step 64 Specify Receivables System Options. See: Specifying System Options (Oracle Projects User Guide).
Optional Required Optional
Step 65 Set up output tax codes for customer invoices. See: Setting Up Invoice Line Tax Codes (Oracle Projects User Guide).
n/a Required n/a
Step 66 Define billing cycles. See: Billing Cycles (Oracle Projects User Guide).
n/a Required n/a
A-10 Oracle Project Resource Management Implementation and Administration Guide

Oracle Projects Implementation Checklist
Step 67 Implement billing cycle extension (advanced implementation step). See: Billing Cycle Extension (Oracle Projects User Guide).
n/a Optional n/a
Step 68 Define payment terms. See: Payment Terms (Oracle Projects User Guide).
n/a Required n/a
Step 69 Define agreement types. See: Agreement Types (Oracle Projects User Guide).
n/a Required n/a
Step 70 Define bill rate schedules. See: Bill Rate Schedules (Oracle Projects User Guide).
Required if your Transfer Price Schedules or Project Billing setup are based on Rates.
Conditional Conditional Conditional
Step 71 Define invoice formats. See: Invoice Formats (Oracle Projects User Guide).
n/a Required n/a
Step 72 Define credit types. See: Transfer Pricing (Oracle Projects User Guide).
n/a Required n/a
Step 73 Define event types. See: Event Types (Oracle Projects User Guide).
n/a Conditional n/a
Step 74 Assign event types for cost-to-cost revenue. See: Assigning Event Types for Cost-to-Cost Revenue (Oracle Projects User Guide).
n/a Conditional n/a
Step 75 Define customers. See: Customers (Oracle Projects user Guide).
Optional Required Optional
Step 76 Implement Percent Complete Revenue Accrual and Invoicing. See: Setup Requirements for Percent Complete Revenue and Invoicing (Oracle Projects User Guide).
n/a Conditional n/a
Step 77 Implement labor billing extension. See: Labor Billing Extensions (Oracle Projects User Guide).
n/a Optional Optional
Step 78 Implement billing extensions. See: Billing Extensions (Oracle Projects User Guide).
n/a Optional n/a
Step 79 Implement automatic invoice approve/release extension. See: Automatic Invoice Approve/Release Extension (Oracle Projects User Guide).
n/a Optional n/a
Step 80 Implement AR transaction type extension. See: AR Transaction Type Extension (Oracle Projects User Guide.)
n/a Optional n/a
Step 81 Implement the output tax extension. See: Output Tax Extension (Oracle Projects User Guide).
n/a Optional n/a
Implementation Steps Checklist A-11

Oracle Projects Implementation Checklist
Step 82 Implement Revenue-Based Cost Accrual extension. See: Revenue-Based Cost Accrual (Oracle Projects User Guide).
n/a Optional n/a
Step 83 Implement cost accrual billing extension. See: Cost Accrual Billing Extension (
A-12 Oracle Project Resource Management Implementation and Administration Guide

Oracle Projects Implementation Checklist
Step 96 Implement project workflow extension. See: Project Workflow Extension (Oracle Projects User Guide).
Optional Optional Optional
Step 97 Implement verify organization change extension. See: Verify Organization Change Extension (Oracle Projects User Guide).
Optional Optional Optional
Project and Organizational Security
Step 98 Define security profiles and global security profiles. See: Define Security Profiles (Oracle Projects 11i Release 11.5.3/Mini-Pack B User Guide Supplement) and Define Security Profiles (Implementing Oracle HRMS).
Required to restrict organization access.
Conditional Conditional Conditional
Step 99 Define organization-based security. See: "Understanding Responsibility-Based Security" in Chapter 5, "Configuring Your Organization Security".
n/a n/a Optional
Step 100 Define role-based security. See: "Understanding Role-Based Security" in Chapter 5, "Configuring Your Organization Security".
n/a n/a Optional
Step 101 Implement project and labor cost security extension. (advanced implementation step) See: Project Security Extension (Oracle Projects User Guide).
Optional Optional Optional
Inter-Project Billing: Global Setup
Step 102 In Oracle Payables, define suppliers for the provider operating units.
n/a Conditional n/a
Step 103 Define expenditure types for inter-project Payables invoices. See Setup for Inter-Project Billing (Oracle Projects User Guide).
Optional if you have completed project costing setup.
n/a Conditional n/a
Step 104 Define customers in Oracle Receivables for the receiver operating units. See Oracle Receivables User Guide.
Required to use inter-project billing.
n/a Conditional n/a
Step 105 Define inter-project agreement types. See: Setup for Inter-Project Billing (Oracle Projects User Guide).
Optional if you have completed project billing setup.
n/a Optional n/a
Step 106 Define inter-project billing cycles. See: Billing Cycles (Oracle Projects User Guide).
Optional if you have completed project billing setup.
n/a Optional n/a
Implementation Steps Checklist A-13

Oracle Projects Implementation Checklist
Step 107 Define inter-project invoice formats. See: Invoice Formats (Oracle Projects User Guide).
Optional if you have completed project billing setup.
n/a Optional n/a
Step 108 Customize the Payables Open Interface Workflow so that you can override the default attributes for currency conversion. See: Customizing the Payables Open Interface Workflow (Oracle Projects User Guide).
n/a Optional n/a
Step 109 Define inter-project supplier types. See: Setup for Inter-Project Billing (Oracle Projects User Guide).
n/a Optional n/a
Inter-Project Billing: Operating Unit Setup
Step 110 Define internal billing implementation options. See: Setup for Inter-Project Billing (Oracle Projects User Guide).
Required to use inter-project billing.
n/a Conditional Optional
Step 111 Define supplier sites for internal suppliers. See: Setup for Inter-Project Billing (Oracle Projects User Guide).
Required for each receiver operating unit, if you are using inter-project billing.
n/a Conditional n/a
Step 112 Define customer bill and ship sites for internal customers. See: Defining Customer Bill and Ship Sites for Internal Customers (Oracle Projects User Guide).
Required for each receiver operating unit, if you are using inter-project billing.
n/a Conditional n/a
Step 113 Define provider and receiver controls. See: Setup for Inter-Project Billing (Oracle Projects User Guide).
Required to use inter-project billing.
n/a Conditional n/a
Step 114 In Oracle Receivables, define tax account codes for the tax amounts on internal Receivables invoices. See: Defining Automatic Accounting in Oracle Receivables (Oracle Projects User Guide).
Required for each receiver operating unit, if you are using inter-project billing.
n/a Conditional n/a
Step 115 Define tax codes for internal Payables invoices. See: Setup for Inter-Project Billing (Oracle Projects User Guide).
Required for each receiver operating unit, if you are using inter-project billing.
n/a Conditional n/a
A-14 Oracle Project Resource Management Implementation and Administration Guide

Oracle Projects Implementation Checklist
Step 116 Verify that Receivables and Payables share the same tax codes. See: Setup for Inter-Project Billing (Oracle Projects User Guide).
Required for each provider and receiver operating unit, if you are using inter-project billing.
n/a Conditional n/a
Step 117 Modify the Supplier Invoice Charge Account process. See: Setup for Inter-Project Billing (Oracle Projects User Guide).
Required for each receiver operating unit, if you are using inter-project billing.
n/a Conditional n/a
Step 118 Define receiver projects. See: Setup for Inter-Project Billing (Oracle Projects User Guide).
Required to use inter-project billing.
n/a Conditional n/a
Step 119 Define provider projects. See: Setup for Inter-Project Billing (Oracle Projects User Guide).
Required to use inter-project billing.
n/a Conditional n/a
Cross Charge - Borrowed and Lent
Step 120 Define transfer price rules. See: Defining Transfer Price Rules (Oracle Projects User Guide).
Required to use borrowed and lent processing.
Conditional Conditional n/a
Step 121 Define transfer price schedules. See: Defining Transfer Price Schedules (Oracle Projects User Guide).
Required to use borrowed and lent processing.
Conditional Conditional n/a
Step 122 Define cross charge implementation options for all operating units using borrowed and lent processing. See: Defining Cross Charge Implementation Options (Oracle Projects User Guide).
Conditional Conditional n/a
Step 123 Define additional expenditure types for borrowed and lent processing. See: Expenditure Types (Oracle Projects User Guide).
Optional Optional n/a
Step 124 Define transaction sources for borrowed and lent processing. See: Defining Transaction Sources for Cross Charge Processing (Oracle Projects User Guide).
Optional Optional n/a
Step 125 Define provider and receiver controls. See: Defining Provider and Receiver Controls (Oracle Projects User Guide).
Conditional Conditional n/a
Implementation Steps Checklist A-15

Oracle Projects Implementation Checklist
Step 126 Implement the cross charge client extensions. See: Cross Charge Client Extensions (Oracle Projects User Guide).
Optional Optional n/a
Cross Charge - Intercompany Billing
Step 127 Define transfer price rules. See: Defining Transfer Price Rules (Oracle Projects User Guide).
Required to use cross charge processing.
Conditional Conditional n/a
Step 128 Define transfer price schedules. See: Defining Transfer Price Schedules (Oracle Projects User Guide).
Required to use cross charge processing.
Conditional Conditional n/a
Step 129 Define inter-company supplier types. See: Defining Cross Charge Implementation Options (Oracle Projects User Guide).
n/a Optional n/a
Step 130 In Oracle Payables, define suppliers for the provider operating units.
Required to use intercompany billing,
n/a Conditional n/a
Step 131 Define supplier sites for internal suppliers. See: Defining Supplier Sites for Internal Suppliers (Oracle Projects User Guide).
n/a Conditional n/a
Step 132 Define customers in Oracle Receivables for the receiver operating units. See: Oracle Receivables User Guide.
n/a Conditional n/a
Step 133 Define customer bill and ship sites for internal customers. See: Defining Customer Bill and Ship Sites for Internal Customers (Oracle Projects User Guide).
Required for each receiver operating unit, if you are using intercompany billing.
n/a Conditional n/a
Step 134 Define intercompany billing expenditure types. See: Defining Expenditure Types for Cross Charge Processing (Oracle Projects User Guide).
Optional if you have completed project billing setup.
n/a Optional n/a
Step 135 Define intercompany billing invoice formats. See: Invoice Formats and About Invoice Formats for Intercompany Billing (Oracle Projects User Guide).
Optional if you have completed project billing setup.
n/a Optional n/a
A-16 Oracle Project Resource Management Implementation and Administration Guide

Oracle Projects Implementation Checklist
Step 136 Define intercompany billing cycles. See: Billing Cycles (Oracle Projects User Guide).
Optional if you have completed project billing setup.
n/a Optional n/a
Step 137 Define agreement types for cross charge processing. See: Defining Agreement Types for Cross Charge Processing (Oracle Projects User Guide).
Optional if you have completed project billing setup.
n/a Optional n/a
Step 138 Define internal transaction sources. See: Defining Transaction Sources for Cross Charge Processing (Oracle Projects User Guide).
n/a Optional n/a
Step 139 Customize the Payables Open Interface Workflow. See: Customizing the Payables Open Interface Workflow (Oracle Projects User Guide).
Conditional Conditional Conditional
Step 140 Implement the cross charge client extensions. See: Cross Charge Client Extensions (Oracle Projects User Guide).
n/a Optional n/a
Cross Charge - Intercompany Billing: Operating Unit Setup
Step 141 Define internal billing implementation options. See: Defining Internal billing Implementation Options (Oracle Projects User Guide).
Required to use intercompany billing.
n/a Conditional n/a
Step 142 Define a project type for intercompany billing projects. See: Defining a Project Type for Intercompany Billing Projects (Oracle Projects User Guide).
Required for each provider operating unit, if you are using intercompany billing.
n/a Conditional n/a
Step 143 Define project templates for intercompany billing projects. See: Defining Project Templates for Intercompany Billing Projects (Oracle Projects User Guide).
n/a Conditional n/a
Step 144 Define intercompany billing projects. See: Defining Intercompany Billing Projects (Oracle Projects User Guide).
Required for each provider operating unit, if you are using intercompany billing.
n/a Conditional n/a
Implementation Steps Checklist A-17
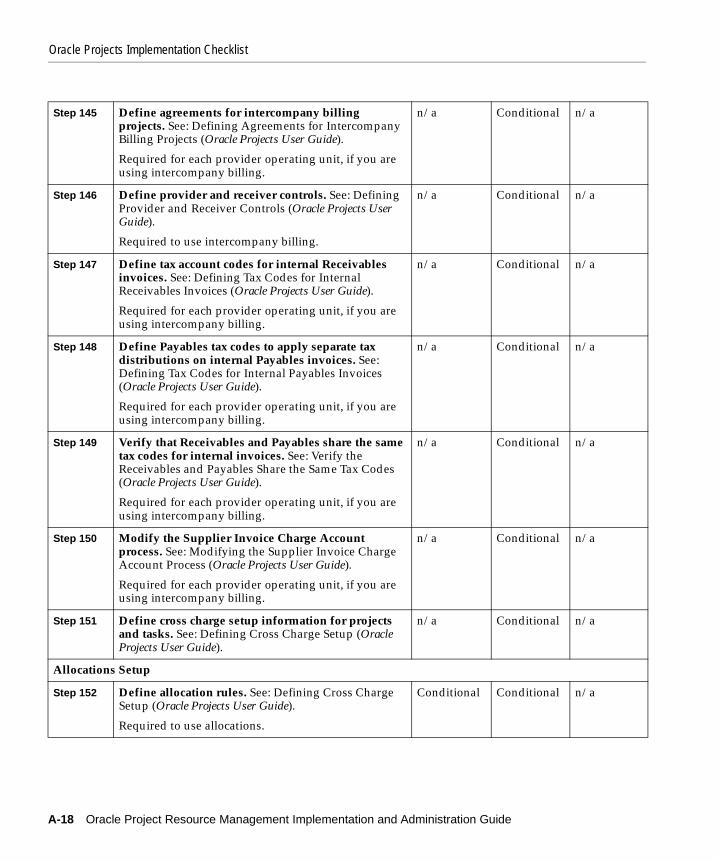
Oracle Projects Implementation Checklist
Step 145 Define agreements for intercompany billing projects. See: Defining Agreements for Intercompany Billing Projects (Oracle Projects User Guide).
Required for each provider operating unit, if you are using intercompany billing.
n/a Conditional n/a
Step 146 Define provider and receiver controls. See: Defining Provider and Receiver Controls (Oracle Projects User Guide).
Required to use intercompany billing.
n/a Conditional n/a
Step 147 Define tax account codes for internal Receivables invoices. See: Defining Tax Codes for Internal Receivables Invoices (Oracle Projects User Guide).
Required for each provider operating unit, if you are using intercompany billing.
n/a Conditional n/a
Step 148 Define Payables tax codes to apply separate tax distributions on internal Payables invoices. See: Defining Tax Codes for Internal Payables Invoices (Oracle Projects User Guide).
Required for each provider operating unit, if you are using intercompany billing.
n/a Conditional n/a
Step 149 Verify that Receivables and Payables share the same tax codes for internal invoices. See: Verify the Receivables and Payables Share the Same Tax Codes (Oracle Projects User Guide).
Required for each provider operating unit, if you are using intercompany billing.
n/a Conditional n/a
Step 150 Modify the Supplier Invoice Charge Account process. See: Modifying the Supplier Invoice Charge Account Process (Oracle Projects User Guide).
Required for each provider operating unit, if you are using intercompany billing.
n/a Conditional n/a
Step 151 Define cross charge setup information for projects and tasks. See: Defining Cross Charge Setup (Oracle Projects User Guide).
n/a Conditional n/a
Allocations Setup
Step 152 Define allocation rules. See: Defining Cross Charge Setup (Oracle Projects User Guide).
Required to use allocations.
Conditional Conditional n/a
A-18 Oracle Project Resource Management Implementation and Administration Guide

Oracle Projects Implementation Checklist
AutoAllocations Setup
Step 153 Create AutoAllocation sets. See: Defining Cross Charge Setup (Oracle Projects User Guide).
Required to use AutoAllocations.
Conditional Conditional n/a
Step 154 Set up Workflow for Allocations. See: Setting Up Workflow for Step-Down AutoAllocations (Oracle Projects User Guide).
Required to use AutoAllocations.
Conditional Conditional n/a
Step 155 Implement the Allocation Extensions. See: Allocation Extensions (Oracle Projects User Guide).
Optional Optional n/a
Utilization
Step 156 Define utilization categories. See Chapter 9, "Implementing Resource Utilization".
n/a n/a Required
Step 157 Define work types. See Chapter 9, "Implementing Resource Utilization".
n/a n/a Required
Step 158 Define utilization options. See Chapter 9, "Implementing Resource Utilization".
n/a n/a Required
Step 159 Set the profile options for utilization:
PA: Organization Utilization Default Period Type
PA: Organization Utilization Default Calculation Method
PA: Resource Utilization Default Period Type
PA: Resource Utilization Default Calculation Method
See: Chapter 9, "Implementing Resource Utilization".
n/a n/a Required
Forecasting
Step 160 Define forecasting options. See: Chapter 10, "Implementing Financial Forecasting".
Required to use financial forecasting.
Conditional Conditional Optional
Step 161 Define expenditure categories. See: Expenditure Categories (Oracle Projects User Guide).
Optional if you have already defined expenditure categories.
Conditional Conditional Optional
Step 162 Define revenue categories. See: Revenue Categories (Oracle Projects User Guide).
Required to use financial forecasting.
Conditional Conditional Optional
Implementation Steps Checklist A-19

Oracle Projects Implementation Checklist
Step 163 Define expenditure types. See: Expenditure Types (Oracle Projects User Guide).
Required to use financial forecasting.
Conditional Conditional Optional
Step 164 Define compensation rules. See: Compensation Rules (Oracle Projects User Guide).
Required to use financial forecasting.
Conditional Conditional Optional
Step 165 Define employee cost rates. See: Employee Cost Rates (Oracle Projects User Guide).
Required to use financial forecasting.
Conditional Conditional Optional
Step 166 Implement labor costing extension. See: Labor Costing Extensions (Oracle Projects User Guide).
Optional Optional Optional
Step 167 Define cost bases and cost base types. See: Cost Bases and Cost Base Amount Types (Oracle Projects User Guide).
Optional Optional Optional
Step 168 Define burden cost codes. See: Burden Cost Codes (Oracle Projects User Guide).
Optional Optional Optional
Step 169 Define burden structures. See: Burden Structures (Oracle Projects User Guide).
Optional Optional Optional
Step 170 Define rate schedules. See: Bill Rate Schedules (Oracle Projects User Guide).
Optional Optional Optional
Step 171 Define rate schedules. See: Bill Rate Schedules (Oracle Projects User Guide)
Required to use financial forecasting.
Conditional Conditional Conditional
Project Status Inquiry Setup
Step 172 Define derived columns. See: Derived Columns for Project Status Inquiry (Oracle Projects User Guide).
Optional Optional n/a
Step 173 Define displayed columns. See: Non-Default Configuration for Project Status Inquiry (Oracle Projects User Guide).
Optional Optional n/a
Step 174 Implement commitments from external systems. See Implementing Commitments from External Systems (Oracle Projects User Guide).
Optional Optional n/a
Step 175 Implement custom reporting strategy. See Custom Reporting Using Project Summary Accounts (Oracle Projects User Guide).
Optional Optional n/a
A-20 Oracle Project Resource Management Implementation and Administration Guide

Oracle Projects Implementation Checklist
Step 176 Implement the commitment changes extension. See Commitment Changes Extension (Oracle Projects User Guide).
Optional Optional Optional
Step 177 Implement the project status inquiry extension. See Project Status Inquiry Extension (Oracle Projects User Guide).
Optional Optional Optional
Capital Projects Extensions
Step 178 Implement the Asset Assignment Extension. See: Asset Assignment Extension (Oracle Projects User Guide).
Optional n/a n/a
Step 179 Implement the CIP Grouping Extension. See: CIP Grouping Extension (Oracle Projects User Guide).
Optional n/a n/a
Additional Setup
Step 180 Define descriptive flexfields. See: Descriptive Flexfields (Oracle Projects User Guide).
Optional Optional Optional
Step 181 Define request groups for report and process security. See: Oracle Applications System Administrator’s Guide.
Optional Optional Optional
Step 182 Define additional users. See: Oracle Applications System Administrator’s Guide.
Optional Optional Optional
Step 183 Define responsibilities for functional users. See: Security Profiles (Oracle Projects User Guide).
Optional Optional Optional
Step 184 Define frequently-used folders. See: Customizing the Presentation of Data (Oracle Applications User’s Guide) and Administering Folders (Oracle Applications System Administrator’s Guide). To see which windows are folder-enabled, see Oracle Projects Navigation Paths (Oracle Projects User Guide).
Optional Optional Optional
AutoAccounting for Costs
ATTENTION: If you have a multiple organization installation, you must repeat these steps for each operating unit.
Step 185 Set up accounting for labor costs. See: Accounting for Labor Costs (Oracle Projects User Guide).
Conditional Conditional n/a
Step 186 Set up accounting for expense report costs. See: Accounting for Expense Report Costs (Oracle Projects User Guide).
Conditional Conditional n/a
Step 187 Set up accounting for usage costs. See: Accounting for Usage Costs (Oracle Projects User Guide).
Conditional Conditional n/a
Implementation Steps Checklist A-21
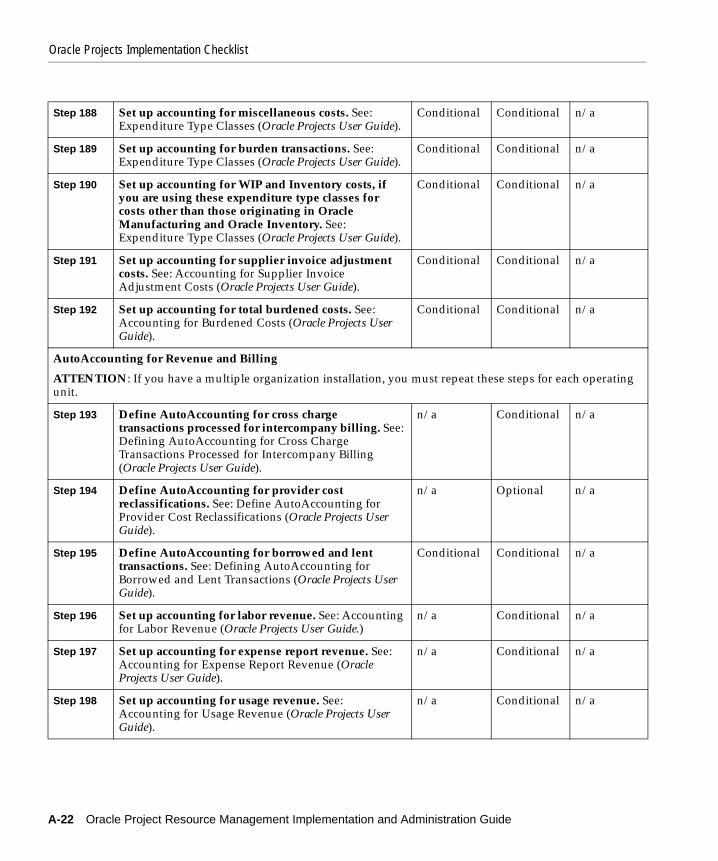
Oracle Projects Implementation Checklist
Step 188 Set up accounting for miscellaneous costs. See: Expenditure Type Classes (Oracle Projects User Guide).
Conditional Conditional n/a
Step 189 Set up accounting for burden transactions. See: Expenditure Type Classes (Oracle Projects User Guide).
Conditional Conditional n/a
Step 190 Set up accounting for WIP and Inventory costs, if you are using these expenditure type classes for costs other than those originating in Oracle Manufacturing and Oracle Inventory. See: Expenditure Type Classes (Oracle Projects User Guide).
Conditional Conditional n/a
Step 191 Set up accounting for supplier invoice adjustment costs. See: Accounting for Supplier Invoice Adjustment Costs (Oracle Projects User Guide).
Conditional Conditional n/a
Step 192 Set up accounting for total burdened costs. See: Accounting for Burdened Costs (Oracle Projects User Guide).
Conditional Conditional n/a
AutoAccounting for Revenue and Billing
ATTENTION: If you have a multiple organization installation, you must repeat these steps for each operating unit.
Step 193 Define AutoAccounting for cross charge transactions processed for intercompany billing. See: Defining AutoAccounting for Cross Charge Transactions Processed for Intercompany Billing (Oracle Projects User Guide).
n/a Conditional n/a
Step 194 Define AutoAccounting for provider cost reclassifications. See: Define AutoAccounting for Provider Cost Reclassifications (Oracle Projects User Guide).
n/a Optional n/a
Step 195 Define AutoAccounting for borrowed and lent transactions. See: Defining AutoAccounting for Borrowed and Lent Transactions (Oracle Projects User Guide).
Conditional Conditional n/a
Step 196 Set up accounting for labor revenue. See: Accounting for Labor Revenue (Oracle Projects User Guide.)
n/a Conditional n/a
Step 197 Set up accounting for expense report revenue. See: Accounting for Expense Report Revenue (Oracle Projects User Guide).
n/a Conditional n/a
Step 198 Set up accounting for usage revenue. See: Accounting for Usage Revenue (Oracle Projects User Guide).
n/a Conditional n/a
A-22 Oracle Project Resource Management Implementation and Administration Guide

Oracle Projects Implementation Checklist
Step 199 Set up accounting for miscellaneous revenue. See: Expenditure Type Classes (Oracle Projects User Guide).
n/a Conditional n/a
Step 200 Set up accounting for burden transactions revenue. See: Expenditure Type Classes (Oracle Projects User Guide).
n/a Conditional n/a
Step 201 Set up accounting for inventory revenue. See: Expenditure Type Classes (Oracle Projects User Guide).
n/a Conditional n/a
Step 202 Set up accounting for work in process revenue. See: Expenditure Type Classes (Oracle Projects User Guide).
n/a Conditional n/a
Step 203 Set up accounting for supplier invoice revenue. See: Accounting for Supplier Invoices Revenue (Oracle Projects User Guide).
n/a Conditional n/a
Step 204 Set up accounting for event revenue. See: Accounting for Event Revenue (Oracle Projects User Guide).
n/a Conditional n/a
Step 205 Set up accounting for unbilled receivables, unearned revenue, and receivables. See: Accounting for Revenue and Invoices (Oracle Projects User Guide.)
n/a Conditional n/a
Step 206 Define Invoice Rounding account. See: Invoice Rounding (Oracle Projects User Guide).
n/a Conditional n/a
Step 207 Set up accounting for invoice write-offs. See: Accounting for Revenue and Invoices (Oracle Projects User Guide).
n/a Conditional n/a
Implementation Steps Checklist A-23

Oracle Applications Implementation Checklist for Oracle Projects Integration
Oracle Applications Implementation Checklist for Oracle Projects Integration
The following checklist includes the setup steps for other Oracle Applications that affect the integration of Oracle Projects with those applications. You should
A-24 Oracle Project Resource Management Implementation and Administration Guide
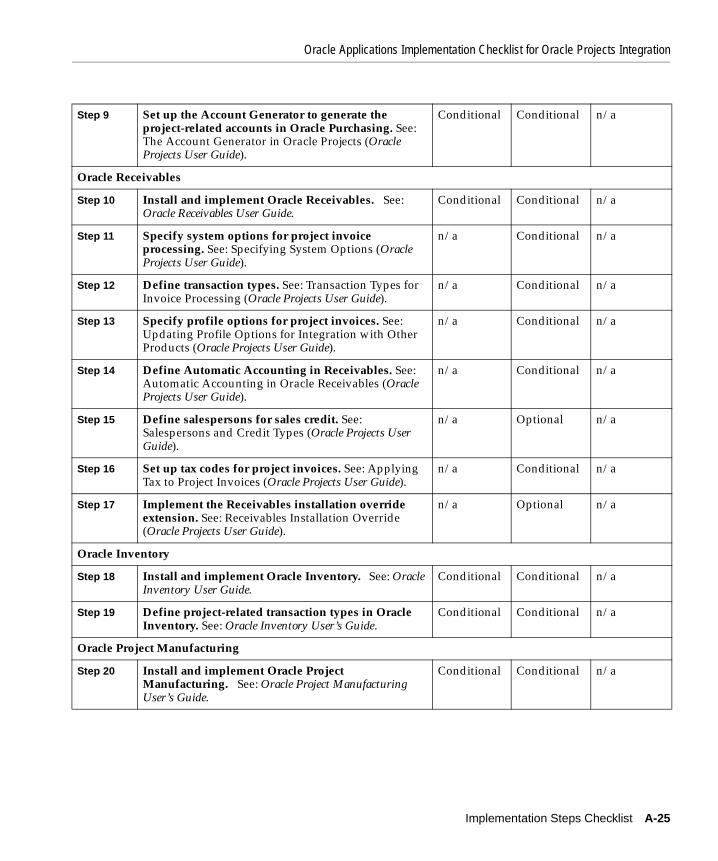
Oracle Applications Implementation Checklist for Oracle Projects Integration
Step 9 Set up the Account Generator to generate the project-related accounts in Oracle Purchasing. See: The Account Generator in Oracle Projects (Oracle Projects User Guide).
Conditional Conditional n/a
Oracle Receivables
Step 10 Install and implement Oracle Receivables. See: Oracle Receivables User Guide.
Conditional Conditional n/a
Step 11 Specify system options for project invoice processing. See: Specifying System Options (Oracle Projects User Guide).
n/a Conditional n/a
Step 12 Define transaction types. See: Transaction Types for Invoice Processing (Oracle Projects User Guide).
n/a Conditional n/a
Step 13 Specify profile options for project invoices. See: Updating Profile Options for Integration with Other Products (Oracle Projects User Guide).
n/a Conditional n/a
Step 14 Define Automatic Accounting in Receivables. See: Automatic Accounting in Oracle Receivables (Oracle Projects User Guide).
n/a Conditional n/a
Step 15 Define salespersons for sales credit. See: Salespersons and Credit Types (Oracle Projects User Guide).
n/a Optional n/a
Step 16 Set up tax codes for project invoices. See: Applying Tax to Project Invoices (Oracle Projects User Guide).
n/a Conditional n/a
Step 17 Implement the Receivables installation override extension. See: Receivables Installation Override (Oracle Projects User Guide).
n/a Optional n/a
Oracle Inventory
Step 18 Install and implement Oracle Inventory. See: Oracle Inventory User Guide.
Conditional Conditional n/a
Step 19 Define project-related transaction types in Oracle Inventory. See: Oracle Inventory User’s Guide.
Conditional Conditional n/a
Oracle Project Manufacturing
Step 20 Install and implement Oracle Project Manufacturing. See: Oracle Project Manufacturing User’s Guide.
Conditional Conditional n/a
Implementation Steps Checklist A-25
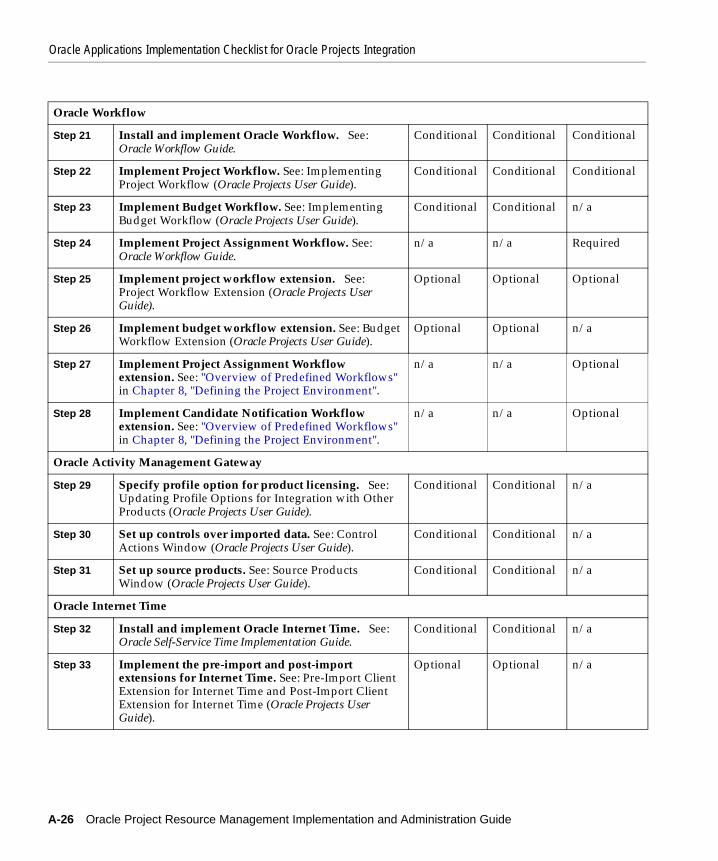
Oracle Applications Implementation Checklist for Oracle Projects Integration
Oracle Workflow
Step 21 Install and implement Oracle Workflow. See: Oracle Workflow Guide.
Conditional Conditional Conditional
Step 22 Implement Project Workflow. See: Implementing Project Workflow (Oracle Projects User Guide).
Conditional Conditional Conditional
Step 23 Implement Budget Workflow. See: Implementing Budget Workflow (Oracle Projects User Guide).
Conditional Conditional n/a
Step 24 Implement Project Assignment Workflow. See: Oracle Workflow Guide.
n/a n/a Required
Step 25 Implement project workflow extension. See: Project Workflow Extension (Oracle Projects User Guide).
Optional Optional Optional
Step 26 Implement budget workflow extension. See: Budget Workflow Extension (Oracle Projects User Guide).
Optional Optional n/a
Step 27 Implement Project Assignment Workflow extension. See: "Overview of Predefined Workflows" in Chapter 8, "Defining the Project Environment".
n/a n/a Optional
Step 28 Implement Candidate Notification Workflow extension. See: "Overview of Predefined Workflows" in Chapter 8, "Defining the Project Environment".
n/a n/a Optional
Oracle Activity Management Gateway
Step 29 Specify profile option for product licensing. See: Updating Profile Options for Integration with Other Products (Oracle Projects User Guide).
Conditional Conditional n/a
Step 30 Set up controls over imported data. See: Control Actions Window (Oracle Projects User Guide).
Conditional Conditional n/a
Step 31 Set up source products. See: Source Products Window (Oracle Projects User Guide).
Conditional Conditional n/a
Oracle Internet Time
Step 32 Install and implement Oracle Internet Time. See: Oracle Self-Service Time Implementation Guide.
Conditional Conditional n/a
Step 33 Implement the pre-import and post-import extensions for Internet Time. See: Pre-Import Client Extension for Internet Time and Post-Import Client Extension for Internet Time (Oracle Projects User Guide).
Optional Optional n/a
A-26 Oracle Project Resource Management Implementation and Administration Guide
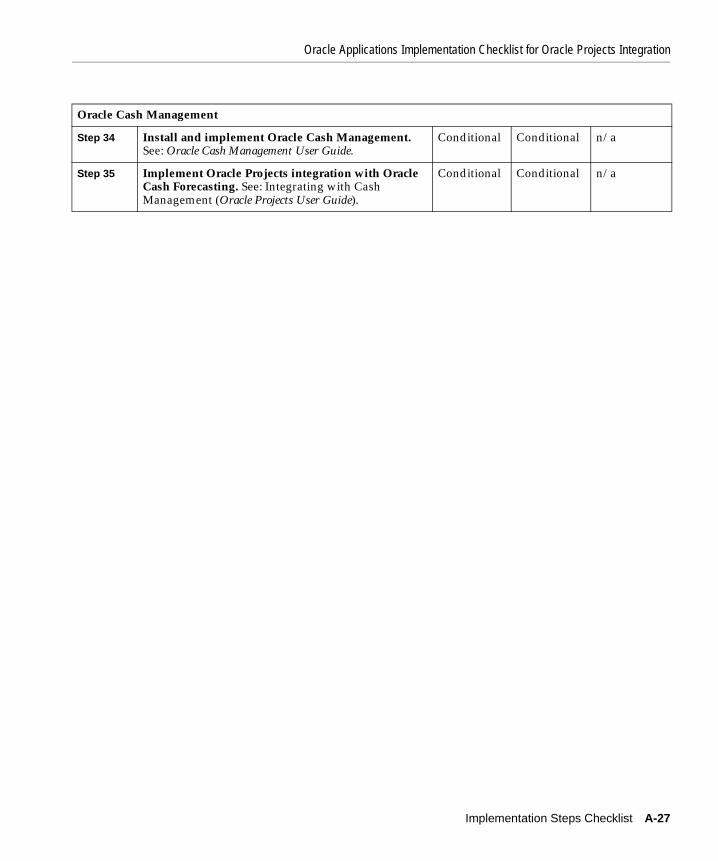
Oracle Applications Implementation Checklist for Oracle Projects Integration
Oracle Cash Management
Step 34 Install and implement Oracle Cash Management. See: Oracle Cash Management User Guide.
Conditional Conditional n/a
Step 35 Implement Oracle Projects integration with Oracle Cash Forecasting. See: Integrating with Cash Management (Oracle Projects User Guide).
Conditional Conditional n/a
Implementation Steps Checklist A-27

Oracle Applications Implementation Checklist for Oracle Projects Integration
A-28 Oracle Project Resource Management Implementation and Administration Guide

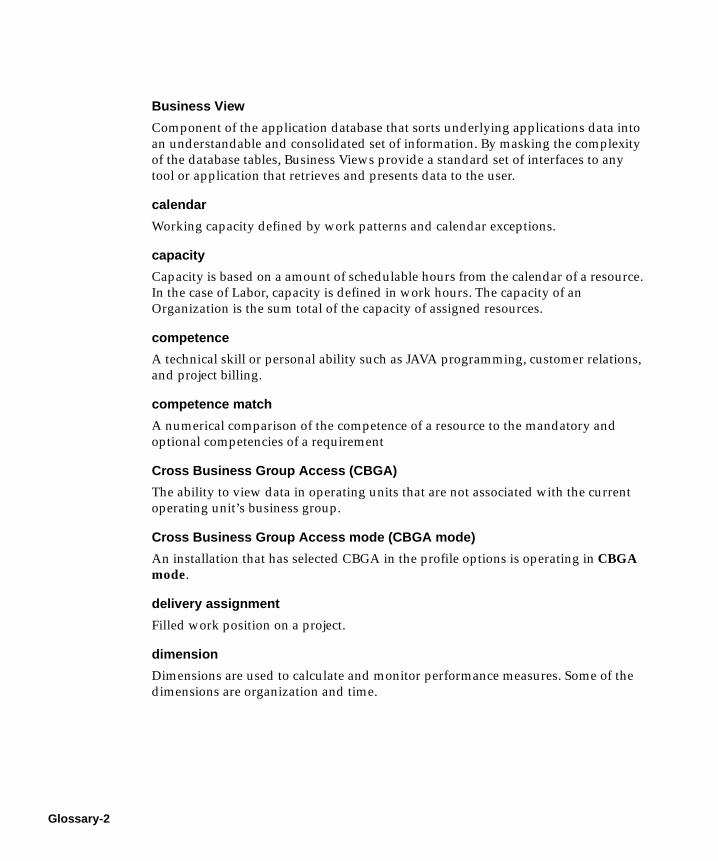
Business View
Component of the application database that sorts underlying applications data into an understandable and consolidated set of information. By masking the complexity of the database tables, Business Views provide a standard set of interfaces to any tool or application that retrieves and presents data to the user.
calendar
Working capacity defined by work patterns and calendar exceptions.
capacity
Capacity is based on a amount of schedulable hours from the calendar of a resource. In the case of Labor, capacity is defined in work hours. The capacity of an Organization is the sum total of the capacity of assigned resources.
competence
A technical skill or personal ability such as JAVA programming, customer relations, and project billing.
competence match
A numerical comparison of the competence of a resource to the mandatory and optional competencies of a requirement
Cross Business Group Access (CBGA)
The ability to view data in operating units that are not associated with the current operating unit’s business group.
Cross Business Group Access mode (CBGA mode)
An installation that has selected CBGA in the profile options is operating in CBGA mode.
delivery assignment
Filled work position on a project.
dimension
Dimensions are used to calculate and monitor performance measures. Some of the dimensions are organization and time.
Glossary-2

Discoverer
An Oracle Tool that allows users to retrieve data from a database. Discoverer provides a user friendly method for creating database queries and displaying information.
duration
The total number of days between the start date and end date of a team role.
effort
The total number of hours of a team role.
End User Layer
Component of discoverer that translates business view column names into industry standard terminology and provides links between related data tables. Discoverer accesses information through the End User Layer (EUL).
global hierarchy
An organization hierarchy that includes one or more business groups. A global hierarchy can be used by installations that are in CBGA mode.
global security profile
An HR security profiles that is not associated with a business group. A global security profile can secure organizations and people throughout a global (cross business group) organization hierarchy.
HR job
In HRMS, the HR job for a resource (person) is the job linked to the primary assignment of the person.
job group
A collection of jobs defined for a specific purpose. Jobs in a job group have the same key flexfield structure.
Logical Data Model
A representation of the End User Layer. Available in a readable format, the Logical Data Model gives the relationship between folders, allowing a Discoverer user to determine the data elements needed for a specific analysis.
Glossary-3

master job group
The job group that is used as an intermediate mapping group between other job groups.
master job
A job in a master job group.
non-capacity work type
Work types assigned to forecast assignment items or actual expenditure items reduce the total capacity of a given resource for the specified time period.
requirement
Unfilled work position on a project.
responsibility
A security feature of Oracle applications that groups forms and procedures under the user application.
schedule
The working hours defined by the calendar and schedule exceptions.
Single Business Group Access mode (SBGA mode)
An installation that has selected No for the profile option HR: Cross Business Group is operating in SBGA mode.
team role
Specific position on a project representing either requirements or assignments as appropriate for the context in which it is used within the application.
utilization
A measure of how effectively a resource was used or is projected to be used.
utilization method
Capacity Utilization Method compares the actual (productive) work performed and forecasted (productive) work to be performed by the resource to the capacity of a resource.
Worked Hours Utilization Method compares the actual (productive) work performed and forecasted (productive) work to be performed by the resource to the total number of hours recorded (actuals) or assigned (forecasted) of a resource.
Glossary-4
utilization category
An implementation-defined category used for utilization reporting. This reporting grouping combines one or more work types for organization and resource utilization views.
utilization view
Utilization views enables you to measure a resource or organization utilization percentage based on different groupings of work types.
work type
Work types are an implementation-defined classification of work performed. Work types are used to classify both actual and forecast amounts. They differ from expenditure types which are a classification of cost expended. Work types are also grouped together by Utilization Categories.
worksheet
A specific grouping of information within an Analysis Workbook. A workbook is composed of one or more worksheets, each with its own set of data and graphs. Conceptually this is similar to the “sheets” and “workbook” concept within a spreadsheet application.
unassigned time
The net amount of hours for a given period for which a resource does not have any scheduled assignments (capacity hours minus scheduled hours.)
Glossary-5

Glossary-6

Index
Aadministrative assignmentcreating an, 2-6administrative assignments
ownership, 2-2administrative processes, 12-2application
process flowsadministrative assignment, creating an, 2-6assignment, adding an, 2-6requirement, creating a, 2-5requirement, filling a, 2-5resource searching, 2-5
assigningcompetencies, 4-6organizational authority, 5-18project calendars, 7-5resource calendars, 7-6shifts and exceptions to calendars, 7-4
assignmentadding an, 2-6administrative
creating an, 2-6changes requiring approval, 8-12primary, for employee, 4-3
assignment approvalnotification messages, 8-13workflow process, 8-11
assignment approval statuses, 8-8assignment schedule statuses, 8-14assignment statuses, seeded, 8-6assignments
administrative
ownership, 2-2attributes
calendar, 7-2project, 8-2
authorityforecast, granting, 10-14organization, 5-4organizational level, 5-17utilization, 9-10
AutoAccounting feature, A-3availability, 7-7Available Resource Hours (PAAVLRES)
workbook, 11-46
Bbill rate schedule
job-based, 10-7billable status, 12-4business group
definition, 3-2business manager, 5-7business views, list of, 11-31
Ccalendar
assigning a project, 7-5assigning a resource, 7-6assigning shifts and exceptions, 7-4attributes, 7-2availability, 7-7changing, 12-7creating a, 7-4
Index-1

defaults, 7-5definition of, 7-2timeline options, 7-7types, 7-2
calendar exceptions, 7-4Calendar Months folder, 11-15Calendar Years folder, 11-14calendar, changes to a, 7-4candidate
notification processes, 8-19candidate statuses, seeded, 8-7centralized deployment, 1-5changing
calendars, 12-7default operating unit, 12-4job billable status, 12-4job levels, 12-4job utilization, 12-4master calendar, 12-7organization hierarchy, 12-5primary assignment, 12-5resource information, 12-5
checklist, implementation, A-5checklist, integration implementation, A-24checklists
Discoverer postinstallation tasks, 11-2Oracle Projects implementation, A-4
classificationExpenditure/Event organization, 3-3HR organization, 3-3
client extensionAssignment Approval Changes Extension, 8-15Assignment Approval Notification
Extension, 8-16combination deployment, 1-5competence structure, 4-4competencies
assigning, 4-6defining, 4-4examples of levels, 4-4job-assigned, 4-6matching, 4-7requirement, 4-7resource, 4-7role-assigned, 4-6
contractors, 4-2cost-based distribution rule, 10-4cost-rate schedule
job-based, 10-6creating
administrative assignments, 2-6assignments, 2-6calendars, 7-4job structure, 3-5requirements, 2-5
Ddata security, managing, A-3decentralized deployment, 1-5default operating unit, changing, 12-4default status controls, 8-4deferred workflow processes, 8-10, 12-2deferred workflow processes, initiating, 8-10defining
calendar exceptions, 7-4calendar types, 7-2competencies, 4-4job groups, 3-5job mapping, 3-5job-based bill rate schedule, 10-7job-based cost rate schedule, 10-6jobs, 3-5locations, 4-3master job level, 3-6organization default calendar, 7-5organization hierarchies, 3-4organizational authority, 5-17primary assignment, 4-3primary contact, 5-18project roles, 6-1project team, 2-2role controls, 6-2role lists, 6-2role-based security, 5-5roles, 6-3security strategy, 5-2shifts and shift patterns, 7-3site default calendar, 7-5time periods, 10-8
Index-2
timeline options, 7-7unassigned time, 10-8user level access, 5-3utilization categories, 9-6utilization strategy, 9-2work types, 9-7
delivery team, 2-2deployment method
centralized, 1-5combination, 1-5decentralized, 1-5
diagramproject team, 2-2security check process flow, 5-20task flows, 2-3
distribution rulecost-based, 10-4event-based, 10-5work-based, 10-4
Eemployee
home address, 4-3required information, 4-2
enterprise structurebusiness groups in the, 3-2determining, 3-1organizations in the, 3-3
error causesmissing or invalid setup information, 12-2
event-based distribution rule, 10-5example
competence levels, 4-4example of implementation, A-3Expenditure/Event classification, 3-3extended team, 2-2
Ffile
PARAAPCB.pls, 8-15PARAAPCS.pls, 8-15PARAWFCB.pls, 8-16PARAWFCS.pls, 8-16
PARCWFCB.pls, 8-20PARCWFCS.pls, 8-20
fillingrequirements, 2-5
financial business area, 11-12financial forecast
calculating revenue, 10-3calculations, 10-3cost-based distribution rule, 10-4event-based distribution rule, 10-5forecast item creation, deferred, 12-3implementation steps, 10-6maintaining, 12-10process, 10-2profile option, 10-7security, 10-14unassigned time, 10-8work-based distribution rule, 10-4
financial forecast functionality, description of, 10-1Financial Organization Rollup Groups
folder, 11-27Fiscal Quarter Numbers folder, 11-14, 11-28Fiscal Years folder, 11-14, 11-28FLW: Forecast Exceptions Report process, 12-10folder
Calendar Months, 11-15Calendar Years, 11-14Financial Organization Rollup Groups, 11-27Fiscal Quarter Numbers, 11-14, 11-28Fiscal Years, 11-14Lookup for Class Categories, 11-30Project Managers, 11-28Project Managers folder, 11-27Required Project Hours by GL Period, 11-15Required Project Hours by GL Period: Team Role
Detail, 11-15Required Project Hours by Global Week, 11-17Required Project Hours by Global Week: Team
Role Detail, 11-18Required Project Hours by PA Period, 11-16Required Project Hours by PA Period: Team Role
Detail, 11-17Resource Capacity by GL Period, 11-19, 11-20Resource Managers, 11-14Resource Schedule by GL Period, 11-21
Index-3

Resource Schedule by GL Period: Team Role Detail, 11-21
Resource Schedule by Global Week, 11-24Resource Schedule by Global Week: Team Role
Detail, 11-25Resource Schedule by PA Period, 11-22Resource Schedule by PA Period: Team Role
Detail, 11-23Sales Pipeline by GL Period, 11-28Sales Pipeline by PA Period, 11-29Staffing Organization Rollup Groups, 11-13
forecast authoritymenu, 5-16
forecast authority, granting, 10-14forecast exceptions, correcting, 12-11forecast exceptions, list of, 12-10forecast implementation options, 10-9forecast item creation process, 12-3functions
access by responsibility, 5-10
Hhierarchy
organizational, 3-4HR
Cross Business Group profile option, 4-4HR organization, 3-3
Iimplementation
checklist for Oracle Projects, A-4deployment method, 1-5planning, 1-4
implementation checklist, integration with Oracle Projects, A-24
implementation checklist, Oracle Projects, A-5implementation example, A-3implementation wizard, A-2installation base, 1-3invalid setup information, 12-2item type
PA: Project Assignments, 8-12
Jjob
groups, 3-5primary assignment, 3-5
job competencies, 4-6job level, master, 3-6job levels, changing, 12-4job mapping, 3-5job structure
creating a, 3-5job-based bill rate schedule, 10-7job-based cost rate schedule, defining, 10-6jobs, 3-5
billable status, 12-4including in utilization calculations, 9-5
Kkey features, application, 1-2
Llevels of role-based security, 5-5locations, defining employee, 4-3Lookup for Class Categories folder, 11-30
Mmaintaining resources, 12-6managing
data security, A-3resource pool, 4-1
master calendar changes, 12-7master job level, 3-6menus
forecast authority, 5-16project authority, 5-14project manager, 5-12resource, 5-14resource authority, 5-16resource pool, 5-14utilization authority, 5-16
menus, seeded, 5-12missing setup information, 12-2
Index-4
Ooperating unit
default, 3-3resource, 3-3
Oracle Discoverertasks checklist, 11-2
Oracle Discoverer, install and setup tasks, 11-2Oracle forms changes, 12-1Oracle HRMS tables, 1-4organization
authority level, 5-4default calendar, 7-5definition of, 3-3hierarchy, 3-4hierarchy, changing, 12-5HR, 3-3operating unit, default, 3-3Project Expenditure/Event, 3-3resource assignment, 4-2utilization view, 9-3
organization manager responsibility, seeded functions, 5-12
organizational authority, 5-17assigning, 5-18levels of, 5-17
organizational hierarchy, 3-4Overcommitted Resource Hours (PAOVCRES)
workbook, 11-52overviews
setting up Oracle Projects, A-2
PPA: Availability Calculation Period profile
option, 7-7PA: Availability Duration profile option, 7-7PA: Cross-Project Responsibility profile option, 5-6PA: Cross-Project User - Update profile option, 5-4,
5-6PA: Cross-Project User - View profile option, 5-3,
5-5PA: Default Calendar profile option, 7-5PA: Default Cancelled Assignment Status profile
option, 8-9
PA: Default Cancelled Requirement Status profile option, 8-9
PA: Default Filled Requirement Status profile option, 8-9
PA: Default Starting Candidate Status profile option, 8-9
PA: Forecasting Period Type profile option, 10-7PA: Global Week Start Day profile option, 9-12PA: Organization Utilization Default Calculation
Method profile option, 9-13PA: Percentage of Resource Capacity profile
option, 7-8PA: Project Assignments item type, 8-12PA: Resource Utilization Calculation Method profile
option, 9-13PA: Resource Utilization Period Type profile
option, 9-13PA: Starting Assignment Status profile option, 8-9PA: Starting Requirement Status profile option, 8-9PA: Utilization Calculation Begin Date profile
option, 9-13PA: Utilization Manager Default Period Type profile
option, 9-13PA: Utilization Records Per Set profile option, 9-13PARAAPCB.pls file, 8-15PARAAPCS.pls file, 8-15PARAWFCB.pls file, 8-16PARAWFCS.pls file, 8-16PARCWFCB.pls file, 8-20PARCWFCS.pls file, 8-20percentage of probability, 8-3pipeline information, 8-3planning
implementation, 1-4poplist changes, 12-1PRC: Generate Calendar Schedules process, 12-7PRC: Generate Forecast Item Exception
process, 12-10PRC: Generate Utilization process, 12-9PRC: Maintain Project Resources process, 12-6PRC: Rebuild Resource Timeline, 12-7PRC: Rebuild Resource Timeline process, 12-7predefined status flows, for assignment
approval, 8-11primary assignment
Index-5

employee, 4-3primary assignment, changing, 12-5primary contact, defining, 5-18primary job, 3-5PRM reporting solution, 11-1probability list, 8-3process, 12-7
FLW: Forecast Exceptions Report, 12-10forecast item creation, 12-3PRC: Generate Calendar Schedules, 12-7PRC: Generate Forecast Item Exception
process, 12-10PRC: Generate Utilization, 12-9PRC: Maintain Project Resources, 12-6security check, 5-19
process flowapplication, 2-5
profile optionHR: Cross Business Group, 4-4PA: Availability Calculation Period, 7-7PA: Availability Duration, 7-7PA: Cross-Project Responsibility, 5-6PA: Cross-Project User - Update, 5-4, 5-6PA: Cross-Project User - View, 5-3, 5-5PA: Default Calendar, 7-5PA: Default Cancelled Assignment Status, 8-9PA: Default Cancelled Requirement Status, 8-9PA: Default Filled Requirement Status, 8-9PA: Default Starting Candidate Status, 8-9PA: Forecasting Period Type, 10-7PA: Global Week Start Day, 9-12PA: Organization Utilization Default Calculation
Method, 9-13PA: Percentage of Resource Capacity, 7-8PA: Resource Utilization Calculation
Method, 9-13PA: Resource Utilization Period Type, 9-13PA: Starting Assignment Status, 8-9PA: Starting Requirement Status, 8-9PA: Utilization Calculation Begin Date, 9-13PA: Utilization Manager Default Period
Type, 9-13PA: Utilization Records Per Set, 9-13self-service environment options, 8-23
profile options
utilization, 9-12project
attributes, 8-2project authority
menu, 5-14project environment, 8-1project manager, 5-7
menu, 5-12project manager responsibility, seeded
functions, 5-10project manager role, 2-4Project Managers folder, 11-27Project Resource Management Super User, A-2Project Resource Management super user, 5-9Project Resource Management super user
responsibility, seeded functions, 5-10project roles, defining, 6-1project security structure, 5-1project statuses, 8-5project team
defining a, 2-2delivery, 2-2diagram, 2-2extended, 2-2
Projects Billing Super User, A-2Projects Costing Super User, A-2
Rreference sources, iv-xvireporting
Available Resource Hours (PAAVLRES) workbook, 11-46
business views, 11-31Calendar Months folder, 11-15Calendar Years folder, 11-14financial business area, 11-12Financial Organization Rollup Groups
folder, 11-27Fiscal Quarter Numbers folder, 11-14, 11-28Fiscal Years folder, 11-14Lookup for Class Categories folder, 11-30Overcommitted Resource Hours (PAOVCRES)
workbook, 11-52Project Managers folder, 11-27, 11-28
Index-6

Required Project Hours (PAREQPRJ) workbook, 11-33
Required Project Hours by GL Period folder, 11-15
Required Project Hours by GL Period: Team Role Detail folder, 11-15
Required Project Hours by Global Week folder, 11-17
Required Project Hours by Global Week: Team Role Detail folder, 11-18
Required Project Hours by PA Period folder, 11-16
Required Project Hours by PA Period: Team Role Detail folder, 11-17
Resource Capacity by GL Period folder, 11-19, 11-20
Resource Managers folder, 11-14Resource Schedule by GL Period folder, 11-21Resource Schedule by GL Period: Team Role
Detail folder, 11-21Resource Schedule by Global Week
folder, 11-24Resource Schedule by Global Week: Team Role
Detail folder, 11-25Resource Schedule by PA Period folder, 11-22Resource Schedule by PA Period: Team Role
Detail folder, 11-23Sales Pipeline by GL Period folder, 11-28Sales Pipeline by PA Period folder, 11-29Sales Pipeline Workbook (PASALPIP)
workbook, 11-60Scheduled Resource Hours (PASCHRES)
workbook, 11-39security, 11-32staffing business area, 11-11Staffing Organization Rollup Groups
folder, 11-13reporting time period, 9-9Required Project Hours (PAREQPRJ)
workbook, 11-33Required Project Hours by GL Period folder, 11-15Required Project Hours by GL Period: Team Role
Detail folder, 11-15Required Project Hours by Global Week
folder, 11-17
Required Project Hours by Global Week: Team Role Detail folder, 11-18
Required Project Hours by PA Period folder, 11-16Required Project Hours by PA Period: Team Role
Detail folder, 11-17requirement
creating a, 2-5filling a, 2-5
requirement statuses, seeded, 8-5requirements
competencies, 4-7resource
availability, 7-7changing information, 12-5changing primary assignment, 12-5competencies, 4-7contractor setup, 4-2default functions, 5-8home address, 4-3menu, 5-14missing information, 4-3organization assignment, 4-2required information, 4-2searching, 2-5utilization view, 9-3
resource authoritymenu, 5-16
Resource Capacity by GL Period folder, 11-19Resource Capacity by Global Week folder, 11-20Resource Capacity by PA Period folder, 11-19resource manager, 5-8resource manager responsibility, seeded
functions, 5-11resource manager role, 2-4Resource Managers folder, 11-14resource operating unit, 3-3resource pool
benefits of, 4-2managing, 4-1menu, 5-14
Resource Schedule by GL Period folder, 11-21Resource Schedule by GL Period: Team Role Detail
folder, 11-21Resource Schedule by Global Week folder, 11-24Resource Schedule by Global Week: Team Role
Index-7
Detail folder, 11-25Resource Schedule by PA Period folder, 11-22Resource Schedule by PA Period: Team Role Detail
folder, 11-23resource search
job level-based, 3-6resources
maintaining, 12-6responsibilities
business manager, 5-7Oracle Applications, A-2organization manager
seeded functions, 5-12project manager, 5-7
seeded functions, 5-10Project Resource Management super user, 5-9
seeded functions, 5-10resource, 5-8resource manager, 5-8
seeded functions, 5-11seeded, 5-7seeded function and menu access, 5-9staffing manager, 5-8
seeded functions, 5-10team member
seeded functions, 5-11responsibility function access, 5-10responsibility-based security, 5-3role
controls, 6-2defining a, 6-3lists, 6-2project manager, 2-4resource manager, 2-4staffing manager, 2-4team member, 2-4
role competencies, 4-6role-based security, 5-5
levels, 5-5roles
enterprise, 5-5seeded, 5-6
SSales Pipeline by GL Period folder, 11-28Sales Pipeline by PA Period folder, 11-29Sales Pipeline Workbook (PASALPIP)
workbook, 11-60Scheduled Resource Hours (PASCHRES)
workbook, 11-39searching
competence match, 4-7job level-based, 3-6resource, 2-5
securitydiagram of, check process flow, 5-20financial forecast, 10-14model comparison, 5-2process, check, 5-19project role-based, 5-1reporting, 11-32responsibility-based, 5-1, 5-3role-based levels, 5-5strategy, 5-2structure, 5-2
seededassignment approval statuses, 8-8assignment statuses, 8-6candidate statuses, 8-7menu and function access, 5-9menus, 5-12organization manager responsibility
functions, 5-12project manager responsibility functions, 5-10Project Resource Management super user
responsibility functions, 5-10requirement statuses, 8-5resource manager responsibility functions, 5-11responsibilities, 5-7responsibility function access, 5-10roles, 5-6staffing manager responsibility functions, 5-10super user responsibility, A-2team member responsibility functions, 5-11
self-service environment, defining, 8-23shared data, implementation, A-4shift patterns, defining, 7-3
Index-8
shifts and exceptions, assigning to calendars, 7-4shifts, defining, 7-3site default calendar, 7-5sources
of reference, iv-xvistaffing business area, 11-11staffing manager, 5-8staffing manager responsibility, seeded
functions, 5-10staffing manager role, 2-4Staffing Organization Rollup Groups folder, 11-13standalone mode
utilization results, 9-1status controls, 8-4statuses
Assign Resources to the Project status, 8-5assignment, 8-6assignment approval, 8-8assignment schedule, 8-14candidate, 8-7Change Project Probability status, 8-5profile options for, 8-9requirement, 8-5seeded project, 8-5
statuses, definition of, 8-4structure
competence, 4-4enterprise, 3-1job, 3-5of implementation guide, iv-xv
super user responsibility, seeded, A-2system administration, A-2
Ttables
Oracle HRMS, 1-4Oracle Projects, 1-4
task flow diagram, 2-3team member responsibility, seeded
functions, 5-11team member role, 2-4technology stack, 1-3time periods, defining, 10-8timeline, updating, 12-8
transactional reporting, 11-1
Uunassigned time, tracking, 9-9, 10-8updating schedules with calendar changes, 12-7user level access, 5-3user role
project manager, 2-4resource manager, 2-4staffing manager, 2-4team member, 2-4
utilizationCapacity Method, 9-2categories, 9-6changing job, 12-4defining strategy, 9-2forecast functionality, 9-9functionality description, 9-1generating, 12-9granting, authority, 9-10method, 9-4organization view, 9-3profile options, 9-12reporting, 9-4reporting time period, 9-9resource view, 9-3specifying, jobs, 9-5time periods, 9-3Total Worked Hours, 9-2unassigned time tracking, 9-9work types, 9-7
utilization authoritymenu, 5-16
Vversion
Self-Service Framework, 1-3
Wweighting percentage, 9-2work-based distribution rule, 10-4workbook
Index-9
Available Resource Hours (PAAVLRES), 11-46Overcommitted Resource Hours
(PAOVCRES), 11-52Required Project Hours (PAREQPRJ), 11-33Sales Pipeline Workbook (PASALPIP), 11-60Scheduled Resource Hours (PASCHRES), 11-39
workflow processassignment approval notification
messages, 8-13assignment approval, seeded processes, 8-12candidate declined, 8-20candidate notification processes, 8-19Generate_Assignment_Approvers
procedure, 8-17Generate_NF_Recipients procedure, 8-18, 8-21new candidate, 8-19seeded assignment approval, 8-11Set_Timeout_And_Reminders procedure, 8-19
workflow processes, default, 8-10workflow processes, deferred, 8-10
Index-10


