Page 1
Importing Cisco IOU VM into Virtualbox
Importing Cisco IOU VM into Virtualbox, the Cisco IOU VM can be obtained from this
<http://sourceforge.net/projects/gns-3/files/IOU%20VMs/ >.
Download the GNS3 IOU VM.ova file as of latest.
Launched Oracle VM VirtualBox Manager.
File > Import Appliance...
Page 2
Browse to the download GNS3 IOU VM.ova file
Open the GNS3 IOU VM.ova file.
Page 3
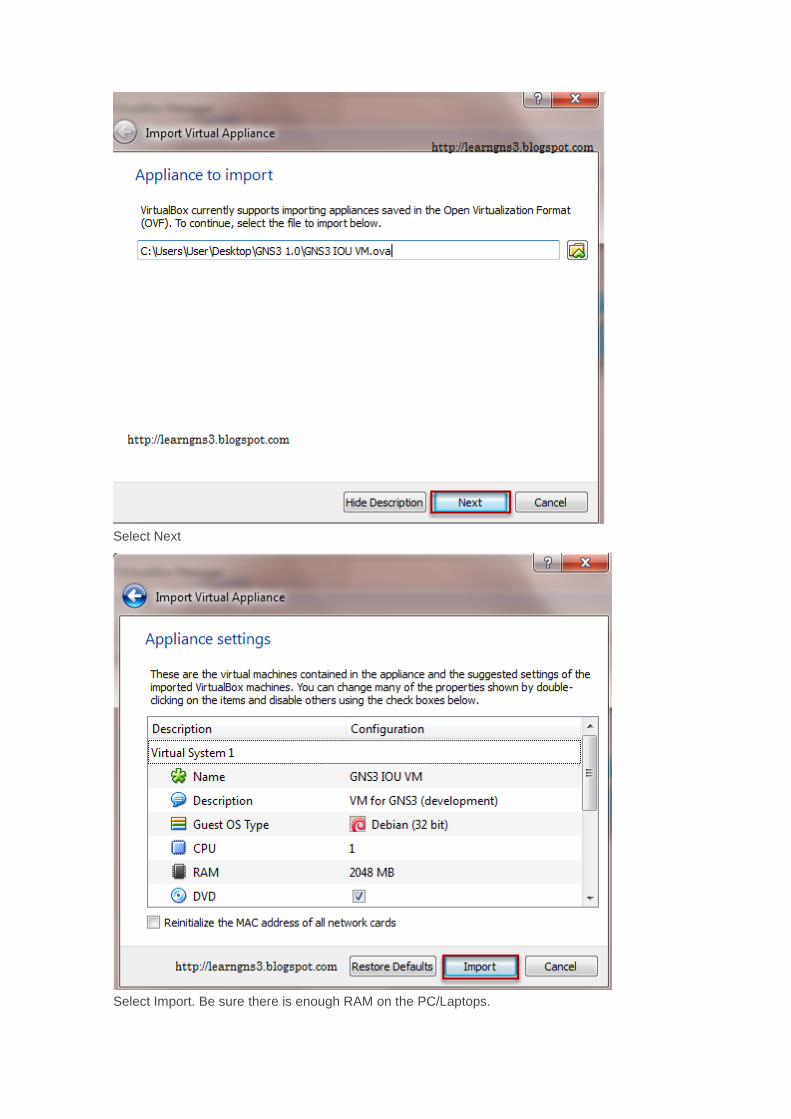
Select Next
Select Import. Be sure there is enough RAM on the PC/Laptops.
Page 4
Select Settings. Do not Start yet. Configure the Network Settings.
Page 5
In the Settgs, ensure Network Adapter 1 is Host-only Adapter on VirtualBox Host-Only
EthernetAdapter.
Power on the GNS3 IOU VM.
Login into the GNS3 IOU VM console with login:password as root / cisco.
Page 6
Confirm the GNS3 IOU Host IP address is 192.168.56.101.
Use any Internet Browser and goto http://192.168.56.101:8000/upload
Select the Cisco IOU image.
Note: Image cannot be provided but google is always your best friend. The hint I can give is
search for this i86bi_linux_l2-ipbasek9-ms.may8-2013-team_track and i86bi_linux-
adventerprisek9-ms.152-4.M1
Page 7
Click upload
Upon complete, the IOU path will be printed on the Files on 192.168.56.101:8000
Proceed to upload other IOS image file till completed.
Page 8
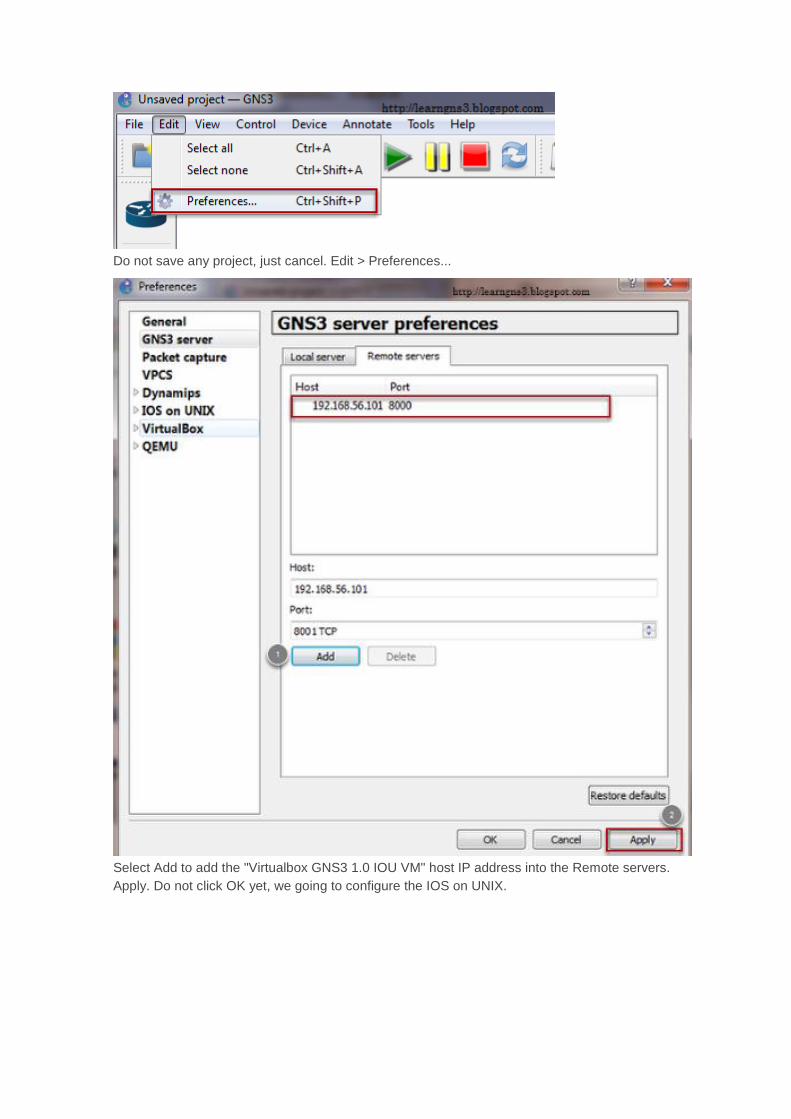
Do not save any project, just cancel. Edit > Preferences...
Select Add to add the "Virtualbox GNS3 1.0 IOU VM" host IP address into the Remote servers.
Apply. Do not click OK yet, we going to configure the IOS on UNIX.
Page 9
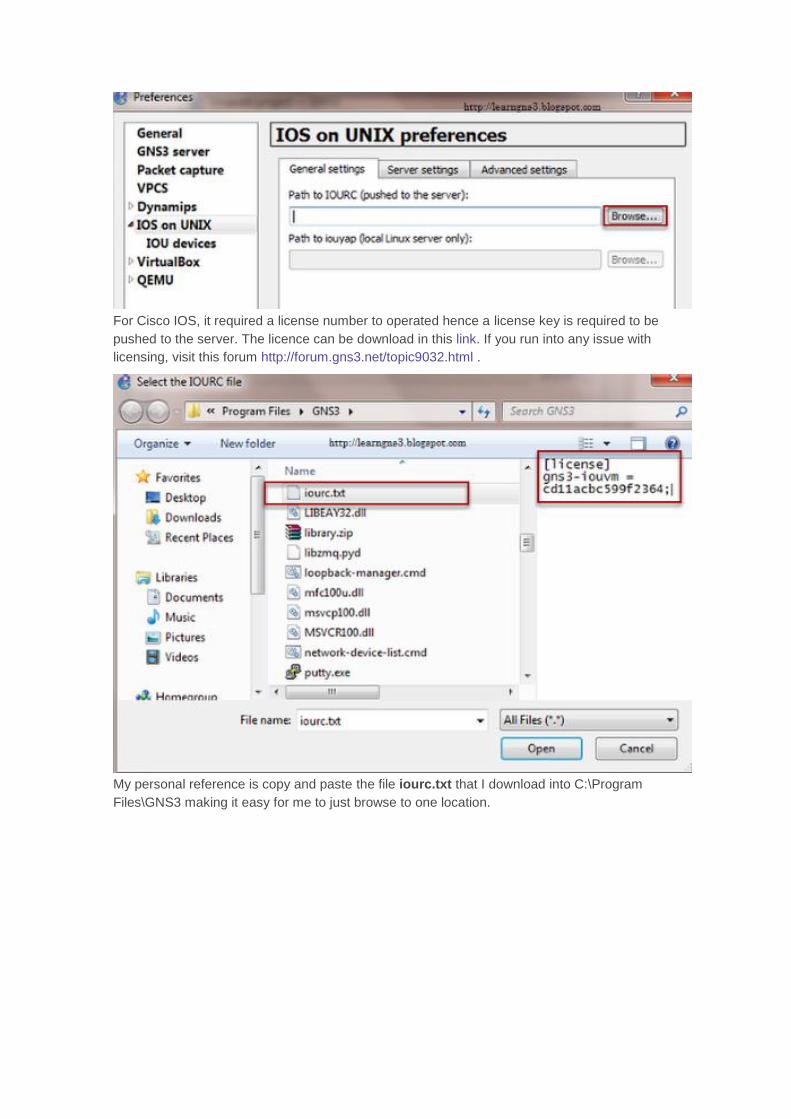
For Cisco IOS, it required a license number to operated hence a license key is required to be
pushed to the server. The licence can be download in this link. If you run into any issue with
licensing, visit this forum http://forum.gns3.net/topic9032.html .
My personal reference is copy and paste the file iourc.txt that I download into C:\Program
Files\GNS3 making it easy for me to just browse to one location.
Page 10
Once the iourc.txt is specify, select Apply. Do not click OK yet, there is additional settings to be
configure in IOU devices.
Page 11
Adding the IOU device, before that the IOU path field is required. Let take a look how to quickly
copy the path.
Confirm the images is upload into GNS IOU VM going into
cd /home/gns/GNS3/images
ls -l
pwd
(All case sensitive for above three line commands)
Page 12
Remember this, there is trick. Using any Internet Browser, open up 192.168.56.101:8000 and
the Files on 192.168.56.101:8000 will be displayed. Highlight the path and copy to the next
step. I am going to use this L2 Switch image for this illustration.
Select Remote and ensure that Run on server with 192.168.56.101:8000 is selected. It can be
on different IP address as long the remote servers is selected corrected.
Page 13
Copy and paste the IOU image path. For the name, any name can be specify as I choose to use
the image name. L2 image is for this illustration, as L3 image is the same procedure.
Page 15
Drag the IOU L2 Switches from the Switches panel and happy GNS3!. Continued and
repeat the steps with a L3 Router as well