50
INDeX NOCpro Installation & Maintenance 38DHB0002UKDA - Issue 5 (12/00)

INDeX NOCproInstallation & Maintenance
38DHB0002UKDA - Issue 5 (12/00)

Contents
Introduction...................................................................................................................................... 3General.............................................................................................................................................. 3INDeX NOCpro Description ............................................................................................................... 3System Specification ......................................................................................................................... 4INDeX NOCpro Server Set-up ......................................................................................................... 5Connecting the INDeX NOCpro Server.............................................................................................. 5INDeX System Programming............................................................................................................. 6PC Configuration ............................................................................................................................. 7Server and Client PC Set-up (Windows NT) ...................................................................................... 7Client PC Set-up (Windows 95) ....................................................................................................... 19Software Installation...................................................................................................................... 26Overview.......................................................................................................................................... 26Installing INDeX NOCpro (Windows NT) ......................................................................................... 27Installing INDeX NOCpro (Windows 95) .......................................................................................... 32Protecting the Auto-Dial Database................................................................................................... 34The Busy Lamp Field (BLF) .......................................................................................................... 35Introduction...................................................................................................................................... 35The BLF Screen............................................................................................................................... 35Using BLF with the NOCpro Console............................................................................................... 36Console Customisation................................................................................................................. 37Using INDeX NOCpro Client for the First Time................................................................................ 37Changing the Date & Time............................................................................................................... 38Changing the External Queue Labels .............................................................................................. 39Changing the Stand-by Settings ...................................................................................................... 40Changing the Console Ringing ........................................................................................................ 41Configuring Call Annotation or Auto-Dial.......................................................................................... 42Changing the Associated Terminal .................................................................................................. 43Changing the Console Language..................................................................................................... 44Customising the Console Profile ...................................................................................................... 45Find Server/Locate File.................................................................................................................... 45TCP/IP Networking......................................................................................................................... 46Overview.......................................................................................................................................... 46TCP/IP Settings Required................................................................................................................ 46Changing a NOCpro Server/Client PC to TCP/IP ............................................................................ 47Removing Previous Protocols.......................................................................................................... 48Index ............................................................................................................................................... 49
Contents

General Introduction
Installation & Maintenance INDeX NOCpro38DHB0002UKDA - Issue 5 (12/00) Page 3
IntroductionGeneral
This manual covers the installation of INDeX Network Operator Console (INDEXNOCpro) products, i.e. the INDeX NOCpro Server and additional INDeX NOCproOperator Consoles.The INDeX NOCpro Server PC provides a link between the INDeX telephonesystem and a LAN network. Suitable PC's on that network (referred to as "Clients")can then act as INDeX NOCpro Operator Consoles.When a PC is in use as a console, details of waiting calls appear on its screen andits keyboard performs a range of call control actions. During this time, a phoneassociated with the PC carries the speech for answered calls.
INDeX NOCpro DescriptionIndividual INDeX NOCpros Clients link via a LAN to the INDeX NOCpro Server. TheINDeX NOCpro Server connects to the INDeX Telephone System via a serial link.This allows multiple INDeX NOCpros to be installed using a single INDeX NOCproServer. Each INDeX NOCpro requires an adjacent DT telephone associated with itduring INDeX NOCpro installation. The diagram below shows the INDeX NOCprosystem major elements:
– NOCpro Server PC (Access Manager):Connects to the INDeX telephone system using a serial cable. It provides thelink between the telephone system and the LAN. The INDeX NOCpro Serveralso includes software to act as the first NOCpro Operator.
– NOCpro Client PCs (Operators):NOCpro Client (Operators) can be installed on suitable PC's on the network.Each Operator requires an adjacent phone. A licence key entered in the INDeXtelephone system controls the number of INDeX NOCpro Operators that can runat the same time. Currently the maximum number of INDeX NOCpro Operatorsrunning at the same time is five.– The NOCpro Client software can be run on the same PC as the NOCpro
Server. If this is done, the recommended maximum number of INDeXNOCpro Clients running at anytime is five.
– INDeX Telephone System:This must be a minimum of Level 7.2.3 or higher for NOCpro, but must be Level8.1 or higher for NOCpro working with BLF.

System Specification Introduction
INDeX NOCpro Installation & MaintenancePage 4 38DHB0002UKDA - Issue 5 (12/00)
System SpecificationBoth the Server PC and Client PC must meet the minimum requirements.
Computer Systems– Server PC:
– Pentium 133MHz or higher– Minimum 64MBytes of RAM– Supports serial port up to 38.4K
– Client PC:– Pentium 133MHz or higher– Minimum 64Mbytes of RAM
– Monitor: 15" (or optional 17") SVGA supporting 800x600– Keyboard: Win NT/95 Compatible– Floppy Disk Drive A: 31/2" 1.44 Mb high density– PC speaker or Sound Card (Sound card only with NT.)– CD ROM DriveExpansion Cards– Network Card: Micronet , 10MB PCI Combo (Model SP2082A)System Software– Windows NT Workstation: Version: 4.0, Media: CD ROM– Windows 95: Version: Latest, Media: CD ROM– INDeX Application Service Pack CD: Version 1.0, Media: CD ROM,
incorporating:– Windows NT Service Pack 4SP2082A)
E-mail Requirements– Microsoft Outlook or Outlook Express or similar
INDeX Telephone System:This must be a minimum of Level 7.2.3 or higher for NOCpro, but must be Level 8.1or higher for NOCpro working with BLF..
If INDeX IVM is being used as the NOCpro Server Level 8.1 or higher software mustbe used.
WARNING:If your INDeX switch contains an IVM cassette and/or is equipped with aproduct that is already using an Access Manager DO NOT install AccessManager (NOCpro). Use the existing Access Manager instead. A 32-bitAccess Manager must be used when BLF is installed. See "InstallingINDeX NOCpro (Windows NT)" on page 27.

Connecting the INDeX NOCpro Server INDeX NOCpro Server Set-up
Installation & Maintenance INDeX NOCpro38DHB0002UKDA - Issue 5 (12/00) Page 5
INDeX NOCpro Server Set-upConnecting the INDeX NOCpro Server
Use the following if an INDeX IVM Cassette is not used. Otherwise, when an INDeXIVM Cassette is used connection to both the customer network and the AccessManager are either via one of the serial ports or the RJ45 socket on the front of theIVM Server cassette.The instructions below assume that you are using cables plus line drivers suppliedby Avaya. You may also require additional serial cable for long cable distances.To connect to an INDeX system:1. Connect one end of the CABCON-9-25 cable to a free port on the INDeX control
cabinet (the cabinet containing the CPU Cassette).– You can use any of the 4 serial sockets on the cabinet. Avoid using the first
(front) socket if possible as this is required for some INDeX systemmaintenance tasks.
2. The diagram below shows the remaining connections.– Note the DTE and DCE settings of the line drivers.– You must connect CABWOC to serial port COM1 of the PC. If this is not a
9-pin port, you need a 9-pin male to 25-pin female serial converter.– If the cable distances are short, you may connect CABWOC directly to
CABCON-9-25.

INDeX System Programming INDeX NOCpro Server Set-up
INDeX NOCpro Installation & MaintenancePage 6 38DHB0002UKDA - Issue 5 (12/00)
INDeX System ProgrammingAll of the following need to be set-up on the INDeX telephone system.
Console Licence keyThe INDeX requires entry of a licence key before supporting use of INDeXNOCpros. The Operator's Console licence key also controls how many consolescan run at the same time.The licence key is unique to the serial number of the INDeX system's CPU Cassette(displayed on the INDeX system's resources screen during log on).To enter the licence number:1. From the Main Menu select System.2. Select Switch Licences and then select Operator's Console.3. Enter the license key number.4. Check that the menu now shows the correct number of consoles required in the
Option column.
Console Red Alert TimeoutDefines the time after which the console call queues display a call as red (urgent).To set the console red alert timeout:1. From the Main Menu select System and then select Timeouts.2. Select PC Console Red Alert and set the required timeout in seconds (default
= 20 seconds).
Console Group (The Operator Number)1. From the Main Menu select Group. Enter the directory number you want used
for the operator's group.2. Define the Group Access type from one of the terminal group options as
required.3. If already known, use Add Number(s) to add the NOCpro console's associated
terminal directory numbers into the group.
Trunk Dispositions & QueuesRepeat this process for all trunks that should route calls to the operator group.1. From the Main Menu select Trunk and enter the trunk's directory number.2. Set the required call dispositions to the operator's group directory number.3. Use Incoming Queue Number to select in which NOCpro external call queue
the trunk's calls should appear.
Setting the Serial Port Speed1. From the Main Menu, select System and then Serial Port.2. Select the port to which the INDeX NOCpro Server is attached. Set the port's
speed to 38400.Notes:
– Ensure the Access Manager has also been set to the same speed as theINDeX Telephone System.
– You can use either Comm Port 1 or Comm Port 2 of the NOCpro Server,ensuring the Access Manager is also set accordingly.

Server and Client PC Set-up (Windows NT) PC Configuration
Installation & Maintenance INDeX NOCpro38DHB0002UKDA - Issue 5 (12/00) Page 7
PC ConfigurationServer and Client PC Set-up (Windows NT)
On Windows NT platforms both the Server and the Client software can be run eitheron separate PCs or the same PC. This section details the set-up for both the ServerPC and the Client PC configurations. When the Server PC and the Client PCsoftware require different set-up instructions these are highlighted within the text.This section is divided as follows:1. Install Windows NT Workstation.
If windows NT has already been installed check, and change if necessary, thatwithin the "Set-up Options" menu you have entered your name asAdministrator, your Organisation name, ID No. and your computer name asNOC_SERVER. See Steps 19 to 23 in "Install Windows NT 4.0 Workstation" onpage 7.
2. Essential Windows NT Workstation modification for INDeX NOCpro application.3. Set Server PC to AutoLogon4. Install Windows NT Service Pack 4.
Install Windows NT 4.0 Workstation1. Insert Windows NT CD ROM and Windows NT Set-up Disk 1 and reboot the
PC.2. When prompted, insert Windows NT Set-up Disk 2 and press Enter.3. Press Enter "To set-up Windows NT now".4. Press Enter to attempt to detect Mass Storage Devices in your PC.5. When prompted, insert Windows NT Set-up Disk 3 and press Enter to continue.6. Press Enter to confirm that there is only one CD ROM storage device.7. Press Page Down until you reach the end of the Licensing Agreement text and
then press F8 to agree; if you have sufficient licenses.8. With the Keyboard Layout : US highlighted, press Enter and then select United
Kingdom, to change the Keyboard Layout from US to United Kingdom.9. With "The above list matches my computer" highlighted, press Enter.10. If your hard disc is 2G or greater, create a partition in the unpartitioned space by
pressing "C".11. With "Create partition of size (in MB): 2014" highlighted, press Enter.12. Press Enter again to continue.13. Select Format the Partition using FAT file system and press Enter to format the
partition.14. With C:FAT highlighted press Enter.15. With "Leave the current file system intact", highlighted press Enter.16. At \WINNT press Enter for this directory.

Server and Client PC Set-up (Windows NT) PC Configuration
INDeX NOCpro Installation & MaintenancePage 8 38DHB0002UKDA - Issue 5 (12/00)
17. Press Enter to carry out an exhaustive search. Set-up files will now be copied tothe PC.
18. When asked, remove the floppy disk (leaving the Windows NT CD in the CD-ROM Drive) and press Enter.
19. The PC restarts presenting a Windows NT Set-up Wizard from which click Next.20. From the "Set-up Options" screen select Typical and click Next.21. Type your Name as Administrator and your Organisation, click Next.22. Enter the ID Number (from the Windows NT Workstation Manual), click Next.23. Type Computer Name as NOCpro_SERVER and click Next.24. Leave the Password fields blank and then click Next.25. From the "Emergency Repair Disk" screen, select "No, do not create an
emergency repair disk" and click Next.26. Select "Install the Most common Components (recommended)", click Next.27. With 2) Installing Windows NT Networking selected, click Next.28. Select "This computer will participate on a network" and select "Wired to the
network" and then click Next.29. Click Select From List and then click Have Disk. Insert the "Network Adapter
Driver" disk in A: Drive. Click OK.30. Once the name of the adapter appears, click OK. Ensure that ONLY the adapter
driver from the disk is checked, click Next.31. Select the network Protocol according to the Network of the customer's site,
click Next.32. Click Next to Install Selected Components.33. Click Next to start the network. The network will be displayed, confirming your
Computer Name.34. Make this computer a member of Workgroup, click Next and then click Finish.35. From the Date/Time Properties screen, Set Time Zone to GMT and click Close.36. From the Detected Display screen, click OK and then TEST to test the display.37. Wait till colour screen closes, from the Testing Mode screen, click Yes and then
OK to save the display settings. From the Display Properties screen click OK.38. Remove any floppy disks and CDs from the PC, click Restart Computer To
reboot the PC.39. From the Begin Logon screen press Ctrl+Alt+Delete to log on.40. From the Logon Information screen, enter the User name and Password, click
OK.

Server and Client PC Set-up (Windows NT) PC Configuration
Installation & Maintenance INDeX NOCpro38DHB0002UKDA - Issue 5 (12/00) Page 9
Windows NT ModificationsTo be able to install and run the INDeX NOCpro application on both the Server andClient PC it is essential to modify Windows NT as detailed in this section.
Regional SettingsThe Regional Settings need to be changed from the default installation settingswhich are usually English (United States).1. From the Windows taskbar, click Start, point to Settings and select Control
Panel.2. With the Control Panel open, select Regional Settings. The following screen
appears:
3. Select English (United Kingdom), click Apply, and then click OK.

Server and Client PC Set-up (Windows NT) PC Configuration
INDeX NOCpro Installation & MaintenancePage 10 38DHB0002UKDA - Issue 5 (12/00)
Virtual MemoryEnables you to configure the virtual-memory-paging file, for your hard disk.With virtual memory under Windows NT, some of the program code and otherinformation are kept in RAM, while other information is temporarily swapped to avirtual-memory-paging file. When that information is required again, Windows NTpulls it back into RAM and, if necessary, swaps other information to virtual memory.The resulting benefit is that you can run more programs at one time than yoursystem's RAM would usually allow.1. From the Windows taskbar, click Start, point to Settings and select Control
Panel.2. With the Control Panel open, select System, and click the Performance tab.
The following screen appears:
3. Click Change, and alter the Initial Size to the maximum possible.4. Click Set, as shown in the following screen:
5. Click OK.6. From the System Properties screen, click Close.7. When prompted, click Yes to restart the PC.

Server and Client PC Set-up (Windows NT) PC Configuration
Installation & Maintenance INDeX NOCpro38DHB0002UKDA - Issue 5 (12/00) Page 11
Network IPX Frame TypeThis is only applicable if the site network uses IPX Frame Type.1. From the Windows taskbar click Start, point to Programs and select Control
Panel.2. With the Control Panel open, select Network and click the Protocols tab.
The following screen appears:
3. With the NWLink IPX/SPX Compatible Transport selected, click Properties.This represents three scenarios:– If a Novell NetWare Server is present on the network, ensure the INDeX
NOCpro Server PC uses the same frame type as NetWare Server;– If the Server is on the network, ensure the INDeX NOCpro Server PC uses
the same frame type as the Server Cassette (Required INDeX NOCprosetting for this is Ethernet II);
– If no other servers are on the network, ensure that all PCs running Avayaproducts are using the same frame type.
4. Set the Frame Type to Ethernet II.
5. Click OK.6. From the Network screen, click Binding and then click Close.7. Click Yes to restart the PC.

Server and Client PC Set-up (Windows NT) PC Configuration
INDeX NOCpro Installation & MaintenancePage 12 38DHB0002UKDA - Issue 5 (12/00)
Guest AccountFor INDeX NOCpro application to communicate, the Guest Account on Windows NTneeds to be enabled. This is modified through the User Manager.1. From the Windows taskbar, click Start, point to Programs and from
Administrative Tools (Common), select User Manager the following screenappears:
2. Double click Guest, the following screen appears:
3. Ensure Account Disabled is unchecked, e.g. do not tick. Click OK.4. From the User menu, select Exit to close User Manager.

Server and Client PC Set-up (Windows NT) PC Configuration
Installation & Maintenance INDeX NOCpro38DHB0002UKDA - Issue 5 (12/00) Page 13
Event Log SettingsThe Event Log settings are altered through the Windows NT Event Viewer.1. From the Windows taskbar, click Start, point to Programs and from
Administrative Tools (Common), select Event Viewer the following screenappears:
2. From the Log menu, select Log Settings, the following screen appears:
3. There are three Settings available: System, Security and Application.4. Use the pull down list select System and from the Event Log Wrapping options
ensure Overwrite Events as Needed is selected.5. Repeat step 3 for the other two settings, i.e. Security and Application.6. Click OK.7. From the Log menu, select Exit to close the Event Viewer.

Server and Client PC Set-up (Windows NT) PC Configuration
INDeX NOCpro Installation & MaintenancePage 14 38DHB0002UKDA - Issue 5 (12/00)
Sharing the Hard DrivesThe following must be carried out on the Server PC running the INDeX NOCproServer applications. If the Server and Client software are running on different PCs,do not perform the following on the Client PC.In order for all INDeX NOCpro applications to function correctly, the drives on an NTWorkstation machine must be shared.1. From the Windows taskbar, click Start, point to Programs and select Windows
NT Explorer.2. Click the C: drive using the right hand mouse button. From the context-sensitive
menu, select Sharing, the following screen appears:
3. You need to create a share named C if one does not already exist.4. From the (C:) Properties screen, click New Share, the following screen
appears:
5. Type C (must be UPPERCASE) as the Share Name.6. Ensure Maximum Allowed is also selected. Click OK.7. From the (C:) Properties screen, click Apply and then click OK.8. From the File menu, select Close to close the Windows NT Explorer.

Server and Client PC Set-up (Windows NT) PC Configuration
Installation & Maintenance INDeX NOCpro38DHB0002UKDA - Issue 5 (12/00) Page 15
Map Network DriveThe following must be carried out on the Client PC only. If the Server and Clientsoftware are running on the same PC, do not perform the following.
Sharing INDeX NOCpro Server1. From the Windows NT desktop, click (using the right mouse button) Network
Neighbourhood and select Map Network Drive.2. Select a Drive (e.g. E:) and in the Path Type \\NOCSERVER\C, ensuring
Reconnect at Logon is also checked as shown on the following screen:
3. Click OK.This enables you to share the INDeX NOCpro Server files.4. See "Protecting the Auto-Dial Database" on page 34 for instructions on
connecting/protecting the Auto Dial Database.

Server and Client PC Set-up (Windows NT) PC Configuration
INDeX NOCpro Installation & MaintenancePage 16 38DHB0002UKDA - Issue 5 (12/00)
Set Server PC to AutologonThe following procedure should be used to enable the server PC running theNOCpro Server and the Delta Server to automatically logon when the systempowers up. This will then allow the Access Manager and Delta Server to beautomatically started if it is included in the Start\Programs\Startup folder:
1) Run REGEDIT and go to:‘HKEY_LOCAL_MACHINE\SOFTWARE\Microsoft\WindowsNT\CurrentVersion\Winlogon’
2) From the Edit menu add a string value, rename to AutoAdminLogon and setvalue = 1
3) From the Edit menu add a string value, rename to DefaultPassword and setvalue = <auto logon user password>
4) Set DefaultUserName = <auto logon user name>
Note: DefaultPassword must not be blank. The User account used toautologon must have Administrator rights. This same User must be usedto log on to install NOCpro Server.

Server and Client PC Set-up (Windows NT) PC Configuration
Installation & Maintenance INDeX NOCpro38DHB0002UKDA - Issue 5 (12/00) Page 17
Install Windows NT Service Pack 4Alterations to Windows NT 4.0's configuration including the addition of software,mean that the Service Pack (containing Microsoft bug fixes), needs to be reapplied.1. Insert the INDeX Application Service Pack CD in the CD ROM Drive, from the
Windows NT desktop, double click My Computer, and double click the CD-ROMdrive.
2. From the Asp10 Explorer screen, double click NT4sp4, the following screenappears:
4. Click Next to continue. The following screen appears:
5. Click Yes to proceed to the following screen:

Server and Client PC Set-up (Windows NT) PC Configuration
INDeX NOCpro Installation & MaintenancePage 18 38DHB0002UKDA - Issue 5 (12/00)
6. Ensure Install the Service Pack is selected, click Next to proceed to thefollowing screen:
7. Select No, I do not want to create an Uninstall directory, click Next toproceed to the following screen:
8. Click Finish, to commence the copying of the Service Pack 4 files.Note When reinstalling Windows NT Service Pack 4 the following message
appears relating to overwriting of files. Do not overwrite existing files withthe Service Pack 4 files. Hence ensure NO to All in the Confirm FileReplace screen is clicked as appropriate.
10. When copying of files has completed, the following acknowledgement screenappears:
11. Click OK. Windows NT will now automatically restart the PC.12. Once the PC has restarted, changed the Regional Setting from English (United
States) back to English (British)

Client PC Set-up (Windows 95) PC Configuration
Installation & Maintenance INDeX NOCpro38DHB0002UKDA - Issue 5 (12/00) Page 19
Client PC Set-up (Windows 95)This section details the Client PC configuration as follows:1. Install Windows 95.2. Essential Windows 95 modifications for INDeX NOCpro application.
Install Windows 951. Insert Windows 95 CD ROM and Windows 95 Set-up Disk 1 and reboot the PC.2. At the A:\ prompt, type X:, (X is the letter associated with the CD drive of the
PC) and press Enter.3. At the X:\> prompt, type Setup and press Enter.4. Press Enter to continue.5. From the Windows 95 Set-up Welcome screen, click Continue to begin set-up.6. Click Yes to agree the software License Agreement.7. At Windows 95 Set-up Wizard, 1) Collecting information about your
computer click Next.8. Select Directory C:\Windows, click Next. Select Typical, click Next.10. Type the Certificate of Authority number, click Next.11. Enter your name and Organisation, click Next.12. Check Network Adapter, click Next.13. Select Install the most common components (recommended), click Next.14. Select "No, I don't want a Startup disk", click Next.15. Click Next, 2) Copying Windows 95 files to your Computer.16. Remove the floppy disk, 3) Restarting your computer and finishing Set-up,
Click Finish.17. From the Date/Time Properties screen, Set Time Zone to GMT London and click
Apply and then click OK..18. Click Next and follow the instructions according to your printer requirements, to
install the Printer driver19. Once the printer is installed, click OK to restart the PC.20. After the PC reboot, follow the instructions to install Internet Explorer.21. From the Windows taskbar, click Start, point to Settings and select Control
Panel.22. From the Control Panel options, open Display, select Background tab and then
change the Active Desktop wallpaper to None wallpaper. Click Apply.23. Select the Web tab and then click to clear "View my Active Desktop as a web
page". Click Apply.24. Click OK.

Client PC Set-up (Windows 95) PC Configuration
INDeX NOCpro Installation & MaintenancePage 20 38DHB0002UKDA - Issue 5 (12/00)
Windows 95 ModificationsOnce Windows 95 is installed, you need to make the following adjustments to beable to run the INDeX NOCpro application:
Regional SettingsThe Regional Settings need to be changed from the default installation settingwhich is usually English(United States).1. From the Windows taskbar, click Start, point to Settings and select Control
Panel.2. With the Control Panel open, select Regional Settings. The following screen
appears:
3. From the Regional Settings tab select English (British), click Apply, click Yes torestart the PC.

Client PC Set-up (Windows 95) PC Configuration
Installation & Maintenance INDeX NOCpro38DHB0002UKDA - Issue 5 (12/00) Page 21
Network IPX Frame TypeThis is only applicable if the site network uses IPX Frame Type. Otherwiseconfigure the network according to the Site's Network.1. From the Windows taskbar, click Start, point to Settings and select Control
Panel.2. With the Control Panel open, select Network. The following screen appears:
3. Click Add, the following screen appears:
4. Select Adapter and then click Add, the following screen appears:
5. Click Have Disk.

Client PC Set-up (Windows 95) PC Configuration
INDeX NOCpro Installation & MaintenancePage 22 38DHB0002UKDA - Issue 5 (12/00)
6. Insert the Micronet Ethernet disk in the A: drive and click OK. When thefollowing screen appears, click OK.
7. From the Network screen, click IPX/SPX compatible Protocol, click Properties,the following screen appears:
8. Tick "I want to enable NetBOIS over IPX/SPX".9. Click the Advanced tab, highlight the ‘Frame Type’ in Property, then from the
Value drop-down list, select Ethernet II, as displayed in the following screen.Click OK.

Client PC Set-up (Windows 95) PC Configuration
Installation & Maintenance INDeX NOCpro38DHB0002UKDA - Issue 5 (12/00) Page 23
10. From the Network screen, click File and Print Sharing the following screenappears:
11. Click to select both options and click OK.12. From the Network screen, click the Identification tab, enter the Computer name
and Workgroup as required.
13. Click OK.14. Ensure the Windows 95 CD is inserted, type X:\Win95, drive (X: is the letter
associated with the CD-ROM drive of the PC).15. Click OK to copy files from the CD-ROM.16. When prompted, click Yes to restart the PC.17. When prompted, enter User Name and the Password as required, click OK.

Client PC Set-up (Windows 95) PC Configuration
INDeX NOCpro Installation & MaintenancePage 24 38DHB0002UKDA - Issue 5 (12/00)
Change Device Manager1. From the Windows taskbar, click Start, point to Settings and select Control
Panel.2. With the Control Panel open, select System. The following screen appears:
3. Select the Device Manager tab, the following screen appears:
4. Double click Other Devices. Click PCI Ethernet Controller, click Remove.5. Double click Network adapters, click 32 Bit IO Mode PCI Ethernet Adapter and
then click Remove.6. Click OK. Ensure the Windows 95 CD is inserted in the DC ROM Drive, click
Yes to restart the PC.7. Follow the instructions to update the devices, when the PC is being rebooted .8. Recheck the Network set-up of your site (e.g., If using IPX/SPX Protocol, repeat
steps 7-9 in the Network IPX Frame Type section of this manual, see page 21).Note: If, during this configuration Version Conflict screen(s) appear(s), clickYes.

Client PC Set-up (Windows 95) PC Configuration
Installation & Maintenance INDeX NOCpro38DHB0002UKDA - Issue 5 (12/00) Page 25
9. Once the Network set-up is rechecked, from the System Properties screen,click Device Manager tab and the following will be displayed on the screen:
10. Click OK.11. From the desktop, double click Network Neighbourhood, you will see a list of all
the PCs within this network.
Map Network DriveSharing INDeX NOCpro Server1. From the Windows 95 desktop, click (using the right mouse button) Network
Neighbourhood and select Map Network Drive.2. Select a Drive (e.g. E:) and in the Path Type \\NOCSERVER\C, ensuring
Reconnect at Logon is also checked as shown on the following screen:
3. Click OK.This enables you to share the INDeX NOCpro Server files.4. See "Protecting the Auto-Dial Database" on page 34 for instructions on
connecting/protecting the Auto Dial Database.

Overview Software Installation
INDeX NOCpro Installation & MaintenancePage 26 38DHB0002UKDA - Issue 5 (12/00)
Software InstallationOverview
This section describes the procedures for installing the software for the INDeXNOCpro product on either a Windows NT or Windows 95 platform. There are twobasic scenarios for installing INDeX NOCpro:
Both NOCpro Server and Client applications on a standalone PCThe required sequence for installing INDeX NOCpro is:1. Install on a Windows NT platform only.2. Install INDeX NOCpro application3. Install INDeX Access Manager (NOCpro Server) application
WARNINGOnly installed when no other Access Manager application is installed
4. Where applicable, install INDeX PC BLF application (requires 32-bit Acc. Man.)5. Reinstall Windows NT Service Pack 46. Restart your PC.
INDeX NOCpro applications on multiple PCsFor the Server/Client scenario on multiple PCs the required sequences for installingINDeX NOCpro are:
On the Server PC:1. Install on a Windows NT platform only.2. Install INDeX NOCpro application3. Install INDeX Access Manager (NOCpro Server)
WARNINGOnly installed when no other Access Manager application is installed
4. Where applicable, install INDeX PC BLF application (requires 32-bit Acc. Man.)5. Reinstall Windows NT Service Pack 46. Restart your PC.
On the Client PC(s):1. Can be installed on either a Windows NT or a Windows 95 platform.2. Install INDeX NOCpro application3. Where applicable, install INDeX PC BLF application
Note: INDeX PC BLF must also be installed on the Server PC4. Reinstall Windows NT Service Pack 45. Restart your PC
Reinstalling NOCpro or Upgrading NOC to NOCproThe following instructions are applicable to both of these activities. However, beforereinstalling or upgrading NOCpro you must protect your existing Auto-DialDatabase. See "Protecting the Auto-Dial Database" on page 34

Installing INDeX NOCpro (Windows NT) Software Installation
Installation & Maintenance INDeX NOCpro38DHB0002UKDA - Issue 5 (12/00) Page 27
Installing INDeX NOCpro (Windows NT)The following two sequences of instructions are for the installation proceduresrequired for installing the INDeX NOCpro product. Perform the appropriatesequence for either single or multiple PC working.
Installing both NOCpro Server and Client Applications on a Standalone PCThis procedure is identical to that for Installing NOCpro Server Applications on aPC. See below.
Installing NOCpro Server Applications on a PC1. With Windows NT open and no applications running, check to see if an INDeX
Access Manager is installed. Click the right hand mouse button on the WindowsStart button, select Find and use either Access or INDeX to locate the AccessManager and, if installing BLF, the Delta server. NOCpro is compatible withAccess Manager V31 and Delta Server V38 and above. The versions installedcan be seen on the applications title bar. If either of the installed versions islower than 1.0a31 for Access Manager and 1.0a38 for Delta Server they mustbe upgraded (use INDeX Application CD V1.0 or higher). Note and closemenus.
2. Insert the NOCpro CD in the appropriate drive of the PC. The following screenwill appear; otherwise open the CD drive and double click on the NOCpro icon.
Select the required language for installation and click OK. After a short pausethe following screen will appear.
3. Tick the INDeX NOCpro / INDeX PC BLF box
Installing INDeX NOCpro (Windows NT) Software Installation
INDeX NOCpro Installation & MaintenancePage 28 38DHB0002UKDA - Issue 5 (12/00)
4. Only tick the INDeX ACCESS MANAGER (NOC SERVER) box if no otherAccess Manager is installed.
WARNINGIf another INDeX Access Manager is already installed and/or an IVMcassette is fitted DO NOT install Access Manager (NOCpro). When otherINDeX products (IVM say) contain an Access Manager that is alreadyinstalled, the Access Manager (NOCpro) will override the other activeAccess Manager and hence disable the feature! See step one above.
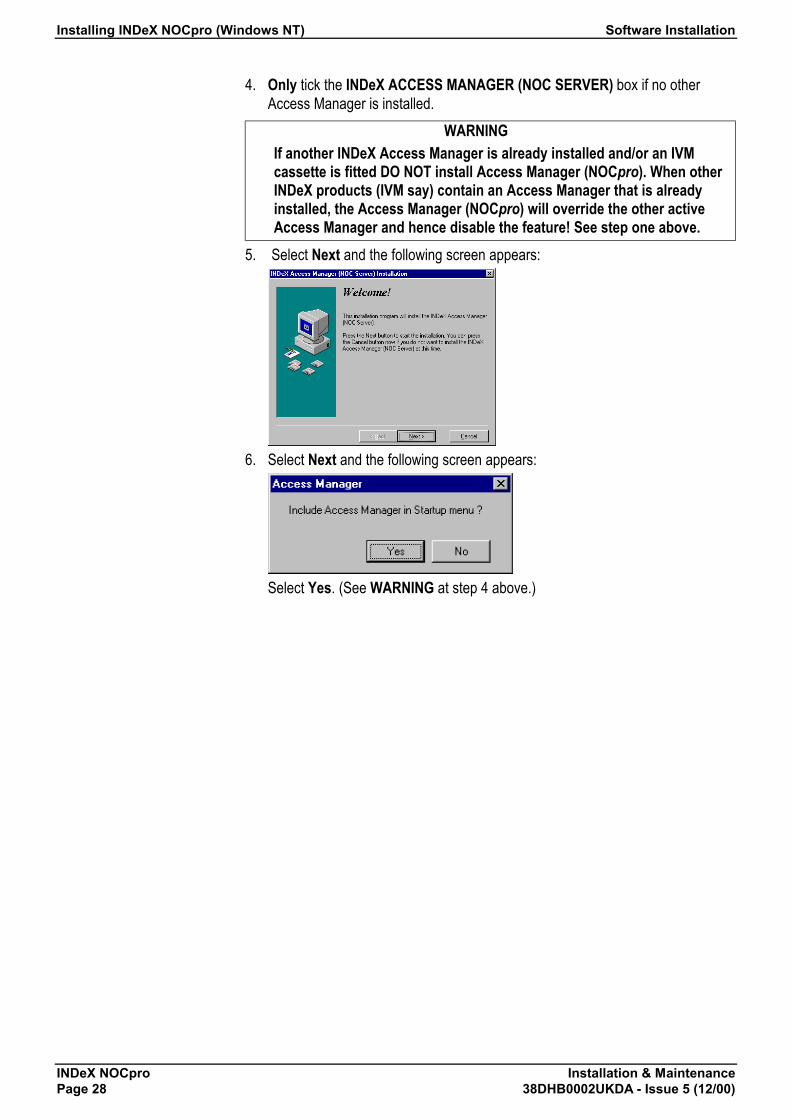
5. Select Next and the following screen appears:
6. Select Next and the following screen appears:
Select Yes. (See WARNING at step 4 above.)

Installing INDeX NOCpro (Windows NT) Software Installation
Installation & Maintenance INDeX NOCpro38DHB0002UKDA - Issue 5 (12/00) Page 29
7. The following screen appears:
Followed by :
8. You must restart you PC to complete installation and you must also reinstallthe Windows NT Service Pack 4. See "Install Windows NT Service Pack 4" onpage 17 .Note: The Server PC should have been set up to AutoLogon (see page 16), if
it has not, then you must Logon after restarting when the Logon menuappears.
9. If installed, the Access Manager (NOC Server) screen will appear. Minimise it.10. If INDeX PC BLF was installed the Delta Server must be running on the Server
PC. From the Windows Start button, select Programs | INDeX CCM and doubleclick on the Delta Server icon. Otherwise, right click on Start and use the Findmenu to locate INDeX Delta Server. When it appears, minimise the Delta Serverscreen.
11. Install the Server applications on all Server PC(s) by repeating the steps above.

Installing INDeX NOCpro (Windows NT) Software Installation
INDeX NOCpro Installation & MaintenancePage 30 38DHB0002UKDA - Issue 5 (12/00)
Installing NOCpro Client Applications on a Standalone PC(s)1. Insert the NOCpro CD in the appropriate drive of the PC. The following screen
will appear; otherwise open the CD drive and double click on the NOCpro icon.
Select the required language for installation and click OK. After a short pausethe following screen will appear.
WARNING:Do not tick the INDeX ACCESS MANAGER (NOC SERVER) box
2. Tick the INDeX NOCpro / INDeX PC BLF box

Installing INDeX NOCpro (Windows NT) Software Installation
Installation & Maintenance INDeX NOCpro38DHB0002UKDA - Issue 5 (12/00) Page 31
3. Select Next and the following screen appears:
Followed by:
4. You must restart you PC to complete installation and you must also reinstallthe Windows NT Service Pack 4. See "Install Windows NT Service Pack 4" onpage 17.
5. If INDeX PC BLF was installed the Delta Server must be running on either theServer PC, or the IVM casette, etc. At the Server PC and from the WindowsStart button, select Programs | INDeX CCM and double click on the DeltaServer icon. Otherwise, right click on Start and use the Find menu to locateINDeX Delta Server. When it appears, minimise the Delta Server screen.
6. Repeat this procedure from step 1 for all other Client PCs.

Installing INDeX NOCpro (Windows 95) Software Installation
INDeX NOCpro Installation & MaintenancePage 32 38DHB0002UKDA - Issue 5 (12/00)
Installing INDeX NOCpro (Windows 95)The following two sequences of instructions are for the installation proceduresrequired for installing the INDeX NOCpro product. Perform the appropriatesequence for either single or multiple PC working:
Installing both NOCpro Client and Server Applications on a Standalone PCOnly install NOCpro Client and Server Applications together on a Windows NTworkstation. See "Both NOCpro Server and Client applications on a standalone PC"on page 26)
Installing NOCpro Client Applications on a Windows 95 PC1. Insert the NOCpro CD in the appropriate drive of the PC. The following screen
will appear; otherwise open the CD drive and double click on the NOCpro icon.
Select the required language for installation and click OK. After a short pausethe following screen will appear.
3. Tick the INDeX NOCpro / INDeX PC BLF box
Installing INDeX NOCpro (Windows 95) Software Installation
Installation & Maintenance INDeX NOCpro38DHB0002UKDA - Issue 5 (12/00) Page 33
4. Select Next and the following screen appears:
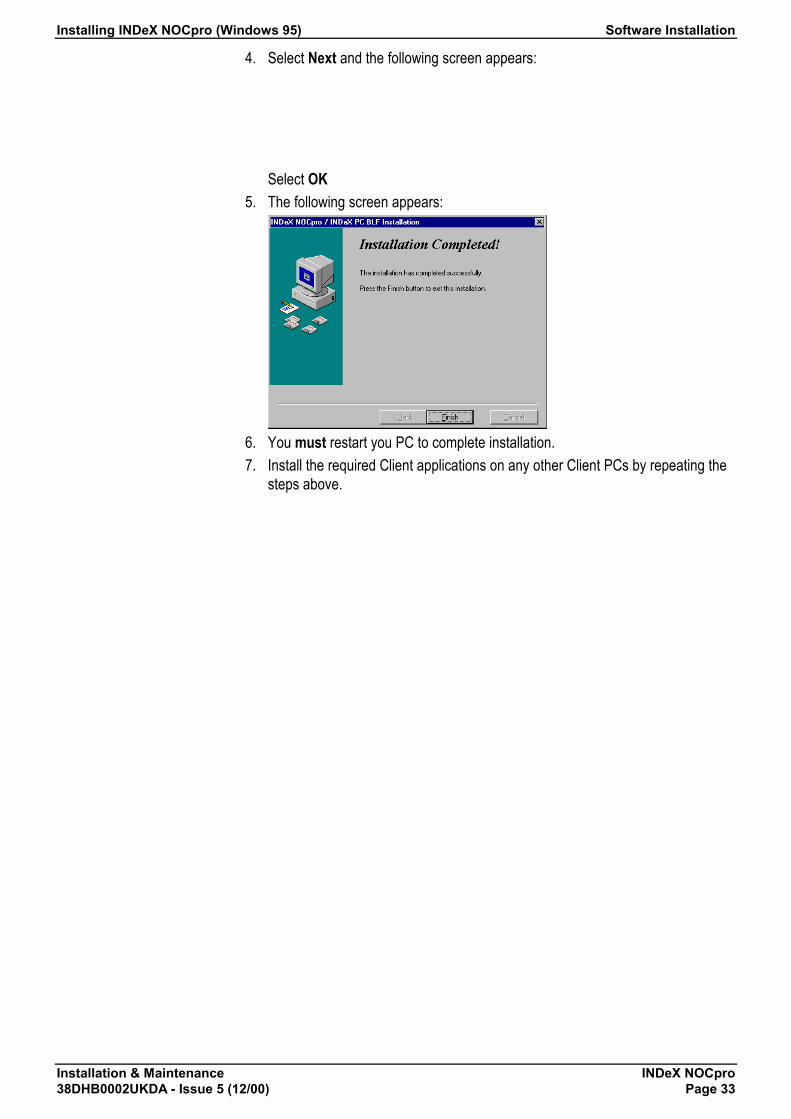
Select OK5. The following screen appears:
6. You must restart you PC to complete installation.7. Install the required Client applications on any other Client PCs by repeating the
steps above.

Protecting the Auto-Dial Database Software Installation
INDeX NOCpro Installation & MaintenancePage 34 38DHB0002UKDA - Issue 5 (12/00)
Protecting the Auto-Dial DatabaseReinstalling INDeX NOCpro
If reinstalling the Networked Operator Console (INDeX NOCpro) software, use thefollowing instructions to retain the user's existing AutoDial Database.1. In Explorer, open the Program Files folder and from the NOCpro folder click
the filename NOCpro.mdb2. Select Rename from the pop up menu.3. Type NOCpro.bak and then press Enter.4. Install the Networked Operator Console (INDeX NOCpro) software as detailed in
"Installing INDeX NOCpro (Windows NT)" on page 27.5. After the installation, restart the Explorer again. Open the NOCpro folder from
the Profiles folder.6. Using the right hand mouse button, click the filename NOCpro.mdb and select
Delete from the pop up menu. Ensure the correct file name is displayed, andthen click OK.
7. Using the right hand mouse button, click the filename NOCpro.bak and selectRename from the pop up menu.
8. Type NOCpro.mdb and then press Enter.9. From File menu, select Exit.
Upgrading from NOC to INDeX NOCproIf upgrading from NOC to INDeX NOCpro software, use the following instructions toretain the user's existing Autodial database.1. In Explorer, open the Opcon folder. Click the filename NOCpro.mdb2. From the Edit menu, select Copy and open the Program Files and click Paste.3. Install the Networked Operator Console (INDeX NOCpro) software as detailed in
"Installing INDeX NOCpro (Windows NT)" on page 27.4. In Explorer, open the Program Files folder.5. Click the filename autodial.mdb and then click Copy.6. Open the Program Files and then the NOCpro folder.5. From the Edit menu, select Paste. Rename NOCpro.mdb as NOCproold.mdb5. From File menu, select Exit.

Introduction The Busy Lamp Field (BLF)
Installation & Maintenance INDeX NOCpro38DHB0002UKDA - Issue 5 (12/00) Page 35
The Busy Lamp Field (BLF)Introduction
The Networked Operators Console has the ability to display up to 100 extensionusers on a Busy Lamp Field. Before the BLF can be used both NOCpro and theAccess Manager 32-bit must be running (see page 37).
The Delta Server SoftwareThe Delta Server software may be installed on any Windows NT PC on the networkand links the BLF with the INDeX and Access Manager. The Delta Server must berunning before you can use BLF. Your INDeX must be running at Level 8.1 orhigher to enable the Delta Server to communicate with the Access Manager.
The BLF ScreenStarting the BLF:1. Ensure that both the NOCpro Server and the NOCpro are running (see page
37).2. The Delta Server must also be running. On the Windows task bar, if the Delta
Server icon is not shown select Programs, INDeX CCM and double click on theINDeX Delta Server icon. Minimise the Delta Server screen.
3. Click on Start in the Windows task bar. Select Programs, then click on INDeXPC BLF icon.
4. The BLF Screen will be displayed.
Each of the tabs 1-5 displays up to 20 extension users.

Using BLF with the NOCpro Console. The Busy Lamp Field (BLF)
INDeX NOCpro Installation & MaintenancePage 36 38DHB0002UKDA - Issue 5 (12/00)
To Add an Extension:1. With the BLF screen displayed, use your mouse to select the required key.2. Press the right hand button on your mouse and then click the Assign option to
display the Select Directory Numbers screen.
3. You may now select which user you wish displayed under your chosen key byhighlighting the name or DN number.
To Remove or Edit an existing entry1. With the mouse chose the entry you wish to change and then right click the
mouse. A pop up menu is displayed allowing you to Assign, Remove or Edit.You may then amend the BLF display, as you require.
Using BLF with the NOCpro Console.You may use the BLF either just an indicator of the status of extension users or asan integral part of the Console. If the BLF button is Red this means the user is usingthe handset. In the space beside the BLF button the status of the phone, “on divert”etc., is displayed.By using the mouse you call an extension by clicking the BLF button for that user.

Using INDeX NOCpro Client for the First Time Console Customisation
Installation & Maintenance INDeX NOCpro38DHB0002UKDA - Issue 5 (12/00) Page 37
Console CustomisationUsing INDeX NOCpro Client for the First Time
When the INDeX NOCpro Client is launched for the first time, the Access Managermust be running within the Startup menu. (See Explorer | Profiles | All Users | Start |Programs | Startup.) All associated terminals (operator positions) must be identified.1. From the Windows Start button, select Programs and INDeX NOCpro.
Double click on INDeX NOCpro and the following screen appears:
2. Before completely opening, the following screen appears to enable you toassociate a terminal with the INDeX NOCpro Client/Server.
3. Enter the required Terminal directory number, click OK.You must ensure the same directory number has also been programmed withinthe INDeX Telephone System.
4. When fully opened, the following screen appears:
5. From the settings menu you can customise your console as described on thefollowing pages.

Changing the Date & Time Console Customisation
INDeX NOCpro Installation & MaintenancePage 38 38DHB0002UKDA - Issue 5 (12/00)
Changing the Date & TimeThe console displays the date and time as set on the INDeX. Changing the consolevalues also changes the INDeX clock settings.To change the date & time:1. From the console screen, press Alt+S (Settings).2. Press Alt+C (Config). The Time and Date screen is displayed.
3 Use the up down arrow to amend the time or the drop down box to amend thedate.
4. When finished, press Alt+A (Apply) to save the changes or press Alt+C(Cancel) to exit without saving the changes.
5. If no other changes to configuration are required press Alt+O (OK).

Changing the External Queue Labels Console Customisation
Installation & Maintenance INDeX NOCpro38DHB0002UKDA - Issue 5 (12/00) Page 39
Changing the External Queue LabelsYou can give each of the external queues a label name (other than their defaults ofExt.1, Ext.2 and Ext.3).To change the external queue labels:1. From the console screen, press Alt+S (Settings).2. Press Alt+C (Config).3. Press Alt+Q (Queues) tab. The Queues screen is displayed.
4. Enter the label names required and amend the queue colours as required. Notethat the console only displays approximately 11 characters
5. When finished press Alt+O (OK) to exit.

Changing the Stand-by Settings Console Customisation
INDeX NOCpro Installation & MaintenancePage 40 38DHB0002UKDA - Issue 5 (12/00)
Changing the Stand-by SettingsYou can change the threshold settings of the Standby mode allowing differentconsoles to restore to service with different numbers of calls queuing to the operatorgroup.To change the threshold settings.1. From the console screen, press Alt+S (Settings).2. Press Alt+C (Config).3. Press Alt+S (Standby Setting). The Standby Settings screen is displayed.
Note: The Total Queued Calls Trip Level indicates the total number of alltypes of call queuing on the NOCpro. The other six independentqueues are summed to make this total.
4. Settings may be amended as required.5. When finished press Alt+O (OK) to exit.

Changing the Console Ringing Console Customisation
Installation & Maintenance INDeX NOCpro38DHB0002UKDA - Issue 5 (12/00) Page 41
Changing the Console RingingYou can change the console ringer used to indicate new calls.To change the console ringing:1. From the console screen, press Alt+S (Settings).2. Press Alt+C (Config).3. Press Alt+R (Ringer). This displays the Ringer screen.
4. Select the type of ringing required.5. To exit, press Alt+O (OK) when finished.

Configuring Call Annotation or Auto-Dial Console Customisation
INDeX NOCpro Installation & MaintenancePage 42 38DHB0002UKDA - Issue 5 (12/00)
Configuring Call Annotation or Auto-DialWhile talking to a caller, typing on the keyboard can have one of two effects:- Auto-Dial: Search the Auto-Dial database using the text that you type.- Call Annotation: Add the text that you type as a call annotation.To select Call Annotation or Auto-Dial:1. From the console screen, press Alt+S (Settings).2. Press Alt+C (Config.)3. Press Alt+K (Keyboard Action)
4. Select either Caller Annotation or Auto Dial.5. If you wish to amend or define the user definable fields (used for DDI, fax Nos.,
e-mail addresses, etc.) press Alt+A (Auto-Dial).
6. Amend as required and press Alt+O (OK) to exit

Changing the Associated Terminal Console Customisation
Installation & Maintenance INDeX NOCpro38DHB0002UKDA - Issue 5 (12/00) Page 43
Changing the Associated TerminalThe Network Operator Console can be associated with any display phone on theINDeX telephone system. The associated phone provides the speech path forhandling operator calls.Caution: Changing a console's associated telephone will require
reprogramming of INDeX. Only an approved system maintainershould perform this programming.To receive calls the directory number of the associated terminalmust also be programmed into the operator group (and anyprevious number removed).
To change the associated terminal:Ensure that you have taken the console out-of-service, by pressing F6.
WARNING: Do not do this whilst on a call.1. From the console screen, press Alt+S (Settings).2. Press Alt+n (Connections).3. Press Alt+A (Associated Terminal). This displays a dialogue box, which tells
you the currently associated terminal number.
4. Press Alt+Y (Yes) only if you want to change the associated terminal, otherwisepress Alt+N (No).
5. Enter the directory number of the terminal (a DT-3/4/5 or TT-3/5) to associate
with the console. Then press Alt+O (OK), otherwise press Alt+C (Cancel).6. The console program automatically closes. Restart the console (see page 37).

Changing the Console Language Console Customisation
INDeX NOCpro Installation & MaintenancePage 44 38DHB0002UKDA - Issue 5 (12/00)
Changing the Console LanguageYou can switch the console to your preferred language.To change the console language:1. From the console screen, press Alt+S (Settings).2. Press Alt+L (Languages). A menu of the languages available appears.
3. Move the cursor over the language required and when it is highlighted releasethe mouse button.
– The Options choice displays a menu of buttons from which to make thelanguage selection.
Note: If the console does not have all the phrases it needs in the languageyou select, it will prompt you to enter the text each missing phrase.

Customising the Console Profile Console Customisation
Installation & Maintenance INDeX NOCpro38DHB0002UKDA - Issue 5 (12/00) Page 45
Customising the Console ProfileMulti-users of the console can customise the size and shape of the console screento their preferred profile.To customise the console profile:1. With the console screen displayed, use the mouse to change the screen profile,
e.g. to full screen, half screen, etc.2. From the console screen, press Alt+P (Profile)
3. Press Alt+S (Save), Alt+n (Save as new) and name the personalised screenprofile.
4. To exit, press Alt+O (OK) when finished.To select a personalised console profile:1. From the console screen, press Alt+P (Profile)2. Press Alt+L (Load) and then select the named personal profile you wish to use.4. To exit, press Alt+O (OK).
Find Server/Locate FileYou can display the location of the Server (Access Manager) available to you. Youcan also display the location of the NOCpro Database file. These options are meantfor engineer's use only.
To find the Server:1. With the Console screen displayed, press Alt+S, Alt+N followed by Alt+S. The
Find Server screen is displayed
To locate the NOCpro file:1. With the console screen displayed, press Alt+S, Alt+C followed by Alt+D. The
Locate File screen is displayed.

Overview TCP/IP Networking
INDeX NOCpro Installation & MaintenancePage 46 38DHB0002UKDA - Issue 5 (12/00)
TCP/IP NetworkingOverview
The process of configuring the Server PC to use TCP/IP consists of the followingstages.Summary1. Check the TCP/IP settings required (these should be supplied by the customer
Network Manager).2. Re-configure Client PC to TCP/IP.3. Allow the Server PC and Client PCs to restart and then check the connection.4. Remove any former network protocol if required by the customer's Network
Manager.
TCP/IP Settings RequiredThe customer's Network Manager must supply the full range of settings. The keysettings are:If using DHCP:– DHCP server address.If using a fixed IP address:– IP Address.– Subnet mask.– Default gateway.

Changing a NOCpro Server/Client PC to TCP/IP TCP/IP Networking
Installation & Maintenance INDeX NOCpro38DHB0002UKDA - Issue 5 (12/00) Page 47
Changing a NOCpro Server/Client PC to TCP/IPConfiguring TCP/IP on Windows NT4
The following process may require you to have the original Windows NT4Workstation CD available. It will also require the PC to be restarted after completion.The following procedure applies to both Server PC and the Windows NT Client PC.1. Right-click the Network Neighbourhood icon and select Properties.2. Click the Adapters tab to check that the PC's network card is listed.
– If the network card is not shown, refer to the manufacturers suppliedinformation for correct installation.
3. Click on the Protocols tab. Check that TCP/IP Protocol is shown. If not shownthen use the process below to install the protocol.– Click on Add and select TCP/IP Protocol. After installation the list of
protocols should include TCP/IP Protocol.4. Click on the Bindings tab, then return to the Protocols tab.5. Highlight TCP/IP Protocol and click on Properties. Add the settings specified
by the customer's Network Manager and then click on OK.6. Click OK and allow the PC to restart.
Configuring TCP/IP on Window 95The following process may require you to have the original Windows 95 CDavailable. It will also require the Client PC to be restarted after completion.1. Right-click the Network Neighbourhood icon and select Properties.2. Check to see that the PC's network card is listed.
– If the network card is not shown, refer to the manufacturers suppliedinformation for correct installation.
– Note: If intending to use NSM with an NE2000 compatible network card youshould complete the following actions. Select the card and then Properties.Under Driver Type ensure that Real Mode 16-bit NDIS driver is selected.
3. Check that TCP/IP is shown. If not shown use the process below to add theprotocol.– Select Add…, then select Protocol and select Add… again. From the
Manufacturer's list select Microsoft. From the Network Protocols listselect TCP/IP. Click on OK and follow any instructions given.
4. Highlight TCP/IP and click on Properties. Add the settings specified by thecustomer's Network Manager and then click on OK.
5. Click OK and allow the Client PC to restart.

Removing Previous Protocols TCP/IP Networking
INDeX NOCpro Installation & MaintenancePage 48 38DHB0002UKDA - Issue 5 (12/00)
Removing Previous ProtocolsThe customer's network manager may want all other existing network protocolsremoved from the Server PC. If that is the case use the following steps on both theServer PC and the Client PC (do not do this until you have successfully establishedTCP/IP connection between the Server PC and a Client PC set to TCP/IP):1. Right-click the Network Neighbourhood icon and select Properties.2. Click on the Protocols tab. Check that TCP/IP Protocol is shown. If not shown
then use the process below to install the protocol.3. Highlight any protocols not required and then click on Remove.4. After removing all extra protocols, click on the Bindings tab, wait as the Binding
configuration is checked and then return to the Protocols tab.5. Click OK and allow the PC to restart.

Index
Installation & Maintenance INDeX NOCpro38DHB0002UKDA - Issue 5 (12/00) Page 49
AAssociated terminal 43Auto dialer database 37Auto-Dial
Configuring 42
BBusy Lamp Field 35
CCall annotation active 42Change queue names 39Change terminal 43Client PC Win95
INDeX NOC 26Install 19Map Network Drive 15, 25Modifications 20Network Settings 21Regional Settings 20System Settings 24
Client PC WinNTINDeX NOC 26
ConfigurationClient PC Win95 19INDeX NOC Server PC 5Server PC 7
Console Customisation 37Associated Terminal 43Auto-Dial/Call Annotation 42Date & time 38Language 44Profile 45Queue Labels 39Ringing 41Standby Settings 40
Console Ringer 41
DDate & time 38
EEdit queue labels 39
IIncoming Queue Number 6INDeX
Programming 6Software 3
InstallReinstall INDeX NOC 34
IntroductionClient PC 19Server PC 7
LLanguages 44
Level 7.2.3+ software 3
NNetwork setup (TCP/IP) 46
PPC Console Red Alert 6
QQueue names 39Queue Number 6
SServer PC
Event Log 13Guest Account 12, 13INDeX CCM 26INDeX NOC 26Install Windows NT 7Network Settings 11Regional Settings 9Sharing Hard Drive 14, 15Virtual Memory 10Windows NT Modifications 9
Service Pack 3Server PC 17
Setup TCP/IP 46Software Applications
Server PC 26Software level 3Specification
Client PC 4Server PC 4Software 4
Switching the Console Ringer On/Off 41
TTCP/IP 46Terminal 43Timeouts 6
UUpgrade to INDeX NOC 34
Index

INDeX NOCpro Installation & MaintenancePage 50 38DHB0002UKDA - Issue 5 (12/00)
Performance figures and data quoted in this document are typical,and must be specifically confirmed in writing by Avaya before they
become applicable to any particular order or contract. The companyreserves the right to make alterations or amendments to the detailed
specifications at its discretion. The publication of information in thisdocument does not imply freedom from patent or other protective
rights of Avaya, or others.Intellectual property related to this product (including trademarks)
and registered to Lucent Technologies has been transferred orlicensed to Avaya.
This confidential document is the property of Avaya and without itsprior written consent may not be disclosed to a third party nor copied.
Any comments or suggestions regarding this document should besent to "[email protected]".
© Copyright 2000 AvayaAvaya Global SME Solutions
Sterling Court15 - 21 Mundells
Welwyn Garden CityHertfordshire
AL7 1LZEngland
Tel: +44 (0) 1707 392200Fax: +44 (0) 1707 376933
Email: [email protected]: http://www.sdxplc.com


