Self Service Document 3.6.01 Copyright reserved for E.J. Milde & Co Pty Ltd INFLATABLE PFD’S Instrucons for Annual Self Inspecon Only to be used for jackets in recreaonal use. Every twelve months it is required that your jacket be inspected and tested, to make sure all is in working order. It is recommended that every third service on recreaonal use jackets be performed by an authorised agent. Please follow the 10 step test plan and complete the test form. • Please read this document fully and ensure that you understand what is required before you start. If you do not understand or do not feel that you can complete all required tasks please take your jacket to an authorised service agent. • During the self inspecon certain replacement parts may be required. Depending on your model of jacket a green indicator clip, gas cylinders or automac firing cartridges may need replacing. • If your Inflatable PFD or a component fails any test listed below the PFD must be taken to an authorised service centre for further tesng. UML Mini Manual Step One- Visual Inspecon 1. Check all stching, buckles and closures to see all are intact and working correctly. 2. Visually check the outside cover to see there is no wear or damage 3. Open jacket and remove cylinder from inflator. Jackets made aſter June 2013 have step by step fold lines. If your jacket pre dates this, take careful note to how bladder folds into pack. 4. Check bladder for any signs of obvious damage, ie abrasions, cuts, holes etc. 5. Check all reflecve tape is stuck down and not peeling away 6. Check oral inflator tube is not damaged. 7. Check whistle which will be located on oral tube. Check funcon by blowing through it sharply. Only jackets made aſter June 2013 will have whistles aached, if your jacket pre dates this, please disregard this step. Step Two - Oral Inflator Check 1. Check inflator valve operang correctly by blowing a small amount of air into the bladder then by inverng the cap in to the oral tube to release the valve, and expel all air (Fig 2). Do not insert anything into the valve except the inverted cap. 2. Look for any damage or cracks around or on the Tube (Fig 1).
Transcript
Self Service Document 3.6.01 Copyright reserved for E.J. Milde & Co Pty Ltd
INFLATABLE PFD’S Instructions for Annual Self Inspection
Only to be used for jackets in recreational use. Every twelve months it is required that your jacket be inspected and
tested, to make sure all is in working order. It is recommended that every third service on recreational use jackets be performed by an authorised agent. Please follow the 10 step test plan and complete the test form.
• Please read this document fully and ensure that you understand what is required before you start. If you do not understand or do not feel that you can complete all required tasks please take your jacket to an authorised service agent.
• During the self inspection certain replacement parts may be required. Depending on your model of jacket a green indicator clip, gas cylinders or automatic firing cartridges may need replacing.
• If your Inflatable PFD or a component fails any test listed below the PFD must be taken to an authorised service centre for further testing.
Self Service Document 3.6.01 Copyright reserved for E.J. Milde & Co Pty Ltd Self Service Document 3.6.01 Copyright reserved for E.J. Milde & Co Pty Ltd
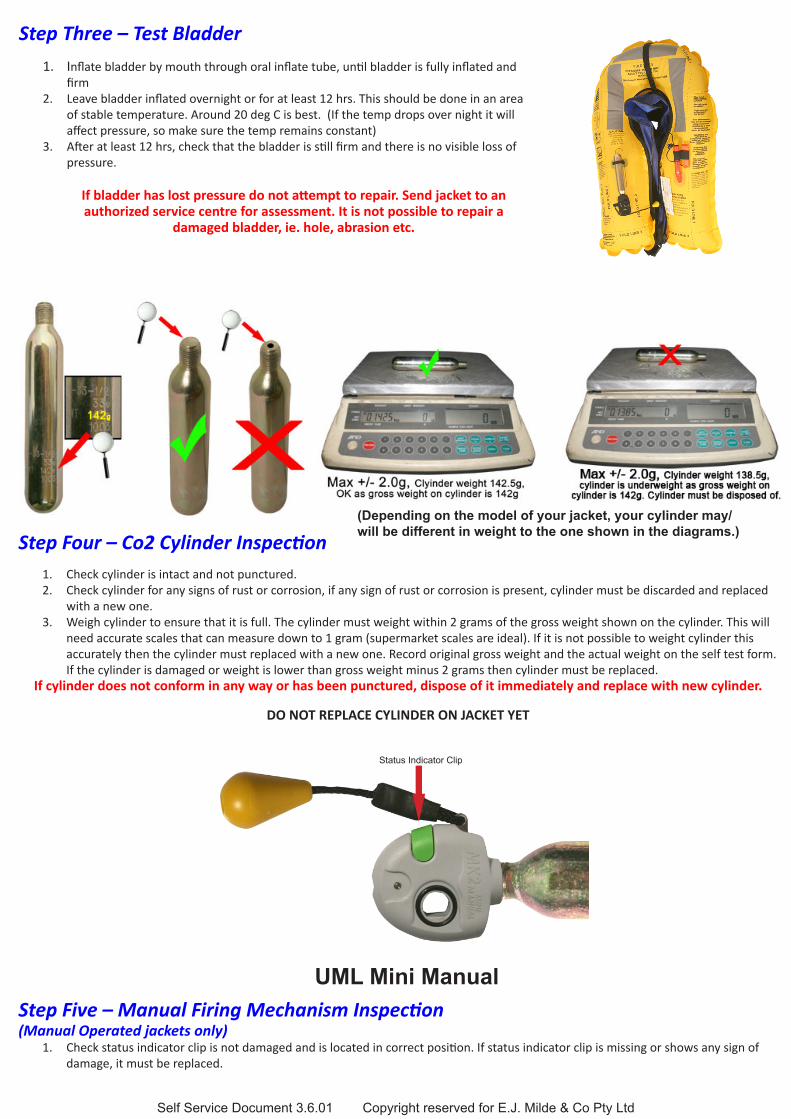
Step Four – Co2 Cylinder Inspection1. Checkcylinderisintactandnotpunctured.2. Checkcylinderforanysignsofrustorcorrosion,ifanysignofrustorcorrosionispresent,cylindermustbediscardedandreplaced
Self Service Document 3.6.01 Copyright reserved for E.J. Milde & Co Pty Ltd Self Service Document 3.6.01 Copyright reserved for E.J. Milde & Co Pty Ltd
Step Six – Refit Co2 Cartridge.1. Ifjacketandinflatorhaspassedalltestsrefitcylinder2. Whenfittingcylinderholdmechanismfirmlyandscrewcylinderintoitclockwisedirection,handtightenonlyuntilfirmlyinto
Step Eight – Repack your PFDRepackyourPFDensuringthatalltheairhasbeenremovedfromthebladder.Ensurethattheinflatorpullcordisfreeandnottangled.Ifyourjackethasmarkedfoldlines,foldinnumberorder,ifyourbladderdoesnothavemarkedfoldlinesrepackasyounotedwhenunpackinginStep1.
Step Nine – Complete Self Test FormEnsureallinformationontheselftestformhasbeencompletedandthatyouhavesignedand datedit.Takenoteofthedateofthenextselftestandrecorditsothatyouwillnotforgettotestyourjacket.Itisagoodideatoplacethiscertificateoracopyinyourboatinthecasethatyouhaveanon-watersafetyinspection.Thiswillbeyourevidencethatyourjacketisinaserviceablecondition.
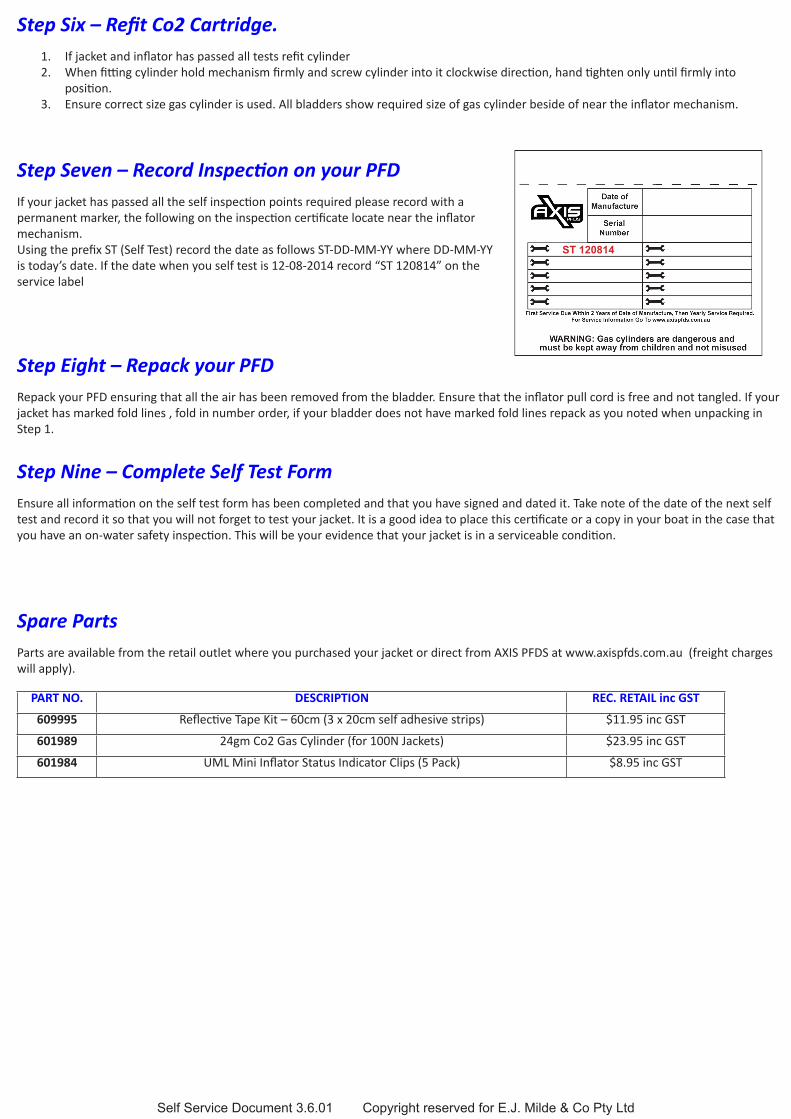
Step Seven – Record Inspection on your PFDIfyourjackethaspassedalltheselfinspectionpointsrequiredpleaserecordwithapermanentmarker,thefollowingontheinspectioncertificatelocateneartheinflatormechanism.UsingtheprefixST(SelfTest)recordthedateasfollowsST-DD-MM-YYwhereDD-MM-YYistoday’sdate.Ifthedatewhenyouselftestis12-08-2014record“ST120814”ontheservicelabel
Self Service Document 3.6.01 Copyright reserved for E.J. Milde & Co Pty Ltd
2 Oral Inflator Test Pass Fail2-1 Check oral inflator valve is operational2-2 Check oral tube for damage or cracks
3 Bladder Test Pass Fail3-1 Inflate bladder by mouth, leave inflated overnight or at least 12 hours, after at least 12 hours check bladder
is still firm and there is no visible loss of pressure.
4 Cylinder Inspection Pass Fail4-1 Check cylinder is intact and not punctured4-2 Check cylinder for any sign of rust or corrosion, if present replace cylinder4-3 Weigh cylinder, record original gross weight (marked on cylinder) and actual weight4-4 Cylinder Check Record Gross Weight Actual Weight
5 Manual Firing Mechanism Pass Fail5-1 Visual inspection of the firing mechanism and safety clip
7 Record inspection of the PFD on your jacket using permanent marker8 Repack your PFD9 Complete self test form
AXIS Inflatable Jacket Self Inspection CertificateThis self inspection certificate is for recreational use only, NOT Commercial use PFD’s
Please carefully read the instructions on how to test your PFD, follow them carefully and record your results on this form. If at any stage there is a fail, you must either replace the faulty component or if that is not
possible please send it to an accredited service centre for repairs. DO NOT ATTEMPT ANY REPAIRS YOURSELF.
Product Model Serial Number* Batch No and date of manufacture
I hereby certify that this PFD has been inspected and serviced in accordance with the AXIS annual self inspection instructions described in steps 1-9
YY MMDate of last service, or if it is the first, Date of purchase
*If no serial number is available use boat registration number or mobile phone with the prefix of either “ST” or name initials.
Check each step in the appropriate box, Pass or Fail or if not applicable (NA)
6 C02 Cylinder Pass Fail6-1 Refit C02 Cylinder 6-2 Replace green arming clip (UML Mini Inflator only)
1 General Inspection Pass Fail1-1 Check stitching, buckles and closures to see if all intact and working1-2 Visually check outside cover for any signs of wear or damage1-3 Open jacket and remove cylinder, inspect for rust or corrosion1-4 Check bladder is not damaged1-5 Check reflective tape is stuck down and not peeling away 1-6 Check oral tube is not damaged1-7 Check whistle, make sure it works when you blow in it. Only jackets made after June 2013 will have whistles
attached, if your jacket pre dates this, please disregard this step.