Resonance of Fate tells the story of the land of Basel, a towering society that is struggling to survive in a post-apocalyptic world. There's a lot to see if you are ready to explore every corner, and that's precisely what we'll help you to do with this guide. You'll find detailed information on the battle system, as well as information about each side mission and story quest. With us at your side, Basel's salvation is truly in your hands!
The heart of Resonance of Fate is its complex combat system. The first thing you need to realize is that you can and should visit the Arena location, right near the start of the game. There, you can be walked through numerous lessons that cover some of the same ground that we'll cover in the following paragraphs, only in an interactive manner. You can make as many attempts as needed to clear each of these lessons and it's absolutely recommended that you do so on your first trip through the game because it otherwise doesn't feature a proper tutorial system. Since the combat featured here is rather unconventional, you should definitely give yourself a proper start and visit the arena at the earliest opportunity.
Once you've cleared the tutorials in the Arena, your fun doesn't have to end. You can also stick around to fight tougher competitors for coins that you can use to purchase unique items. Again, time spent at the Arena will prove worth your while. If you place the Arena within the appropriate terminal effects, it's a great place to level up your characters (since you can fight some of the toughest monsters in the game there as you progress through the ranks) and to gather items from battle. Don't overlook it!
Two Types of Damage
There are two distinct types of damage that you can inflict in battle: Direct and Scratch. Both types are important, since you'll need to combine them in order to defeat any tougher enemies that you encounter.
Direct damage is inflicted using hand gun and grenade weapons. You must deal direct damage to kill every enemy that you encounter in the game, but there's a problem: most of your enemies have shields that you need to disable before direct damage is a reasonable possibility. Shields are particularly strong against direct damage (that's their obvious function), so you could find yourself spending several minutes whittling away at a shield unless you switch to a machine gun.
A machine gun deals Scratch damage. This is easily recognized because it appears in blue on an enemy's life meter. When you deal scratch damage, you should consider it temporary. That scratch damage doesn't actually harm an enemy unless you follow it up with direct damage, in which case the amount of your enemy's life meter that had turned blue from scratch damage will vanish. If you take too long to turn scratch damage
The Basics
When you encounter an enemy at random while exploring the world map, or as you advance through a dungeon, you'll be taken to a three-dimensional battlefield. Unless you're fighting your way through a key event, you can often escape by finding glowing patches along the edge of a given area. Any damage that you took will remain in effect, though, and the bezel crystals that allow you to perform your most powerful attacks and to sustain damage without dying won't be refilled. If you run out of bezel crystals, you will be unable to initiate heroic attacks (the best way to weaken and destroy your enemies) and every hit that you take will inflict a substantial amount of damage that could easily result in a "Game Over" screen. The only way to refill those crystals is to mount successful attacks on enemies that break through their defenses enough that they lose crystals of their own. If your characters find themselves taking damage and losing crystals, they can run around to try to collect shards and get back in the game, but by that point they've probably done enough things wrong that they're dead meat unless they manage to inflict the right sort of damage on a weakened foe in the general vicinity. Combat takes place in what you might call a turn-based manner. Enemies and heroes both have meters that indicate when they can attack. You can often cycle between characters when you get a turn. There's no cost to you if you'd prefer one character to attack instead of another, something that can prove useful as you try to set up Tri-Attack moves that we'll discuss in a moment. Generally you will get a turn and then an enemy will, but it's not always that simple. Every step that you take drains some of your gauge and charging weapons to attack does the same thing. Not only that, but enemies can interrupt you. Filling a meter completely is seldom an option because a foe might pick you off from a distance if you aren't smart about things. You can only be assured a proper turn if you initiate a heroic attack. We'll cover that in a moment.
into direct damage, that blue will vanish and you'll have to turn it blue again.
The obvious method to take out all but the weakest enemies in the game, then, is to start with scratch damage that weakens shields. Then follow that up with direct damage that turns the scratch damage into HP loss that forces shields and portions of the life meter to disappear. Then repeat the process in subsequent rounds until your opponent's life meter is toast. Even the toughest opponents in the game will fall to this strategy if it is properly applied, while even puny enemies could take ages to kill if you don't keep it in mind and put it to proper use.
Heroic Attacks
A heroic attack is a way to set up powerful combo attacks. Initiating a heroic attack will cost you a full bezel crystal, which is risky because you typically don't have many of those to spare. You need to make sure that when you use a heroic attack, you have a good chance of either finishing off your enemy or that you will inflict enough damage that a bezel crystal or two is restored to your own meter in the process. When you first initiate a heroic attack, you'll need to place an anchor. This anchor determines where your character will attempt to move. You can have enemies and walls between your character's current position and that anchor, but you need to be ready to compensate for such complications by leaping over them or by blasting them out of your way. When you have decided where to place the anchor, pressing the button again will begin the attack. Once a heroic attack has begun, an action gauge will rapidly drain until it is empty. Your character will run toward the anchor that you placed, moving in a straight line. You now can press the button again to leap into the air if you need to clear walls and other obstacles. You also can press the 'Action' button to fire your weapon. If you wait to press that button, your weapon will charge as your character's gauge drains and he or she reaches the anchor that you placed. Charged shots inflict more damage on your enemies according to the level of the weapon that you currently have equipped, plus powerful effects can periodically take place as you cycle up to higher levels, but it's not always best to worry about charging shots because the speed at which your weapons charge can vary depending on your equipment and your proximity to the enemy who you have chosen to target. You need to get a feel for which tactic will work best in each given situation.
Tri-Attacks
When you're going up against certain bosses or even weaker enemies with strong defenses, it can sometimes seem like your heroic attacks aren't doing much damage. When you find that to be the case, it's likely time for a Tri-Attack. To use a Tri-Attack, you first need to gain one or more Resonance Points. The number of resonance points that you have will go a long way toward determining the duration of your Tri-Attack. One point means that you won't get to attack for long, but two points is much more reasonable. You can use more points beyond even that, of course, but they're hard to acquire because of the manner in which resonance points are obtained. To gain resonance points, you have to use heroic attacks without interruption, one per character turn. Essentially, your characters start each battle positioned on a line. Picture that line as A, B and C in order from left to right. If you have character A use a heroic attack, he or she needs to pass between B and C at some point. Otherwise, you'll lose most or all of any resonance points that you had previously acrued. When you're moving in the required direction and can expect to gain a resonance point, your character's line between the current location and the anchor that you are placing will appear blue on-screen to indicate that all is well. Then the next character needs to move in a manner that causes another blue line to plot his or her course and so forth. If you take a turn without using a heroic action or if you run out of bezel crystals, resonance points are quickly lost and you'll have to start fresh. Just walking around to position yourself for a better heroic attack will also quickly drain your resonance points, so you need to be careful.
The easiest way to initiate a quick Tri-Attack maneuver is to have character B rush toward the diagonal left at the start of battle, then have character A head to the diagonal right and then have the third character initiate the Tri-Attack on his or her turn. Things get more complicated in subsequent rounds as your characters maneuver the battlefield. When you do decide to initiate a Tri-Attack, you'll see a triangular outline appear on-screen to indicate where the characters will run while performing the attack. Before you actually start the charge, you can press the shoulder buttons to cycle between the three impacted characters to determine who will lead the rush. This is adviseable if you want to switch to a machine gunner to soften the enemy troops up before your hand gun users follow up with direct damage, for instance. It's also important to cycle characters if your character who is about to initiate the Tri-Attack routine isn't near enough to an enemy to actually start out with much damage. You want to begin your rush with someone who has a good chance of quickly going on the offensive, rather than running around and draining energy without anything worthwhile happening. Wall and enemy obstacles are a final consideration. Hopefully, your triangular path takes you around both of those things, but if not you should start with a character who is about to hit something bad so that you can immediately instruct him or her to leap into the air. Otherwise, your Tri-Attack could quickly lose its impact as characters are forced to abandon their efforts. Once you have your triangle positioned where you want it and all is well, press the button that normally initiates a heroic attack. In this case, a Tri-Attack will follow. Your characters will run the permiter of the prescribed triangle and you'll swap rapidly between them, giving each one of them commands as the others keep moving. The Tri-Attack persists until your characters have expended their meters or run into obstacles.
Final Tips
Once you have a feel for the flow of combat, you can start planning useful attacks. As you do, you'll likely come to the realization that healing kits aren't particularly useful. If you're fighting well, you'll fare better by remaining on the offensive. In most cases, you'll be able to use heroic attacks without having to worry about running out of bezel crystals and you'll probably use two or three Tri-Attack maneuvers in nearly every boss battle.
The last thing we would add is that you need to remember when to charge and when to release quick bursts of hand gun fire. Tougher enemies often have shields all around their bodies. A powerful, charged machine gun blast may only remove one shield or it may disable most or all of them. Just because a bunch of shields have turned blue doesn't mean that you've almost won, though. When you follow up with your handgun, pay attention. A host of blue shields typically means that you should fire a bunch of weak shots to disable each one rather than causing only a single shield to disappear. A huge shield encircling the enemy, on the other hand, means that a single charged shot is in order.
We'll reference specific strategies for tough encounters in our walkthrough, of course. With the information we've just provided, you should have no trouble unraveling the secrets of Basel.
There's a lot more to Resonance of Fate than you might imagine, thanks to an unusual combat system, some quirks to the leveling system and maps that beg exploration and interaction in unusual new ways. You should read your manual if you're having trouble, of course, but we're also here to explain how you can turn the game's basics into your friend as you work through to the end.
Gun Customization
While leveling up your characters is a great way to make them a formiddable presence in combat, it's not the only means to that end. Weapons also are key. As you progress through the game, you'll find all sorts of pieces that can be added to your guns to improve their rate of fire, their power and the amount of ammunition that they can carry.
Upgrades add weight to the gun, so it's important that you don't make a gun too heavy for your characters to wield. Usually, this only matters if you're attempting to dual wield and your characters haven't leveled up enough, which is why we stressed that you should try to level characters up across all disciplines. That way, you can support any special upgrades that you make.
Pieces for your gun typically are found by crafting at one of the shops in the game. You need to bring components that you have found by defeating enemies and those can be turned into equipment for your gun, provided you have the rubies to pay for the crafter's services. Pieces come in a variety of types and you'll see diagrams depicting their general shape and attributes before you make a purchase. Pay attention to that chart, and especially note the connection types.
A given piece may have a '+' sign on the side, for example, or it may have the outline of a '+' sign. There's a difference. The actual '+' sign is like a circular button on the top side of a LEGO piece, while the outline is like the cylindrical underside of another LEGO piece to which it will connect. If those two match, that means that the two pieces can attach. Many pieces will have two or three types of connection and will have vary in length, so you need to keep all of that in mind as you purchase and build your weapons.
There are a few types of piece: barrels, extenders, ammo clips and sights. These for the most part have one or two connection types, so you should quickly get a feel for what will work where. As you look in the crafting shop, you may find a piece that looks spectacular, one that you would like to buy right now, but the construction of such pieces often requires components that you don't have yet. If that's the case, don't worry; you'll naturally collect those precious components as you progress through the game and explore the lower
Level Progression
It's important to recognize that the level-up system in Resonance of Fate isn't going to function in the precise manner that you might imagine. You don't gain levels based on the number of enemies defeated. Rather, you gain experience points for each attack. This can lead to situations where a character who is weak in a given discipline can go up a level or two in a single fight before even one enemy has fallen. Your level that displays on the status screen represents the combined total of your degree of proficiency with three weapon types: hand guns, machine guns and cases. These level up independently of one another, so if you're constantly using the hand gun while ignoring your machine gun, for instance (common during the early portions of the game when only one machine gun is available to be shared between all three characters), you could be making things harder on yourself than they need to be. Make sure that you switch out weapons frequently so that all three weapon disciplines are advancing at a similar rate. The reason for this may not be immediately obvious. Each character seems to have a natural affinity with one type of gun or another, and it might seem that you'd want to keep the character equipped with that weapon so that he or she can specialize in it. However, that would mean that you miss out on HP and skill bonuses that come with each level gained. When a character goes up a level in any weapon discipline, he or she gains somewhere around 60 to 70 HP and the ability to carry around more weight. Suppose that you're only leveling up your hand guns. It won't take long before most encounters are a challenge because you only have half the HP that you really should given the number of battles that you will have fought. Around a third of the way through the game, you also gain the ability to dual wield, but if you haven't leveled up enough to carry around the weight that two guns require, you will have to level up for awhile before you can take advantage of that precious new talent. You shouldn't need to level grind much at all if you work through the game and manage your levels in a sensible fashion. If you're having trouble with enemies after using the strategies that we'll outline in our walkthrough of the game, though, level up a bit more and try again. Odds are good that you'll come out on top.
reaches of the tower. By the end of your adventure, you should be able to build pretty much anything you want with little difficulty.
As you advance through the game, always make sure that you're not neglecting your guns. If you're having too much trouble with a boss, odds are good that you can remedy the situation by leveling up your characters just a little bit and by tweaking your gun so that it's more effective.
Map Exploration
Exploring the world of Basel is no less complex than the leveling system. Essentially, you're on a huge tower with multiple levels, like a stack of plates attached to and balanced on a mop handle and twigs. Buildings and dungeons are positioned along the various plates, but you can't visit them until you unlock spaces on a grid fashioned out of Energy Hex pieces.
You most commonly gain those pieces by defeating enemies. There are several shapes and types of hex pieces available to you. These will allow you to clear typical space, or to set up bases where you can rest and save your progress, to unlock areas that are central to plot progression and to trigger powerful effects on the map.
The Energy Hexes that you'll need to use in order to access special buildings are typically doled out in story sequences, which is the game's way of preventing you from progressing too far until you are ready to do so. Along with Core Lift passes, the availability (or lack) of Energy Hexes means that you should almost never have to worry about encountering tougher enemies than you can theoretically handle at any given point in the game.
There are exceptions to that rule. As you explore the maps, you'll occasionally come across glowing red spaces on the grid. These should be approached with caution because they represent a challenging enemy encounter. You should make sure to save (if you haven't recently) before entering any of those hex spaces, lest you find yourself overwhelmed by a powerful foe. There are rewards if you triumph over such nasties, of course.
Also placed along the various levels of the tower are elevators that will lead you up and down one floor at a time. Like any other space on the grid, they must first be unlocked by placing hex pieces. Then you're free to use them to instantly shift levels. As you work through the game, you'll become intimiately familiar with elevator and lift locations. You'll also become a master of navigating what at first can seem like a confusing mess of a world map.
Terminal Activation and Effects
Terminals that are placed throughout the land serve as a final point of interest on the maps. Once activated, these terminals can have an effect on connected spaces on the grid, depending on how you place Energy Hexes in the adjacent areas. As an example, a terminal might allow you to gain an increased amount of experience from enemy encounters, or the rate at which enemies drop precious loot could be improved. By paying close attention to terminals, you can make things easier on yourself in the game's later portions. You can also combine effects if you find terminals that are close enough together. When you first are exposed to the concept of terminals, it can seem rather abstract. You need to learn to master them, though, or you will have a much harder time with certain side quests. The first rule of terminals is that you must activate one by placing standard hex pieces on the map. This is easy enough. However, you next need to connect available terminals to what is known as a Station Hex. Not every terminal needs to be connected to a distinct terminal, since you can chain terminals together, but at least one Station Hex must be connected to any grouping of terminals. You will most commonly obtain these Station Hex pieces in the Ebel City guild. Every Station Hex can be obtained by trading five Energy Hex pieces of any one color. For example, you might trade five blue Energy Hex pieces for one blue Station Hex. When you then place that station on the map, you can use Energy Hex pieces of the same color to connect your station to a nearby terminal that is available.
Resonance of Fate is divided into chapters and to finish each chapter, you'll have to satisfy the conditions of one or more story quests. These become available as you meet certain requirements. Chapters tend to conclude once you've visited a dungeon and defeated a boss, but your quests may involve other objectives. For example, you may need to unlock a new area and meet with a character before your true mission becomes clear.
As you work on those main quests, you'll also be able to visit Guild buildings placed throughout the land. There are several of them, each with a bulletin board where residents place job postings. You may also find bulletin boards elsewhere. When you check those boards, you'll find special assignments.
Quests are available only within the chapter in which you first encounter them. Once you clear all story missions within a chapter, you'll have the option to continue to the next chapter. You'll be notified if any side missions haven't been completed and you can choose to delay chapter advancement until you've completed the side missions, which we recommend.
Side quests that you complete award you with Hunter Points that allow you to receive loot from the Guild, just as most story quests do. You'll receive a package at the mailbox in front of your home base for every 100 points that you gain. Completing side quests also allows you to pick up powerful bullets and upgrades for your gun, all stuff that will make boss encounters go more smoothly. Those side missions may take extra time, but the rewards are sometimes worth it and you'll get more out of the game if you spend the time to explore and complete each one.
Connecting a terminal to a Station Hex doesn't necessarily activate that terminal. Each terminal has a requirement listed that must first be met. You might need to connect thirty spaces on a grid to a given terminal before it will come to life, for instance. Once you do, you'll activated that terminal and you will benefit from its effects any time you are on a space within its area of impact until you disable it by placing a hex of a different color over the top of it (a useful trick if you enable a terminal and find that you don't appreciate its effects on a connected area). When you have activated one terminal, the next logical step is to activate additional ones and to combine their effects. The way to accomplish this feat is to expand your area of impact so that it crosses over another terminal. When that happens, the two will be combined and both effects will be in place. However, the requirements increase as you add new terminals. For example, you'll need a total of 75 blue spaces active on the map if you connect a terminal requiring 30 blue spaces to another one requiring 45. If you connect the two and don't have enough total spaces on the map available, both connected terminals will be deactivated until that issue is remedied. Therefore, it's important to make sure that you have plenty of pieces of the desired color in your inventory before making a connection that produces a new threshhold. A final point to keep in mind is that terminals can be connected to one another even if they aren't on the same floor. To do so, just connect a terminal to an elevator on one floor, then go up or down using that elevator to the next floor. Connect the end of that elevator to a terminal on the new floor and keep going from there. This is a powerful strategy that can really increase the amount of loot and experience you gain from battles, but remember that it won't work with Core Lift spaces. Only elevators can be utilized in that fashion. If you capture a dungeon area within the effect of terminals, every space within that dungeon will benefit from those effects.
Resonance of Fate is broken into chapters and those chapters are completed by clearing story-centric missions. Each chapter also contains side missions that will be available only for the duration of that chapter. To make things simple, we will outline all missions as we walk you through each of the game's chapters. You'll find specific information on how to finish each available quest, but you can always skip them if you're not interested. Just remember that once a mission vanishes, it's gone for good. In this walkthrough, we'll give you the information that you need to enjoy every major event available in the game from its opening moments to its closing credits. If you're ready to go, let's get started!
Following the opening cutscene, you'll appear on the front steps of a building. This is your home base and you will be returning frequently throughout your adventure to come.
You'll be informed that you can access a story mission from the Mission Memo screen, which you should go ahead and do immediately. There, you'll receive the first of many story missions, 'Star from the Heavens,' and you'll be able to begin your proper adventure.
Star from the Heavens
Travel to Cafe Chelsey, which will require that you make more of the map available to the northeast from town. When you arrive there, you'll receive the Attache Case. Take the case to Pater's Manor in Chandelier, which you can reach by using the elevator at Core Lift 1. Make sure that you enter his home at night, as instructed, or you won't be able to meet with him.
Head down the steps and an old man will give you directions to the Cafe: just outside town, past Rainy Bridge. Since the bridge is closed, you need to head downhill to the Guild. Head along the stairs leading toward the lower left, into the next portion of the town.
»
»
Reward 25 Hunter Points, 25000 Rubies
Location Pater (Level 3 - Pater's Manor)
Objective "I would like you to visit the Cafe Chelsey on Level 4, collect a parcel from Sullivan, and then see that it is delivered to my home in Chandelier. However, my duties keep me occupied during the day, so I may see you only at night. I'm sorry, but please time your arrival accordingly."
(Above Left) Much of your progression through the game will unfold because of missions such as this one. (Above Right) Meet with the Familiar Staffer just in front of the Guild building.
As you proceed left, you'll enter into conversation with the Familiar Staffer. He tells you of a bulletin board posting. Head inside the guild and left toward the bulletin board. The Veteran Staffer will stop you briefly to explain the whole system. When that conversation ends, check the board to find an assortment of available new missions.
Bridge Restoration
Activate the map leading northeast from Ebel City. You should be able to do so using only two hex grids.
Lex's Knives
Once you talk to Rose in Ebel City (she will be near the guild, either on the ground level or on the slope just above it) and receive the Lex's Knife Set item, go to the world map and cross over the restored bridge to the northeast. There, you can enter the Core Lift 1 area. Lex is wandering around near the entrance, so talk to him and hand over the knife set to satisfy the requirements for this mission. You'll receive your reward immediately and the mission is complete.
Pest Extermination
Reward 5 Hunter Points, 2000 Rubies, Escape Hex
Location Familiar Staffer (Level 4 - Ebel City)
Objective "Rainy Bridge is in need of urgent repairs, and everyone's up in arms over the blocked artery. We need someone to patch broken grids with Energy Hexes so that Rainy Bridge becomes useable again. Once you've confirmed the mission details, come see me. I'm the good-looking dude standing in front of the Guild."
Objective "My son left something at home by accident, and I need someone to deliver it to him. You have to come see me first, though. I'll be waiting in front of the Guild. This is urgent!"
Northeast of Ebel City, past the repaired bridge, you'll find a red hex panel with an exclamation mark over it on the map. Entering it will immediately trigger a battle with several dogs. Defeat them to automatically receive your reward.
Three new quests should mean that you have a better idea of where to head next. You'll want to start by leaving the Guild to meet with the Familiar Staffer. He'll address you as you appear on the new screen. He's standing just left of the doorway, so talk to him and he will brief you. He'll also explain how Energy Hexes work, so pay attention to that mini-tutorial. When you've read through that, you'll receive Perfect Aid(3) from the staffer. He recommends that you head to the arena. Now you should exit to the world map.
Remember that when you are on the world map, moving the analog stick around will allow you to be attacked by enemies. For now, seek out such random encounters as a means of strengthening your characters and obtaining hexes that you can use to build a path to the right along the bridge. It's also a good idea to visit the arena if this is your first time playing the game, as that's the best way to get a feel for the battle system. You can follow through 16 mini-lessons and we absolutely recommend that you do so in order to save yourself frustration down the road. Then you can resume your main quest.
(Above Left) Time spent in combat will allow you to earn hexes and experience. (Above Right) You can place the hexes toward the right of the area where you begin to slowly bring back the bridge.
As you place hexes along the lower right of the circular area where you first appear, you'll cause new hexes to activate. This can allow you to earn items so that you can continue expanding the available map. Keep in mind that the goal is to turn the impassable white-colored portions of the grid to a more pleasing gray, which then allows you to explore further. You should be able to proceed toward the northeast and reach Cafe Chelsey after defeating only a few enemies.
When you arrive at Cafe Chelsey, there's a cutscene and you'll receive the Attache Case. Another short cutscene follows and then you're returned to the world map. Return to Ebel City. If you've made progress on your available side quests, check in with any people from whom you accepted those quests to receive your rewards. As the game will remind you, missions aren't really complete until you've collected your rewards. When the first side missions are completed, new ones appear to replace them and keep you busy. In each chapter, it's important that you regularly check in at a Guild to earn your rewards and to see what new ones might be available. You can only have three active side quests at a time, so keep checking until no new ones come to replace the old ones.
Reward 5 Hunter Points, 700 Rubies, Dot Sight
Location Allcott (Level 4 - Ebel City)
Objective "Could somebody please do something about the pack of Stray Curs roaming around on the other side of Rainy Bridge? So dangerous, they are!"
Head to Theresa's Manor, which is located just west of Pater's Manor. Near the entrance, you'll find a maid standing toward the left. Talk to her. She has lost a watch that she wants you to retrieve. You'll need to exit to the world map, then head toward Cardinal Jean Paulet's manor. It's not accessible just yet, but you can travel to the lower right portion of the available map and set a hex there. You'll receive the Broken Watch item, which you should then return to the maid at Theresa's Manor.
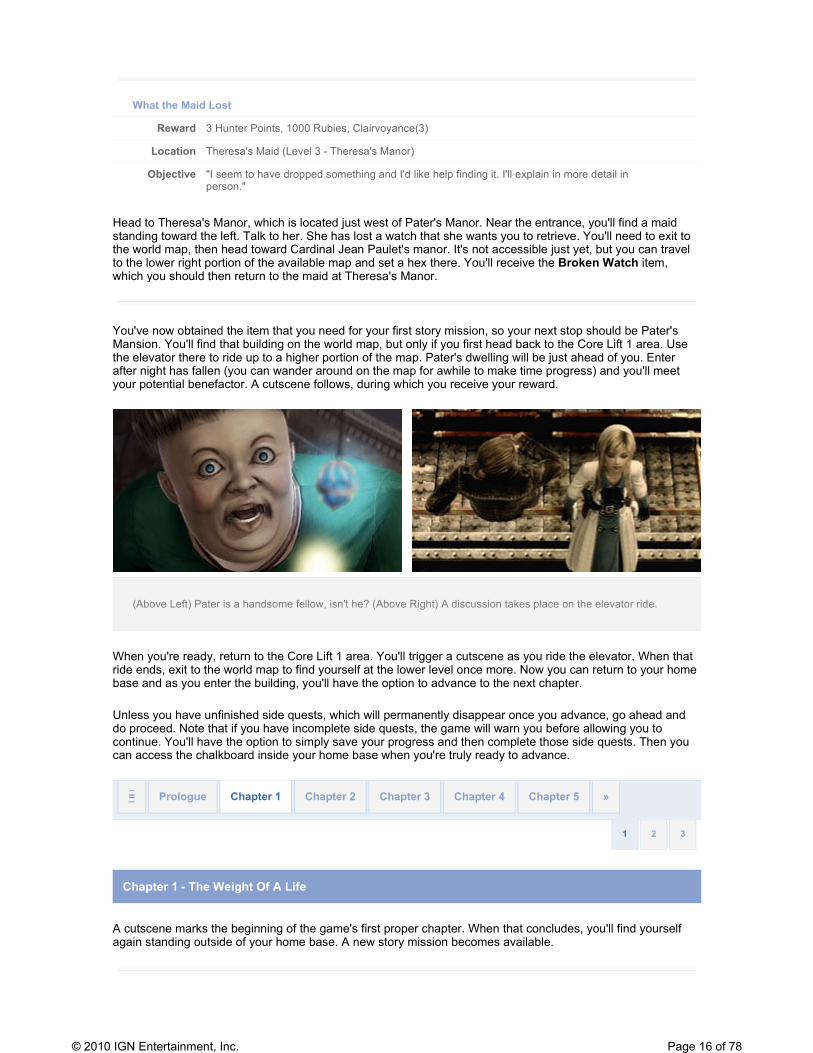
You've now obtained the item that you need for your first story mission, so your next stop should be Pater's Mansion. You'll find that building on the world map, but only if you first head back to the Core Lift 1 area. Use the elevator there to ride up to a higher portion of the map. Pater's dwelling will be just ahead of you. Enter after night has fallen (you can wander around on the map for awhile to make time progress) and you'll meet your potential benefactor. A cutscene follows, during which you receive your reward.
(Above Left) Pater is a handsome fellow, isn't he? (Above Right) A discussion takes place on the elevator ride.
When you're ready, return to the Core Lift 1 area. You'll trigger a cutscene as you ride the elevator. When that ride ends, exit to the world map to find yourself at the lower level once more. Now you can return to your home base and as you enter the building, you'll have the option to advance to the next chapter.
Unless you have unfinished side quests, which will permanently disappear once you advance, go ahead and do proceed. Note that if you have incomplete side quests, the game will warn you before allowing you to continue. You'll have the option to simply save your progress and then complete those side quests. Then you can access the chalkboard inside your home base when you're truly ready to advance.
Chapter 1 - The Weight Of A Life
A cutscene marks the beginning of the game's first proper chapter. When that concludes, you'll find yourself again standing outside of your home base. A new story mission becomes available.
Since you're within convenient reach of the Guild, you might as well head there before you worry about the story mission. Enter the Guild and check the bulletin board to see about new missions. You should find two more waiting for you.
Power Station Checkup
Build a path to the Hughes Power Station area, located due south of Ebel City. You'll actually have to look first to the east, where a brown roadblock prevents you from building. The hex piece that you need to clear that area is rewarded to you when you complete 'The Garden Party,' so do that first and then you can clear the path and make a hex trail to the power station.
An Act of Kindness
Meet with Daniel during the day, in front of his shop. He wants dolls. Head back to your home base. Enter the bedroom on the lower floor and in the back left corner you will find the Bongo the Clown item. Take the doll back to Daniel for your reward.
Meet with the people who dole out those quests if you plan to make their day (though Daniel's is the only job that you can complete just yet), then travel to Theresa's Manor. When you enter, you'll find a guard standing at the door as usual. Talk to the guard and if you've come during the daytime, he'll let you pass through.
Reward N/A
Location Theresa (Level 3 - Theresa's Manor)
Objective "Would you care to join me for tea sometime? Any time will be fine if it's during the day. I will be waiting at my manor in Chandelier."
Reward 5 Hunter Points, 1000 Rubies, Sonic Chug(5)
Location Familiar Staffer (Level 4 - Ebel City)
Objective "The output from the Hughes Power Station has been faltering lately. I have to investigate it, but I need your help. I'll explain what needs to be done, so just come talk to me. The nice guy always in front of the Guild? That would be me."
Objective "I want to pretty up the shop a little. It's kind of barren as it is. I'll be in front of the shop during the day. Come see me then. I have to tend the shop at night, so that won't do."
(Above Left) It's not a bad idea to start the chapter by performing errands for the local populace. (Above Right) Cardinal Theresa will give the party members a Flower for their trouble.
Inside the manor, a cutscene follows. You'll receive the Flower once it concludes and a new story mission (one with an actual reward) will become available. You'll appear outside the manor and will then receive Energy Hex(4) from the guard, as well as a valuable Station Hex that you can and should use to complete the 'Power Station Checkup' side mission. Activating terminals and making use of their effects will play an important role in this game, so pay attention to the advice that the game gives you and look to our 'Basics' section if you later find yourself needing a refresher.
A Battlefield Revisited
You'll begin this mission with the Flower that you need to complete it. Head back out to the world map outside of Theresa's Manor. Now ride the central elevator back down to Level 4 and head south from there. You can use one of your new hex pieces to clear the way to a new region, if you haven't already done so while completing one of the optional missions. Once the way forward is clear, head southeast to find the elevator to that upper level. Ride it up to Level 6 and then head northeast, using hexes of the appropriate sort to unearth the ruins of Lucia. Enter the ruins and traverse them to reach your destination on the far side of the dungeon.
Now that you have some Energy Hexes, you can explore more of the map and more easily complete side quests. To reach the sixth level at this point in the game, you first need to head back down to the fourth level. The eastern area has an elevator that will take you to Level 6. If you haven't already done so in order to complete the optional 'Power Station Checkup' mission, use one of your Energy Hexes to clear an obstruction so that you can map a path to that elevator. Then ride it up to the sixth level after a brief cutscene. From where you first appear on this new level, the town of Lucia is located to the northeast.
Reward 25 Hunter Points, 20000 Rubies
Location Theresa (Level 3 - Theresa's Manor)
Objective "I'd like you to take that flower and place it on his grave in the town of Lucia on Level 6."
(Above Left) The elevator that you'll need to ride to the sixth floor is located to the east. (Above Right) Lucia isn't likely what you had in mind.
Lucia, as it turns out, lies in ruins. You'll have to unearth it using some of the Energy Hexes that you received, and you'll have to spend a few more hexes just to get there. Once you have reached the city and revealed its location, you can enter it. However, don't expect a peaceful visit. You'll appear on dungeon map hex.
Walk along that dungeon map hex toward the upper left and you'll come to the Downtown area. When you enter that, you'll need to be ready for a series of fights. Note the Abandoned Energy Station tile ahead of it. There, you can rest and save your progress. Since enemies will attack you around this area, it's a great place to build up your skills for the tough encounters ahead.
When you are ready to proceed, enter the Downtown tile. You now need to progress along a short pattern of grids, but each grid contains an enemy encounter. There's nothing particularly challenging about these encounters if you're good at fighting by now, particularly if you leveled up your skills a bit. When you finish a given fight, you won't leave the battlefield but will instead find yourself standing around where you just defeated your foes. Look to the upper right side of the screen and you'll see the grid along which you are traveling. It's color-coded. If you've gotten turned around and aren't sure which way advances through the dungeon and which way retreats, you can compare the color coding against the circle and arrows that appear at your character's feet. That way, you can be sure that you're headed in the right direction.
(Above Left) This is one boss who knows how to make an entrance! (Above Right) Standing on the high ground doesn't really make you any safer.
Once you reach the end of the area, you'll find yourself battling a boss monster known as Tar Man. It's easy to tell when you're facing off against him because there's a preliminary cutscene. Hopefully, you've made it this far without taking any real damage, as you'll want to start this fight in the best shape possible. Your nemesis attacks with two of the explosive Drum Carrier enemies in close proximity, so target and destroy those first to limit the number of enemies with which you must contend. You should be able to have your handgun carriers take out one of them apiece, leaving you free to heal party members or to weaken Tar Man.
To win this battle, what you really want to do is set yourself up for a long-lasting Tri-Attack. You can easily drain half of your opponent's life meter in that fashion, then finishing him up is relatively easy because you can have your machine gunner wear down his shields, then move in quickly to finish off one shield at a time with
handgun damage. If you're smart about each round and make sure not to let your own shields drop too low, this can be an easy fight.
Once you win, you can progress into the next portion of the town's ruins. Doing so will trigger a cutscene and then you'll receive your reward for completing the mission. You'll reappear in the area where you left the flower. Now head toward the sparkling point toward the back of the screen. Search there to find the Fetid Crystal. Far along the right side of that same screen, there's another sparkling point that's more difficult to see. Search there to find the Multi-Aid R-S item. Now you must backtrack through the Downtown area, back toward the entrance. Enemies will have reappeared along the way, so be ready to deal with them as you make your way back to the entrance.
Back on the world map, make your way to Level 4 and witness a cutscene along the way. When you arrive, head to Ebel City. Return to your home base and advance to the next chapter.
Chapter 2 - Blackout
Following a cutscene, you'll appear inside your home base. A new story mission is available.
Blackout
This story mission becomes available as Chapter 2 begins. Just travel to the Hughes Power Station, as instructed. It should already be available to you if you completed the optional 'Power Station Checkup' mission first made available in Chapter 1.
Leave your building and the Elderly Man will initiate a tutorial on terminals. When that concludes, he'll give you Energy Hex(4) and Metal-Coated Rounds(50) to use as you see fit.
(Above Left) Even heroes in RPGs need to relax once in awhile. (Above Right) The elderly man who hangs out near your base will provide you with useful info and items.
Before you head out onto the world map to put your new gear to use, check the Guild for new missions. You'll find three new ones available immediately.
Reward 25 Hunter Points
Location N/A (Level 4 - Hughes Power Station)
Objective "Head to the Hughes Power Station on Level 4 and restore the power."
The Papa Gremlin monster apparently attacked the familiar staffer's father, somewhere near the Cafe Chelsey area. During the attack, a precious trinket was lost. Head out onto the map and you'll see a red tile near the cafe. Make the tile available using your Energy Hexes if needed. Enter it and defeat the monster that waits inside. The Papa Gremlin has strong defenses, but he's joined by weaker fellows. You can spend one round assaulting him head-on and building up resonance points. Then from there, you can defeat his cohorts to keep your meter from dropping too low. Then finish him up with a second round of powerful attacks to earn the Fountain Pen. Take it back to the staffer to collect your reward.
Salvage Hunt
Izzy is the fellow that hangs around on the far right side of the screen where you find the Guild, at the base of the gently-sloping staircase that leads up the hill toward your home base. Talk to him and he'll tell you that he needs some Scrapped Machinegun MS items. He wants a total of three of them. Talk to him again and he'll mention that the Machinegun Gears at the Hughes Power Station have them if you're up to harvesting them. Do so when you visit the area for your story-based mission. You can exit and re-enter the first section a few times to safely gather the goodies. Then bring the items back to Izzy for your reward.
Lost in the Darkness
Charles is found on Razzle Street as it curves back toward the lower left after winding its way past the shop where you can upgrade your weapons. Talk to him and he will explain that he has dropped his notebook and wants you to find it for him. The information that he gives you at first is rather vague, so talk to him again a few times. He'll reference meeting with a redhead at Cafe Chelsey and a blonde at Core Life 1. Talk to the person at the lift and there's no sign of the notebook. Head to the cafe. There, you'll find Dingy Notebook along a bench at the far left side of the area. Take that with you back to Charles and hand it over for your reward.
On the world map, head for the power station. There's likely a row of cones standing in your way. Brushing against one of these will initiate an attack with some enemies that you shouldn't have much trouble defeating. Then you can enter the station itself.
Reward 5 Hunter Points, 1500 Rubies, Compact Scope a
Location Familiar Staffer (Level 4 - Ebel City)
Objective "I have a job that might be a bit trivial. If anyone has the time, it'd be good if they could drop by. The buff dude always hanging around in front of the Guild, that would be me."
(Above Left) Machinegun Gears are best defeated by first weakening their shields. Ignore the nearby curs at your own peril! (Above Right) With the last of the enemies defeated, you can find out what lurks within the station's deepest chamber.
Inside of the station, you'll find yourself immediately engaged in battle with a Machinegun Gear and some Stray Cur enemies. Though the gear is your obvious target, you can't afford to ignore the curs. They won't just disappear, even if you manage to defeat the machinegun ahead of them, so you might as well take out the animals near the start of the fight. Have Zephyr run forward and hit the machinegun with some blasts to lower its shields, then follow up that attack by having your other two fighters rush in with handguns blazing. In that initial rush, make sure that you take out the dogs and deal some good damage to the machinegun, so that you're left with only the main weapon to worry about in successive rounds. Finish it off carefully and you'll likely receive a Scrapped Machinegun MS that you can take back with you to Ebel City to satisfy the terms of the 'Salvage Hunt' side mission. You can keep exiting to the world map, then re-entering and defeating the same enemy to quickly build up three of the item.
When you've satisfied the conditions of the side mission, or if you've decided to worry about it later, you'll be able to continue deeper into the power station while battling more enemies of a similar sort.
Once you have almost arrived at the back end of the power station, you'll find yourself facing three of the Machinegun Gear enemies at once, along with some hounds. During this battle, it's especially important that you keep your wits about you. Try to take out the dogs quickly or they'll prevent you from performing the powerful attacks that you need to use in order to dispatch the machinegun enemies. As usual, the best way to hit these tanks is to start with Zephyr's machine gun to drag down the shields, then follow that up immediately with your most powerful handgun user and then finish up with your third character. This strategy works because you'll often be able to refill part of your action meter by dealing so much damage in short order and that will prevent you from falling into a weakened state where enemies can easily eliminate you.
Clearing away that set of Machinegun Gear enemies will allow you to reach the final portion of the station, where you will find yourself battling the area boss.
(Above Left) Your opponent has little in the way of protection if you sneak around behind him. (Above Right) Set up a Tri-Attack if you can to really inflict some damage.
Tesla Tortoise is shaped like half of a bubble, with a powerful wall of armor that encases most of his fragile
inner core. If you try to fight cautiously, you're probably going to die a lot. The trick to defeating him is to make long rushes in a triangular pattern. Start with Zephyr, as usual. Have him rush diagonally left or right past the tortoise so that he stops near the far wall. He can pump a lot of ammunition into the enemy that won't do long-term damage, but that's fine. Follow up that initial attack with a flurry of shots from one of your other characters, then repeat once more.
As you fight, make sure that you're moving in patterns that will allow you to build up Resonance Points, the better to initiate a Tri-Attack. You should be able to keep a healthy distance from the tank as you work your way around it, chipping away slowly at its defenses. When you have enough points, then you can mount an all-out attack and really do some damage.
You'll notice as you fight that the tank has a fragile back side where you can do more harm with your shots. Don't be tempted into getting too close, though, or you'll be pelted with laser shots that quickly build up Scratch damage. The way to easily win the fight is to make sure that you remain on the offensive and deal enough damage with each round to renew gems so you can continue attacking. Don't even think of standing still to fire unless you find yourself left with no choice in the matter. Just keep rushing and use Tri-Attack combos when you can and the tank will go down with little effort on your part.
Once the tank is destroyed, there's a cutscene and you'll receive your reward for completing the mission. Fight your way back to Ebel City. If you want, you can stop along the way to explore any areas of the plant that you may have missed on the way to the boss. You can find items such as the MG High Barrel by breaking open some crates in the blue section toward the upper right of the grid. When you finally return to your base after the trip to the power plant, you'll view a cutscene and then can choose to advance to the next chapter.
Chapter 3 - A Flower
Following a cutscene, you'll receive some Energy Hexes and a new story mission becomes available for the new chapter.
For Art Enthusiasts Only
To meet this objective, simply ride the lift up to the third floor and travel to Garigliano's Manor. You'll need to clear the way using brown Energy Hexes. When you have done so, enter the building to trigger a cutscene. You'll receive credit for clearing the mission once that cutscene concludes.
Head next to the Guild and you'll receive several optional missions to keep you busy throughout the remainder of the chapter.
Objective "Those who appreciate beauty, come to my manor in Chandelier! I have a job fit for only those who truly understand beauty! Show me beauty, and the job shall be yours!"
This mission is automatically open to all Hunter characters such as yourself. To complete it, all that you need to do is defeat the enemies that appear on the red tiles near the elevator leading to Level 6 (southeast of Ebel City). You should have no trouble defeating them using the same general strategies that have allowed you to reach this point in the game.
A Father Missing
Talk to the familiar staffer in the usual spot. He'll mention that his father, Allcott, has gone missing. You're supposed to find the man and to ask him to return home. The staffer mentions that he spends a lot of his time in the town's shop but hasn't been spotted there lately. Enter the guild and talk to Adolfo who stands just to the lower side of the bulletin board. He'll mention seeing an old grandpa type at Cafe Chesey, which is where you should head next. When you arrive, you'll see the old man looking at the skyline. Talk to him and he'll tell you to report back to his son. Return to Ebel City and do so to receive your reward.
The Effort to Stand
Talk to the gentleman who needs your assistance in the guild. He'll be standing by the table along the bottom edge of the screen during daytime. He'll offer you his business card, which you should accept to add Business Card (Eng) to your inventory. Your task is to pass it along to a top-class engineer. The engineer in this case is Izzy, who you should be able to find by heading up the ramp just to the right of the Guild. Near the top, you'll find Izzy standing and looking out over a railing. Talk to him and hand over the card. That's all there is to the quest. You'll receive your reward immediately.
When you're ready, travel to Core Lift 1 and use that to ride up to Level 3. There, you can travel toward the left and place some more hex pieces to map a way to Garigliano's Manor.
active with many sightings reported around the Core Lift on Level 4. The terrorist threat must be neutralized. Hunters in the area are to aid in their suppression."
Reward 5 Hunter Points, 4000 Rubies, Compact Scope B
Location Familiar Staffer (Level 4 - Ebel City)
Objective "My dad's gone missing! Wanted: Hunters to conduct a search. For details, come see me in person. I'm the dude always standing in front of the Guild."
Reward 8 Hunter Points, 4000 Rubies, Foregrip
Location Burnell (Level 4 - Ebel City)
Objective "I'm looking for an engineer. Someone who can build devices for rehabilitating the young miss's legs. I'll be waiting at the Ebel City Guild in the daytime."
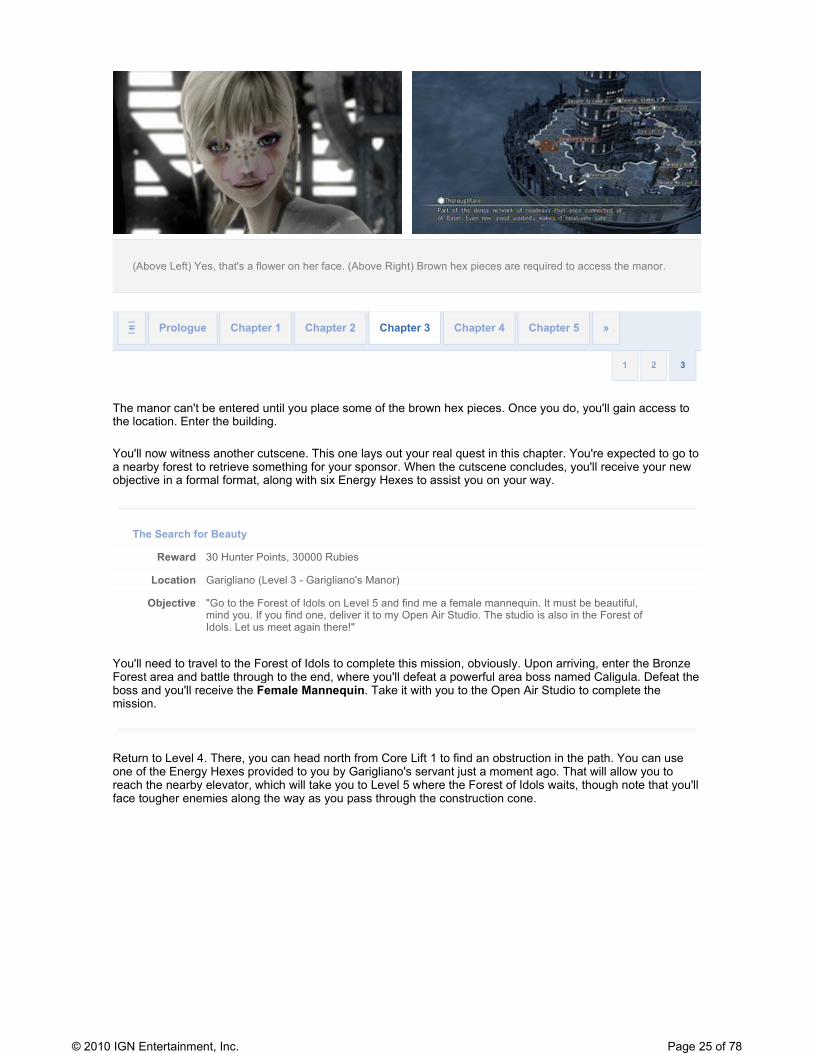
(Above Left) Yes, that's a flower on her face. (Above Right) Brown hex pieces are required to access the manor.
The manor can't be entered until you place some of the brown hex pieces. Once you do, you'll gain access to the location. Enter the building.
You'll now witness another cutscene. This one lays out your real quest in this chapter. You're expected to go to a nearby forest to retrieve something for your sponsor. When the cutscene concludes, you'll receive your new objective in a formal format, along with six Energy Hexes to assist you on your way.
The Search for Beauty
You'll need to travel to the Forest of Idols to complete this mission, obviously. Upon arriving, enter the Bronze Forest area and battle through to the end, where you'll defeat a powerful area boss named Caligula. Defeat the boss and you'll receive the Female Mannequin. Take it with you to the Open Air Studio to complete the mission.
Return to Level 4. There, you can head north from Core Lift 1 to find an obstruction in the path. You can use one of the Energy Hexes provided to you by Garigliano's servant just a moment ago. That will allow you to reach the nearby elevator, which will take you to Level 5 where the Forest of Idols waits, though note that you'll face tougher enemies along the way as you pass through the construction cone.
Objective "Go to the Forest of Idols on Level 5 and find me a female mannequin. It must be beautiful, mind you. If you find one, deliver it to my Open Air Studio. The studio is also in the Forest of Idols. Let us meet again there!"
(Above Left) You'll need to put down a lot of hexes to clear a path to the Forest of Idols. (Above Right) You can rest and save at the energy station before attempting the gauntlet to come.
On Level 5, you'll need to use a large number of hexes to clear the path to your destination. Note that there are red-hued tiles visible along the edges of this area. Though you can reach them, that's not advisable. The enemies that await are extremely powerful and will likely make mincemeat out of you at this time unless you have leveled up a substantial amount. Avoid them for now and simply focus on your primary mission objective.
When you reach the forest, use some of the beige-colored Energy Hexes to make it rise to the surface, then enter. You'll find yourself on another hex map, this one depicting the dungeon interior. Follow the path toward the upper region. There's an Abandoned Energy Station tile where you can rest and save, making this an excellent area to level up your characters if needed. When you're ready for your proper adventure, head toward the northeast area (labeled as the 'Bronze Forest') and enter to begin a series of battles.
For the fights in this region, remember that you can make things much easier on yourself if you start with a handgun user. Have him or her blast any barrels positioned near enemies, possibly taking out two or three before the fight even begins. Follow that effort up by having your machine gunner weaken remaining enemies, then clean up most of the stragglers with another assault from hand guns. By the time you reach the second round, you'll have pared down your foes enough that survival should be a breeze. The strategy works less efficiently as you progress, but you can still apply its general principles. Some of the enemies also carry explosive tanks on their backs to power their flamethrowers, so you can blast one enemy to inflict damage in an area radius.
(Above Left) Caligula has long arms made of blades that can knock your fighters from the sky. (Above Right) Stand your ground and fight within range of those blades only as a last (and probably futile) resort.
As you near the end of that forest area, you'll run up against a powerful machine named Caligula. He'll give you a lot more trouble than his weaker cohorts that you've encountered up to this point, so you need to play it smart if you hope to win. Start as usual by taking out his companions (first with a round of machine gun fire to weaken shields and then with handgun fire to finish the job) so that they don't demolish your life meters with their flamethrowers. Don't get too close to Caligula as you do so, though, since he can cut you out of the air with his blades even when you're in the middle of a combo. When the flamethrower guys are toast, you're finally free to turn your attention to Caligula himself. Continue to wear him down from a distance with long rushes that end with you outside of easy range of his blades, then perform a crippling Tri-Attack once you have enough 2 or 3 resonance points. After that, it's simply a matter of finishing off any shields that your Tri-Attack
When you win the fight, you can go ahead and proceed to the last of the hex tiles within this particular area. You'll trigger a cutscene, at the end of which you receive the Female Mannequin.
Now you can head back to the main forest map, where your first stop will likely be the Abandoned Energy Station so that you can rest and save your progress. Once you've done that, you can head to the Plaster Forest for a couple of easy fights and items from chests in the second hex. Then you're ready to visit the Open Air Studio.
(Above Left) You can head off the beaten path if you want to find extra items. (Above Right) Perhaps this fellow should be left alone with his mannequin?
Upon arriving at the Open Air Studio that was located in the southeast corner of this dungeon map as you entered it, you'll trigger a cutscene. When it concludes, you'll receive your rewards for completing the story mission, a Station Hex will be added to your inventory and a note will appear to let you know that you can now purchase and wear B-type clothing articles.
You've now done everything that you need to in order to advance to the next chapter. You can check the crate for an item in the Open Air Studio once the cutscene concludes, but otherwise you should head back to your home base to see a new cutscene and to advance to the next chapter.
Chapter 4 - This Tiny World
As usual, this chapter begins with a brief cutscene and with your first plot-based mission.
The Invitation
Travel to the Open Air Studio. Your arrival will trigger a cutscene and then the quest is complete.
Reward N/A
Location Jean Paulet
Objective "Please join me at Cardinal Garigliano's Open Air Studio in the Forest of Idols. You simply must join me in experiencing this excitement and rapture!"
Now is also a good time to see what optional quests are available for this chapter at the Guild. You'll find three new ones.
Rebel Suppression 2
If you take the elevator down to Level 6, you'll find several red hex tiles with exclamation marks positioned over them. Defeat enemies that wait at each tile to automatically satisfy the conditions of this quest. Note that these enemies are far more powerful than those you've been fighting in standard quests up to this point, so you may need to level up your characters a bit before attempting this particular quest. Winning requires frequent use of Tri-Attack maneuvers, since otherwise it's difficult to survive against the steady barrage of bullets that your enemy groups are capable of sending your way, so you'll want to keep character positioning in mind with each turn that you take.
The Broken Sewing Machine
As you would suppose from her bulletin post, Miranda spends her time in the clothing boutique in Ebel City. Find her there and she will give you details. You need to fight a tank known as the Battle Plough in the area around the Hughes Power Station. That will gain you a part that she needs to repair her sewing machine. When you head to the world map with the quest active, you'll see red spaces on the map near the station. Those don't all contain the enemy that you're hoping to find, but one of them will.
You'll find that the Battle Plough has ridiculously good defense, so you need to play it smart if you hope to win. Winning the battle is easy if you spend a first round gathering resonance points while moving toward the back right side of the arena while destroying the dead battery, then start the second round by having one of your characters (probably Leanne) run toward the left side of the arena as the start of a Tri-Attack. You can very possibly finish off the enemy with that Tri-Attack if you're positioned properly. When you win, take the Berserk Motor part that you receive with you to the shop in Ebel City for your reward.
All-Natural Meat
Use Core Lift 1 to ride to Level 3, then from there take an elevator to Level 2 and head to Barbarella's Manor. When you arrive, use a purple Energy Hex to make the manor available. Enter it and you will see a man in a
Objective "Activities by the rebel group have been reported in the vicinity of Lucia on Level 6. The terrorist threat must be neutralized. Hunters in the area are to aid in their suppression."
Reward 8 Hunter Points, 2000 Rubies, Bolt Padding
Location Miranda (Level 4 - Ebel City)
Objective "My boutique is in dire straits! Won't it be horrible if no one could buy my clothes? If you think so, please come help!"
Objective "Cardinal Barbarella told me she'd like to dine on some natural meat within the next few days. Cooking the meat isn't a big challenge. But hunting for it is out of my specialty. So, I'd like you to procure the meat."
chef's cap standing along the right side of the front walkway. Talk to him and he will ask you to obtain some meat for him. You likely already have Quality Meat in your possession, or you can soon obtain it while battling the enemies in this chapter. Once you have the item, hand it over to the chef to complete the mission.
After tending to the side quests, you're ready to resume your efforts on the main mission. Begin by heading to the Open Air Studio where you concluded your efforts in the previous chapter. Along the way, you'll find cones blocking your progress. Touching them will trigger enemy encounters.
(Above Left) Leanne isn't as impressed by the statue as her two male friends. (Above Right) You new mission is to escort a statue.
Once you arrive safely at the Open Air Studio (you may wish to rest and save at the Abandoned Energy Station along the way), you'll trigger a cutscene. Then you'll receive a new story-based mission.
Honorable Work
As the game will tell you when the mission first becomes available after you meet with Jean Paulet in the Open Air Studio, you must escort the statue to the top of that particular dungeon. Enemies will attack along the way and can damage the statue, which you need to bring to the top of the tower in one piece. This is all just one big escort mission, then. Escort the statue safely to the top of the tower (this requires you to battle a weaker version of Caligula, revived from the previous chapter) and your work is done.
Your job now is to escort the statue that was depicted in the cutscene as it rides automatically along some tracks toward the top of the tower. Since you're in a dungeon, you should already have a good idea what this will mean: lots of battles with monsters. You can't afford to let the statue take much damage along the way, so as usual you'll need to battle aggressively against the various enemies that you encounter along the way.
There are a few rules to keep in mind on your escort mission. One is that if you fall in battle (or if the statue does), you'll have the expensive option to revive and refill life meters. That refill applies to the statue as well. Remember that you can also target the statue in battle, though not with healing items, so make sure that you don't accidentally shoot your inanimate friend. A final thing to remember is that if you exit the area while
Reward 30 Hunter Points, 20000 Rubies
Location Jean Paulet
Objective "Please transport the Goddess of Mercy statue to the top of the Forest of Idols tower. The great honor of this undertaking can belong only to you!"
escorting the statue, its location will reset and you'll need to begin anew. Keep those rules in mind and let them govern your actions as you work through the dungeon to the boss who lurks at the end.
(Above Left) Grenades work wonders on the enemies you find throughout this area. (Above Right) A Tri-Attack should be enough to weaken Return of Caligula and his cohorts enough that you can finish them off in another round.
As you battle through the dungeon, you'll find that the statue slowly takes damage as you battle the durable monsters in each of the dungeon's hex tiles. Your goal should be to take out your opponents quickly, as usual, but you don't have time to stop and heal your party members like you normally would. Equip grenades if you have them, since those will help to quickly amass damage, and have Zephyr weaken shields while the other two rain down handgun bullets. Focusing on one enemy at a time seems to work best, and you should worry about those enemies who are nearest to the statue first. Otherwise, they'll take up a nice position and chip away at the statue's health while you're wasting time with unimportant matters. If there are explosive barrels on the field, trot forward toward the barrels so that two or three enemies get near those barrels while approaching you, then blast the barrels to deal huge damage within a wide radius so that it's easier to clean up any stragglers.
When you do reach the boss area, you'll find yourself battling Caligula once more. You've defeated him in the past and that encounter seems to have weakened him. Return of Caligula, as the game calls him, will go down fairly quickly now. You might not have long to take care of him, though, because by now the statue that you're escorting has likely been considerably weakened. Spend the first round of the battle focusing on one of the two enemies alongside the rejuvenated Caligula. Let the first two party members attack while building up resonance points, then have the third initiate a Tri-Attack to take down the weak enemies remaining before everyone finally focuses on Caligula. Another round or two should be enough time to take down the big fellow, who likely was caught in the tail end of any Tri-Attack routine that you managed. Grenades work as well on him as they do the other enemies in this area, so you should be able to make a quick battle of it.
Once that struggle ends, you'll witness a cutscene and will automatically receive your rewards for another story mission successfully completed. If you've finished all of the chapter's side missions, go ahead and return to your home base, then watch a new cutscene and choose to advance to the next chapter.
Chapter 5 - Flux
Following the cutscene and a gift of some Energy Hexes, you'll receive your first story-based mission of the chapter.
You should remember the way to Barbarella's Manor if you've been completing all of the optional side quests so far. Simply ride Core Lift 1 up to Level 3, then from there ride an elevator to Level 2 and enter the manor (you'll need to use an Energy Hex to make it available if you haven't already done so previously). In the manor, you'll meet with Barbarella to satisfy the requirements for this first mission.
Before you start worrying about finding the distressed Barbarella, stop by the guild for a look at this chapter's optional side quests.
Igniting Creativity
You may want to hold off on tackling this mission until you've completed the first story-based mission in the chapter, as that mission awards you with an item that you will need. When that's tended to, head to Garigliano's Manor on Level 3 and meet with the eccentric artist. He wants photographs of three idol statues, all from different sites. He'll give you Garigliano's Camera to help with the task. Though you might get the impression that you'll need to head to the Forest of Idols to complete this mission, you're actually looking for other idols.
The first idol is on display in front of Jean Paulet's Manor, which is located near Garigliano's Manor on Level 3. You may have to use an Energy Hex to make the manor available, as it's unlikely that you've had reason to visit it previously. When you enter, examine the base of the statue and you'll be able to take a photograph to obtain the Sublime Idol Photo. The second idol is in the ruins of Lucia on Level 6. You'll have to enter the Downtown area and work your way through to the back end where you can photograph the waiting idol (positioned along the large stone wall along the back left side fo the ruins area) to receive the Despairing Idol Photo. Now you just need to find and photograph the third idol. It's located at Crank Seminary, but you can't get there until you are able to ride Core Lift 2. The pass that you need will be obtained once you satisfy the first story mission for this chapter. When you have that pass, you can ride the lift down to Level 7 and clear your way to Crank Seminary. Enter and you'll find the idol in plain sight along the back wall. Take its picture to receive the Malevolent Idol Photo.
Once you have taken all three photographs, return to Garigliano with your masterpieces and he'll reward you accordingly.
Objective "Those who appreciate beauty, contribute to my next artistic oeuvre! Only those with a sure eye for artistry need apply. I await at my manor!"
Reward 8 Hunter Points, 3000 Rubies, Shooting Star
Location Miranda (Level 4 - Ebel City)
Objective "I don't have enough mannequins for displaying clothes. I'm perfectly willing and capable of making my own, but gathering the materials is too much of a challenge. I have investigated where those hard-to-get materials are, so come see me if you need to know."
Find Miranda and she'll ask you (as she did in her bulletin posting) to find her parts that she can use to construct mannequins. She'll suggest that you head to the Forest of Idols in search for parts, a tip that's not really necessary since you probably already had that location in mind. However, she does mention that you'll need five complete sets of parts to satisfy her needs: head, arms, torso and legs. If you're extremely fortunate, you already have all of the parts that you need. You can check for the pieces in your inventory under the 'Other' tab. If you don't have what you need, travel to the Forest of Idols and pick up the missing bits by fighting enemies along the Forest Path within that area (you don't have to enter any of the actual dungeon portions of the forest; just travel along the path near the Abandoned Energy Station). Then return them to Miranda for your reward.
The Prelate's Medal
Ride Core Lift 1 up to Level 3 and meet with Theresa at her manor. She will explain that she's hoping to find a keepsake left behind by her dearly departed husband. She believes that it is buried somewhere near Lucia. Travel to the Lucia area by returning to Level 4 and then riding the elevator from there to Level 6. The trinket that you're looking for is on the world map. There's an area that you previously haven't been able to unlock with hexes, but you now have a 'U'-shaped one that you can use on the far side of the city. When you do so, a chest will be revealed that contains The Prelate's Medal. Take that back with you to Theresa and she'll reward you as promised.
When you're ready to find Barbarella, head to Core Lift 1 and ride that to Level 3, then from there ride an elevator to Level 2 and enter the manor. It's probably already available to you from an earlier side quest, but if not, you'll need to use an Energy Hex to make it available now. Either way, enter the mansion to meet with the lovely cardinal.
(Above Left) Cardinal Barbarella loves nothing more than fine wine. (Above Right) The cardinal's servant will give you the Core Lift 2 Pass that allows you to hunt down a fine wine.
Once you arrive in the manor, you'll trigger a cutscene and when it concludes, you'll receive some Energy Hexes and Core Lift 2 Pass, which you can use to reach Silver Canyon and other areas. You'll also receive Molotov Cocktail(25) to help you deal with the monsters in that region. A new story mission is also made available.
Reward 10 Hunter Points, 10000 Rubies, Perfect Aid
Location Theresa (Level 3 - Theresa's Manor)
Objective "Could I get you to indulge in somewhat of a mystery? I will be waiting at my manor in Chandelier."
When this mission is made available, you also receive the Core Lift 2 Pass that you can use to finally reach Level 7. To do so, head down to Level 4 and from there take the elevator to Level 6. Now head northwest from there and ride Core Lift 2 down to Level 7. There, you can make a path to Silver Canyon, fighting at least one enemy group along the way. Once you reach the canyon, work across the bridges (first South Bridge then West Bridge) to reach the Refridgia area along the back side. Defeat the boss that lurks at the back of that dungeon to receive the Red Wine and satisfy the requirements of the mission.
Your next stated destination is Silver Canyon, though there are plenty of stops you can make along the way. The canyon itself you can reach by riding the elevator from Level 4 down to Level 6. There, you'll find the Core Lift 2, which is available to you now that you have the pass. Ride the lift to the lower area and you'll notice a cone blocking a path to one side. You can fight your way through the enemies that guard that checkpoint, then continue along the map to reach the Silver Canyon area, which you can make available using an Energy Hex that was provided to you by the servant at Barbarella's Manor.
While you're on this level, however, you should also clear a path to the Crank Seminary area. There you can find and take a picture of an idol for the "Igniting Creativity" side quest. Complete that side quest for a handy item that will help you as you venture into Silver Canyon. It's important to note at this point that you also have missions available from a new guild. Head to Cranktown and enter the guild there. Check the bulletin board for more missions.
Motive Undeclared
Go to Cafe Chelsey to find Ellis. He'll explain that you need to clear a path to the Dakota Vein area on Level 9 using Energy Hexes. You can reach that low level from Level 4 by first riding the elevator down to Level 6, then taking Core Lift 2 down to Level 7, then riding the elevator near Cranktown to Level 8. Once you arrive on Level 8, a final elevator will take you down to Level 9 where you can find the Dakota Vein. Of course, you'll have to lay hex pieces along most of the route described above, so make sure to bring plenty along to aid in the effort. Once you have cleared the desired path (you'll need to lay down a green Energy Hex to complete the job), return to your patron in Cafe Chelsey for the promised reward. He'll mutter something to the effect of informing Master Gelsey of the development. How ominous!
Objective "Run along to the Refridgia in the Silver Canyon on Level 7 and scrounge up a bottle of red wine, would you darlings? That would be right now."
Travel to Forsaken, which you'll reach easily enough near the top of Core Lift 2. When you enter the area, you'll see the traveling merchant as usual. She wants you to retrieve her billboard for her. By her description, you'll find it on the top of the tinny machine from Level 6. Head back out to the world map and you'll see several tiles with exclamation marks hanging over them. The enemies that you'll encounter along these areas are explosive, so you should be able to easily take out groups of them in just a single round with airborne handgun attacks. When you've defeated the appropriate one (easily identified by the 'Shop' billboard that he carries instead of an explosive barrel), you'll receive the Billboard, which you should take back to the traveling merchant in Forsaken for your reward.
A Small Errand
Travel up to Level 4 and enter Core Lift 1. There, you'll find the postman wandering around in front of the steps leading up to the lift. He'll tell you that he needs to get a package delivered to Basilica. Agree to help him by accepting the package and you'll receive Mailed Parchment. Now you just need to find Basilica. Start by riding the lift up to Level 3. From there, ride an elevator up to Level 2, where you can then access an elevator that will allow you to ride all the way up to Level 1. There, make your path to Basilica, which you'll need to make available using two Energy Hexes. Enter the area to find the recipient of the package, a man named Bennet, standing near the front steps of a gated building. Hand over the parchment to complete the quest and receive your reward.
The new missions shouldn't require a lot of time from you, so you might want to tackle them right away. When they're out of the way, stop by Cranktown and make sure that you have an Ice-Resistant Vest for each party member. You've probably already found one, but you'll want to go ahead and purchase another two at 7000 rubies apiece. Make sure that you also pick up a good supply of Molotov Cocktails, as well. 200 or so ought to do it. Once you're thus equipped, make your way to Silver Canyon. Upon entering it, you'll find yourself on a dungeon map. Walk along the hexes to the South Bridge area and enter it to begin negotiating a series of three enemy encounters. Your adversaries here shouldn't prove especially difficult. Just hit them with fire-based attacks that you should have in your inventory.
(Above Left) Your enemes in this region are huge but weak against fire attacks. (Above Right) Silver Canyon is a dangerous place, so prepare yourself before you enter it.
Objective "I've waited so long for my revenge! I've finally found them! Hunters who avail themselves of my services are to report to me immediately. I'll be waiting in Forsaken."
Once you get through the South Bridge area, the path on the map splits and you can next head for the West Bridge or East Bridge area. The latter route is tempting, as all indications are that you'll come out on the other end of that bridge right next to an Abandoned Energy Station. The Chemist's Closet area (which you shouldn't worry about since you can't yet do anything worthwhile at that location) is not far from there, as well as the Refridgia area that is your true destination. However, the East Bridge is a single-battle dead end. The only reason to go there is to gather some healing supplies and cocktails from chests available on the battlefield.
The West Bridge area is where you can make progress. Enter it and you'll find yourself on the first of several more battle hexes, as was the case at South Bridge. Work your way through that and you'll be able to save at the Abandoned Energy Station. You can check the nearest side of the East Bridge to battle some monsters for experience and to pick up Anti-Ice(3), Incindiary Rounds(30) and First Aid S(5) from the treasure chests. You'll probably need those items in the near future. Once you've grabbed the loot, it's time to enter the Refridgia area.
When you do enter the Refridgia, you'll find that it contains two more battle hexes. The first one is a rather typical encounter of this area. Try to get through it without using too many of your powerful items, if possible, since you'll want to save those for the encounter that is to come. After clearing away the enemies, stop and make sure that you've customized your weapons and that everything is in order. If all of that looks good, go ahead and enter the next hex.
(Above Left) The yeti, like so many boss monsters, knows how to make an entrance. (Above Right) Your yeti foe has plenty of shields that you'll need to remove in order to inflict serious harm.
As you arrive on the scene, a Yeti will attack, along with two cohorts. The first thing you should know about the Yeti is that he'll use powerful ice attacks that can freeze your warriors in their tracks, rendering them unable to attack. That means that Tri-Attack efforts will be out of the question unless you find a way to deal with that issue. The weak wall near your starting point as the battle begins offers some protection, but it's only temporary. Your enemies will come to attack you and the yeti's breath can reach practically all the way across the battle area.
The trick to winning this fight isn't really any different from the trick that allows you to win any other in the area. Just start by hitting your opponent with some Molotov Cocktails, follow that up with machine gun fire, then initiate a Tri-Attack that will give you time to take out a gremlin or two and perhaps damage the Yeti. Remember that you'll be dealing with gremlins all along, since the Yeti can summon more at will, so don't worry about them too much except as a convenient means of filling your action meter. Instead, most of your attacks should focus on the Yeti and you need to try to manage a Tri-Attack every other round or so. Keep hammering away at the goon and eventually you'll win.
Following the battle, you'll witness a cutscene and then receive a bottle of Red Wine. A new story mission will be made available and you'll appear back in the area where you were just fighting the Yeti.
You've beaten the Yeti, so now it's time to return the wine. Head back to the world map and from there, travel to Le Chit-Chat Noir as instructed. When you arrive, you'll automatically have a conversation with Barbarella's Page and the mission is complete.
Now it's time to backtrack to the world map. There's no sign of Zephyr. Go ahead and save your progress at the Abandoned Power Station if you're concerned about enemy encounters runing your day. Then you can exit out to the world map and take a stroll over to Le Chit-Chat Noir as ordered by your newest story mission. When you arrive, you'll automatically begin conversing with Barbarella's Page. Once that brief conversation ends, you'll receive your reward for the mission.
A series of cutscenes will follow. Then you're back in control within the tavern. Head back out to the world map and from there return to your home base on Level 4, in Ebel City. Any fights that you have along the way will have to be handled without Zephyr, but don't worry; he'll rejoin your party once you reach the base. You'll just need to make sure to re-equip him.
A cutscene will play as you enter your base, then you'll have the option to advance to the next chapter if you wish.
Chapter 6 - Malady
Following a lengthy cutscene, you'll find yourself in control of your party minus one character: Leanne. You're advised that your characters can now wield two guns at once to inflict increased damage. This is true if your levels are high enough, but remember that your party members need to be capable of carrying that sort of weight around with them. You may need to remove some accessories and you may also need to level up a bit if your characters are below level 35 or so. Level grinding is your best option, if needed, since you'll still be playing around in Silver Canyon and likely want to keep your gear equipped that can defend against ice attacks. There's really not much that you can safely accomplish in this chapter until you can dual wield, so make that your first priority before tackling anything else. Then you can worry about the new story mission that also has been made available.
Cold Medicine
Leanne is sick and her two friends want to find cold medicine. Head to Silver Canyon, near where you concluded the previous chapter. This time, venture into the Chemist's Closet area, which has opened up to allow you to explore it. Inside, you'll find a new boss encounter with the Cannon Colossus. Defeat that monster and you'll receive the Cold Medicine, which you should take back to your base in Ebel City. Upon arriving home, you'll receive credit for completing the quest.
Though your next explicit destination is Silver Canyon, as dictated by the 'Cold Medicine' mission, you may also wish to activate the chapter's optional quests along the way. Some of them are rather easy and yield substantial rewards that will help you in combat. Visit the guild in Ebel City to activate several of the side missions.
The Fashion Check
Visit Garigliano at his manor on Level 3 (up a short ride from Level 4 by way of Core Lift 1). He will ask that one of your party members come to him wearing entire casual attire. You can manage that by having the intended party member (that should be Zephyr) visit Miranda's clothing shop in Ebel City. Have him change into his 'B' type of gear. He should have a shirt, pants, holsters, boots and an 'other' accessory in that style, all equipped. You can spend close to 25,000 rubies purchasing everything, if you haven't already been doing so up to this point. Then head to Garigliano's Manor sporting the new duds. You'll receive the promised reward, as well as Fashion Is Art 1st ed. that will help you to complete the 'Fashion is Art!' side mission offered by Miranda in Ebel City.
The Courage to Walk
Talk to Burnell in the guild. He's standing next to the girl in the wheelchair at the table. He'll give you the Business Card (Pharm) if you agree to accept it. Your next job is to find a quality pharmacist. You can do so by visiting Cranktown. Head along the street, left past the guild and up the steps leading toward the hotel. There, you'll notice a man standing near a railing. You are given the opportunity to give him the business card you obtained. Do so and you'll immediately receive your reward for completing the mission.
Rebel Suppression 3
West of Cranktown on Level 7, there are four red-hued hex tiles with exclamation marks placed overhead. Defeat the enemies that lurk on each tile and when you have finished doing so, you'll satisfy the terms of the mission and a reward will be provided as promised.
The problem, of course, is that these enemies won't go down without a fight. The helicopters are capable of slicing quickly through your shields, plus they're joined by gunmen on the ground. In general, your goal should be to make your moves so that you don't attract the attention of more than one gunman or helicopter at a time.
Objective "Help with a sensibilities survey on the inhabitants of lower levels. Those confident, nay, proud of their proportions should see me at my manor in Chandelier."
Objective "We have intelligence that the rebel group is amassing its forces near Cranktown on Level 7. The rebels must be crushed. Hunters in the area are to aid in the suppression."
The easiest thing to do is to battle the helicopters while avoiding those gunmen, since you should be able to take out a helicopter every two rounds or so even with only two characters in your party. Spend the first round by instructing your machine gunner to turn all (or nearly all) shields fully blue, then follow up with a hand gunner who can break away all of those shields so that a second round can be spent repeating the process while actually bringing down the chopper in question. It's not a bad idea to make a return to your base in Ebel City after clearing each tile so that you can save your progress and make use of any items gained, if needed. Then get back to the fight.
You should be able to make decent headway on the missions as described, even without Leanne. Your efforts to do so will take you to Cranktown, where you should go ahead and check in at the guild for still more missions as old ones drop from the list when completed. Note that these newer missions are in general more difficult. You don't have to finish them right now. If you wish, you can wait until the very end of the chapter so that you have your full party assisting you in the effort.
Fashion is Art!
You can meet with Miranda in her shop in Ebel City, but she doesn't have much to say that's of any value. She just repeats the terms of her mission, which call for you to visit Cardinal Garigliano on Level 3. Before you do so, make sure that you dress in a full range of type 'B' casual clothes available in Miranda's shop. Head to Garigliano and you'll satisfy the terms of another mission while also receiving the Fashion Is Art 1st ed. item in the process. Take that back to Miranda and hand it over to her to complete the 'Fashion is Art!' side mission.
Freight Request
Travel to Cranktown on Level 7. Once you arrive, you'll find Darrel standing just left of the set of shops near the city's entrance. Talk to him and agree to transport the Dubious Cargo to receive that item. You next need to take it back to Ebel City with you.
The return trip to Ebel City will be dangerous because your path is blocked by several of the cones that indicate enemy encounters. You'll face groups of powerful enemies at each such cone. If you aren't dual wielding, you'll have a difficult time building up damage quickly enough to overwhelm your adversaries. Once you manage to get through the lot of them, you can backtrack the rest of the way to Ebel City. Another encounter is waiting for you at Level 6, between you and the lift to Level 4, and you'll also find one final one ahead of Ebel City. When you reach the city itself, remember that you're looking for a fellow named Bobby. You'll find him standing just outside of the door leading into Miranda's clothing shop. You'll receive your reward immediately upon delivering the goods.
Reward 8 Hunter Points, 2000 Rubies, Cold Padding
Location Miranda (Level 4 - Ebel City)
Objective "For my next piece, I want to incorporate more artistic elements. And, to do that, I want to tap into the mind of Basel's Cardinal Garigliano, our most celebrated artist. Can you help me with that?"
Reward 10 Hunter Points, 5000 Rubies, Hand Grenade +(20)
Location Darrel (Level 7 - Cranktown)
Objective "I need a parcel transported to Ebel City. Details cannot be revealed here. We must meet in person."
When you're done with the side missions or you have decided to ignore them for the moment, it's time to turn your attention once more to Silver Canyon. Travel there, fighting enemies at the forced encounter along the way. After entering the canyon proper, cross the bridges and then rest and save at the Abandoned Power Station.
(Above Left) You'll face unavoidable enemies on the way to the canyon. (Above Right) Hit the Cannon Colossus hard with your most powerful attacks, but don't forget to hit the gunmen for action gauge refills as necessary.
After saving, it's time to make your way to the Chemist's Closet area, which you may recall seeing in Chapter 5. At that time, there wasn't anything interesting to do at the location because the way forward had been blocked, but that has since changed.
Inside the Chemist's Closet, you'll fight one group of normal enemies and then proceed inward to find yourself battling a Cannon Colossus boss. This guy is actually fairly weak when it comes to physical attacks, but he has powerful shields that make it difficult to deal any substantial damage to him. He's also joined by gunmen with powerful defenses who can interrupt your ground-based attacks and keep you from building a solid offensive effort, so you need to keep them in mind as you plan your attack. Only one will be present at a time, but the boss will bring new ones to replace the ones you kill.
Start the encounter as usual with a rush of machine gun fire to weaken shields, then follow that up with quick bursts of handgun fire so that the shields start to drop. Continue working in circles around the colossus as necessary, taking time when needed to fire powerful shots at the gunmen to more quickly refill your action gauge. It's better to spend most of your turn refilling your gauge and hurting those gunmen (while steering clear of the Colossus and his giant feet) than it is to focus mostly on the Colossus itself while failing to refill crystals. As long as you keep your gauge full, this fight will go well for you, but the minute your gauge drops to empty you've pretty much lost unless you can immediately refill it.
(Above Left) Which medicine should you bring? Why not bring both? (Above Right) Finally back home with the medicine.
When you defeat the boss, you'll see a brief cutscene and receive Cold Medicine. Now it's time to get the medicine back to Leanne in Ebel City.
Once you arrive back in the city, head to your home base. Enter it and there will be a brief cutscene. Then you
can choose to advance the story to the next chapter or (with Leanne now back in your party) you can tackle any remaining side missions first.
Chapter 7 - The Star Vein
A cutscene greets you as you begin the game's seventh chapter. Then you'll receive a new story mission. You also will receive some new Energy Hexes and the Core Lift 3 Pass that will allow you to reach new areas that you must explore within this chapter.
The Hunt for Gelsey
Travel to Level 11 by following lifts (including Core Lift 3, which you could only activate starting with this chapter) to the lower levels. Enter and work your way through the Mine 24 area. When you reach the end, you'll battle Gelsey and his comrades. Defeating Gelsey completes the mission.
The next place that you should visit is the Guild. Go there and you'll receive several new missions, as usual.
The Hope to Advance
Talk to Burnell and accept the Lens Material that he will give you. He wants you to find a skilled optician to fashion a pair of eyeglasses. Talk to him again and he'll tip you to the rumor that a man in Cranktown is capable of making quality eyeglasses. Head there next. The man that you're looking for in Cranktown is waiting for you on the street in front of the hotel. Hand over the material and you'll satisfy the terms of the mission (and receive your reward).
The Town of Hope
Reward 30 Hunter Points, 50000 Rubies
Location Sullivan
Objective "We want you to clear out the rebels who are occupying Mine 24 on Level 11. The ringleader is a former military man by the name of Gelsey. This matter must be kept quiet. We therefore cannot order a major military deployment. Surely you can take care of this?"
Objective "I hope to have eyeglasses made for the young miss. We have the materials already, but haven't found a lens crafter who can fashion them into a pair of glasses. We seek a lens crafter, or someone who can scout one. I'll be waiting at the Ebel City Guild in the daytime."
You won't have the Energy Hexes that you need to most easily complete this side mission until you have started work on the story mission that becomes available at the start of the chapter. Once that's done, you can get back to this side mission before advancing to the next chapter.
Visit Pater and he'll explain that he needs you to trigger a terminal effect on Patertopolis. The abandoned city is located on Level 6. Travel there next. You'll have to use an Energy Hex to make Patertopolis available on the world map. There are two terminals located nearby, but you'll need a dark purple Energy Hex to activate either of them (and still more pieces to expand from the newly-activated terminal to the actual Patertopolis area so that it is within range of the terminal you chose). Remember that once activated, you can turn a terminal any color by placing pieces and expanding them outward, so just use a color that you can easily reproduce so that it reaches Patertopolis. The entire city area needs to be covered and you need to have placed enough pieces that the terminal activates. You can press the 'Start' button while hovering over Patertopolis to see what impact (if any) has been made by your Energy Hex placement.
Once Patertopolis is being impacted by the terminal of your choice, head to Pater's Manor to get credit for a job well done.
Emergency Call-up!
To reach the traveling merchant on Level 8, head to Level 7 and look near Cranktown. There's an elevator nearby that you can use to travel even lower. Once you arrive on Level 8, you'll see the Waterless Bridge area located just to the right. Lay down any Hexes that prove necessary, then enter the location. You'll see the merchant and her 'Shop' sign slightly up the slope in this area. Talk to her and accept the Mega-Sack that she gives you. Now you need to deliver that to her sister. The sister is located at a shop in Albona, which itself is located on Level 10. You can get there by traveling through Core Lift 3, for which you now have a pass. When you reach Albona, head left along the street. Head past the bulletin board and through an archway to continue through merchant shops along the street. The lady standing behind the shelving on the left side of the street is the traveling merchant's sister. Talk to her to hand over the sack and to receive your reward.
Now that you have a feel for how things should go, complete any side missions that are convenient for you at the moment (the 'Emergency Call-up!' mission is easy enough and you can buy an LP-09 handgun from the merchant you meet at the end of that quest for 200,000 Rubies if you need an extra gun for dual wielding). Completing a few of the missions that you've already received will open up new ones.
A Seductive Proposal
Location Pater (Level 3 - Pater's Manor)
Objective "Make the once abandoned Patertopolis inhabitable again! Seeking people who will aid in the restoration efforts. Come to my place in Chandelier."
Objective "Calling all hunters who avail themselves of my services! I need you to gather here immediately!"
Reward 8 Hunter Points, 2000 Rubies, MC Electrified Rounds(25)
Location Juliet (Level 7 - Core Lift 2)
Objective "I've got my eye on a certain object. If you can procure it, I'll trade you a super juicy tip for it. It will be worth your while, if you know what I mean."
Travel to Core Lift 2. There's a lady in a red blouse standing along the side of the entryway. Talk to her. She will ask you for HG Magazine +4, an item she needs for some gun customization that she is doing. As she'll tell you if you talk to her a second time, the tinkerer in Cranktown is capable of making that part. Visit the tinkerer and turn in 5500 Rubies, Scrapped Lead(1) and Scrapped Bazooka E(1) to produce the desired HG Magazine +4 that you need for Juliet. If you're having a hard time locating a Scrapped Bazooka E, just remember that you can occasionally obtain them by defeating the Rocketfoot enemies on Level 9 (they look like elephants with rocket launchers). Once you have the HG Magazine +4, return it to Juliet for your reward.
The Mystery Beauty
Head to Core Lift 1 and you'll find the postman wandering around on the path ahead of the lift. Agree to accept the item he's carrying and you'll receive the Light Envelope. You need to deliver it to Level 8, but he can't tell you anything beyond that. Head out to the world map and ride the lift down to Level 6, then use Core Lift 2 and travel down to Level 7. From there, ride the elevator near Cranktown, which will take you down to Level 8. Enter the Waterless Bridge area. There's someone walking the pathway there. Hand the item over to Jeanne and you'll complete the mission.
Your first order of business once you're ready to start focusing on story missions is to head for Level 11. Depending on how you've spent your time up until now, you may need to bring along a lot of hex pieces to clear a path. You'll possibly be covering a lot of new ground.
(Above Left) Level 11 is quite a ways down the tower and plotting a course can require specialized pieces. (Above Right) The Hooded Gangster enemies answer to no man, just bullets.
From Level 4, ride the elevator down to Level 6, ride Core Lift 2 down to Level 7, ride the elevator near Cranktown down to Level 8, take the elevator from there to Level 9 and on that level, ride Core Lift 3 down to Level 10. As you arrive, you can head over to the town of Albona, which you may have already visited for a side mission, and then not far past there you'll find the elevator leading to Level 11 (for now, you can safely ignore the longer widing path that leads to a different elevator that leads to a separate portion of Level 11). Once you arrive on Level 11, you should see a path leading to an area called Mine 24. There will be an obstruction in the way that signifies a battle. Defeat the enemies that wait there (note that you may receive Energy Hex items as a reward that you can use to complete the 'Town of Hope' side quest) and continue laying path so that you reach the mine. Enter it.
When you enter the mine, you'll find yourself at the top side of the hex map in the screen's upper right corner. You want to work your way toward the back end, which is a rather lengthy undertaking as there are numerous hexes on the grid and each one represents a battle. Make sure that you defeat each enemy grouping as you advance along the grid, since you'll otherwise lose energy without any refills. There's a side path you can take
Reward 5 Hunter Points, 1500 Rubies, First Aid EX
Location Postman (Level 4 - Core Lift 1)
Objective "A letter for delivery outside my territory has me in a bind. I'm looking for someone who can deliver it for me. It's addressed to a female name if that helps. Hey, it could be someone pretty!"
most of the way through the mine to check some crates for an Adaptor Foregrip and some shells for your guns, which you might as well do if things are going well for you.
(Above Left) Gelsey is a freak with a grandparent fixation. (Above Right) Start the battle by focusing on Gelsey's guards, not the man himself.
At the deepest level of the mine, you'll find Gelsey. There's a cutscene to announce his arrival, but he doesn't exactly inspire fear when you face him. He's just a gunman with a few underlings along for the ride. Wearing through his defenses in the usual manner proves more difficult than you might imagine, but there's another trick that you can attempt. Start the battle by focusing on eliminating his guards. You need to get rid of all four while trying to keep up your supply of bezel crystals so that you aren't wiped out by shots from enemy guns. When the last of the goons go down and you have damaged Gelsey enough, he will throw a flash grenade and vanish.
In Gelsey's place, you'll see several barrels. Don't attack the barrels yet. Watch them. One of them will shake slightly on occasion. When you see that one, have your three characters surround the barrel at close proximity (a few paces away). Have a hand gunner blast apart the barrel and you'll see Gelsey again. Now since he's surrounded, you can take turns hitting him until he throws another flash grenade and the process repeats. Keep in mind that if you blast the wrong barrel when that happens, you'll cause Gelsey to reappear with more goons at his side and that could be a fatal error. Just be patient and pay attention and you can win this fight with little difficulty.
(Above Left) Say hello to one of Vashyron's old buddies. (Above Right) The kids admire pretty crystal shards while the adults talk.
When you've defeated Gelsey and have finished any side missions, there's nothing left to do but to return to your home base in Ebel City to advance to the next chapter.
Following a series of cutscenes, you'll find yourself controlling Vashyron and Zephyr. Leanne has accepted a solo mission and you will be following to make sure that all goes well. Your first story mission in the chapter is available immediately.
Snoop Patrol
Travel to Patertopolis on Level 6. You'll have to make your way through two unavoidable enemy encounters along the way, as there is a cone on Level 4 and then a row of them on Level 6. You only have to worry about one of the cones on Level 6 unless you feel like battling more enemies When you arrive at Patertopolis, you'll see a cutscene and then be engaged in battle. Defeat those enemies and continue through Patertopolis, battling enemies as you go until you reach the end of the dungeon. Fight and defeat the boss that waits at the end of that area to add Leanne to your active party once more and to satisfy the conditions of the quest.
As usual, you can find several side missions available at the Guild the moment you gain control of your party.
Cleaned Out by Creativity
Talk to Miranda in her shop and she'll ask you to fetch her 80 or so fabric scraps. Those are items commonly dropped by enemies on the upper levels (particularly Level 4), so you should already have somewhere close to that number in your inventory unless you've been regularly selling them. That's all that there is to the mission.
A Water Beast Gone Dry
Reward 20 Hunter Points
Location N/A
Objective "Leanne and Pater are in Patertopolis on Level 6. Let's sneak a peek on them, heheh."
Objective "Three Grass Yetis sprang up from under the Waterless Bridge on Level 8. I tried to put them down before they could do much damage, but couldn't handle them alone. Please defeat
Travel to Level 8. Just outside of the Waterless Bridge area that you'll see from the elevator, there are three red hexes with exclamation marks. As usual, each of those spaces represents an enemy encounter. The Yeti enemies are quite powerful with strong defenses and travel with companions who like to leap into the air and smash the ground to create powerful shockwaves. Surviving the fights can prove difficult if you take too long and wind up fighting all three, so try to take care of the leader quickly so that his friends don't get to join. Tri-Attack efforts work well here only if you're careful (the crates can get in the way and your enemies are large enough to stop good runs unless you're patying close attention). Heroic runs around your enemies, alternating between machine gun and hand gun with each action taken, will tend to work best. Defeat all three enemy groups to complete the mission.
Different Values
Make your way to the Basilica area on Level 1, as directed. There, you'll find Bennet standing on the walkway that leads up to the building's front steps. Talk to him. He asks if you're familiar with the Freud Remnants on Level 8. Apparently, some ancient texts are located in that area and Bennet wants you to retrieve them for him. Travel to that area as requested. Inside, you'll find that you're in a dungeon area. There's an Abandoned Save Station nearby if you need to rest and save. Doing so isn't a bad idea. Once you've tended to that, enter the Ruins Site Central area and battle some enemies. There should be a crate here, along the edge near the wall. Open it to find the Ancient Text. That's what you came for, so go ahead and take it back to Bennett for your reward.
Complete those first few missions and once you do, a new one will appear on the nearest bulletin board.
Top Secret!
Go to Core Lift 1 and you'll find Sammy along the walkway leading up to the lift. Talk to him and he'll give you the Love Letter. Take it with you to Core Lift 2, which in this chapter will involve battling a tough monster group along the way if you haven't already cleared a path to Patertopolis. When you reach Core Lift 2, you'll find Kate running around near the lift and once you offer her the letter, you'll receive credit for another completed mission.
Following Leanne, as you'll find out once you attempt the actual story mission, is not as easy as you might suppose. On Level 4, there's a cone between you and the elevator leading down to Level 6, where Patertopolis is build. You'll have to defeat some enemies that are rather challenging when you have only two party members. Just remember to focus on one enemy at a time and you should be fine.
Objective "A certain hunter found a certain something at a certain location, but because they had no interest in it, they simply left it there. Well, I am interested, and I do want it! Details will be provided when we meet in person. Someone may poach it if I wrote the details here..."
Objective "Please deliver a love letter to Kate at Core Lift 2. I'll be finished writing soon, so please come get it. I'll die if anyone else finds out, so this is top secret!"
(Above Left) The journey to Patertopolis is frought with danger in the form of unavoidable enemy encounters. (Above Right) Knock away barrels on one round, then finish off the lizards that wait beneath on your next round.
When you reach Level 6, there's a vertical column of the cones between you and the Patertopolis area. Clear your way through one of them and continue left to Patertopolis itself. The enemies are easily enough defeated if you're smart about how you play and focus on one enemy at a time. Often, you can use machine gun fire on one of the portly gunmen to weaken him all or most of the way, then have your hand gunner follow up and wipe one out, then knock the barrel off one of the other enemies for a bezel crystal refill and to set you up for the next round. Then you just take out that enemy with your next charge and repeat the process a few times until you've won.
Once you arrive at Patertopolis, you'll witness a brief scene, then you'll find yourself immediately engaged in battle. The enemies that you fight here should prove no more challenging than those you faced at the roadblocks along the way to Patertopolis. You should still find that the fights go well if you just keep focusing on a single enemy at a time and make sure to refill your bezel crystals almost as quickly as you use them performing heroic actions.
Deeper with Patertopolis, you'll encounter more proficient resistance. When you find yourself battling against an enemy group that includes the Missile Plough machine and a translucent wall on the far side of the area preventing you from progressing further, it's time to tread carefully. That plough is capable of firing a barrage of missiles that you can't typically avoid if it spots you, plus it's joined by a Sprocket Juggernaut (looks like a giant scorpion) that has excellent defenses and offensive measures of its own. As if that weren't enough, you're also facing two gunmen on foot. This is a tough encounter for the unprepared. Note that you can also sometimes trick the plough into firing heat-seeking missiles that will loop back and blast itself if you run around in a clever fashion, though the other enemies in the area will make such tactics difficult. For that reason, it's best to take a more conventional approach. Start by eliminating the devastating plough with machine gun rushes followed by hand gun blasts, then take out the Sprocket Juggernaut and finally clean up the gunmen. When you win, advance through the dungeon some more until you trigger a cutscene and a boss encounter.
(Above Left) The Missile Plough enemies will inflict massive damage with their missiles if you leave them alive more than a round or two. (Above Right) Tri-Stamp is one of the easiest bosses that you've yet battled if you keep making diagonal rushes and avoid the goblins.
The boss that you'll face here, Tri-Stamp, shouldn't prove difficult for you at all if you have upgraded your weapons and characters sufficiently. Simply make diagonal rushes past him, first with machine gun blasts
using one character and then with hand gun blasts using the other. If you maintain a steady assault, crystals will refill regularly and allow you to keep applying that technique. Just make sure that you don't bump into the behemoth while you're attacking (and make sure that you are attacking from the air). You don't want to wind up too close to his feet, either, lest he make an attempt to live up to his name.
While you're battling Tri-Stamp, you'll also have to contend with poisonous goblins. They'll almost never even get to attack you as long as you keep making your quick rushes back and forth, so you could very well get through the battle while sustaining only a hit or two.
When you win the struggle, there's a cutscene and you'll receive your rewards for a mission completed. Leanne is back in your party now, so make sure that you go back through and complete any missions that may have given you trouble in the past. This is also a good time to level up Leanne so that she catches up to her gentlemen companions, if needed. When you return to your home base, you can advance to the next chapter if you're ready.
Chapter 9 - The Sacred Sign
You'll learn more about the history that haunts one of your characters in a cutscene that kicks off the ninth chapter. Then you'll receive some Energy Hex pieces and a new mission.
Lucia's Sacred Sign
Travel to Antourion's Manor on Level 2. You'll need to use a light purple Energy Hex piece to make it rise from the map so that you can enter. Head inside the building to trigger a cutscene and the mission will complete automatically (though there's no on-screen notification to that effect).
Before heading to the manor, you should check in at the Guild to see what side quests are available. There are three for your immediate consideration and possible action.
Lady in the Red
Find Miranda in her shop, as usual. Talk to her. She needs you to fetch her materials from Darrel in Cranktown. Travel there next, but know that you may run into an unavoidable enemy group along the way as a result of the chapter's fixation with making Lucia difficult to reach. When you arrive on Level 7 after riding Core Lift 2, you'll find more unavoidable enemy encounters along the pathway leading to that town. That explains the delay in deliveries to Miranda's store. Work your way through them and to Cranktown. When you enter, you'll find him standing around near the shops to the left of the town's entrance. Talk to him to receive the Steamer Trunk. Now you need to take it back to Ebel City. Thankfully, there are no additional unavoidable enemy patrols when you return to the map. Backtrack to Ebel City and go to Miranda's store. Hand over the trunk that you received
Reward N/A
Location Antourion (Level 2 - Antourion's Manor)
Objective "I must have words with you at my manor in Chandelier. The great tragedy of Lucia... I have something to ask of you, the sole survivor."
Reward 10 Hunter Points, 2000 Rubies, Hawk Eye
Location Miranda (Level 4 - Ebel City)
Objective "Shipments of materials have been awfully slow. My shop will go under if this keeps up!"
from Darrel to complete the mission and receive your reward.
Authentic Cuisine
After traveling to Barbarella's Manor, you'll find a chef standing on the walkway in front of the building. That's Lex. Talk to him and accept the item that he gives you, Lex's Haute Cuisine. Now you need to take it back with you to Ebel City, to the 'loud and emphatic lady' that lives there. He's referring to Rose, the woman who stands around on the platform above the Guild. Talk to her and hand over the cuisine to complete the mission.
A Letter to my Girl
Travel to Albona on Level 10. Enter the town and head to the roadway with the merchants on either side. There's a soup lady there, and nearby you'll find David. Talk to him. He wants you to deliver a letter to a girl named Joanne on Level 9. Accept the Letter of Longing that he gives you, then head to Level 9 by way of Core Lift 3. At the top of the lift, you should find a lady in a blouse and skirt standing around. Talk to her for the opportunity to hand over the letter that you received from David. When you do, you'll receive credit for another completed mission.
Don't forget to check for new side missions as you complete the ones that are available when you first check at the start of the chapter. You'll find two more of them.
Feel Better, Kitty Dog!
Work your way down to Albona on Level 10. From the entrance to the town, head left along the street past the bulletin board. Sarah will be standing somewhere near it. Talk to her and she asks you to obtain some Luxury Meat for Kitty Dog. To obtain some of that, you'll need to defeat enemies in Lucia. Enter the area map (which is guarded by a perimeter of unavoidable enemies when you first approach in this chapter) and save at the Abandoned Energy Station. Then wander around on the dungeon map battling Wrecking Ball enemies until one drops the Luxury Meat. You can increase the likelihood of a drop by equipping the Charm Ring (available from the arena if you have enough copper and silver coins) or by heading to Level 5 and activating the terminals that increase rare item drops, then connecting that all the way to the Lucia area of the map using the long blue Energy Hexes. Once you have the meat, bring it to Sarah for your reward.
Reward 8 Hunter Points, 3000 Rubies, Mighty Suit
Location Lex (Level 2 - Barbarella's Manor)
Objective "I want my ma--she lives out in the countryside--to have a taste of real gourmet cuisine. Won't someone take this ultra-first-class, mega-pricey fish to her? I put my all into preparing it."
Meet with Rose, the woman standing above the guild who received the meal from her son as you completed the 'Authentic Cuisine' side mission in this chapter. She will hand over the Deluxe Recipe, which you need to take to Lex at the walkway leading into Barbarella's Manor. You'll receive your reward for a successful mission upon handing over the item.
Once you've completed the side missions that can be easily cleared, it's time to worry about the mission that will advance the plot. Head to Antourion's Manor on Level 2, near Barbarella's Manor.
(Above Left) Use an Energy Hex to make Antourion's Manor available. (Above Right) Antourion has a great deal to say and so do you.
You'll need to use an Energy Hex to make the manor available for entry, but that won't be a problem unless you've been wasting them (you should have more than enough of the faint maroon color that is needed). Enter the manor and a cutscene will follow. Then the mission completes. Now it's time for a new story mission.
Search for the Sacred Sign
Head to Level 6 as instructed and start toward Lucia. You'll find unavoidable enemy groupings guarding the perimeter. Defeat any that get in your way, then enter the area. From the dungeon map that appears, access the Downtown area. Travel through until you reach the room where you fought a boss in a previous chapter. Now there are three Screw-Top enemies. Defeat them, then look for a new exit along the side of the room that wasn't available the last time you visited. The light along that route should be white. Follow the path to exit the Downtown area and appear back within the Lucia map. Continue to another Abandoned Energy Station and rest up. Save your progress, then enter the nearby Parkway area. There's a boss battle there with Jalopy
Golem. When you win, a cutscene follows and then the mission is complete.
You've been in Lucia before and now you'll go there again. The familiar cones that signify enemy encounters are blocking your progress, so bust your way through any of those that you need to and gain admittance to the city ruins. Once inside, rest and save at the Abandoned Energy Station. Note that enemies known as Wrecking Ballers attack in this area now. They are lizards with wrecking balls as shields. If you defeat enough of them with sufficient style, one should eventually drop a Luxury Meat item that you can use for one of this chapter's side quests, (the girl who offers the 'Feel Better, Kitty Dog!' wants it). You can equip items to improve your luck with drops and you can also extend terminal effects to this area from Floor 5 if needed. Make sure that you get the desired meat before proceeding if you're concerned about completing every side mission. It'll save you some backtracking later if you pay attention now.
(Above Left) You can leap to the stage area to make it harder for your foes to follow you and punch you. (Above Right) The new exit leads back to the Lucia map, near a new Abandoned Energy Station and the Parkway area.
Head to the Downtown area when you're ready to proceed. You've been through here in the past, but this time you'll be exiting through a new route. The first few groups of enemies that you meet shouldn't give you much trouble. You will be able to run past many of them without taking any damage or using any crystals if you're in a hurry.
You'll soon come to some more challenging foes, however. The scorpion-shaped enemies can fire at you with machine guns to quickly break through your shields, plus they're joined by tough soldiers with strong defenses. You're best off avoiding them when possible, but soon you'll get to a group of enemies that are less easily avoided.
Three Screw-Top enemies will attack you in the staging area where you defeated a boss in a previous chapter. Each of the new foes has powerful shield capabilities, which is the bad news. The good news is that because of their girth, the ennemies can't easily pin you in a corner if you keep moving. Tri-Attack efforts can actually be detrimental here in the tight space, but heroic attacks that carry you back and forth along the side of the room where you enter can yield positive results. Remember to alternate between machine gun fire one turn and hand guns the next, and don't be afraid to skip turns if a character isn't armed with what you need to make that happen. You need to focus on quickly building up damage, something that the exploive barrels in the area don't help with nearly as much as you might anticipate. Take on the enemies one at a time and you should be able to easily win.
Once you have defeated those massive goons, you should notice a new exit route accessible from that room. It's the one with the white arrow, so follow that new corridor and you'll be asked if you would like to exit the area. Do so and you'll appear back in the Lucia dungeon map. Continue around and there's another Abandoned Save Station ahead of a new area known as Parkway. Rest up at the station and save your progress, then enter the Parkway area.
(Above Left) The Jalopy Golem's purpose is to prevent you from finding out what secrets lie at the end of the Parkway. (Above Right) Start with powerful Scratch damage, then follow that up with handgun bursts.
Immediately after you enter the Parkway area, you'll witness a scene that depicts the arrival of a powerful new foe: the Jalopy Golem. He is joined in battle by two Fullmetal Gear allies. You need to defeat the Jalopy Golem in order to advance to the next hex in this brief new dungeon. His Fullmetal Gear allies will keep coming as you destroy them and are therefore inconsequential except for the risk that they pose.
As you fight the Jalopy Golem, you'll soon find that he carries a powerful machine gun turret that is capable of breaking through all of a party member's shields and triggering a critical status in a single turn. If crystals start showering everywhere, your enemies will retrieve them and you can lose a lot of battle progress. Therefore, it's important that you don't give him a chance to fire that weapon. One way to limit his projectile use is to start the fight by having your characters run straight to the left or right to drop from the edge of the stage where you are positioned as the fight begins. There you can open chests for items and also sneak around to find the Jalopy Golem.
Your machine gunner should head to the left while the other two head to the right to draw the attention of the golem and his gear allies. What you want to do is get your characters close to the Jalopy Golem and then start hitting him from the sides. Short bursts of fire will do fine and will slowly eat away at his shields while the gears fight ineffectually from the sides. If you're close enough to the Jalopy Golem, they'll stay far enough away to avoid being a threat. Keep firing your shots to prevent the golem from charging up his turret. He should wheel to face the two main characters who are causing harm, leaving your machine gunner to perform heroic actions on occasion that quickly wear down the shields without putting him at risk. There's a certain art to applying the strategy, but it works far better than a suicidal full-on rush and it should allow you to emerge victorious.
Once you win, you'll see a cutscene and will receive credit for completing the mission. Now you can tend to any remaining side missions, then head back to your base to view a new cutscene and to advance to the next chapter.
Chapter 10 - The Seminary
This is a short and easy chapter, at least as far as actual plot elements and required battles go (though some of the side missions can prove challenging), but a revalatory one. After a cutscene, you'll find yourself in control of your party minus one member: Zephyr. A new story mission becomes available and you'll receive some Energy Hex pieces.
Travel to Crank Seminary on Level 7, as instructed. You'll have to battle three unavoidable enemy groups along the way. When you arrive, a cutscene follows and then the mission is complete.
Change equipment to accomodate your two-member party, then head to the Guild to check out the chapter's selection of side missions.
Rebel Suppression 4
Travel to Level 6 and you'll find four enemy tiles with exclamation marks over them, right near Patertopolis as predicted. Defeat each of the enemy groups and you'll receive your reward once the last of them are defeated.
A Job Too Big
Head to Level 8 and make your way to the Freud Remnants portion of the map. As you approach, you'll notice four red tiles with exclamation marks over them. To satisfy the terms of this mission, you need to defeat the enemies that lurk within those spaces. You'll likely fight the Piledrive Giant last, accompanied by two buddies. In that fight, take out one of the weaker buddies in each of the first two turns so that they can't damage you in later rounds, then finish the fight in the remaining rounds by running around your slower moving main target using heroic attack maneuvers. When you defeat the giant himself, you'll automatically receive credit and a reward for completing the mission.
Chicken Gruel for the Soul
Location N/A
Objective "Head for Crank Seminary on Level 7."
Reward 10 Hunter Points, 10000 Rubies, Hand Grenade ++(20)
Location The Cardinals
Objective "We have obtained intelligence that the rebels are preparing to launch acts of sabotage in the vicinity of Patertopolis on Level 6. All hunters within the area are to cooperate in the eradication of the saboteurs."
Reward 10 Hunter Points, 7500 Rubies, MC Sub-Zero Rounds +(25)
Location David (Level 10 - Albona)
Objective "I accepted an extermination job, but I'm outclassed. But walking away from the job's not in the cards. I'm not putting a dent in my good name and reputation! So, could I get you to take down the Piledriver Giant that appeared around the Freud Remnants on Level 8?"
Objective "There's been a cold bug going around in Chandelier. I'm running out of the medicine I had prepared before. Won't a kindly hunter help bring some more? I await in my manor, of course."
Meet with Barbarella in her manor. She wants you to get her a medicine chest from the Silver Canyon area. If you talk to the servant standing near her table, he'll direct you to the Chemist's Closet portion of the canyon. Take a trip there. When you arrive, battle the enemies that greet you and work to the back of the closet. There, you'll find a waiting crate that you can open to receive the Medicine Chest item. Take it back to Barbarella in her manor for your reward for another mission completed.
Most of those early side missions are most easily cleared when you have all three party members, so you may wish to tackle the story mission before worrying about the chapter's content that waits on the side.
Your first objective while working on the chapter's proper progression is to head to Crank Seminary on Level 7. There's an unavoidable fight in the way, almost immediately, on the bridge leading east from Ebel City. Even with only two party members, you should be able to defeat them easily. There's another such obstruction on Level 6, ahead of Core Lift 2. That group can be difficult to defeat if you're hit with their stun grenades, so try to avoid that particular disaster as you take down the first two or three of them from behind the shelter of the walls and then finish off the rest with long heroic action runs. Continue toward Crank Seminary after that, battling a final group of unavailable enemies that awaits your arrival on Level 7. After that, you're free to advance to the seminary.
(Above Left) You'll find yourself battling various groups of enemies on the way to the seminary. (Above Right) An emotional cutscene is your reward for making the journey.
Arrive at the seminary and you'll trigger a cutscene. When it concludes, so does the story-based mission that you had undertaken. Now you should return to Ebel City. When you enter your home base, you'll trigger a new cutscene. Following that, you'll have the opportunity to advance the chapter.
Before you do that, of course, you should complete any side missions that are available. You now have three party members, so you should re-equip everyone to your liking. Then tackle the side missions and any new ones that you make available by visiting the Guild as the old ones are finished.
Pater's Message
Meet with the maid who wanders along the front steps at Pater's Manor on Level 3. Talk to her and she will tell you that there's a gift waiting for you in Patertopolis on Level 6. Head to that area next. Enter and work your way to the very back hex. There, left of the bench where a previous chapter's events concluded, you'll find a
Reward 5 Hunter Points, 2500 Rubies, (Victory) Pater
Location Pater's Maid (Level 3 - Pater's Manor)
Objective "Please! Help! I'm in desperate need of help! Desperate!"
crate. Open it to obtain the Bundle of Love that Pater left for you. Take the bundle back to the maid at Pater's Manor and when you hand it over, your mission is complete and you'll receive your reward.
The Secret Medicine
You'll find Stanley standing just to the left of the Guild building in Cranktown. Talk to him. He will ask you to find a Beast's Beard Mushroom for him. Talk to him again and he'll mention that you can harvest the item from a Matango Walker. That creature hangs around the Freud Remnants area on Level 8, so travel in that direction and fight the monsters that appear as exclamation marks over red hex spaces on the map until one yields the desired prize upon its defeat. Then take that back to Stanley to complete your mission and receive the promised reward.
If the battle with Matango Walker is giving you trouble (as well it might), remember to remain a safe distance from the Matango Walker. His cohorts don't do a lot fo damage, but the walker is capable of draining most or all of a character's shields in a single blow. Don't let yourself wind up anywhere near him after making a run or you'll take a considerable amount of damage. Play things safe, use Tri-Attacks that carry you around the various obstructions in the area and you'll have the Beast's Beard Mushroom that you need in no time!
Once the last of the side missions are out of the way, go ahead and advance to the next chapter.
Chapter 11 - A Place To Lay Emotion Down
Following a series of cutscenes, you'll begin in chapter 11 with a party consisting only of Zephyr. A new story mission is immediately available.
A Visitor from the Past
As Zephyr, you'll appear just outside of the home base. Equip the weapons that you'll need for a rough battle, then head out to the world map and head east to the unavoidable encounter on the west side of the Rainy Bridge area. Win the battle and you'll complete the quest.
When you appear, it's just outside of the home base. You can travel to the right to exit to the world map, but first you should make sure that you're equipped with a weapon that can deal direct damage. The ideal is to have one machine gun and one hand gun equipped. Then you can exit to the map and you'll see an unavoidable enemy encounter just to the east, at the entrance to the Rainy Bridge area. Travel there when you're ready to initiate a cutscene and a battle.
Reward 8 Hunter Points, 5000 Rubies, First Aid EX(3)
Location Stanley (Level 7 - Cranktown)
Objective "If anyone has the time to spare, I could use help with my pet project."
Reward 35 Hunter Points
Location Lagerfeld
Objective "The bridge that continues to this area. Let us meet there."
(Above Left) Lagerfeld has a bone to pick with Zephyr. (Above Right) You'll face him alone on the Rainy Bridge, man to man.
The fight that follows is between Zephyr and Lagerfeld. Since you have only the one party member, there's not much that you can do to switch up your strategy. Spend your first round hitting him with as much scratch damage as you can manage over the course of a heroic attack run. Do not leap into the air. Hit Lagerfeld with a fully charged burst of machine gun fire from behind and you should turn most or all of his meter blue. Note that if you pay attention, you'll see him slowly turning as you run past him, but he doesn't keep up with you and you'll be able to hit him from behind as long as you do so before he has properly faced you.
When that first round ends, Lagerfeld will most likely warp to your location (if you're within his considerable range) and pummel you mercilessly. Crystals will shower everywhere when that happens and you'll lose all or most of your bezel crystals. You need to blast Lagerfeld for damage before he gathers any of those. If you haven't turned his meter fully blue by that point, then hopefully you managed to get out of his range so that you can take a second run and finish turning it blue. Then you need to hit Lagerfeld with a gun burst to turn his filled scratch damage meter into direct damage. If he goes down, you've won the fight and if he doesn't, you'll most likely just have to try again. This isn't a fight that you are going to win once Lagerfled manages to recover from either the direct or scratch damage that you inflict.
Once your foe has fallen, there will be more cutscenes and then you'll be asked if you wish to advance to the next chapter. There are side quests that you should complete first, so choose to save instead of advancing and then head to the Guild to see what assignments are available. You now have your full party back, so you should also make sure to rework your equipment as necessary.
The Roadblock
Travel down to the Dakota Vein area on Level 9 and you'll see a single red space with an exclamation mark over it. The Flare Yeti that you fight here should be a breeze and can be targeted immediately. Begin by having your machine gunner hit him with a fully charged blast from behind, which should turn his entire meter blue, then repeat the process with a hand gun blast (also from behind) on the next attack. Victory and a reward for completing the mission will immediately be yours!
Reward 10 Hunter Points, 5000 Rubies, HP Electrified Rounds +(25)
Location David (Level 10 - Albona)
Objective "I took on a job I'm desperate to do properly, but there's a toughie along the way that I can't deal with. Can someone take out the Flare Yeti blocking the way to Dakota Vein on Level 9?"
Talk to Miranda in her shop. She wants you to find her an Iristone, which a specific monster carries. She's not sure which one. You can obtain the item by defeating the Vibrant Tar Man monster in the Freud Remnants area, located on Level 8. Once you arrive in that area, head to the Ruins Site East portion of the map. Battle through the first hex on the grid and when you reach the second one, you'll find yourself battling against the Vibrant Tar Man. The Vibrant Tar Man is a rather challenging foe, but he fights alone. You can win by making long heroic attack runs, first as a machine gunner and then while firing a hand gun. Tri-Attack maneuvers work well as long as you remember to start them with your machine gunner, as well (and as long as you avoid the crates). When you win, you should receive the Iristone item. Once you have it, take it back to Miranda to complete your quest and receive the promised reward.
A Beast on the Loose
Visit Pater's Manor. Talk to the maid wandering around in front of it a time or two. She's looking for Pater's dog, Lassie Doo, who won't respond to anyone but the maid. The dog is loose in Chandelier somewhere, so your job is to find it and then report back to the maid. Head out to the world map and ride the elevator up to Level 2. There, ride up one more level to the top of Chandelier, Level 1. Travel to the Basilica and there you'll find Lassie Doo lying in a heap near the front steps. Talk to her and she'll whine. That's enough for now. Return to the maid at Pater's Manor with the news and you'll receive your reward for completing the mission.
Making Amends
Travel to the Tower of the Righteous area on Level 11. As you arrive, you'll notice three red tiles with exclamation marks dangling over them. Entering any of those spaces triggers a battle. Eliminate monsters on all three of them to automatically complete the mission and receive your reward.
Once you complete those side missions, you're ready to advance to the next chapter.
Objective "Exterminate monsters for me. Those that roam around the Tower of Righteous on Level 11. It's something I must see done before I die. I should see to it myself, but my frail body won't allow it. So I've readied the best reward I could. It doesn't matter who, wipe out those monsters for me."
A series of cutscenes serves as the introduction to this chapter. You will be provided with some new Energy Hex pieces and then you'll find yourself in charge of your party. It has shrunk in size, though. You're in control of only Vashyron. A new story mission is available.
The Wedding Crasher
Travel to Square Garden, at the top level of Chandelier. There, Vashyron will work through some weak enemies (who can easily be skipped without any penalty if you use heroic attacks and make sure to shoot an opponent on the way to each new hex space) before reaching a boss battle at the end. Upon defeating the boss, the mission will be complete.
Since you're only controlling Vashyron at the moment, there's not much point in attempting side missions just yet. Equip a machine gun and a hand gun both, then go ahead and make your way to Level 1. If you haven't been to the Square Garden area before, which is likely the case, the way to get there is to head up Core Lift 1 to Level 3, then ride an elevator up to Level 2, then head around to the elevator along the lower side of that area that leads to Level 1. You should see the Square Garden area to the left. You'll need to use an Energy Hex to make it rise from the map so that you can access it if you haven't been to this location previously.
(Above Left) The Square Garden area is located on Chandelier's top level. (Above Right) Make heroic dash runs and leaps to quickly navigate the Square Garden dungeon.
When you enter the Square Garden area, you will find yourself at the entryway to a dungeon area. Walk through the archway to find yourself in the dungeon, though at this point there are no enemies present. That will soon change. Wander through the corridors as you would a typical dungeon, keeping your hand gun equipped for now. There will be numerous encounters along the way, but you don't need to worry about defeating the enemies. In each round, just make a heroic dash toward the desired exit, blasting an enemy as you go so that one bezel crystal is regenerated. Then you can spend the second turn running a short distance to the exit. Work through the dungeon in this manner until you reach your destination, visible on the grid map as a hex circled in white.
Reward 35 Hunter Points, 15000 Rubies
Location Cimano
Objective "Please crash a wedding behind held in the Square Garden of Chandelier! Before it's too late to get my girl back!"
Once you do reach that actual space, you'll trigger the arrival of the area's boss. This fight can be difficult, since your party consists of only Vashyron and you'll be going up against a helicopter and a bunch of foot soldiers. If you try to take out the gunmen first, the helicopter's shots will likely tear you apart before you deal any damage to it at all. However, taking out the helicopter will eliminate all of the other enemies, as well. With that being the case, you should focus all of your efforts solely on the helicopter.
When you begin the fight, you'll see the helicopter ahead of you in the distance. Run forward (without using a heroic attack just yet) and keep to the left of the ledge on which the fight takes place. Shortly before your meter empties, you should have arrived near the left corner of the platform. The helicopter should now be ahead of you and just to the right, while directly to the right there will be gunmen. Make sure that you have your machine gun equipped. Now it's time to use a heroic attack that will take you along a line in front of the helicopter. Leap into the air so that you glide over the gunmen and when you have charged your machine gun, release it to fire a blast at the helicopter's shields.
(Above Left) The helicopter isn't alone as it attacks you at the chapel. (Above Right) Leap in the air over the gunmen and focus on hitting the helicopter with machine gun and hand gun fire, not the soldiers.
When you land on the other side of the gunmen, switch to your hand gun. Now repeat what you just did, leaping back over to the left. Continue leapfrogging over the soldiers, using first your machine gun and then your handgun to burn through the helicopter's shields. If you're doing it properly, you should sustain only minor damage throughout the fight and you will receive new bezel crystals regularly, as well. Just as long as your HP doesn't drop too low, you can win using the technique.
After defeating the helicopter, you'll receive credit for completing your mission. Now it's time to head back to Ebel City (now with your full party, whom you should re-equip to your liking) and your home base. Save your progress there, then go to the Guild to see about any side quests.
Going Gangbusters
Travel to the Albona area and you'll notice four red spaces on the map with exclamation marks over them. Defeat the enemies at each of those places and when the last of them are gone, you'll receive your reward.
Note that if you're having difficulty with these foes using the strategies that have carried you this far in the game, there's not much you can do except level up your characters a bit, make sure that their weapons are
Objective "We have reports that the rebel group has made contact with the gangsters that rule over the Albona area on Level 10. We believe it is an attempt to merge forces. The present whereabouts of the rebels are unknown. To prevent the merger, hunters in the vicinity are to join the fight against the gangsters."
properly upgraded and keep trying. The tanks fire explosive rounds once per round and recover quickly even if you stun them, so you need to take out one tank per round if you intend to win. That's particularly true when going up against two of the tanks at once. Have your machine gunner carry armor-piercing rounds so that he can completely fill a given tank's scratch meter, then quickly follow up with one of your hand gunners. With any big tanks gone, you'll be free to focus on the weaker gunners in subsequent rounds.
Christmas Cheer
Head to Theresa's Manor on Level 3. Enter her chamber and talk to her. She reiterates her request and if you talk to her again, she'll suggest seeking the opinions of the people in Ebel City. Return there and talk to Izzy, just down the stairs from your home base but before you reach the Guild. He'll offer to build you something that you can use in exchange for one Scrapped Hammer SH1, ten pieces of Srap Iron and ten pieces of Scrap Bronze. You can obtain the Scrapped Hammer SH1 by defeating the Sledgehammer enemy found in the Dakota Vein on Level 9 (he's several spaces into the dungeon, so don't give up when you don't encounter him immediately). The other two you likely already have in your inventory. Turn the loot into Izzy and he'll give you a Tree Voucher. He also mentions a fellow in Cranktown who had some lights that would be icing on the cake. Go to Cranktown next and talk to William. He's standing on the walkway that leads past the Hotel. Talk to him and he'll ask you to find him three pieces of lighting scrap. When you hand that over, you'll receive the Six-Way Light Bulb. He'll suggest that you visit Albona next to find a star. Do so. When you arrive in Albona, talk to the Shop Owner along the back street. She'll hand over the Ritzy Star at no charge. Take that back to Theresa for your reward.
Not Available as Trash
Travel to Albona and go to the back street with the merchant stalls. You'll find Slash along one side and he'll ask you for the Armanium. Talk to him a second time and he'll volunteer some useful info: you can get Armanium by scrapping a Scrapped Eater TAR2, obtained by defeating Tar Armor enemies in Lucia on Level 6. Go there next. Start making your way through the Downtown area and in the fourth hex, you'll find yourself facing two of the Tar Armor enemies. Defeat them and at least one of them should drop a Scrapped Eater TAR2 item. Take that with you back to town and scrap it for the Armanium (you'll receive three of that item), then take one to Slash in Albona for your reward.
The Missing Brother
As the mission instructs, visit Cranktown during the night hours. Near the eastern entrance, ahead of the series of three shops, you'll meet Elisa and her mother. Talk to Elisa to get more info. She wants you to find out what happened to her brother at Crank Seminary. Leave Cranktown and travel to the seminary. Enter and look at the debris lying on the floor, just right from the base of the statue. Investigate the sparkling point there to obtain the Broken Glasses. Now take those with you back to Elisa in Cranktown. Remember that you'll have to arrive
Objective "I'm planning a Christmas party for the children, but I don't have much in the way of decorations. Could you help me find something they'd enjoy?"
Objective "I've been searching for some Armanium. But it's not anything you can just find lying around... Can anyone get some for me?"
Reward 5 Hunter Points, 250 Rubies, Perfect Aid
Location Elisa (Level 7 - Cranktown)
Objective "My big brother hasn't come home in a long time. Where did he go? Won't someone find my brother for me please? I will be waiting in Cranktown at night with Mama."
at night in order to meet with her. Hand over the glasses and you'll receive credit for completing your mission.
When you have cleared the last of the side missions, go ahead and advance to the thirteenth chapter.
Chapter 13 - Christmas
After a cutscene, you'll appear on the front steps of your home base and will receive a new story mission.
The Christmas Party
Travel to the Square Garden area at Level 1. You'll need to make your way through every hex on the dungeon map, delivering presents to the children using the same mechanics that in any other situation would find you firing a gun. When you've delivered every last present, you'll receive credit for completing the mission.
Travel to the Guild next to see what side quests are available in the chapter. As usual, new ones will become available as you complete old ones (since no more than three side quests will ever display at once).
The Forefront of Fashion
Talk to Miranda in her shop. She wants you to find her some Vulcanized Hide. Allcott has told her that you can harvest it on the lower levels. Find Allcott himself for more info. He's in the Ebel City weapons shop. He'll inform you that the Junker Behemoths used to yield the precious hide, but they are believed to have gone extinct. If any remain, he figures you'll find them in Etsia on Level 10. That's your next destination, then. Travel down to Level 10 and enter Etsia. When you arrive, you may want to equip gear that protects from heat, as many of your foes in this area will try to fry you to a crisp.
From the main Etsia map, your first order of business should be to rest and save your progress. You can find an extra Heat Protector if you battle to the end of the 'D' Block area, but the item that you're looking for is only obtained by defeating the Junker Behemoth enemy that lurks at the back end of the 'R' Block area. He has strong armor, so you'll want to use bullets that can break through those defenses quickly if you mean to win. Once you emerge victorious, you'll receive the expected Vulcanized Hide. Return that to Miranda in Ebel City for your reward.
Reward 30 Hunter Points, 10000 Rubies
Location Theresa (Level 1 - Square Garden)
Objective "You're aware that we organize an annual Christmas event in the Square Garden of Chandelier, aren't you? I'm in need of volunteers to distribute gifts to children at the party. I'm so sorry about the short notice, but could you do this as a favor to me?"
Travel to the area near Etsia on Level 10. You'll see four enemy tiles ahead of the entrance to that dungeon, each with exclamation marks over them. Those each represent a trio of enemies that you will need to defeat. The two smaller guys within each grouping of enemies are relatively weak and you should have little difficulty defeating them within a round apiece. The larger fellow often requires several rounds and is capable of dealing more damage, but he moves slowly and you can put the long wall between you as you make heroic runs back and forth across it to stay out of the way of his projectiles and stomp move. Defeat all four enemy groups to automatically complete the mission.
The Ravening Beasts
Head to the Silver Canyon area and you'll find five red tiles nearby with exclamation marks positioned over each of them. Enter and defeat the enemies (they're especially weak against metal-coated rounds fired from your machine gun) on all five spaces to receive your reward for another successful mission.
The Future of Medicine
Travel to Cranktown on Level 7 and meet with Stanley in the usual spot, just to the right from the hotel. He needs you to pick up some pharmacology textbooks from Warden at Core Lift 2. Travel to Core Lift 2 and ride the lift back up to Level 6. Talk to the gentleman in the white coat to receive the Pharmacology Text. Now take it back to Stanley. You'll receive credit for completing the mission.
Once you've tended to the side quests, or at least the ones that are convenient at present, it's time to head to the Square Garden area on Level 1, where the previous chapter's narrative events took place.
Reward 10 Hunter Points, 12500 Rubies
Location David (Level 10 - Albona)
Objective "I was tasked with exterminating monsters that appeared around Etsia on Level 10, but... Damn it, I feel so useless! An you knock out some Manhole Stoppers for me?"
Objective "There's a nasty infestation of pests stirring up trouble around Silver Canyon on Level 7. My boys found themselves outmatched, though. Can you fry those nasties instead?"
Objective "If anyone has the time to burn, I need your cooperation for the future of medicine! ...I kid. It's a simple job you can do to while away the time."
(Above Left) Dressed for the season, you'll deliver gifts. (Above Right) Children crowd you in search of the goodies.
You'll now find yourself playing through one of the most unique missions in the game. Your job in this dungeon isn't to battle enemies; it's to deliver presents. The mechanics for doing so are the same as the combat system, except you can't select between guns and such. The button that typically fires bullets now delivers presents to children.
You need to work your way through every hex on the grid, which is easiest if you start by first going left one to deliver presents, then retreating back right and following the snaking path through the rest of the hexes. As you 'battle' the children, you'll find that they can be quite unruly. They run around the area and sometimes they will mob Leanne so that she is too dazed to take action. Try to avoid letting them corner her like that, though Zephyr and Vashyron can help out if that does happen.
Note that you can still use heroic actions in these areas. They won't even drain your crystals, so in general it's a good idea to make heroic runs. Leap into the air as you near the children and you can throw a present or two at the child of your choice to satisfy his or her seasonal cravings. Once you have cleared the entire dungeon, a cutscene plays and the mission concludes. You'll receive your reward, then there's another cutscene as you find yourself controlling only Leanne.
(Above Left) Use your heroic action 'attacks' to more easily deliver gifts. (Above Right) With a job well done, it's time to party!
As Leanne, you have a new story mission that you need to complete.
A Christmas Prayer
As instructed, travel to the Basilica area on Level 1 in Chandelier. It's a short distance from your position when
you first receive the mission. Simply exit to the world map, ride the elevator to Level 2, travel left to the next elevator and ascend once more to Level 1, then follow the path around to the Basilica.
Start by heading to the Basilica area. You should remember how to get there by now, given how much time you've spent on the world map in this game. Once you arrive, you'll trigger a new cutscene. When it concludes, your mission is complete.
Now you can head back to your home base and, if you've finished every side quest of interest to you, advance to the next chapter.
Chapter 14 - An Old Promise
When the start-of-chapter cutscene concludes, you'll appear in the lobby of your home base. A new story mission is available and Leanne is not. You also will receive some Energy Hex pieces that allow you to access new portions of the map, a fact that will come in handy shortly.
An Old Promise
Head east from Ebel City, reuniting with Leanne along the way, and use Core Lift 1 to reach Level 3. From there, head just to the left and ride the elevator up to Level 2, then head around that map to reach an olive green hex block. Place a newly-acquired Energy Hex piece there to open up the pathway. Lay more pieces so that you can reach the nearby elevator, which previously was unavailable. It will take you up to Level 1, where you can make Aetersyl available using two Energy Hex pieces.
Before you worry about the story mission, now is a good time to check at the guild for new side missions. Leanne will be rejoining your party shortly, so it's not a bad idea to have your current challenges laid out in front of you.
Showdown
Just west of the Forest of Idols on Level 5, you'll find four red enemy tiles with exclamation marks over them. Defeat the enemies that lurk on each tile to receive your reward.
Objective "The rebels' main force emerged without warning near the Forest of Idols on Level 5. They have begun their advance. All hunters are to join in the final battle. The rebellion must be crushed once and for all."
Find Stanley in his usual place in Cranktown, just to the right of the Hotel. He'll mention leaving a book, Pharmacology, Vol. VI, in the Gran Idee Mines. He'd like you to retrieve it for him. You can find the mines on Level 11. To get there from Cranktown, work your way to the lower side of Core Lift 3. Then head forward to the four-way path and follow the right branch past Albona to reach an elevator that will take you to Level 11. Now proceed past the Tower of Righteousness to another elevator. Ride that down to Level 12 and you will see the mines at the end of the pathway ahead of you. Before you set foot inside, make sure that you have items equipped to protect yourself from poison. Your trip inside will be a long one, so you may also want to make sure that you have the kit equipped on someone so that an Escape Hex can be used once you reach the end of the area to avoid the need for backtracking.
Once you enter the mines, just make your way toward the deepest region (the hex along the lowest left portion of the map). You'll have to fight some tough enemies along the way, but by now your levels should be high enough and your general mode of operation should be more than enough to help you defeat each foe. Following a final battle with a giant machine and some goblins, you can investigate the crates along the back side of the area to find Pharmacology, Vol. VI as anticipated. Take it back to Cranktown to complete your mission.
A Thirst For Knowledge
Meet with Antourion in his manor. He will ask you to survey the entirety of Level 10. It's possible at this point that you have already done so. If not, go down to that level and do so. You should have more than enough Energy Hex pieces to do as your employer asks. Once the area has been surveyed, you can talk to Antourion again to receive credit for completing the mission.
Your first order of business in this chapter should be reuniting with Leanne as you complete the chapter's first story mission. Start across the bridge toward Core Lift 1 and you'll trigger a cutscene. Leanne will rejoin your party. Then you can either start in on side quests or concern yourself with the story mission. We recommend the former, as it's a great way to build levels and gather gear for the more challenging story mission area.
When you're ready for the story mission, you can start by using Core Lift 1 to reach Level 3, then ascending the elevator to the left to reach Level 2. From there, travel around the rim until you come to the green hex tile near the far side of the tower. Previously, you couldn't pass that point. With the new piece you gained at the start of the chapter, however, that has changed. Place it and then make a path to the newly-accessible elevator. Ride it up to Level 1, then use some brown Energy Hex pieces to make Aetersyl available on the map. Enter.
Reward 8 Hunter Points, 5000 Rubies, Perfect Aid
Location Stanley (Level 7 - Cranktown)
Objective "If you ever happen to be in Cranktown, drop in. There's something I'd like help with. That's if you've got the time, of course."
Objective "We were hoping to send a survey team down tot he lower levels. However, they've been beset by delays during preparations. I seek help from those who can operate on Level 10."
(Above Left) Your reunion with Leanne will happen rather promptly. (Above Right) Aetersyl is a dungeon, not some friendly manor.
When you arrive in Aetersyl, a brief cutscene follows and then you appear on a map of the vicinity. Enemies will attack you as you make your way along this map and they're more challenging than you might anticipate, despite the lack of an intimidating appearance. Deal with them carefully and make your way to the Abandoned Energy Station so that you can rest and save. This is a good place to level up if that's needed, as well. Then when you're properly prepared, you can go ahead and enter the Grand Hall area.
The enemies that you encounter upon first appearing are powerful, enough so that they'll likely cream you if you haven't leveled yourself up significantly. However, you don't have to defeat them. Rush past them while taking as little damage as possible, and from there continue through another such corridor. You'll notice that you're moving along the hex grid in an easterly direction. When you get all the way to the right side, you'll emerge on the dungeon map again. Now walk around to the back side of the building. There's an entryway there, but ignore it as it leads nowhere important. Instead, continue around and you will find a place where you can enter the building from another side.
If you think back to the hex grid you just left a moment ago, you should see that now you're working your way through the same area as before, except now you're traveling along the grid's vertical column. Make sure to grab the PDW-XN.V3 from the golden case after you clear this first room of enemies. Then you want to start down the vertical column, not up it.
As you continue in that direction, you'll soon find yourself back in a room that should look familiar to you. That's because you've already visited it, but from the opposite side of the grating. As you approach from this side, you'll notice a lever. You can move to the lever and pull it to open the gate, making it easier to navigate the dungeon on subsequent visits. Then if you're feeling fatigued, you can head for the exit to make a pit stop at the Abandoned Energy Station before proceeding once more.
(Above Left) You have to flip this switch before the boss will show up in the dungeon. (Above Right) Hit the turrets with machine gun fire from behind the bunkers.
This time, your destination is the eastern wing that you already passed through previously. This time, now that you have the gate open, you'll encounter a different circumstance as you pass through those halls: a cutscene and some enemies.
The fight begins in a long corridor. There are three soldiers here. You should easily be able to take out one per round if your machine gunner is using Hollow Point Bullets of one sort or another. Then it's time to look left, through an archway.
Through that archway, you'll see a bunch of the turrets that were depicted in the cutscene. There are several of them positioned in a circle, with the lead turret at the top of the circle. The trick to taking out these cannons is to remember that they have shields. If you run in with your guns blazing, you're probably going to die. However, a careful approach makes this fight a breeze because disabling the shields will destroy the turrets. There's no need to worry about taking on the main bodies.
First, make sure that your machine gunner has a suitably powerful gun. It needs to have fast charge time and you shouldn't equip it with any special rounds. Have your machine gunner head into the area and quickly take up position behind one of the bunkers. Now have one of the hand gun users join him. Make sure that both are flush against the bunker so that they're not drawing fire from the turrets, which will destroy the bunker in time. You don't want that happening. Instead, you want to fire a charged blast of machine gun fire through the netted window. The more damage you do the better, of course. You should be able to turn a whole shield blue on the nearest turret. Now have your hand gun user convert that to direct damage and the cannon will be destroyed. Repeat the process for each of the other cannons to win the fight.
(Above Left) Direct Kills are the way to easy victory in this otherwise grueling battle. (Above Right) Leanne is in a bit of a hurry, as you've no doubt noticed.
After the battle, there's another cutscene and you'll receive credit for completing the story mission. Then you should return to Ebel City. When you arrive, there will be another cutscene. Then you can choose to advance to the next chapter if you'd like.
Chapter 15 - Power Beyond Conception
You'll receive some Energy Hex pieces as a cutscene concludes, then a new story mission as the chapter begins properly.
Search for Sullivan
Travel back up to Level 1, where you entered Aetersyl. In the same general area, you'll find the Outer Wall
Reward 35 Hunter Points
Location N/A
Objective "Head to the Outer Wall of Level 1 and find Sullivan."
area. Enter it. A battle will ensue. Defeat those enemies and you'll appear on the Outer Wall Dungeon map. Head to the back and enter the Sullivan's Manor Promenade area. Defeat the enemies in the first hex, prepare yourself for battle in the second hex, then enter for a boss battle. Defeat those enemies to complete the mission.
With your story mission clear, it's time to check for available side missions.
This Gun's For You!
Travel to Cranktown and you'll find Anthony pacing around near the vending stalls on the street near the area entrance. He has a test for you. He wants you to find a Moonlight Gem from Mine 24 and a Human Fossil that is held by monsters in the Gran Idee Mines. Only when you have obtained both will he entrust you with his gun. It's time to hunt for those items.
To find the Moonlight Gem, travel to Mine 24 on Level 11 and work your way toward the lower left portion of the hex grid map. The second space from the end of that long passageway includes a chest that you can open for the Moonlight Gem.
To find the Human Fossil, head to the Gran Idee Mines on Level 12. Travel through the mine until you come to the first intersection and continue into the dead-end room that waits there. Within that room, you'll find a Bone Collector enemy. He's a powerful foe, but you can defeat him as you would any other powerful monster: with machine gun runs followed by handgun blasts. His powerful melee attacks will crush you if you let them, but you can prevent him from even using them by making sure that you use fully charged handgun attacks to stun him. When he perishes, he'll give up the Human Fossil.
Take your items back to Anthony in Cranktown for your reward.
Winter Fashion Materials
Talk to Miranda in her shop and she will ask you to obtain 20 of the Hide item for her. You likely have that many and then some from battling throughout the world. Many monsters will drop it when defeated. Hand over 20 of the item to receive credit for completing the mission.
Objective "I'm looking for a young hunter worthy of inheriting one of my long-cherished firearms. Those who think themselves skilled... Those who consider themselves worthy should come see me!"
Objective "There's a shortage of a certain material for winter wear. We're history if we can't get anymore. Won't someone, anyone, help gather the material for us?"
Find Carlo at Le Chit-Chat Noir. He'll likely be standing in the left corner along the bottom of the screen. Talk to him and he'll reiterate that he's looking for a Locked Trunk item on Level 12. If you've explored that area, you very likely already received the Locked Trunk from revealing hex spaces along the map near the Grand Edee Mines. Hand it over now for your reward.
With the side missions out of the way, you're free to resume your plot-related efforts. If you've completed all side quests in the game up to this point, be sure also to check the mailbox outside your base for the HG L-Rail Barrel and a Perfect Aid. Then you should travel to the Outer Wall on Level 1, right near Aetersyl. You'll need to use one of the brown Energy Hex pieces that you were given at the onset of the chapter to cause the area to become available.
(Above Left) Use the final variety of Energy Hex piece to activate the Outer Wall area. (Above Right) You'll need to work your way through some snipers to enter the Outer Wall.
When you enter the Outer Wall area, you'll trigger a brief cutscene and then find yourself engaged in a battle. This fight is easily won by targeting the leader with machine gun fire, hand gun shots and then possibly a Tri-Attack to finish the job in the first round.
Once those enemies go down, you'll find yourself on the general dungeon map for the Outer Wall area. It's a rather lengthy area, with the only area of note being Sullivan's Manor Promenade on the far side. Head there now.
When you enter the promenade area, you'll have to battle toward its back. There are only two spaces on the grid. The first one is occupied by a handful of gunners. You should be able to defeat them quite easily. Do so, then check the crates that they were guarding to find the MG S-Rail Barrel and an Escape Hex item. You should also place defensive items in effect one each party member. Now advance to the next chamber.
(Above Left) Sullivan's Manor Promenade is along the back side of the map. (Above Right) Begin the battle by
Location Carlo (Level 7 - Le Chit-Chat Noir)
Objective "I lost my Locked Trunk somewhere on Level 12. I'm at my wit's end. It's irreplaceable. If found, please return it!"
taking out the Bahamut helicopter or it'll inundate your party with missiles throughout the fight.
In the next area, you'll see a cutscene and then you'll find yourself engaged in a boss battle. This fight consists of two gunners, a Bahamut helicopter and three Mobile Storm Cannon enemies. The cannons are your actual target, but you can make things easier on yourself by first eliminating the helicopter (which fires missiles throughout the fight) and the gunmen. Then focus on disabling the shields on the tanks and finally destroying their interior mechanisms. You'll probably want to utilize more defense-enabling items about halfway through the battle.
When the last of the enemies are defeated, you'll see a cutscene and the mission is completed. You'll appear on the Outer Wall dungeon map, right near the entrance so that you can immediately exit to the world map and return to Ebel City. When you arrive, go to your home base for another cutscene and to save. If you've completed all side quests in the chapter, it's time to advance to the game's final chapter.
Chapter 16 - The Basilica
As usual, a cutscene serves as the opening for the next chapter. You'll receive some Energy Hex pieces, then a new mission.
The Basilica
Travel to the Basilica area, on Level 1. Enter and work your way through, battling enemies and bosses alike. When you reach the very top portion of the hex grid map, you'll face the final boss. Remember that you can leave to save and resupply in Ebel City after defeating each boss. Defeating the final boss will give you credit for clearing the mission and you'll be able to see the game's closing credits.
This is the last chapter, but there remain side missions for you to complete. Check the bulletin board at the Guild one final time to make them available.
Rebel Termination Order
There will be three red tiles with exclamation marks hanging in the air over them when you leave Ebel City for the world map. They are positioned along the Rainy Bridge. Defeat the enemies on each of those tiles (all of them extremely easy) and when the last of them are defeated, you'll automatically receive credit for completing the mission.
Reward N/A
Location N/A
Objective "Head to the Basilica of Chandelier."
Reward 20 Hunter Points, 10000 Rubies, Expander Super Barrel
Location The Cardinals
Objective "Thanks to the work of hunters, the rebels are no longer the threat they once were. Indeed, their organization is all but in shambles. However, the rebel leader has amassed the die-hard followers at Rainy Bridge on Level 4 to make their last stand. All hunters are called upon to participate in the hunt for the fanatical holdouts."
You'll find Izzy near the Guild, rummaging through junk as usual. Bring the items that he requested and when you hand them over, you'll receive credit for completing the mission. Having trouble finding the items? Rare Metal Shard items are commonly dropped by enemies that you battle on Level 7 near Cranktown. The Crystal Core is more difficult to find, but you can glean them from the Goliath enemies that sometimes attack within the Grand Idee Mines on Level 12. If you haven't been selling a lot of your materials and you've been completing side quests up to this point, there's a good chance that you do in fact already have both items in your inventory.
My Trauma
Travel to the Hughes Power Station. Enter it and work your way through the area. When you arrive at the second space, you should notice something called a 'UFO Catcher' among the enemies. You need to pursue it through the dungeon now. It will flee from you, so follow it along the grid and pay attention to the direction it heads so that you don't lose it. You should be able to hit it with a burst of charged machine gun fire before it vanishes in one hex, then in the next hex hit it with a hand gun and keep alternating. Note that if you try to fully charge your gun, it may take too long and the UFO Catcher could disappear, so get a feel for just how long you can get away with charging before firing. Once you actually bring down the enemy, you'll instantly receive credit for completing the mission.
When the side missions are out of the way, it's time to head to the Basilica on Level 1.
(Above Left) Defeat the other guys that fight alongside Garigliano first so that they don't wear you down too much. (Above Right) When it's just you and Garigliano, hit him with fully charged bursts of gunfire fired from the air in the
Reward 15 Hunter Points, 35000 Rubies, Long Scope Elite
Location Izzy (Level 4 - Ebel City)
Objective "A Crystal Core and Rare Metal Shard. I'm looking for these two items. Will someone be willing to sell these to me? They're valuable materials. I'll pay you well for them!"
Reward 12 Hunter Points, 5100 Rubies, Special Scope
Location MacGregor (Level 7 - Cranktown)
Objective "A UFO appears near the Hughes Power Station on Level 4! Blast that thing out of the sky! Don't ask me why! Don't come ask me, either!"
Enter the Basilica and a cutscene will follow. Once that concludes, you can head through the doorways to find yourself in a dungeon, working your way along a hex map. You'll battle a few units of relatively weak enemies, then come to the first of several boss battles.
That first boss battle is with Garigliano and his helpers. He's a high-level boss who won't go down easily, flanked by several guards who are also quite powerful. If you try to take out Garigliano without first eliminating his guards, you'll be in for a world of hurt. Try to take out each of the guards without succumbing to their powerful elemental blasts. They attack with poison and shock attacks, so if you have strong defense against those elements the fight will go better for you.
Remember to always attack with fully charged bursts of gunfire. That will make full scratch damage more likely (particularly if you're attacking from behind) with the machine gun and it will probably stun your opponents if you're using a hand gun. This briefly keeps one enemy from attacking each round and could be enough to save you until you're down to only Garigliano himself. Even then, heroic attacks that stun him will be your friend between more powerful Tri-Attack maneuvers. When you've battled for long enough, Garigliano will finally go down. Now you can return to Ebel City to save and perhaps purchase more supplies. Then it's time to venture deeper into the dungeon.
(Above Left) Trip switches in the dead-end branches so that you can pass through a gate shortly. (Above Right) Like Garigliano, Antourion doesn't care to fight alone.
You'll come to a split in the path where you can continue straight, head left or head right. The paths to the left and right are obviously dead ends, but you'll need to follow them anyway. Defeat enemies in each direction and examine pedestals that they were guarding. You'll be able to activate them, which will open a gate deeper in the dungeon. Now continue along that center path that you ignored previously. Past a Godhammer enemy encounter. For that fight, just do your best to apply your usual strategies in the tight corridor as you keep the enemy running back and forth around the bunker. You don't have to stick around to fight if you don't want to. Just work your way to the far side and pass through the newly-opened gate to find yourself viewing a cutscene that depicts the arrival of the next boss: Antourion.
The fight with Antourion shouldn't give you too much difficulty. Make sure that you have strong armor equipped, preferably with good defenses against ice attacks. Antourion's fighting companions like to spray you with icy blasts that can freeze you if you're unfortunate, something that can severely limit your ability to dominate. Of course, domination from round to round is what you need to engineer. Make sure that you keep Antourion stunned with repeated machine gun and hand gun blasts. If he is left to his own devices for awhile, he'll launch a devastating attack that you can't do much about. Simply focusing on Antourion while using heroic attacks and the occasional Tri-Attack is the easiest way to win, particularly since his soldiers will all fall the moment their leader is gone.
After you defeat Antourion, you may again wish to backtrack to the area entrance to save your progress. Then it's time to continue your assault on the Basilica.
(Above Left) Collect goodies from the crates before you explore the treacherous side paths. (Above Right) The heavily armored enemies that guard these switches can be difficult if you don't deal full scratch damage.
From where you battled Antourion, continue toward the top of the hex grid map. You'll see another fork in the path. Grab the HG S-Rail Barrel and the Escape Hex from the crates here, after defeating the enemies. Again, you need to head along each of those forks to activate switches.
The encounters along those two dead-end paths are among the most difficult in the game unless you're making proper use of your machine gun. You'll face multiple, enormous enemies at once and a lot of them are capable of attacks that can remove most of your shields with a single hit. You can use the architecture to shield yourself from sight and from blasts, which can buy you time to deal full scratch damage with a completely charged blast of machine gun fire. If you stay low to the ground, it's even possible that you can deal full scratch damage to multiple enemies at once, making otherwise difficult encounters much simpler to manage.
After activating the two switches, you've done everything in the tower except face Rowen. It's not a bad idea to head back to the world map to save again. Then you can head up the middle path to face Rowen.
(Above Left) The Venomous Fog enemies will make the battle much more difficult than it needs to be until you eliminate them. (Above Right) Rowen uses powerful attacks when he's not stunned, so try to keep him stunned when possible.
When you finally reach Rowen, it's time to get serious.
Like his fellow cardinals, Rowen is accompanied by a few guards. The Venomous Fog enemies spew poison at you, so you should take care of them quickly with your most powerful hollow-point bullets so that the main guy you have to worry about dealing you damage is Rowen himself. His more standard gunmen, while still dangerous, aren't worth paying much attention to because they seem to regenerate when you kill them, though the Venomous Fog enemies do not.
As you battle the Venomous Fog enemies, try to keep Rowen stunned as often as possible with handgun blasts. Otherwise, he'll use special attacks that can truly decimate your life meter. Focus on removing the poisonous enemies first, then from there on out spend your time focusing on Rowen himself and healing as necessary. When you're going up against Rowen and not his companions, the metal-coated bullet types seem to deal the most damage. They still aren't likely to drain his life meter nearly as fast as you might like. This is
one fight where you'll likely need to heal a fair bit, unless you're leveled up sufficiently and have the best armor and guns.
Once you defeat Rowen, the game concludes and you can go back through it again on the same difficulty, or on a higher one if you prefer. Congratulations!
Some questions are bound to come up more often than others as players work through this game. Below, we're providing answers to some of the ones that we see most commonly. Remember that if you need help with a question that isn't answered here, you can likely find the information you seek in our walkthrough, which contains information on both side quests and story quests and is broken down by chapter.
Common questions...
» Basel's Liberator
Awarded for making all of Basel's hexes accessible again. Are you even human?!
30G / SILVER
» Challenge Conqueror
You've defeated the top-ranked team, the Last Line! Amazing!
30G / SILVER
» Kings of Neverland
Finish Neverland.
30G / SILVER
» The Legendary Hunter
You've completed every mission in the game! The legend wil l never die!
90G / - -
» Stardust Hunters
You've got a star in every rank!
90G / GOLD
» Clear a Second Playthrough
Cleared a second playthrough! Congratulations! and... Thank you!!
90G / GOLD
» Where do I find [some item]?
There are numerous items throughout the game, required for weapon synthesis and to complete side quests. Many of them aren't particularly important, though. We've listed information on the important ones in our walkthrough. If you need something to complete a mission, we'll tell you where you can find it. If you need an item for synthesis, you can typically obtain it by breaking down scraps. Those scraps are obtained by soundly defeating enemies. Make sure that you fight a few enemies on each level of the tower as they become available. By doing so, you'll quickly find the parts that you need and you can sell others for the rubies that you need to pay for new gear.
» How do I take pictures with Garigliano's Camera?
During an early side mission, Cardinal Garigliano will ask you to take pictures of three idols for him. He doesn't give you a lot of information on how to do so, however. We provide additional information on how to complete the task in our walkthrough, but in general you need to take pictures by finding idols in front of Jean Paulet's Manor, deep within the ruins of Lucia and at Crank Seminary on Level 7. When you reach each of those statues, you can investigate their pedestals to automatically snap the required picture. You'll return the camera to the cardinal along with the photographs.
» How do I get more bezel crystals?
Bezel Crystals, the crystals that apear along the bottom of the screen and allow you to execute more moves in combat, are potentially the most important items in the game. You can't just find them, however, not really. Instead, you gain additional crystals on your meter as you progress through the story. Bosses drop shards as they fall in combat and you'll gain a new crystal as enough shards form. You can also find shards (and other helpful items) as you clear away areas on the world map, so it's worth clearing as much of the known world as possible.
» Where do I find the Energy Hex that I need to...?
Energy Hexes are tricky. You can find some of them rather frequently by defeating even standard enemies, but the simple fact is that if you're looking for a particular color and you can't seem to find it, that's the way things are supposed to be. Key locations often will be visible in plain sight but the game doesn't want you to go there just yet. You'll need to wait until certain story elements have transpired, in which case you'll often receive a new color of Energy Hex from a cardinal or other character and will suddenly be able to unlock an area that formerly taunted you from the world map. As you venture toward the lower floors on the tower, enemies will more commonly surrender new colors of hex, but by then you probably don't need them as much.
» Are tasks shared between guilds?
The short answer is 'yes.' Early in the game, you'll only have access to the guild in Ebel City. As you advance to later chapters, new guilds will open up to you. Checking the bulletin board at any guild will give you access to quests from the other guilds, though it's usually obvious which guild posted a given quest just by the nature of the people whom you are asked to visit. You'll only have three side missions available at one time, so make sure that you keep checking back at guilds as you complete side missions to make sure that you don't miss any before clearing a chapter. Once you advance from one chapter to the next, any unfinished quests will be gone for good.