Name:Abdualziz Mohammed Saeed al-Juhani Division: 33221 Trainer Name: Ibrahim Abdullah Eid Odaini Number academic 114331631: Install and Configure DHCP role on Windows Server 2012 Setup: Installing the DHCP role - Start the Server Manager
Transcript
Name:Abdualziz Mohammed Saeed al-JuhaniDivision: 33221Trainer Name: Ibrahim Abdullah Eid OdainiNumber academic 114331631:
Install and Configure DHCP role on Windows Server 2012
Setup: Installing the DHCP role
- Start the Server Manager
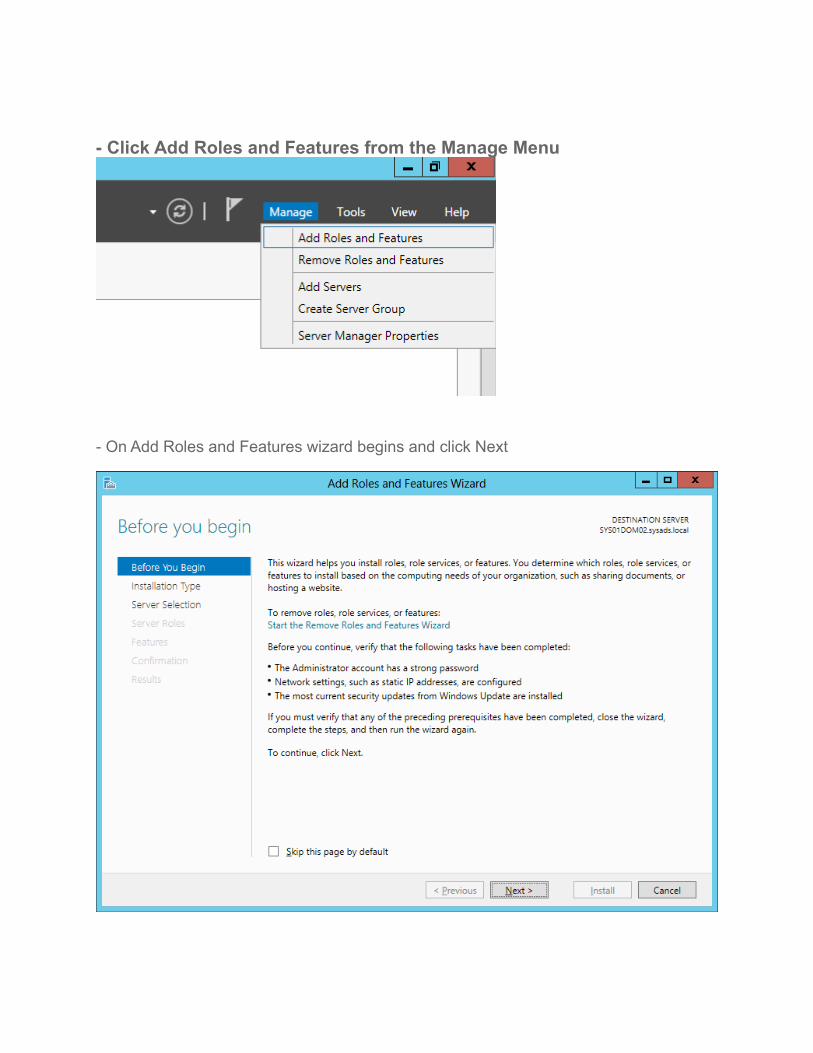
- Click Add Roles and Features from the Manage Menu
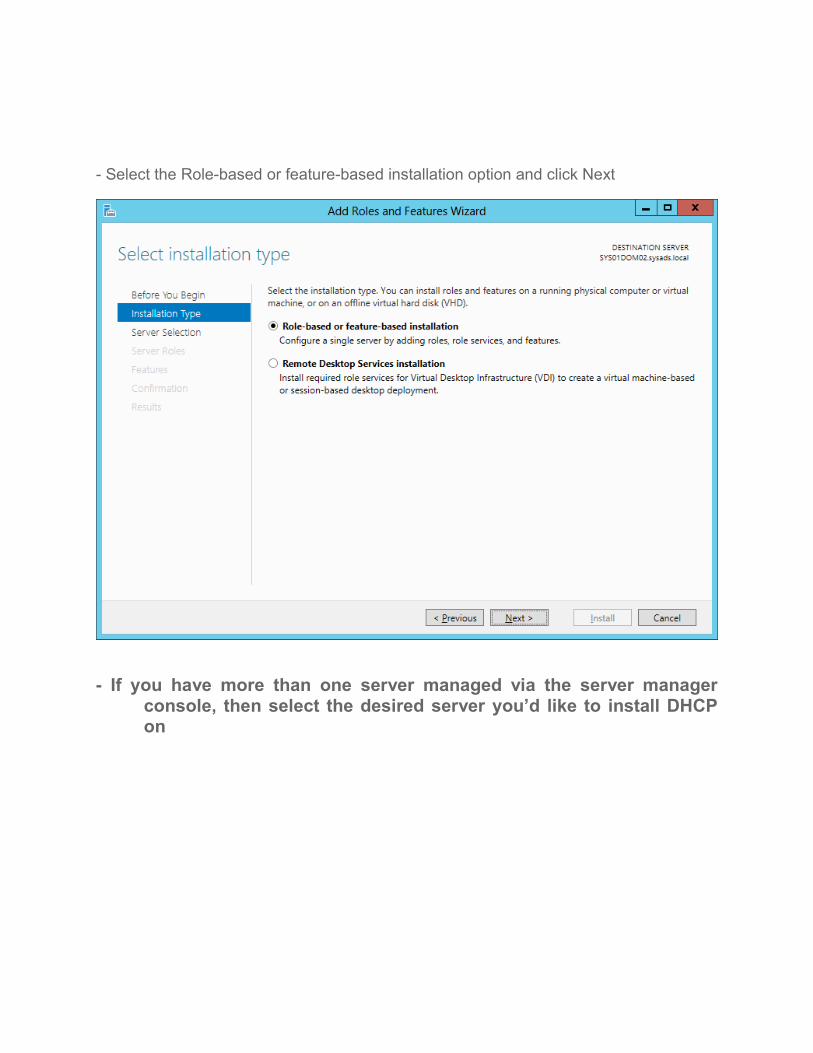
- On Add Roles and Features wizard begins and click Next
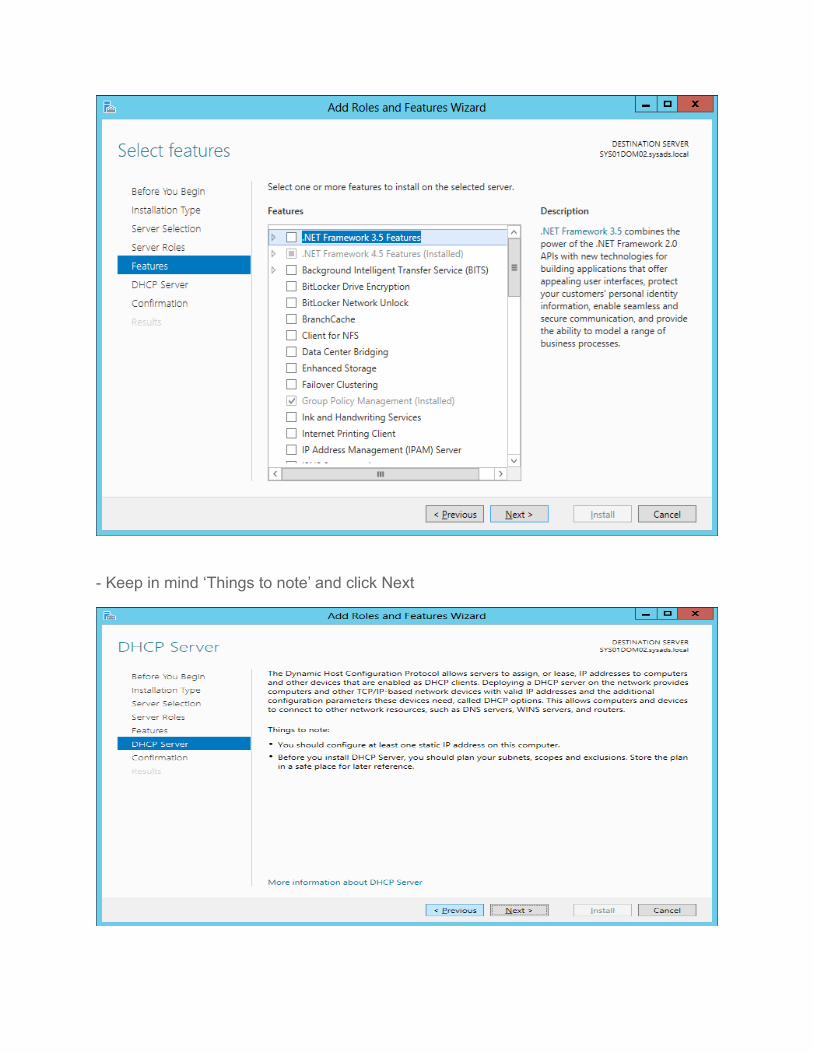
- Select the Role-based or feature-based installation option and click Next
- If you have more than one server managed via the server managerconsole, then select the desired server you’d like to install DHCPon
- From the Roles lists, check the DHCP Server role, click Add Features on the popup
windows
- Click Next
- Select additional features you desire or leave as default and click Next
- Keep in mind ‘Things to note’ and click Next
- Confirm information on summary page and click Install
- After install is completed, click Close
Post Deployment
- Click on the warning icon and then click on ‘Complete DHCP Configuration’
- On DHCP Post-Install wizard, click Next
- On Authorization, select a domain user account that has permissions to create objects
in the Net Services container in Active directory (For security lock-down) or simply use a
domain admin account and click Next
- Confirm on summary page that the security groups had been created and Authorizing
DHCP server role done. Close the screen
Configuring a DHCP Failover Scope
Figure 1The IP address configuration is also done in the typical way that we have done in any DHCP server up to this point.
Figure 2Now that we have our demo scope available, we will right-click the Scope in the DHCP Manager console and selectConfigure Failover:
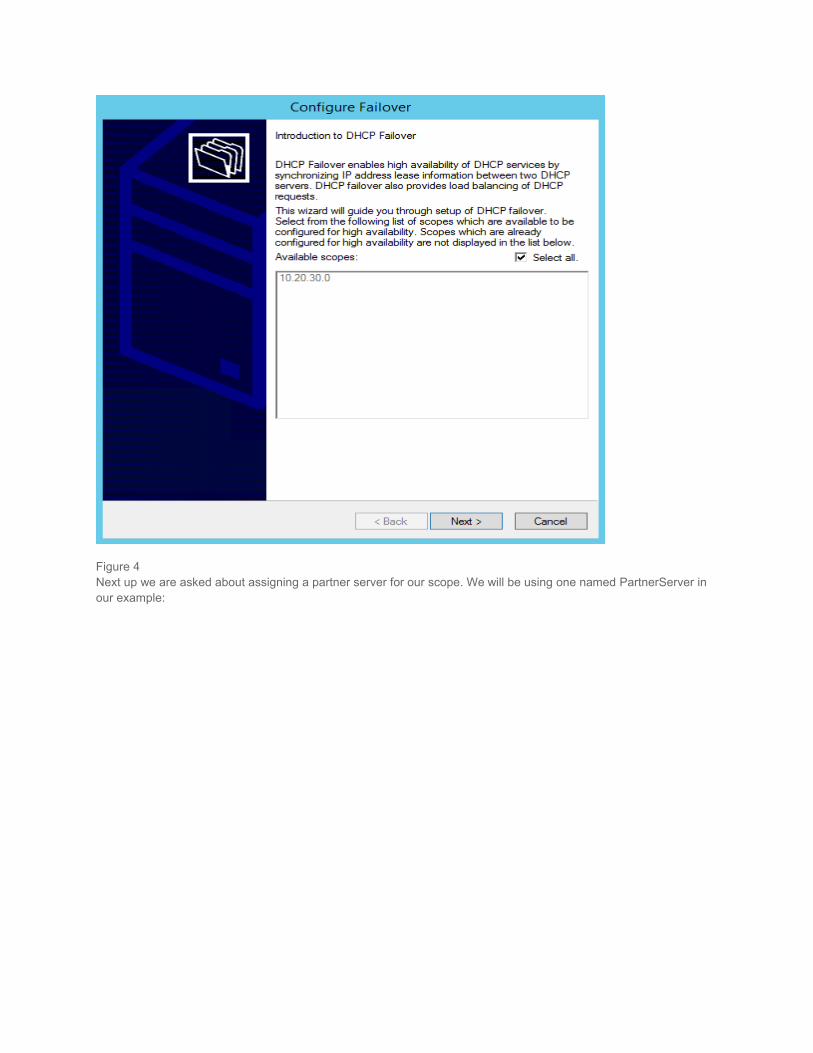
Figure 3The Failover Configuration wizard opens up with a list of scopes that are available to protect. In our sample, we have the 10.20.30.0/24 scope:
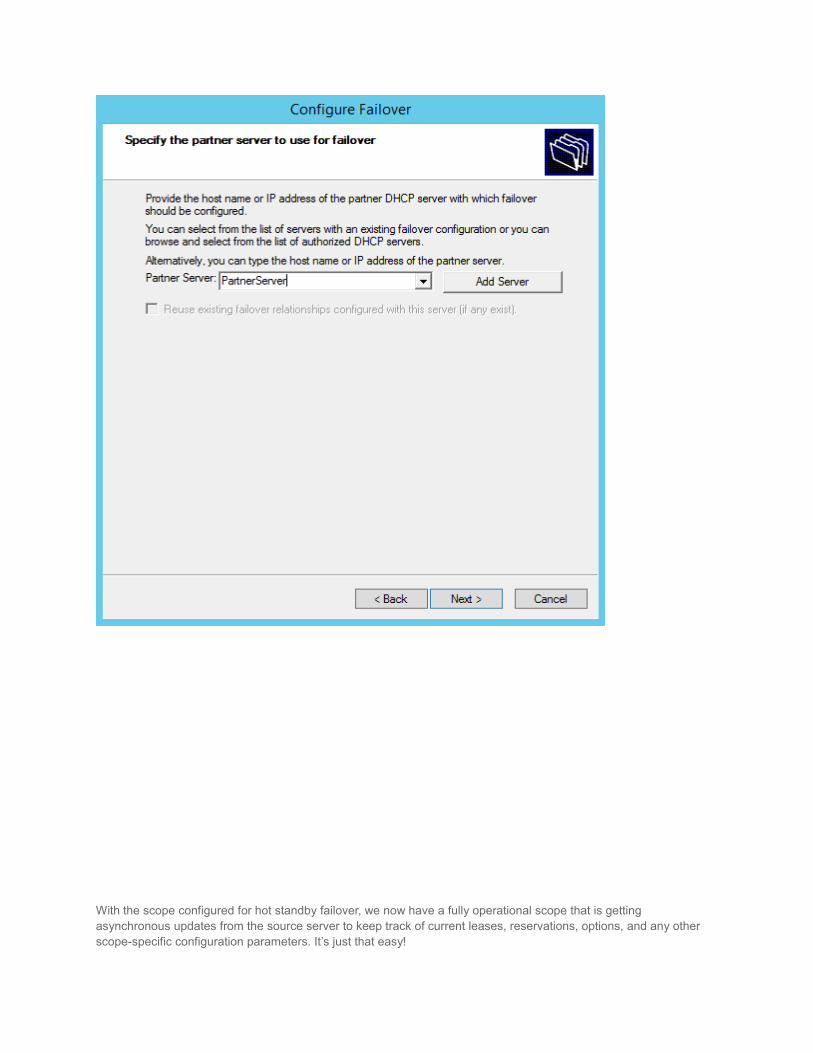
Figure 4Next up we are asked about assigning a partner server for our scope. We will be using one named PartnerServer in our example:
With the scope configured for hot standby failover, we now have a fully operational scope that is getting asynchronous updates from the source server to keep track of current leases, reservations, options, and any other scope-specific configuration parameters. It’s just that easy!
For our own curiosity, it is good to check what the failover scope looks like. You simply open the target DHCP partner server, expand the scopes and right-click the failover scope in the DHCP Manager window. On the properties page there is a Failover tab which displays all of the information about the connection.