Install and Setup ISE 3.1 using Zero Touch Provisioning (ZTP) Contents Introduction Prerequisites Requirements Components Used ISE 3.1 Zero Touch Provisioning ZTP ISE Installation by VM user data ZTP ISE Installation by ISE configuration image Limitations Introduction This document describes how to install and setup ISE by zero touch provisioning (ZTP) in ISE 3.1. Contributed by Saravanan Manoharan, Security Consulting Engineer. Prerequisites Requirements Cisco recommends that you have basic knowledge of these topics: ISE ● VMware Virtual Machine ● Ubuntu ● Components Used The information in this document is based on Cisco ISE Version 3.1. The information in this document was created from the devices in a specific lab environment. All of the devices used in this document started with a cleared (default) configuration. If your network is live, ensure that you understand the potential impact of any command. ISE 3.1 Zero Touch Provisioning This Document explians the two options of ZTP in ISE 3.1 ZTP ISE Installation by VM user data 1.
Transcript
Install and Setup ISE 3.1 using Zero TouchProvisioning (ZTP) Contents
IntroductionPrerequisitesRequirementsComponents UsedISE 3.1 Zero Touch Provisioning ZTP ISE Installation by VM user data ZTP ISE Installation by ISE configuration imageLimitations
Introduction
This document describes how to install and setup ISE by zero touch provisioning (ZTP) in ISE 3.1.
Contributed by Saravanan Manoharan, Security Consulting Engineer.
Prerequisites
Requirements
Cisco recommends that you have basic knowledge of these topics:
ISE●
VMware Virtual Machine●
Ubuntu●
Components Used
The information in this document is based on Cisco ISE Version 3.1.
The information in this document was created from the devices in a specific lab environment. All ofthe devices used in this document started with a cleared (default) configuration. If your network islive, ensure that you understand the potential impact of any command.
ISE 3.1 Zero Touch Provisioning
This Document explians the two options of ZTP in ISE 3.1
ZTP ISE Installation by VM user data 1.
ZTP ISE Installation by ISE configuration image2.
ZTP ISE Installation by VM user data
Note: This Method is supported only for ISE installation in Virtual Machines. This documentuses ESXi 6.7 and this method of ZTP ISE install by VM user data is supported only fromESXi 6.5 and above
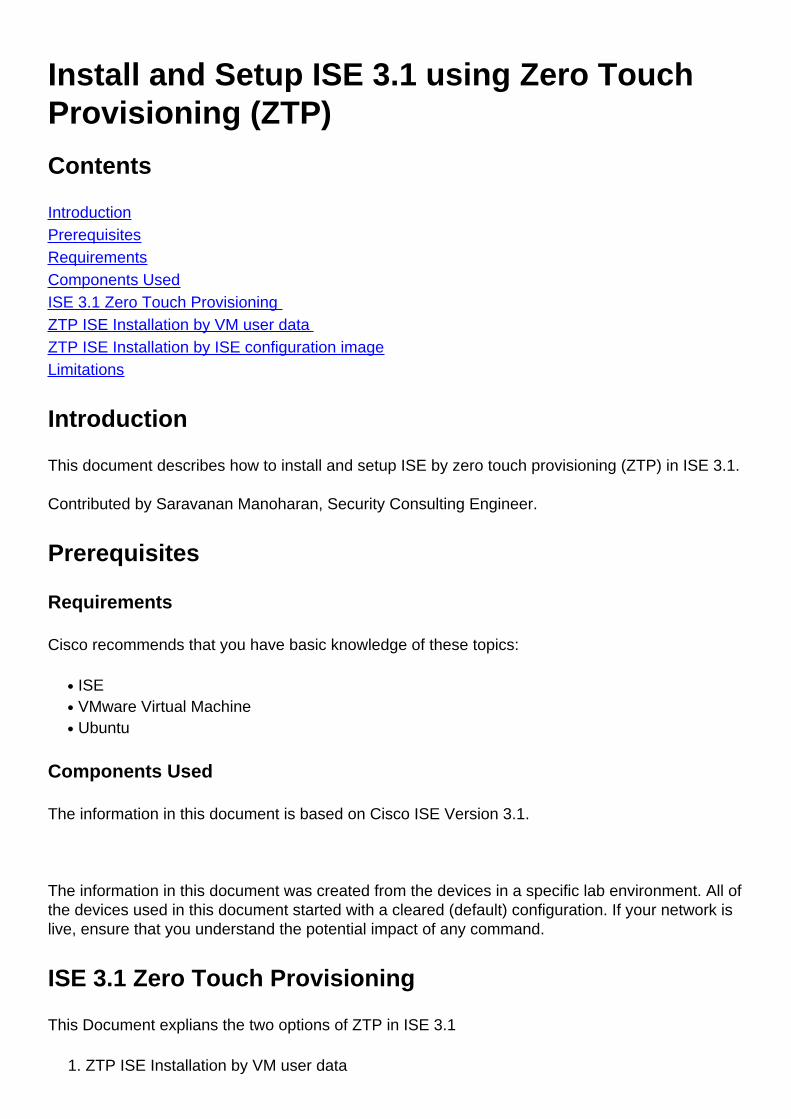
Step 1. Deploy a new VM with ISE 3.1 OVA template.
Deploy a new VM and choose the 3.1 ISE OVA file
Enter the name of the VM●
Select the datastore●
Select Thick Provision●
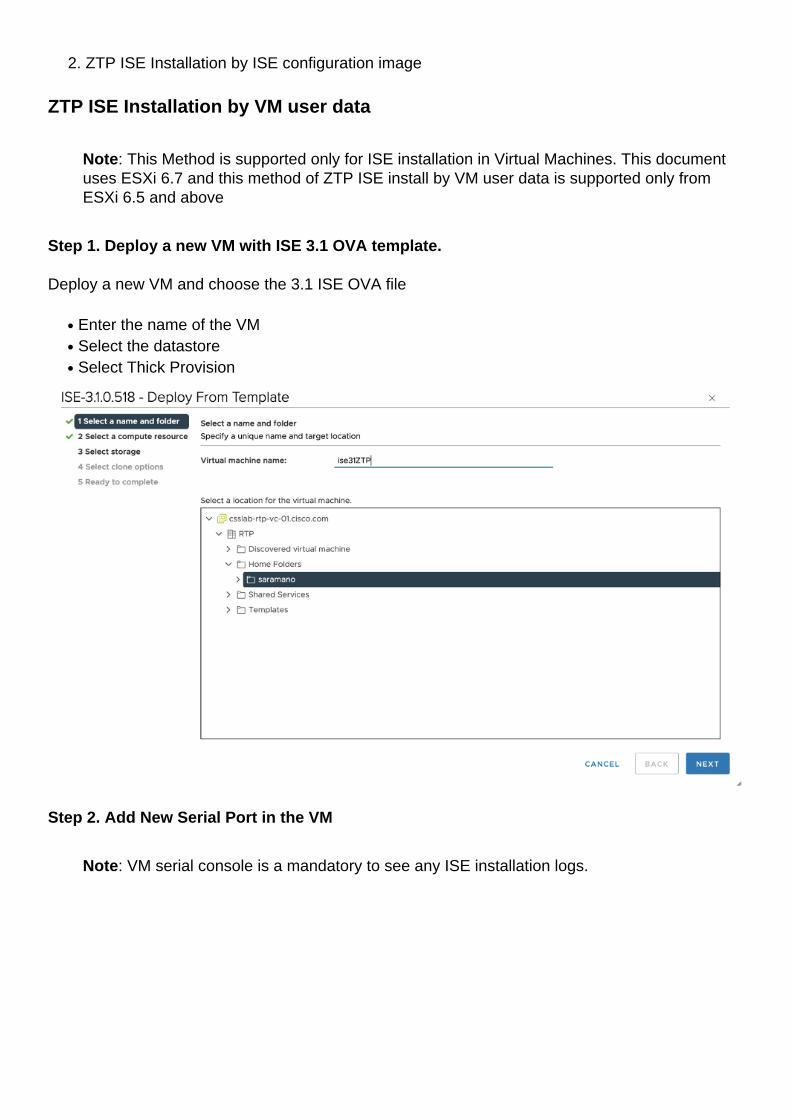
Step 2. Add New Serial Port in the VM
Note: VM serial console is a mandatory to see any ISE installation logs.
Step 3. Create a configuration file
Enter the mandatory parameters such as hostname, IP address, IP netmask, IP default gateway,DNS domain, primary name server, NTP server, system timezone, SSH, username, andpassword. Optional parameters such as IPV6, patch, hot patch, services, and repository detailscan also be configured in the file.
hostname=ise31ztp
ipv4_addr=10.122.112.188
ipv4_mask=255.255.255.0
ipv4_default_gw=10.122.112.1
domain=csslab.com
primary_nameserver=10.122.111.5
secondary_nameserver=10.122.111.6
primary_ntpserver=10.122.1.1
secondary_ntpserver=10.122.112.1
timezone=America/New_York
ssh=true
username=admin
password=Iseisc00l
#Repository Configuration are optional
repository_name=csslab_FTP
repository_protocol=FTP
repository_server_name=10.122.109.4
repository_path=cisco/saramano
ers=true
openapi=true
pxgrid=true
pxGrid_Cloud=true
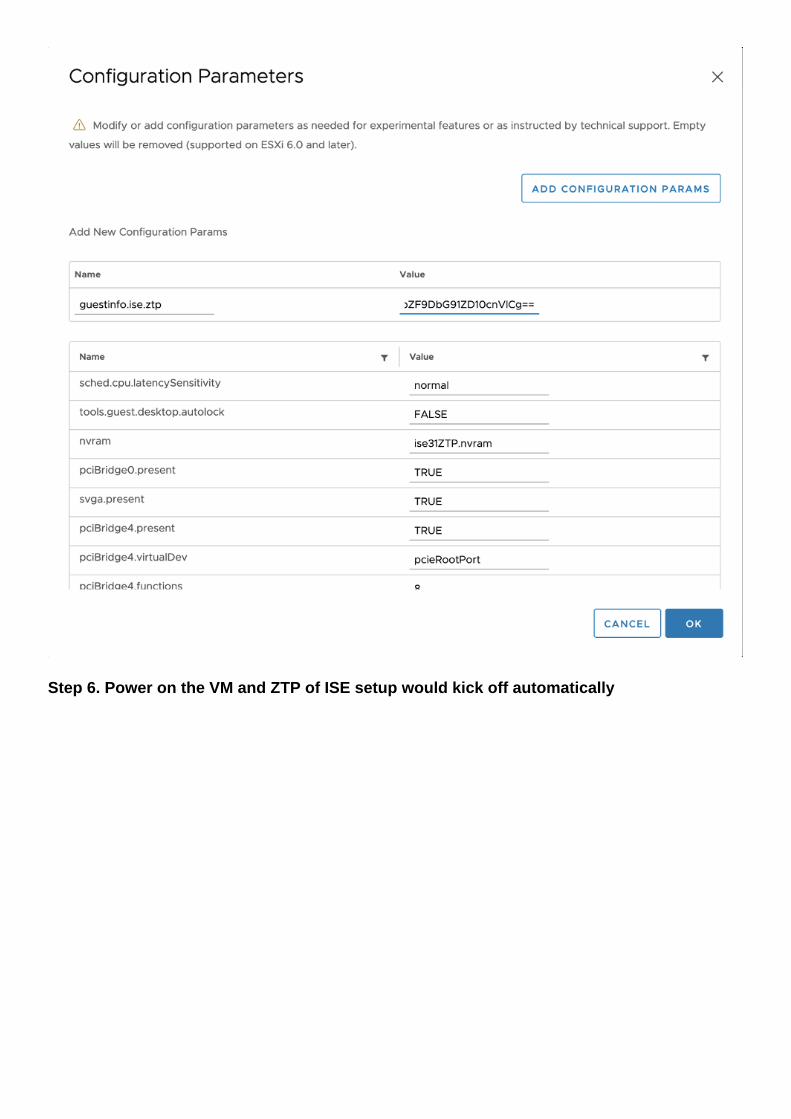
Step 4. Get the Encoded string for the configuration file
Use https://www.base64encode.org/ to encode the content in step 3.
Step 5. Enter the encoded string in the ISE VM user data
Copy the Encoded string from step 4, navigate to VM Options > Advanced > ConfigurationParameters > Edit Configuration > ADD Configuration params
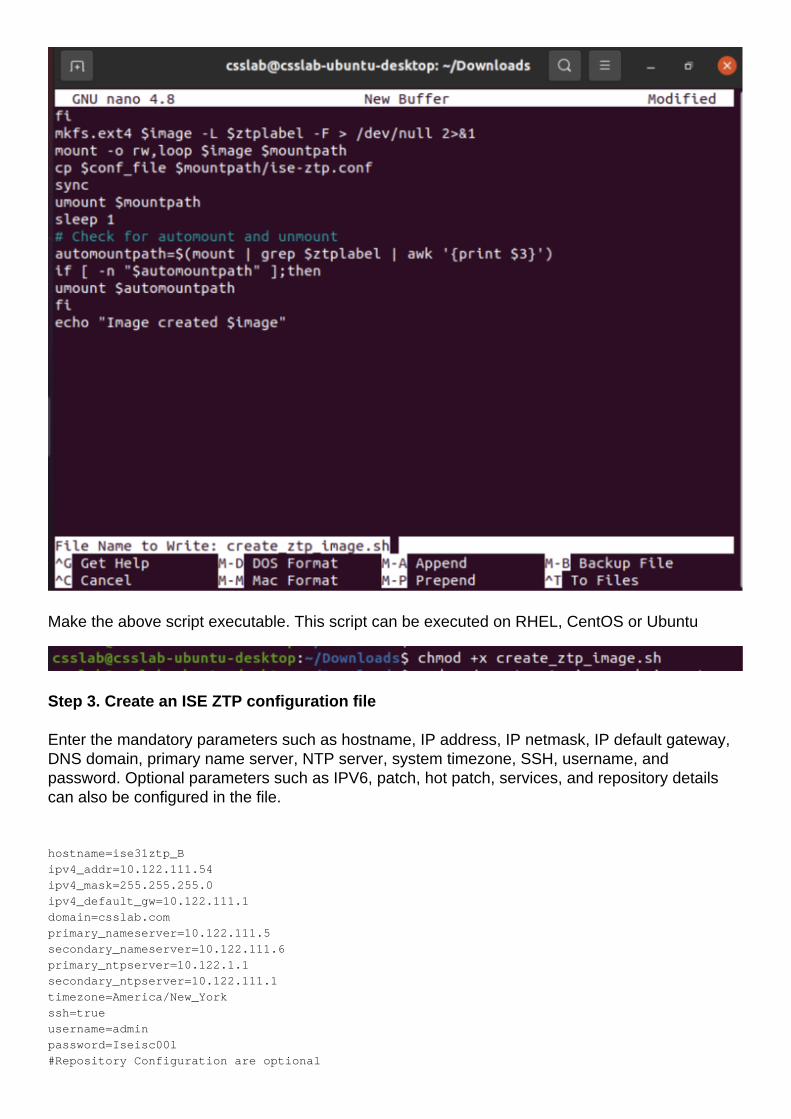
Make the above script executable. This script can be executed on RHEL, CentOS or Ubuntu
Step 3. Create an ISE ZTP configuration file
Enter the mandatory parameters such as hostname, IP address, IP netmask, IP default gateway,DNS domain, primary name server, NTP server, system timezone, SSH, username, andpassword. Optional parameters such as IPV6, patch, hot patch, services, and repository detailscan also be configured in the file.
hostname=ise31ztp_B
ipv4_addr=10.122.111.54
ipv4_mask=255.255.255.0
ipv4_default_gw=10.122.111.1
domain=csslab.com
primary_nameserver=10.122.111.5
secondary_nameserver=10.122.111.6
primary_ntpserver=10.122.1.1
secondary_ntpserver=10.122.111.1
timezone=America/New_York
ssh=true
username=admin
password=Iseisc00l
#Repository Configuration are optional
repository_name=csslab_FTP
repository_protocol=FTP
repository_server_name=10.122.109.4
repository_path=cisco/saramano
ers=true
openapi=true
pxgrid=true
pxGrid_Cloud=true
Note: The executable file and the above ZTP config file must be placed in the samedirectory.
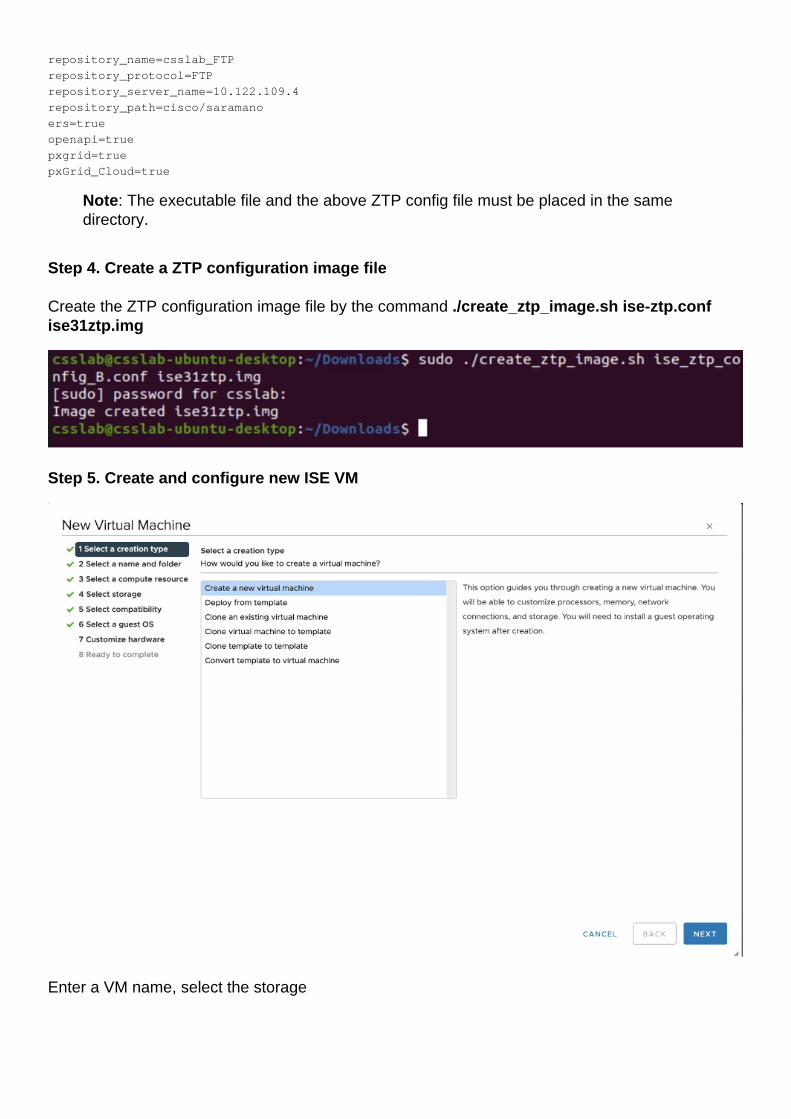
Step 4. Create a ZTP configuration image file
Create the ZTP configuration image file by the command ./create_ztp_image.sh ise-ztp.confise31ztp.img
Step 5. Create and configure new ISE VM
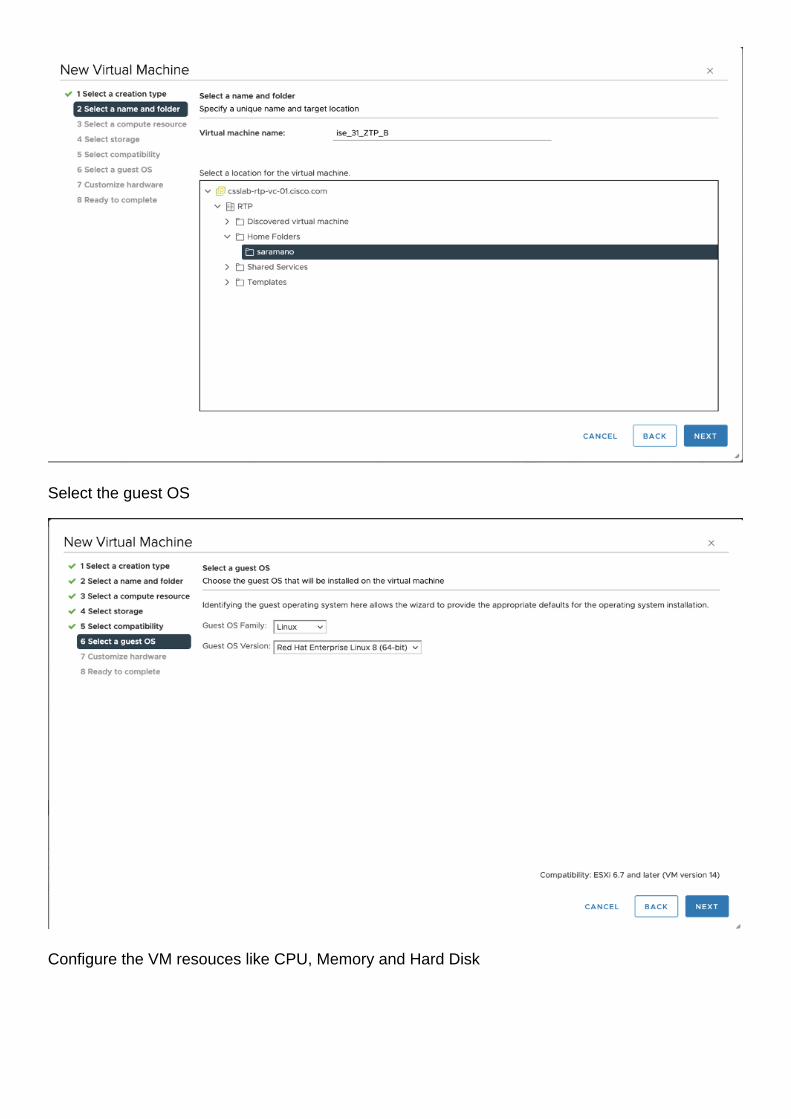
Enter a VM name, select the storage
Select the guest OS
Configure the VM resouces like CPU, Memory and Hard Disk
Add two CD/Drive device in the VM. Primary one is for the ISE ISO file and the second CD/DVDdrive is for used to mount ISE ZTP image file
Add new Serial port. VM serial console is a mandatory to see any ISE installation logs.
After all the neccessary configuration, Power on the VM.
Step 6. Mount the ISO and ZTP Image
On the VM console, choose Removable devices and mount ISE 3.1 ISO on the Primary CD/DVDdrive
Mount ise31ztp image file on second CD/DVD drive
Now power off the VM and Power on again. The ISE software install would kick start. All thesubsequent steps are automatic and no manual intervention is needed at any point.
Access the VM serial console to view the ISE install logs. After the ISE software install, the setuptriggers automatically
Once the above setup is completed, the ISE application starts. Verify the show running-config bylog into the CLI and verify the web GUI access
Limitations
If the ping to the gateway, DNS or NTP fails, the ZTP process hangs.1.If the Firewall blocks the ICMP, ISE can’t be installed by ZTP.2.
In the Manual method you can say “No” in the case of a ping failure to the Gateway, DNS, NTP,etc, so the setup process continues. In ZTP, this is the limitation.
You need root access on the Linux server to create the ISE config image 3.Encrypted/hashed password in the key-value pair file for the ‘admin’ account is notsupported. It only supports the Plain password