Installation and Configuration of the VCAA Assessment Online VM (Build 95) for Gover nment Schools Table of Contents 1. ABSTRACT.......................................................... 2 2. ARCHIVE OF VELS DATA..............................................2 3. IMPORT BUILD 95 VM................................................3 3.1. Copy new VM to host hard drive...................................................................................... 3 3.2. Open Hyper-V Manager.................................................................................................... 3 3.3. Import New VM.................................................................................................................. 3 3.4. Configure VM..................................................................................................................... 5 3.5. Power On............................................................................................................................ 5 4. CONNECT TO NEW VM.................................................6 4.1. Log into the VM.................................................................................................................. 6 4.2. Install DEECD approved Anti-Virus Software................................................................... 6 5. VCAA CONFIGURE................................................... 10 5.1. Select your school from the list...................................................................................... 10 5.2. Enter your activation code.............................................................................................. 11 5.3. Click on Verify Connection.............................................................................................. 11 5.4. Click on Transfer File....................................................................................................... 12 5.5. Activate VCAA Assessment Online.................................................................................. 13 5.6. Import Students............................................................................................................... 14 5.7. PC configurations............................................................................................................ 14 6. CONTACT DETAILS..................................................14 Installation and Configuration of the VCAA On Demand VM Page 1 of 19
Transcript
Installation and Configuration of the VCAA Assessment Online VM (Build 95) for Gover nment Schools
3.1. Copy new VM to host hard drive..............................................................................................33.2. Open Hyper-V Manager...........................................................................................................33.3. Import New VM........................................................................................................................33.4. Configure VM...........................................................................................................................53.5. Power On..................................................................................................................................5
4. CONNECT TO NEW VM....................................................................................................................6
4.1. Log into the VM........................................................................................................................64.2. Install DEECD approved Anti-Virus Software.........................................................................6
5.1. Select your school from the list..............................................................................................105.2. Enter your activation code.....................................................................................................115.3. Click on Verify Connection....................................................................................................115.4. Click on Transfer File............................................................................................................125.5. Activate VCAA Assessment Online.........................................................................................135.6. Import Students.......................................................................................................................145.7. PC configurations...................................................................................................................14
Installation and Configuration of the VCAA On Demand VM Page 1 of 15
1. Abstract
This is a guide for school technicians detailing the process of setting up the VCAA Assessment Online Virtual Machine. This Virtual Machine (VM) is a pre-configured server with the Assessment Online software installed and ready for activation. It is designed to simplify the installation on a standalone or existing server. This VM is entirely self-contained and requires no additional software other than Microsoft Hyper-V.
IMPORTANT NOTE: To complete configuration, please lookup your school’s activation code provided in the ‘On Demand Activation Code List (Build95).xlsx’ file. Alternatively you can obtain the activation code by contacting the On Demand Helpdesk on 1800 827 721 or by email to [email protected]
2. Archive of VELS data
The curriculum scales of the old and new versions are not compatible and so a migration of data from Build 94 to 95 is not possible. For archival purposes it is recommended to power off the Build 94 VM and export it to some long term storage. If the old data is required at a later stage this exported VM can be re-imported and powered on for the purpose of report generation.
A database backup only is not suitable as it cannot be restored into a Build 95 VM without corruption and mismatching reports.
The VM can be compressed after export to save on space.
After this proceed with importing of the new Build 95 VM.
Installation and Configuration of the VCAA On Demand VM Page 2 of 15
3. Import Build 95 VM
3.1. Copy new VM to host hard driveExtract the VM from the supplied archive to a location on the Hyper-V host’s hard drive that has adequate space for the VM and room for expansion.Please note that the Hyper-V image can grow to a maximum of 60 GB however it is not expected to actually reach this limit.If less that 60 GB is provided for expansion then periodically monitor the growth of the VM to ensure there will be no issues with available storage in the future.
3.2. Open Hyper-V Manager
3.3. Import New VMRight click on the server in the left hand list, and then click Import Virtual MachineBrowse to the location of the VM you copied earlier, ensure Move or restore the virtual machine is ticked, and then click Import
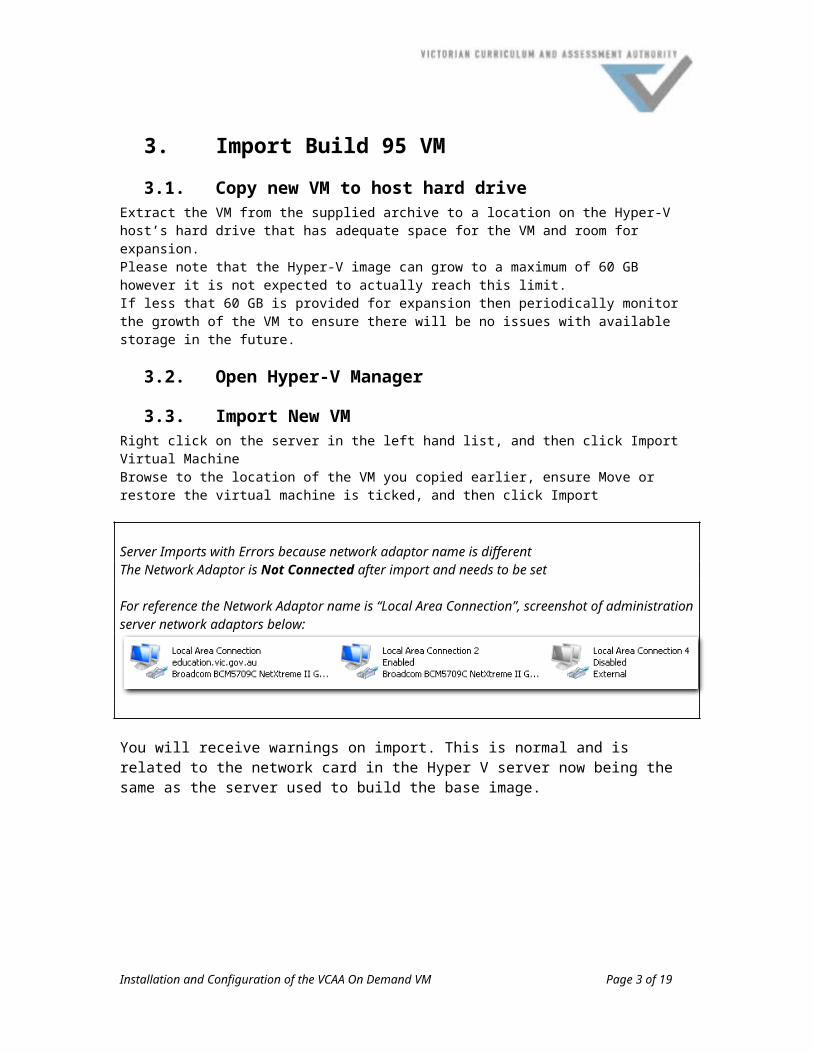
Server Imports with Errors because network adaptor name is differentThe Network Adaptor is Not Connected after import and needs to be set
For reference the Network Adaptor name is “Local Area Connection”, screenshot of administration server network adaptors below:
You will receive warnings on import. This is normal and is related to the network card in the Hyper V server now being the same as the server used to build the base image.
Right-click the newly imported VM and click Settings
Installation and Configuration of the VCAA On Demand VM Page 3 of 15
Locate the Network Card in the hardware list on the right. Click on it. Then in the drop-down box over to the right select the server network card that you are connecting the new VM through
Installation and Configuration of the VCAA On Demand VM Page 4 of 15
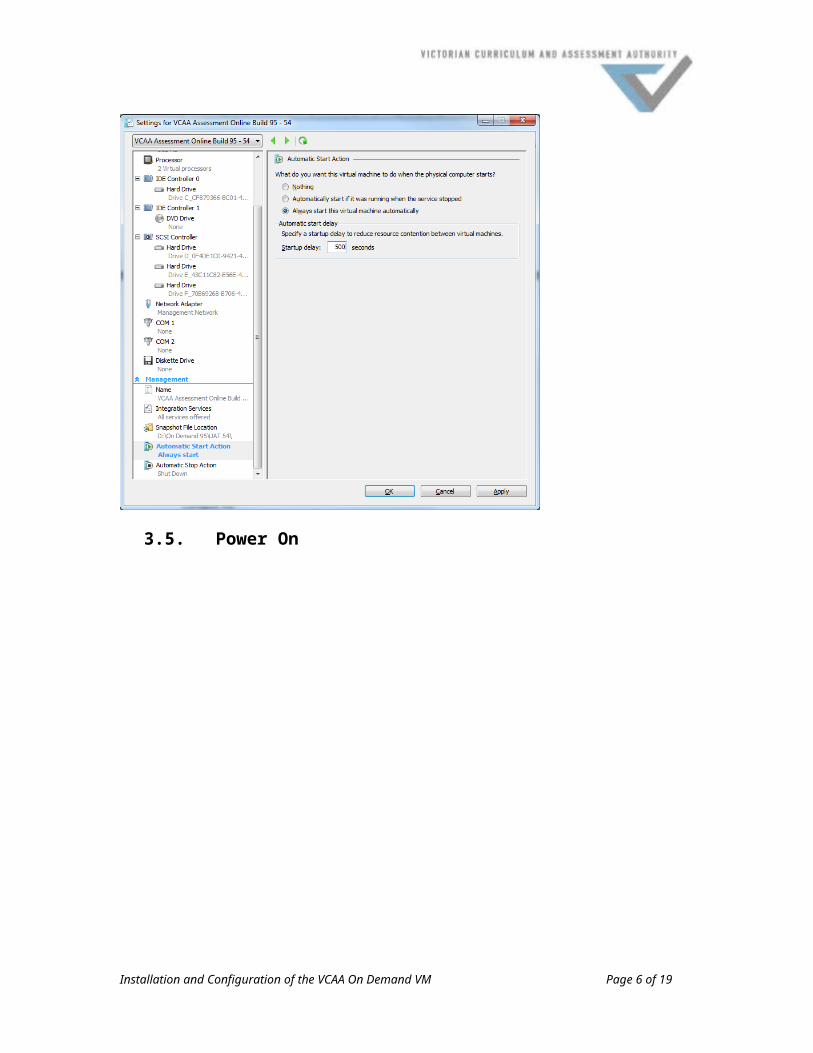
3.4. Configure VMRight click on the new VM and click SettingsChange the name of the VM is desired and the start-up options to auto start with a delay of 500 seconds.
3.5. Power On
Installation and Configuration of the VCAA On Demand VM Page 5 of 15
4. Connect to new VM
Right click on the VM in the list of VMs and click on Connect. This will open a console session with the new VM.
4.1. Log into the VM.Remember to use [CTRL] + [ALT] + [END] when working with a VM.Log in to the VM with the username “schladmin” and the password “OnlineaDmin”The VM will now run its Run Once script to configure the backup script, the IP Address, and the Auto Updater. You will see several messages confirming that the Run Once script in running and completing.
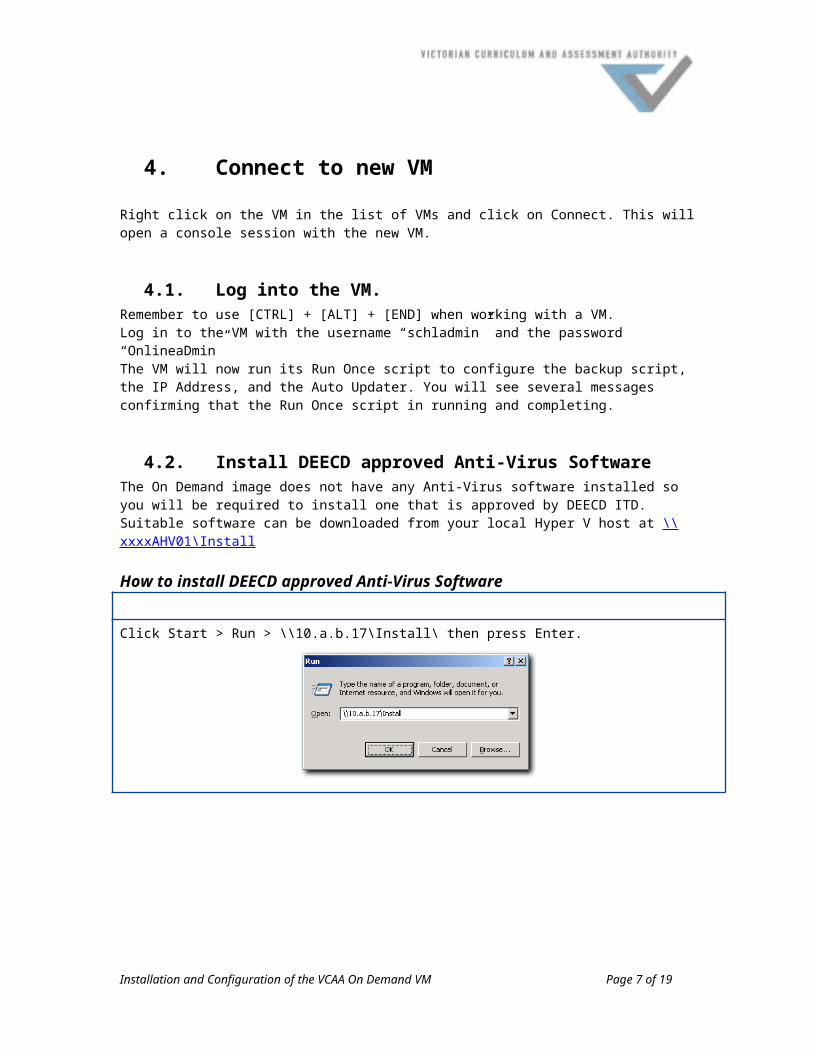
4.2. Install DEECD approved Anti-Virus SoftwareThe On Demand image does not have any Anti-Virus software installed so you will be required to install one that is approved by DEECD ITD.Suitable software can be downloaded from your local Hyper V host at \\xxxxAHV01\Install
How to install DEECD approved Anti-Virus Software
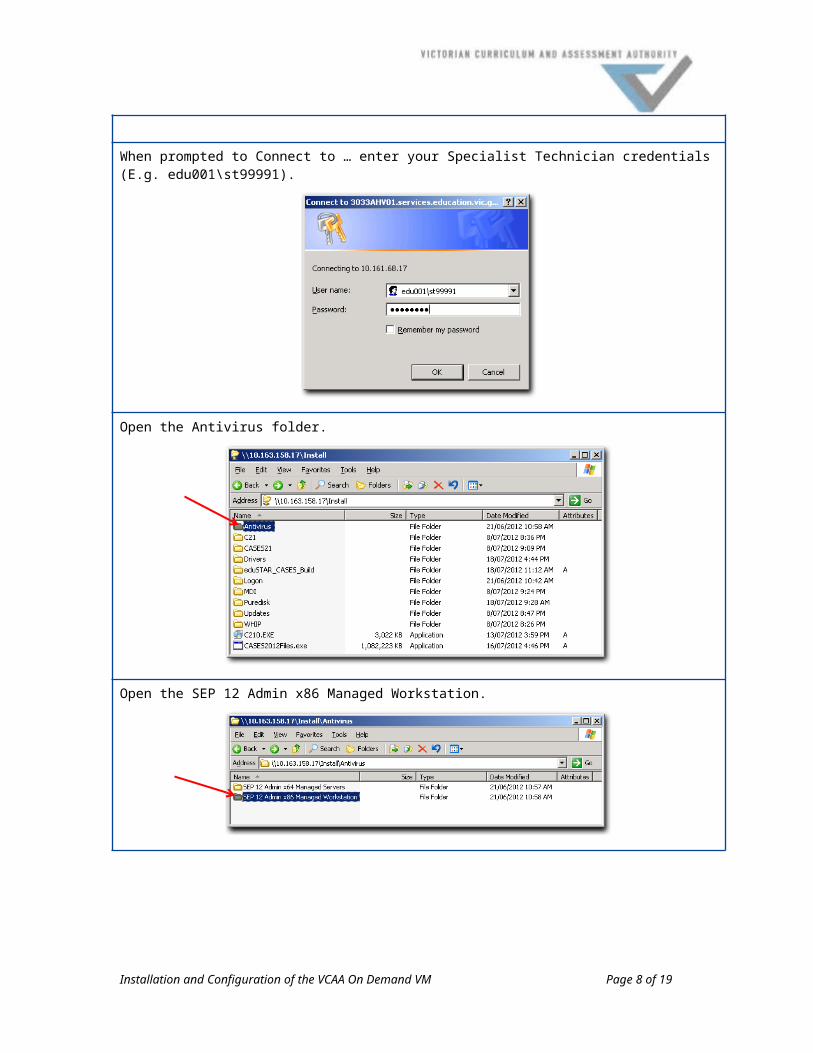
Click Start > Run > \\10.a.b.17\Install\ then press Enter.
When prompted to Connect to … enter your Specialist Technician credentials (E.g. edu001\st99991).
Installation and Configuration of the VCAA On Demand VM Page 6 of 15
Open the Antivirus folder.
Open the SEP 12 Admin x86 Managed Workstation.
Run Setup.exe.
Installation and Configuration of the VCAA On Demand VM Page 7 of 15
When the Open File – Security Warning is displayed, click Run.
Symantec Endpoint Protection will now install. Note: No user interaction is required.
When installed, the Symantec Endpoint Protection icon will display in the system tray.
Double-click the Symantec Endpoint Protection icon in the system tray.
Installation and Configuration of the VCAA On Demand VM Page 8 of 15
The Symantec Endpoint Protection window will display with a status saying Virus and Spyware Protection definitions are out of date.
Click Fix.
A Protection Definitions popup will display
Click OK.
Symantec Endpoint Protection has now requested definition updates and will be updated. Note: this may take a few hours to complete.
When the definitions update has completed, the Symantec Endpoint Protection icon will display a green dot.
Installation and Configuration of the VCAA On Demand VM Page 9 of 15
5. VCAA Configure
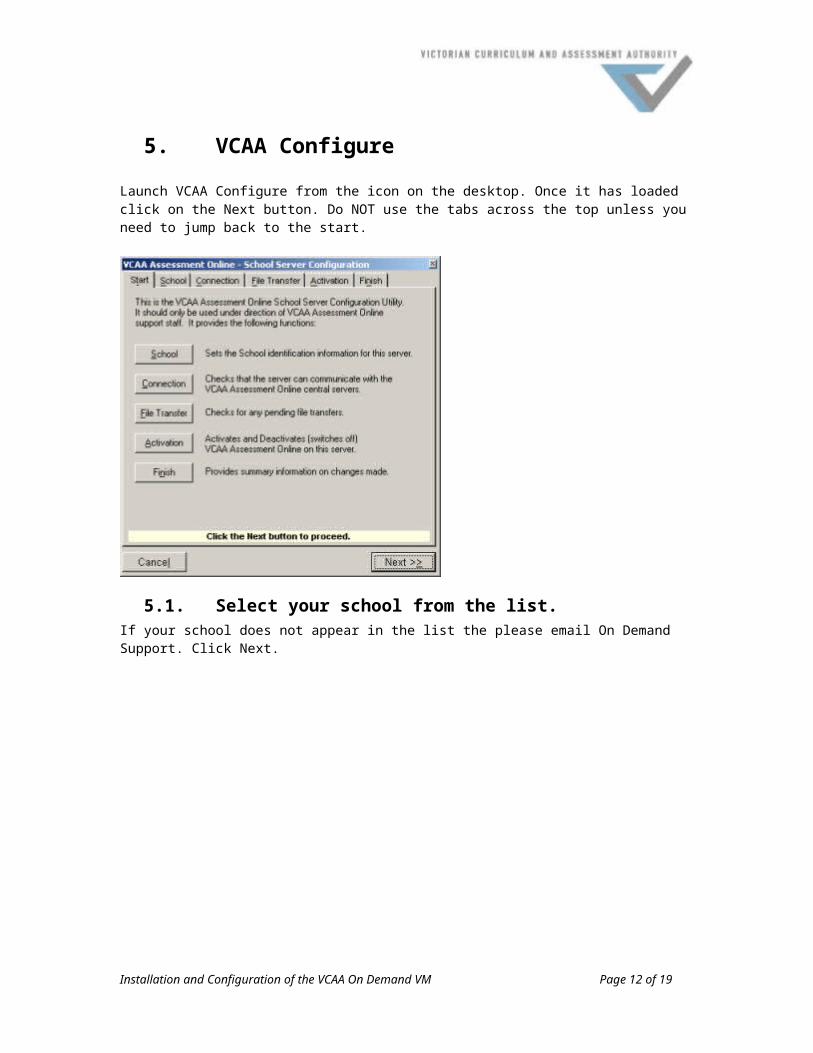
Launch VCAA Configure from the icon on the desktop. Once it has loaded click on the Next button. Do NOT use the tabs across the top unless you need to jump back to the start.
5.1. Select your school from the list.If your school does not appear in the list the please email On Demand Support. Click Next.
Installation and Configuration of the VCAA On Demand VM Page 10 of 15
5.2. Enter your activation code. Look up your school’s activation code in the spread sheet provided – On Demand Activation Code List (Build 95).xlsx. If your school name does not appear in this document, please contact the On Demand Helpdesk to obtain your code on 1800 827 721 or by email to [email protected]
Enter this code twice and click Next. This will now set your School ID in the database and registry.
5.3. Click on Verify Connection.Wait for roughly 5-10 seconds. If the process takes any longer than this then there could be a problem with connectivity or teachers have already queued tests for download. If there is anything in your download queue it will be downloaded now during the Verify Connection step.
Installation and Configuration of the VCAA On Demand VM Page 11 of 15
Upon success you should receive the following message.
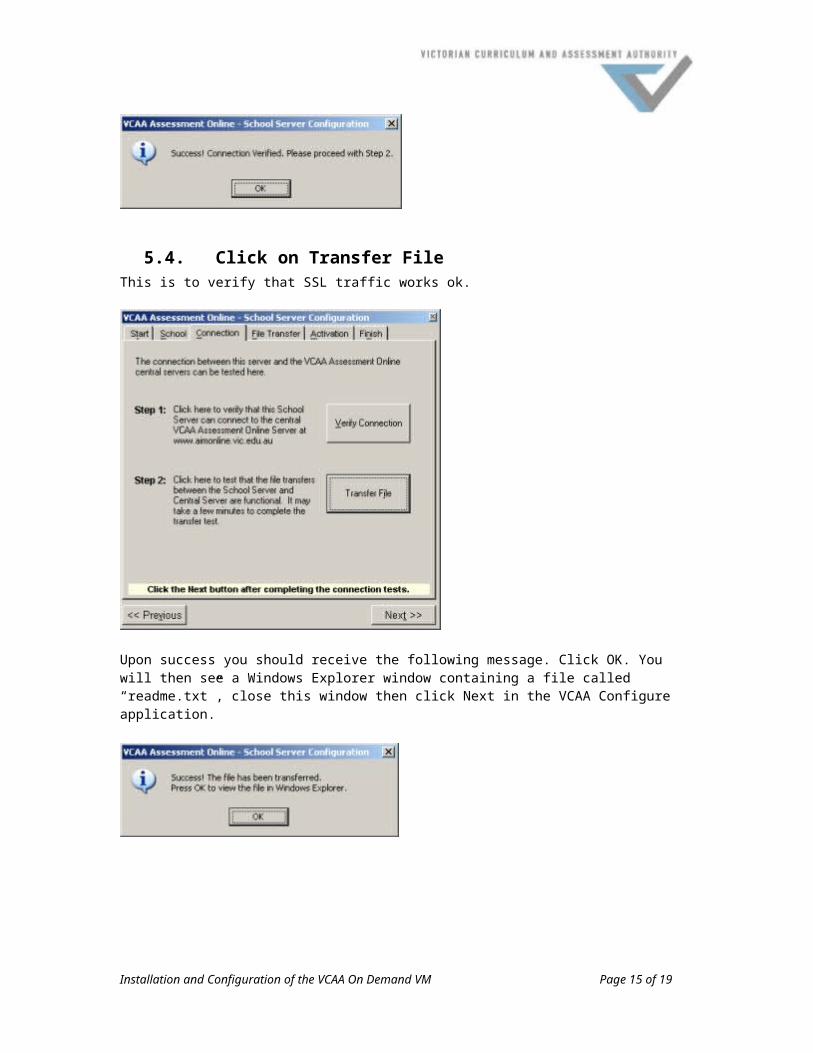
5.4. Click on Transfer FileThis is to verify that SSL traffic works ok.
Installation and Configuration of the VCAA On Demand VM Page 12 of 15
Upon success you should receive the following message. Click OK. You will then see a Windows Explorer window containing a file called “readme.txt”, close this window then click Next in the VCAA Configure application.
Installation and Configuration of the VCAA On Demand VM Page 13 of 15
You can skip the next step as Verify Connection performs the same task. This step is left over from an older version of the application. Click Next.
5.5. Activate VCAA Assessment OnlineClick on Switch On to activate your VCAA Assessment Online server. This step will start the IIS website and send an activation code to our central server.
When activated click Next.
Installation and Configuration of the VCAA On Demand VM Page 14 of 15
If everything has gone well then you should see the following. If your final screen is not like this then something has not worked correctly. Take note of what is displayed here and if you run into problems quote it to the helpdesk.
Click Exit.
With this configuration completed you are ready to use your new install of On Demand Build 95.
5.6. Import StudentsTo import student details please refer to the relevant instructions for importing student details for your school. There are separate instructions for importing from CASES21 or CHESS.
5.7. PC configurations Install ActiveX controls on the PCs where the students will complete the test. Ensure that pop-up blockers are disabled. Add IP to trusted sites It is recommended that the IP address is saved as a shortcut or a favourite on PCs if
possible.
PLEASE ENSURE THAT YOU SEND AN EMAIL PROVIDING THE IP ADDRESS OF THE ON DEMAND TESTING APPLICATION TO THE PRINCIPAL AND/OR THE RELEVANT STAFF AT THE SCHOOL.
6. Contact Details Any queries regarding VCAA Assessment Online technical support or training programs should be directed to the On Demand Helpdesk on 1800 827 721. Please leave a message on our Voice Mail service if we are unable to answer your call immediately. Alternatively E-mail enquiries to [email protected] .
Installation and Configuration of the VCAA On Demand VM Page 15 of 15