56
Oracle® Fusion Middleware Installation Guide for Application Developer 11g Release 1 (11.1.1.6.0) E14827-05 November 2011

Oracle® Fusion MiddlewareInstallation Guide for Application Developer
11g Release 1 (11.1.1.6.0)
E14827-05
November 2011

Oracle Fusion Middleware Installation Guide for Application Developer, 11g Release 1 (11.1.1.6.0)
E14827-05
Copyright © 1999, 2011, Oracle and/or its affiliates. All rights reserved.
Primary Author: Wortimla RS
This software and related documentation are provided under a license agreement containing restrictions on use and disclosure and are protected by intellectual property laws. Except as expressly permitted in your license agreement or allowed by law, you may not use, copy, reproduce, translate, broadcast, modify, license, transmit, distribute, exhibit, perform, publish, or display any part, in any form, or by any means. Reverse engineering, disassembly, or decompilation of this software, unless required by law for interoperability, is prohibited.
The information contained herein is subject to change without notice and is not warranted to be error-free. If you find any errors, please report them to us in writing.
If this is software or related documentation that is delivered to the U.S. Government or anyone licensing it on behalf of the U.S. Government, the following notice is applicable:
U.S. GOVERNMENT RIGHTS Programs, software, databases, and related documentation and technical data delivered to U.S. Government customers are "commercial computer software" or "commercial technical data" pursuant to the applicable Federal Acquisition Regulation and agency-specific supplemental regulations. As such, the use, duplication, disclosure, modification, and adaptation shall be subject to the restrictions and license terms set forth in the applicable Government contract, and, to the extent applicable by the terms of the Government contract, the additional rights set forth in FAR 52.227-19, Commercial Computer Software License (December 2007). Oracle America, Inc., 500 Oracle Parkway, Redwood City, CA 94065.
This software or hardware is developed for general use in a variety of information management applications. It is not developed or intended for use in any inherently dangerous applications, including applications that may create a risk of personal injury. If you use this software or hardware in dangerous applications, then you shall be responsible to take all appropriate fail-safe, backup, redundancy, and other measures to ensure its safe use. Oracle Corporation and its affiliates disclaim any liability for any damages caused by use of this software or hardware in dangerous applications.
Oracle and Java are registered trademarks of Oracle and/or its affiliates. Other names may be trademarks of their respective owners.
Intel and Intel Xeon are trademarks or registered trademarks of Intel Corporation. All SPARC trademarks are used under license and are trademarks or registered trademarks of SPARC International, Inc. AMD, Opteron, the AMD logo, and the AMD Opteron logo are trademarks or registered trademarks of Advanced Micro Devices. UNIX is a registered trademark of The Open Group.
This software or hardware and documentation may provide access to or information on content, products, and services from third parties. Oracle Corporation and its affiliates are not responsible for and expressly disclaim all warranties of any kind with respect to third-party content, products, and services. Oracle Corporation and its affiliates will not be responsible for any loss, costs, or damages incurred due to your access to or use of third-party content, products, or services.

iii
Contents
Preface ................................................................................................................................................................ vii
Intended Audience..................................................................................................................................... viiDocumentation Accessibility .................................................................................................................... viiRelated Documents .................................................................................................................................... viiConventions ................................................................................................................................................ vii
1 Installation Overview
1.1 Installation Roadmap for Oracle Application Developer ..................................................... 1-11.2 Directory Structure of Oracle Application Developer........................................................... 1-3
2 Installing Application Developer
2.1 Preparing to Install ..................................................................................................................... 2-12.1.1 Reviewing System Requirements and Certification ....................................................... 2-12.1.2 Understanding Oracle Fusion Middleware Support of 64-bit JDK.............................. 2-22.1.3 Installing and configuring a Supported Database ......................................................... 2-22.1.4 Creating Database Schemas ............................................................................................... 2-22.1.5 Installing an Application Server........................................................................................ 2-22.2 Installation Instructions ............................................................................................................. 2-32.2.1 Obtaining the Software ....................................................................................................... 2-32.2.2 Starting the Installer ............................................................................................................ 2-32.2.3 Installation Log Files ........................................................................................................... 2-42.2.4 Inventory Screens (UNIX Only)......................................................................................... 2-42.2.5 Installation Screens and Instructions ................................................................................ 2-5
3 Configuring Application Developer
3.1 Configuration Instructions ........................................................................................................ 3-13.1.1 Starting the Configuration Wizard ................................................................................... 3-13.1.2 Configuration Log Files ...................................................................................................... 3-23.1.3 Creating a New Domain ..................................................................................................... 3-23.1.3.1 Configuring Oracle Enterprise Manager................................................................... 3-23.1.3.2 Configuring Oracle Web Services Manager (OWSM) Policy Manager................ 3-33.1.3.3 Applying Java Required Files (JRF) ........................................................................... 3-43.1.3.4 Using Custom Port Numbers ..................................................................................... 3-43.1.4 Extending an Existing Domain .......................................................................................... 3-53.2 Starting the Administration Server .......................................................................................... 3-5

iv
3.3 Verifying the Installation ........................................................................................................... 3-5
4 Deinstalling Application Developer
4.1 Deinstallation Instructions......................................................................................................... 4-14.1.1 Stopping Oracle Fusion Middleware................................................................................ 4-24.1.2 Removing the Application Developer Schemas.............................................................. 4-24.1.3 Removing Application Developer..................................................................................... 4-24.1.3.1 Starting the Deinstaller ................................................................................................ 4-24.1.3.2 Deinstallation Screens and Instructions .................................................................... 4-24.1.4 Manually Removing the Oracle Home Directory ........................................................... 4-34.1.5 Removing Oracle WebLogic Server .................................................................................. 4-34.1.6 Removing Oracle JDeveloper............................................................................................. 4-44.1.7 Removing Program Groups (Windows Only) ................................................................ 4-44.1.8 Rebooting Your System (Windows Only)........................................................................ 4-44.2 Reinstallation ............................................................................................................................... 4-4
A Application Developer Installation Screens
A.1 Specify Inventory Directory (UNIX Only) ............................................................................. A-2A.2 Inventory Location Confirmation (UNIX Only).................................................................... A-3A.3 Welcome ..................................................................................................................................... A-4A.4 Install Software Updates .......................................................................................................... A-5A.5 Prerequisite Checks ................................................................................................................... A-7A.6 Specify Installation Location .................................................................................................... A-8A.7 Application Server ..................................................................................................................... A-9A.8 Installation Summary .............................................................................................................. A-10A.9 Installation Progress ................................................................................................................ A-11A.10 Installation Complete .............................................................................................................. A-12
B Application Developer Deinstallation Screens
B.1 Welcome...................................................................................................................................... B-2B.2 Deinstall Oracle Home .............................................................................................................. B-3B.3 Deinstallation Progress ............................................................................................................. B-4B.4 Deinstallation Complete ........................................................................................................... B-5
C Silent Installation
C.1 About Silent Installation and Deinstallation.......................................................................... C-1C.2 Oracle Application Developer Response Files ...................................................................... C-1C.2.1 Installation Response Files ................................................................................................ C-1C.2.1.1 Contents of the sampleResponse_wls.rps File ........................................................ C-1C.2.1.2 Contents of the sampleResponse_was.rsp File ....................................................... C-2C.2.2 Deinstallation Response Files ........................................................................................... C-3
D Troubleshooting
D.1 General Troubleshooting Tips ................................................................................................. D-1D.2 Installation and Configuration Log Files................................................................................ D-2

v
D.2.1 Installation Log Files .......................................................................................................... D-2D.2.2 Configuration Log Files ..................................................................................................... D-2D.3 Keeping Track of Your JRE Location ...................................................................................... D-3D.4 Need More Help?....................................................................................................................... D-3
Index

vi

vii
Preface
The Oracle Fusion Middleware Installation Guide for Application Developer provides information and instructions for installing, configuring, troubleshooting, and removing Application Developer.
Intended AudienceThis guide is intended for users who are installing Oracle Fusion Middleware for the first time and are comfortable running some system administration operations, such as creating users and groups, adding users to groups, and installing operating system patches on the computer where your components will be installed. Users on UNIX systems who are installing need root access to run some scripts.
Documentation Accessibility For information about Oracle's commitment to accessibility, visit the Oracle Accessibility Program website at http://www.oracle.com/pls/topic/lookup?ctx=acc&id=docacc.
Access to Oracle SupportOracle customers have access to electronic support through My Oracle Support. For information, visit http://www.oracle.com/support/contact.html or visit http://www.oracle.com/us/corporate/accessibility/support/index.html if you are hearing impaired.
Related DocumentsFor additional information, see the following manuals:
■ Oracle Fusion Middleware Installation Planning Guide
■ Oracle Fusion Middleware Administrator's Guide
■ Oracle Fusion Middleware Concepts
■ Oracle Fusion Middleware High Availability Guide
ConventionsThe following text conventions are used in this document:

viii
Convention Meaning
boldface Boldface type indicates graphical user interface elements associated with an action, or terms defined in text or the glossary.
italic Italic type indicates book titles, emphasis, or placeholder variables for which you supply particular values.
monospace Monospace type indicates commands within a paragraph, URLs, code in examples, text that appears on the screen, or text that you enter.
1
Installation Overview 1-1
1Installation Overview
The Oracle Application Developer is an end-to-end application framework that builds on Java EE standards and open-source technologies to simplify and accelerate implementing service-oriented applications. Oracle Application Developer is suitable for enterprise developers who want to create applications that search, display, create, modify, and validate data using Web, wireless, desktop, or Web services interfaces. Used in tandem, Oracle JDeveloper 11g and Oracle Application Developer provide an environment that covers the full development lifecycle from design to deployment, with drag-and-drop data binding, visual UI design, and team development features built in.
1.1 Installation Roadmap for Oracle Application DeveloperThe steps you need to take to install Oracle Application Developer are described in Table 1–1.

Installation Roadmap for Oracle Application Developer
1-2 Oracle Fusion Middleware Installation Guide for Application Developer
Table 1–1 Tasks in the Oracle App Dev Installation Procedure
Task Description More Information
Prepare your system environment for installation.
Ensure that your system environment meets the general installation requirements for Oracle Fusion Middleware as well as Oracle Application Developer and RCU.
For hardware and software requirements, database schema requirements, minimum disk space and memory requirements, and required system libraries, packages, or patches, see Oracle Fusion Middleware System Requirements and Specifications document.
For supported 32-bit and 64-bit operating systems, databases, JDKs, and third-party products, see System Requirements and Supported Platforms for Oracle Fusion Middleware 11gR1 on the Oracle Fusion Middleware Supported System Configurations.
For cross-product interoperability and compatibility, see Oracle Fusion Middleware Interoperability and Compatibility Guide.
Run RCU to create the necessary schemas.
Oracle Application Developer includes Oracle WSM Policy Manager and Oracle WSM-PM Extension. These components require that the MDS schema exists in your database prior to installation. You must run Repository Creation Utility (RCU) to create the MDS schema in your database.
Follow the instructions in "Creating Schemas" in Oracle Fusion Middleware Repository Creation Utility User's Guide.
Install an Application Server.
Oracle App Dev requires an Application Server. One of the following must be installed:
■ Oracle WebLogic Server
■ IBM WebSphere
Installing Oracle WebLogic Server creates the Middleware home and WebLogic home directories, which are required for an Oracle App Dev installation. For more information, see "Middleware Home and WebLogic Home Directories" in Oracle Fusion Middleware Installation Planning Guide.
If you are installing IBM WebSphere, you must create the Middleware home directory structure manually. The Middleware home has no dependency on the location of your IBM WebSphere installation.
If you are installing Oracle WebLogic Server, see the following sections in Oracle Fusion Middleware Installation Guide for Oracle WebLogic Server:
■ "Product Distribution" for instructions on how to download the latest version.
■ "Running the Installation Program in Graphical Mode" for installation instructions.
If you are installing IBM WebSphere, see Oracle Fusion Middleware Third-Party Application Server Guide for installation information.

Directory Structure of Oracle Application Developer
Installation Overview 1-3
1.2 Directory Structure of Oracle Application DeveloperFigure 1–1 shows the directory structure of a simple Oracle Application Developer installation on a single host, using all of the default values.
Install Oracle Application Developer.
Use the installer to install the software.
This creates the Oracle Common home (oracle_common) directory inside the Middleware home.
See "Obtain the Oracle Fusion Middleware Software" in Oracle Fusion Middleware Installation Planning Guide for information on where to obtain the software.
See Chapter 2, "Installing Application Developer" for installation instructions.
Configure Oracle App Dev and create your WebLogic Domain.
Use the Oracle Fusion Middleware Configuration Wizard to create your WebLogic domain and configure your Oracle App Dev components.
You will be asked for the location of the Domain home directory, which is where the Administration Server and Managed Servers reside.
You will also be asked for the location of the Application home directory, which is where your applications reside.
Both of these directories can be located anywhere on your system.
After the domain is created, you can extend it later if you want to add more components to the domain.
If you are using IBM WebSphere, please refer to the Oracle Fusion Middleware Third-Party Application Server Guide for installation instructions and important information.
See Chapter 3, "Configuring Application Developer" for instructions on starting the Configuration Wizard and creating your WebLogic Domain.
Start the servers. Start the Administration Server and the Managed Server.
See Section 3.2, "Starting the Administration Server"for instructions on how to start the Administration Server and Managed Servers.
Table 1–1 (Cont.) Tasks in the Oracle App Dev Installation Procedure
Task Description More Information

Directory Structure of Oracle Application Developer
1-4 Oracle Fusion Middleware Installation Guide for Application Developer
Figure 1–1 Directory Structure of Oracle application Developer

Installing Application Developer 2-1
2Installing Application Developer
This chapter describes how to install Application Developer.
The following topics are covered in this chapter:
■ Section 2.1, "Preparing to Install"
■ Section 2.2, "Installation Instructions"
2.1 Preparing to Install Review the information in this section before you begin:
■ Section 2.1.1, "Reviewing System Requirements and Certification"
■ Section 2.1.2, "Understanding Oracle Fusion Middleware Support of 64-bit JDK"
■ Section 2.1.3, "Installing and configuring a Supported Database"
■ Section 2.1.4, "Creating Database Schemas"
■ Section 2.1.5, "Installing an Application Server"
2.1.1 Reviewing System Requirements and CertificationBefore performing any installation, you should read the system requirements and certification documents to ensure that your environment meets the minimum installation requirements for the products you are installing. Both of these documents are available on Oracle Technology Network (OTN):
■ "Oracle Fusion Middleware System Requirements and Specifications" at:
http://www.oracle.com/technology/software/products/ias/files/fusion_requirements.htm
This document contains information related to hardware and software requirements, minimum disk space and memory requirements, and required system libraries, packages, or patches.
■ "Oracle Fusion Middleware Supported System Configurations" at:
Note: :
This chapter is intended for Oracle Application Developer 11g Release 1 (11.1.1.6.0) users. If you have an existing Oracle Application Developer installation, refer to "Applying the Latest Oracle Fusion Middleware Patch Set" in Oracle Fusion Middleware Patching Guide.

Preparing to Install
2-2 Oracle Fusion Middleware Installation Guide for Application Developer
http://www.oracle.com/technology/software/products/ias/files/fusion_certification.html
This document contains information related to supported installation types, platforms, operating systems, databases, JDKs, and third-party products.
2.1.2 Understanding Oracle Fusion Middleware Support of 64-bit JDKIf you are using a 64-bit Java Virtual Machine (JVM) in your environment, ensure that all of your Oracle Fusion Middleware components are using the 64-bit JVM. You cannot mix components using a 32-bit JVM with those using a 64-bit JVM.
Refer to the Oracle Fusion Middleware Certifications matrix for information on the platforms that support a 64-bit JDK:
http://www.oracle.com/technology/software/products/ias/files/fusion_certification.html
If your Oracle Fusion Middleware components are running in a 64-bit JVM environment, ensure that WebLogic Server is installed with the 64-bit JDK. For 32-bit JVM support, refer to the Oracle Fusion Middleware Release Notes for information on how to configure your environment for 32-bit JVM support for your platform.
2.1.3 Installing and configuring a Supported Database For the latest information about supported databases, visit the following URL:
http://www.oracle.com/technology/software/products/ias/files/fusion_certification.html
2.1.4 Creating Database SchemasOracle Application Developer includes Oracle WSM Policy Manager and Oracle WSM-PM Extension. These components require that the MDS schema exists in your database prior to installation. You must run Repository Creation Utility (RCU) to create the MDS schema in your database. Follow the instructions in "Creating Schemas" in Oracle Fusion Middleware Repository Creation Utility User's Guide to do so.
2.1.5 Installing an Application ServerOracle Application Developer requires an application server. The following application servers are supported:
■ Oracle WebLogic Server
■ IBM WebSphere
See the System Requirements and Supported Platforms for Oracle Fusion Middleware 11gR1 Document to determine the exact version required for your installation. This
Note:
■ For the 32-bit version of the product, the system on which you are installing must be a supported 32-bit system. Installing a 32-bit version of the product on a 64-bit system is not supported.
■ For a 64-bit Linux operating system, you should use the 32-bit Java Runtime Environment (JRE) on a client machine for the Imaging Advanced Viewer.

Installation Instructions
Installing Application Developer 2-3
document is located on the "Oracle Fusion Middleware Supported System Configurations" page:
http://www.oracle.com/technetwork/middleware/ias/downloads/fusion-certification-100350.html
If you are using Oracle WebLogic Server:
1. See "Product Distribution" in Oracle Fusion Middleware Installation Guide for Oracle WebLogic Server for instructions on how to download the latest Oracle WebLogic Server.
2. See "Running the Installation Program in Graphical Mode" in Oracle Fusion Middleware Installation Guide for Oracle WebLogic Server for installation instructions.
If you are using IBM WebSphere, please refer to the Oracle Fusion Middleware Third-Party Application Server Guide for installation instructions and important information.
2.2 Installation InstructionsWhen you run the installer, Application Developer is installed onto your system. After the product is installed, you must run the Fusion Middleware Configuration Wizard to configure your components.
This section contains the following topics:
■ Section 2.2.2, "Starting the Installer"
■ Section 2.2.3, "Installation Log Files"
■ Section 2.2.4, "Inventory Screens (UNIX Only)"
■ Section 2.2.5, "Installation Screens and Instructions"
2.2.1 Obtaining the SoftwareTo obtain the App Dev 11.1.1.6.0 software, refer to Oracle Fusion Middleware Download, Installation, and Configuration ReadMe:
http://download.oracle.com/docs/cd/E23104_01/download_readme.htm
Select one of the download locations and download "Application Development Runtime." This will be saved to your system as a .zip archive file.
After you download the archive file, unpack the archive file into a directory of your choice on the machine where you will be performing the installation.
2.2.2 Starting the InstallerTo start the installer, go to the directory where you unpacked the archive file and switch to the Disk1 directory.
On UNIX operating systems:
cd unpacked_archive_directory/Disk1./runInstaller -jreLoc JRE_LOCATION
On Windows operating systems:
cd unpacked_archive_directory\Disk1setup.exe -jreLoc JRE_LOCATION

Installation Instructions
2-4 Oracle Fusion Middleware Installation Guide for Application Developer
The installer requires the full path to the location of a Java Runtime Environment (JRE) on your system. When you installed Oracle WebLogic Server, a JRE was installed on your system in the jdk160_27 directory inside the Middleware home. You can use this location as the JRE_LOCATION to start the installer.
On 64-bit platforms, the JRE location is the JAVA_HOME you used to install Oracle WebLogic Server.
If you do not specify the JRE location with the -jreLoc option, you will be prompted to provide the location of your JRE before the installer is started. For example, on a UNIX operating system:
[> ./runInstaller Starting Oracle Universal Installer... Checking if CPU speed is above 300 MHz. Actual 2999 MHz PassedChecking Temp space: must be greater than 150 MB. Actual 66070 MB PassedChecking swap space: must be greater than 512 MB. Actual 4047 MB PassedChecking monitor: must be configured to display at least 256 colors. Actual 256 PassedPreparing to launch Oracle Universal Installer from /tmp/OraInstall2010-02-23_10-57-58AM. Please wait ...Please specify JRE/JDK location ( Ex. /home/jre ), <location>/bin/java should exist :
Specify the full path to the JRE on your system before you continue.
2.2.3 Installation Log FilesThe installer writes logs files to the Oracle_Inventory_Location/log (on UNIX operating systems) or Oracle_Inventory_Location\logs (on Windows operating systems) directory. Refer to Section D.2.1, "Installation Log Files" for more information about the log files and their contents.
2.2.4 Inventory Screens (UNIX Only)If you are installing on a UNIX system, and if this is the first time any Oracle product is being installed on your system with the Oracle Universal Installer, you will be asked to provide the location of an inventory directory. This is where the installer will set up subdirectories and maintain inventory data for each Oracle product that is installed on this system.
Follow the instructions in Table 2–1 to configure the inventory directory information. For more help, click on the screen name in the table below, or click the Help button in the GUI.
Note: If you are installing Oracle Application Developer on a 64-bit UNIX or Windows operating system with a 32-bit JDK, you must specify the JRE_LOCATION using the -jreLoc option from the command line. The option to provide your JRE_LOCATION at the prompt is not supported in such cases, and the installer will not start.
Installation Instructions
Installing Application Developer 2-5
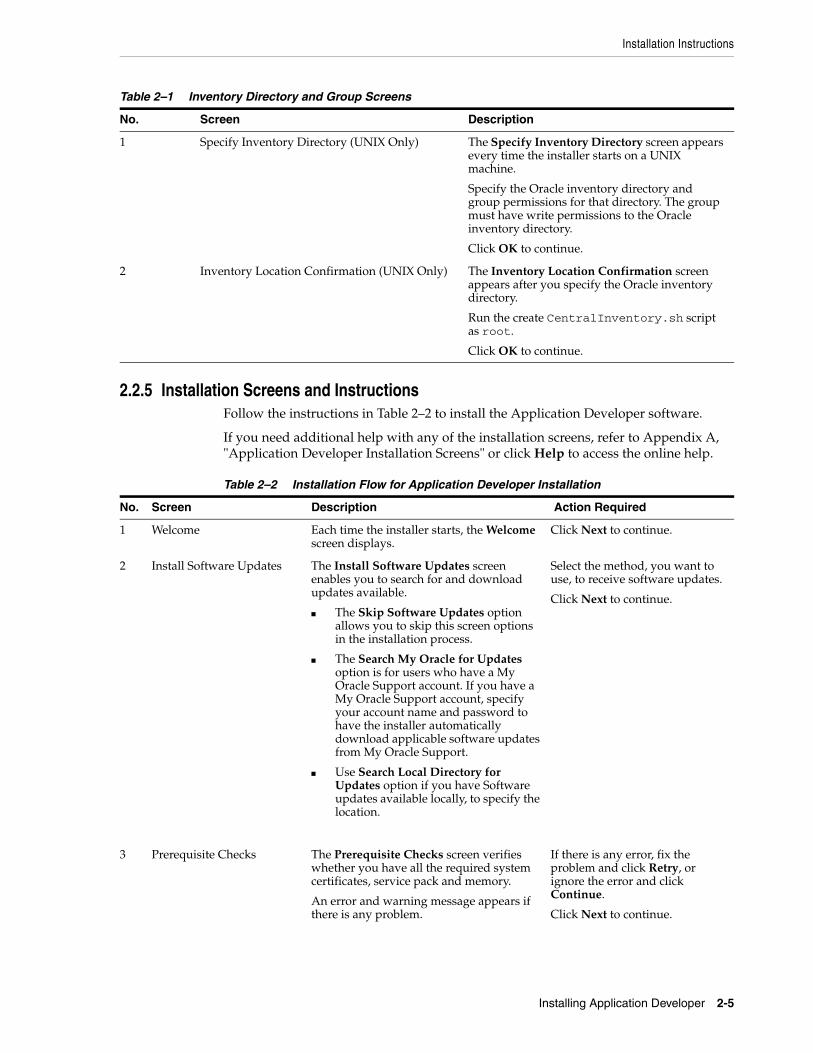
2.2.5 Installation Screens and InstructionsFollow the instructions in Table 2–2 to install the Application Developer software.
If you need additional help with any of the installation screens, refer to Appendix A, "Application Developer Installation Screens" or click Help to access the online help.
Table 2–1 Inventory Directory and Group Screens
No. Screen Description
1 Specify Inventory Directory (UNIX Only) The Specify Inventory Directory screen appears every time the installer starts on a UNIX machine.
Specify the Oracle inventory directory and group permissions for that directory. The group must have write permissions to the Oracle inventory directory.
Click OK to continue.
2 Inventory Location Confirmation (UNIX Only) The Inventory Location Confirmation screen appears after you specify the Oracle inventory directory.
Run the create CentralInventory.sh script as root.
Click OK to continue.
Table 2–2 Installation Flow for Application Developer Installation
No. Screen Description Action Required
1 Welcome Each time the installer starts, the Welcome screen displays.
Click Next to continue.
2 Install Software Updates The Install Software Updates screen enables you to search for and download updates available.
■ The Skip Software Updates option allows you to skip this screen options in the installation process.
■ The Search My Oracle for Updates option is for users who have a My Oracle Support account. If you have a My Oracle Support account, specify your account name and password to have the installer automatically download applicable software updates from My Oracle Support.
■ Use Search Local Directory for Updates option if you have Software updates available locally, to specify the location.
Select the method, you want to use, to receive software updates.
Click Next to continue.
3 Prerequisite Checks The Prerequisite Checks screen verifies whether you have all the required system certificates, service pack and memory.
An error and warning message appears if there is any problem.
If there is any error, fix the problem and click Retry, or ignore the error and click Continue.
Click Next to continue.

Installation Instructions
2-6 Oracle Fusion Middleware Installation Guide for Application Developer
After the installation is complete, you are ready to run the Configuration Wizard to configure your domain for Oracle Application Developer products. Go to Chapter 3, "Configuring Application Developer" for instructions.
4 Specify Installation Location The Specify Installation Location screen enables you to specify the location of the Oracle Weblogic Server Home, or IBM WebSphere Home, where the Middleware home is created.
The Oracle Common home (oracle_common) will automatically be created inside the Middleware home.
Specify the Middleware home location. If you are using Oracle WebLogic Server as the application server, use the existing Middleware home that was created when you installed Oracle WebLogic Server.
If you are using IBM WebSphere as the application server, specify a directory that you wish to use as the Middleware home. This directory has no relation to the location of your WebSphere installation. If you specify a directory location that does not already exist, the installer will create the directory for you.
Click Next to continue.
5 Application Server The Application Server screen enables you to select the application server you wish to use for the installation.
If Oracle WebLogic Server is already installed in the Middleware Home, the WebSphere option is disabled. If Oracle WebLogic Server is not present in Middleware Home, then WebLogic Server is disabled and WebSphere is the only option.
Select the server installed in your machine.
Click Next to continue.
6 Installation Summary The Installation Summary screen lists the components and products that will be installed in the system.
Verify the installation about to be performed.
Click Install to continue.
7 Installation Progress This screen shows the progress of the installation.
When the process is 100% complete, click Next to continue.
8 Installation Complete The Installation Complete screen appears when the installation is complete.
Click Finish to dismiss the screen.
Table 2–2 (Cont.) Installation Flow for Application Developer Installation
No. Screen Description Action Required

Configuring Application Developer 3-1
3Configuring Application Developer
This chapter describes how to configure Application Developer and create or extend a WebLogic Domain after the software has already been installed or patched to the latest version.
The following topics are covered:
■ Section 3.1, "Configuration Instructions"
■ Section 3.2, "Starting the Administration Server"
■ Section 3.3, "Verifying the Installation"
3.1 Configuration InstructionsAfter the installation is complete, you can configure the components using the Fusion Middleware Configuration Wizard. The instructions in this section describe how to do so.
This section contains the following content:
■ Starting the Configuration Wizard
■ Configuration Log Files
■ Creating a New Domain
■ Extending an Existing Domain
3.1.1 Starting the Configuration WizardThe Configuration Wizard is located in the common/bin directory inside the Oracle WebLogic home. To start the Configuration Wizard:
On UNIX operating systems:
cd MW_HOME/wlserver_10.3/common/bin./config.sh
On Windows operating systems:
cd MW_HOME\wlserver_10.3\common\binconfig.cmd
If this is a new installation and you need to create a new WebLogic domain, follow the instructions in Section 3.1.3, "Creating a New Domain". You can also run the Configuration Wizard to extend an existing WebLogic domain, as described in Section 3.1.4, "Extending an Existing Domain".

Configuration Instructions
3-2 Oracle Fusion Middleware Installation Guide for Application Developer
If you are using a 32-bit operating system, Oracle JRockit SDK is installed as part of the Oracle WebLogic installation. This is the JDK that the Configuration Wizard will use by default. If you want to invoke the Configuration Wizard with the Sun JDK, do the following prior to starting the Configuration Wizard:
1. Set the JAVA_HOME environment variable to the location of the Sun JDK. For example, you can set it to the Sun JDK that was installed with Oracle WebLogic Server in the MW_HOME/jdk160_27 (on UNIX operating systems) or MW_HOME\jdk160_27 (on Windows operating systems) directory.
2. Set the JAVA_VENDOR environment variable to "Sun".
3.1.2 Configuration Log FilesTo create a log file for your configuration session, use the -log=log_filename parameter when you start the Configuration Wizard.
On UNIX operating systems:
./config.sh -log=log_filename
On Windows operating systems:
config.cmd -log=log_filename
Log files of your configuration session are created in the MW_HOME/oracle_common/common/bin (on UNIX operating systems) or MW_HOME\oracle_common\common\bin (on Windows operating systems) directory. For more information about the Configuration Wizard log files, see Section D.2.2, "Configuration Log Files".
3.1.3 Creating a New DomainFollow the instructions in "Creating a WebLogic Domain" in Oracle Fusion Middleware Creating Domains Using the Configuration Wizard to create a new WebLogic domain for your Oracle Application Developer components.
3.1.3.1 Configuring Oracle Enterprise ManagerIf you want to configure Oracle Enterprise Manager in your domain, you must select "Oracle Enterprise Manager - 11.1.1.0 (oracle_common)" on the Select Domain Source screen, as shown below:

Configuration Instructions
Configuring Application Developer 3-3
Note that "Oracle JRF - 11.1.1.0 (oracle_common)" is automatically selected as a dependency.
3.1.3.2 Configuring Oracle Web Services Manager (OWSM) Policy ManagerYou can create a domain with Oracle Web Services Manager (OWSM) Policy Manager to secure JAX-WS clients and web services deployed in your environment. On the Select Domain Source screen in the Configuration Wizard, select the following options, as shown in the figure below:
■ "Oracle WSM Policy Manager - 11.1.1.0 (oracle_common)"
■ "Oracle Enterprise Manager - 11.1.1.0 (oracle_common)"
■ "Oracle JRF - 11.1.1.0 (oracle_common)"

Configuration Instructions
3-4 Oracle Fusion Middleware Installation Guide for Application Developer
3.1.3.3 Applying Java Required Files (JRF)Java Required Files (JRF) consists of those components not included in the Oracle WebLogic Server installation and that provide common functionality for Oracle business applications and application frameworks.
JRF consists of a number of independently developed libraries and applications that are deployed into a common location. The components that are considered part of Java Required Files include: Oracle Application Development Framework, Oracle Fusion Middleware Audit Framework, Dynamic Monitoring Service, Infrastructure Security, Java Object Cache, Oracle Platform Security Services, logging, MDS, Oracle Web Services, and Oracle Web Services Manager.
You must apply JRF to a Managed Server or cluster in certain circumstances.You can only apply JRF to Managed Servers that are in a domain in which JRF was configured. That is, you must have selected Oracle JRF in the Configuration Wizard when you created or extended the domain.
For more information, see "Applying Java Required Files to a Managed Server or Cluster" in Oracle Fusion Middleware Administrator's Guide.
3.1.3.4 Using Custom Port NumbersBy default, the servers that are created in each domain use the same set of port numbers (for example, the Administration Server uses port 7001). If you want to use custom port numbers, you can change the port number when you run the Configuration Wizard:
■ The Administration Server port number can be changed on the Configure Administration Server Screen.
■ The port number for all managed servers in your domain can be changed on the Configure Managed Servers Screen.
Fore more information about port numbers, refer to "Port Numbers" in Oracle Fusion Middleware Administrator's Guide.

Verifying the Installation
Configuring Application Developer 3-5
3.1.4 Extending an Existing DomainWhile creating your WebLogic domain, if you chose not to configure all of the components on the Select Domain Source Screen, you can add these components at a later date by extending your domain. If this is a first time installation or you do not want to add more components, you can skip this section and move to the next section.
Follow the instructions in "Extending a WebLogic Domain" inOracle Fusion Middleware Creating Domains Using the Configuration Wizard to extend an existing domain.
3.2 Starting the Administration ServerTo get your deployments up and running, you must start the Administration Server by running the startWebLogic.sh (on UNIX operating systems) or startWebLogic.cmd (on Windows operating systems) script in the directory where you created your new domain.
On UNIX systems:
DOMAIN_HOME/startWebLogic.sh
On Windows systems:
DOMAIN_HOME\startWebLogic.cmd
You entered the domain name and location on the Specify Domain Name and Location Screen in the Configuration Wizard.
3.3 Verifying the InstallationTo verify the installation, start your browser and enter the following URLs:
■ To access the Administration Server console:
http://administration_server_host:administration_server_port/console
■ If you configured your Administration Server to accept SSL connection, use the following URL to access the Administration Server console in secure mode:
https://administration_server_host:secure_administration_server_port/console
■ To access Enterprise Manager:
http://administration_server_host:administration_server_port/em
Note: Before proceeding, make sure that schemas exist in your database for the components you are configuring when you extend the domain. For example, if you are planning to extend the domain and configure Oracle WSM Policy Manager, then make sure the required schema for this component (MDS) exists in your Oracle database before you continue.

Verifying the Installation
3-6 Oracle Fusion Middleware Installation Guide for Application Developer

Deinstalling Application Developer 4-1
4Deinstalling Application Developer
This chapter describes how to remove Application Developer and related products from your system.
You should always use the instructions provided in this chapter for removing the software. If you try to remove the software manually, you may experience problems when you try to reinstall the software again at a later time. Following the procedures in this chapter will ensure that the software is properly removed. See Section 4.2, "Reinstallation" for more information.
The following topics are covered:
■ Section 4.1, "Deinstallation Instructions"
■ Section 4.2, "Reinstallation"
4.1 Deinstallation InstructionsThe deinstaller will attempt to remove the Oracle Home from which it was started; for Application Developer, this directory is the oracle_common directory. This procedure will not remove any WebLogic domains that you have created - it only removes the software in oracle_common.
Before you choose to remove this directory, make sure that it is not in use by an existing domain, and also make sure you stop all running processes that use the oracle_common directory. After you remove the software, you will no longer be able to use your WebLogic domain.
Deinstalling Application Developer properly involves the following tasks:
■ Stopping Oracle Fusion Middleware
■ Removing the Application Developer Schemas
■ Removing Application Developer
■ Manually Removing the Oracle Home Directory
■ Removing Oracle WebLogic Server
■ Removing Oracle JDeveloper
■ Removing Program Groups (Windows Only)
■ Rebooting Your System (Windows Only)
Deinstallation Instructions
4-2 Oracle Fusion Middleware Installation Guide for Application Developer
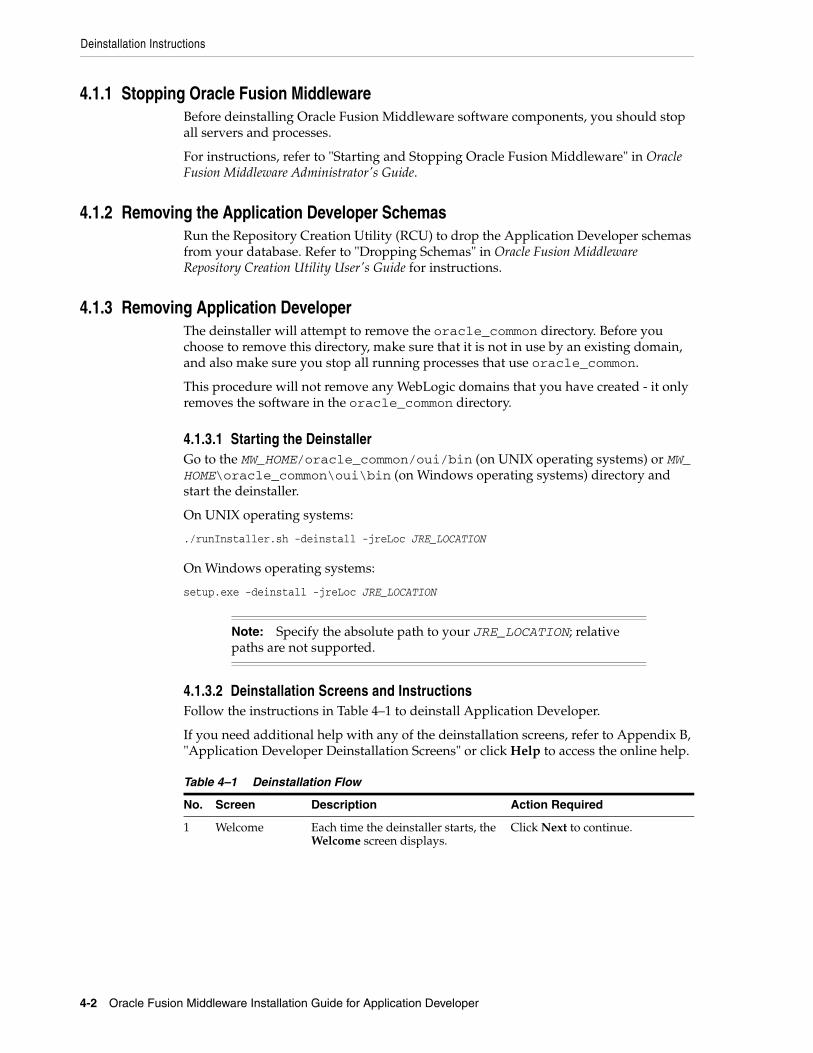
4.1.1 Stopping Oracle Fusion MiddlewareBefore deinstalling Oracle Fusion Middleware software components, you should stop all servers and processes.
For instructions, refer to "Starting and Stopping Oracle Fusion Middleware" in Oracle Fusion Middleware Administrator's Guide.
4.1.2 Removing the Application Developer SchemasRun the Repository Creation Utility (RCU) to drop the Application Developer schemas from your database. Refer to "Dropping Schemas" in Oracle Fusion Middleware Repository Creation Utility User's Guide for instructions.
4.1.3 Removing Application DeveloperThe deinstaller will attempt to remove the oracle_common directory. Before you choose to remove this directory, make sure that it is not in use by an existing domain, and also make sure you stop all running processes that use oracle_common.
This procedure will not remove any WebLogic domains that you have created - it only removes the software in the oracle_common directory.
4.1.3.1 Starting the DeinstallerGo to the MW_HOME/oracle_common/oui/bin (on UNIX operating systems) or MW_HOME\oracle_common\oui\bin (on Windows operating systems) directory and start the deinstaller.
On UNIX operating systems:
./runInstaller.sh -deinstall -jreLoc JRE_LOCATION
On Windows operating systems:
setup.exe -deinstall -jreLoc JRE_LOCATION
4.1.3.2 Deinstallation Screens and InstructionsFollow the instructions in Table 4–1 to deinstall Application Developer.
If you need additional help with any of the deinstallation screens, refer to Appendix B, "Application Developer Deinstallation Screens" or click Help to access the online help.
Note: Specify the absolute path to your JRE_LOCATION; relative paths are not supported.
Table 4–1 Deinstallation Flow
No. Screen Description Action Required
1 Welcome Each time the deinstaller starts, the Welcome screen displays.
Click Next to continue.

Deinstallation Instructions
Deinstalling Application Developer 4-3
4.1.4 Manually Removing the Oracle Home DirectoryIf you have selected No on the warning screen during deinstallation, you must manually remove your oracle_common directory and any sub-directories. For example, if your Oracle Common home directory was /home/Oracle/Middleware/oracle_common on a UNIX operating system:
> cd /home/Oracle/Middleware> rm -rf oracle_common
On a Windows operating system, if your Oracle Common home directory was C:\Oracle\Middleware\oracle_common, use a file manager window and navigate to the C:\Oracle\Middleware directory, then right-click on the oracle_common folder and select Delete.
4.1.5 Removing Oracle WebLogic ServerRefer to "Uninstalling the Software" in Oracle Fusion Middleware Installation Guide for Oracle WebLogic Server for instructions on how to remove Oracle WebLogic Server.
After this is finished, you must manually remove the Middleware home directory. For example, if your Middleware home directory was /home/Oracle/Middleware on a UNIX operating system:
> cd /home/Oracle> rm -rf Middleware
On a Windows operating system, if your Middleware home directory was C:\Oracle\Middleware, use a file manager window and navigate to the C:\Oracle directory, then right-click on the Middleware folder and select Delete.
2 Deinstall Oracle Home
The Deinstall Oracle Home screen shows the Oracle home you are about to deinstall.
Verify the Oracle home you are about to deinstall.
Click Deinstall to continue.
On the Warning screen, select whether or not you want the deinstaller to remove the Oracle home directory in addition to removing the software.
Click Yes to have the deinstaller remove the software and Oracle home, No to remove only the software, or Cancel to return to the previous screen.
If you select No, go to Section 4.1.4, "Manually Removing the Oracle Home Directory" for instructions on how to manually remove your Oracle home directory.
3 Deinstallation Progress
The Deinstallation Progress screen shows the progress and status of the deinstallation.
Wait until the Deinstallation Complete screen appears.
4 Deinstallation Complete
The Deinstallation Complete screen appears when the deinstallation is complete.
Click Finish to dismiss the screen.
Table 4–1 (Cont.) Deinstallation Flow
No. Screen Description Action Required

Reinstallation
4-4 Oracle Fusion Middleware Installation Guide for Application Developer
4.1.6 Removing Oracle JDeveloperIf you have installed Oracle JDeveloper on your system, refer to Oracle Fusion Middleware Installation Guide for Oracle JDeveloper for instructions on how to remove this software from your system.
4.1.7 Removing Program Groups (Windows Only)On Windows systems, you must also manually remove the program groups from the Start Menu\Programs folder. As an example (the folder names and program group names on your system may be different), you might remove the following from C:\Documents and Settings\All Users\Start Menu\Programs:
■ Oracle Fusion Middleware 11.1.1.6.0
■ Oracle WebLogic
4.1.8 Rebooting Your System (Windows Only)On Windows operating systems, you should reboot your computer after you have finished removing all your programs to ensure proper cleanup.
4.2 ReinstallationThe installer does not allow reinstallation of Application Developer in a directory that already contains an Oracle product. To reinstall Application Developer in the same directory as before, you must follow the instructions in this chapter to deinstall the software, then follow the instructions in Chapter 2, "Installing Application Developer" to reinstall the software.

Application Developer Installation Screens A-1
AApplication Developer Installation Screens
This appendix contains screenshots and descriptions for all of the Application Developer installation screens:
■ Specify Inventory Directory (UNIX Only)
■ Inventory Location Confirmation (UNIX Only)
■ Welcome
■ Install Software Updates
■ Prerequisite Checks
■ Specify Installation Location
■ Application Server
■ Installation Summary
■ Installation Progress
■ Installation Complete
Specify Inventory Directory (UNIX Only)
A-2 Oracle Fusion Middleware Installation Guide for Application Developer
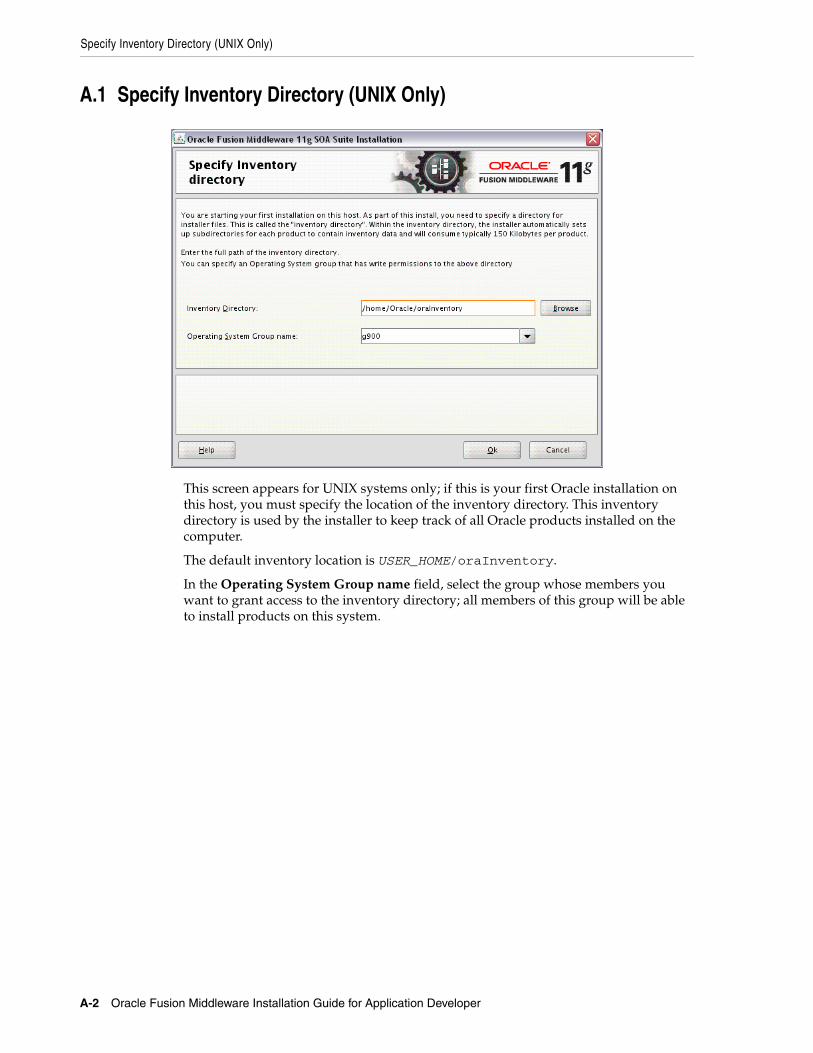
A.1 Specify Inventory Directory (UNIX Only)
This screen appears for UNIX systems only; if this is your first Oracle installation on this host, you must specify the location of the inventory directory. This inventory directory is used by the installer to keep track of all Oracle products installed on the computer.
The default inventory location is USER_HOME/oraInventory.
In the Operating System Group name field, select the group whose members you want to grant access to the inventory directory; all members of this group will be able to install products on this system.

Inventory Location Confirmation (UNIX Only)
Application Developer Installation Screens A-3
A.2 Inventory Location Confirmation (UNIX Only)
This screen appears for UNIX systems only; you are asked to run the inventory_directory/createCentralInventory.sh script as root.
If you do not have root access on this system but wish to continue with the installation, select Continue installation with local inventory.

Welcome
A-4 Oracle Fusion Middleware Installation Guide for Application Developer
A.3 Welcome
The Welcome screen is displayed each time you start the installer.

Install Software Updates
Application Developer Installation Screens A-5
A.4 Install Software Updates
Select the method you want to use for installing software updates.
■ Skip Software Updates
You can choose to skip this option for now.
■ Search My Oracle Support for Updates.
If you have a My Oracle Support account, you can specify your account name and password to have the installer automatically download applicable software updates from My Oracle Support. After entering your credentials, you can test the connection by clicking Test Connection. Click Proxy Settings if you need to configure a proxy server in order to have the installer access My Oracle Support.
Configure your proxy server with the following screen:
■ Search Local Directory for Updates.

Install Software Updates
A-6 Oracle Fusion Middleware Installation Guide for Application Developer
If you have software updates available locally, you can specify the location by using this option. When you select Search Local Directory for Updates an additional "Location" field will appear, as shown below:

Prerequisite Checks
Application Developer Installation Screens A-7
A.5 Prerequisite Checks
If there is a problem, a short error message appears in the bottom portion of the screen. Fix the error and click Retry to try again.
If you want to ignore the error and warning messages and continue with the installation, click Continue.
Click Abort to stop prerequisite checking for all components.

Specify Installation Location
A-8 Oracle Fusion Middleware Installation Guide for Application Developer
A.6 Specify Installation Location
Specify the directories where you want to install your software:
■ If you are using Oracle WebLogic Server as your application server:
In the Oracle Middleware Home field, specify the absolute path to your existing Oracle Middleware home directory; this is the directory that was created when you installed Oracle WebLogic Server. If you do not know the full path to your Middleware home, you can click Browse to select an existing directory in your system.
■ If you are using IBM WebSphere as your application server:
In the Oracle Middleware Home field, specify the absolute path to the directory you want to use as the Middleware home. This directory has no relation to the location of your WebSphere installation. If you specify a directory location that does not already exist, the installer will create the directory for you.
With Application Developer, you are installing the products that are required for the Oracle Common home directory. In the Oracle Home Directory field, notice that the directory oracle_common is already populated and can not be changed. This directory will be created inside the location you specify for your Middleware home.
If you are performing an installation on a Windows operating system, be sure that your directory paths are valid and do not contain double backslashes (\\).

Application Server
Application Developer Installation Screens A-9
A.7 Application Server
Select the application server you want to use for this installation.
■ If the installer detects a Middleware home with Oracle WebLogic Server installed, then this is the application server that will be used. All other fields in this screen will be inactive.
■ If the installer detects a Middleware home without an Oracle WebLogic Server installed, you must select one of the application server options and then provide its location in the Application Server Location field.
■ If the installer does not detect a Middleware home directory, the "WebLogic Server" option will be inactive. You must select "WebSphere" and then provide the location of your IBM WebSphere in the Application Server Location field.

Installation Summary
A-10 Oracle Fusion Middleware Installation Guide for Application Developer
A.8 Installation Summary
Review the information on this screen, and click Install to begin the installation. The operations summarized on this page will be performed when you click Install.
If you want to make any changes to the configuration before starting the installation, use the navigation pane and select the topic you want to edit.
If you want to save this configuration to a text file, click Save. This file can be used later if you choose to perform the same installation from the command line. See Appendix C, "Silent Installation" for more information.

Installation Progress
Application Developer Installation Screens A-11
A.9 Installation Progress
This screen shows you the progress of the installation.
If you want to quit before the installation is completed, click Cancel. Doing so will result in a partial installation; the portion of the software that was installed on your system before you click Cancel will remain on your system, and you will have to remove it manually.

Installation Complete
A-12 Oracle Fusion Middleware Installation Guide for Application Developer
A.10 Installation Complete
This screen summarizes the installation that was just completed.
If you want to save this summary information to a text file for future reference, click Save.
Click Finish to dismiss the screen.
Application Developer Deinstallation Screens B-1
BApplication Developer Deinstallation
Screens
This appendix contains screenshots and descriptions for all of the Application Developer deinstallation screens:
■ Welcome
■ Deinstall Oracle Home
■ Deinstallation Progress
■ Deinstallation Complete

Welcome
B-2 Oracle Fusion Middleware Installation Guide for Application Developer
B.1 Welcome
The Welcome screen is displayed each time you start the deinstaller.
Click Next to continue.

Deinstall Oracle Home
Application Developer Deinstallation Screens B-3
B.2 Deinstall Oracle Home
This screen shows the Oracle home directory that is about to be deinstalled. This is the Oracle home directory from which the deinstaller was started.
Verify that this is the correct directory, then click Deinstall to continue.
The following warning screen will appear:
Click Yes to remove the software and the Oracle home directory from which the deinstaller was started.
Click No to remove the software but do not remove the Oracle home directory.
Click Cancel to return to the previous screen.
Note: Before you choose to remove this Oracle home, make sure that it is not in use by an existing domain.
Deinstallation Progress
B-4 Oracle Fusion Middleware Installation Guide for Application Developer
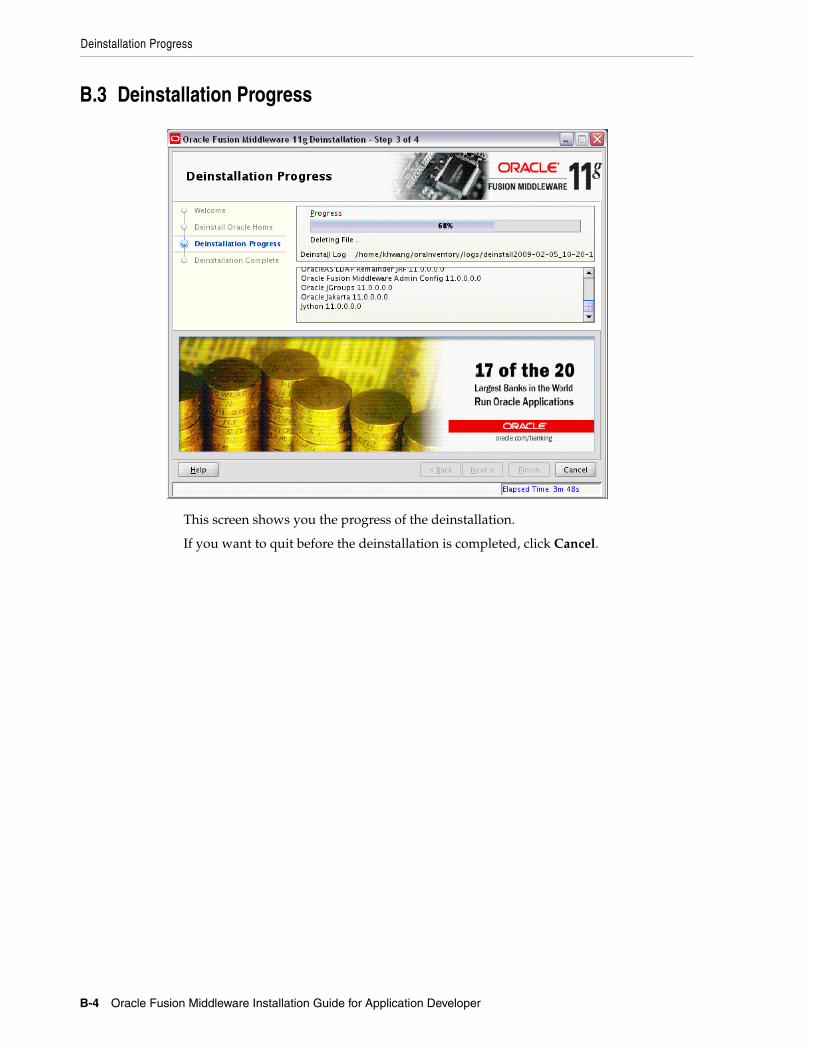
B.3 Deinstallation Progress
This screen shows you the progress of the deinstallation.
If you want to quit before the deinstallation is completed, click Cancel.

Deinstallation Complete
Application Developer Deinstallation Screens B-5
B.4 Deinstallation Complete
This screen summarizes the deinstallation that was just completed.
Click Finish to dismiss the screen.

Deinstallation Complete
B-6 Oracle Fusion Middleware Installation Guide for Application Developer

Silent Installation C-1
CSilent Installation
This appendix describes how to install Application Developer from the command line in silent mode. This appendix contains the following topics:
■ Section C.1, "About Silent Installation and Deinstallation"
■ Section C.2, "Oracle Application Developer Response Files"
C.1 About Silent Installation and DeinstallationFor information about silent installation and deinstallation, refer to "Silent Installation and Deinstallation" in Oracle Fusion Middleware Installation Planning Guide.
C.2 Oracle Application Developer Response FilesOracle recommends creating your response file by first running the install GUI, then clicking Save on the Installation Summary. You will be prompted for a name and location where you want to create this response file. After it is created, you can use it exactly as-is to replicate the installation on other systems, or modify it as needed.
C.2.1 Installation Response FilesA sample response file called sampleResponse_wls.rsp (see Section C.2.1.1, "Contents of the sampleResponse_wls.rps File") is provided in the Disk1/stage/Response (on UNIX operating systems) or Disk1\stage\Response (on Windows operating systems) directory in the location where you unzipped your downloaded archive file for installation. This template response file can be used to install the Oracle Application Developer software if you are using Oracle WebLogic Server as the application server. If you are using IBM WebSphere as your application server, you need to use the sampleResponse_was.rsp file (see Section C.2.1.2, "Contents of the sampleResponse_was.rsp File").
In either case, you will still need to run the Configuration Wizard after installation to create or extend your WebLogic domain and configure Oracle Application Developer components.
C.2.1.1 Contents of the sampleResponse_wls.rps FileBelow are the contents of the sampleResponse_wls.rsp file:
[ENGINE] #DO NOT CHANGE THIS.Response File Version=1.0.0.0.0
Oracle Application Developer Response Files
C-2 Oracle Fusion Middleware Installation Guide for Application Developer
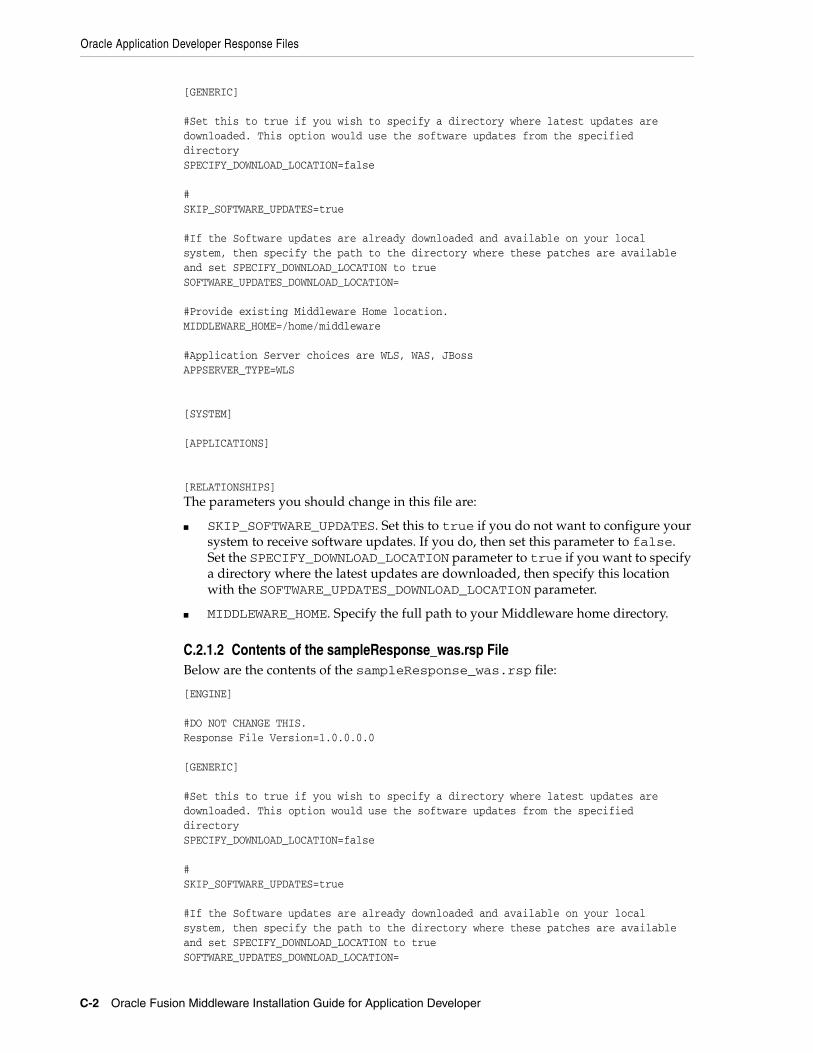
[GENERIC] #Set this to true if you wish to specify a directory where latest updates are downloaded. This option would use the software updates from the specified directorySPECIFY_DOWNLOAD_LOCATION=false #SKIP_SOFTWARE_UPDATES=true #If the Software updates are already downloaded and available on your local system, then specify the path to the directory where these patches are available and set SPECIFY_DOWNLOAD_LOCATION to trueSOFTWARE_UPDATES_DOWNLOAD_LOCATION= #Provide existing Middleware Home location.MIDDLEWARE_HOME=/home/middleware #Application Server choices are WLS, WAS, JBossAPPSERVER_TYPE=WLS [SYSTEM] [APPLICATIONS] [RELATIONSHIPS]The parameters you should change in this file are:
■ SKIP_SOFTWARE_UPDATES. Set this to true if you do not want to configure your system to receive software updates. If you do, then set this parameter to false. Set the SPECIFY_DOWNLOAD_LOCATION parameter to true if you want to specify a directory where the latest updates are downloaded, then specify this location with the SOFTWARE_UPDATES_DOWNLOAD_LOCATION parameter.
■ MIDDLEWARE_HOME. Specify the full path to your Middleware home directory.
C.2.1.2 Contents of the sampleResponse_was.rsp FileBelow are the contents of the sampleResponse_was.rsp file:
[ENGINE] #DO NOT CHANGE THIS.Response File Version=1.0.0.0.0 [GENERIC] #Set this to true if you wish to specify a directory where latest updates are downloaded. This option would use the software updates from the specified directorySPECIFY_DOWNLOAD_LOCATION=false #SKIP_SOFTWARE_UPDATES=true #If the Software updates are already downloaded and available on your local system, then specify the path to the directory where these patches are available and set SPECIFY_DOWNLOAD_LOCATION to trueSOFTWARE_UPDATES_DOWNLOAD_LOCATION=

Oracle Application Developer Response Files
Silent Installation C-3
#Provide Middleware Home location.MIDDLEWARE_HOME=/home/middleware #Application Server choices are WLS, WAS, JBossAPPSERVER_TYPE=WAS #Application Server Location to be specified for WAS and JBoss.APPSERVER_LOCATION=/home/wasinstall [SYSTEM] [APPLICATIONS] [RELATIONSHIPS]The parameters you should change in this file are:
■ SKIP_SOFTWARE_UPDATES. Set this to true if you do not want to configure your system to receive software updates. If you do, then set this parameter to false. Set the SPECIFY_DOWNLOAD_LOCATION parameter to true if you want to specify a directory where the latest updates are downloaded, then specify this location with the SOFTWARE_UPDATES_DOWNLOAD_LOCATION parameter.
■ MIDDLEWARE_HOME. Specify the full path to your Middleware home directory. Remember that this directory must be specified even if you are not using Oracle WebLogic Server as your application server.
■ APPSERVER_LOCATION. Specify the installation directory for your IBM WebSphere application server.
C.2.2 Deinstallation Response FilesA sample deinstallation response file called deinstall_oh.rsp is provided in the Disk1/stage/Response (on UNIX operating systems) or Disk1\stage\Response (on Windows operating systems) directory in the location where you downloaded and unzipped your archive file for installation. This template response file can be used to deinstall your Oracle Application Server software.
The contents of the deinstall_oh.rsp file are shown below:
[ENGINE] #DO NOT CHANGE THIS.Response File Version=1.0.0.0.0 [GENERIC] #Identifies if the Instance deinstallation is valid or notDEINSTALL_IN_ASINSTANCE_MODE=false [SYSTEM] [APPLICATIONS] [RELATIONSHIPS]

Oracle Application Developer Response Files
C-4 Oracle Fusion Middleware Installation Guide for Application Developer

Troubleshooting D-1
DTroubleshooting
This appendix describes solutions to common problems that you might encounter when installing Application Developer. It contains the following sections:
■ Section D.1, "General Troubleshooting Tips"
■ Section D.2, "Installation and Configuration Log Files"
■ Section D.4, "Need More Help?"
D.1 General Troubleshooting TipsIf you encounter an error during installation:
■ Read the Oracle Fusion Middleware Release Notes for Linux x86 or Oracle Fusion Middleware Release Notes for Microsoft Windows (32-Bit) (depending on your platform) for the latest updates. The most current version of the release notes is available on the Oracle Fusion Middleware 11 g Release 1 (11.1.1) Documentation page on Oracle Technology Network:
http://www.oracle.com/technetwork/middleware/docs/middleware-093940.html
Click the View Library link for the documentation library corresponding to your release. The Release Notes are available in the library.
■ Verify that your computer meets the requirements specified in the System Requirements and Specifications document:
http://www.oracle.com/technetwork/middleware/ias/downloads/fusion-requirements-100147.html
■ If you have entered incorrect information on one of the installation screens, return to that screen by clicking Back until you see the screen.
■ If an error occurred while the installer is copying or linking files:
1. Note the error and review the installation log files.
2. Remove the failed installation by following the steps in Chapter 4, "Deinstalling Application Developer".
3. Correct the issue that caused the error.
4. Restart the installation.
Installation and Configuration Log Files
D-2 Oracle Fusion Middleware Installation Guide for Application Developer
D.2 Installation and Configuration Log FilesThis section contains information about the log files that are created when running the Oracle Application Developer installer and the Oracle Fusion Middleware Configuration Wizard. Log files contain information that can help you troubleshoot problems with your installation or configuration.
■ Section D.2.1, "Installation Log Files"
■ Section D.2.2, "Configuration Log Files"
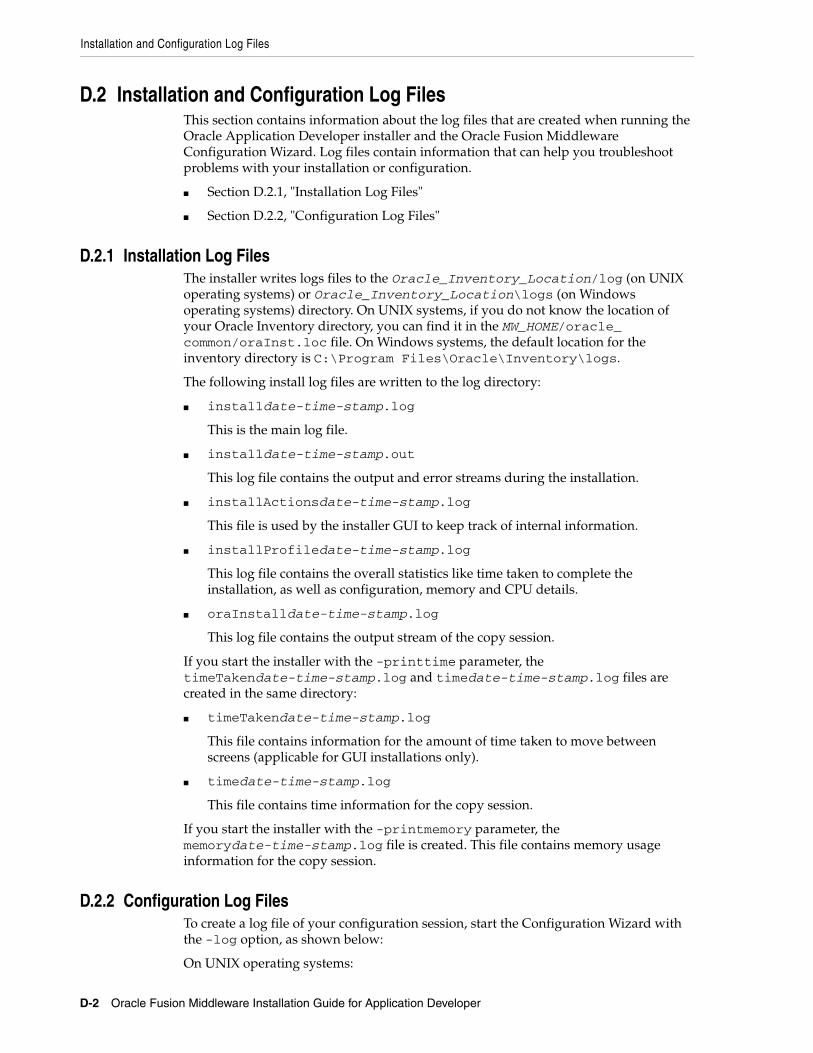
D.2.1 Installation Log FilesThe installer writes logs files to the Oracle_Inventory_Location/log (on UNIX operating systems) or Oracle_Inventory_Location\logs (on Windows operating systems) directory. On UNIX systems, if you do not know the location of your Oracle Inventory directory, you can find it in the MW_HOME/oracle_common/oraInst.loc file. On Windows systems, the default location for the inventory directory is C:\Program Files\Oracle\Inventory\logs.
The following install log files are written to the log directory:
■ installdate-time-stamp.log
This is the main log file.
■ installdate-time-stamp.out
This log file contains the output and error streams during the installation.
■ installActionsdate-time-stamp.log
This file is used by the installer GUI to keep track of internal information.
■ installProfiledate-time-stamp.log
This log file contains the overall statistics like time taken to complete the installation, as well as configuration, memory and CPU details.
■ oraInstalldate-time-stamp.log
This log file contains the output stream of the copy session.
If you start the installer with the -printtime parameter, the timeTakendate-time-stamp.log and timedate-time-stamp.log files are created in the same directory:
■ timeTakendate-time-stamp.log
This file contains information for the amount of time taken to move between screens (applicable for GUI installations only).
■ timedate-time-stamp.log
This file contains time information for the copy session.
If you start the installer with the -printmemory parameter, the memorydate-time-stamp.log file is created. This file contains memory usage information for the copy session.
D.2.2 Configuration Log FilesTo create a log file of your configuration session, start the Configuration Wizard with the -log option, as shown below:
On UNIX operating systems:

Need More Help?
Troubleshooting D-3
% ./config.sh -log=log_filename
On Windows operating systems:
G:\ config.cmd -log=log_filename
If you specify an absolute path with your log_filename then your log file will be created there. If you only specify a file name with no path, then the log files are created in the MW_HOME/oracle_common/common/bin (on UNIX operating systems) or MW_HOME\oracle_common\common\bin (on Windows operating systems) directory.
D.3 Keeping Track of Your JRE LocationThe JRE location used by the Application Developer installer is stored in the MW_HOME/oracle_common/oui/oraparam.ini (on UNIX operating systems) or MW_HOME\oracle_common\oui\oraparam.ini (on Windows operating systems) file. This file is used by OPatch and Oracle Universal Installer (OUI) to determine the location of your preferred JRE.
It is possible to change the location of your JRE (for example, the JRE directory is moved out of the Middleware Home). If this happens, you will get an error message when trying to run OPatch or OUI since the JRE location can no longer be found. If this happens, you can do one of the following:
■ Edit the MW_HOME/oracle_common/oui/oraparam.ini (on UNIX operating systems) or MW_HOME\oracle_common\oui\oraparam.ini (on Windows operating systems) file to point to the new JRE location.
■ Use the -jreLoc command line option to point to the new JRE location. See Section 2.2.2, "Starting the Installer" for more information.
D.4 Need More Help?If this appendix does not solve the problem you encountered, try these other sources:
■ Oracle Fusion Middleware Release Notes for Linux x86 or Oracle Fusion Middleware Release Notes for Microsoft Windows (32-Bit) (depending on your platform). The most current version of the release notes is available on the "Oracle Fusion Middleware 11 g Release 1 (11.1.1) Documentation" page on Oracle Technology Network:
http://www.oracle.com/technetwork/middleware/docs/middleware-093940.html
Click the View Library link for the documentation library corresponding to your release. The Release Notes are available in the library.
■ My Oracle Support (formerly OracleMetaLink: https://support.oracle.com/)
If you do not find a solution for your problem, open a service request.

Need More Help?
D-4 Oracle Fusion Middleware Installation Guide for Application Developer

Index-1
Index
AAdministration Server
starting, 3-5Administration Server console
accessing, 3-5Application Developer
configuring, 3-1custom port numbers, 3-4deinstalling, 4-1installation log files, 2-4installing, 2-1silent installation, C-1starting the deinstaller, 4-2verifying the installation, 3-5
applying Java Required Files, 3-4
Cconfiguration log files, 3-2, D-2configuring Application Developer, 3-1creating a new WebLogic domain, 3-2custom port numbers, 3-4
Ddeinstaller
starting, 4-2deinstaller location, 4-2deinstalling Application Developer, 4-1directory structure, 1-3dropping the Application Developer schemas, 4-2
EEnterprise Manager
accessing, 3-5extending an existing WebLogic domain, 3-5
FFusion Middleware Configuration Wizard, 3-1
log files, 3-2starting, 3-1starting with Sun JDK, 3-2
Iinstallation directory structure, 1-3installation instructions
Application Developerinstallation instructions, 2-3
installation log files, 2-4, D-2
JJava Required Files, 3-4
applying, 3-4Java Runtime Environment (JRE)
location of, 2-4JRF
See Java Required Files
Llog files, 2-4, 3-2, D-2
for Configuration Wizard, D-2for installation, D-2
MMy Oracle Support, D-3
OOracle Fusion Middleware
stopping, 4-2Oracle Inventory location, 2-4Oracle SOA Suite
directory structure, 1-3Oracle WebCenter
starting the installer, 2-4Oracle WebLogic Server
removing, 4-3Oracle WSM Policy Manager, 1-2, 2-2
creating schemas for, 1-2, 2-2Oracle WSM-PM Extension, 1-2, 2-2
creating schemas for, 1-2, 2-2
Pport numbers, 3-4
Index-2
Rremoving Oracle WebLogic Server, 4-3response files
samples provided, C-1, C-3
Sschemas
dropping, 4-2silent installation, C-1starting the Administration Server, 3-5starting the Configuration Wizard, 3-1starting the installer, 2-4stopping Oracle Fusion Middleware, 4-2
Ttroubleshooting, D-1
Uusing custom port numbers, 3-4
Vverifying the installation, 3-5
WWebLogic domain
creating, 3-2extending, 3-5


