Wink Compatible Wink Hub Required Compatible con Wink Necesita el hub Wink ZigBee ® Certified Product Producto ZigBee ® certificado Monitor. Detect. Control. ™ Se recomienda enfáticamente que un profesional realice la instalación Connects directly to main water supply. Se conecta directamente al suministro principal de agua. Installation & Operation Manual Manual de instalación y operación 8840000H
Transcript
Wink CompatibleWink Hub RequiredCompatible con WinkNecesita el hub Wink
Se recomienda enfáticamente que un profesional realice la instalación
Connects directly to main water supply.Se conecta directamente al suministro principal de agua.
Installation & Operation Manual
Manual de instalación y operación
8840000H
leakSMART™ Complete Home Water Protection
leakSMART™ is an innovative, wireless system that eliminates the threat of water damage by keeping you in constant control of your home’s water supply. It not only detects leaks in your home, but also immediately shuts off the water, stopping damage before it can start — all in less than 5 seconds.
1 Pair both your leakSMART™ Valve and waterproof leakSMART™ Sensor(s) with Wink, or another compatible smart home system.
Install your leakSMART™ Valve to your main water supply. Professional installation is strongly recommended.
Easily monitor and control your main water supply with your mobile device, and enjoy peace of mind knowing that the threat of water damage from a faulty appliance or burst supply line can be eliminated.
2
3
It’s sophisticated technology that’s surprisingly simple to use:
Once your leakSMART™ system is up and running, please keep this manual for future reference.
CAUTION: Do not install sensor batteries before taking steps noted within this manual.
Table of Contents• Homeowner System Setup .................... 3-4
• Professional Installation Steps .............. 9-11
• Warranty ............................ Inside Back Cover
3
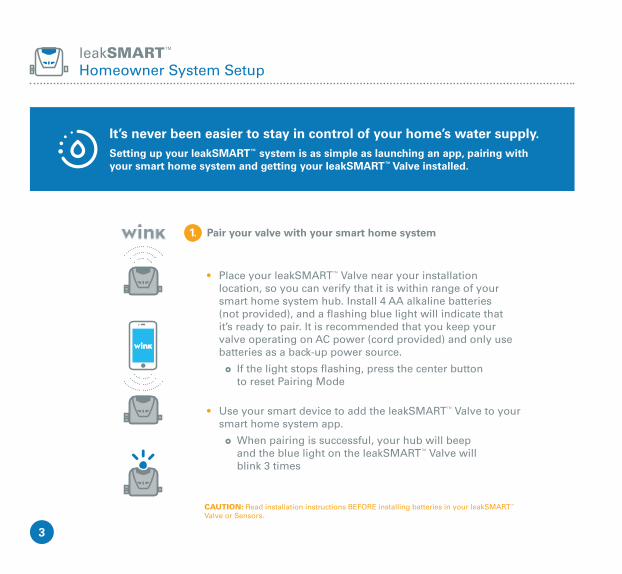
1. Pair your valve with your smart home system
• Place your leakSMART™ Valve near your installation location, so you can verify that it is within range of your smart home system hub. Install 4 AA alkaline batteries (not provided), and a flashing blue light will indicate that it’s ready to pair. It is recommended that you keep your valve operating on AC power (cord provided) and only use batteries as a back-up power source.
} If the light stops flashing, press the center button to reset Pairing Mode
• Use your smart device to add the leakSMART™ Valve to your smart home system app.
} When pairing is successful, your hub will beep and the blue light on the leakSMART™ Valve will blink 3 times
leakSMART™ Homeowner System Setup
It’s never been easier to stay in control of your home’s water supply. Setting up your leakSMART™ system is as simple as launching an app, pairing with your smart home system and getting your leakSMART™ Valve installed.
CAUTION: Read installation instructions BEFORE installing batteries in your leakSMART™ Valve or Sensors.
4
leakSMART™ Homeowner System Setup
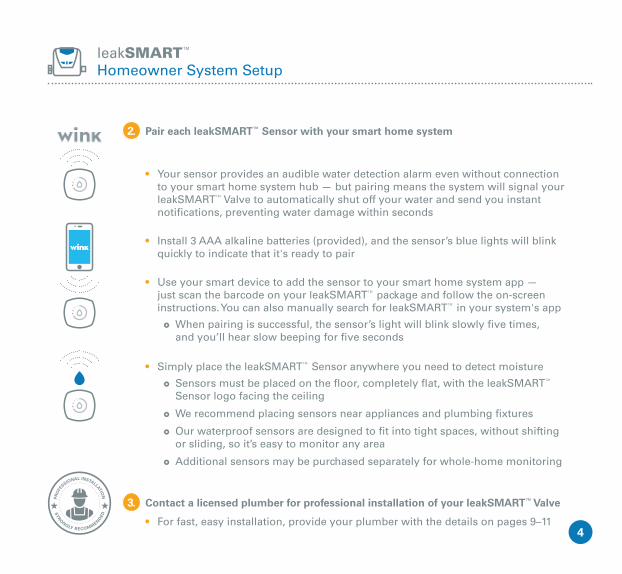
2. Pair each leakSMART™ Sensor with your smart home system
• Your sensor provides an audible water detection alarm even without connection to your smart home system hub — but pairing means the system will signal your leakSMART™ Valve to automatically shut off your water and send you instant notifications, preventing water damage within seconds
• Install 3 AAA alkaline batteries (provided), and the sensor’s blue lights will blink quickly to indicate that it's ready to pair
• Use your smart device to add the sensor to your smart home system app — just scan the barcode on your leakSMART™ package and follow the on-screen instructions. You can also manually search for leakSMART™ in your system's app
} When pairing is successful, the sensor’s light will blink slowly five times, and you’ll hear slow beeping for five seconds
• Simply place the leakSMART™ Sensor anywhere you need to detect moisture
} Sensors must be placed on the floor, completely flat, with the leakSMART™ Sensor logo facing the ceiling
} We recommend placing sensors near appliances and plumbing fixtures
} Our waterproof sensors are designed to fit into tight spaces, without shifting or sliding, so it’s easy to monitor any area
} Additional sensors may be purchased separately for whole-home monitoring
3. Contact a licensed plumber for professional installation of your leakSMART™ Valve
• For fast, easy installation, provide your plumber with the details on pages 9–11
5
leakSMART™ Valve Operation
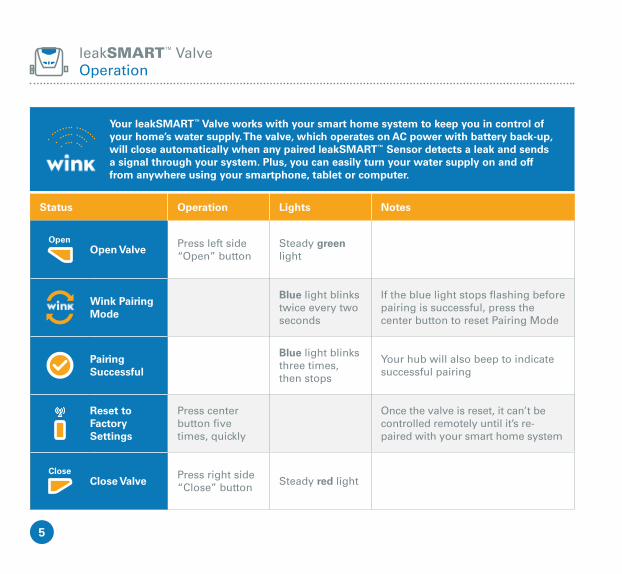
Your leakSMART™ Valve works with your smart home system to keep you in control of your home’s water supply. The valve, which operates on AC power with battery back-up, will close automatically when any paired leakSMART™ Sensor detects a leak and sends a signal through your system. Plus, you can easily turn your water supply on and off from anywhere using your smartphone, tablet or computer.
Status Operation Lights Notes
OpenOpen Valve
Press left side “Open” button
Steady green light
Wink Pairing Mode
Blue light blinks twice every two seconds
If the blue light stops flashing before pairing is successful, press the center button to reset Pairing Mode
Pairing Successful
Blue light blinks three times, then stops
Your hub will also beep to indicate successful pairing
Reset to Factory Settings
Press center button five times, quickly
Once the valve is reset, it can’t be controlled remotely until it’s re-paired with your smart home system
CloseClose Valve
Press right side “Close” button
Steady red light
6
leakSMART™ Valve Troubleshooting
Problem What to Check
Status lights do not come on
• Make sure there is power to the outlet
• Unplug AC power adapter cord from valve cover and plug back in
• If AC adapter extension wire was used, unplug both ends and reconnect
• Replace batteries
No water comes out of the faucet
• Check that your leakSMART™ Valve is open by pressing the "Open" button on your Valve
• Make sure the main water supply valve is open
• Replace batteries
leakSMART™ Valve does not operate
• Check that the unit is powered from the AC power adapter
• Check or replace batteries
leakSMART™ Valve does not operate with your smart home system
• Check your smart home system app to ensure the valve is connected
• Check Internet connection to your hub
• Press reset button on your hub
• You may need to install additional devices to increase the range of your hub (sold separately)
7
leakSMART™ Valve Troubleshooting
Open
Close
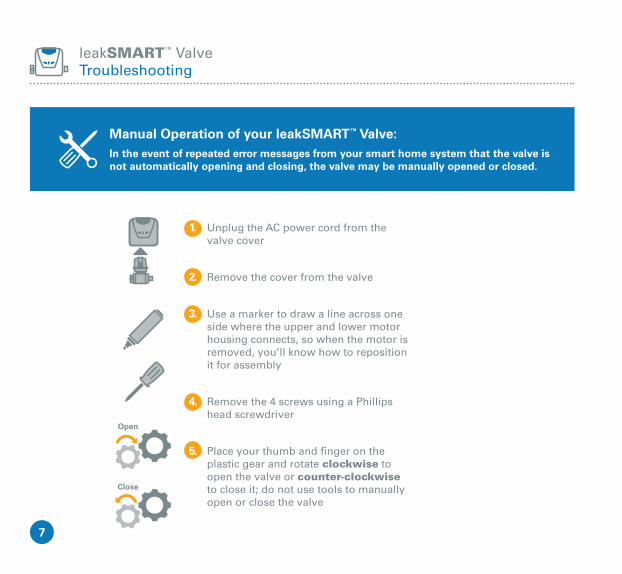
Manual Operation of your leakSMART™ Valve:In the event of repeated error messages from your smart home system that the valve is not automatically opening and closing, the valve may be manually opened or closed.
1. Unplug the AC power cord from the valve cover
2. Remove the cover from the valve
3. Use a marker to draw a line across one side where the upper and lower motor housing connects, so when the motor is removed, you’ll know how to reposition it for assembly
4. Remove the 4 screws using a Phillips head screwdriver
5. Place your thumb and finger on the plastic gear and rotate clockwise to open the valve or counter-clockwise to close it; do not use tools to manually open or close the valve
8
State Blue Light Audible Alarm Notes
3x Insert batteries
3 seconds steadyBrief chirp as battery hits metal contacts
Press the button and the sensor is ready to pair
Ready to pair
Fast blinking; will remain in this state and repeat blinking pattern for two minutes
SilentIf the light stops blinking, press button to enter pairing mode
Pairing successful
Blue light blinks slowly five times
Slow beeping for five seconds
:30sWorking and connected
Blue light blinks once every 30 seconds
Silent
Water detected
Blue light blinks twice per second (no pause) until out of alarm condition
Five quick beeps; pause; repeat until out of alarm condition
When water is detected, the leakSMART™ Valve will automatically shut off in less than 5 seconds; you will also receive notification on your mobile device
Battery lowBlue light flashes twice per 30 seconds
Chirp every 5 minutes
leakSMART™ Wireless Leak Sensor Operation
CAUTION: Read installation instructions BEFORE installing batteries in your leakSMART™ Valve or Sensors.
9
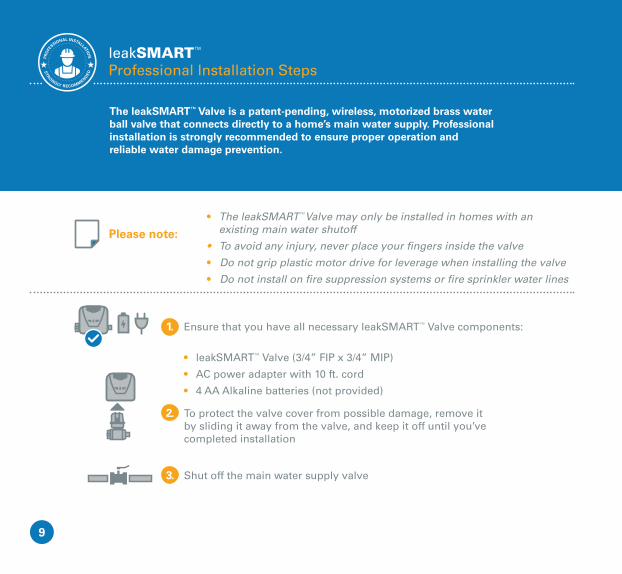
• The leakSMART™Valve may only be installed in homes with an existing main water shutoff
• To avoid any injury, never place your fingers inside the valve
• Do not grip plastic motor drive for leverage when installing the valve
• Do not install on fire suppression systems or fire sprinkler water lines
Please note:
1. Ensure that you have all necessary leakSMART™ Valve components:
• leakSMART™ Valve (3/4” FIP x 3/4” MIP)
• AC power adapter with 10 ft. cord
• 4 AA Alkaline batteries (not provided)
2. To protect the valve cover from possible damage, remove it by sliding it away from the valve, and keep it off until you’ve completed installation
3. Shut off the main water supply valve
leakSMART™ Professional Installation Steps
The leakSMART™ Valve is a patent-pending, wireless, motorized brass water ball valve that connects directly to a home’s main water supply. Professional installation is strongly recommended to ensure proper operation and reliable water damage prevention.
10
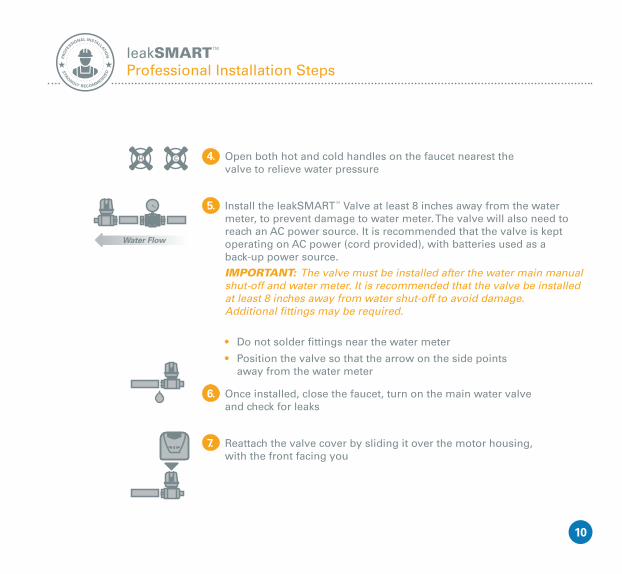
4. Open both hot and cold handles on the faucet nearest the valve to relieve water pressure
5. Install the leakSMART™ Valve at least 8 inches away from the water meter, to prevent damage to water meter. The valve will also need to reach an AC power source. It is recommended that the valve is kept operating on AC power (cord provided), with batteries used as a back-up power source.
IMPORTANT: The valve must be installed after the water main manual shut-off and water meter. It is recommended that the valve be installed at least 8 inches away from water shut-off to avoid damage. Additional fittings may be required.
• Do not solder fittings near the water meter
• Position the valve so that the arrow on the side points away from the water meter
6. Once installed, close the faucet, turn on the main water valve and check for leaks
7. Reattach the valve cover by sliding it over the motor housing, with the front facing you
leakSMART™ Professional Installation Steps
Water Flow
11
Open Close
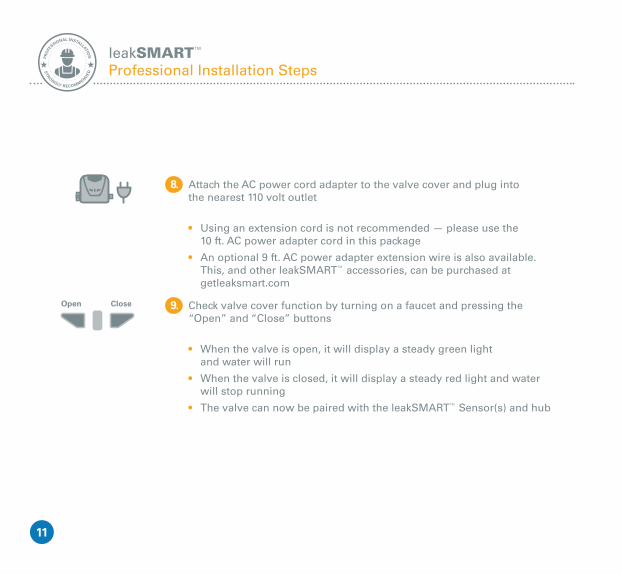
8. Attach the AC power cord adapter to the valve cover and plug into the nearest 110 volt outlet
• Using an extension cord is not recommended — please use the 10 ft. AC power adapter cord in this package
• An optional 9 ft. AC power adapter extension wire is also available. This, and other leakSMART™ accessories, can be purchased at getleaksmart.com
9. Check valve cover function by turning on a faucet and pressing the “Open” and “Close” buttons
• When the valve is open, it will display a steady green light and water will run
• When the valve is closed, it will display a steady red light and water will stop running
• The valve can now be paired with the leakSMART™ Sensor(s) and hub
leakSMART™ Professional Installation Steps
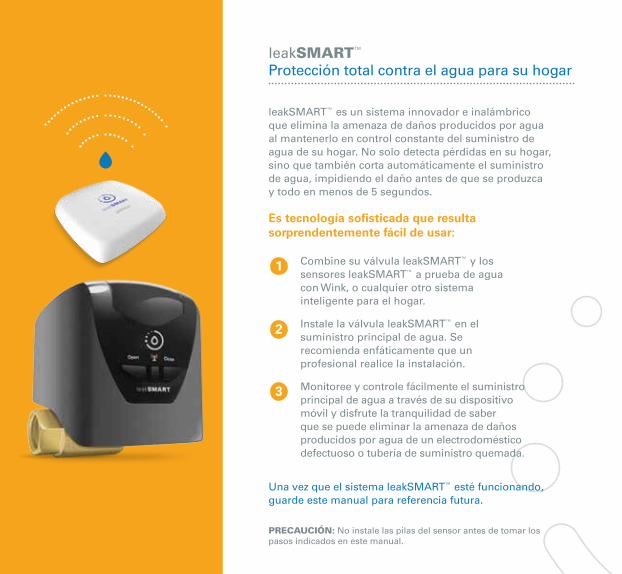
1 Combine su válvula leakSMART™ y los sensores leakSMART™ a prueba de agua con Wink, o cualquier otro sistema inteligente para el hogar.
Instale la válvula leakSMART™ en el suministro principal de agua. Se recomienda enfáticamente que un profesional realice la instalación.
Monitoree y controle fácilmente el suministro principal de agua a través de su dispositivo móvil y disfrute la tranquilidad de saber que se puede eliminar la amenaza de daños producidos por agua de un electrodoméstico defectuoso o tubería de suministro quemada.
2
3
Es tecnología sofisticada que resulta sorprendentemente fácil de usar:
Una vez que el sistema leakSMART™ esté funcionando, guarde este manual para referencia futura.
PRECAUCIÓN: No instale las pilas del sensor antes de tomar los pasos indicados en este manual.
leakSMART™ Protección total contra el agua para su hogar
leakSMART™ es un sistema innovador e inalámbrico que elimina la amenaza de daños producidos por agua al mantenerlo en control constante del suministro de agua de su hogar. No solo detecta pérdidas en su hogar, sino que también corta automáticamente el suministro de agua, impidiendo el daño antes de que se produzca y todo en menos de 5 segundos.
Índice• Configuración de sistema para el propietario .... 3-4
1. Combine su válvula con el sistema inteligente para el hogar
• Coloque la válvula leakSMART™ cerca de la ubicación de instalación, de modo que pueda verificar que se encuentra dentro del rango del hub de sistema inteligente para el hogar. Instale 4 baterías AA alcalinas (no se incluyen) y una luz parpadeante azul indicará que está listo para conectar. Se recomienda que la válvula funcione con alimentación de CA (se incluye el cable) y solo utilice baterías como fuente de alimentación de reserva.
} Si la luz deja de parpadear, presione el botón del centro para reiniciar el Modo de emparejamiento.
• Utilice su dispositivo inteligente para añadir la válvula leakSMART™ a la aplicación del sistema inteligente para el hogar.
} Cuando el emparejamiento se haya realizado con éxito, el hub emitirá un pitido y la luz azul en la válvula leakSMART™ titilará 3 veces.
Nunca ha sido tan fácil estar en control del suministro de agua de su hogar.
Configurar el sistema leakSMART™ es tan simple como iniciar una aplicación, acoplarla con su sistema inteligente para el hogar e instalando la válvula leakSMART™.
PRECAUCIÓN: Lea las instrucciones ANTES de instalar las baterías en los sensores o válvula leakSMART™.
leakSMART™ Configuración de sistema para el propietario
4
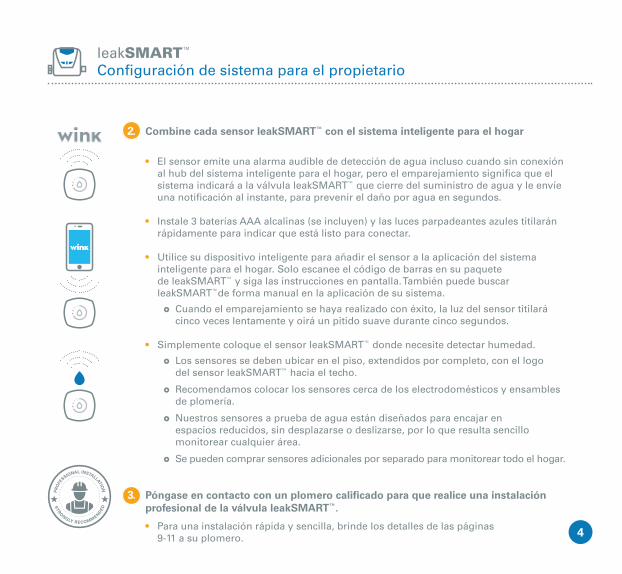
2. Combine cada sensor leakSMART™ con el sistema inteligente para el hogar
• El sensor emite una alarma audible de detección de agua incluso cuando sin conexión al hub del sistema inteligente para el hogar, pero el emparejamiento significa que el sistema indicará a la válvula leakSMART™ que cierre del suministro de agua y le envíe una notificación al instante, para prevenir el daño por agua en segundos.
• Instale 3 baterías AAA alcalinas (se incluyen) y las luces parpadeantes azules titilarán rápidamente para indicar que está listo para conectar.
• Utilice su dispositivo inteligente para añadir el sensor a la aplicación del sistema inteligente para el hogar. Solo escanee el código de barras en su paquete de leakSMART™ y siga las instrucciones en pantalla. También puede buscar leakSMART™de forma manual en la aplicación de su sistema.
} Cuando el emparejamiento se haya realizado con éxito, la luz del sensor titilará cinco veces lentamente y oirá un pitido suave durante cinco segundos.
• Simplemente coloque el sensor leakSMART™ donde necesite detectar humedad.
} Los sensores se deben ubicar en el piso, extendidos por completo, con el logo del sensor leakSMART™ hacia el techo.
} Recomendamos colocar los sensores cerca de los electrodomésticos y ensambles de plomería.
} Nuestros sensores a prueba de agua están diseñados para encajar en espacios reducidos, sin desplazarse o deslizarse, por lo que resulta sencillo monitorear cualquier área.
} Se pueden comprar sensores adicionales por separado para monitorear todo el hogar.
3. Póngase en contacto con un plomero calificado para que realice una instalación profesional de la válvula leakSMART™.
• Para una instalación rápida y sencilla, brinde los detalles de las páginas 9-11 a su plomero.
leakSMART™ Configuración de sistema para el propietario
5
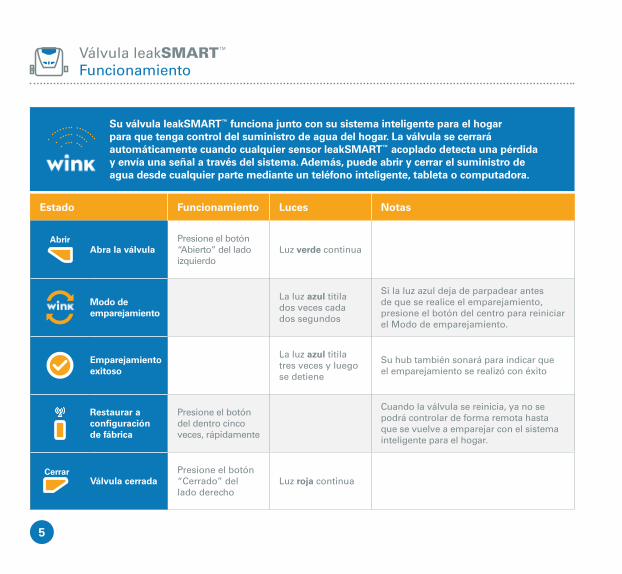
Estado Funcionamiento Luces Notas
AbrirAbra la válvula
Presione el botón “Abierto” del lado izquierdo
Luz verde continua
Modo de emparejamiento
La luz azul titila dos veces cada dos segundos
Si la luz azul deja de parpadear antes de que se realice el emparejamiento, presione el botón del centro para reiniciar el Modo de emparejamiento.
Emparejamiento exitoso
La luz azul titila tres veces y luego se detiene
Su hub también sonará para indicar que el emparejamiento se realizó con éxito
Restaurar a configuración de fábrica
Presione el botón del dentro cinco veces, rápidamente
Cuando la válvula se reinicia, ya no se podrá controlar de forma remota hasta que se vuelve a emparejar con el sistema inteligente para el hogar.
CerrarVálvula cerrada
Presione el botón “Cerrado” del lado derecho
Luz roja continua
Válvula leakSMART™ Funcionamiento
Su válvula leakSMART™ funciona junto con su sistema inteligente para el hogar para que tenga control del suministro de agua del hogar. La válvula se cerrará automáticamente cuando cualquier sensor leakSMART™ acoplado detecta una pérdida y envía una señal a través del sistema. Además, puede abrir y cerrar el suministro de agua desde cualquier parte mediante un teléfono inteligente, tableta o computadora.
6
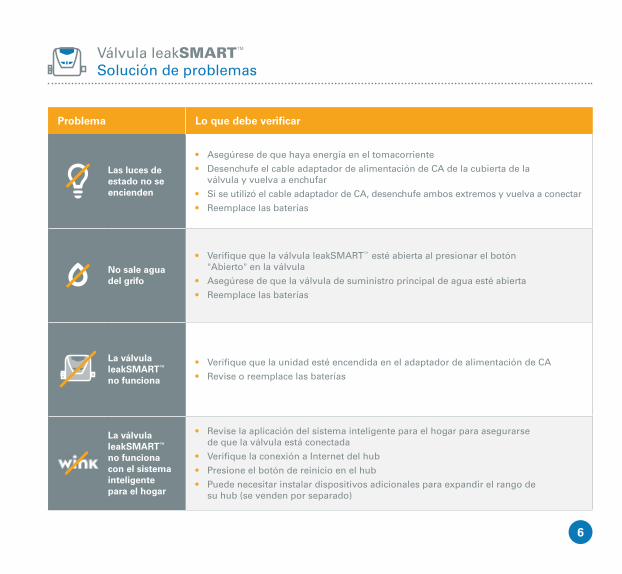
Problema Lo que debe verificar
Las luces de estado no se encienden
• Asegúrese de que haya energía en el tomacorriente
• Desenchufe el cable adaptador de alimentación de CA de la cubierta de la válvula y vuelva a enchufar
• Si se utilizó el cable adaptador de CA, desenchufe ambos extremos y vuelva a conectar
• Reemplace las baterías
No sale agua del grifo
• Verifique que la válvula leakSMART™ esté abierta al presionar el botón "Abierto" en la válvula
• Asegúrese de que la válvula de suministro principal de agua esté abierta
• Reemplace las baterías
La válvula leakSMART™ no funciona
• Verifique que la unidad esté encendida en el adaptador de alimentación de CA
• Revise o reemplace las baterías
La válvula leakSMART™ no funciona con el sistema inteligente para el hogar
• Revise la aplicación del sistema inteligente para el hogar para asegurarse de que la válvula está conectada
• Verifique la conexión a Internet del hub
• Presione el botón de reinicio en el hub
• Puede necesitar instalar dispositivos adicionales para expandir el rango de su hub (se venden por separado)
Válvula leakSMART™ Solución de problemas
7
Válvula leakSMART™ Solución de problemas
Abrir
Cerrar
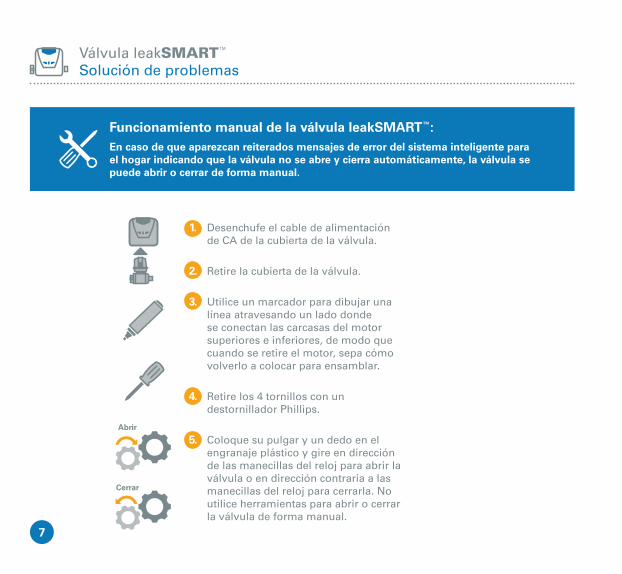
Funcionamiento manual de la válvula leakSMART™:En caso de que aparezcan reiterados mensajes de error del sistema inteligente para el hogar indicando que la válvula no se abre y cierra automáticamente, la válvula se puede abrir o cerrar de forma manual.
1. Desenchufe el cable de alimentación de CA de la cubierta de la válvula.
2. Retire la cubierta de la válvula.
3. Utilice un marcador para dibujar una línea atravesando un lado donde se conectan las carcasas del motor superiores e inferiores, de modo que cuando se retire el motor, sepa cómo volverlo a colocar para ensamblar.
4. Retire los 4 tornillos con un destornillador Phillips.
5. Coloque su pulgar y un dedo en el engranaje plástico y gire en dirección de las manecillas del reloj para abrir la válvula o en dirección contraria a las manecillas del reloj para cerrarla. No utilice herramientas para abrir o cerrar la válvula de forma manual.
8
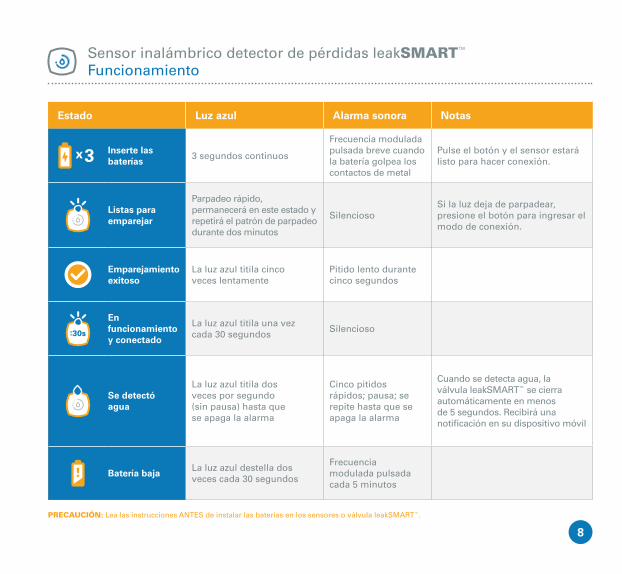
Estado Luz azul Alarma sonora Notas
3x Inserte las baterías
3 segundos continuos
Frecuencia modulada pulsada breve cuando la batería golpea los contactos de metal
Pulse el botón y el sensor estará listo para hacer conexión.
Listas para emparejar
Parpadeo rápido, permanecerá en este estado y repetirá el patrón de parpadeo durante dos minutos
SilenciosoSi la luz deja de parpadear, presione el botón para ingresar el modo de conexión.
Emparejamiento exitoso
La luz azul titila cinco veces lentamente
Pitido lento durante cinco segundos
:30s
En funcionamiento y conectado
La luz azul titila una vez cada 30 segundos
Silencioso
Se detectó agua
La luz azul titila dos veces por segundo (sin pausa) hasta que se apaga la alarma
Cinco pitidos rápidos; pausa; se repite hasta que se apaga la alarma
Cuando se detecta agua, la válvula leakSMART™ se cierra automáticamente en menos de 5 segundos. Recibirá una notificación en su dispositivo móvil
Batería bajaLa luz azul destella dos veces cada 30 segundos
Frecuencia modulada pulsada cada 5 minutos
Sensor inalámbrico detector de pérdidas leakSMART™ Funcionamiento
PRECAUCIÓN: Lea las instrucciones ANTES de instalar las baterías en los sensores o válvula leakSMART™.
9
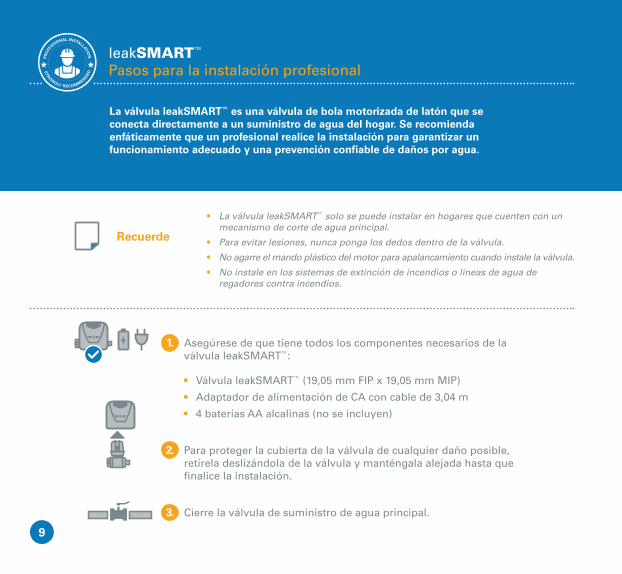
• La válvula leakSMART™ solo se puede instalar en hogares que cuenten con un mecanismo de corte de agua principal.
• Para evitar lesiones, nunca ponga los dedos dentro de la válvula.
• No agarre el mando plástico del motor para apalancamiento cuando instale la válvula.
• No instale en los sistemas de extinción de incendios o líneas de agua de regadores contra incendios.
Recuerde
1. Asegúrese de que tiene todos los componentes necesarios de la válvula leakSMART™:
• Válvula leakSMART™ (19,05 mm FIP x 19,05 mm MIP)
• Adaptador de alimentación de CA con cable de 3,04 m
• 4 baterías AA alcalinas (no se incluyen)
2. Para proteger la cubierta de la válvula de cualquier daño posible, retírela deslizándola de la válvula y manténgala alejada hasta que finalice la instalación.
3. Cierre la válvula de suministro de agua principal.
leakSMART™ Pasos para la instalación profesional
La válvula leakSMART™ es una válvula de bola motorizada de latón que se conecta directamente a un suministro de agua del hogar. Se recomienda enfáticamente que un profesional realice la instalación para garantizar un funcionamiento adecuado y una prevención confiable de daños por agua.
10
4. Abra las perillas de agua fría y caliente en el grifo cerca de la válvula para aliviar la presión del agua.
5. Instale la válvula leakSMART™ al menos a 20,32 cm del medidor de agua para evitar daños al medidor. La válvula también deberá conectarse a una fuente de alimentación de CA. Se recomienda que la válvula se mantenga funcionando con alimentación de CA (se incluye el cable) con baterías usadas como fuente de alimentación de reserva. IMPORTANTE: La válvula se debe instalar después del cierre manual principal de agua y del medidor de agua. Se recomienda instalar la válvula al menos a 20,32 cm del cierre de agua para evitar daños. Es posible que requiera conectores adicionales.
• No suelde accesorios cerca del medidor de agua.
• Coloque la válvula de manera que la flecha lateral apunte lejos del medidor de agua.
6. Una vez instalada, cierre el grifo, encienda la válvula de agua principal y verifique si hay pérdidas
7. Coloque nuevamente la cubierta de la válvula deslizándola sobre la carcasa del motor por la parte frontal hacia usted.
Flujo de agua
leakSMART™ Pasos para la instalación profesional
11
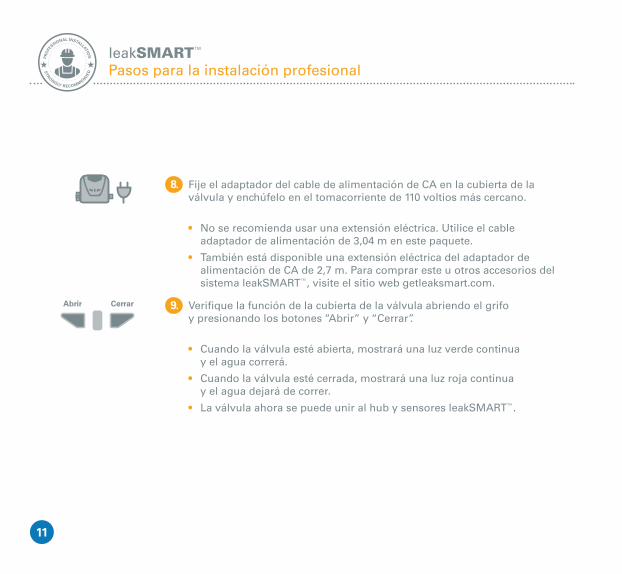
Abrir Cerrar
8. Fije el adaptador del cable de alimentación de CA en la cubierta de la válvula y enchúfelo en el tomacorriente de 110 voltios más cercano.
• No se recomienda usar una extensión eléctrica. Utilice el cable adaptador de alimentación de 3,04 m en este paquete.
• También está disponible una extensión eléctrica del adaptador de alimentación de CA de 2,7 m. Para comprar este u otros accesorios del sistema leakSMART™, visite el sitio web getleaksmart.com.
9. Verifique la función de la cubierta de la válvula abriendo el grifo y presionando los botones “Abrir” y “Cerrar”.
• Cuando la válvula esté abierta, mostrará una luz verde continua y el agua correrá.
• Cuando la válvula esté cerrada, mostrará una luz roja continua y el agua dejará de correr.
• La válvula ahora se puede unir al hub y sensores leakSMART™.