58
© 2010 The McGraw-Hill Companies, Inc. All rights reserved Mike Meyers’ CompTIA A+ ® Guide to Managing and Troubleshooting PCs Third Edition Installing and Upgrading Windows Chapter 14
| Date post: | 31-Dec-2015 |
| Category: |
Documents |
| Upload: | gwendolyn-leblanc |
| View: | 81 times |
| Download: | 2 times |

© 2010 The McGraw-Hill Companies, Inc. All rights reserved
Mike Meyers’ CompTIA A+® Guide to
Managing and Troubleshooting PCs
Third Edition
Installing and Upgrading Windows
Chapter 14

© 2010 The McGraw-Hill Companies, Inc. All rights reserved
Mike Meyers’ CompTIA A+® Guide to
Managing and Troubleshooting PCs
Third Edition
Overview
• In this chapter, you will learn how to
– Identify and implement pre-installation tasks
– Install and upgrade Windows 2000, Windows XP, and Windows Vista
– Troubleshoot installation problems
– Identify and implement post-installation tasks
– Explain the structures created during the installation process

© 2010 The McGraw-Hill Companies, Inc. All rights reserved
Mike Meyers’ CompTIA A+® Guide to
Managing and Troubleshooting PCs
Third Edition
Installing and Upgrading
• Accomplished in three main steps– Step one: Prepare for installation– Step two: Install– Step three: Perform post-installation tasks

© 2010 The McGraw-Hill Companies, Inc. All rights reserved
Mike Meyers’ CompTIA A+® Guide to
Managing and Troubleshooting PCs
Third Edition
Preparing for Installation or Upgrade
1. Identify hardware requirements2. Verify hardware and software compatibility3. Decide: Clean install or upgrade? 4. Back up data5. Select an installation method6. Identify partition and file systems to use7. Determine computer’s network role8. Decide on language and locale settings9. Plan for post-installation tasks

© 2010 The McGraw-Hill Companies, Inc. All rights reserved
Mike Meyers’ CompTIA A+® Guide to
Managing and Troubleshooting PCs
Third Edition
Identify Hardware Requirements
Core Resources−CPU−RAM−Free hard disk space
Miscellaneous−Video adapter−Display−Storage devices

© 2010 The McGraw-Hill Companies, Inc. All rights reserved
Mike Meyers’ CompTIA A+® Guide to
Managing and Troubleshooting PCs
Third Edition
Verify Compatibility
• Hardware and software• Use the Windows Logo’d Products List
(a.k.a., the Hardware Compatibility List )

© 2010 The McGraw-Hill Companies, Inc. All rights reserved
Mike Meyers’ CompTIA A+® Guide to
Managing and Troubleshooting PCs
Third Edition
Clean Install or Upgrade
• Clean install– Usually done on empty hard disk– All applications must be installed
• Upgrade– New OS installs on top of the old one– Many previous settings and capabilities retained– Applications don’t need to be reinstalled
• Multiboot– Doing a clean install side by side with another OS– Enables you to boot to more than one OS

© 2010 The McGraw-Hill Companies, Inc. All rights reserved
Mike Meyers’ CompTIA A+® Guide to
Managing and Troubleshooting PCs
Third Edition
Other Installation Methods
• When deploying many computers, automated methods used
• Image—complete copy of OS and applications– Norton Ghost– Clonezilla– Acronis’ True Image
• Remote Installation Services (RIS)

© 2010 The McGraw-Hill Companies, Inc. All rights reserved
Mike Meyers’ CompTIA A+® Guide to
Managing and Troubleshooting PCs
Third Edition
Determine How to Back Up Data
• If data saved to central server, skip this step
• If data exists on local drive, back it up
• Back up to network server, DVD, USB, hard drive, etc.– Will need to restore data from this location after
upgrade or reinstall

© 2010 The McGraw-Hill Companies, Inc. All rights reserved
Mike Meyers’ CompTIA A+® Guide to
Managing and Troubleshooting PCs
Third Edition
Select an Installation Method
• Two basic choices
– Optical disc (CompTIA A+ focus)• Boot from CD or DVD and
start installation
– Over the network • More for CompTIA Network+ techs and network
administrators

© 2010 The McGraw-Hill Companies, Inc. All rights reserved
Mike Meyers’ CompTIA A+® Guide to
Managing and Troubleshooting PCs
Third Edition
Determine Partition and File System
• Partition– Create when drive first created (or use third-party
tools to repartition)– If multiboot, use one partition for each OS
• File system– Use NTFS whenever possible—security features are
valuable– If older OSs need FAT or FAT32, use FAT or FAT32
for their partition
© 2010 The McGraw-Hill Companies, Inc. All rights reserved
Mike Meyers’ CompTIA A+® Guide to
Managing and Troubleshooting PCs
Third Edition
Miscellaneous
• Network role– Standalone, workgroup, or domain
(see Chapter 23)– Environment determines choice
• Language and locale settings– Languages and displays can be configured for
different countries
• Plan for post-installation tasks– Internet access?– Discs from manufacturers?– Access to backed up data?
© 2010 The McGraw-Hill Companies, Inc. All rights reserved
Mike Meyers’ CompTIA A+® Guide to
Managing and Troubleshooting PCs
Third Edition
Installing and Upgrading
• Insert disc and product key, accept EULA• Windows 2000 hardware requirements• Windows XP issues
– Upgrade paths– Hardware requirements– Compatibility– Upgrade Advisor– Registration vs. activation
• Windows Vista issues– Upgrade paths– Hardware requirements– Compatibility

© 2010 The McGraw-Hill Companies, Inc. All rights reserved
Mike Meyers’ CompTIA A+® Guide to
Managing and Troubleshooting PCs
Third Edition
Install or Upgrade to Windows 2000 Professional
• Hardware Requirements
Component Minimum RecommendedCPU Pentium 133 MHz Pentium II 350 MHzMemory 64 MB 128 MBHard Disk 2 GB with 650 MB
free6.4 GB with 2 GB free
Network None Modern NICDisplay VGA resolution SVGA resolution Optical Not required unless
installing from CDNot required unless installing from CD

© 2010 The McGraw-Hill Companies, Inc. All rights reserved
Mike Meyers’ CompTIA A+® Guide to
Managing and Troubleshooting PCs
Third Edition
Install or Upgrade to Windows XP Professional
• Upgrade paths
Windows 98
Windows XP Pro
Windows Me
Windows NT 4.0SP5 or later
Windows 2000 Pro(including SPs)
Windows XP Home

© 2010 The McGraw-Hill Companies, Inc. All rights reserved
Mike Meyers’ CompTIA A+® Guide to
Managing and Troubleshooting PCs
Third Edition
Install or Upgrade to Windows XP Professional (continued)
• Hardware Requirements
Component Minimum RecommendedCPU Intel or AMD
233 MHzIntel or AMD 300 MHz
Memory 64 MB 256 MBHard Disk 1.5 GB available hard
drive space4 GB available hard drive space
Network None Modern NIC
Display DirectX version 8800 × 600 resolution
DirectX version 8800 × 600 resolution
Optical Any CD or DVD drive Any CD or DVD drive
© 2010 The McGraw-Hill Companies, Inc. All rights reserved
Mike Meyers’ CompTIA A+® Guide to
Managing and Troubleshooting PCs
Third Edition
Hardware and Software Compatibility with XP
• Upgrade Advisor
– First process that runs from setup.exe
– Provides list of devices and software known to have issues with XP
– Can be run by itself • From Microsoft’s Web site• Or winnt32 /checkupgradeonly• See sidebar on p. 473 for detailed instructions
– On the installation CD or can be downloaded for free

© 2010 The McGraw-Hill Companies, Inc. All rights reserved
Mike Meyers’ CompTIA A+® Guide to
Managing and Troubleshooting PCs
Third Edition
Windows XP Installation
• Bootable CD-ROM boots into Setup– May need to set boot order in BIOS
• Registration—optional
• Activation– Mandatory within 30 days– Antipiracy mechanism– System disabled after 30
days if not activated– Via Internet or phone

© 2010 The McGraw-Hill Companies, Inc. All rights reserved
Mike Meyers’ CompTIA A+® Guide to
Managing and Troubleshooting PCs
Third Edition
Windows Vista Installation
• Upgrade paths = complicated– See chart on p. 475
– Windows 2000 to Vista requires clean installation
– Windows XP variables• Version of XP• Version of Vista
– Must start the upgrade process from within the older operating system

© 2010 The McGraw-Hill Companies, Inc. All rights reserved
Mike Meyers’ CompTIA A+® Guide to
Managing and Troubleshooting PCs
Third Edition
Windows Vista Installation
Component Minimum Recommended
CPU 1 GHz CPU; 64-bit CPU for 64-bit OS
Any dual-core or better CPU
Memory 1 GB RAM 2+ GB RAM
HDD/SSD 40 GB with 15 GB free space
100+ GB drive
Network Modern NIC with Internet access
Modern NIC with Internet access
Display DirectX 9 graphics with 32 MB RAM; 128 MB RAM for Aero
DirectX 10 graphics with 512+ MB RAM
Optical DVD drive DVD or BD drive
Windows Vista Upgrade Advisor:
www.microsoft.com/windows/windows-vista/get/upgrade-advisor.aspx

© 2010 The McGraw-Hill Companies, Inc. All rights reserved
Mike Meyers’ CompTIA A+® Guide to
Managing and Troubleshooting PCs
Third Edition
For Upgrades, Follow These Pre-Upgrade Steps
1. Check compatibility at Windows Logo’d Product List or through Upgrade Advisor
2. Back up data and configuration files
3. Perform “spring cleaning”
4. Perform disk scan and defragmentation
5. Uncompress all files, folders, and partitions
6. Perform virus scan and disable or remove virus-checking software
7. Disable CMOS virus checking
8. Be prepared to do clean install

© 2010 The McGraw-Hill Companies, Inc. All rights reserved
Mike Meyers’ CompTIA A+® Guide to
Managing and Troubleshooting PCs
Third Edition
Windows 2000/XP Clean Install
• Steps same for both • Start by booting to CD-ROM• Text mode
– Can partition drive in this mode– Choose file system (usually NTFS)

© 2010 The McGraw-Hill Companies, Inc. All rights reserved
Mike Meyers’ CompTIA A+® Guide to
Managing and Troubleshooting PCs
Third Edition
Windows 2000/XP Clean Install (continued)
• Graphical mode
• Enter product key– Good idea to write this on the CD

© 2010 The McGraw-Hill Companies, Inc. All rights reserved
Mike Meyers’ CompTIA A+® Guide to
Managing and Troubleshooting PCs
Third Edition
Windows 2000/XP Clean Install (continued)
• Configure computer name and administrator password
• Network settings

© 2010 The McGraw-Hill Companies, Inc. All rights reserved
Mike Meyers’ CompTIA A+® Guide to
Managing and Troubleshooting PCs
Third Edition
Windows Vista Clean Install
• Fully graphical• Boot to DVD• Enter product key
before anything else
• Product key determines the version installed
• Leave blank and you’ll install trial

© 2010 The McGraw-Hill Companies, Inc. All rights reserved
Mike Meyers’ CompTIA A+® Guide to
Managing and Troubleshooting PCs
Third Edition
Windows Vista Clean Install (continued)
• Follow the screens– EULA– Upgrade or clean installation– Select Custom (advanced) for more options

© 2010 The McGraw-Hill Companies, Inc. All rights reserved
Mike Meyers’ CompTIA A+® Guide to
Managing and Troubleshooting PCs
Third Edition
Windows Vista Clean Install (continued)
• Create/select partition
• Load drivers for HDD if needed– F6 and have disc ready
• Then the big copy– Usually a fairly quick process– Faster than the XP installation process

© 2010 The McGraw-Hill Companies, Inc. All rights reserved
Mike Meyers’ CompTIA A+® Guide to
Managing and Troubleshooting PCs
Third Edition
Windows Vista Clean Install (continued)
• User customization follows the big copy– Choose user name and password– Select profile picture– Choose desktop
background– Manage Automatic
Updates– Adjust time and
date settings

© 2010 The McGraw-Hill Companies, Inc. All rights reserved
Mike Meyers’ CompTIA A+® Guide to
Managing and Troubleshooting PCs
Third Edition
Windows Vista Clean Install (continued)
• If connected to a network, you’ll be prompted to set security levels– Selecting Home or
Work makes your computer discoverable
– Selecting Public Location stops discovery

© 2010 The McGraw-Hill Companies, Inc. All rights reserved
Mike Meyers’ CompTIA A+® Guide to
Managing and Troubleshooting PCs
Third Edition
Windows Vista Clean Install (continued)

© 2010 The McGraw-Hill Companies, Inc. All rights reserved
Mike Meyers’ CompTIA A+® Guide to
Managing and Troubleshooting PCs
Third Edition
Lab – Installing Vista
1. Insert Vista DVD
2. Reboot the computer
3. Boot to the installation DVD– You might need to
make changes in CMOS to boot to the optical drive first
4. Follow the setup wizard
5. Do not put in a product key
6. Install Windows Vista Ultimate
7. Insert a user name
8. Skip the performance test
© 2010 The McGraw-Hill Companies, Inc. All rights reserved
Mike Meyers’ CompTIA A+® Guide to
Managing and Troubleshooting PCs
Third Edition
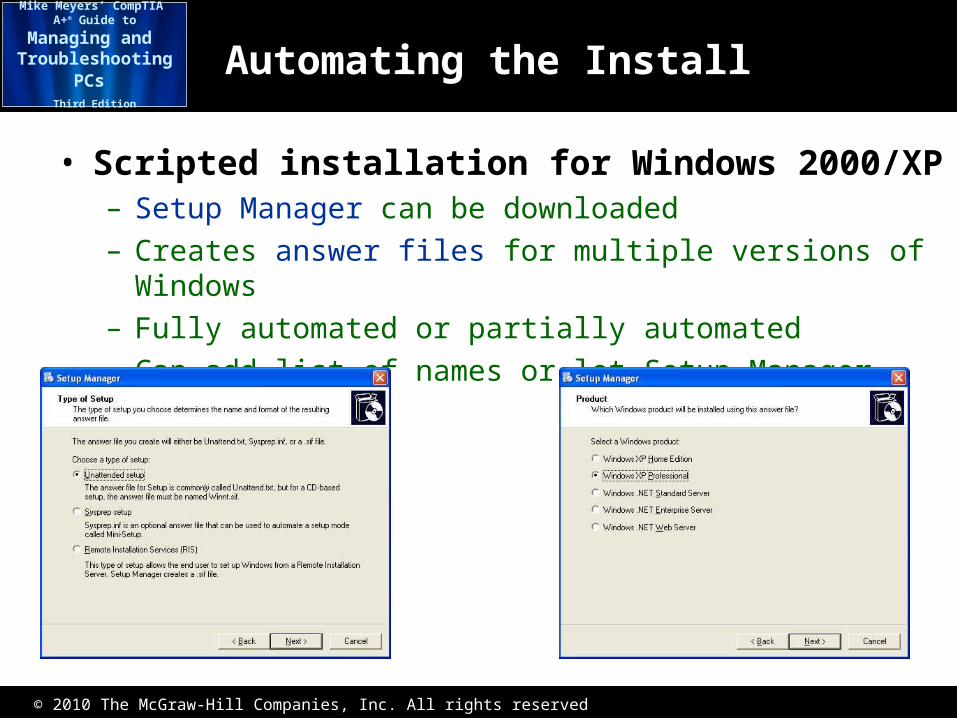
Automating the Install
• Scripted installation for Windows 2000/XP– Setup Manager can be downloaded– Creates answer files for multiple versions of Windows– Fully automated or partially automated– Can add list of names or let Setup Manager generate

© 2010 The McGraw-Hill Companies, Inc. All rights reserved
Mike Meyers’ CompTIA A+® Guide to
Managing and Troubleshooting PCs
Third Edition
Automating the Install (continued)
• Automated Installation Kit (AIK) in Windows Vista– Complicated tool because can create very
customized Master Installation files– Master Installation and other tools enable you to
create images– Can then put those images on network or
removable media– Well beyond CompTIA A+

© 2010 The McGraw-Hill Companies, Inc. All rights reserved
Mike Meyers’ CompTIA A+® Guide to
Managing and Troubleshooting PCs
Third Edition
Automating the Install (continued)
• Disk cloning – Exact copy of drive with fully installed and
configured OS– Works great with standardized systems
• Sysprep– Sysprep sanitizes many unique settings on a
computer– Can help create a automated installation that
requires select user input

© 2010 The McGraw-Hill Companies, Inc. All rights reserved
Mike Meyers’ CompTIA A+® Guide to
Managing and Troubleshooting PCs
Third Edition
Troubleshooting Installation Problems

© 2010 The McGraw-Hill Companies, Inc. All rights reserved
Mike Meyers’ CompTIA A+® Guide to
Managing and Troubleshooting PCs
Third Edition
Text Mode Errors
• No boot device– Either start up disc is bad, or CMOS not set to boot
off optical drive first
• Windows Setup requires XXXX amount of available drive space– Check formatting and/or space of C: drive
• Not ready error on optical drive– Check the CD-ROM drive and disc
• BSoD– Probably due to hardware incompatibility– Check the Microsoft Knowledge Base

© 2010 The McGraw-Hill Companies, Inc. All rights reserved
Mike Meyers’ CompTIA A+® Guide to
Managing and Troubleshooting PCs
Third Edition
Graphical Mode Errors
• Hardware detection errors– Could be hardware incompatibility– If noncritical hardware, find and install correct
drivers
• Can’t read CAB files– Check the CD-ROM for scratches– Try copying i386 files onto hard drive– Replace the optical disc

© 2010 The McGraw-Hill Companies, Inc. All rights reserved
Mike Meyers’ CompTIA A+® Guide to
Managing and Troubleshooting PCs
Third Edition
Lockups During Install
• Smart recovery, repair install– Unplug system and restart– Will automatically start where it left off
• Optical drive, hard drive– Try another disc or another CD-ROM drive
• Log files—track progress of install– Setuplog.txt– Setupapi.log - Hardware / Drivers
© 2010 The McGraw-Hill Companies, Inc. All rights reserved
Mike Meyers’ CompTIA A+® Guide to
Managing and Troubleshooting PCs
Third Edition
• SETUPLOG.TXT−Tracks the complete installation process−Logs success or failures of file copying, registry
updates, reboots, etc.
• SETUPAPI.LOG−Tracks the hardware installed−Uses PnP codes, so not too easy to read
Lockups During Install (continued)

© 2010 The McGraw-Hill Companies, Inc. All rights reserved
Mike Meyers’ CompTIA A+® Guide to
Managing and Troubleshooting PCs
Third Edition
Post-Installation Tasks
• Apply fixes for the OS– Patches fix specific problems– Service packs are collections of patches
• Upgrade drivers• Restore user data files
– Windows Backup (Windows 2000/XP)– Backup and Restore Center (Windows Vista/7)– Copy files and folders manually
• Migrate data and retire the old computer

© 2010 The McGraw-Hill Companies, Inc. All rights reserved
Mike Meyers’ CompTIA A+® Guide to
Managing and Troubleshooting PCs
Third Edition
Migrating and Retiring
• Files and Settings Transfer Wizard (FSTW) for Windows XP– Run the utility on new computer– Create the Wizard Disk– Run the Wizard Disk on old computer
• Can select files and folders to migrate• Doesn’t do program files, just data

© 2010 The McGraw-Hill Companies, Inc. All rights reserved
Mike Meyers’ CompTIA A+® Guide to
Managing and Troubleshooting PCs
Third Edition
Migrating and Retiring (continued)
• Files and Settings Transfer Wizard (FSTW) for Windows XP– Transfer files via network or removable media

© 2010 The McGraw-Hill Companies, Inc. All rights reserved
Mike Meyers’ CompTIA A+® Guide to
Managing and Troubleshooting PCs
Third Edition
Migrating and Retiring (continued)
• User State Migration Tool (USMT)– Functions similarly to the FSTW
– Requires a Windows domain
– More of a business or enterprise tool
– Useful for migrating many users

© 2010 The McGraw-Hill Companies, Inc. All rights reserved
Mike Meyers’ CompTIA A+® Guide to
Managing and Troubleshooting PCs
Third Edition
Migrating and Retiring (continued)
• Windows Easy Transfer– Upgraded FSTW for Windows Vista/7– Functions similarly to the FSTW– Adds security for network transfer– Can use a special
Easy Transfer cable to migrate via USB

© 2010 The McGraw-Hill Companies, Inc. All rights reserved
Mike Meyers’ CompTIA A+® Guide to
Managing and Troubleshooting PCs
Third Edition
Migration Practices
• What do you do with the old drive?
– Follow these principles
• Migrate in a secure environment• Remove data remnants from drive• Recycle old equipment, don’t trash it

© 2010 The McGraw-Hill Companies, Inc. All rights reserved
Mike Meyers’ CompTIA A+® Guide to
Managing and Troubleshooting PCs
Third Edition
Migration Practices (continued)
• Migrate in a secure environment
– Until passwords protect new system, don’t bring it online
– Don’t walk away from the migration if in nonsecure space

© 2010 The McGraw-Hill Companies, Inc. All rights reserved
Mike Meyers’ CompTIA A+® Guide to
Managing and Troubleshooting PCs
Third Edition
Migration Practices (continued)
• Remove data remnants– Formatting won’t do it– Partitioning won’t do it– Use high-caliber
wiping tool like Window Washer
• Good enough for common use, not government use

© 2010 The McGraw-Hill Companies, Inc. All rights reserved
Mike Meyers’ CompTIA A+® Guide to
Managing and Troubleshooting PCs
Third Edition
Migration Practices (continued)
• Recycle
– Computers and peripherals contain hazardous materials
– Don’t dump in trash
– Find recycling service
– Donate old gear

© 2010 The McGraw-Hill Companies, Inc. All rights reserved
Mike Meyers’ CompTIA A+® Guide to
Managing and Troubleshooting PCs
Third Edition
Post-Installation
• Installation creates Windows-specific folders needed by the OS
• Easy way to memorize is to learn the purpose of each file and folder
– Windows 2000/XP structures
– Windows Vista/7 structures
• Each group of OSes differs a little

© 2010 The McGraw-Hill Companies, Inc. All rights reserved
Mike Meyers’ CompTIA A+® Guide to
Managing and Troubleshooting PCs
Third Edition
Windows 2000/XP Boot Process in Brief
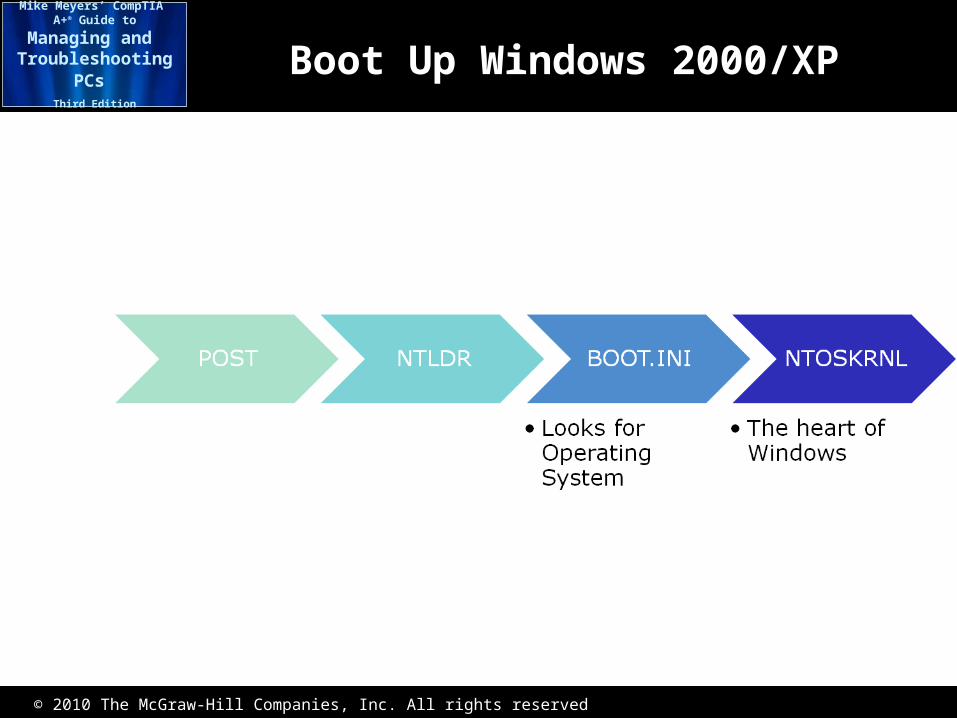
• After POST, BIOS looks for valid OS in the boot sector– MBR points to system files– System files (NTLDR, BOOT.INI, NTDETECT.COM)
start the PC and point to boot files– NTOSKRNL loads device drivers and starts loading
the OS files– GUI starts to load

© 2010 The McGraw-Hill Companies, Inc. All rights reserved
Mike Meyers’ CompTIA A+® Guide to
Managing and Troubleshooting PCs
Third Edition
Windows 2000/XP Boot Process Revealed
• NT Loader manages the startup process– Windows 2000/XP system or start-up files that must
be in the root directory of the system partition• NTLDR (NT Loader)• BOOT.INI• NTDETECT.COM• NTBOOTDD.SYS (only needed for SCSI controllers that don’t
have their own ROM BIOS)
– System Partition• Active partition (typically C: drive)
– Boot Partition• Where OS files located (C:\Windows on XP by default, but
that can be changed during installation)
© 2010 The McGraw-Hill Companies, Inc. All rights reserved
Mike Meyers’ CompTIA A+® Guide to
Managing and Troubleshooting PCs
Third Edition
Windows 2000/XP System Files: NTLDR
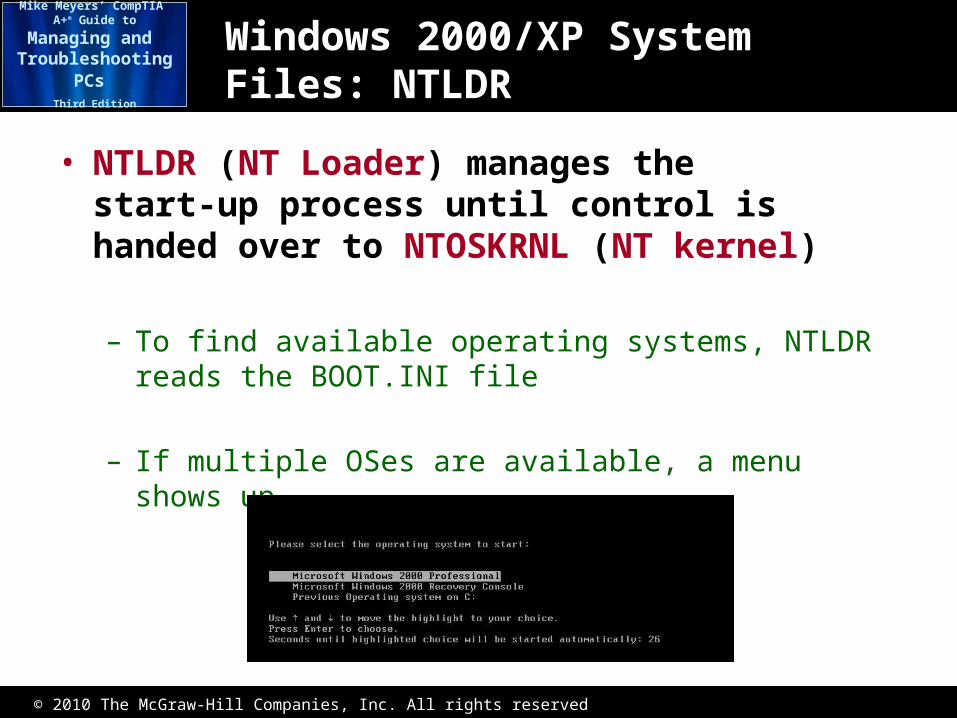
• NTLDR (NT Loader) manages the start-up process until control is handed over to NTOSKRNL (NT kernel)
– To find available operating systems, NTLDR reads the BOOT.INI file
– If multiple OSes are available, a menu shows up

© 2010 The McGraw-Hill Companies, Inc. All rights reserved
Mike Meyers’ CompTIA A+® Guide to
Managing and Troubleshooting PCs
Third Edition
Windows 2000/XP System Files: BOOT.INI
• BOOT.INI is a text file that lists the available OSes and where to find the operating system files in the boot partition
• Can edit BOOT.INI in System applet | Advanced tab | Startup and Recovery | Settings button | click Edit button in System startup section

© 2010 The McGraw-Hill Companies, Inc. All rights reserved
Mike Meyers’ CompTIA A+® Guide to
Managing and Troubleshooting PCs
Third Edition
More Windows 2000/XP System Files
• BOOTSEC.DOS is read by NTLDR if it finds a different OS to load
• NTDETECT.COM detects the hardware if you choose to boot to 2000/XP
• NTBOOTDD.SYS is used if NTLDR detects that the boot partition resides on a SCSI drive that lacks a ROM chip for BIOS support

© 2010 The McGraw-Hill Companies, Inc. All rights reserved
Mike Meyers’ CompTIA A+® Guide to
Managing and Troubleshooting PCs
Third Edition
Critical Windows 2000/XP Boot Files
• NTOSKRNL.EXE– This is the kernel, the major component of Windows
• HAL.DLL– The hardware abstraction layer enables Windows to
run on many types of hardware
• Registry– The Registry is a database that contains information
about everything installed, including hardware and software
• WINLOGON.EXE– Winlogon provides a login prompt or Welcome
screen
© 2010 The McGraw-Hill Companies, Inc. All rights reserved
Mike Meyers’ CompTIA A+® Guide to
Managing and Troubleshooting PCs
Third Edition
Boot Up Windows 2000/XP

© 2010 The McGraw-Hill Companies, Inc. All rights reserved
Mike Meyers’ CompTIA A+® Guide to
Managing and Troubleshooting PCs
Third Edition
Windows Vista Boot Process
• Two paths: BIOS and UEFI• BIOS
– Checks boot order for MBR– Reads location of system partition from MBR– Boot sector points to BOOTMGR
• UEFI jumps straight to BOOTMGR– BOOTMGR reads data in Boot Configuration Data
(BCD) file – BOOTMGR loads WINLOAD.EXE
• Loads HAL, Registry, drivers
– NTOSKRNL.EXE takes over through login

© 2010 The McGraw-Hill Companies, Inc. All rights reserved
Mike Meyers’ CompTIA A+® Guide to
Managing and Troubleshooting PCs
Third Edition


