Installing the Mortal Kombat (Y-unit)/Total Carnage PCB Consolidation Kit Step 1: Verify that you have all of the parts necessary to install your kit. The kit should include: • 1x volume pot assembly, • 1x PCB corner bracket, • 2x cylindrical spacers, • 2x long screws • 3x short screws • 3x acorn nuts You will need to provide: • main game PCB • audio PCB • audio data (ribbon) cable • audio power harness
Transcript
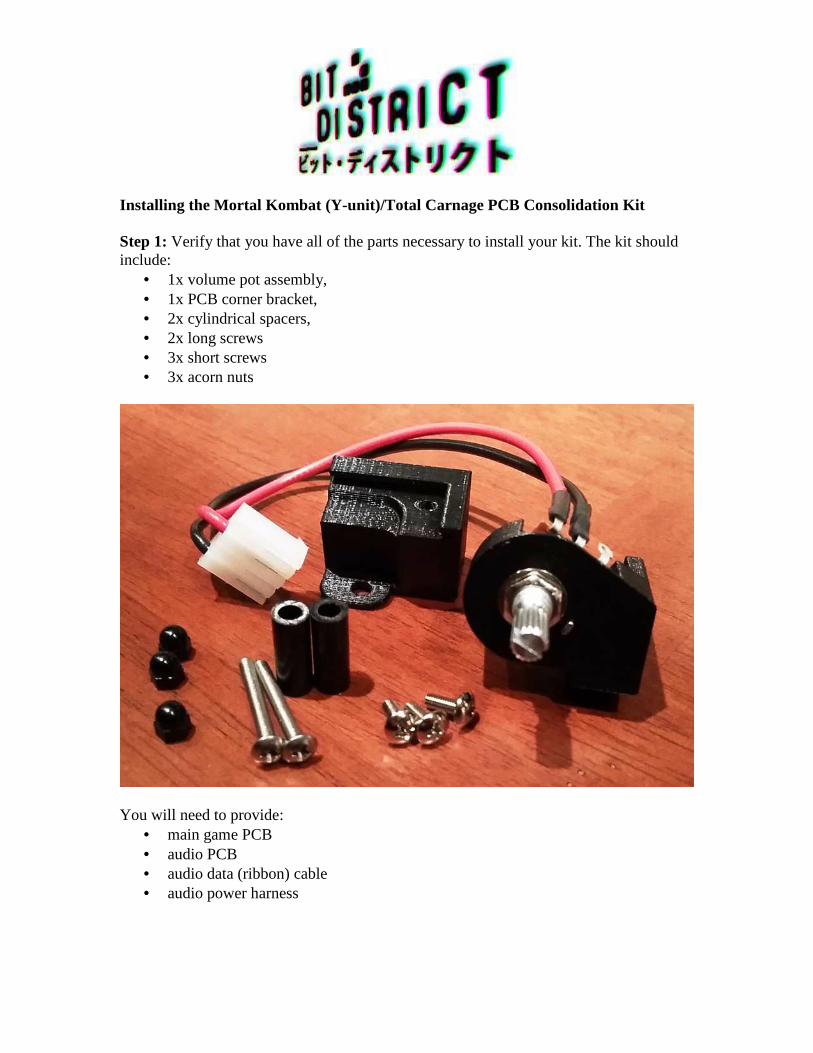
Installing the Mortal Kombat (Y-unit)/Total Carnage PCB Consolidation Kit Step 1: Verify that you have all of the parts necessary to install your kit. The kit should include:
• 1x volume pot assembly, • 1x PCB corner bracket, • 2x cylindrical spacers, • 2x long screws • 3x short screws • 3x acorn nuts
You will need to provide:
• main game PCB • audio PCB • audio data (ribbon) cable • audio power harness
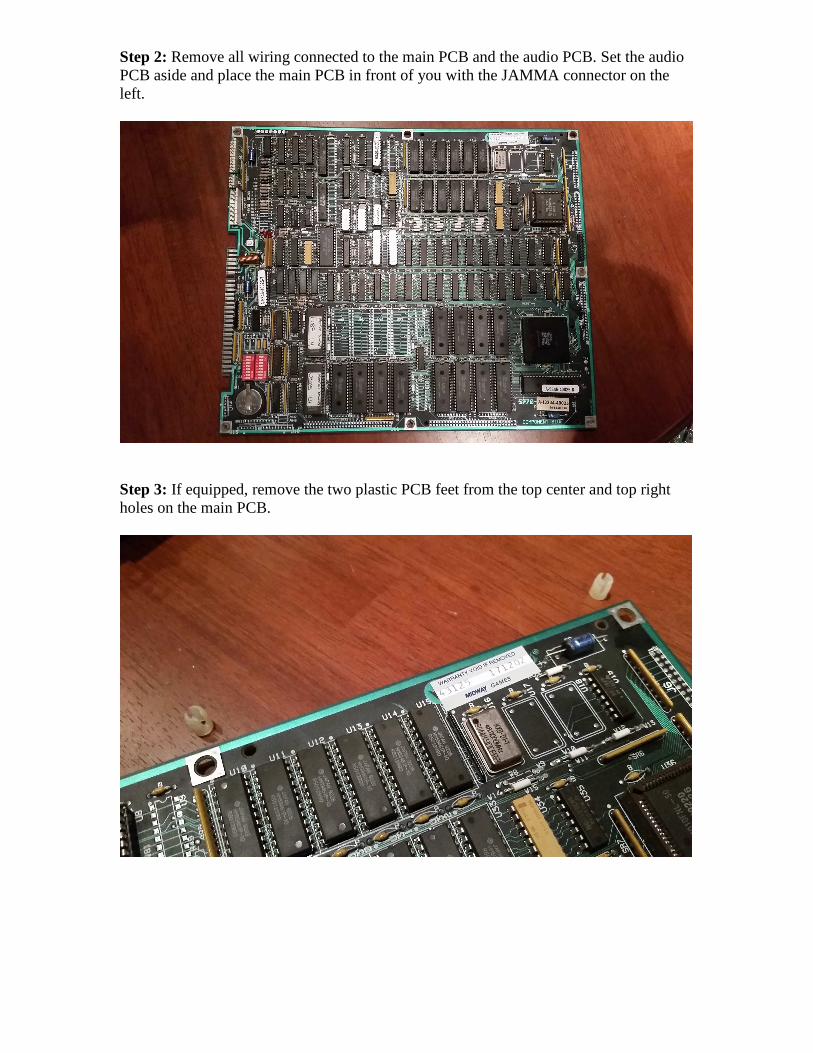
Step 2: Remove all wiring connected to the main PCB and the audio PCB. Set the audio PCB aside and place the main PCB in front of you with the JAMMA connector on the left.
Step 3: If equipped, remove the two plastic PCB feet from the top center and top right holes on the main PCB.
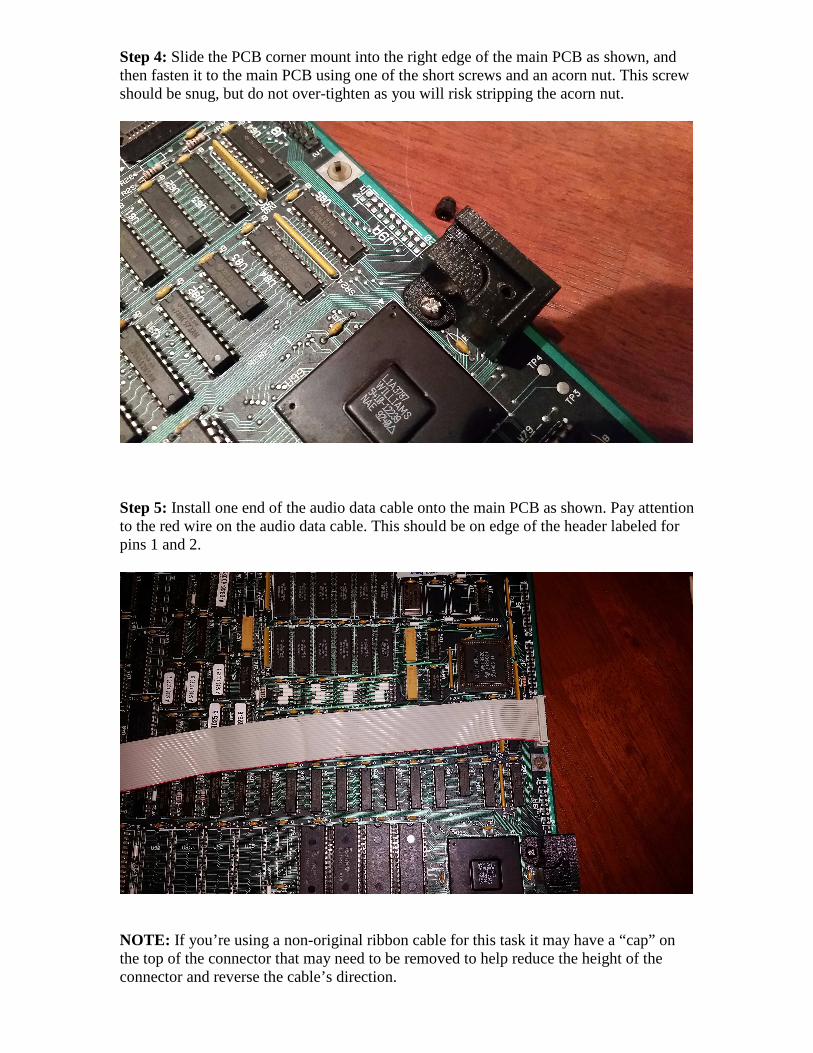
Step 4: Slide the PCB corner mount into the right edge of the main PCB as shown, and then fasten it to the main PCB using one of the short screws and an acorn nut. This screw should be snug, but do not over-tighten as you will risk stripping the acorn nut.
Step 5: Install one end of the audio data cable onto the main PCB as shown. Pay attention to the red wire on the audio data cable. This should be on edge of the header labeled for pins 1 and 2.
NOTE: If you’re using a non-original ribbon cable for this task it may have a “cap” on the top of the connector that may need to be removed to help reduce the height of the connector and reverse the cable’s direction.
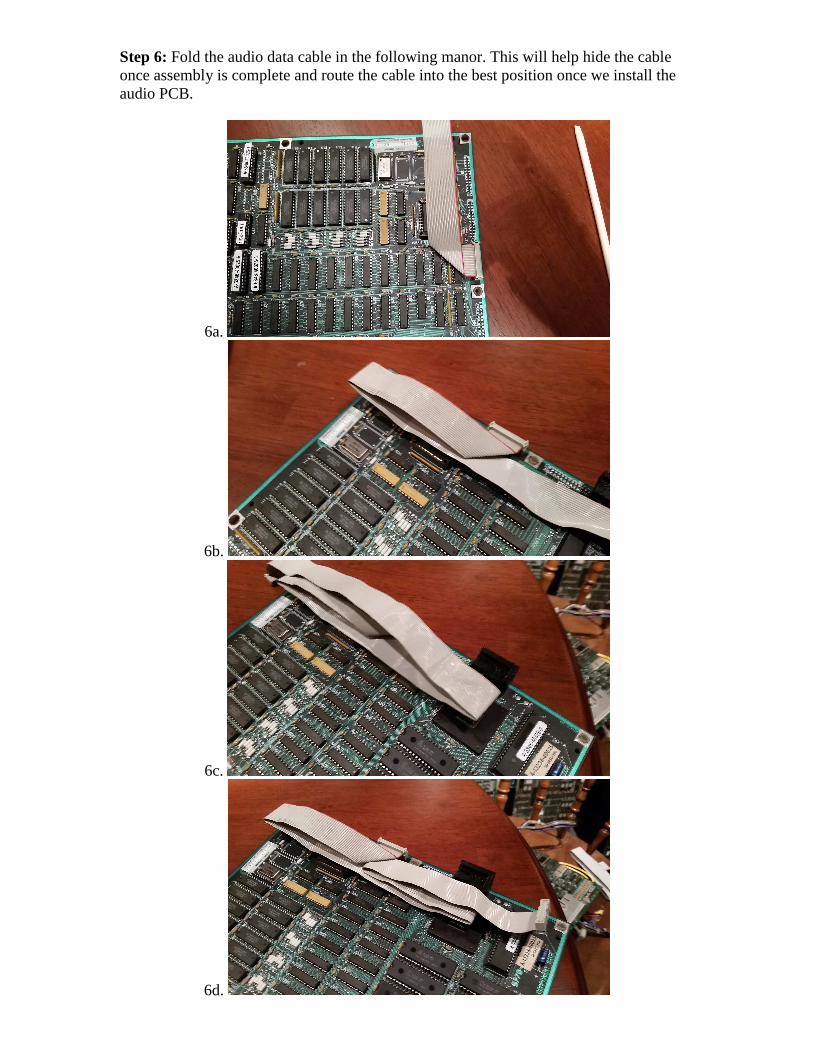
Step 6: Fold the audio data cable in the following manor. This will help hide the cable once assembly is complete and route the cable into the best position once we install the audio PCB.
6a.
6b.
6c.
6d.
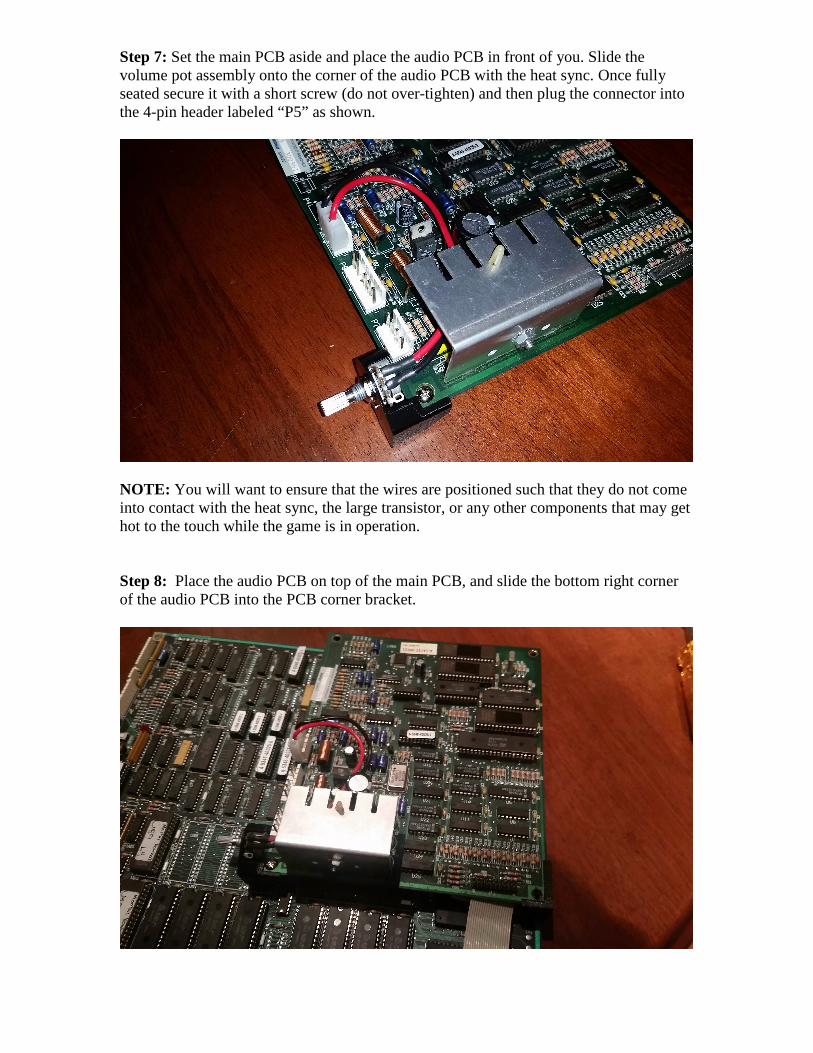
Step 7: Set the main PCB aside and place the audio PCB in front of you. Slide the volume pot assembly onto the corner of the audio PCB with the heat sync. Once fully seated secure it with a short screw (do not over-tighten) and then plug the connector into the 4-pin header labeled “P5” as shown.
NOTE: You will want to ensure that the wires are positioned such that they do not come into contact with the heat sync, the large transistor, or any other components that may get hot to the touch while the game is in operation. Step 8: Place the audio PCB on top of the main PCB, and slide the bottom right corner of the audio PCB into the PCB corner bracket.
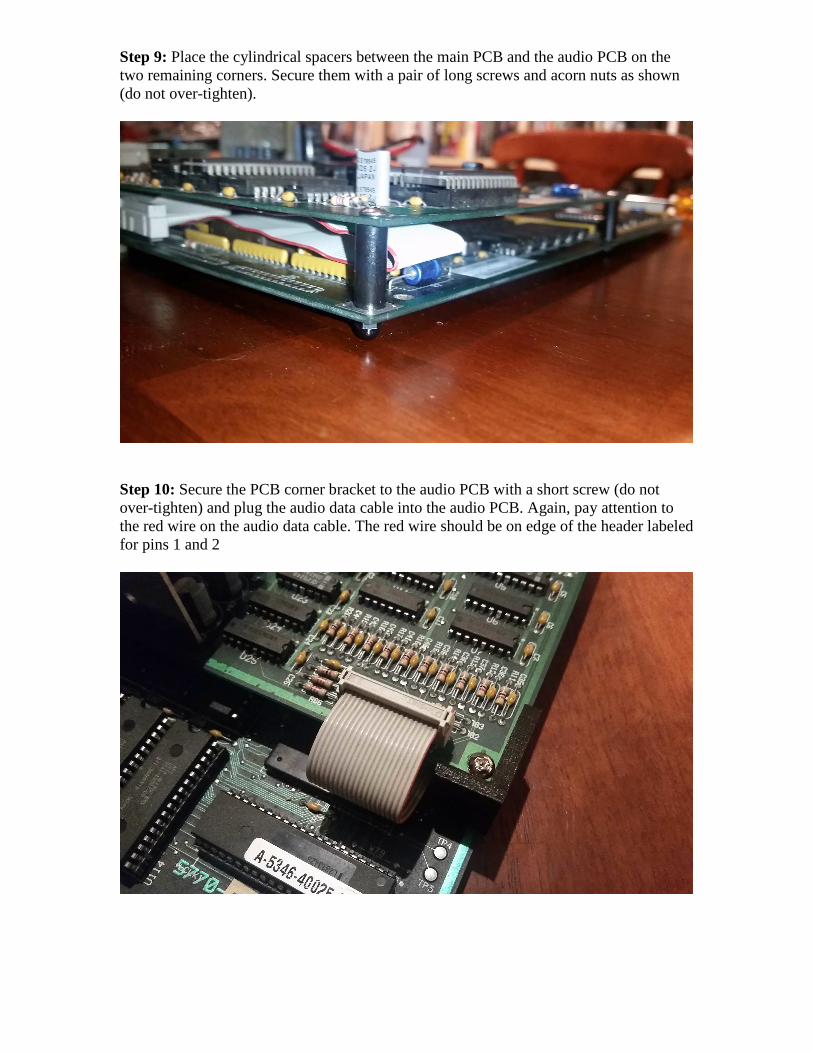
Step 9: Place the cylindrical spacers between the main PCB and the audio PCB on the two remaining corners. Secure them with a pair of long screws and acorn nuts as shown (do not over-tighten).
Step 10: Secure the PCB corner bracket to the audio PCB with a short screw (do not over-tighten) and plug the audio data cable into the audio PCB. Again, pay attention to the red wire on the audio data cable. The red wire should be on edge of the header labeled for pins 1 and 2
Step 11: Install the audio power harness.
Step 11a [optional]: The original audio power harness is much longer than needed once the consolidation kit is installed. You may decide to shorten this harness by removing the cap on the main PCB connector end of the harness, removing the wires, then re-installing them into the connector further down the wires to both shorten the harness and change the direction that the wires exit the connector.
Alternatively, you may opt to buy or build a shorter audio power harness. Or, if neither of these options is to your liking, you may simply bundle the slack in the harness and secure it with a zip-tie.
Installation Complete: Enjoy your new, consolidated, PCB.


![Mortal Kombat [Operations] [English]](https://static.documents.pub/doc/80x56/5459e6beb1af9fb66e8b5ae8/mortal-kombat-operations-english.jpg)


![GamePower - Guia de Estratégias Mortal Kombat [GamePro]](https://static.documents.pub/doc/80x56/577cdaf91a28ab9e78a7094e/gamepower-guia-de-estrategias-mortal-kombat-gamepro.jpg)


