Institut Pendidikan Guru Kampus Dato’ Razali Ismail, Kuala Terengganu ICT Workshop Workshop Course for English Department facilitated by Brighton Education Fellows Peter Wickham and Ruth Wickham. Fellows Peter Wickham and Ruth Wickham
Transcript
Institut Pendidikan Guru Kampus Dato’ Razali Ismail, Kuala Terengganu
ICT Workshop Workshop Course for English Department facilitated by Brighton Education Fellows Peter Wickham and Ruth Wickham.
Fellows Peter Wickham and Ruth Wickham
ICT Workshop, P Wickham R Wickham
1
Contents Background to the ICT Workshop in JBB at IPGKDRI 2011 .................................................................. 4
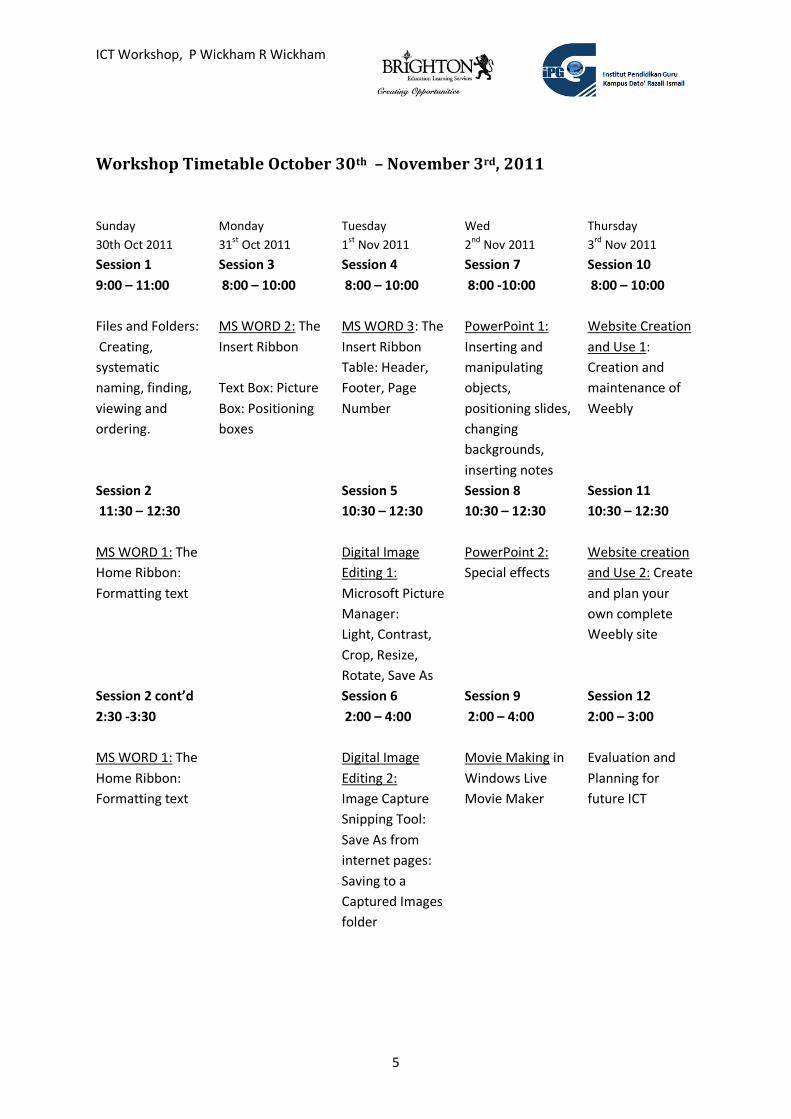
Workshop Timetable October 30th – November 3rd, 2011.............................................................. 5
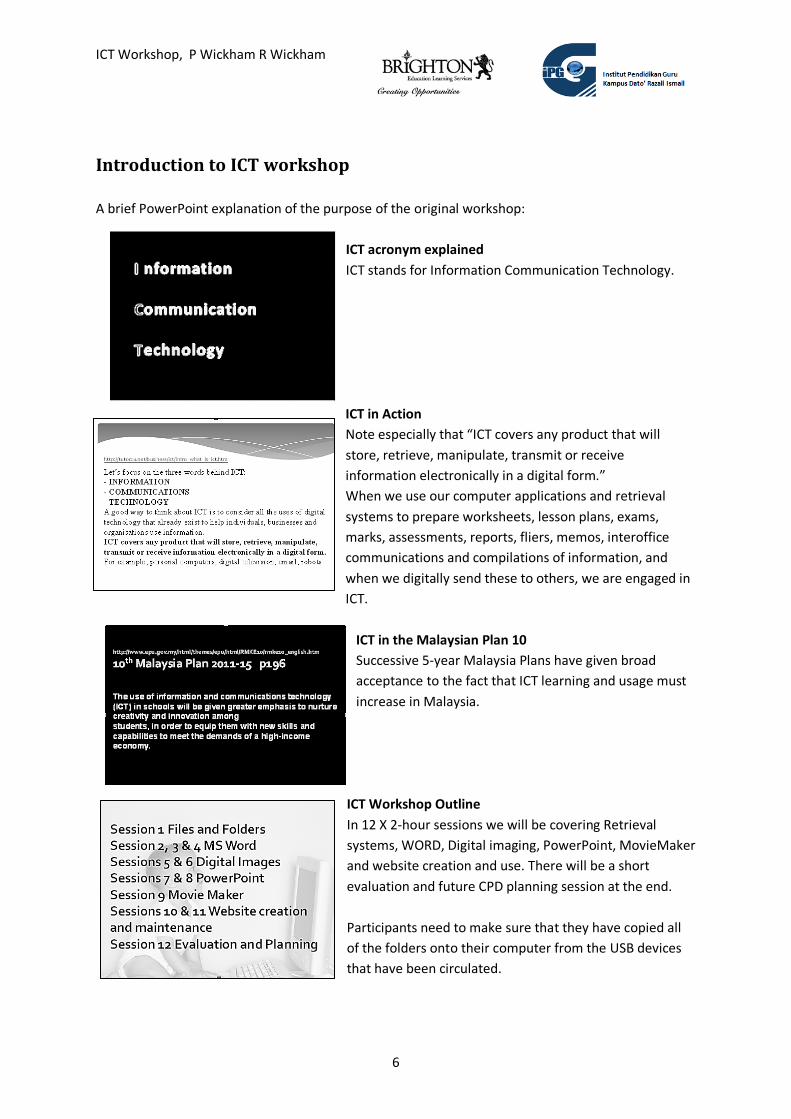
Introduction to ICT workshop ............................................................................................................ 6
communications and compilations of information, and
when we digitally send these to others, we are engaged in
ICT.
ICT in the Malaysian Plan 10
Successive 5-year Malaysia Plans have given broad
acceptance to the fact that ICT learning and usage must
increase in Malaysia.
ICT Workshop Outline
In 12 X 2-hour sessions we will be covering Retrieval
systems, WORD, Digital imaging, PowerPoint, MovieMaker
and website creation and use. There will be a short
evaluation and future CPD planning session at the end.
Participants need to make sure that they have copied all
of the folders onto their computer from the USB devices
that have been circulated.
ICT Workshop, P Wickham R Wickham
7
Session 1: Archiving files & folders
(Presenter: Peter Wickham. Assistant: Ruth Wickham)
Descriptions
This introductory workshop session aims to introduce basic organizational skills so that the participant becomes adept at storing and retrieving files and folders in a computer system. One common complaint from computer users is that they cannot find files or folders that were added to their computer. After this session, users will have basic proficiency in storing and retrieving information in a computer.
Objectives: Participants will practice the following ICT skills:
Difference between files and folders Ordering different Views of a folder
Single click option Sorting a folder
Recognizing icons Properties of files and folders on right-click
Creating and deleting files Tiling folders
Creating and deleting folders Drag and Drop moving of files and folders
Naming files Retrieving from Recycle Bin
Naming and renaming folders Creating shortcuts
Introduction to first session
I am not an ITC expert; there are many things that I do not know about computing, but I am a
lifelong learner even at my age.
Ruth and I both did an ICT Masters’ unit at ECU in Australia in 2009, and another at UOW in 2010.
There are several ways of achieving most things on a computer. We are going to show you what we
consider to be the fastest and simplest way of doing things. If you know a better way, then go ahead
and do it your way when you use your computer. For this course, we will save time by limiting
ourselves to the one way.
All of the ‘tricks’ you will learn in this session are basic to personal computing; they can all be used in
a variety of applications such as WORD, Excel, PowerPoint, image editing and internet skills. You will
find these skills are transferable to most computer applications. These skills will only become
permanent with exploration and practice. In this workshop you will have the opportunity for both.
Peter Wickham / Ruth Wickham
English Language Training Fellow
ICT Workshop, P Wickham R Wickham
8
Materials Required
Facilitator needs:
Cardboard (e.g. manila) folders, several for each group. An assortment of printed papers
with articles/notes/pictures to be sorted into folders.
Soft copy files and folders (on a USB drive to be loaded onto participants’ computers) to
practices file and folder sorting.
Participant needs:
Laptop computer, preferably with Office 2007 or 2010.
Writing materials
Timing
This session is designed to take 1 hour, depending on number and proficiency of participants.
ICT Workshop, P Wickham R Wickham
9
Procedures
The steps for this session are as follows:
ITC Skill Learning Activity
1a. Difference between files and folders:
naming files and folders for easy access.
Name and Rename on right click.
1a. Sort 20 different papers into cardboard
folders and name the files with logical names for
easy access. Share your group’s results with the
whole class. Everyone’s names will be different
according to individuality, but will demonstrate a
thought process for cataloguing items logically.
1b. Creating and naming a folder (right mouse
button use). Drag and drop into a folder. Right
mouse button drag and Move Here to move
completely.
1b. Sort 20 different computer files into folders
within the folder whose names begin with “aa”.
Name the folders. Place all the folders into one
central folder with an appropriate name. Share
reasoning with cohort.
1c. Change a folder icon. Practice changing folder icons to suit folder
contents.
1d. Change to Single Click. Change to Single Click in Folder options.
2a. Recognize icons for WORD 2003, WORD
2007, Excel, PowerPoint, Compressed, folder.
Create a file.
Create a desktop shortcut.
Practice creating and naming one of each type
into a folder created in a drive (not on desktop).
Create a shortcut and move it to the desktop.
Practice accessing it.
3a. Change the View from List to Small,
Medium, Large, Extra Large icons, List, Details
Practise according to own choices.
3b. Right mouse click on an icon, Properties to
get info about the file.
Practise according to own choices.
3c. Right mouse click on folder space to Sort
by name, type, date.
Practise according to own choices.
4a. Tile folders (Restore Down) to get two
multiple folders on screen.
Tile and move by dragging from top bar od folder.
4b. Move files and folders by drag and drop Create another folder and name it Target Folder.
Drag and copy all of the photos of Ruth into this
folder. Rename the folder ‘Ruth Pix’.
4c. Drag and drop in batches after grouping. Right mouse click on folder space. Group. Now
select all the photos of Peter and copy into a
folder called ‘Peter Pix’. Now drop ‘Peter Pix’ and
ICT Workshop, P Wickham R Wickham
10
‘Ruth Pix’ into a folder called ‘Peter & Ruth Pix’.
4d. Cut/Copy & paste a file between folders As above but use Copy & Paste / Cut and Paste
4e. Cut/Copy & Paste a batch of files between
folders
Practice copying and pasting files or folders into a
new file that you have created.
5a. Delete a file or folder. Create a new file and give it a distinctive name.
Copy some files into it. Right click on that folder
and select Delete. Answer Yes.
5b. Retrieve a deleted file or folder. On Desktop go to Recycle Bin. Find the folder in
Recycle Bin. Right click on it and select Restore.
Try deleting one photo and retrieving it from
Recycle Bin.
5c. Empty the Recycle Bin. This should be
done every few months to protect your
computer.
Click on Recycle bin to open. Click on Empty
Recycle Bin. Your deleted files are now gone
forever!
6. Create a shortcut on the desktop. Right click on folder icon and select Create
Shortcut. Drag shortcut to desktop.
7. Final Assignment Go into the folder called ‘Final Assignment’.
Create and name folders within it to store the
files you can see there. Move these files into
these folders so that you can easily find any file
when you need to. Store the Final Assignment
folder in a drive on your computer, not on the
desktop. Change the icon to anything other than
the yellow folder icon. Create a shortcut and
move it to the desktop. Access the folder by
clicking on the Shortcut. Revise your decisions on
where to store each file and what to name them.
ICT Workshop, P Wickham R Wickham
11
Session 2: WORD 1 – ‘Home’ and ‘Page Layout’
Presenter: Ruth Wickham. Assistant: Peter Wickham
Background WORD was included in the ICT workshop as a result of a request from several ELT lecturers at
IPGKDRI in Kuala Terengganu in 2011.
Objectives
Participants will practise the following ICT skills
Use spell check and default language Select Text
Terminology: Ribbon, Tab, Section
Add the Developer Ribbon Use Right Click function
Home Ribbon: Page Layout Ribbon:
Style Section Themes Section
Font Section Page setup Section
Paragraph Section Page Background
Clipboard Section Paragraph Section
Editing Section Arrange Section
ICT Workshop, P Wickham R Wickham
12
Materials Required
Facilitator needs:
Please note that presenters need an excellent grasp of advanced features of Microsoft
WORD, and the ability to present this personal proficiency to participants, leading them
through the various steps to creating a fully featured document. Since Office 2010 is used as
the standard throughout, the presenter also needs considerable knowledge of Office 2007
which in 2011 is more widely used in Malaysia. Similarly, the differences between the
current Windows 7 and the more prevalent Windows Vista (2007) should be familiar to the
presenter.
NOTE: There is no PowerPoint presentation for this session.
All of the files needed for this presentation are provided on the website “ICT Workshop”
(URL: http://ictworkshop.weebly.com).
It is advisable for presenters to download materials, and burn participants’ portion onto a
CD, or copy onto a USB device. Note that not all participants will necessarily have a
computer capable of reading a CD (i.e. a Netbook).
Participant needs:
Laptop computer, preferably with Office 2007 or 2010.
Participants need to have all materials on their computer before a session begins. It might
be advisable for each participant to be given a 1GB USB memory device loaded with their
material.
Important Note to Facilitator:
Participants need to be given a soft copy of the practice document. (Hard copy is below)
Display the Practice Document with the LCD projector, and work through the points as listed below,
allowing participants to make the changes to their practice document and demonstrating changes on
the screen.
Facilitator and/or assistant should be available to give assistance to participants at every stage and
This session is designed to take 1-2 hours to complete, depending on number and experience of
participants.
ICT Workshop, P Wickham R Wickham
14
Procedures:
We have all used WORD, to a greater or lesser extent. But we tend to develop a favourite way of doing things and feel that we don’t have the time to experiment and explore this very powerful program in its entirety. Today we are going to work through some of the areas that are most likely to be useful for lecturers.
A Practice Document has been prepared so that participants can practise applying functions
without spending time typing.
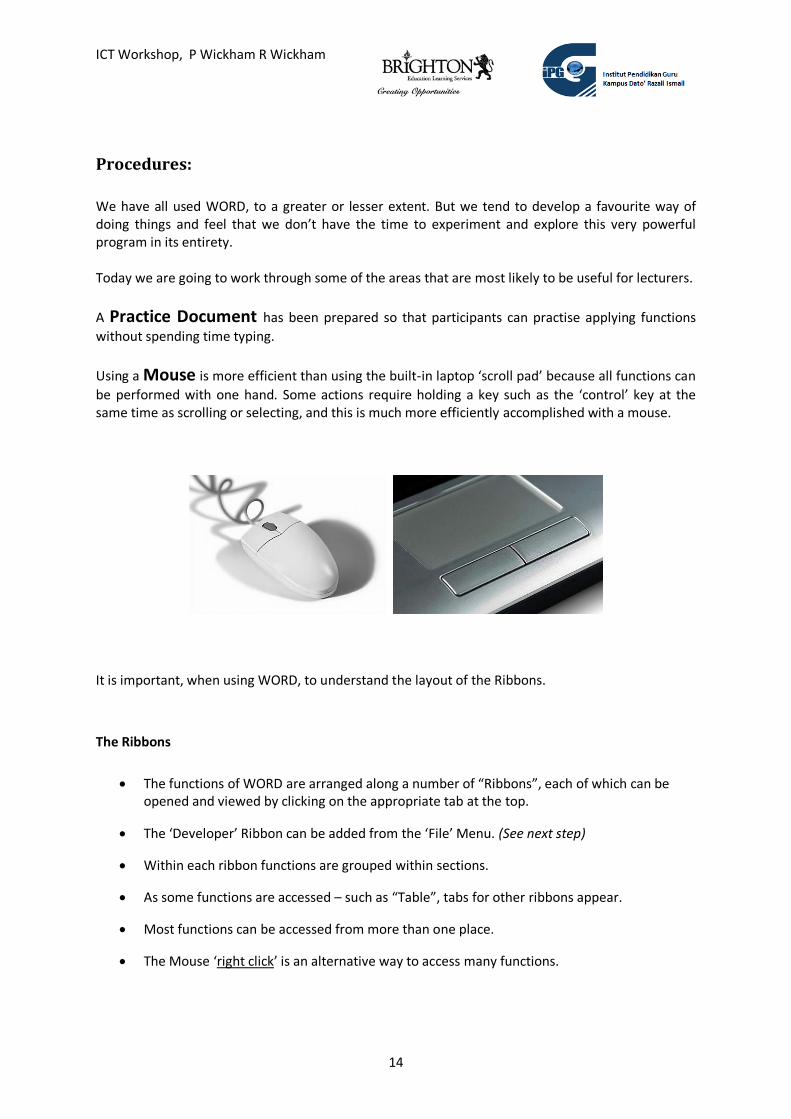
Using a Mouse is more efficient than using the built-in laptop ‘scroll pad’ because all functions can
be performed with one hand. Some actions require holding a key such as the ‘control’ key at the same time as scrolling or selecting, and this is much more efficiently accomplished with a mouse.
It is important, when using WORD, to understand the layout of the Ribbons.
The Ribbons
The functions of WORD are arranged along a number of “Ribbons”, each of which can be opened and viewed by clicking on the appropriate tab at the top.
The ‘Developer’ Ribbon can be added from the ‘File’ Menu. (See next step)
Within each ribbon functions are grouped within sections.
As some functions are accessed – such as “Table”, tabs for other ribbons appear.
Most functions can be accessed from more than one place.
The Mouse ‘right click’ is an alternative way to access many functions.
ICT Workshop, P Wickham R Wickham
15
Add the developer Ribbon:
WORD 2007:
1. Click on the coloured ball in the top left of the page.
2. Click on “Word Options” at the bottom right of the dialogue box.
3. On the ‘Popular’ page, make sure “Show Developer tab in the Ribbon” is checked.
WORD 2010
1. Click on “File” at the top left.
2. Select “Options”
3. Select “Customise Ribbon”, find “Developer” and make sure it is checked.
When all participants have completed this action, the workshop activities can be commenced.
(See below.)
ICT Workshop, P Wickham R Wickham
16
1.0 The ‘Home’ Ribbon
NOTE: All participants need to be able to “select” text using the mouse. Make sure they understand
this basic step before proceeding.
1.3 Style Section
Select appropriate text in the first few paragraphs of the practice document.
Click ‘Title’ for the first line, then ‘Heading 1’ for the first paragraph and ‘Heading 2’ for the
next.
1.2 Font section
Select text and try variety of fonts.
Select text and change sizes
Select text and change size by clicking on ‘Grow’/’Shrink’ font
Select text and change case
Select text and remove all formatting
Select text and change font colour – may be worth increasing size and or changing font first
Select text and highlight – also try selecting highlighter first and use cursor as pen.
Select text and apply text effects – more later with WordArt
Select text and apply bold, italic, underline – note there are more options now –
strikethrough, subscript and superscript.
1.3 Paragraph section
Apply Bullets and numbering to appropriate paragraph
Indent - apply to list, and relate to numbering too.
Alphabetise a list, and sort items
Show/hide hidden formatting symbols (whole document) – not necessarily useful here
Align text – practise on selected text
Line spacing – select and vary spacing
Background colour – experiment with colours
Borders and shading – investigate available options.
1.4 Clipboard section
There are a number of ways to perform cut / copy / paste actions, using ‘right mouse’ is
often the simplest.
Format painter function – copy formatting from the headings to the other headings as
marked.
ICT Workshop, P Wickham R Wickham
17
1.5 Editing section
Find and replace, can be very useful. Select and change a word throughout the document.
Select all / select object also can be useful.
Make sure all participants have mastered all functions and sections of the Home Ribbon.
Move on to the “Page Layout” Ribbon.
2.0 “Page Layout” Ribbon
2.1 “Themes” Section
Hover mouse to see themes change
Hover mouse to see colours change
Hover mouse to see fonts change
2.2 “Page Setup” Section
Note: actions here affect the whole document, not just the open page.
Probably most useful:
Margins – change whole document without selecting
Orientation – change whole document without selecting
(Size – paper choice)
Columns – change without selecting
Options for breaks, line numbers and hyphenation
2.3 “Page Background” Section
For special occasions, try each one (then undo):
Watermark
Page Colour
Page Border
ICT Workshop, P Wickham R Wickham
18
2.4 “Paragraph” Section
This is very similar to the section on ‘Home’ Ribbon, only not as simple.
2.5 “Arrange” Section
Used for arranging pictures, text boxes, objects – more in next session.
Selection Pane – opens a pane on the side.
Align – like ‘Home’ ribbon paragraph section
Gridlines – can be useful when arranging objects etc. Turn on and off.
Project
Complete all tasks on Practice Document. (See Appendix 1)
ICT Workshop, P Wickham R Wickham
19
Session 3: WORD 2 – ‘Insert’ Ribbon
Presenter: Ruth Wickham. Assistant: Peter Wickham
The “Insert” Ribbon is full of powerful possibilities. Therefore this session has been divided into two
parts:
Session 3a: ‘Insert Table’
Session 3b: ‘Insert’ Ribbon (the remainder)
due to the importance and possible complexity of using a table in a WORD document. These could
be presented as 2 separate sessions.
Note: ‘Insert SmartArt’ and ‘Insert Chart’ are presented in the next session – Session 4: ‘Professional
Paper’.
Materials Required
Facilitator needs:
Please note that presenters need an excellent grasp of advanced features of Microsoft
WORD, and the ability to present this personal proficiency to participants, leading them
through the various steps to creating a fully featured document. Since Office 2010 is used as
the standard throughout, the presenter also needs considerable knowledge of Office 2007
which in 2011 is more widely used in Malaysia. Similarly, the differences between the
current Windows 7 and the more prevalent Windows Vista (2007) should be familiar to the
presenter.
NOTE: There is no PowerPoint presentation for this session.
All of the files needed for this presentation are provided on the website “ICT Workshop”
(URL: http://ictworkshop.weebly.com ).
It is advisable for presenters to download materials, and burn participants’ portion onto a
CD, or copy onto a USB device. Note that not all participants will necessarily have a
computer capable of reading a CD (i.e. a Netbook).
Laptop computer, preferably with Office 2007 or 2010.
Participants need to have all materials on their computer before a session begins. It would
be advisable for each participant to be given a 1GB USB memory device loaded with their
material.
Important Reminder to Facilitator:
Participants need to be given a soft copy of the practice document. (Hard copy is below)
With the practice document displayed on the LCD projector, work through the points as listed below,
allowing participants to make the changes to their practice document and demonstrating changes on
the screen.
Facilitator and/or assistant should be available to give assistance to participants at every stage and
allow time for understanding and practice.
Timing
This session is designed to take two hours to complete, or three if participants complete and report
both assignments at the end of this session. This particular session is presented in two parts –
Session 3a: ‘Insert Table’ and Session 3b: ‘Insert’ Ribbon (the remainder) because of the importance
and possible complexity of using a table in a WORD document. These could be presented as 2
separate sessions.
(Note: ‘Insert SmartArt’ and ‘Insert Chart’ are presented in the next session – Session 4:
‘Professional Paper’.)
ICT Workshop, P Wickham R Wickham
21
Session 3a: WORD – “Insert” Ribbon – Insert a Table
Objectives
Participants will practise the following ICT skills:
Insert symbol
Insert a table by 3 different methods
Use the Layout ribbon to adjust format
Use the Design ribbon to change the appearance of the table.
Convert a piece of text to a table
Use a table to format a whole document
Replicate a table as presented
Procedures The “Insert” ribbon is full of interesting possibilities that can take the user well beyond the realm of just words in WORD. Furthermore, as particular items are inserted into the document, new ribbons appear with specific options for those items. Note: Participants need a soft copy of the Practice Document file. Facilitator should have the Practice Document open and displayed via LCD.
The “Insert” Ribbon
The “Insert” ribbon has 7 sections – Pages, Tables, Illustrations, Links, Header and Footer, Text, and Symbols.
Insert Tables
The ‘Table’ function in WORD is powerful and versatile.
Demonstrated Tasks:
Create a 5 x 7 table (using the box selection)
Increase to half page, select whole table
Use ‘Layout’ ribbon to
ICT Workshop, P Wickham R Wickham
22
Distribute rows.
Change (internal) cell alignment
Merge cells
Split cells
Insert rows and columns, distribute columns, rows
Delete rows, columns
Change text direction
Allow spacing between cells – cell margins
Open the ‘Design’ ribbon. Hover over the various design options
Use the ‘Border’ options
On the prepared document table, make parts of the table visible, and others invisible. Two other ways to insert a table
Return to “Insert Table” and select “Insert Table” – note that it simply asks for how many rows and columns.
Return to “Insert Table” and select “Draw Table”. Use cursor to create a rectangle.
Now in “Design” ribbon, experiment with line style, thickness, colour, eraser, borders and shading.
Convert text to table
Using the text provided – Select the text and click on ‘convert text to table’.
Project Reproduce the table as shown on the projector. Use practice document – hard copy in Appendix 2.
ICT Workshop, P Wickham R Wickham
23
Session 3b: WORD – Insert Ribbon
Objectives Participants will practise the following ICT skills:
Insert header, footer, page numbers
Insert Page Break
Insert Hyperlink
Insert Text Box, and edit
Insert Picture, and edit
Insert Clip Art, and edit
Insert Shapes, combine with other inserts
Insert WordArt
Skills NOT included in this session:
Insert SmartArt, Insert Chart, and Insert Cover Page will be included in the session (04) on using WORD for Professional Papers. Insert Screenshot will be briefly mentioned for those who have WORD 2010, as this is not available in WORD 2007.
Insert Header and Footer
Open the “Practise Insert” document.
Insert a header, footer, and page numbers.
Insert a Link
At the end of the Practise WORD document, type or copy and paste the name of the website: http://ICTworkshop.weebly.com .
Select the text. Open the website on the Internet, select and copy the URL.
Click on “Insert Hyperlink” and connect the text to the URL.
Insert a Text Box
Click on “Insert Text Box” and select “Draw Text Box”
Draw a text box. Copy practise text and insert into the text box.
Change the shape and size of the box, move it around.
Notice that a new ribbon tab is now visible – click on the “Format” ribbon.
Investigate the possibilities offered in this ribbon.
Laptop computer, preferably with Office 2007 or 2010.
If possible, Internet access.
Participants need to have all materials on their computer before a session begins. It would
be advisable for each participant to be given a 1GB USB memory device loaded with their
material.
Some participants may already have ‘Windows MovieMaker’ on their computer, especially if
they are still using Windows XP.
Participants with Windows Vista may have Windows MovieMaker version 2.6 (as the original
MovieMaker had problems with Vista). Those with an up-to-date 2010 system will probably
have Windows LIVE MovieMaker already installed.
Both programs are free to download, and the Windows Live MovieMaker program (2011) is
to be preferred in this situation as it is more user-friendly for those who have not done
movie editing before.
It is expected that participants will have music files (MP3) and photos or video clips on their
computers. At IPGKDRI the presenters also provided (digital) folders of music and pictures in
case some participants had nothing suitable on their computers, but generally these were
not needed and have not been made generally available here on the website. The
PowerPoint presentation file is available for download from this page. Participants will need
to have a MovieMaker program installed on their computer before the session, and have
access to pictures and music to practice with.
Timing
This double session is designed to take three hours to complete, or four by the time participants
complete and show their movie at the end of these sessions.
ICT Workshop, P Wickham R Wickham
50
Procedures
It’s quite simple to make a movie presentation out of still photos, or movie clips (your own or downloaded) or a combination of both.
You will need some kind of movie making software, some photos and/or video material, and some suitable music.
There are a number of free movie makers readily available, and the one you choose will partly depend on the version of Windows you have on your computer. (If you are using an Apple Mac, I hear that iMovie is easy and good). Some computers come with Windows MovieMaker already loaded. This program was created with Windows XP, and apparently worked well but there were problems with Vista. A special version (2.6, I think) was created for Vista and can be downloaded for free. Windows Live MovieMaker (2011) seems to come standard with Windows 7 computers. It can also be downloaded for free, although you will likely be pushed to accept the whole of “Windows Essentials” – if you are careful about ticking boxes you can get away with just MovieMaker! I am recommending Windows LIVE MovieMaker for its simplicity; it is extremely user-friendly especially for movie newbies. Another program, “PhotoStory” is also free and easy to use for just photos (not movie clips).
ICT Workshop, P Wickham R Wickham
51
You need to select the photos and/or videos you wish to include in your new movie. For the purposes of the course, a folder of photos downloaded from the Internet has been included.
Addition of music really sets the scene and creates a mood for your movie. Participants may have their own music already on their computer. A folder of possible songs and music is provided for those who wish to use them.
The first step is to import your picture material. On Windows Live Movie Maker there are two places you can click to open a browse window and select your material. At any time you can also right click and choose add photos or clips. When selecting photos from a folder, hold the shift key to select a whole sequence of photos – click on the first and last while holding ‘shift’. To select photos in random sequence, hold the ‘control’ key while selecting. In Windows LIVE Movie Maker the pics are selected directly onto the ‘storyboard’ – all selected pics will be used.
In Windows Movie Maker there is a separate collection point for pics and music, and a separate storyboard / timeline across the bottom. Select the option at the left hand side to import your pictures / clips.
ICT Workshop, P Wickham R Wickham
52
In Windows Live MovieMaker, the pictures now need to be sorted into the order you want them, simply by dragging them around on the storyboard. In Windows MovieMaker, drag the photos into the storyboard / timeline in the order you want them. Note that they will still appear in the collection area and you need to notice which ones you have used.
The following instructions are all for Windows LIVE MovieMaker. Under the ‘edit’ button there is an option for the duration of each (still) photo. For ease of placing them in order, you can reduce this down to ‘1’, and then increase it once they are all in place. Note that at the bottom of the preview box there is an indication of how long your total movie will be. As you create your movie, bear in mind that it will be quite large when you are finished; it is unlikely you will need to make more than a few minutes. (Creating an epic in this medium could overload your computer system.)
On the home ribbon is the ‘add music’ function, with the choice of adding your song from a particular point or throughout the whole move. There are a number of things to consider when choosing your music.
The music tells the viewers how to feel. Looking at this (still) photo with four different background clips gives an indication of this – is it a humorous or comedy situation, or is it dire ad frightening, or will a hero pull through? This slide in the PowerPoint presentation has four very short clips connected to it – these pieces were clipped using ‘Audacity’. Songs can be inserted into your movie and then clipped to shorten. (The clips have been removed in this document.)
ICT Workshop, P Wickham R Wickham
53
There are some music files included in your workshop package. Hover your mouse over each song to see how long it will run for.
Once the music is added – as shown by the green bar above the pictures – it can be ‘snipped’ and shortened, and you can choose to have it fade in or fade out. You can also add narration using your computer microphone directly into the movie, or create a sound file and add it like music. You cannot add BOTH music and narration (although you can with Windows MovieMaker). The way to do this is to first create the movie, and save it as a movie. Then open a new project, and insert your movie as a clip. Then watch you movie while recording your narration (using ‘sound recorder’ in your computer) in order to get the timing perfect. Insert your recorded sound file into your movie as you would with a music file.
Having got your photos / clips into order and maybe chosen some music, you need to add animations. There are two types of animations (both under the ‘animations’ tab) – ‘transitions’, and ‘pan and zoom’. Click on your storyboard line between two pics, and select a transition. A triangle will appear in the corner of the picture. Now click on a ‘pan and zoom’ option so that the picture will appear to move. A small icon with four squares will appear on the pic.
There are a great many options for transitions, many of them similar to PowerPoint transitions. As you hover your mouse you will see a preview of the animation.
ICT Workshop, P Wickham R Wickham
54
There are a lot of choices for ‘pan and zoom’ – again, hover your mouse to see a preview. Play your movie preview to check how it is all fitting together.
Visual Effects can also be added to great effect. The best thing is to experiment with these and see what they look like. With still pictures you may wish to use the same picture twice, transitioning from one to the other and adding a visual effect to one of them.
Finally you need to add some text – a title, maybe some
captions, and various types of credits. All of these will
appear in a pink bar below your pictures, so that you
can check how long each one goes for.
As well as selecting font, colour, size, and background colour, you can select a motion path for your text. Hover your mouse over each one for a brief preview.
ICT Workshop, P Wickham R Wickham
55
Run through your preview again and check on the timing of every part. There are options for lengthening and shortening each element to get the timing just right. These adjustments can take a considerable amount of time. Finally, save your movie. You will be asked about what resolution you would like to save it under – it depends mostly how you want to use or share it. Notice the size (mg per minute of movie). You can also use the options at the top of the page to save it directly to YouTube, Facebook or Windows Live. (In the PowerPoint presentation, this slide contains the short movie created during the workshop – this has been removed from this document.)
Project: Create a movie using your own material – photos and/or clips, and music – and/or material provided
in your workshop folder.
Present your movie to the group, and explain any problems you overcame.
ICT Workshop, P Wickham R Wickham
56
Sessions 11 and 12: Create a Weebly Website
Presenter: Ruth Wickham. Assistant: Peter Wickham
There was a time when having one’s own website was an expensive and complicated operation.
Nowadays with opportunities offered by companies such as ‘Weebly’, it is possible for anyone to
create and manage their own website Materials can be prepared and uploaded for students to
readily access, and information can be passed on in an interesting manner.
Objectives
Participants will create their own (free) Weebly website.
Materials Required
Facilitator needs:
Please note that presenters need an excellent grasp of Weebly Websites, and the ability to
present this personal proficiency to participants, leading them through the various steps to
creating a fully featured website.
PowerPoint presentation for this session.
All of the files needed for this presentation are provided on the website “ICT Workshop”
(URL: http://ictworkshop.weebly.com ).
Participant needs:
Laptop computer.
Participants will all need to have a good connection to the Internet during the session. A
‘mobile broadband dongle’ is sufficient, or access to the IPG cable.
Timing
This session is designed to take two hours to complete, or three if participants complete their
website creation and then present to the group (using LCD projector) at the end of these sessions.
In these next two sessions we are each going to create a free Weebly website. You have seen our site, ‘A Collection of TESL Resources’ (at http://acollectionofteslresources.weebly.com ), where we make our materials available to you as well as sharing news and photos. On your site you can, for example, provide worksheets and assignments to your students to your students to download directly. Your students can each have a site or a page where they upload their finished work. And of course you can share photos and make announcements.
This session provides an introduction to these skills. There is more that you can do, but this will get you started.
Start by going to this address, and fill in your name, email address, and create a password, and click on the ‘Sign up. It’s free’ button. Notice that there is at least one video to help you if you can’t remember what you are told here today.
Once you click on ‘Sign up …’ you will be asked to choose a Title for your website. It can be as long or as short as you like, and it can include capital letters and spaces. When you have chosen your title, you need to click on the drop-down box for ‘Type of site’.
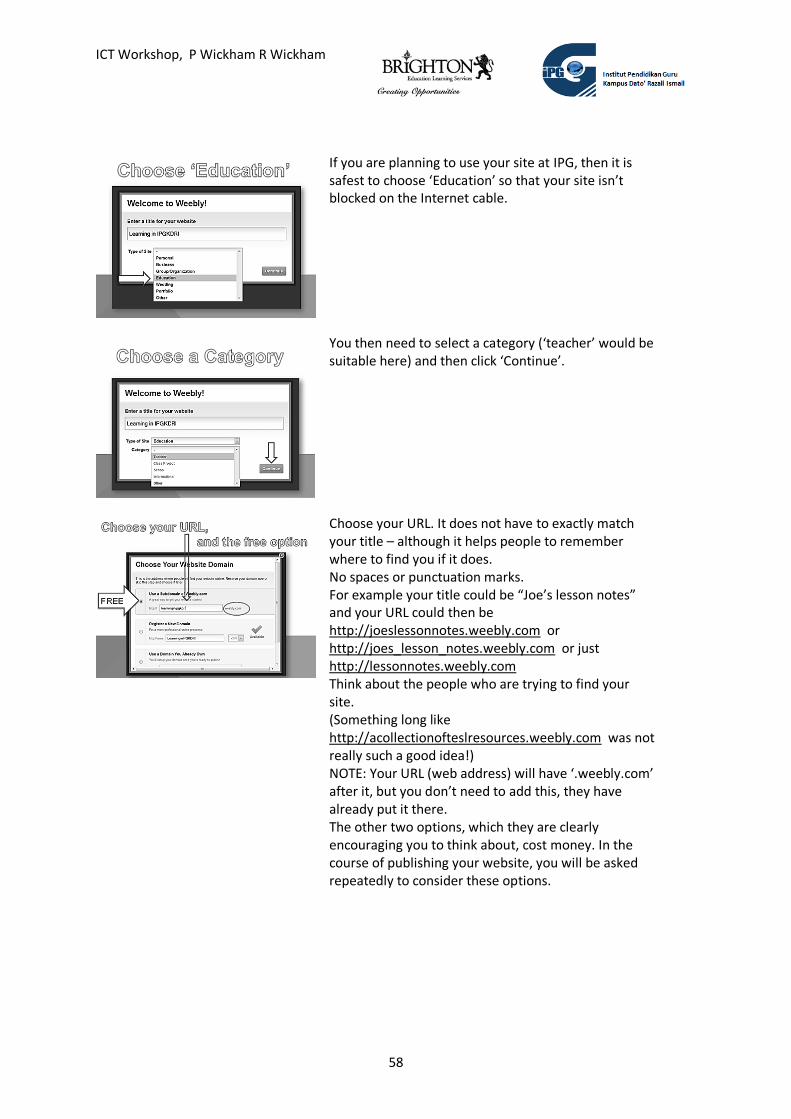
If you are planning to use your site at IPG, then it is safest to choose ‘Education’ so that your site isn’t blocked on the Internet cable.
You then need to select a category (‘teacher’ would be suitable here) and then click ‘Continue’.
Choose your URL. It does not have to exactly match your title – although it helps people to remember where to find you if it does. No spaces or punctuation marks. For example your title could be “Joe’s lesson notes” and your URL could then be http://joeslessonnotes.weebly.com or http://joes_lesson_notes.weebly.com or just http://lessonnotes.weebly.com Think about the people who are trying to find your site. (Something long like http://acollectionofteslresources.weebly.com was not really such a good idea!) NOTE: Your URL (web address) will have ‘.weebly.com’ after it, but you don’t need to add this, they have already put it there. The other two options, which they are clearly encouraging you to think about, cost money. In the course of publishing your website, you will be asked repeatedly to consider these options.
If a large red cross appears next to your URL, it means someone else is already using that address and you need to change it and choose another. You may wish to also change your Title. The green tick indicates that the address is available. Scroll down to click the ‘Continue’ button.
Your new website is created and ready for you to edit. It does not appear on the web until you ‘publish’.
Weebly has a ribbon, with tabs to open new ribbons, just like the Microsoft Office programs. First we want to start by opening the ‘Design’ ribbon.
A ribbon of design templates appears, with arrows at either end to scroll through. There are lots and lots of them … This is fine if you have an idea what you want. It’s simpler to make a selection by opening the ‘All Themes’ window.
ICT Workshop, P Wickham R Wickham
60
Now we can see that there are at least four pages of themes to choose from. However, categories down the side might make it easier to make a selection.
‘Education’ themes, for example, have only five to choose from. But you could choose your theme on the basis of colour or format, or whatever appeals to you.
When you click on a theme you can see a preview with your title in place, and then you are given the option to simply add it as a ‘Favourite’ – this way you might make a short-list of favourites before making your final selection. Once you have decided, click on the ‘Use Theme’ button.
Just because you choose a theme, it doesn’t mean you have to use the same style of print. Click on ‘Design Options’ to make changes here.
ICT Workshop, P Wickham R Wickham
61
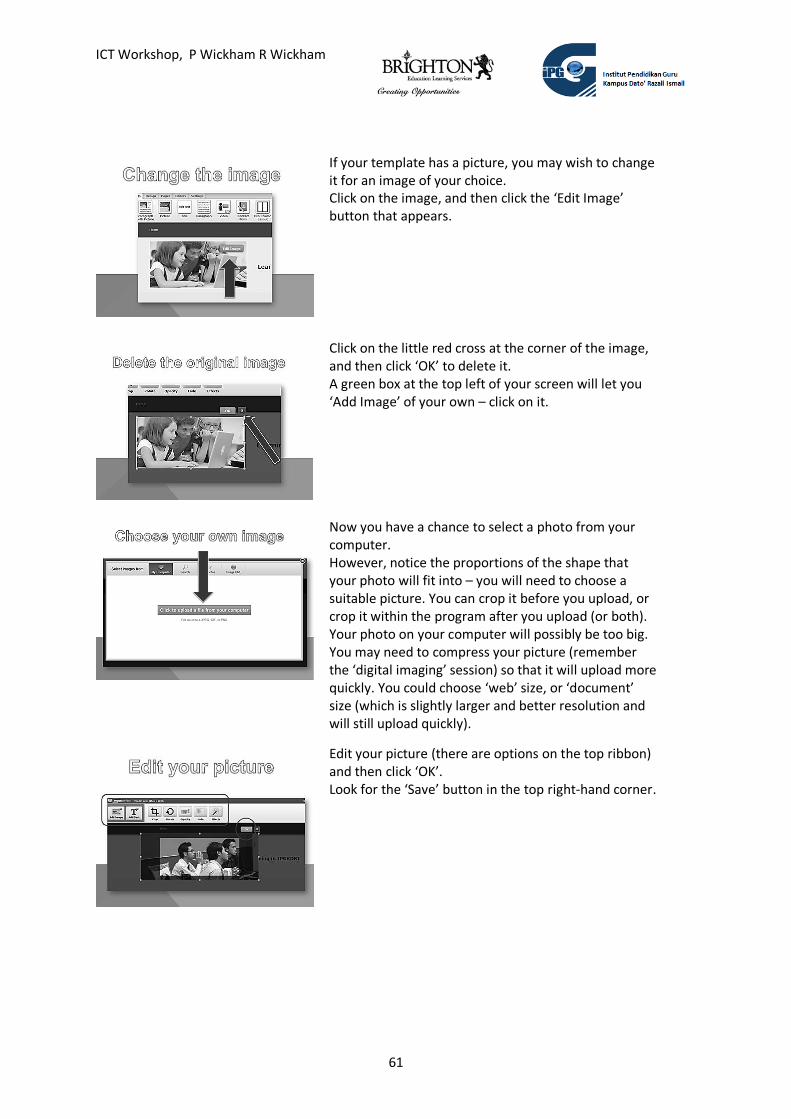
If your template has a picture, you may wish to change it for an image of your choice. Click on the image, and then click the ‘Edit Image’ button that appears.
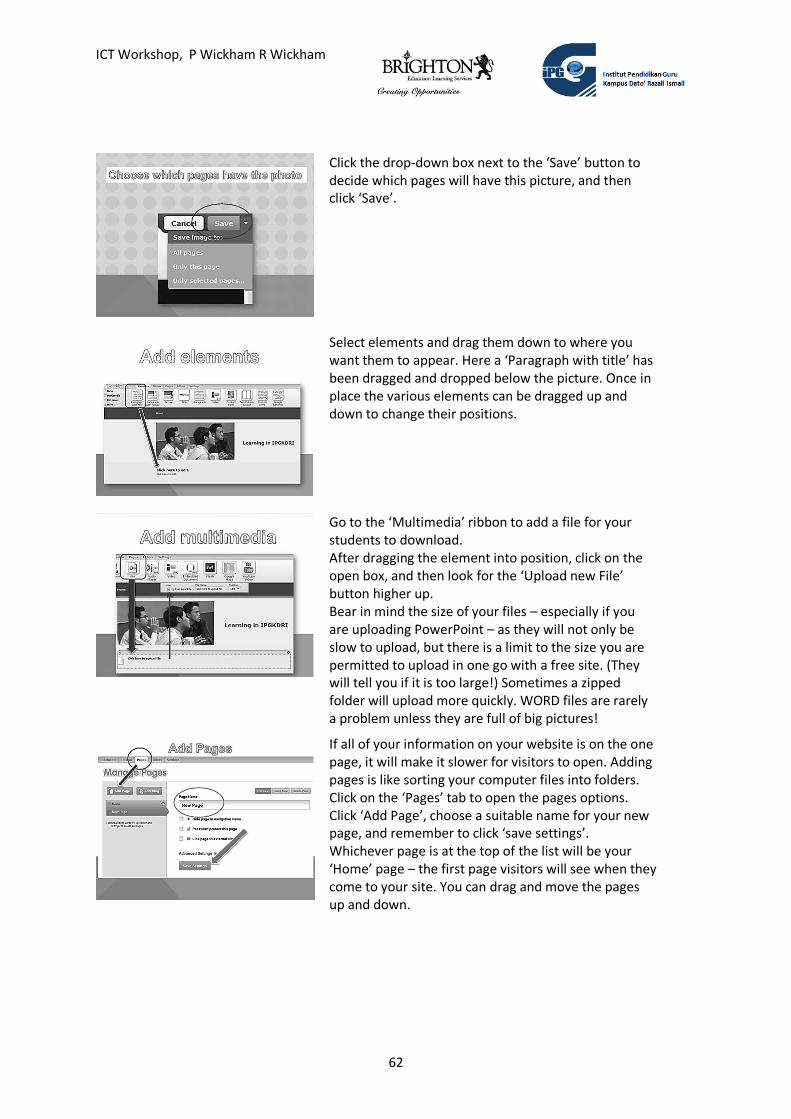
Click on the little red cross at the corner of the image, and then click ‘OK’ to delete it. A green box at the top left of your screen will let you ‘Add Image’ of your own – click on it.
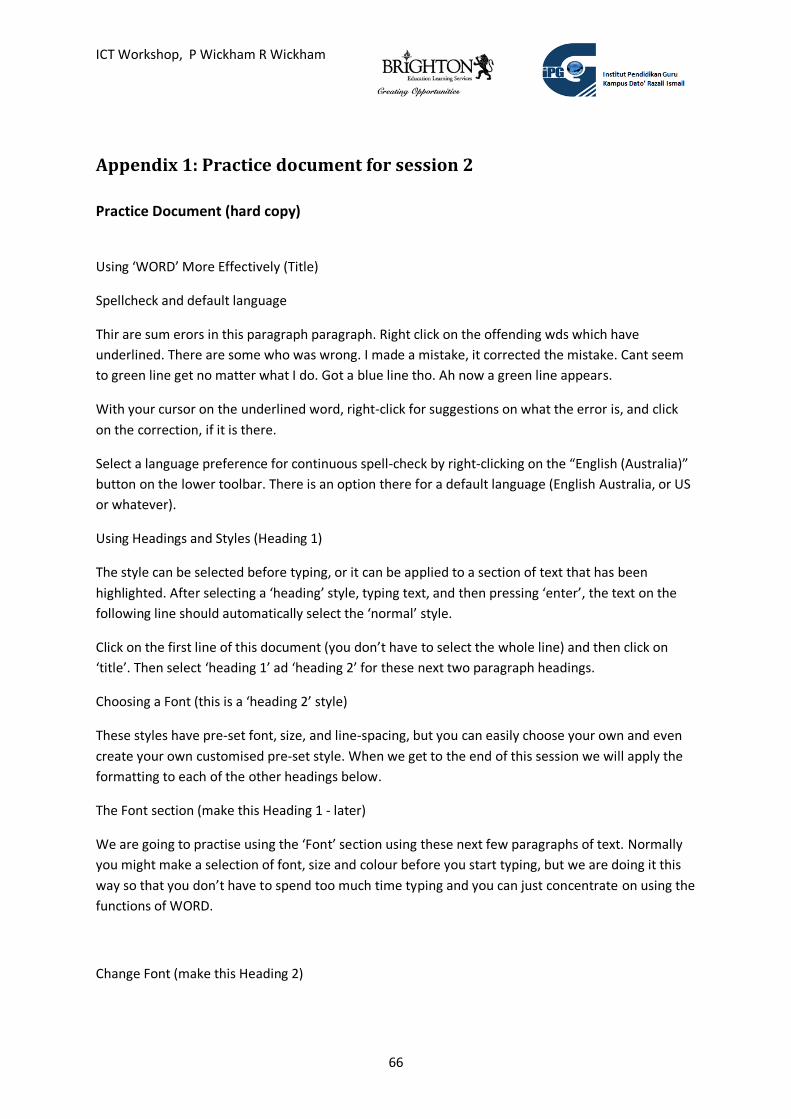
Now you have a chance to select a photo from your computer. However, notice the proportions of the shape that your photo will fit into – you will need to choose a suitable picture. You can crop it before you upload, or crop it within the program after you upload (or both). Your photo on your computer will possibly be too big. You may need to compress your picture (remember the ‘digital imaging’ session) so that it will upload more quickly. You could choose ‘web’ size, or ‘document’ size (which is slightly larger and better resolution and will still upload quickly).
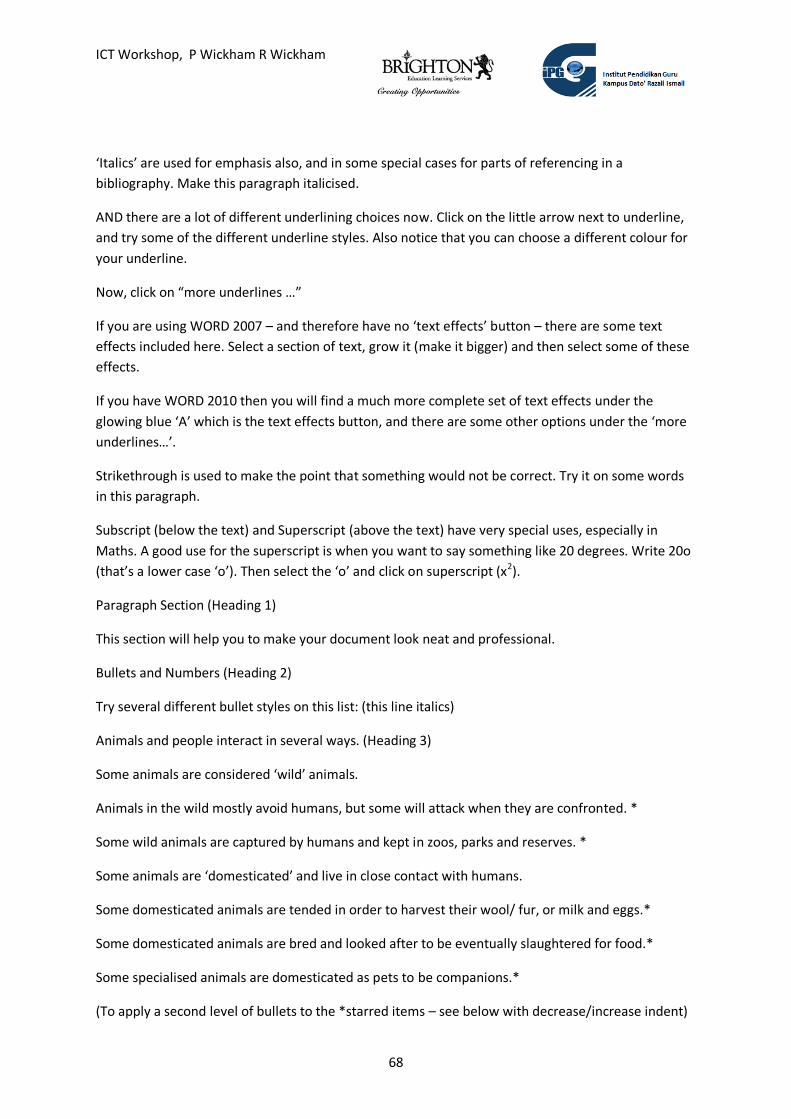
Edit your picture (there are options on the top ribbon) and then click ‘OK’. Look for the ‘Save’ button in the top right-hand corner.
ICT Workshop, P Wickham R Wickham
62
Click the drop-down box next to the ‘Save’ button to decide which pages will have this picture, and then click ‘Save’.
Select elements and drag them down to where you want them to appear. Here a ‘Paragraph with title’ has been dragged and dropped below the picture. Once in place the various elements can be dragged up and down to change their positions.
Go to the ‘Multimedia’ ribbon to add a file for your students to download. After dragging the element into position, click on the open box, and then look for the ‘Upload new File’ button higher up. Bear in mind the size of your files – especially if you are uploading PowerPoint – as they will not only be slow to upload, but there is a limit to the size you are permitted to upload in one go with a free site. (They will tell you if it is too large!) Sometimes a zipped folder will upload more quickly. WORD files are rarely a problem unless they are full of big pictures!
If all of your information on your website is on the one page, it will make it slower for visitors to open. Adding pages is like sorting your computer files into folders. Click on the ‘Pages’ tab to open the pages options. Click ‘Add Page’, choose a suitable name for your new page, and remember to click ‘save settings’. Whichever page is at the top of the list will be your ‘Home’ page – the first page visitors will see when they come to your site. You can drag and move the pages up and down.
ICT Workshop, P Wickham R Wickham
63
Back on your main page you can see the ‘Home’ page tab as well as the new page you have just added.
When you add a new page, you can pull it to the side so that it appears under another page, like a folder within a folder. Don’t forget to ‘save settings’.
Now when you hover your cursor on the page, the other pages become visible.
The three ‘pro’ options are only available after you pay money to Weebly. However, you will rarely need any of these and you can create a very acceptable website using only the available elements. (Having a ‘pro’ account also allows you to upload larger files, and remove the “.weebly” part of your URL.)
ICT Workshop, P Wickham R Wickham
64
Don’t leave your site until you have clicked ‘Publish’. Nothing is ‘live’ until you do so. It is advisable when you are editing your site to publish frequently so as to make sure you don’t lose anything. If you add elements and do not publish, they will not appear on the site.
The very first time you click ‘Publish’ you will see this window (again). Make sure you have selected the top (free) option, check on your URL (maybe write it down if you think you might forget) and click ‘Continue’. Don’t worry, if you DO forget your URL, just go to www.weebly.com and sign in (make sure you remember your email address and password) and you will see your site listed there.
Every single time you publish – and remember to do it frequently – you will see this message. Weebly is once again suggesting that you might like to pay and upgrade. Don’t worry, just close the window and continue.
In time, when the Internet ‘spiders’ start discovering your site, and your students start visiting, you will want to know how many people are visiting. You need to ‘Close’ the editing page using the button in the top right-hand corner.
ICT Workshop, P Wickham R Wickham
65
This page lists all of your sites – you may eventually have more than one! – and a lot of other information which you should check out at some stage. Click on the ‘Stats’ button to see how many are visiting your site.
The graph shows how many people have visited over the last month. At the top right-hand corner you can choose between ‘page views’ and ‘unique visitors’. Below the chart is information about which pages were visited and how many times, and how people found their way to the site. At the top left you can go back to the previous ‘site list’ page, or at the top right you can open your ‘edit site’ page.
Should you decide one day that you don’t want to continue with your site, it is quick and easy to delete. On you Weebly account ‘Home’ page (not your editing page) click on the ‘More’ button. Of course, Weebly will ask you if this is really what you want to do because there is no ‘undo’ button.
Those who were present at the workshop know that ‘Let’s do it!’ is a classic comment from the workshop participants. There is a lot more you can learn, but the best way to learn is by doing. So, get on with it – create and publish your website.
ICT Workshop, P Wickham R Wickham
66
Appendix 1: Practice document for session 2
Practice Document (hard copy)
Using ‘WORD’ More Effectively (Title)
Spellcheck and default language
Thir are sum erors in this paragraph paragraph. Right click on the offending wds which have
underlined. There are some who was wrong. I made a mistake, it corrected the mistake. Cant seem
to green line get no matter what I do. Got a blue line tho. Ah now a green line appears.
With your cursor on the underlined word, right-click for suggestions on what the error is, and click
on the correction, if it is there.
Select a language preference for continuous spell-check by right-clicking on the “English (Australia)”
button on the lower toolbar. There is an option there for a default language (English Australia, or US
or whatever).
Using Headings and Styles (Heading 1)
The style can be selected before typing, or it can be applied to a section of text that has been
highlighted. After selecting a ‘heading’ style, typing text, and then pressing ‘enter’, the text on the
following line should automatically select the ‘normal’ style.
Click on the first line of this document (you don’t have to select the whole line) and then click on
‘title’. Then select ‘heading 1’ ad ‘heading 2’ for these next two paragraph headings.
Choosing a Font (this is a ‘heading 2’ style)
These styles have pre-set font, size, and line-spacing, but you can easily choose your own and even
create your own customised pre-set style. When we get to the end of this session we will apply the
formatting to each of the other headings below.
The Font section (make this Heading 1 - later)
We are going to practise using the ‘Font’ section using these next few paragraphs of text. Normally
you might make a selection of font, size and colour before you start typing, but we are doing it this
way so that you don’t have to spend too much time typing and you can just concentrate on using the
functions of WORD.
Change Font (make this Heading 2)
ICT Workshop, P Wickham R Wickham
67
The key to any of these functions is to first ‘select’ the text you want to apply it to. If you select some
text and thin click on the ‘down’ arrow of the font box, you can watch the font change as you run
your cursor down the list.
Reminder – right-click! Select a word or phrase, and then right-click on it. Most of the functions in
the ribbon also appear through this option as well.
Change Font Size (Heading 2)
The same applies to the drop-down box on the font size. As long as you select text first, you can run
your cursor down the list and watch the size change until you come to the size you wish to choose.
Grow or Shrink Font (Heading 2)
Of course, if you want to, you can just click repeatedly on the large and small ‘A’ buttons to ‘Grow’
(increase) or ‘Shrink’ (decrease) selected text.
Change Case (Heading 2)
It can be tiresome to realise that you have used the WRONG CAPITALISING right through a text and
you have to go back and Meticulously Change each one. The case change button has several options
for this. Try it on this paragraph.
Colour (Heading 2)
There are many reasons why you might want to have parts of your text in different colours. This is
likely to be combined with a change of font and/or a change of colour. Select some text, and grow it,
and then try some different colours.
Clear Formatting (Heading 2)
If you want to get rid of all the formatting and just return to a plain text document, or
section of the document, select the affected text and click on the ‘clear formatting’.
Highlight (Heading 2)
This can be used to draw someone’s attention to parts of your text, or you may want to use it when
you are studying a WORD document as part of a research project. There are several different colours
available. You can select text and then choose the highlight colour, or you can select the highlight
button and then use your cursor like a highlighter pen. Try both methods of highlighting on this
paragraph.
Bold, Italics, Underline, Strikethrough, Subscript and Superscript (Heading 2)
Bold is very useful for emphasising something, change this line to bold.
ICT Workshop, P Wickham R Wickham
68
‘Italics’ are used for emphasis also, and in some special cases for parts of referencing in a
bibliography. Make this paragraph italicised.
AND there are a lot of different underlining choices now. Click on the little arrow next to underline,
and try some of the different underline styles. Also notice that you can choose a different colour for
your underline.
Now, click on “more underlines …”
If you are using WORD 2007 – and therefore have no ‘text effects’ button – there are some text
effects included here. Select a section of text, grow it (make it bigger) and then select some of these
effects.
If you have WORD 2010 then you will find a much more complete set of text effects under the
glowing blue ‘A’ which is the text effects button, and there are some other options under the ‘more
underlines…’.
Strikethrough is used to make the point that something would not be correct. Try it on some words
in this paragraph.
Subscript (below the text) and Superscript (above the text) have very special uses, especially in
Maths. A good use for the superscript is when you want to say something like 20 degrees. Write 20o
(that’s a lower case ‘o’). Then select the ‘o’ and click on superscript (x2).
Paragraph Section (Heading 1)
This section will help you to make your document look neat and professional.
Bullets and Numbers (Heading 2)
Try several different bullet styles on this list: (this line italics)
Animals and people interact in several ways. (Heading 3)
Some animals are considered ‘wild’ animals.
Animals in the wild mostly avoid humans, but some will attack when they are confronted. *
Some wild animals are captured by humans and kept in zoos, parks and reserves. *
Some animals are ‘domesticated’ and live in close contact with humans.
Some domesticated animals are tended in order to harvest their wool/ fur, or milk and eggs.*
Some domesticated animals are bred and looked after to be eventually slaughtered for food.*
Some specialised animals are domesticated as pets to be companions.*
(To apply a second level of bullets to the *starred items – see below with decrease/increase indent)
ICT Workshop, P Wickham R Wickham
69
Remove the formatting (select and click on the eraser in the ‘font’ section), and apply numbers to
the list. Apply a second level to the *starred items the same way you did with the bullets.
Decrease / Increase Indent (Heading 2)
This is one way to create the levels of bullets and numbers. Select the starred items (*) in the list,
and click the right-hand indent button to move them to the right. This will create a second level with
different bullets / numbering style.
You can also create indented margins, or sections of text - such as when you provide a longish quote
in a research paper.
Sort (Heading 2)
Sort this list into alphabetical order A-Z (select the list and click on the AZ↓):
Broccoli Peanuts Zucchinis Mangoes Avocado Egg plant Carrots Potatoes Apples
Now try sorting it Z - A
Show/Hide Formatting symbols (Heading 2)
This one is probably best left alone for now!
Align Text (Heading 2)
Usually you will want to align your text to the left. For titles and headings you might want to align to
the centre. Putting your address at the top right corner of a letter is one use for the ‘align right’
option. If you want a document to look really professional, like a printed book, you might want to try
the ‘justify’ option. This does tend to result in some lines with the words spread weirdly across the
page. Try the different options with this paragraph or others.
Line and Paragraph Spacing (Heading 2)
Try selecting a section of text in this document and vary the spacing. Sometimes academic
documents have a particular requirement such as 1.5 or double spacing.
You can also select the text and click on ‘no spacing’ in the styles section, and then select a spacing
option.
ICT Workshop, P Wickham R Wickham
70
Shading (Heading 2)
This is for colouring the background of a certain area. It’s different from highlighting which only
surrounds the words. Try it on this paragraph.
Borders and Shading (Heading 2)
This can be used to apply to the lines/borders in a table – see later – but you can also draw borders
around sections of text. Select this paragraph and try adding some borders.
If there is a paragraph break, like in this section, the internal lines will appear between the
paragraphs.
Each of the options ‘toggles’ – click once to put it there, and click again to remove it. Or you can use
that eraser button in the ‘font’ section, or just the ‘undo’ blue arrow at the top right.
Clipboard section (Heading 1)
There are a number of ways to perform cut / copy / paste actions, (select text and then) using ‘right
mouse’ is often the simplest, or you can use the buttons here.
Format painter (Heading 2)
This can be very useful. If you see formatting that you like in one section of a document you can
copy it to other places.
Find and select a ‘heading 2’ style line near the beginning of this document. Double click the icon to
copy to more than one place. Now click on each line through this document that says ‘heading 2’.
Then repeat the process with ‘heading 1’.
Using the right click for painting style and format (Heading 2)
Change the font and/or size of a section of text. Select the text, and right click. Find ‘styles’. Here
there is an option that will change ‘normal’ (or ‘no spacing’ if that is what the section if already set
to) to match the present setting.
Editing section (Heading 2)
Find and Replace – find the word ‘text’, replace it with the word ‘words’.
Click the ‘undo’ arrow when you have finished!
Page Layout Ribbon (Heading 1)
Themes Section (Heading 2)
There are a lot of pre-set themes. Click on the arrow under ‘themes’ and then hover over some of
the themes. The whole document will change to give you an idea how it would look.
ICT Workshop, P Wickham R Wickham
71
The same is true for Fonts, and also for colours. Try hovering over some of them, then try clicking on
some and then use the blue ‘undo’ arrow at the top left of your screen.
(However, for the effects button we need to first create some Word Art. It has an effect on the
whole document when there are items affected by WordArt, so we will look at it later.)
Page Setup Section (Heading 2)
Generally the options in this section affect the whole document, not just parts that are selected.
Margins – try changing the margins, and then undo.
Orientation – change orientation, and undo.
Size – only use this option if you are planning to print out in a different paper size, click the arrow
and see what options are available.
Columns – have a look at the various options for columns. When would these be useful?
Page Background (Heading 2)
Changes in this area affect the whole document.
Watermark – click on the drop-down arrow on ‘Watermark’, try selecting some of the watermark
words which appear as a light background to the document behind the text.
Click on the ‘Watermarks’ drop-down box again and select ‘custom watermark’. In the dialogue box
that opens you can select a text watermark of your own, or you can select a picture watermark using
a picture from your computer. Browse to select a picture, choose the scale (by trial and error), and
uncheck the ‘washout’ box if it appears to pale/light in your document.
You can also select ‘Page Colour’ to choose a colour for the whole background of your document.
The ‘Fill effects’ button in this drop-down option will let you choose patterns and textures within
your colour.
Page Borders – this looks very similar to the ‘borders and shading’ option at the bottom of the drop-
down menu under borders on the ‘home’ ribbon.
Completed Practice Document
Working systematically through the instructions in the practice document can produce a variety of
results as choices are made. One possible version is included on the website
Appendix 2: Practice Document - Session 03a - Insert Table Follow the instructions to create a table here ↓⇣↓ (by the way – where do you find an arrow?)
Draw Table
Draw a table here. ▽
ICT Workshop, P Wickham R Wickham
73
Use a table to format a whole document.
A table format can be used to align elements of a document, such as a test or worksheet. Adjust the visibility of the borders of this table so that the only lines are where the student must answer:
Final Assignment: Pedagogical Implications of Technology at Home
Student Name Date
For each of the situations listed below, discuss the implications for the child as he/she enters school.
1. There is no electricity in the child’s home.
2. There is no TV in the child’s home.
3. The parents have no computer; the child has never seen one.
4. The child walks to school; the family does not own a car or motorbike.
Suggest 4 scenarios regarding technology at home which would be beneficial to a child’s education.
1. 2.
3. 4.
ICT Workshop, P Wickham R Wickham
74
Convert Text to Table
Select the text below, and convert it to a table. [In the dialog box make these selections: 3 columns, Auto-fit to content and then separate text at commas.] Daily Routines Every day Sam must manage these things: Get out of bed, get dressed, get his schoolbag ready. While he is at school he must: Pay attention, do everything he is told, do his best work. After school Sam needs to: Walk home quickly, do his homework, get the table ready for tea.
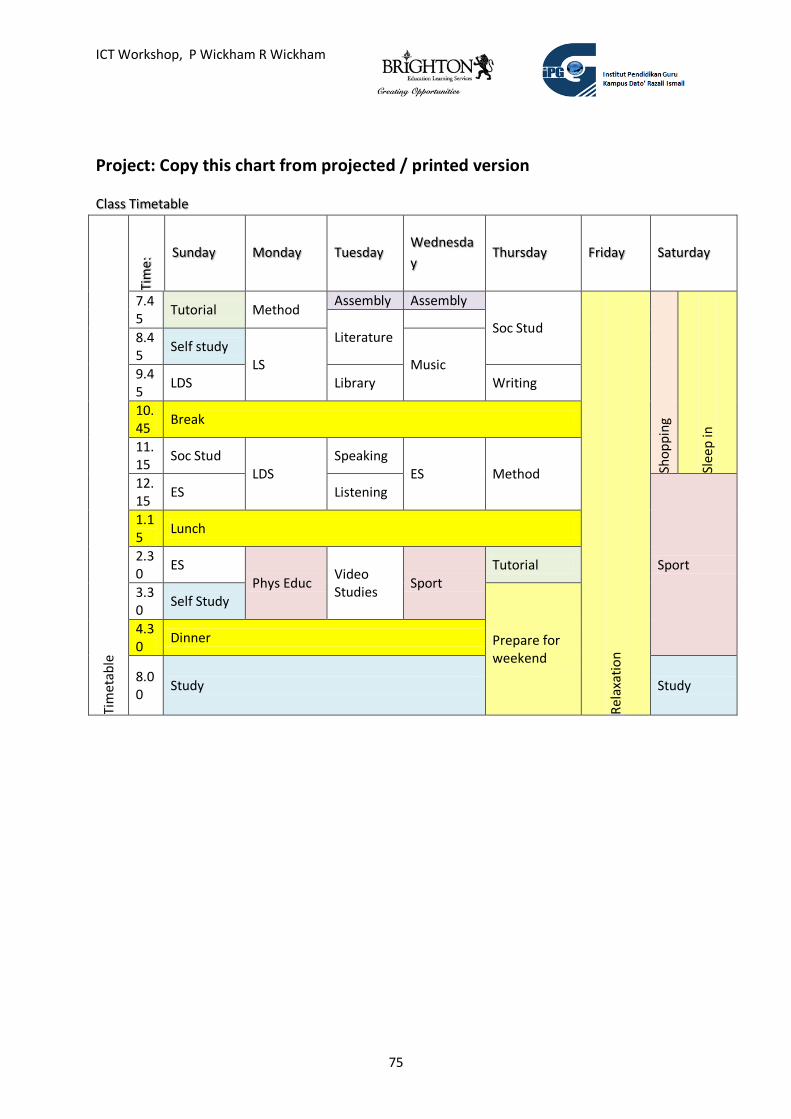
Project –copy the table Reproduce the displayed table – from screen and/or from page below (here ↓)
ICT Workshop, P Wickham R Wickham
75
Project: Copy this chart from projected / printed version
Class Timetable
Tim
etab
le
Tim
e: Sunday Monday Tuesday
Wednesda
y Thursday Friday Saturday
7.45
Tutorial Method Assembly Assembly
Soc Stud
Rel
axat
ion
Sho
pp
ing
Slee
p in
Literature
8.45
Self study LS Music
9.45
LDS Library Writing
10.45
Break
11.15
Soc Stud LDS
Speaking ES Method
12.15
ES Listening
Sport
1.15
Lunch
2.30
ES Phys Educ
Video Studies
Sport Tutorial
3.30
Self Study
Prepare for weekend
4.30
Dinner
8.00
Study Study
ICT Workshop, P Wickham R Wickham
76
Appendix 3: Session 03b Insert Ribbon Practice Document
Insert Header and Footer
Insert a header:
ICT Workshop IPGKDRI Oct 30-Nov 3 2011. Peter Wickham/Ruth Wickham
Insert a footer: - your name, and today’s date.
Insert page numbers – choose a position.
Insert Hyperlink
Insert a hyperlink to the website using these words:
A Collection of TESL Resources
Check that the link works – hold down the ‘control’ key and click on the link.
Insert Text Box
Draw a text box below here. (The text below will move out of the way.)
Cut and paste this text into the box:
PETALING JAYA: The computer lab project in Sabah is a “failure” because only two of the 300 labs were ready in December 2010, according to the 2010 Auditor-General’s Report.
“This is despite a six-month extension and after RM98.9 million (86%) of the RM113.73 million was spent on the construction cost,” the report said.
“This failure to meet the deadline has resulted in the Education Ministry incurring RM3.17 million in liquidated and ascertained damages for the period between Nov 1, 2008 and May 11, 2009. However, the ministry has terminated this contract in March 2010.”
Change the shape and size of the box, move it around.
Notice that a new ribbon tab is now visible – click on the “Format” ribbon. Investigate the possibilities offered in this ribbon.
Insert a Picture
Insert a picture from the collection provided, or from your computer.
Again, notice the Format ribbon, and apply the various options.
ICT Workshop, P Wickham R Wickham
77
Insert Clip Art
You will probably need to be connected to the Internet to select clip art.
Search for clip art under the term ‘student’. Choose a picture to insert.
Use the Format ribbon to make adjustments.
Insert Shapes
Choose a shape, and use it to highlight something in your picture or clip art.
Use the Format ribbon to make adjustments.
Insert WordArt
Choose a style of WordArt to insert.
Notice that when you insert WordArt it creates a text box, which you can edit and move like any
other text box.
Project – create a flyer
Now copy the Project document. The elements for this are provided in your folder on the computer.
ICT Workshop, P Wickham R Wickham
78
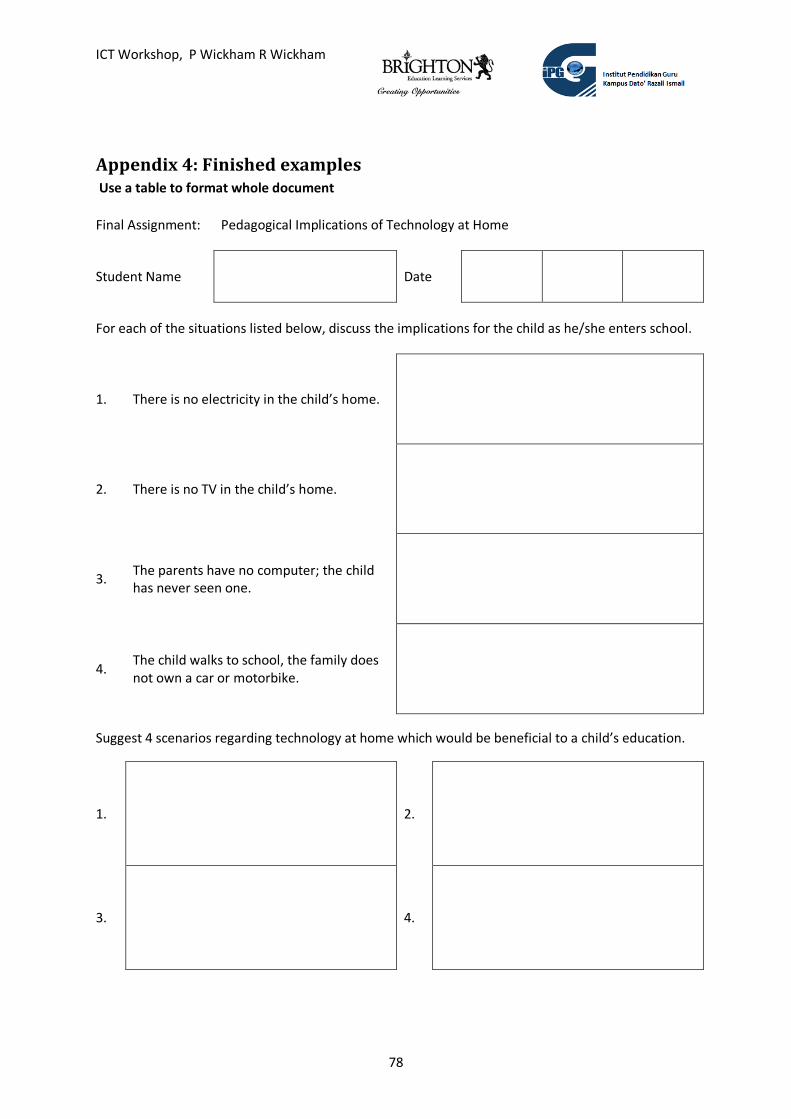
Appendix 4: Finished examples Use a table to format whole document
Final Assignment: Pedagogical Implications of Technology at Home
Student Name Date
For each of the situations listed below, discuss the implications for the child as he/she enters school.
1. There is no electricity in the child’s home.
2. There is no TV in the child’s home.
3. The parents have no computer; the child has never seen one.
4. The child walks to school, the family does not own a car or motorbike.
Suggest 4 scenarios regarding technology at home which would be beneficial to a child’s education.
1. 2.
3. 4.
ICT Workshop, P Wickham R Wickham
79
Finished example – Convert text to table
Results of exercise:
Daily Routines
Every day Sam must manage these things:
Get out of bed get dressed get his schoolbag ready.
While he is at school he must:
Pay attention do everything he is told do his best work.
After school Sam needs to:
Walk home quickly do his homework get the table ready for tea.
ICT Workshop, P Wickham R Wickham
80
Appendix 5: Session 04 Practice Document for Using WORD
Professionally An Article about Using WORD to Format Professional Papers
By A.N. Author
This is my abstract. This is where I explain briefly what I am trying to accomplish in writing this
article, my hypothesis, and the results. When people are looking through articles for something in
particular, this is what they will read, and they will decide whether they want to read the whole
article. Also, if the article is available for purchase, or in a journal that is available for purchase, this is
all people can see until they pay money. So this needs to be written in a way that makes the right
people really want to read it.
This is my introduction, or sometimes it is called background. This is part of the actual article, unlike
the abstract. It explains who I am and why I am doing this. It tells people about my experiment or
research, and what I am hoping or expecting to discover or prove. This section supplies the setting
for the whole article. When people read this they will understand the whole background to my
research. Some of the points in here may seem repetitive as they have already been stated in the
abstract, but that is alright.
Now I am going to write about my literature review. Before I started my research, I did some reading
to find out what other people have studied and discovered in this area. I will refer to several other
papers such as …
I have noticed that some of this research was incomplete, or did not quite cover the area I want to
cover. I will refer to some research such as … which has some interesting results and I hope I can
confirm these results.
There is a gap in the available literature, and I cannot find anyone who has written about exactly
what I am researching, and therefore it is important for me to do so.
Now I am going to describe my research methods. Everyone needs to know that I have been careful
and diligent in my research, so I need to explain everything very carefully here. There will be several
subsections relating to this area.
ICT Workshop, P Wickham R Wickham
81
First I am going to explain about my sampling. I need to explain how I selected my subjects, and why
I selected them this way. I should explain about the makeup of my groups.
I have a control group. In this group there are a total of 60:
Males 28
Females 32
Their age ranges are as follows:
0 to 10 2
11 to 20 9
21 to 30 25
31 to 40 15
41+ 9
My experimental group is similar, athough not exactly the same. In this group there were also a total
of 60:
Males 31
Females 29
And their age ranges are as follows:
0 to 10 3
11 to 20 8
21 to 30 28
31 to 40 13
41+ 8
Now I am going to carefully explain my procedures for the experiment. I will tell how I had three
meetings with each group. In between the meetings they undertook some training.
ICT Workshop, P Wickham R Wickham
82
This is what we did in the first meeting. This was just an introductory and explanatory meeting. The
participants filled in a survey. A copy of the survey is in Appendix 1.
Then we had a second meeting a month later. The participants completed a second survey to get
their reactions to the training methods over the last month. This survey can be found in Appendix 2.
A third meeting was held after another month, and once again the participants completed a survey.
This survey is included in Appendix 3.
Here I will insert a Smart Art Graphic to demonstrate the information above. The information we
want to demonstrate in this Graphic is the Training Cycle for both groups… (The graphic could
demonstrate a simple cycle that goes ‘survey, train, test, survey…’ etc.
Finally in this section I will explain about the training methods the participants were involved in and
how the experimental group’s training differed from the control group’s normal training sessions. I
will include here timetables showing their training sessions. The training was 3 days per week for 3
hours a day.
Control Group
Time Monday Tuesday Wednesday
9.00 Listening Reading Writing
10.00 Speaking Listening Reading
11.00 Writing Speaking Test
Experimental Group
Time Sunday Tuesday Thursday
10.00 Reading Writing Listening
11.00 Reading Writing Listening
2.00 Speaking Speaking Test
ICT Workshop, P Wickham R Wickham
83
Next I will describe the results of the experiment. This is mostly about the test results of each group
at the end of each week, as well as the results of their monthly surveys. This is just the raw results,
not an evaluation of them. I will talk about the results here, but the tables of test and survey results
are in Appendix 4.
My next section is about my findings, explaining what I think about the results and whether I think
they proved my point. I will need to once again refer to the other papers I researched in my
literature review. I will give some quotes such as this one … ‘One of the obvious initial difficulties
which strikes students of psychology is that they cannot classify the subject in a precise way’
And I will back this up with an even longer quote here …
I might also need to explain why the experiment did not entirely give the results I hoped for or
expected.
Now I will round my paper off with my conclusion. This is not a very long section, and it starts on its
own page. I summarise again what I was trying to do, and how well (or not) the experiment went,
and what I feel that I have proved or not proved. This section may also include some
recommendations, or they could be in a separate section if they are longer.
I need to insert a bibliography, or at least a list of reference cited
And finally I have 4 appendices, each starting on a separate page.
ICT Workshop, P Wickham R Wickham
84
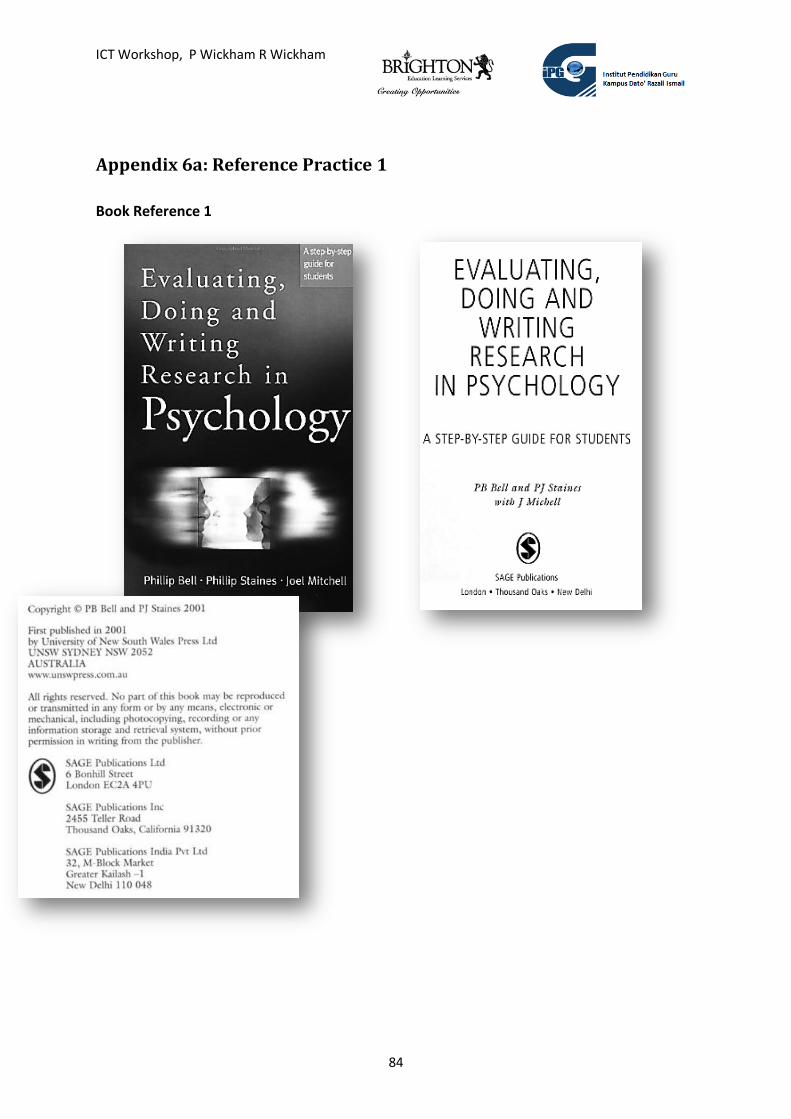
Appendix 6a: Reference Practice 1
Book Reference 1
ICT Workshop, P Wickham R Wickham
85
Sample for Quote 1
Psychology in the Academy
This book is a response to ‘hat the authors consider is the most common problem confronting
students of psychology. Although common, it is largely ignored by those involved in teaching
undergraduate psychology courses. Generally, the difficulty concerns the nature
psychological argument — its conventions and idiosyncrasies. More than any other single
aspect of psychology it is this that students fail to understand. Perhaps the best way to
emphasise the dimensions of the problem is to look at it from the student’s point of view.
One of the obvious initial difficulties which strikes students of psychology is that they cannot
classify the subject in a precise way. It cannot he placed neatly into the usual pigeonholes
which have served so well in their earlier, secondary education. Psychology, they may feel, is
not quite a ‘science’ (meaning that it appears somewhat different from physics), although it is
not like the study of literature or art. And yet at times the subject matter is similar to both the
sciences and the more conventional ‘humanities’. It includes fields as diverse as existentialist
theories of man’s place in his social world, philosophical speculation about the ‘mind—body
problem’, as well as methodologically rigorous
…
(page 2)
INTRODUCTION: THE PROBLEM • 9
So we spend a whole chapter, Chapter 4, on problems of definition in psychology.
The motivation for this hook, therefore, rises from our belief that most undergraduates
studying psychology are merely assumed to know, rather than explicitly taught, how to
construct, analyse or evaluate the kind of argument which is characteristic of psychological
discussion.
We feel that it is unrealistic to expect students merely to ‘pick up’ such an ability by some
apparently magical process. Rather, the ability requires explicit instruction and practice —
that is, familiarity with a variety of arguments, concepts and techniques for analysing these.
Therefore, this book presents basic concepts and techniques involved in advanced argument
in an informal, practical manner to enable students consciously to develop the ability to
construct worthwhile written and oral presentations in the field of psychology.
What follows is entirely informal, requiring no knowledge of logic or allied disciplines.
Without assuming that there is a unique, simple approach to constructing and expressing
arguments, we have tried to present both general principles and specific techniques,
illustrating these by numerous examples and exercises.
ICT Workshop, P Wickham R Wickham
86
Appendix 6b: Reference Practice 2
Book Reference 2
ICT Workshop, P Wickham R Wickham
87
Sample for quote 2
Why do research?
An obvious question relevant to any book on research methods in psychology
is the following: Why study human behavior? In a sense, we need to think
about why research is important or worth doing before we launch into an
entire book devoted to the mechanics and intricacies of actually doing it. In
what ways does research allow us to move from armchair musings to the active
exploration of a topic? Here are some of the things that research allows you to accomplish:
To move beyond idle curiosity into formulating questions.
To reduce error and bias in the process of answering these questions, thereby
improving both the answer and your own reasoning skills.
To test competing interpretations of’ events against one another so that a best account
of some phenomena can be isolated.
To use quantitative and qualitative skills to solve problems.
To gain perspective on questions, to obtain a broader view, to go beyond the given
information.
To add to collective knowledge, as well as your own personal store.
To create connections among otherwise disparate sources of information.
(page 4)
ICT Workshop, P Wickham R Wickham
88
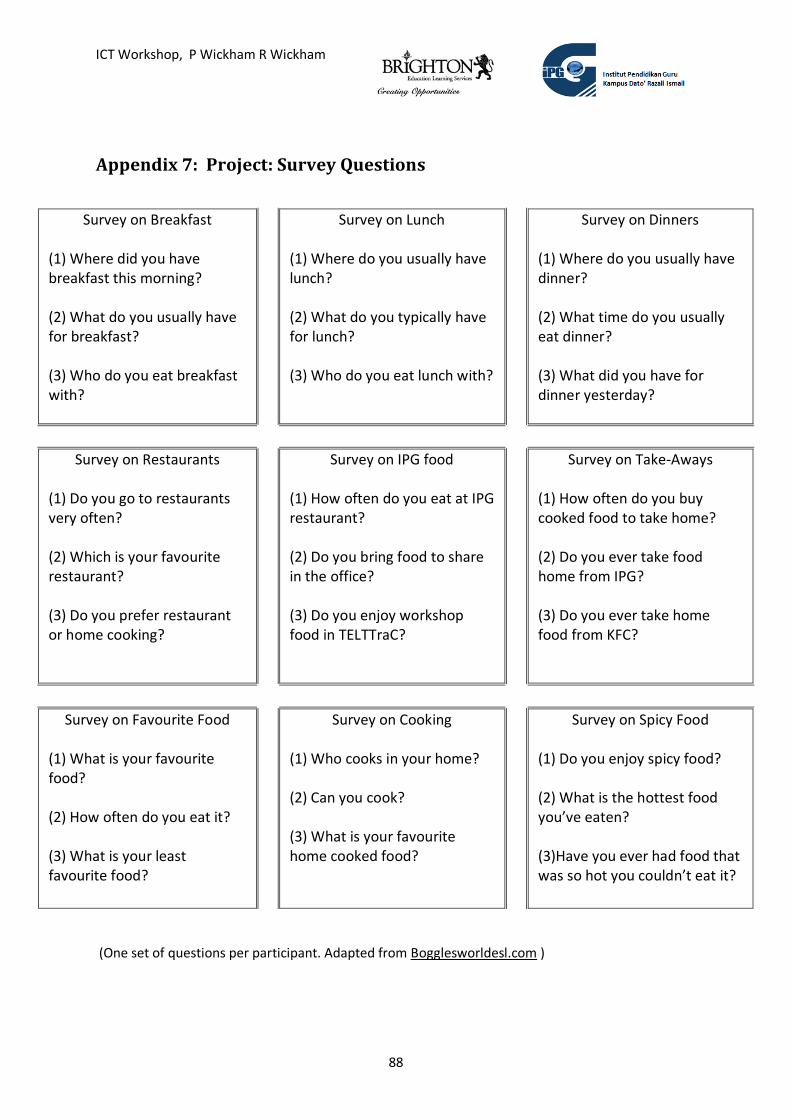
Appendix 7: Project: Survey Questions
(One set of questions per participant. Adapted from Bogglesworldesl.com )
Survey on Breakfast
(1) Where did you have breakfast this morning? (2) What do you usually have for breakfast? (3) Who do you eat breakfast with?
Survey on Lunch (1) Where do you usually have lunch? (2) What do you typically have for lunch? (3) Who do you eat lunch with?
Survey on Dinners
(1) Where do you usually have dinner? (2) What time do you usually eat dinner? (3) What did you have for dinner yesterday?
Survey on Restaurants (1) Do you go to restaurants very often? (2) Which is your favourite restaurant? (3) Do you prefer restaurant or home cooking?
Survey on IPG food (1) How often do you eat at IPG restaurant? (2) Do you bring food to share in the office? (3) Do you enjoy workshop food in TELTTraC?
Survey on Take-Aways (1) How often do you buy cooked food to take home? (2) Do you ever take food home from IPG? (3) Do you ever take home food from KFC?
Survey on Favourite Food (1) What is your favourite food? (2) How often do you eat it? (3) What is your least favourite food?
Survey on Cooking (1) Who cooks in your home? (2) Can you cook? (3) What is your favourite home cooked food?
Survey on Spicy Food (1) Do you enjoy spicy food? (2) What is the hottest food you’ve eaten? (3)Have you ever had food that was so hot you couldn’t eat it?