6
BAADER www.baader-stronghold.de Instruction Manual Baader Stronghold Tangent Assembly Order No.: 2450310B (blue) or 2450310S (black) 2450310S

BAADER
www.baader-stronghold.de
Instruction Manual
Baader StrongholdTangent Assembly
Order No.: 2450310B (blue)
or 2450310S (black)
Copyright Baader Planetarium GmbH, all rights reserved - 11 - Stand: 04/2010
2450310B
2450310S

BAADER
www.baader-stronghold.de
Included in delivery 1. Stronghold Tangent Assembly 2. Locking Dowel 3. Holder for Locking Dowel 4. Reducer 3/8“ to 1/4“5. EQ-Clamp6. 1/4“ Photo-Thumb-Screw
(In the as-delivered-condition, the Photo-Thumb-Screw is secured with an O-Ring which has to be removed prior to use)
Technical data Color:.................................................................Black or Blue Weight: ..............................................................680 gMaterial: ............................................................Aluminum hard anodizedCarrying capacity: ............................................Photographic max. 7,0kgShifting range Azimut: .....................................+/- 23°Shifting range Elevation: .................................+/- 35°Length: ..............................................................115mm (incl. adjustment screws)Width: ................................................................128mm (incl. adjustment screws) Height: ...............................................................54mm (without EQ-clamp)Mounting Options Top Plate: ..........................1/4“ photo screw, 6pc M6 threaded holes (depth of thread 6mm)Mounting Options Base Plate: 1/4“ and 3/8“ photo thread, 4pc M6 and 4pc M5 threaded holes (depth of
thread 6mm)General Mounting Options: Included in delivery: EQ-clamp (Vixen standard), to be mounted on top
plate or base-plate alternatively. Optional: Baader 3“ rider clamp (Order No.: 2450316) with special bore holes and screws to fit Baader Stronghold base plate.
Copyright Baader Planetarium GmbH, all rights reserved - 21 - Stand: 04/2010
Fig. 1: Top Mounting Plate Fig. 2: Base Mounting Plate
1
2
3
5
4
6
BAADER
www.baader-stronghold.de
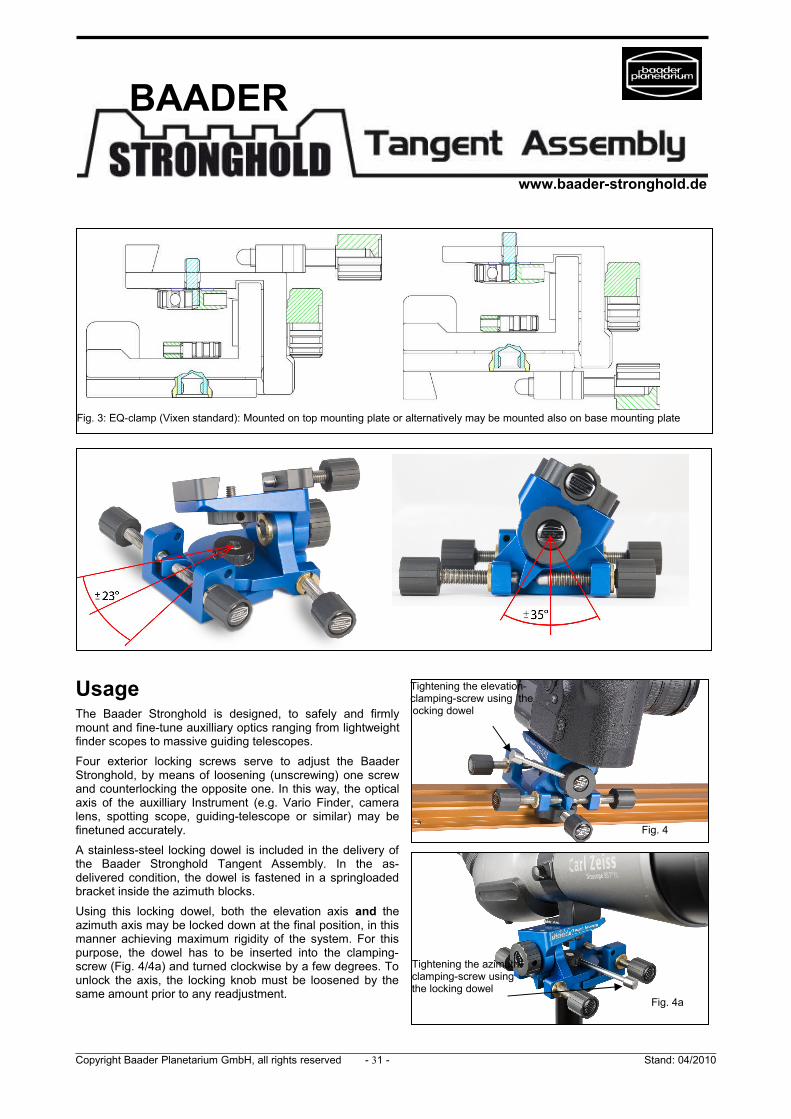
Usage The Baader Stronghold is designed, to safely and firmly mount and fine-tune auxilliary optics ranging from lightweight finder scopes to massive guiding telescopes.
Four exterior locking screws serve to adjust the Baader Stronghold, by means of loosening (unscrewing) one screw and counterlocking the opposite one. In this way, the optical axis of the auxilliary Instrument (e.g. Vario Finder, camera lens, spotting scope, guiding-telescope or similar) may be finetuned accurately.
A stainless-steel locking dowel is included in the delivery of the Baader Stronghold Tangent Assembly. In the as-delivered condition, the dowel is fastened in a springloaded bracket inside the azimuth blocks.
Using this locking dowel, both the elevation axis and the azimuth axis may be locked down at the final position, in this manner achieving maximum rigidity of the system. For this purpose, the dowel has to be inserted into the clamping-screw (Fig. 4/4a) and turned clockwise by a few degrees. To unlock the axis, the locking knob must be loosened by the same amount prior to any readjustment.
Copyright Baader Planetarium GmbH, all rights reserved - 31 - Stand: 04/2010
Fig. 4
Tightening the elevation-clamping-screw using the locking dowel
Fig. 3: EQ-clamp (Vixen standard): Mounted on top mounting plate or alternatively may be mounted also on base mounting plate
Fig. 4a
Tightening the azimuth-clamping-screw using the locking dowel
BAADER
www.baader-stronghold.de
Mounting the Stronghold onto various telescopesHow to mount onto EQ-dovetail-bar (Vixen / Celestron / Baader V-dovetail-bar):
→ The EQ-clamp (included in the delivery, consisting of two parts) can be mounted onto the base-plate of the Baader Stronghold. (In the as-delivered condition the EQ-clamp is mounted onto the Stronghold top plate.)
How to mount onto 3“ dovetail-bar (Losmandy-Style or Baader 3“ dovetail-bar):→ A special 3“ rider clamp (#2450316) featuring two boreholes is required for mounting the Baader Stronghold.
The 3“ rider clamp can be mounted onto the Stronghold top plate or base-plate. Please order the 3“ rider clamp in the special design including matching screws for the Baader Stronghold, by quoting order number 2450316.
How to mount on top of 1/4“ oder 3/8“ photo thumb screws, onto tripods, etc.: → A rotating 3/8“ tapered blind hole with a thumb screw on the other side is located at the base plate. Position the
Baader Stronghold onto the 3/8“ screw of your tripod or similar and turn the 3/8“ thread using the thumb knob, until the Baader Stronghold is attached tightly to the tripod head. Use the locking dowel to fully tighten the thumb knob. The same applies for 1/4“ screws - for this purpose, the reducer 3/8“ to 1/4" (included in the delivery) must be threaded into the 3/8“ tapered bore hole.
How to mount using the M5 or M6 tapered holes:→ The base plate of the Baader Stronghold features 4pc M6 and 4pc M5 tapered holes for your own adaptations.
Please note that screws must not be threaded down further than 6mm into the base plate.
Mounting of accessories and telescopes onto the top plateTelescopes with EQ-dovetail-bars (Vixen / Celestron or Baader V-bars):
→ The EQ-clamp (included in delivery) must be mounted on the top plate in the same way as it comes in the as-delivered condition. Using the knurled thumb-screw, all adequate EQ- or V-dovetail-bars may be fastened with the EQ-clamp of the Baader Stronghold.
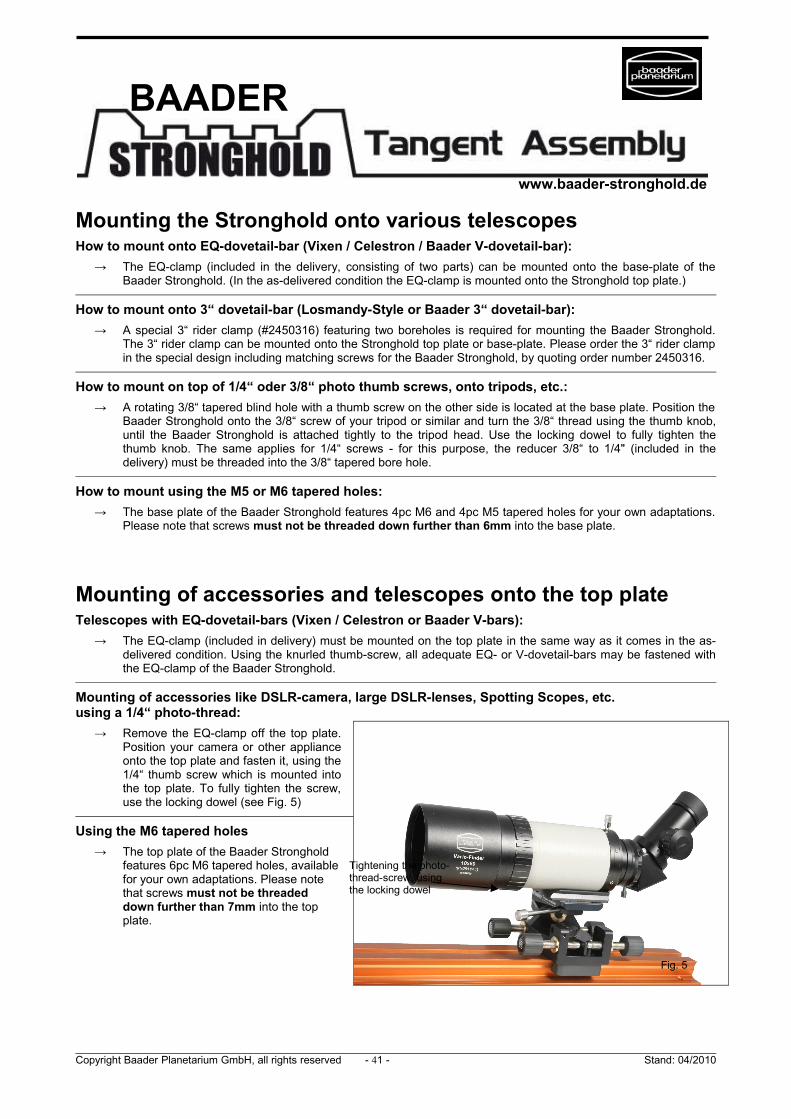
Mounting of accessories like DSLR-camera, large DSLR-lenses, Spotting Scopes, etc. using a 1/4“ photo-thread:
→ Remove the EQ-clamp off the top plate. Position your camera or other appliance onto the top plate and fasten it, using the 1/4“ thumb screw which is mounted into the top plate. To fully tighten the screw, use the locking dowel (see Fig. 5)
Using the M6 tapered holes→ The top plate of the Baader Stronghold
features 6pc M6 tapered holes, available for your own adaptations. Please note that screws must not be threaded down further than 7mm into the top plate.
Copyright Baader Planetarium GmbH, all rights reserved - 41 - Stand: 04/2010
Fig. 5
Tightening the photo-thread-screw, using the locking dowel
BAADER
www.baader-stronghold.de
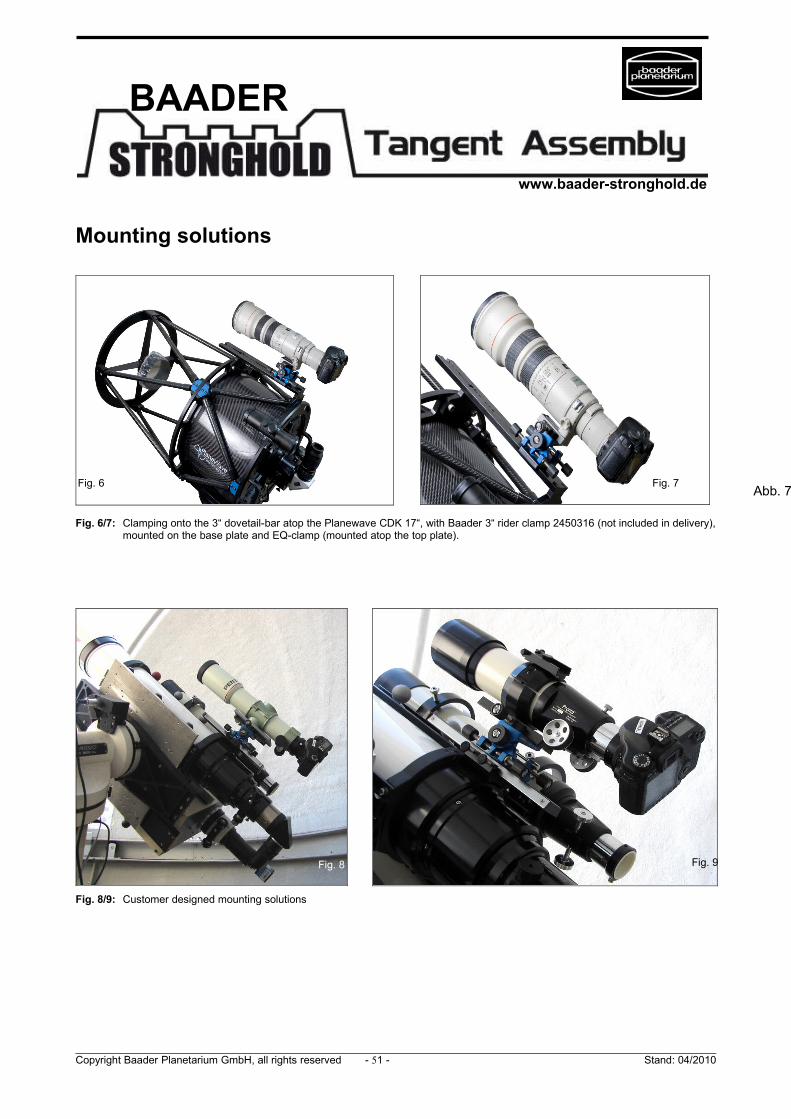
Mounting solutions
Fig. 6/7: Clamping onto the 3“ dovetail-bar atop the Planewave CDK 17“, with Baader 3“ rider clamp 2450316 (not included in delivery), mounted on the base plate and EQ-clamp (mounted atop the top plate).
Fig. 8/9: Customer designed mounting solutions
Copyright Baader Planetarium GmbH, all rights reserved - 51 - Stand: 04/2010
Abb. 7
Fig. 8 Fig. 9
Fig. 7Fig. 6
BAADER
www.baader-stronghold.de
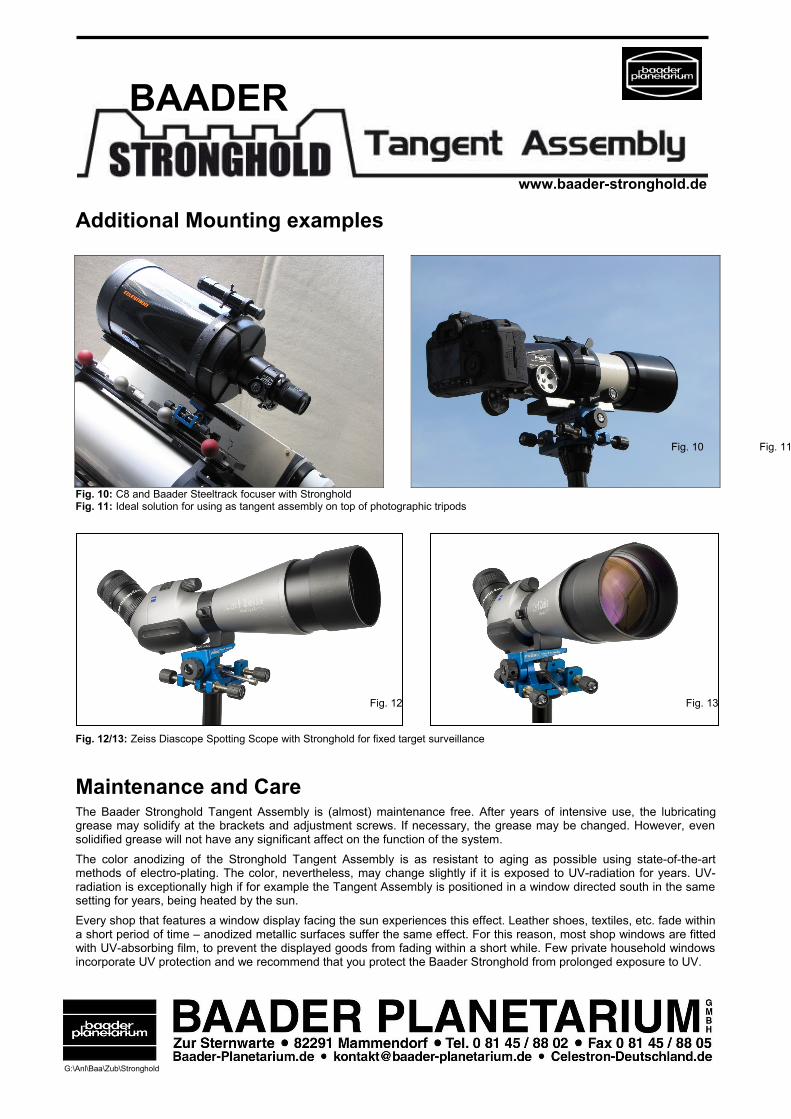
Additional Mounting examples
Fig. 10: C8 and Baader Steeltrack focuser with StrongholdFig. 11: Ideal solution for using as tangent assembly on top of photographic tripods
Fig. 12/13: Zeiss Diascope Spotting Scope with Stronghold for fixed target surveillance
Maintenance and CareThe Baader Stronghold Tangent Assembly is (almost) maintenance free. After years of intensive use, the lubricating grease may solidify at the brackets and adjustment screws. If necessary, the grease may be changed. However, even solidified grease will not have any significant affect on the function of the system.
The color anodizing of the Stronghold Tangent Assembly is as resistant to aging as possible using state-of-the-art methods of electro-plating. The color, nevertheless, may change slightly if it is exposed to UV-radiation for years. UV-radiation is exceptionally high if for example the Tangent Assembly is positioned in a window directed south in the same setting for years, being heated by the sun.
Every shop that features a window display facing the sun experiences this effect. Leather shoes, textiles, etc. fade within a short period of time – anodized metallic surfaces suffer the same effect. For this reason, most shop windows are fitted with UV-absorbing film, to prevent the displayed goods from fading within a short while. Few private household windows incorporate UV protection and we recommend that you protect the Baader Stronghold from prolonged exposure to UV.
Copyright Baader Planetarium GmbH, all rights reserved - 61 - Stand: 04/2010 G:\Anl\Baa\Zub\Stronghold
Fig. 10 Fig. 11
Fig. 12 Fig. 13


