Intelligent Provisioning User Guide for HPE ProLiant Gen10 Servers and HPE Synergy Part Number: 881706-005 Published: August 2019 Edition: 1 Abstract This document details how to access and use the Intelligent Provisioning and HPE Rapid Setup Software, including tasks such as installing an OS, updating firmware, software, and drivers, and performing some diagnostic tests. Intelligent Provisioning is included in the optimized server support software from the Service Pack for ProLiant (SPP). This document is intended for administrators experienced in using ProLiant Gen10 servers and HPE Synergy compute modules.
Transcript
Intelligent Provisioning User Guide forHPE ProLiant Gen10 Servers and HPESynergy
Part Number: 881706-005Published: August 2019Edition: 1
AbstractThis document details how to access and use the Intelligent Provisioning and HPE RapidSetup Software, including tasks such as installing an OS, updating firmware, software, anddrivers, and performing some diagnostic tests. Intelligent Provisioning is included in theoptimized server support software from the Service Pack for ProLiant (SPP). This document isintended for administrators experienced in using ProLiant Gen10 servers and HPE Synergycompute modules.
NoticesThe information contained herein is subject to change without notice. The only warranties for HewlettPackard Enterprise products and services are set forth in the express warranty statements accompanyingsuch products and services. Nothing herein should be construed as constituting an additional warranty.Hewlett Packard Enterprise shall not be liable for technical or editorial errors or omissions containedherein.
Confidential computer software. Valid license from Hewlett Packard Enterprise required for possession,use, or copying. Consistent with FAR 12.211 and 12.212, Commercial Computer Software, ComputerSoftware Documentation, and Technical Data for Commercial Items are licensed to the U.S. Governmentunder vendor's standard commercial license.
Links to third-party websites take you outside the Hewlett Packard Enterprise website. Hewlett PackardEnterprise has no control over and is not responsible for information outside the Hewlett PackardEnterprise website.
AcknowledgmentsMicrosoft® and Windows® are either registered trademarks or trademarks of Microsoft Corporation in theUnited States and/or other countries.
Linux® is the registered trademark of Linus Torvalds in the U.S. and other countries.
Red Hat® is a registered trademark of Red Hat, Inc. in the United States and other countries.
About HPE Rapid Setup Software................................................................................................ 9Software installed with Intelligent Provisioning............................................................................. 9
Accessing Intelligent Provisioning..................................................... 10Accessing Intelligent Provisioning from the iLO web interface .................................................. 10Accessing Intelligent Provisioning using an iLO remote console session...................................10
F10 mode options..................................................................................11Selecting F10 mode to use..........................................................................................................11Initial configuration in Intelligent Provisioning..............................................................................11
Using the First Time Setup wizard....................................................................................11Entering First Time Wizard settings.......................................................................11
Reinstalling from an ISO image.............................................................................13Reinstalling from an RPM package (Linux only)................................................... 13
Initial configuration in HPE Rapid Setup Software......................................................................14Configuring a RAID with HPE Rapid Setup Software overview....................................... 14
Creating an advanced RAID array manually......................................................... 15Using the HPE Rapid Setup Software main menu................................................ 15
Configuring the server and installing an operating system ............ 23Configuring the server and installing an OS with Intelligent Provisioning................................... 23
Server support and special characters.............................................................................23Source media types and installation methods supported for each OS............................ 23Selecting hardware settings............................................................................................. 23Selecting the OS.............................................................................................................. 26Reviewing your settings................................................................................................... 28Checking installation parameters..................................................................................... 28
Determining the installed Intelligent Provisioning version................................................ 30Setting Intelligent Provisioning Preferences .............................................................................. 30Downloading Active Health System data ................................................................................... 31
Downloading an Active Health System log...................................................................... 31Uploading an AHS log to AHSV....................................................................................... 32
Using Deployment Settings ........................................................................................................32Creating a Deployment Settings package........................................................................33Using Deployment Settings package to configure a single server................................... 34Deployment Settings package-level actions.................................................................... 35Deployment Settings package individual settings............................................................ 36
Version Information................................................................................................36Array Configuration settings.................................................................................. 36Entering operating system information..................................................................36Entering ROM settings.......................................................................................... 37Entering Intelligent Provisioning Preferences .......................................................37
Using the BIOS Configuration (RBSU) utility.............................................................................. 38About iLO Configuration..............................................................................................................39
Running an iLO self-test...................................................................................................40Management Settings...................................................................................................... 40
Configuring Manager iLO Management Settings.................................................. 40Configuring iLO Management Manager Network Service and Virtual NetworkService Settings.....................................................................................................41Configuring iLO Management SNMP Settings...................................................... 42
User Accounts..................................................................................................................46Configuring iLO Account Services.........................................................................46Editing User Account settings............................................................................... 46Adding a user account...........................................................................................47
Resetting the iLO............................................................................................................. 47Configuring Intelligent Storage....................................................................................................47
Creating a new array or logical drive................................................................................48Configuring an array or logical drive................................................................................ 48
About Hardware Validation Tool..................................................................................................49Using the hardware validation tool................................................................................... 49
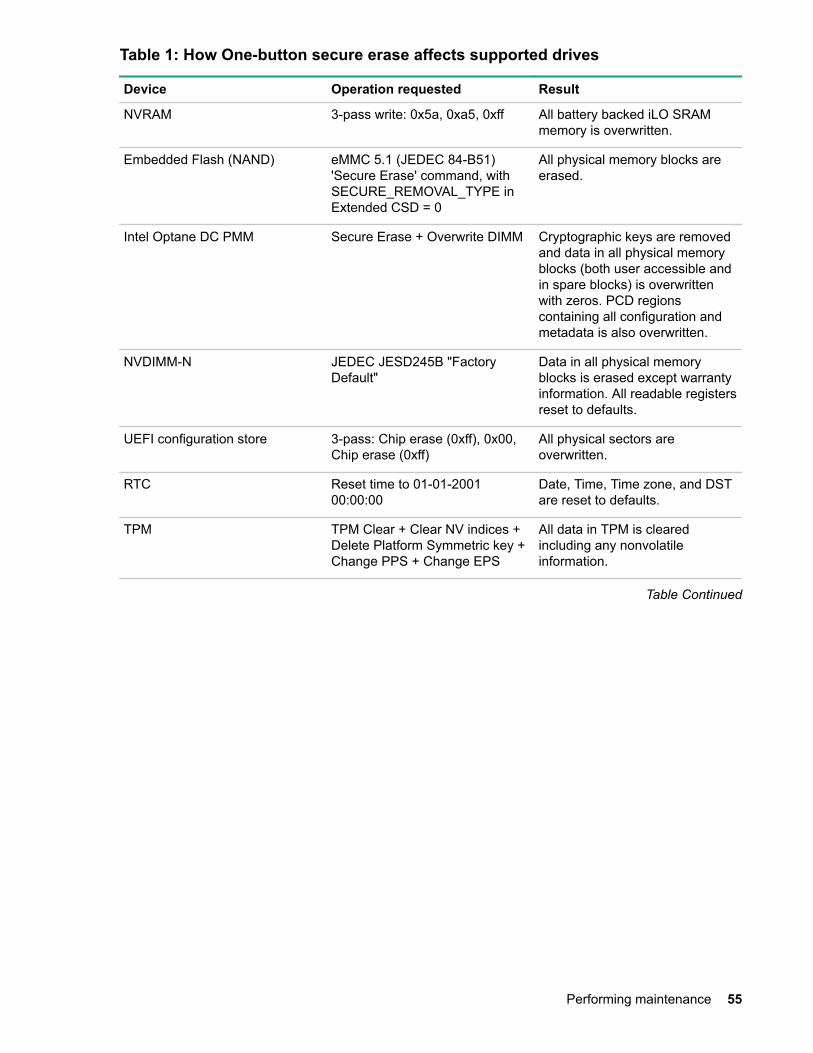
Erasing server data.....................................................................................................................50About erasing data in Intelligent Provisioning.................................................................. 50Using One-button secure erase....................................................................................... 51
Impacts to the system after One-button secure erase completes......................... 52One-button secure erase FAQ.............................................................................. 54
Using System Erase and Reset....................................................................................... 57System Erase and Reset options.......................................................................... 57
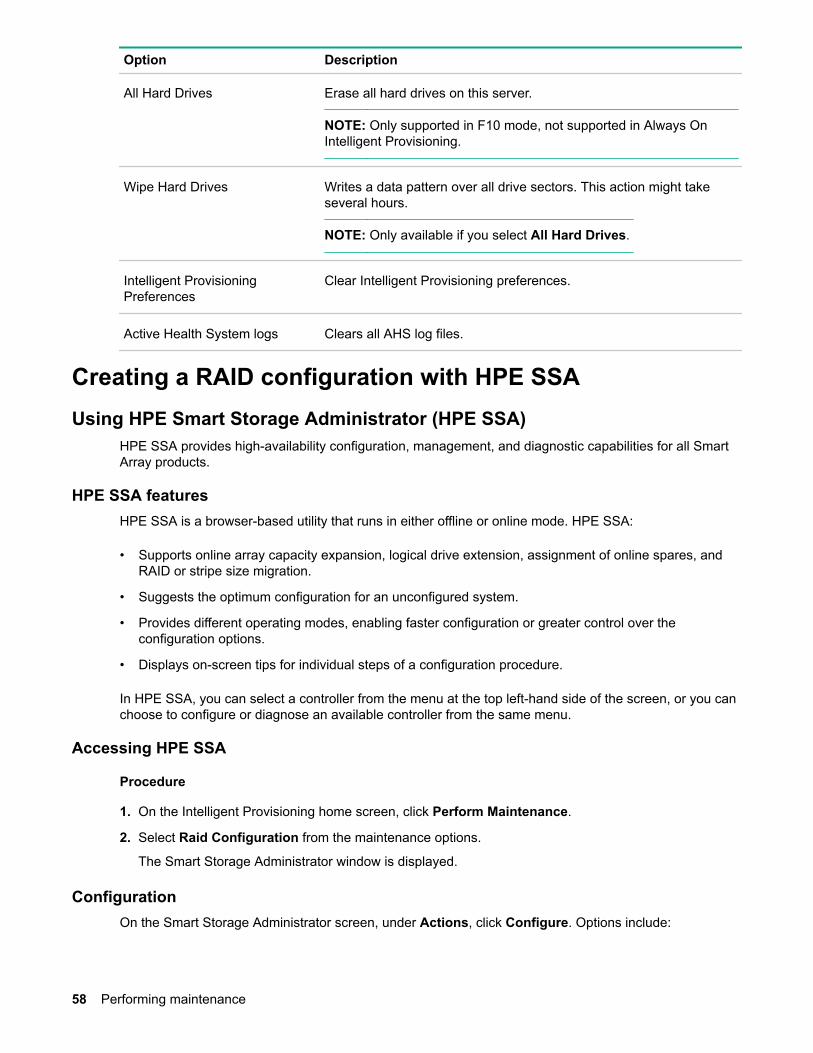
Creating a RAID configuration with HPE SSA............................................................................ 58Using HPE Smart Storage Administrator (HPE SSA)...................................................... 58
Using the USB Key Utility.....................................................................60
4
Troubleshooting.................................................................................... 62Basic troubleshooting techniques............................................................................................... 62Troubleshooting general issues ................................................................................................. 62
iLO log on required during Intelligent Provisioning F10 boot........................................... 62Intelligent Provisioning does not launch when F10 is pressed.........................................62Intelligent Provisioning PXE flashing doesn't re-image Always On IntelligentProvisioning......................................................................................................................63OS Host name field missing.............................................................................................63Accessing version information in deployment settings.....................................................64A browser does not import a deployment profile correctly............................................... 64Some Legacy BIOS Mode installs need specific instructions.......................................... 64Always On Intelligent Provisioning does not display status of NICs................................ 64Cannot create a custom partition size..............................................................................65Intelligent Provisioning cannot launch One-Button secure erase.....................................65One-Button secure erase is unsuccessful or reports errors.............................................66One-Button secure erase succeeds but some drives are not erased.............................. 66One-Button secure erase reports errors, but no specific details...................................... 67
Troubleshooting Windows-specific issues ................................................................................. 67Windows Essentials does not install from USB source....................................................67Windows does not install on AMD servers.......................................................................68
Troubleshooting Linux-specific issues ....................................................................................... 68Unable to proceed with Assisted installation of Red Hat Enterprise Linux 7....................68Assisted installation of Red Hat OS hangs...................................................................... 68
Troubleshooting VMware-specific issues ...................................................................................69Server reboots during VMware Assisted installation........................................................69
Support and other resources...............................................................71Accessing Hewlett Packard Enterprise Support......................................................................... 71Accessing updates......................................................................................................................71Customer self repair....................................................................................................................72Remote support.......................................................................................................................... 72Warranty information...................................................................................................................72Regulatory information................................................................................................................73Documentation feedback............................................................................................................ 73
5
IntroductionTIP: The information in this guide is for using Intelligent Provisioning with ProLiant Gen10 serversand HPE Synergy compute modules. It includes information on using Intelligent Provisioning andHPE Rapid Setup Software. For information on using Intelligent Provisioning with ProLiant Gen8and Gen9 Servers, see the Intelligent Provisioning user guides available on the Information Libraryat (http://www.hpe.com/info/intelligentprovisioning/docs).
Intelligent ProvisioningIntelligent Provisioning is a single-server deployment tool embedded in ProLiant servers and HPESynergy compute modules. Intelligent Provisioning simplifies server setup, providing a reliable andconsistent way to deploy servers.
Intelligent Provisioning 3.30 and later includes HPE Rapid Setup Software. When you launch F10 modefrom the POST screen, you are prompted to select whether you want to enter the Intelligent Provisioningor HPE Rapid Setup Software mode.
NOTE: After you have selected a mode, you must reprovision the server to change the mode thatlaunches when you boot to F10.
Intelligent Provisioning prepares the system for installing original, licensed vendor media and HewlettPackard Enterprise-branded versions of OS software. Intelligent Provisioning also prepares the system tointegrate optimized server support software from the Service Pack for ProLiant (SPP). SPP is acomprehensive systems software and firmware solution for ProLiant servers, server blades, theirenclosures, and HPE Synergy compute modules. These components are preloaded with a basic set offirmware and OS components that are installed along with Intelligent Provisioning.
IMPORTANT: HPE ProLiant XL servers do not support operating system installation with IntelligentProvisioning, but they do support the maintenance features. For more information, see "PerformingMaintenance" in the Intelligent Provisioning user guide and online help.
After the server is running, you can update the firmware to install additional components. You can alsoupdate any components that have been outdated since the server was manufactured.
To access Intelligent Provisioning:
• Press F10 from the POST screen and enter either Intelligent Provisioning or HPE Rapid SetupSoftware.
• From the iLO web interface using Always On. Always On allows you to access IntelligentProvisioning without rebooting your server.
More information
About HPE Rapid Setup Software on page 9
F10/Remote console featuresF10/Remote console allows you to:
• Access HPE Smart Storage Administrator for disk configuration.
• Perform a full set-up of Intelligent Provisioning.
F10/Remote console includes options that are not available in Always On Intelligent Provisioning.
Always On Intelligent ProvisioningAlways On Intelligent Provisioning allows you to:
• Perform functions when the server is off.
• Perform tasks when running an operating system without powering off the server.
In the Always On Intelligent Provisioning version, the Perform Maintenance screen contains utilities thatare not available in iLO. For more information, see the iLO user guide.
NOTE: To install an OS in Always On mode, extract the installation ISO on the FTP server.
Intelligent Provisioning operationIntelligent Provisioning includes the following components:
• Critical boot drivers
• Active Health System (AHS)
• Erase Utility
• Deployment Settings
IMPORTANT:
• Although your server is preloaded with firmware and drivers, Hewlett Packard Enterpriserecommends updating the firmware upon initial setup. Also, downloading and updating the latestversion of Intelligent Provisioning ensures the latest supported features are available.
• For ProLiant servers, firmware is updated using the Intelligent Provisioning Firmware Updateutility.
• Do not update firmware if the version you are currently running is required for compatibility.
NOTE: Intelligent Provisioning does not function within multihomed configurations. A multihomed host isone that is connected to two or more networks or has two or more IP addresses.
Intelligent Provisioning provides installation help for the following operating systems:
• Microsoft Windows Server
• Red Hat Enterprise Linux
• SUSE Linux Enterprise Server
• VMware ESXi/vSphere Custom Image
• ClearOS
Not all versions of an OS are supported. For information about specific versions of a supported operatingsystem, see the OS Support Matrix on the Hewlett Packard Enterprise website (http://www.hpe.com/info/ossupport).
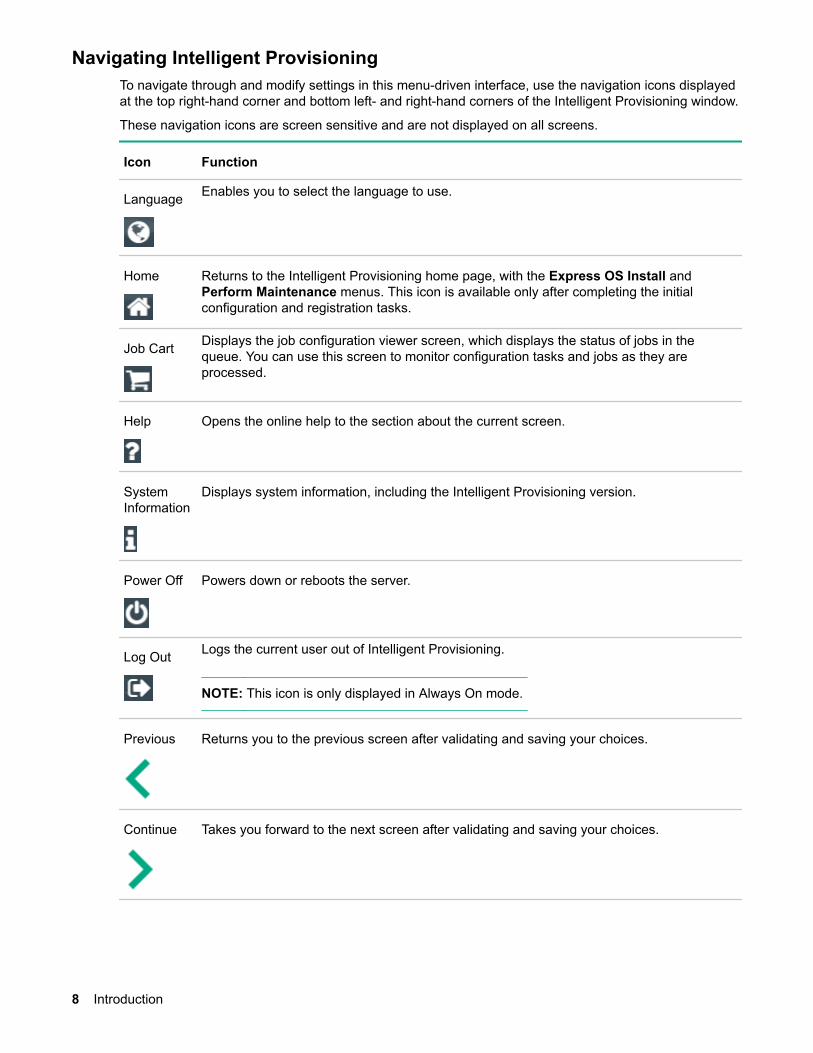
Navigating Intelligent ProvisioningTo navigate through and modify settings in this menu-driven interface, use the navigation icons displayedat the top right-hand corner and bottom left- and right-hand corners of the Intelligent Provisioning window.
These navigation icons are screen sensitive and are not displayed on all screens.
Icon Function
Language Enables you to select the language to use.
Home Returns to the Intelligent Provisioning home page, with the Express OS Install andPerform Maintenance menus. This icon is available only after completing the initialconfiguration and registration tasks.
Job Cart Displays the job configuration viewer screen, which displays the status of jobs in thequeue. You can use this screen to monitor configuration tasks and jobs as they areprocessed.
Help Opens the online help to the section about the current screen.
SystemInformation
Displays system information, including the Intelligent Provisioning version.
Power Off Powers down or reboots the server.
Log Out Logs the current user out of Intelligent Provisioning.
NOTE: This icon is only displayed in Always On mode.
Previous Returns you to the previous screen after validating and saving your choices.
Continue Takes you forward to the next screen after validating and saving your choices.
8 Introduction
About HPE Rapid Setup SoftwareHPE Rapid Setup Software is a simple, fast, and easy way to:
• Manage BIOS settings.
• Configure a RAID on your system.
• Install ClearOS from the Internet or USB.
• Install supported versions of Windows or VMware from USB or network share.
• Use Hardware Validation Tools.
NOTE: HPE Rapid Setup Software does not support installing a Red Hat or SUSE Linux operatingsystem.
Software installed with Intelligent ProvisioningWhen a Windows system is installed using Intelligent Provisioning with Internet access, all the softwareapplications are automatically downloaded and installed. On other operating systems or on a Windowssystem without Internet access, the following applications are not automatically installed with IntelligentProvisioning. To install the following applications, run SPP.
• ProLiant Agentless Management Service (AMS)
• Network Configuration Utility for Windows
• HPE Smart Storage Administrator (HPE SSA)
• Lights-Out Online Configuration Utility
• HPE Rapid Setup Software
Introduction 9
Accessing Intelligent ProvisioningAccessing Intelligent Provisioning from the iLO webinterface
Procedure
1. Open a browser and enter https://<iLO host name or IP address> to log in to the iLO webinterface.
2. Enter a user account name and password, and click Log In.
3. Click Intelligent Provisioning in the navigation tree.
4. Click Always On.
The Intelligent Provisioning web interface opens in a new browser window.
Accessing Intelligent Provisioning using an iLO remoteconsole session
Procedure
1. Open a browser and enter https://<iLO host name or IP address> to log in to the iLO webinterface.
2. From the iLO web interface, navigate to the Remote Console & Media page.
3. Verify that your system meets the requirements for using the remote console application you want touse.
4. Click the launch button for your selected application.
Alternatively, you can click an Integrated Remote Console link on the Information - iLO Overviewpage.
5. Restart or power on the server.
The server restarts and the POST screen appears.
6. Press F10 when prompted during the server POST.
7. Select Intelligent Provisioning.
When accessing Intelligent Provisioning, one of the following happens:
If you are using Intelligent Provisioning for the first time, the First Time Setup wizard will guide youthrough initial configuration and registration tasks. For more information, see Using the First Time Setupwizard on page 11.
To exit Intelligent Provisioning, reboot the server by clicking the power icon at the top right of the page.
10 Accessing Intelligent Provisioning
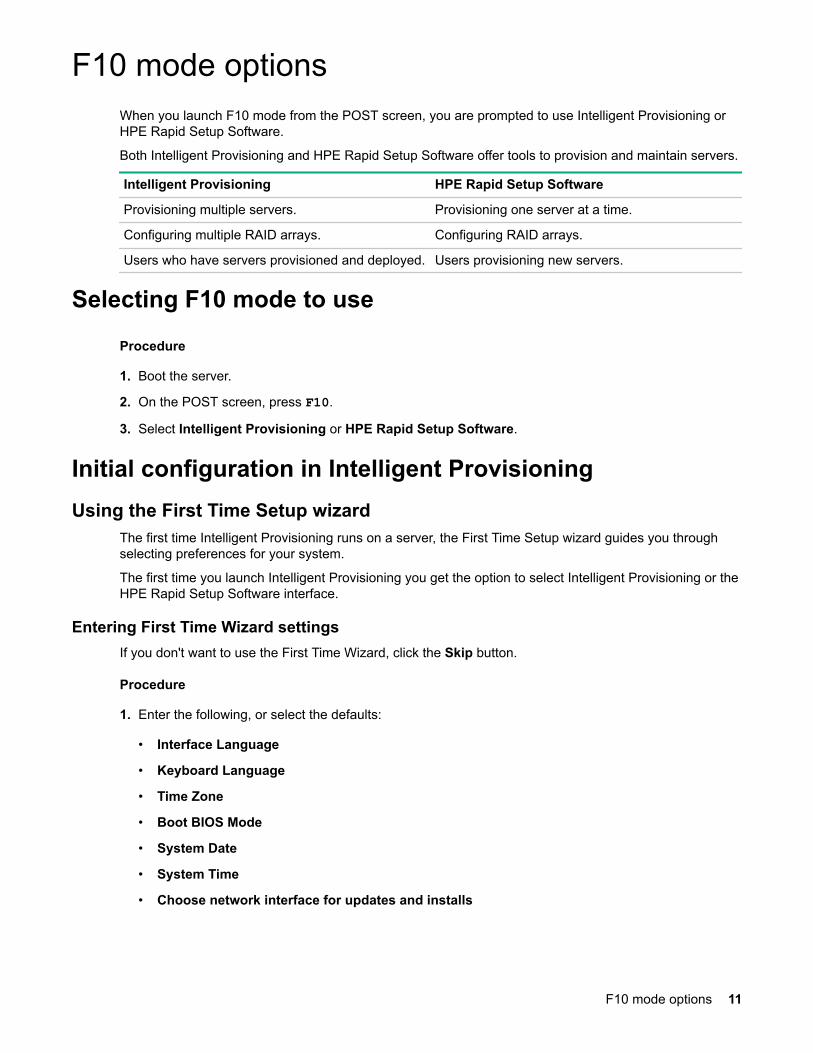
F10 mode optionsWhen you launch F10 mode from the POST screen, you are prompted to use Intelligent Provisioning orHPE Rapid Setup Software.
Both Intelligent Provisioning and HPE Rapid Setup Software offer tools to provision and maintain servers.
Intelligent Provisioning HPE Rapid Setup Software
Provisioning multiple servers. Provisioning one server at a time.
Users who have servers provisioned and deployed. Users provisioning new servers.
Selecting F10 mode to use
Procedure
1. Boot the server.
2. On the POST screen, press F10.
3. Select Intelligent Provisioning or HPE Rapid Setup Software.
Initial configuration in Intelligent ProvisioningUsing the First Time Setup wizard
The first time Intelligent Provisioning runs on a server, the First Time Setup wizard guides you throughselecting preferences for your system.
The first time you launch Intelligent Provisioning you get the option to select Intelligent Provisioning or theHPE Rapid Setup Software interface.
Entering First Time Wizard settingsIf you don't want to use the First Time Wizard, click the Skip button.
Procedure
1. Enter the following, or select the defaults:
• Interface Language
• Keyboard Language
• Time Zone
• Boot BIOS Mode
• System Date
• System Time
• Choose network interface for updates and installs
F10 mode options 11
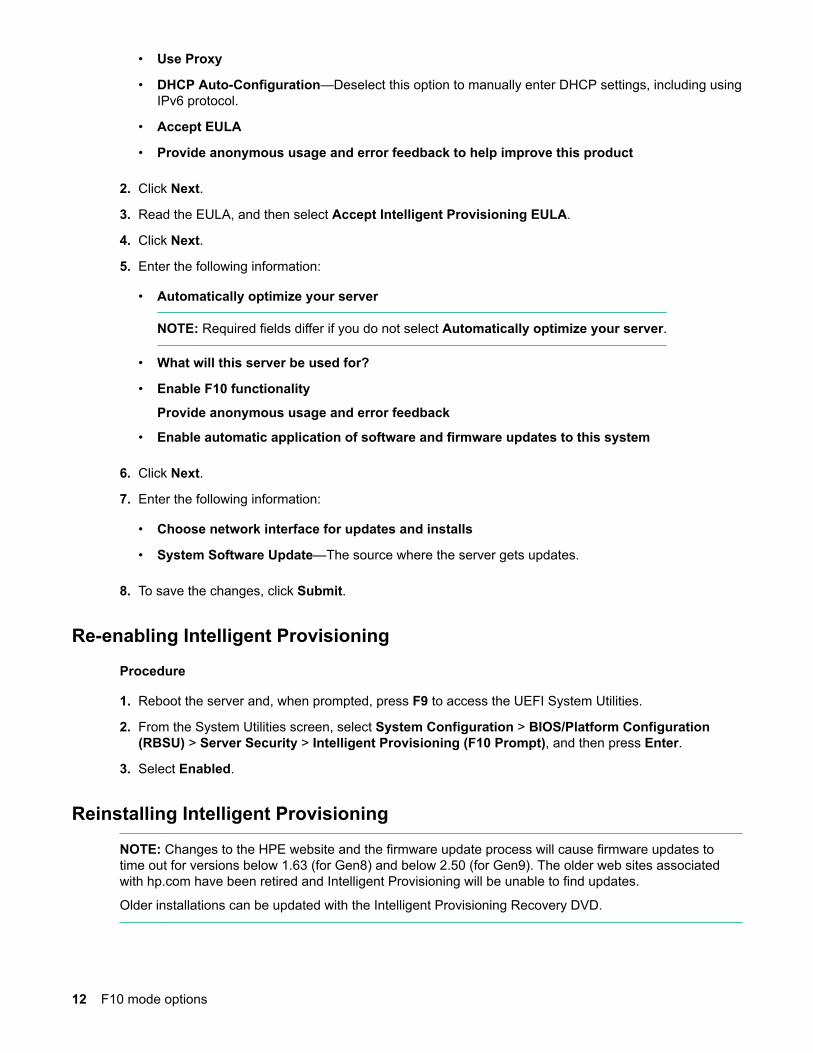
• Use Proxy
• DHCP Auto-Configuration—Deselect this option to manually enter DHCP settings, including usingIPv6 protocol.
• Accept EULA
• Provide anonymous usage and error feedback to help improve this product
2. Click Next.
3. Read the EULA, and then select Accept Intelligent Provisioning EULA.
4. Click Next.
5. Enter the following information:
• Automatically optimize your server
NOTE: Required fields differ if you do not select Automatically optimize your server.
• What will this server be used for?
• Enable F10 functionality
Provide anonymous usage and error feedback
• Enable automatic application of software and firmware updates to this system
6. Click Next.
7. Enter the following information:
• Choose network interface for updates and installs
• System Software Update—The source where the server gets updates.
8. To save the changes, click Submit.
Re-enabling Intelligent Provisioning
Procedure
1. Reboot the server and, when prompted, press F9 to access the UEFI System Utilities.
2. From the System Utilities screen, select System Configuration > BIOS/Platform Configuration(RBSU) > Server Security > Intelligent Provisioning (F10 Prompt), and then press Enter.
3. Select Enabled.
Reinstalling Intelligent Provisioning
NOTE: Changes to the HPE website and the firmware update process will cause firmware updates totime out for versions below 1.63 (for Gen8) and below 2.50 (for Gen9). The older web sites associatedwith hp.com have been retired and Intelligent Provisioning will be unable to find updates.
Older installations can be updated with the Intelligent Provisioning Recovery DVD.
12 F10 mode options
You can reinstall Intelligent Provisioning instead of using the Firmware Update Utility to ensure you havethe latest version. There are two methods for reinstalling Intelligent Provisioning.
Reinstalling from an ISO image
Procedure
1. Download the ISO image file for the latest Intelligent Provisioning recovery media by clickingDownload from the Intelligent Provisioning website (http://www.hpe.com/info/intelligentprovisioning).
NOTE: The following servers and Intelligent Provisioning versions are supported:
• Gen8 supports Intelligent Provisioning 1.x.
• Gen9 supports Intelligent Provisioning 2.x.
• Gen10 supports Intelligent Provisioning 3.x.
2. To download the ISO image file, complete the onscreen instructions.
3. Mount the ISO file in one of the following ways:
• Using iLO virtual media.
• Burn the Intelligent Provisioning recovery media ISO file to a DVD and place it in the CD/DVD driveof the server.
4. To power up the server Press ON.
5. To display the boot menu, press F11 during server POST.
6. Press 1 on the keyboard to boot from the CD/DVD.
7. To update or reinstall Intelligent Provisioning, select the interactive method. The server continuesbooting from the Intelligent Provisioning recovery media.
8. Select Reinstall Intelligent Provisioning when the window opens.
9. Reboot the server when the installation is complete by pressing F10.
Reinstalling from an RPM package (Linux only)
Procedure
1. Download the RPM package file for the latest Intelligent Provisioning recovery RPM package from theSDR website (https://downloads.linux.hpe.com/SDR/repo/ip/).
2. Execute the command:
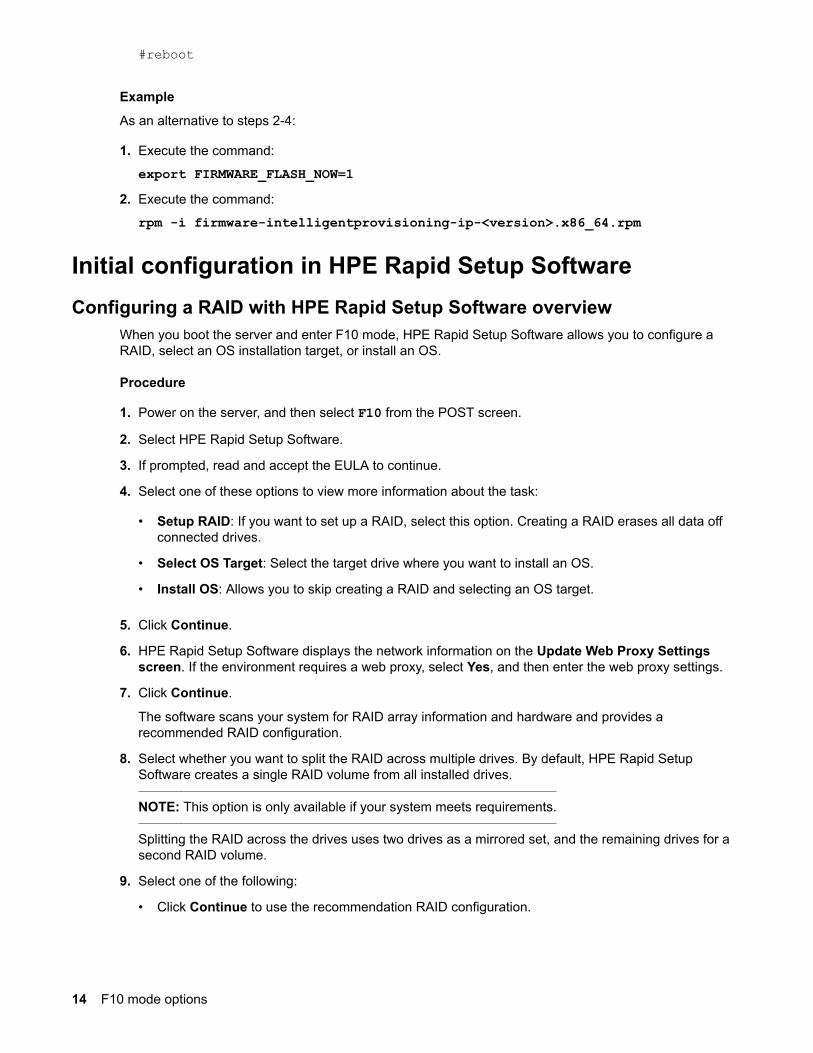
rpm -i firmware-intelligentprovisioning-<version>.x86_64.rpm3. Execute the command:
cd /usr/lib/x86_64-linux-gnu/firmware-intelligentprovisioning-ip-<version>/4. Execute the command:
Initial configuration in HPE Rapid Setup SoftwareConfiguring a RAID with HPE Rapid Setup Software overview
When you boot the server and enter F10 mode, HPE Rapid Setup Software allows you to configure aRAID, select an OS installation target, or install an OS.
Procedure
1. Power on the server, and then select F10 from the POST screen.
2. Select HPE Rapid Setup Software.
3. If prompted, read and accept the EULA to continue.
4. Select one of these options to view more information about the task:
• Setup RAID: If you want to set up a RAID, select this option. Creating a RAID erases all data offconnected drives.
• Select OS Target: Select the target drive where you want to install an OS.
• Install OS: Allows you to skip creating a RAID and selecting an OS target.
5. Click Continue.
6. HPE Rapid Setup Software displays the network information on the Update Web Proxy Settingsscreen. If the environment requires a web proxy, select Yes, and then enter the web proxy settings.
7. Click Continue.
The software scans your system for RAID array information and hardware and provides arecommended RAID configuration.
8. Select whether you want to split the RAID across multiple drives. By default, HPE Rapid SetupSoftware creates a single RAID volume from all installed drives.
NOTE: This option is only available if your system meets requirements.
Splitting the RAID across the drives uses two drives as a mirrored set, and the remaining drives for asecond RAID volume.
9. Select one of the following:
• Click Continue to use the recommendation RAID configuration.
14 F10 mode options
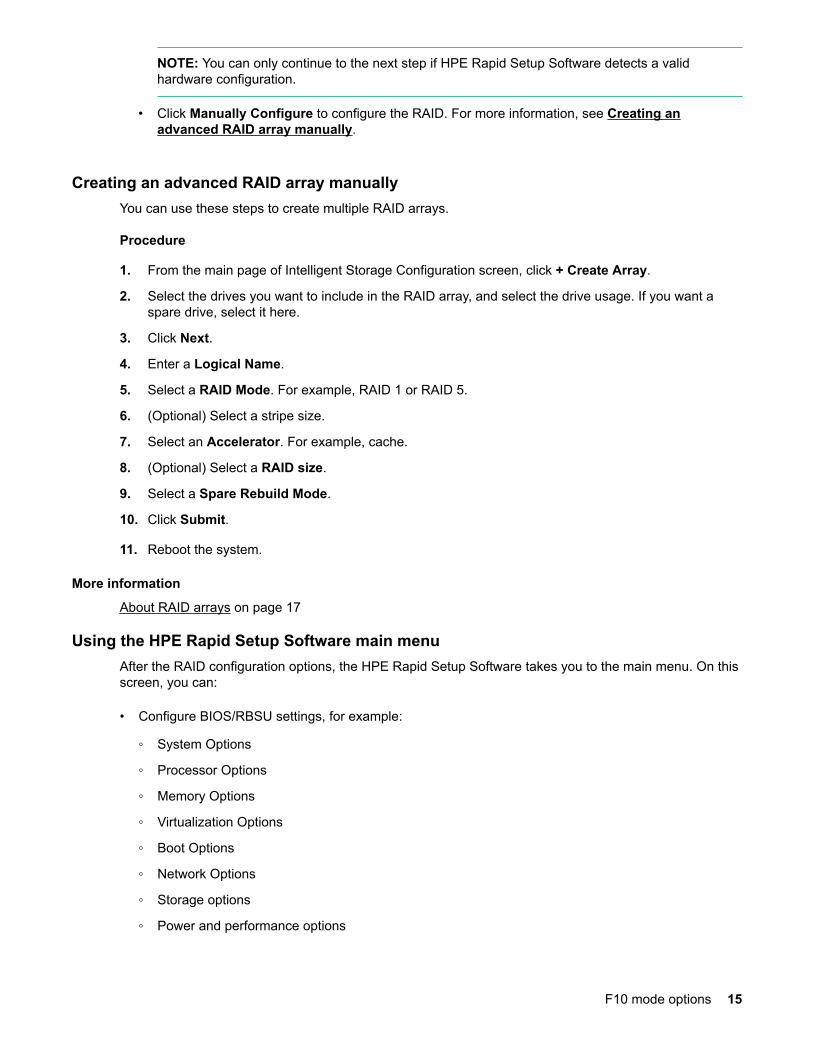
NOTE: You can only continue to the next step if HPE Rapid Setup Software detects a validhardware configuration.
• Click Manually Configure to configure the RAID. For more information, see Creating anadvanced RAID array manually.
Creating an advanced RAID array manuallyYou can use these steps to create multiple RAID arrays.
Procedure
1. From the main page of Intelligent Storage Configuration screen, click + Create Array.
2. Select the drives you want to include in the RAID array, and select the drive usage. If you want aspare drive, select it here.
3. Click Next.
4. Enter a Logical Name.
5. Select a RAID Mode. For example, RAID 1 or RAID 5.
6. (Optional) Select a stripe size.
7. Select an Accelerator. For example, cache.
8. (Optional) Select a RAID size.
9. Select a Spare Rebuild Mode.
10. Click Submit.
11. Reboot the system.
More information
About RAID arrays on page 17
Using the HPE Rapid Setup Software main menuAfter the RAID configuration options, the HPE Rapid Setup Software takes you to the main menu. On thisscreen, you can:
• Configure BIOS/RBSU settings, for example:
◦ System Options
◦ Processor Options
◦ Memory Options
◦ Virtualization Options
◦ Boot Options
◦ Network Options
◦ Storage options
◦ Power and performance options
F10 mode options 15
◦ Embedded UEFI shell
◦ Server Security
◦ PCIe device configuration
◦ Advanced options
◦ Date and Time
◦ System default options
◦ Language settings
• Configure RAID settings.
• Perform hardware validation tests.
• Install a supported operating system.
More information
About Hardware Validation Tool on page 49Configuring the server and installing an OS with Intelligent Provisioning on page 23Using the BIOS Configuration (RBSU) utility on page 38
Installing an operating system with HPE Rapid Setup SoftwareHPE Rapid Setup Software allows you to install the supported versions of Windows, ClearOS, andVMware. If you want to install a Linux operating system that is supported on your server, use IntelligentProvisioning to install the operating system.
Prerequisites
• HPE Rapid Setup Software supports installing ClearOS from a USB key or the Internet.
• HPE Rapid Setup Software supports installing supported Windows or VMware operating system froma USB key or network location.
• When installing from a USB key, plug the media into the server.
• When installing from a network drive, make sure that the files are available.
• Complete the RAID setup instructions. For more information, see Configuring a RAID with HPERapid Setup Software overview.
NOTE: If HPE Rapid Setup Software displays a message that firmware updates are available, you canclick Go to view the available updates. When you install the OS, HPE Rapid Setup Software also updatesthe firmware.
Procedure
1. From the main menu, select the operating system that you want to install.
2. Select the network location where the operating system files are saved, or navigate to the operatingsystem installation files.
3. Follow the onscreen prompts.
16 F10 mode options
NOTE: Hewlett Packard Enterprise recommends updating firmware, software, and drivers afterinstalling an operating system.
Once all HPE Rapid Setup Software settings are recorded, the software reboots the server. Thesoftware might reboot the server multiple times as it applies the configuration settings. After the OS isinstalled, you can configure the OS.
More information
Updating firmware on page 29Configuring a RAID with HPE Rapid Setup Software overview on page 14
About RAID arraysRAID arrays can help increase system performance and reduce the risk of drive failure. You can createRAID arrays with drives with different specifications, but performance will be based on the smallest driveor lowest speed. For example, if you create an array with a 1 TB drive and a 2 TB drive, then the arraycan store a maximum 1 TB of data. The extra storage on the larger drive is not available until youreformat the drive.
RAID 0A RAID 0 configuration provides data striping, but there is no protection against data loss when a drivefails. However, it is useful for rapid storage of large amounts of noncritical data (for printing or imageediting, for example) or when cost is the most important consideration. The minimum number of drivesrequired is one.
This method has the following benefits:
• Useful when performance and low cost are more important than data protection.
• Has the highest write performance of all RAID methods.
• Has the lowest cost per unit of stored data of all RAID methods.
• All drive capacity is used to store data (none allocated for fault tolerance).
F10 mode options 17
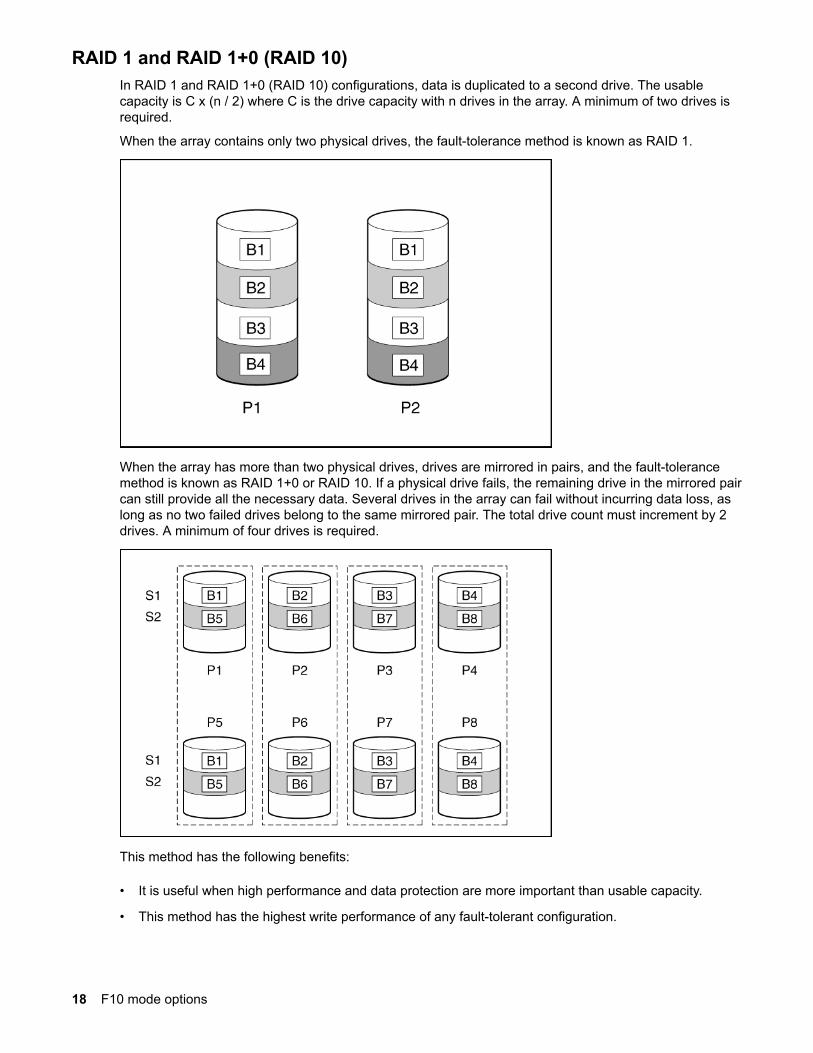
RAID 1 and RAID 1+0 (RAID 10)In RAID 1 and RAID 1+0 (RAID 10) configurations, data is duplicated to a second drive. The usablecapacity is C x (n / 2) where C is the drive capacity with n drives in the array. A minimum of two drives isrequired.
When the array contains only two physical drives, the fault-tolerance method is known as RAID 1.
When the array has more than two physical drives, drives are mirrored in pairs, and the fault-tolerancemethod is known as RAID 1+0 or RAID 10. If a physical drive fails, the remaining drive in the mirrored paircan still provide all the necessary data. Several drives in the array can fail without incurring data loss, aslong as no two failed drives belong to the same mirrored pair. The total drive count must increment by 2drives. A minimum of four drives is required.
This method has the following benefits:
• It is useful when high performance and data protection are more important than usable capacity.
• This method has the highest write performance of any fault-tolerant configuration.
18 F10 mode options
• No data is lost when a drive fails, as long as no failed drive is mirrored to another failed drive.
• Up to half of the physical drives in the array can fail.
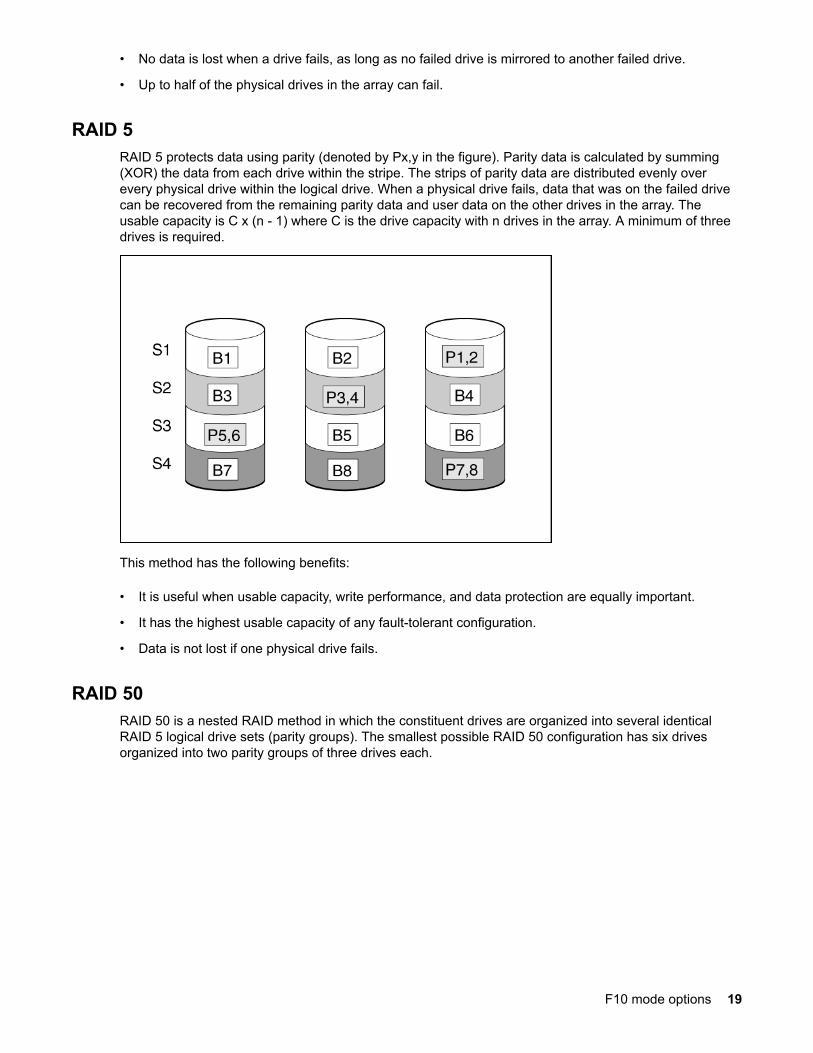
RAID 5RAID 5 protects data using parity (denoted by Px,y in the figure). Parity data is calculated by summing(XOR) the data from each drive within the stripe. The strips of parity data are distributed evenly overevery physical drive within the logical drive. When a physical drive fails, data that was on the failed drivecan be recovered from the remaining parity data and user data on the other drives in the array. Theusable capacity is C x (n - 1) where C is the drive capacity with n drives in the array. A minimum of threedrives is required.
This method has the following benefits:
• It is useful when usable capacity, write performance, and data protection are equally important.
• It has the highest usable capacity of any fault-tolerant configuration.
• Data is not lost if one physical drive fails.
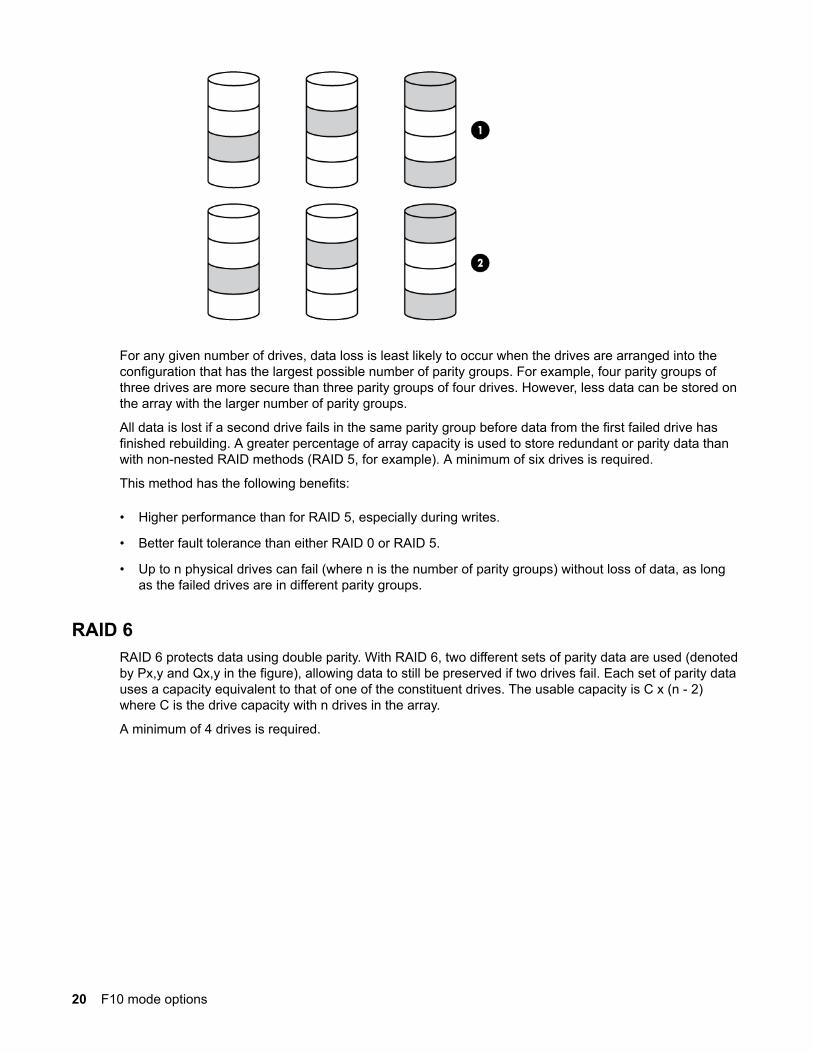
RAID 50RAID 50 is a nested RAID method in which the constituent drives are organized into several identicalRAID 5 logical drive sets (parity groups). The smallest possible RAID 50 configuration has six drivesorganized into two parity groups of three drives each.
F10 mode options 19
For any given number of drives, data loss is least likely to occur when the drives are arranged into theconfiguration that has the largest possible number of parity groups. For example, four parity groups ofthree drives are more secure than three parity groups of four drives. However, less data can be stored onthe array with the larger number of parity groups.
All data is lost if a second drive fails in the same parity group before data from the first failed drive hasfinished rebuilding. A greater percentage of array capacity is used to store redundant or parity data thanwith non-nested RAID methods (RAID 5, for example). A minimum of six drives is required.
This method has the following benefits:
• Higher performance than for RAID 5, especially during writes.
• Better fault tolerance than either RAID 0 or RAID 5.
• Up to n physical drives can fail (where n is the number of parity groups) without loss of data, as longas the failed drives are in different parity groups.
RAID 6RAID 6 protects data using double parity. With RAID 6, two different sets of parity data are used (denotedby Px,y and Qx,y in the figure), allowing data to still be preserved if two drives fail. Each set of parity datauses a capacity equivalent to that of one of the constituent drives. The usable capacity is C x (n - 2)where C is the drive capacity with n drives in the array.
A minimum of 4 drives is required.
20 F10 mode options
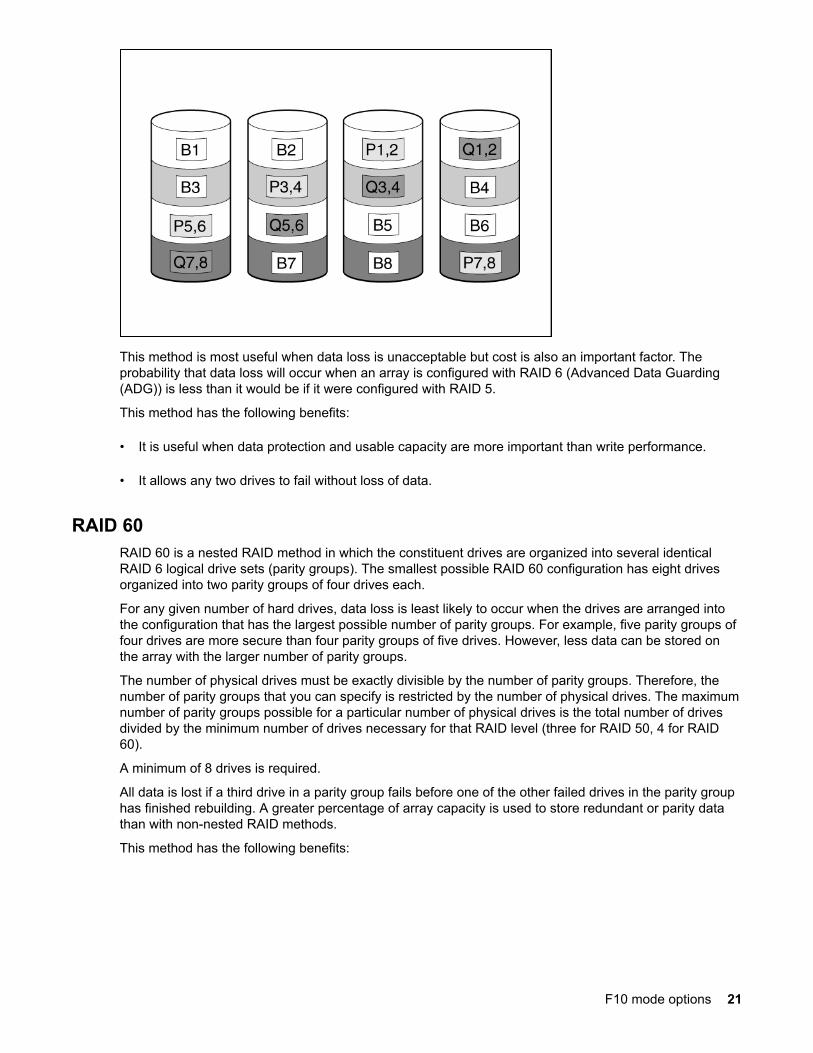
This method is most useful when data loss is unacceptable but cost is also an important factor. Theprobability that data loss will occur when an array is configured with RAID 6 (Advanced Data Guarding(ADG)) is less than it would be if it were configured with RAID 5.
This method has the following benefits:
• It is useful when data protection and usable capacity are more important than write performance.
• It allows any two drives to fail without loss of data.
RAID 60RAID 60 is a nested RAID method in which the constituent drives are organized into several identicalRAID 6 logical drive sets (parity groups). The smallest possible RAID 60 configuration has eight drivesorganized into two parity groups of four drives each.
For any given number of hard drives, data loss is least likely to occur when the drives are arranged intothe configuration that has the largest possible number of parity groups. For example, five parity groups offour drives are more secure than four parity groups of five drives. However, less data can be stored onthe array with the larger number of parity groups.
The number of physical drives must be exactly divisible by the number of parity groups. Therefore, thenumber of parity groups that you can specify is restricted by the number of physical drives. The maximumnumber of parity groups possible for a particular number of physical drives is the total number of drivesdivided by the minimum number of drives necessary for that RAID level (three for RAID 50, 4 for RAID60).
A minimum of 8 drives is required.
All data is lost if a third drive in a parity group fails before one of the other failed drives in the parity grouphas finished rebuilding. A greater percentage of array capacity is used to store redundant or parity datathan with non-nested RAID methods.
This method has the following benefits:
F10 mode options 21
• Higher performance than for RAID 6, especially during writes.
• Better fault tolerance than RAID 0, 5, 50, or 6.
• Up to 2n physical drives can fail (where n is the number of parity groups) without loss of data, as longas no more than two failed drives are in the same parity group.
Dedicated spareThe dedicated spare drive activates any time a drive within the array fails.
Failure spare activationFailure spare activation mode activates a spare drive when a member drive within an array fails usingfault tolerance methods to regenerate the data.
Assigning one or more online spare drives to an array enables you to postpone replacement of faultydrives.
22 F10 mode options
Configuring the server and installing anoperating system
Follow the instructions to configure the hardware and install an OS on your server.
Configuring the server and installing an OS with IntelligentProvisioning
Follow the onscreen prompts in the Intelligent Provisioning Express OS Install menu to complete thefollowing tasks:
Procedure
1. Selecting hardware settings on page 23
2. Selecting the OS on page 26
3. Reviewing your settings on page 28
More information
Using the HPE Rapid Setup Software main menu on page 15
Server support and special characters
• ProLiant XL Servers do not support operating system installations with Intelligent Provisioning. Theseservers do support the maintenance features described in Performing maintenance on page 29,except deploying the operating systems installations.
• You can only use special characters in passwords. Do not use special characters in any other datafields. Special characters, punctuation, and spaces are not supported in any pathname.
Source media types and installation methods supported for each OSEach Express OS Install screen provides a guided method for configuring the server, installing an OS,and updating the system software.
IMPORTANT: Intelligent Provisioning only supports original, licensed vendor media or HewlettPackard Enterprise-branded versions. Demo or developer versions of the OS, or media that hasbeen modified to slipstream custom software or service packs, are not supported and might not becorrectly identified by the installation process.
For more information about source media and installation methods supported by each OS, see theIntelligent Provisioning Release Notes.
Selecting hardware settings
Procedure
1. Select Express OS Install on the Intelligent Provisioning home screen.
The Operating System Installation screen appears.
2. Select a RAID Configuration option.
Configuring the server and installing an operating system 23
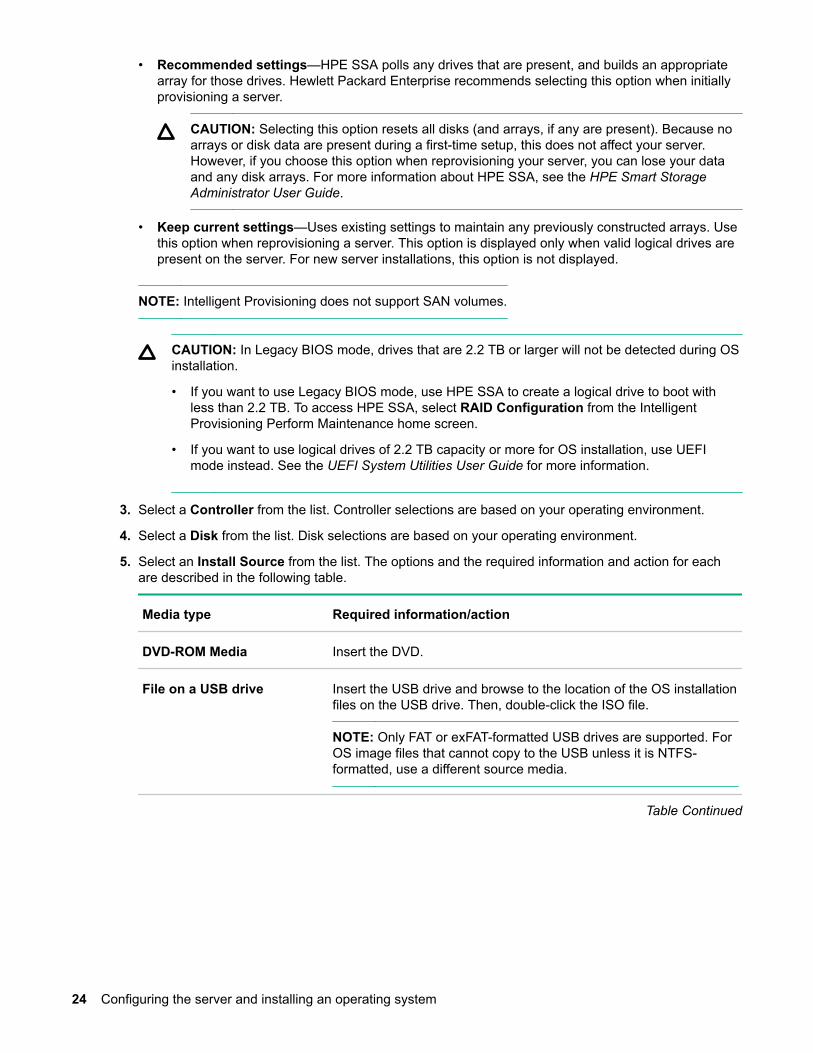
• Recommended settings—HPE SSA polls any drives that are present, and builds an appropriatearray for those drives. Hewlett Packard Enterprise recommends selecting this option when initiallyprovisioning a server.
CAUTION: Selecting this option resets all disks (and arrays, if any are present). Because noarrays or disk data are present during a first-time setup, this does not affect your server.However, if you choose this option when reprovisioning your server, you can lose your dataand any disk arrays. For more information about HPE SSA, see the HPE Smart StorageAdministrator User Guide.
• Keep current settings—Uses existing settings to maintain any previously constructed arrays. Usethis option when reprovisioning a server. This option is displayed only when valid logical drives arepresent on the server. For new server installations, this option is not displayed.
NOTE: Intelligent Provisioning does not support SAN volumes.
CAUTION: In Legacy BIOS mode, drives that are 2.2 TB or larger will not be detected during OSinstallation.
• If you want to use Legacy BIOS mode, use HPE SSA to create a logical drive to boot withless than 2.2 TB. To access HPE SSA, select RAID Configuration from the IntelligentProvisioning Perform Maintenance home screen.
• If you want to use logical drives of 2.2 TB capacity or more for OS installation, use UEFImode instead. See the UEFI System Utilities User Guide for more information.
3. Select a Controller from the list. Controller selections are based on your operating environment.
4. Select a Disk from the list. Disk selections are based on your operating environment.
5. Select an Install Source from the list. The options and the required information and action for eachare described in the following table.
Media type Required information/action
DVD-ROM Media Insert the DVD.
File on a USB drive Insert the USB drive and browse to the location of the OS installationfiles on the USB drive. Then, double-click the ISO file.
NOTE: Only FAT or exFAT-formatted USB drives are supported. ForOS image files that cannot copy to the USB unless it is NTFS-formatted, use a different source media.
Table Continued
24 Configuring the server and installing an operating system
Media type Required information/action
SMB/CIFS (Windows Share) Enter network connection information, including:
• Server Name or IP Address—Server name or IP address of theserver that hosts the OS contents. If a server name is specified, aDNS entry is also required.
• Share Name—The name of the network share using ServerMessage Block (SMB) protocol that hosts the OS contents.
• Network Share User—User name used to access the networkshare.
• Network Share Password (not encrypted)—Password for theuser name used to access the network share.
An anonymous FTP server Enter network connection information, including:
Server Name or IP Address—FTP server name or IP address ofthe server that hosts the OS contents. FTP support requiresanonymous access to the FTP server and does not supportconnecting to an FTP server through a proxy.
IMPORTANT: When entering an FTP path, remove spacesand punctuation. The FTP server directory structure cannotcontain spaces or special characters (including punctuation).
6. Select whether to do a Firmware Update.
• Skip Update—Default. No firmware updates are performed before the OS installation.
• Update before OS Install—Firmware updates available according to the baseline defined in thelatest SPP are done before OS installation.
7. Select an Install Method.
NOTE: If using Always On (Intelligent Provisioning accessed from the iLO web interface), only theAssisted Install option is listed.
• Assisted Install—An express installation process uses Hewlett Packard Enterprise-defineddefaults to configure the server software and firmware, partition storage, and install the OS withdrivers. It also performs a software and firmware update if the network is available at your location.Hewlett Packard Enterprise recommends selecting this option for first-time server setup.
Configuring the server and installing an operating system 25
NOTE: The ProLiant iLO 5 Channel Interface Driver is installed automatically if you use theIntelligent Provisioning Assisted Install method for Windows installation. The ProLiant iLO 5Channel Interface Driver is standard for SUSE Linux Enterprise Server, Red Hat Enterprise Linux,and ClearOS.
• Manual—Installs the OS from a custom OS CD/DVD without searching the web. After selecting thisoption, insert the provided CD/DVD so that the server can reboot from the OS CD/DVD. IntelligentProvisioning partitions storage based on OS recommendations.
NOTE: The Legacy BIOS boot order cannot be changed by pressing F10. If doing an assisted or amanual install in Legacy BIOS mode, you must ensure that:◦ On Windows system:
– Manual install: The system only boots to a DVD.
– Assisted install: The system boots to a hard drive.
◦ On Linux/VMware, the system boots to the hard drive.
Do this by changing the boot order or by pressing F11 to choose at boot.
8. To proceed to Selecting the OS, click the Continue right arrow.
IMPORTANT: If an unsupported media device is selected, you will not be able to continue to thenext screen. To resolve the issue, remove the unsupported media device, and make sure thatyou have a supported install source when prompted.
Selecting the OSYou can use Always On Intelligent Provisioning mode supports installing an OS from:
• FTP server
• SMB/CIFS (Windows share)
• Virtual media source
◦ Local ISO
◦ URL
• Install Clear OS from the Internet
Prerequisites
To install an OS in Always On mode from an FTP server, extract the installation ISO. An ISO that is notextracted it too large to install from an FTP source.
Procedure
1. Select an operating system or choose the default. OS Language, OS Keyboard, and Time Zone areautomatically filtered.
Supported OS families include:
26 Configuring the server and installing an operating system
• Microsoft Windows
NOTE: Microsoft Windows Essentials are supported from an ISO only, not a USB or networksource.
• VMware vSphere Custom Image
• SUSE Linux Enterprise Server
• Red Hat Enterprise Linux
• ClearOS
NOTE: Certain ProLiant servers require an HPE Customized image for a successful VMware ESXiinstallation. For more information or to download an image, see the Hewlett Packard Enterprisewebsite at http://www.hpe.com/info/esxidownload.
2. Enter information into the following fields (automatically selected in manual installations):
• Organization Name
• Owner Name
• Optional Password
• Confirm Password
NOTE: When creating passwords, refer to the operating system documentation for passwordrequirements. Requirements might include:
• Minimum password length
• Maximum password length
• Upper case letters
• Lower case letters
• Punctuation marks !@#$%^&*_.
• Special characters
NOTE: Windows Linux only support using the underscore _ special character.
If you do not provide a password, Windows prompts for a password on first boot. Linux and VMwareESXi 6.5 and earlier use the default password password. VMware ESXi 6.5U and later use thepassword Passw0rd_.
a. For manual installations, select the operating system again after entering the product key.
3. Enter Hyper-V role for the system.
4. Enable Windows Firewall.
5. To proceed to Reviewing your settings, click the Continue right arrow.
Configuring the server and installing an operating system 27
CAUTION: Continuing past this screen resets the drives to a newly installed state and installs theselected OS. Any existing information on the server is erased. This does not affect a first-time setup,because there is no data present on the server.
Procedure
1. Review and confirm your deployment settings.
2. Click the Continue right arrow to begin the automated installation and configuration process.Depending on the deployment settings, a variety of screens are displayed, providing progressinformation about the installation.
Checking installation parametersDuring the installation and configuration process, consider the following:
• A EULA might be displayed.
• The Firmware Update screen might be displayed at this time, depending on the following two systemsettings:◦ In the Preferences screen, System Software Update must have been enabled. See Setting
preferences for more information.
◦ In the Operating System Installation screen, Update before OS Install must have beenselected. See Selecting hardware settings for more information.
If the Firmware Update screen is displayed, follow the onscreen prompts to obtain and install thelatest firmware on server components. When the updates are complete, the Installing OS page isdisplayed, ready to begin the OS installation.
• If you attempt to deploy an OS on a server with no installed drives, the server reboots. After POSTcompletes, a page is displayed indicating that the settings are being applied. The deployment does notproceed, but messages are written to the IML.
• For Windows installations, messages about an untested Windows version and hpkeyclick messagesmight be displayed while the drivers are installed. This is expected behavior. No action is required.
28 Configuring the server and installing an operating system
Performing maintenanceNOTE: The following maintenance tasks are not supported on an HPE Synergy compute module:
• Downloading Active Health System data
• Updating firmware
• Using iLO Configuration Utility
To perform these tasks on an HPE Synergy compute module, you must use HPE OneView.
Updating firmwareHPE servers and their installed hardware options are preloaded with the latest firmware. However,updated firmware might be available. You can use Intelligent Provisioning to find and deploy availableupdates.
• For ProLiant servers, use the Intelligent Provisioning Firmware Update utility to find and apply thelatest firmware.
• For HPE Synergy compute modules, use HPE OneView to update the firmware. IntelligentProvisioning updates can be performed when an SPP update is available.
NOTE: The Intelligent Provisioning Firmware Update utility reflects the latest updates available in thebaseline defined in the latest SPP. Updates that are not in the SPP baseline do not appear on theupdates list.
You can use the Firmware Update utility to roll back to older versions of components.
Prerequisites
To update firmware, make sure that port 443 is open for SSL communication.
Procedure
1. Boot the system, and then press F10 at the POST screen.
2. On the Intelligent Provisioning home screen, click Perform Maintenance.
3. Select Firmware Update from the maintenance options.
The system searches for firmware on the source configured in the System Software Update settings.This process might take a few minutes; wait for the display to generate the results. If no new firmwareis available, the current version is displayed in the Firmware Update screen.
NOTE: Alternatively, you can download and copy the SPP ISO to a DVD or USB key. To downloadSPP, see the website (http://www.hpe.com/servers/spp/download). For instructions on using theISO, see the Service Pack for ProLiant Quick Start Guide on the website (http://www.hpe.com/support/SPP_UG_en).
Updates create versions that you can use to undo an update.
• Rollback to previous
NOTE: This feature allows you to return to a previous firmware version. You can choose specificfirmware versions you can roll back.
5. Select the items to update, and then click Submit.
6. The Job Configuration Viewer screen displays the selected items.
7. Do one of the following:
• Launch Now
• Add another job
8. Click Reboot at the completion of the firmware update process.
Determining the installed Intelligent Provisioning version
To check the Intelligent Provisioning version, click the System Information Intelligent ProvisioningImage version is listed.
Setting Intelligent Provisioning PreferencesUse Intelligent Provisioning Preferences to change basic preferences, including the interface andkeyboard languages, network and share setting, system date and time, and software update settings. Inaddition, the EULA is accessible from this screen.
Procedure
1. On the Intelligent Provisioning home screen, click Perform Maintenance.
2. Select Intelligent Provisioning Preferences from the maintenance options.
3. Select settings for the following options:
• Interface Language
• Keyboard Language
• Boot BIOS Mode
• System Software Update—Select a source updates.
• Time Zone
• System Date
• System Time
• Choose network interface for updates and installs
• Use Proxy, and provide proxy details.
• DHCP Auto-Configuration, and provide the configuration details.
30 Performing maintenance
• Accept EULA, or click Read EULA.
• Provide anonymous usage and error feedback to help improve this product. No personaldata is collected and it will not be shared with third parties.
4. Click Submit.
When Intelligent Provisioning is run for the first time on a server, this is the first screen that is displayedwithin Intelligent Provisioning. For more information about the fields on this screen, see Using the FirstTime Setup wizard.
Downloading Active Health System dataHPE Support uses the Active Health System (AHS) log file for problem resolution.
Use the Active Health System Log screen to download AHS telemetry data from the server onto a USBkey in the form of an AHS log file case number or a default string with an .ahs extension. Use this screento select the duration for which data needs to be extracted and the USB key as destination media. Youcan select a specific start and end date to limit the duration of data extraction.
If connected through iLO, locally connected USB keys shared through virtual devices can also be used forsaving AHS log information.
The high level steps for submitting a case are:
Procedure
1. Download an AHS Log from the server experiencing a support issue. See Downloading an ActiveHealth System log.
2. Upload the AHS Log to the Active Health System Viewer at http://www.hpe.com/servers/AHSV. SeeUploading an AHS log to AHSV.
3. Review the Fault Detection Analytics for any self-repair actions/recommendations. See the AHSV UserGuide for more information.
4. Create a support case using the AHSV Navigation menu. See the AHSV User Guide for moreinformation.
Downloading an Active Health System log
Procedure
1. Insert a USB key into the server.
2. To go directly to Intelligent Provisioning, press the F10 during the boot.
3. On the Intelligent Provisioning home screen, click Perform Maintenance.
4. From the maintenance options, select Active Health System Log from the maintenance options.
The Active Health System Log screen appears.
5. Enter a start date and an end date, and then click Download logs.
6. Select the USB key from the Removable Device to Save Log to list.
7. Define the period for which to retrieve data by selecting the From and To dates. Hewlett PackardEnterprise recommends retrieving seven days of data, which creates a 10 MB to 15 MB file.
8. If there is an associated HPE Support Case Number, enter it. You can also enter a Contact Nameand email address. The contact information helps HPE Support assist with the issue.
9. Click Download Logs to save the data to the USB key.
NOTE: Do not remove the USB key until the download has completed and the media lights clear.
Once the data has been downloaded, upload it to the Active Health System Viewer at http://www.hpe.com/servers/AHSV.
Uploading an AHS log to AHSVThe maximum file size limit is 250 MB. For logs that are larger than 250 MB, contact the HPE SupportCenter for assistance.
Perform this task in AHSV.
Prerequisites
IMPORTANT: The server from which the AHS log was created must have a valid warranty. If theserver is out of warranty, an error message is displayed: Server is not Entitled. Checkthese options for renewing your license. The options include:
• Buy more licenses.
• Find partner for license purchase.
• Contact HPE Support.
Procedure
1. Select Upload AHS Log.
2. Navigate to your log file, and then click Open.
A window is displayed that shows parsing and log loading states. As the AHS log loads, the screendisplays the estimated time of completion.
TIP: This window also displays videos for different platforms. You can search and play differentvideos while you are waiting for the log file to load.
To cancel the load process, click Cancel
Using Deployment SettingsThe Intelligent Provisioning Deployment Settings page enables you to create server configurationpackages. You can deploy the packages using a USB key or iLO Scripting to one or more ProLiantservers or HPE Synergy compute modules. Using Deployment Settings is an alternative to using theScripting Toolkit or iLO RESTful Interface Tool.
For more information about iLO RESTful Interface Tool, see http://www.hpe.com/info/resttool.
NOTE: Some browsers do not import Deployment Profiles correctly. Use the extension .txt to ensurebrowser compatibility.
1. On the Intelligent Provisioning home screen, click Perform Maintenance.
2. Select Deployment Settings from the maintenance options.
When you open Deployment Settings, you can choose to manage an existing Deployment Settingsprofile or create a new one based on existing deployment settings.
More information
About Hardware Validation Tool on page 49Creating a Deployment Settings package on page 33
Creating a Deployment Settings package
Procedure
1. On the Deployment Settings screen, do one of the following:
a. Create a profile based on an existing profile. Import the existing profile, click Import and use one ofthe following options:
• From Network Share enter:◦ Server Name or IP Address—Server name or IP address of the server that hosts the OS
contents. If a server name is specified, a DNS entry is also required.
◦ Share Name—The name of the network share using Server Message Block (SMB) protocolthat hosts the OS contents.
◦ Domain Name—Name of the domain that hosts the network share.
◦ Network Share User—User name used to access the network share.
◦ Network Share Password (not encrypted)—Password for the user name used to accessthe network share.
• From USB Drive—Insert the USB key containing the deployment:
I. Save the deployment from the USB key to the local server.II. On the Select a Deployment screen, select the deployment from the list, and click Deploy.
If the USB key and their stored deployments are not displayed, click Rescan.
Specify a file path, and then go to Step 8.
b. Create a new, custom profile, click Create New Deployment, and navigate the deploymentsettings screens to complete the settings in the following steps.
2. Enter a Deployment Name—Enter a name for this deployment package. Do not include spaces.
3. Enter the Version Information—Enter User Notes and Captured From details, and click Done. See Entering version information.
4. Enter an Operating System—Do one of the following:
Performing maintenance 33
• To leave the OS details as shown, click Done.
• To add an operating system, click Edit. On the Operating System Installation screen, select anInstall Source, complete the fields required on the resulting screens, and click Done. See Entering operating system information.
5. Enter the ROM Settings—Do one of the following:
• To leave the ROM configuration as shown, click Done.
• To edit ROM settings, click Edit. On the RBSU Profile Editing screen, complete your edits, and clickDone. See Entering ROM settings.
6. Enter the Array Configuration—Review or select new settings. See Entering array configurationsettings.
7. Enter Intelligent Provisioning Preferences—See Setting Intelligent Provisioning Preferences.
8. Click Save. When prompted, enter a name and navigate to a network share or a USB key to save theDeployment Settings.
Using Deployment Settings package to configure a single server
IMPORTANT:
• Before using a deployment to install an OS, be sure that the drives and arrays are configured.
• Do not interrupt the configuration process.
Procedure
1. Do one of the following:
a. To use the deployment you created on the server, click Deploy.
b. To use a previously created deployment:
Select Deployment Settings > Import.
• From Network Share enter:◦ Server Name or IP Address—Server name or IP address of the server that hosts the OS
contents. If a server name is specified, a DNS entry is also required.
◦ Share Name—The name of the network share using Server Message Block (SMB) protocolthat hosts the OS contents.
◦ Domain Name—Name of the domain that hosts the network share.
◦ Network Share User—User name used to access the network share.
◦ Network Share Password (not encrypted)—Password for the user name used to accessthe network share.
• From USB Drive—Insert the USB key containing the deployment:
34 Performing maintenance
I. Save the deployment from the USB key to the local server.
II. On the Select a Deployment screen, select the deployment from the list, and click Deploy.If the USB key and their stored deployments are not displayed, click Rescan.
2. As the deployment runs, a validation screen applies settings for the following elements:
• ROM Settings
• Array Settings
• System Options
• Firmware Update
• Hardware Validation Tool
Deployment Settings package-level actionsPackage-level actions manipulate the Deployment Settings package, not individual settings within adeployment.
After making a selection on the initial page, the Select a Deployment screen opens.
On the Select a Deployment screen, existing Deployment Settings packages that are stored on the serverare displayed in the left pane, existing Deployment Settings packages that are stored on an installed USBdrive are displayed in the right pane, and package-level action icons are displayed in the center of thescreen. If a USB drive is installed, its name is displayed near the top of the screen in the Target USB Keyfield.
• To perform a package-level action on a Deployment Settings package, select one of the displayedpackages, and then select an action icon in the middle pane.
• To open a specific Deployment Settings package to change individual settings, double-click one of thedisplayed packages.
The following table defines the available actions.
Icon Description
Click the Deploy icon to launch the automatic configuration utility.
Click the Edit icon to change the following options:
• Version Information
• Operating System parameters
• Intelligent Provisioning Preferences
• Array Configuration information
• ROM Settings
Table Continued
Performing maintenance 35
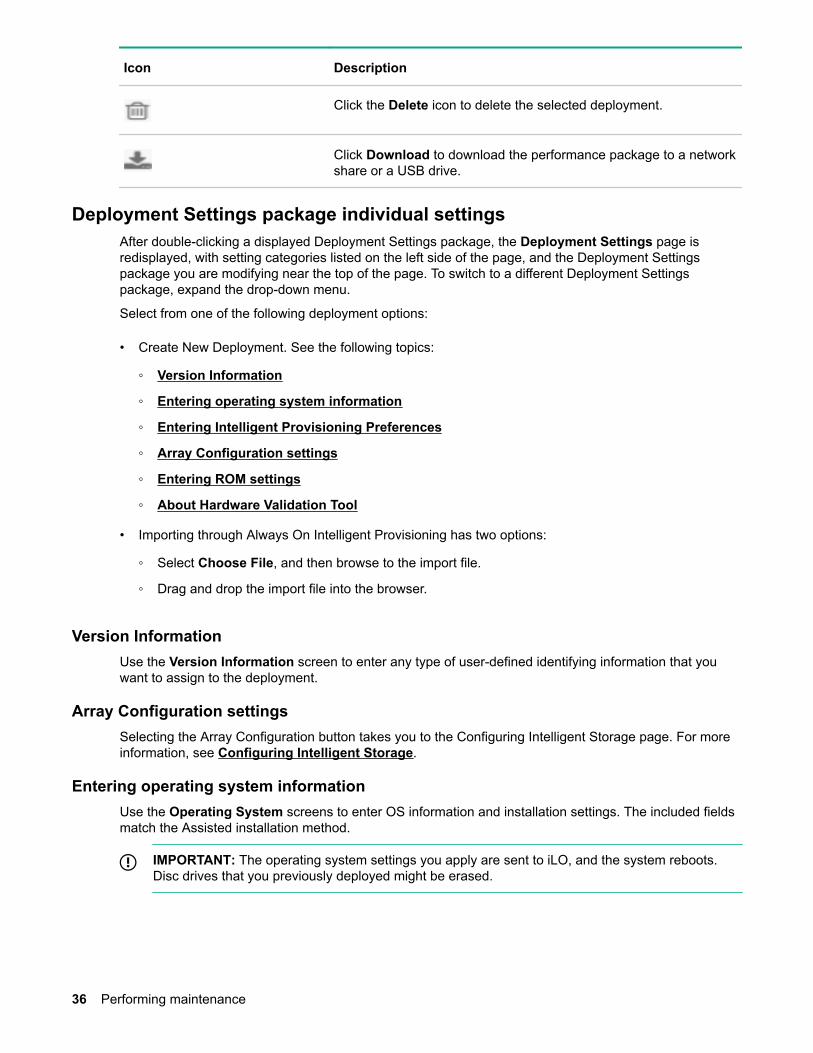
Icon Description
Click the Delete icon to delete the selected deployment.
Click Download to download the performance package to a networkshare or a USB drive.
Deployment Settings package individual settingsAfter double-clicking a displayed Deployment Settings package, the Deployment Settings page isredisplayed, with setting categories listed on the left side of the page, and the Deployment Settingspackage you are modifying near the top of the page. To switch to a different Deployment Settingspackage, expand the drop-down menu.
Select from one of the following deployment options:
• Create New Deployment. See the following topics:
◦ Version Information
◦ Entering operating system information
◦ Entering Intelligent Provisioning Preferences
◦ Array Configuration settings
◦ Entering ROM settings
◦ About Hardware Validation Tool
• Importing through Always On Intelligent Provisioning has two options:
◦ Select Choose File, and then browse to the import file.
◦ Drag and drop the import file into the browser.
Version InformationUse the Version Information screen to enter any type of user-defined identifying information that youwant to assign to the deployment.
Array Configuration settingsSelecting the Array Configuration button takes you to the Configuring Intelligent Storage page. For moreinformation, see Configuring Intelligent Storage.
Entering operating system informationUse the Operating System screens to enter OS information and installation settings. The included fieldsmatch the Assisted installation method.
IMPORTANT: The operating system settings you apply are sent to iLO, and the system reboots.Disc drives that you previously deployed might be erased.
36 Performing maintenance
Procedure
1. Select an OS family.
2. Enter the OS media path, which can be a Windows share or an FTP site on the local network.Installation of Windows from an FTP site is not supported.
a. For a Windows share location, enter the following network connection settings:
• Server Name or IP Address—Server name or IP address of the server that hosts the OScontents. If a server name is specified, a DNS entry is also required.
• Share Name—The name of the network share using Server Message Block (SMB) protocol thathosts the OS contents.
• Network Share User—User name used to access the network share.
• Network Share Password—Password for the user name used to access the network share.
b. For an FTP site, enter:
• Server Name or IP Address—FTP server name or IP address of the server that hosts the OScontents. FTP support requires anonymous access to the FTP server and does not supportconnecting to an FTP server through a proxy.
IMPORTANT:◦ When entering an FTP path, do not include spaces and punctuation. The FTP server
directory structure cannot contain spaces or special characters (including punctuation).
◦ Windows and SLES FTP installation, and RHEL network share installation are notsupported.
c. For ClearOS, click Install ClearOS from the Internet.
The system automatically pulls the ISO from the specified location to install it.
3. Enter the user name and password for the Deployment Settings package to use to access the networkshare.
This password is not encrypted. For a more secure access method, use FTP.
4. Select the OS and the keyboard language.
5. Enter the product key.
If you do not enter a product key and one is required, the OS installation pauses indefinitely, promptingyou to enter the key. The installation resumes after you enter the product key.
6. Click Deploy, and verify that you are ready to create the OS.
7. Click Apply to install the OS.
Entering ROM settingsFor information on ROM settings, see Using the BIOS Configuration (RBSU) utility.
Entering Intelligent Provisioning PreferencesTo enter basic system settings, click Create New Deployment > Intelligent Provisioning Preferences >Edit.
Performing maintenance 37
Procedure
1. Select the user interface and keyboard language.
2. Enter Boot BIOS Mode.
3. Select a System Software Update option:
• Update from HPE website
• Update From Custom URL
4. Select Time Zone, System Date, and System Time.
5. Choose your network interface for updates and installs.
6. In the Choose network interface for updates and installs section, choose the following based on yoursetup:
• Use Proxy—Configures a network proxy for use with features that communicate across thenetwork. Enter a proxy address and port.
• DHCP Auto-Configuration—(Recommended) DHCP automatically assigns IP addresses to yourserver.
NOTE: DHCP auto-configuration does not support IPv6 networks.
• IPv4/IPv6—Works as a mask field for the IP address.
7. Accept the Intelligent Provisioning EULA.
8. Click Update.
Using the BIOS Configuration (RBSU) utilityThe BIOS configuration page allows you to change some system configurations from IntelligentProvisioning. The options available differ based on the system components. For a description of RBSUoptions, see the UEFI System Utilities User Guide at https://www.hpe.com/info/uefi/docs.
For example, you can update:
• Jitter Smoothing
• Workload Matching
• Core Boosting
• Workload profiles
• Boot options
• Storage options
• Network options
• Virtualization options
NOTE: If a lock icon is shown next to a BIOS option, you cannot change that option. The option might berestricted to the F9 screen, or you might have to change another setting, for example the WorkloadProfile.
1. From the main Intelligent Provisioning screen, click Perform Maintenance > iLO Configuration >Network Interfaces > Manager Dedicated Network Interface.
2. Configure the following settings:
• Auto Neg: Select this option and the NIC automatically configures speed and duplex.
• FQDN
• Frame Size
• Full Duplex: Enable full duplex on the NIC. Auto Neg overrides this option.
• Host Name: Provide the DNS Host name.
• IPv4 Addresses
• IPv6 Addresses
• IPv6 Static Addresses
• IPv6 Default Gateway
• Link Status (of this port)
• MAC address
Performing maintenance 43
• Max IPv6 Static Addresses
• Name Servers
• Permanent MAC Address
• Speed Mbps
• UEFI Device Path
• DHCPv4
◦ Enabled
◦ Use DNS Servers
◦ Use Domain Name
◦ Use Gateway
◦ Use NTP Servers
◦ Use Static Routes
• SLAAC Enabled
• Static Default Gateway
• Static Routes
• Shared Network Port Options
◦ NIC
◦ Port
• Configuration Settings
• Domain Name
• Host Name
• Interface Type
• NIC Enabled
• Ping Gateway On Startup
• NIC supports IPv6
• Supports Flexible LOM
3. Click Save Settings to save your changes.
Configuring iLO Manager Shared Network Interface
Procedure
1. From the main Intelligent Provisioning screen, click Perform Maintenance > iLO Configuration >Network Interfaces > Manager Shared Network Interface.
2. Configure the following settings:
44 Performing maintenance
• Auto Neg: Select this option and the NIC automatically configures speed and duplex.
• FQDN
• Frame Size
• Full Duplex: Enable full duplex on the NIC. Auto Neg overrides this option.
• Host Name: Provide the DNS Host name.
• IPv4 Addresses
• IPv6 Addresses
• IPv6 Static Addresses
• IPv6 Default Gateway
• Link Status (of this port)
• MAC address
• Max IPv6 Static Addresses
• Name Servers
• Permanent MAC Address
• Speed Mbps
• UEFI Device Path
• DHCPv4
◦ Enabled
◦ Use DNS Servers
◦ Use Domain Name
◦ Use Gateway
◦ Use NTP Servers
◦ Use Static Routes
• SLAAC Enabled
• Static Default Gateway
• Static Routes
• Shared Network Port Options
◦ NIC
◦ Port
• Configuration Settings
• Domain Name
• Host Name
• Interface Type
Performing maintenance 45
• NIC Enabled
• Ping Gateway On Startup
• NIC supports IPv6
• Supports Flexible LOM
3. Click Save Settings to save your changes.
User Accounts
Configuring iLO Account Services
Procedure
1. From the main Intelligent Provisioning page, click Perform Maintenance > iLO Configuration > UserAccounts > Account Service.
2. Configure the following settings:
• Auth Failure Delay Time Seconds
• Auth Failure Logging Threshold
• Auth Failures Before Delay
• Default Password
• Default User Name
• Min Password Length
3. Click Save Settings to save the changes.
Editing User Account settings
Procedure
1. On the iLO Configuration Utility screen, click User Accounts, and then click Administer UserAccounts.
The User Accounts screen appears.
2. Select a user account.
3. Enter the user’s password. Re-enter the password to confirm it.
4. Select the appropriate permissions for the user account:
• Login Priv—Enables a user to log in to iLO.
• User Config Priv—Provides the user account with user configuration privileges.
• Virtual Power and Reset Priv—Enables a user to power-cycle or reset the host system. Theseactivities interrupt the system availability. A user with this privilege can diagnose the system byusing the button.
46 Performing maintenance
• Host BIOS Config Priv—Enables a user to configure the host BIOS settings by using the UEFISystem Utilities.
• Host Storage Config Priv—Enables a user to configure to host storage settings.
• Remote Console Priv—Enables a user to remotely access the host system Remote Console,including video, keyboard, and mouse control.
• Virtual Media Priv—Enables a user to use the Virtual Media feature on the host system.
• iLO Config Priv—Enables a user to configure most iLO settings, including security settings, and toremotely update the iLO firmware. This privilege does not enable local user account administration.
• Host NIC Config Priv—Enables a user to configure the host storage settings.
5. Click Update.
Adding a user account
Procedure
1. From the main Intelligent Provisioning page, click Perform Maintenance > iLO Configuration > UserAccounts > Add User Account.
2. Enter the following information:
• Login Name
• User Name
• Password
• Confirm Password
3. Select Service Account if the service user.
4. Click Add to create the account.
Resetting the iLO
Procedure
1. From the main Intelligent Provisioning page, click Perform Maintenance > iLO Configuration >Reset Options.
2. Select from the following options:
• Reset iLO
• Reset to Factory Default Settings
• Clear RESTful API state
Configuring Intelligent StorageThe Intelligent Storage options allow you to:
Performing maintenance 47
• Create arrays
• Create logical drives
• Create logical devices
◦ Logical drives
◦ Physical drives
◦ Storage enclosures
• Change configuration settings
• View system messages
Creating a new array or logical drive
Procedure
1. Click + Create Array.
2. To create a simple array, click Simple Array.
3. Select a Logical Drive Type.
4. Select the Number of Drives.
5. Enter a Logical Drive Name.
6. Select a RAID mode.
7. Select a Minimum Array Size.
8. Review the array settings.
9. Click Submit.
Configuring an array or logical drive
Procedure
1. Make changes to the following options:
NOTE: Changes take place during the next reboot.
• General
◦ Transformation Priority
◦ Rebuild Priority
◦ Surface Scan Analysis Priority
48 Performing maintenance
◦ Surface Scan Analysis Delay (Seconds)
◦ Current Parallel Surface Scan Count
• Advanced
◦ RAID 6/60 Alternate Consistency Repair Policy
◦ Maximum Drive Request Queue Depth
◦ Monitor and Performance Analysis Delay (Seconds)
About Hardware Validation ToolThe Hardware Validation Tool performs discovery on the components in your system and then displaysthe results. You can:
• Test the system
• View test results
• Export test results
Using the hardware validation tool
Procedure
1. Click Hardware Validation Tool.
The tool performs hardware discovery. This discovery process might take several minutes.
2. After discovery finishes, the tool displays the test results.
3. Select one of the following tabs:
Performing maintenance 49
• Survey: Displays an overview of the hardware in the system.
• Test: Tests the hardware and displays the test results.
• Export: Export test results. If there is no network connection, save the files to a USB key.
• Compare: Compare the tests to previous test results.
Erasing server dataAbout erasing data in Intelligent Provisioning
Intelligent Provisioning provides two methods to secure data on a server you want to decommission orprepare for a different use. Both methods follow NIST Special Publication 800-88 Revision 1, Guidelinesfor Media Sanitization.
For more information about the specification, see https://nvlpubs.nist.gov/nistpubs/specialpublications/nist.sp.800-88r1.pdf.
NOTE: Section 2.5 of the specification describes the level of sanitization. The appendix recommendsminimum sanitization levels for media.
One-button secure erase
One-button secure erase implements the NIST SP 800-88 Revision 1 Sanitization Recommendationsfor Purging user data and returns the server and supported components to the default state. Thisfeature automates many of the tasks you follow in the Statement of Volatility document for a server.
This feature is supported only on Gen10 servers that have been updated with SPP version 2019.03.0or later.
To use this feature, the storage drives attached to the affected Gen10 system must support a nativesanitize method. Examples include the SANITIZE command for SATA and SAS drives and FORMATfor NVM Express drives. The NIST publication recommends these commands for purging data onthese device types. Using these commands is more secure than using software to overwrite data onstorage drives.
When a One-button secure erase is in progress, iLO prevents firmware update and iLO resetoperations.
If you want to use the server after you perform the One-button secure erase procedure, you mustprovision the server.
NOTE: You can also use the iLO RESTful tool to launch the One-button secure erase feature.
System Erase and Reset
The System Erase and Reset function overwrites data on drives by using the guidelines from DoD5220.22-M. This feature is analogous to the NIST SP 800-88 Minimum SanitizationRecommendations Revision 1 description of clearing data. In this method, software overwrites allblock devices attached to the system by applying random patterns. This method can be used tooverwrite devices that do not support One-button secure erase. For example, use this option fordrives that do not support a native sanitize method.
CAUTION: One-button secure erase and System Erase and Reset should be used with extremecaution, and only when a system is being decommissioned or used for a different purpose. Thesystem and iLO may reboot multiple times until the process completes. The erase features:
• Wipe data from drives and any non-volatile/persistent storage.
• Reset iLO and delete all licenses stored there.
• Reset BIOS settings.
• Delete AHS and warranty data stored in the system.
• The processes also delete any deployment settings profiles.
Using One-button secure erase
Prerequisites
• An active iLO Advanced license is installed.
• You have an iLO user account with all iLO 5 privileges, including Recovery Set.
• Disable the following:◦ Server Configuration Lock
For instructions, see the UEFI System Utilities User Guide for HPE ProLiant Gen10 Servers andHPE Synergy .
◦ Smart Array Encryption
For instructions, see the "Clearing the encryption configuration" section in the HPE Smart Array SRSecure Encryption Installation and User Guide.
• If iLO is configured to use the High Security, FIPS, or CNSA security state, change the security stateto Production.
For instructions, see the HPE iLO 5 User Guide.
NOTE: Intelligent Provisioning does not support the High Security, FIPS, or CNSA security states. Onservers that use these security states, you can use REST tools to initiate the One-button secure eraseprocess. For more information, see the REST documentation.
• c-Class and HPE Synergy users:
◦ Remove HPE OneView or Virtual Connect profiles assigned to the system.
• The iLO security setting on the system maintenance switch must be in the OFF position.
• Hewlett Packard Enterprise recommends configuring SNMP, AlertMail, or iLO RESTful API alertsbefore initiating the One-button secure erase process. If errors occur when individual components areerased, an Integrated Management Log (IML) entry is logged for each error. The IML is erased laterduring the One-button secure erase process. After the log is erased, the individual component errorswill be unavailable. Using SNMP, AlertMail, or iLO RESTful API alerts allow you to review the IML log.
Procedure
1. Disconnect or detach any storage devices that you do not want to be erased using this procedure.This includes any removable drives, external storage, and shared storage.
Performing maintenance 51
NOTE:
• Hewlett Packard Enterprise recommends disconnecting or detaching drives that are not beingerased to reduce the chances of data loss.
• An Integrated Management Log (IML) reports an erase failure for each drive not supporting nativesanitize methods. Other errors might also occur when erasing the drives and are reported in theIML. Consult the IML and Troubleshooting guide for details. The overall status of user data erase,that includes erase of drives, is reported as "Completed with errors" in these cases.
2. From the main Intelligent Provisioning screen, click Perform Maintenance, and then follow theonscreen prompts to begin erasing the system.
3. Click One-button secure erase.
IMPORTANT: Securely erasing the system might take up to a day or more to complete,depending on the storage size. Avoid interactions with iLO or the system that involvesconfiguration changes and powering the system off, until the procedure is complete.
The server reboots and the BIOS deletes the data that it controls. After the BIOS finishes this process,the system powers off. iLO then deletes the remaining items.
If errors occur when individual components are erased, an Integrated Management Log (IML) entry islogged for each error and you receive a notification if you configured SNMP, AlertMail, or Redfishalerts. The IML is erased later during the One-button secure erase process. After the log is erased, theindividual component errors will be unavailable. When the One-button secure erase process iscomplete, a final IML entry is logged. This entry provides summary information and does not includefailure information for specific components.
The overall progress of the operation can be viewed from the Always On Intelligent Provisioningpage, which is accessible from the iLO web interface. This page is not accessible during an iLO reset.
On c-Class and HPE Synergy servers, the iLO network settings might be reassigned after the processis complete, and the system might power on.
Impacts to the system after One-button secure erase completesThe One-button secure erase feature reverts the system and supported components to the factory state.To use the system, reprovision the server.
• All data on impacted storage drives and persistent memory is erased and is not recoverable.
All RAID settings, disk partitions, and OS installations are removed.
• BIOS and iLO 5 settings are reset to the factory default settings.
◦ iLO 5 network and other settings are erased and will need to be reconfigured.
◦ iLO 5 Language Packs are removed and iLO 5 will display text in English only.
◦ Installed iLO 5 licenses are removed and the license status reverts to iLO Standard.
◦ The System Recovery Set is removed and will need to be recreated.
◦ iLO 5 user accounts are removed. After the process is complete, log in with the default factoryAdministrator account and password.
◦ The Active Health System, Integrated Management Log, and iLO Event Log are cleared.
◦ BIOS and SmartStorage Redfish API data is removed and then recreated on the next boot.
52 Performing maintenance
◦ Secure Boot is disabled and enrolled certificates are removed (other than the factory installedcertificates).
◦ Boot options and BIOS user-defined defaults are removed.
◦ Passwords, pass-phrases, and encryption keys stored in the TPM or BIOS are removed.
◦ The date, time, DST, and time zone are reset.
◦ The system will boot with the most recent BIOS revision flashed.
• Intelligent Provisioning will not boot and will need to be reinstalled.
Returning the system to an operational state requires the following:
◦ Configure the iLO 5 network settings. For more information, see the iLO 5 User Guide.
◦ Install Intelligent Provisioning using an Intelligent Provisioning recovery image.
◦ Install an operating system.
◦ Install iLO licenses.
◦ Configure BIOS settings.
NOTE: Requirements differ based on the system contents and system use.
Hardware components that are reverted to the factory state:
Gen10 hardware impacted Hardware not impacted
UEFI Configuration store USB drives
RTC (System Date and Time) SD cards
Trusted Platform Module iLO Virtual Media
NVRAM
• BIOS Settings
• iLO Settings
• Integrated Management Log
• iLO Event Log
Configuration on PCI controllers
• HPE Smart Array SR controllers and drivesconnected on the internal ports. For example,3I:1:1
• HPE Smart Array S100i Software RAID
• HPE Smart Array MR controllers and connectedstorage
• Drives connected to external ports on HPESmart Array SR controllers, for example, 1E:1:1.
• SAS HBAs and connected drives
Table Continued
Performing maintenance 53
Gen10 hardware impacted Hardware not impacted
Drive data (for drives that support native sanitizemethods).
• SATA, SAS drives (SSD and HDD)
• NVM Express
SATA, SAS, and NVM Express drives that do notsupport native sanitize methods. For example,most drives used with Gen9 and earlier servers.
Persistent memory
• NVDIMM-N
• Intel Optane DC Persistent Memory
FCoE, iSCSI storage
Embedded Flash
• RESTful API data
• AHS
• Firmware repository
GPGPUs
Other FPGAs, accelerators, offload engines thathave keys or storage
One-button secure erase FAQDoes One-button secure erase purge USB devices and internal SD cards?
No. One-button secure erase does not erase USB devices and internal SD cards.
If an HDD does not support the Purge function, does One-button secure erase attempt to purgeit?
No. One-button secure erase skips a drive that does not support the purge function.
Does One-button secure erase support Smart Array controllers?
Only HPE Smart Array "SR" controllers are supported for One-button secure erase.
Does Smart Array erase drives that do not support Purge?
Smart Array can wipe drives (overwrite with a pattern) that do not support the purge operation. One-button secure erase does not request the Smart Array to perform this nonsecure wipe. Use theIntelligent Provisioning “System Erase and Reset” feature to wipe data on such drives.
Does One-button secure erase erase battery backed cache?
See the table following for more information.
How does One-button secure erase process the erase commands?
See the following table for information on how One-button secure erase purges or overwrites data.
What requirements do users need to launch One-button secure erase?
Users need all iLO privileges to launch One-button secure erase.
Does One-button secure erase remove the serial number and product ID?
No, these items are not erased by One-button secure erase.
How long does the process take?
The duration depends on the hardware. Sanitization of HDDs takes longer than SSDs.
54 Performing maintenance
Table 1: How One-button secure erase affects supported drives
Device Operation requested Result
NVRAM 3-pass write: 0x5a, 0xa5, 0xff All battery backed iLO SRAMmemory is overwritten.
Intel Optane DC PMM Secure Erase + Overwrite DIMM Cryptographic keys are removedand data in all physical memoryblocks (both user accessible andin spare blocks) is overwrittenwith zeros. PCD regionscontaining all configuration andmetadata is also overwritten.
NVDIMM-N JEDEC JESD245B "FactoryDefault"
Data in all physical memoryblocks is erased except warrantyinformation. All readable registersreset to defaults.
UEFI configuration store 3-pass: Chip erase (0xff), 0x00,Chip erase (0xff)
All physical sectors areoverwritten.
RTC Reset time to 01-01-200100:00:00
Date, Time, Time zone, and DSTare reset to defaults.
NOTE: Before initiating the One-button secure erase, the"Security reset function" must beperformed manually through theHPE Smart StorageAdministrator, if Smart ArraySecure Encryption was enabled.
• The security reset functionremoves the drive keys thatare stored on the ESKM forremote key management. Allsecrets, keys, and passwordsfrom the controller and drivesare cleared. This operationdoes not remove the controllerkey on the ESKM.
• All array configurations, logicaldrives and metadata aredeleted. All controller settingsare reset to their factorydefaults.
• Flash backup is cleared anddata in the DRAM write backcache is lost when the poweris removed.
All attached drives are requestedto be sanitized. See below foroperations requested on thedrives.
HPE Smart Array S100i SoftwareRAID
Reset to SATA AHCI mode +Physical drive sanitize
The controller is reset to thedefault SATA AHCI mode. Allarray configurations, logicaldrives, and metadata are deleted.All attached SATA drives arerequested to be sanitized asbelow.
SATA HDD1 ATA SANITIZE with CRYPTOSCRAMBLE EXT if supported.
The CRYPTO SCRAMBLE EXTcommand changes the internalencryption keys that are used foruser data, so the user data isirretrievable.
A single pass of ATA SANITIZEwith OVERWRITE EXT option
All physical sectors areoverwritten with zeros, includingthose that are not useraccessible. Any previous data incaches are also madeinaccessible.
SATA SSD1 ATA SANITIZE with CRYPTOSCRAMBLE EXT if supported.
The CRYPTO SCRAMBLE EXTcommand changes the internalencryption keys that are used foruser data, so the user data isirretrievable.
Table Continued
56 Performing maintenance
Device Operation requested Result
A single pass of ATA SANITIZEwith BLOCK ERASE option
Previous data in all physicalmemory blocks, including thosethat are not user accessible,becomes irretrievable. Anyprevious data in caches are alsomade inaccessible.
SAS HDD2 A single pass of SCSI SANITIZEwith OVERWRITE EXT option
All physical sectors areoverwritten, including those thatare not user accessible. Any datain caches are also sanitized.
SAS SSD2 A single pass of SCSI SANITIZEwith BLOCK ERASE option
All physical memory blocks,including those that are not useraccessible, are set to a vendor-specific value. Any data incaches are also sanitized.
This is a cryptographic eraseaccomplished by deleting theencryption key.
A single pass of NVM ExpressFORMAT with SES = 1
All data and metadata associatedwith all namespaces is destroyed.All user content present in theNVM subsystem is erased.
1. These drives might be connected to the HPE Smart Array “SR” controllers or the Chipset SATAcontroller.
2. SAS drives connected only to the HPE Smart Array “SR” controllers are supported.
Supported device(s) that fail the erase, and devices that are not supported, are not erased securely.These drives might contain sensitive data. Isolate drives that are not erased and use other methods todelete the data, or securely dispose of the device according to your organization's security policies.
Using System Erase and ResetUse System Erase and Reset to clear hard drives and Intelligent Provisioning Preferences.
In this mode, Intelligent Provisioning software overwrites data on the drives using the guidelines fromDoD 5220.22-M, which is similar to the NIST description of clearing data. All block devices attached to thesystem are overwritten by applying random patterns in a three-pass process. These block devices includedrives attached to the server. Depending on the amount of storage installed on a system, the overwriteprocess can take many hours or even days to complete. Use this method to select and erase drives onthe system that didn't support the native sanitize methods used by One-button secure erase.
System Erase and Reset optionsThe following table includes the options in the System Erase and Reset menu and a description of whatselecting each option will do.
Performing maintenance 57
Option Description
All Hard Drives Erase all hard drives on this server.
NOTE: Only supported in F10 mode, not supported in Always OnIntelligent Provisioning.
Wipe Hard Drives Writes a data pattern over all drive sectors. This action might takeseveral hours.
NOTE: Only available if you select All Hard Drives.
Intelligent ProvisioningPreferences
Clear Intelligent Provisioning preferences.
Active Health System logs Clears all AHS log files.
Creating a RAID configuration with HPE SSAUsing HPE Smart Storage Administrator (HPE SSA)
HPE SSA provides high-availability configuration, management, and diagnostic capabilities for all SmartArray products.
HPE SSA featuresHPE SSA is a browser-based utility that runs in either offline or online mode. HPE SSA:
• Supports online array capacity expansion, logical drive extension, assignment of online spares, andRAID or stripe size migration.
• Suggests the optimum configuration for an unconfigured system.
• Provides different operating modes, enabling faster configuration or greater control over theconfiguration options.
• Displays on-screen tips for individual steps of a configuration procedure.
In HPE SSA, you can select a controller from the menu at the top left-hand side of the screen, or you canchoose to configure or diagnose an available controller from the same menu.
Accessing HPE SSA
Procedure
1. On the Intelligent Provisioning home screen, click Perform Maintenance.
2. Select Raid Configuration from the maintenance options.
The Smart Storage Administrator window is displayed.
ConfigurationOn the Smart Storage Administrator screen, under Actions, click Configure. Options include:
58 Performing maintenance
• Controller settings—Configures the supported controller settings. Depending on the controller, thesecan include setting the array accelerator cache ratio, transform and rebuild priorities, and surface scandelay.
• Caching settings—Configures the supported caching settings which can help increase performanceby taking advantage of cache memory. Caching also helps protect data integrity when used with abattery or capacitor.
• Clear configuration—Resets the controller's configuration to its default state. Existing arrays orlogical drives are deleted, and data on the logical drives is lost. Confirm this is the preferred actionbefore proceeding.
• Physical drive write cache settings—Enables or disables the write cache on physical drivesattached to a controller. This feature can improve performance but precautions must be taken toensure data integrity.
• Modify spare activation mode—Switches the spare activation mode from the default behavior(activate on failure only) to predictive spare activation and back.
• Set Bootable Logical Drive/Volume—Sets the primary and secondary boot logical drives andvolumes. Local logical drives as well as remote logical drives and volumes are listed for selection.
• Manage License Keys—Enables the user to add or remove license keys. Depending on the keysentered or removed, various features can be enabled or disabled.
• More information—Provides an in-depth display of available information for the currently selecteddevice and all of its child devices, when applicable.
Diagnostics/SmartSSDOn the Smart Storage Administrator screen, under Actions, click Diagnose. Options include.
• Array Diagnostics Report—Runs reports on selected controllers to display available diagnostictasks. Reports include SmartSSD Wear Gauge information for supported solid state drives.◦ View Diagnostic Report—Generates and displays a diagnostic report for the selected devices.
The report includes SmartSSD Wear Gauge information for supported Solid State Drives, andusage and estimated lifetime information.
◦ Save Diagnostic Report—Generates a diagnostic report for the selected devices for exportwithout presenting a graphical display.
• SmartSSD Wear Gauge Report—View or generate a report:◦ View SmartSSD Wear Gauge Report—Displays SSD usage and estimated lifetime information.
◦ Save SmartSSD Wear Gauge Report—Generates a report for export, without presenting agraphical display.
Performing maintenance 59
Using the USB Key UtilityThe USB Key Utility is a Windows application that copies Intelligent Provisioning or SPP contents, andother CD or DVD images to a USB flash drive. After copying data to the USB flash drive, you can runIntelligent Provisioning or SPP from the USB flash drive instead of from a CD or DVD. This process isbeneficial in headless-server operations. It also simplifies the storage, transportation, and usage of thecontents by allowing you to retrieve their images from the web and customize them as needed.
Installing the utility adds a shortcut in System Tools in the Programs Start menu folder.
Features
The USB Key Utility supports:
• ISO files larger than 1 GB.
• Quick Formatting on USB flash drives.
• USB flash drives up to a maximum of 32 GB. USB flash drives larger than 32 GB are not displayed inthe utility.
PrerequisitesInstalling applications onto a USB flash drive requires a supported source CD, DVD, or ISO, and a USBflash drive with adequate storage space for storing the source contents. The USB Key Utility requires aUSB 2.0 flash drive with a storage size larger than the media or ISO image (2 GB or greater).
NOTE: Version 2.0 and later of the USB Key Utility does not support a 32-bit operating system.
AutoRun files
AutoRun files do not start automatically from the utility. To start an AutoRun file, double-click theautorun.exe file in the appropriate CD or DVD folder on the USB Key.
Creating a bootable USB keyInstalling the utility adds a shortcut in USB Key Utility program group in the Programs Start menu folder.
Procedure
1. Double-click the USB Key Utility shortcut in the USB Key Utility folder.
2. Complete each step as presented by the application:
a. Click Next at the splash screen.
b. Read the End-User License Agreement, and then select Agree and click Next.
c. Select Create a bootable USB key from CD/DVD, and then click Next.
NOTE: Do not select the Add an additional CD/DVD to a bootable USB key option with SUM6.2.0, SPP 2014.02.0, or Intelligent Provisioning 1.60 and later, which no longer support multiple-boot environments on a single device.
d. Place the USB flash drive in an available USB port. Insert the media in the optical drive or mountthe ISO image, and then click Next.
e. Choose the drive letter of the source, choose the drive letter of the target USB flash drive, and clickNext.
60 Using the USB Key Utility
TIP: If you do not see your drive key, click Rescan Target or insert a new one.
CAUTION: All data on the target USB key will be deleted.
f. Click Next on the warning message screen.
The USB flash drive is formatted, and the source contents are copied to the USB flash drive.
g. To display the README.TXT file, click Finish.
NOTE: The README.TXT file is only displayed if the ISO has one to view.
Adding content to a bootable USB keyThe USB Key Utility supports multiple images on a single USB flash drive if there is adequate spaceavailable on the USB flash drive and you are not loading content that works with a UEFI bootloader,which does not support multiple images due to security reasons.
NOTE: SUM 6.20, SPP 2014.02.0, and Intelligent Provisioning 1.60 and later no longer support multiple-boot environments on a single device. SUM, SPP, and Intelligent Provisioning contain signed parts thatwork with the UEFI boot loader. This change no longer allows for multi-boot setups on a single device,such as a USB key.
Procedure
1. Follow the instructions for creating a bootable USB key.
2. Double-click the USB Key Utility shortcut in the USB Key Utility folder.
3. Complete each step presented by the application:
a. Click Next at the splash screen.
b. Select Agree, and then click Next after reading the End-User License Agreement.
c. Select Add an additional CD/DVD to a bootable USB key, and then click Next.
d. Place the USB flash drive in an available USB port. Insert the media into the optical drive or mountthe ISO image, and then click Next.
e. Choose the drive letter of the source, choose the drive letter of the target USB flash drive, and thenclick Next.
f. Click Next on the informational screen.
The source contents are copied to the USB flash drive.
g. To display the README.TXT file, click Finish.
NOTE: The README.TXT file is only displayed if the ISO has one to view.
4. Repeat steps 2–3 for each source media or image to be transferred to the USB key.
Using the USB Key Utility 61
TroubleshootingBasic troubleshooting techniques
Intelligent Provisioning provides basic troubleshooting tools you can use to resolve issues.
Troubleshooting general issues
iLO log on required during Intelligent Provisioning F10 boot
Symptom
Cannot log on to Intelligent Provisioning without providing iLO user name and password during F10 boot.
Cause
The RBSU BIOS Admin password has been set.
Action
1. Force a shutdown, and then boot to the RBSU.
2. Delete the Admin password.
3. Click Save and exit.
4. Select System Utilities > Embedded Application > Intelligent Provisioning.
5. Launch Intelligent Provisioning.
Intelligent Provisioning does not launch when F10 is pressed
Symptom
Intelligent Provisioning allows service personnel and customers to press the F10 key during SystemPower-On Self-Test (POST) to load the latest Intelligent Provisioning automatically.
Solution 1
Cause
There is an issue with the current Intelligent Provisioning files.
Action
1. Download the Intelligent Provisioning ISO image and the USB Key Utility from hpe.com. See Usingthe USB Key Utility for more information.
2. Create a bootable USB key, and then copy the ISO image.
3. Insert the USB key, and then power up the unit.
4. To boot from the USB key, press F11, and then select Option 3: One Time Boot to USB Drive Key.
The system boots from the USB key and installs IP Recovery. When the installation is complete, theutility prompts you to remove the USB key.
62 Troubleshooting
5. Remove the USB key.
6. Reboot the system and press F10 (IP Recovery) to verify IP Recovery launches properly.
Solution 2
Cause
The iLO is running in FIPS mode.
Action
1. Enter the iLO configuration screen and turn off FIPS mode.
NOTE: Modify the example to fit your system's details.
OS Host name field missing
Symptom
The OS Host name field on the Intelligent Provisioning Assisted Install > OS selection page ismissing.
Troubleshooting 63
Action
OS Host name has been replaced with the Computer name which performs the same function.
Accessing version information in deployment settings
Symptom
Version information for the Deployment settings utility is blank.
Cause
Version information is no longer located in the Deployment settings utility.
Action
Click the System Information icon at the top of the screen for version information.
A browser does not import a deployment profile correctly
Symptom
Intelligent Provisioning does not import a deployment profile correctly.
Action
Verify that the profile is saved as a .txt file format.
Some Legacy BIOS Mode installs need specific instructionsIf the server boot mode is set to Legacy BIOS Mode, some operating systems need specific installations.
NOTE: Legacy BIOS Mode behavior cannot be modified by pressing F10. If you are doing a manualinstallation in Legacy BIOS Mode, ensure that:
• On Windows systems, the system boots to the DVD.
• On Linux and VMware systems, the system boots to the hard drive.
NOTE: Change the boot order, or press F11 during the boot process.
Always On Intelligent Provisioning does not display status of NICs
Symptom
When viewing NICs in Always On Intelligent Provisioning, the NIC does not display the status.
Action
1. Check the status of the NIC options in the iLO page or RBSU.
2. Select the port in AOIP, and then continue with the installation.
64 Troubleshooting
Cannot create a custom partition size
Symptom
When installing an OS, you cannot create a custom partition size.
Action
No action. Intelligent Provisioning does not support creating a custom partition size when installing theoperating system.
You are unable to launch One-button secure erase from Intelligent Provisioning.
Solution 1
Cause
You do not have the correct license.
Action
Install an iLO Advanced license to use One-button secure erase.
Solution 2
Cause
The user credentials provided doesn't have sufficient privileges to start the erase.
Action
Log in with a user account that provides all privileges, or change the user privileges.
Solution 3
Cause
Server Configuration Lock is enabled.
Action
Disable Server Configuration Lock.
More information
Using One-button secure erase on page 51
Troubleshooting 65
One-Button secure erase is unsuccessful or reports errors
Symptom
One-button secure erase reports errors for one or more components in the system, and does notsuccessfully erase the system.
Solution 1
Cause
The drive doesn't support the secure erase method, or the drive failed to complete the erase.
Action
1. Do one of the following:
• For drives supported by One-button secure erase: Launch One-button secure erase again.
• For drives that are not supported by One-button secure erase: Use the System Erase and Resetfunction.
Solution 2
Cause
Drives connected to the external ports of a supported Smart Array controller, the drives are not erased.
Action
Use the System Erase and Reset function to erase external drives.
Make sure that external drives are not connected to other systems before erasing external drives.
Solution 3
Cause
The system failed to complete the One-button secure erase operation on some devices after twoattempts.
Action
Use the System Erase and Reset feature in Intelligent Provisioning to overwrite data on these drives.
One-Button secure erase succeeds but some drives are not erased.
Symptom
One-button secure erase finishes successfully, but some components are not erased.
Cause
Some components are not supported by One-button secure erase. For example:
66 Troubleshooting
• HPE Smart Array MR controllers and drives connected to these controllers are not supported.
• SAS HBAs and connected drives are not supported.
• Storage attached to iSCSI, FC/FCoE, USB, iLO Virtual Media, SD cards are not supported.
NOTE: For more information, see the One-button secure erase prerequisites.
Action
Use the System Erase and Reset feature in Intelligent Provisioning to overwrite the data on thesedevices.
NOTE: Data that is overwritten does not meet the same erase standard as data that is purged by One-button secure erase.
More information
Using One-button secure erase on page 51
One-Button secure erase reports errors, but no specific details.
Symptom
One-button secure erase reports errors, but provides no details on specific component failures.
Cause
One-button secure erase clears all logs from the system. It erases errors reported during One-buttonsecure erase. Only a final message indicating a summary of the procedure is available after all erasecompletes.
Action
Configure SNMP, AlertMail, or Redfish alerts in iLO to receive error notifications during One-button secureerase.
Troubleshooting Windows-specific issues
Windows Essentials does not install from USB source
Symptom
Windows Essentials does not install from a USB source.
Cause
USB installations are not supported for Windows Essentials.
Troubleshooting 67
Action
Install Windows Essentials from an ISO source.
Windows does not install on AMD servers
Symptom
Intelligent Provisioning does not install Windows on AMD servers as expected.
Cause
The BIOS setting IOMMU is activated.
Action
1. From the Intelligent Provisioning main screen, select Perform Maintenance > BIOS/PlatformConfiguration > Virtualization Options > AMD (R) IOMMU.
2. Select Disabled.
3. Save the setting, and then reinstall the operating system.
Troubleshooting Linux-specific issues
Unable to proceed with Assisted installation of Red Hat Enterprise Linux 7
Symptom
When installing Red Hat Enterprise Linux 7, you are unable to proceed with the Assisted installation withvalid OS images through FTP source media.
Cause
Required Red Hat OS files are missing or incorrectly placed.
Action
1. Make sure that all the required Red Hat OS files are present in the OS flat file folder.
2. Make sure that two TRANS.TBL files are present in the Red Hat OS flat files folder. One file must bepresent in the main OS file folder, and another must be present inside the Server folder inside themain OS file folder.
3. Retry the installation.
Assisted installation of Red Hat OS hangs
Symptom
When using the Assisted installation method for Red Hat OS installation with FTP source media, one ofthe following problems occurs:
68 Troubleshooting
• The installation hangs during reboot and a The Red Hat Enterprise Linux Server CD wasnot found error is displayed.
• The installation hangs and a Could not allocate requested partitions error is displayed.
• The installation does not complete successfully.
• The installation completes successfully even if there are missing flat files for the OS installation.
Cause
Using the Assisted installation method for Red Hat OS installation with FTP source media might not workreliably.
Action
1. Obtain the DUD from the HPE Support Center.
2. Install the OS outside of Intelligent Provisioning.
Troubleshooting VMware-specific issues
Server reboots during VMware Assisted installation
Symptom
When performing a VMware Assisted installation with DVD as source media, after Pre-installation iscomplete, the server reboots and the server begins loading the ESXi installer again rather than openingthe OS.
Cause
VMware OS installed on HDD continuously reboots if a USB is connected to SUT.
Action
1. Remove the USB device.
2. Continue the installation.
Troubleshooting 69
Websites
Hewlett Packard Enterprise Information Library www.hpe.com/info/EIL
Support and other resourcesAccessing Hewlett Packard Enterprise Support
• For live assistance, go to the Contact Hewlett Packard Enterprise Worldwide website:
http://www.hpe.com/info/assistance
• To access documentation and support services, go to the Hewlett Packard Enterprise Support Centerwebsite:
http://www.hpe.com/support/hpesc
Information to collect
• Technical support registration number (if applicable)
• Product name, model or version, and serial number
• Operating system name and version
• Firmware version
• Error messages
• Product-specific reports and logs
• Add-on products or components
• Third-party products or components
Accessing updates• Some software products provide a mechanism for accessing software updates through the product
interface. Review your product documentation to identify the recommended software update method.
• To download product updates:
Hewlett Packard Enterprise Support Centerwww.hpe.com/support/hpesc
Hewlett Packard Enterprise Support Center: Software downloadswww.hpe.com/support/downloads
Software Depotwww.hpe.com/support/softwaredepot
• To subscribe to eNewsletters and alerts:
www.hpe.com/support/e-updates
• To view and update your entitlements, and to link your contracts and warranties with your profile, go tothe Hewlett Packard Enterprise Support Center More Information on Access to Support Materialspage:
IMPORTANT: Access to some updates might require product entitlement when accessed throughthe Hewlett Packard Enterprise Support Center. You must have an HPE Passport set up withrelevant entitlements.
Customer self repairHewlett Packard Enterprise customer self repair (CSR) programs allow you to repair your product. If aCSR part needs to be replaced, it will be shipped directly to you so that you can install it at yourconvenience. Some parts do not qualify for CSR. Your Hewlett Packard Enterprise authorized serviceprovider will determine whether a repair can be accomplished by CSR.
For more information about CSR, contact your local service provider or go to the CSR website:
http://www.hpe.com/support/selfrepair
Remote supportRemote support is available with supported devices as part of your warranty or contractual supportagreement. It provides intelligent event diagnosis, and automatic, secure submission of hardware eventnotifications to Hewlett Packard Enterprise, which will initiate a fast and accurate resolution based on yourproduct's service level. Hewlett Packard Enterprise strongly recommends that you register your device forremote support.
If your product includes additional remote support details, use search to locate that information.
Remote support and Proactive Care informationHPE Get Connected
www.hpe.com/services/getconnectedHPE Proactive Care services
www.hpe.com/services/proactivecareHPE Proactive Care service: Supported products list
www.hpe.com/services/proactivecaresupportedproductsHPE Proactive Care advanced service: Supported products list
Regulatory informationTo view the regulatory information for your product, view the Safety and Compliance Information forServer, Storage, Power, Networking, and Rack Products, available at the Hewlett Packard EnterpriseSupport Center:
Hewlett Packard Enterprise is committed to providing our customers with information about the chemicalsubstances in our products as needed to comply with legal requirements such as REACH (Regulation ECNo 1907/2006 of the European Parliament and the Council). A chemical information report for this productcan be found at:
www.hpe.com/info/reach
For Hewlett Packard Enterprise product environmental and safety information and compliance data,including RoHS and REACH, see:
www.hpe.com/info/ecodata
For Hewlett Packard Enterprise environmental information, including company programs, productrecycling, and energy efficiency, see:
www.hpe.com/info/environment
Documentation feedbackHewlett Packard Enterprise is committed to providing documentation that meets your needs. To help usimprove the documentation, send any errors, suggestions, or comments to Documentation Feedback([email protected]). When submitting your feedback, include the document title, part number,edition, and publication date located on the front cover of the document. For online help content, includethe product name, product version, help edition, and publication date located on the legal notices page.