Page | 1 Introducing Queen Cells and Making Splits Written by: Ryan Williamson & Jacob Jordan Raising your own queens or purchasing queen cells to make up splits or re-queen colonies can be a very rewarding and educational experience. There are some distinct advantages to using this method as an alternative to buying mated queens. First, it can be very economical. Secondly, purchased cells can provide a means for you to improve your stock by bringing in new genetics, while at the same time using local drones from your area for mating – thus, maintaining a degree of local genetics in your stock. Additionally, it allows you to further develop your skills as a beekeeper. There are multiple techniques that can be employed to raise queens, make up splits and re-queen colonies. Be sure to familiarize yourself with some of these methods before embarking on making splits and introducing queen cells. This handout highlights the methods that we have found to be most successful, but there are many other techniques and variations. The techniques outlined below will work for queen cells you purchase or raise from your own colonies. The methods described in this guide work well for small beekeeping operations. TIME OF YEAR Queens need drones to mate with, so timing is very dependent on local conditions and yearly weather patterns. Winter and nectar dearths are poor times to raise queens as they lead to a great reduction in drone populations as colonies cease rearing drones and often evict them from the hives to die. An adequate saturation of drones is necessary for well mated queens. In general, in the central Virginia area the best time to make splits is in the spring and early summer. Most years that is early April through mid-July. In general we have found that the percentage of queens returning from their nuptial flights decreases as the year progresses, from as high as 90% to as low as 50%. This is thought to be due to an increase in predators such as birds and dragonflies. Earlier spring splits also benefit from a longer nectar flow and thus have a greater chance to stockpile pollen and honey and build up to a fully functional healthy population to survive winter. PART I OBTAINING QUEEN CELLS USING PURCHASED QUEEN CELLS (“Q-CELLS”) Queen cells can be purchased from local beekeepers or mail-ordered from outside the region. Q- cells are fragile and sensitive to temperature extremes. It is best to keep them at or near brood temperatures, which is around 92-96F degrees. If you are picking up a queen cell locally, bring a small hard-sided insulated cooler and a new zip lock baggy. Add 95F-degree water to the zip lock bag just before placing the Q-cell in the cooler. Next, place a towel or rags on top of the water bottle to give the cell a cushioned ride home. Adding a small damp rag is good to keep the humidity up in the cooler. When you place the Q-cell into your cooler, make sure that the cell will stay vertical on your ride home. Try to avoid any harsh vibrations, bumping, or shaking (the
Transcript
Page | 1
Introducing Queen Cells and Making Splits
Written by:
Ryan Williamson & Jacob Jordan
Raising your own queens or purchasing queen cells to make up splits or re-queen colonies can be
a very rewarding and educational experience. There are some distinct advantages to using this
method as an alternative to buying mated queens. First, it can be very economical. Secondly,
purchased cells can provide a means for you to improve your stock by bringing in new genetics,
while at the same time using local drones from your area for mating – thus, maintaining a degree
of local genetics in your stock. Additionally, it allows you to further develop your skills as a
beekeeper.
There are multiple techniques that can be employed to raise queens, make up splits and re-queen
colonies. Be sure to familiarize yourself with some of these methods before embarking on
making splits and introducing queen cells. This handout highlights the methods that we have
found to be most successful, but there are many other techniques and variations. The techniques
outlined below will work for queen cells you purchase or raise from your own colonies. The
methods described in this guide work well for small beekeeping operations.
TIME OF YEAR
Queens need drones to mate with, so timing is very dependent on local conditions and yearly
weather patterns. Winter and nectar dearths are poor times to raise queens as they lead to a great
reduction in drone populations as colonies cease rearing drones and often evict them from the
hives to die. An adequate saturation of drones is necessary for well mated queens. In general,
in the central Virginia area the best time to make splits is in the spring and early summer. Most
years that is early April through mid-July. In general we have found that the percentage of
queens returning from their nuptial flights decreases as the year progresses, from as high as 90%
to as low as 50%. This is thought to be due to an increase in predators such as birds and
dragonflies. Earlier spring splits also benefit from a longer nectar flow and thus have a greater
chance to stockpile pollen and honey and build up to a fully functional healthy population to
survive winter.
PART I
OBTAINING QUEEN CELLS
USING PURCHASED QUEEN CELLS (“Q-CELLS”)
Queen cells can be purchased from local beekeepers or mail-ordered from outside the region. Q-
cells are fragile and sensitive to temperature extremes. It is best to keep them at or near brood
temperatures, which is around 92-96F degrees. If you are picking up a queen cell locally, bring a
small hard-sided insulated cooler and a new zip lock baggy. Add 95F-degree water to the zip
lock bag just before placing the Q-cell in the cooler. Next, place a towel or rags on top of the
water bottle to give the cell a cushioned ride home. Adding a small damp rag is good to keep the
humidity up in the cooler. When you place the Q-cell into your cooler, make sure that the cell
will stay vertical on your ride home. Try to avoid any harsh vibrations, bumping, or shaking (the
Page | 2
virgin’s wings can be damaged from harsh handling). Also make sure to keep it out of direct
sunlight and away from cool A/C temperatures!
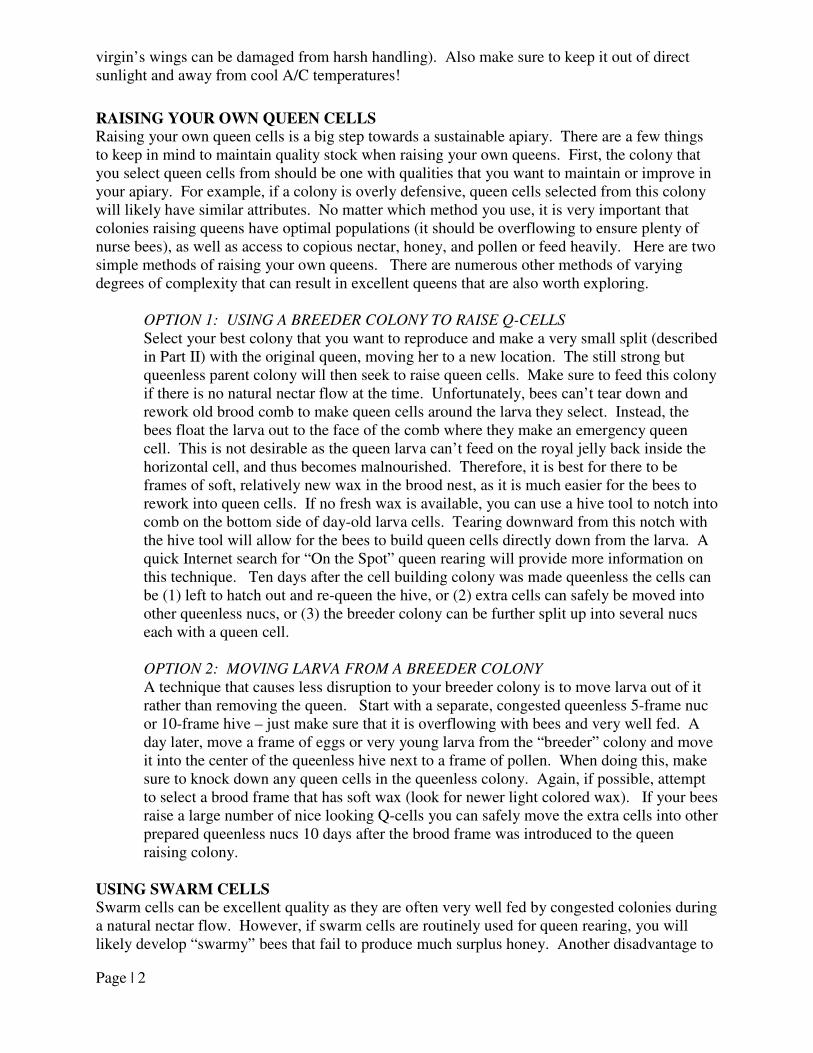
RAISING YOUR OWN QUEEN CELLS
Raising your own queen cells is a big step towards a sustainable apiary. There are a few things
to keep in mind to maintain quality stock when raising your own queens. First, the colony that
you select queen cells from should be one with qualities that you want to maintain or improve in
your apiary. For example, if a colony is overly defensive, queen cells selected from this colony
will likely have similar attributes. No matter which method you use, it is very important that
colonies raising queens have optimal populations (it should be overflowing to ensure plenty of
nurse bees), as well as access to copious nectar, honey, and pollen or feed heavily. Here are two
simple methods of raising your own queens. There are numerous other methods of varying
degrees of complexity that can result in excellent queens that are also worth exploring.
OPTION 1: USING A BREEDER COLONY TO RAISE Q-CELLS
Select your best colony that you want to reproduce and make a very small split (described
in Part II) with the original queen, moving her to a new location. The still strong but
queenless parent colony will then seek to raise queen cells. Make sure to feed this colony
if there is no natural nectar flow at the time. Unfortunately, bees can’t tear down and
rework old brood comb to make queen cells around the larva they select. Instead, the
bees float the larva out to the face of the comb where they make an emergency queen
cell. This is not desirable as the queen larva can’t feed on the royal jelly back inside the
horizontal cell, and thus becomes malnourished. Therefore, it is best for there to be
frames of soft, relatively new wax in the brood nest, as it is much easier for the bees to
rework into queen cells. If no fresh wax is available, you can use a hive tool to notch into
comb on the bottom side of day-old larva cells. Tearing downward from this notch with
the hive tool will allow for the bees to build queen cells directly down from the larva. A
quick Internet search for “On the Spot” queen rearing will provide more information on
this technique. Ten days after the cell building colony was made queenless the cells can
be (1) left to hatch out and re-queen the hive, or (2) extra cells can safely be moved into
other queenless nucs, or (3) the breeder colony can be further split up into several nucs
each with a queen cell.
OPTION 2: MOVING LARVA FROM A BREEDER COLONY
A technique that causes less disruption to your breeder colony is to move larva out of it
rather than removing the queen. Start with a separate, congested queenless 5-frame nuc
or 10-frame hive – just make sure that it is overflowing with bees and very well fed. A
day later, move a frame of eggs or very young larva from the “breeder” colony and move
it into the center of the queenless hive next to a frame of pollen. When doing this, make
sure to knock down any queen cells in the queenless colony. Again, if possible, attempt
to select a brood frame that has soft wax (look for newer light colored wax). If your bees
raise a large number of nice looking Q-cells you can safely move the extra cells into other
prepared queenless nucs 10 days after the brood frame was introduced to the queen
raising colony.
USING SWARM CELLS
Swarm cells can be excellent quality as they are often very well fed by congested colonies during
a natural nectar flow. However, if swarm cells are routinely used for queen rearing, you will
likely develop “swarmy” bees that fail to produce much surplus honey. Another disadvantage to
Page | 3
using swarm cells rather than purchased or home-raised cells is that you likely will not know the
exact age of the Q-cell and thus have a higher likelihood of damaging the developing queen. If
you find capped swarm cells in a hive, you can attempt to thwart a swarm by finding the current
queen and moving her in a small split (“artificial swarm”) to a new location with a generous
amount of bees, brood and honey. Make sure not to move any swarm cells with her! With the
remaining hive you can: (1) leave it alone for the swarm cells to hatch and the virgins fight it out,
or (2) destroy all but a few cells to further reduce the chance of swarming, or (3) move all but a
few swarm cells to other nucs, or (4) further split it into multiple nucs to virtually eliminate the
chance of swarming and increase the chances of raising multiple successful queens.
Queen cells are very sensitive to vibration and orientation until their last two days when they
have “ripened” and the queen inside has developed enough. Therefore, it is really important to
be very gentle with them and make sure they stay upright so the developing queen’s wings are
not damaged. If the bottom of the queen cell appears as though some layers of wax have been
removed (workers help prep the cell for hatching), it is a sign that the cell is “ripe” and the virgin
will soon emerge. If the cell is open at the bottom then the virgin queen has already hatched and
will soon kill the other queen cells. Likely a swarm recently occurred or will very soon!
PART II MAKING QUEENLESS SPLITS OR NUCS TO ACCEPT QUEEN CELLS To re-queen a colony, remove the existing queen the day before introducing a new queen or
queen cell. This allows the pheromones from the old queen to dissipate and the colony then
realizes its “queenless” state. Small colonies (such as small nucs) seem to realize this much
sooner. Often, they will accept a queen cell within hours of being made “queenless.” However,
waiting closer to 24 hours will increase your success rate. A quick heavy smoke also seems to
help (probably masks or dissipates pheromones). Remove a queen BEFORE coming to pick up a
purchased queen cell to allow the hive to be queenless for a minimum of a few hours.
There are numerous approaches to making up splits. The easiest way is to split a colony into two
or three hives, making sure each one has an equal amount of bees and brood and then simply
adding a Q-cell to each split after a few hours. With this method, you do not have to take the
time to locate the current queen because the queen-right colony will tear down the cell. This
works, but you will want to check back in 4-5 days to verify which split has the original laying
queen, which will be evident by the presence of eggs and a queen cell with its side torn out.
To make up 5-frame nuc splits go through a hive and find the queen and put her aside in an
enclosed nuc box. Then take two or three frames of brood with bees on them, one frame of
honey & pollen, and the fifth frame will either be foundation, empty drawn comb, or an
additional frame of honey & pollen (depending on whether or not there is a natural nectar flow).
After adding the frames of brood, but before adding the other frames, shake the nurse bees off
two or three brood frames into the empty space in the nuc (Note: This compensates for foragers
that will return to their original parent colony, and is only necessary if the split will stay in the
same home yard or within two miles). Next, place the splits in a new location facing a different
direction with grass or leaves directly in front of the entrance to encourage field bees to reorient
to their new home. Then, two to 24 hours later introduce a Q-cell. Using this method we have
had nearly one hundred percent acceptance rates.
Page | 4
PART III
INTRODUCING QUEEN CELLS You can place 1 to 3 queen cells in a hive. Typically, the first virgin to emerge will tear down
the additional cells, but having an additional cell is nice insurance, should one fail to emerge.
Typically, we only place one cell in each split unless extras are available, in which case a second
cell is added. If the colony is queenless they often accept a ripe Q-cell with no difficulty. In
order to increase the acceptance rate, however, it is a good idea to carefully inspect the brood
frames and tear down any Q-cells that the bees might have already started.
OPTION 1: INTRODUCING PURCHASED QUEEN CELLS
Place the Q-cell on a brood frame near the center of the cluster. To do this gently press the
plastic rim into the comb next to the brood, about 3/4 of the way up the frame. This will ensure
that the cell will stay at the appropriate temperatures. If the weather is warm and the population
appears adequate, you can alternately place the cell between two top bars in the center of the
cluster so the plastic lip of the cell cup suspends it. Make sure it is between two brood frames
(optimally in the center of the brood nest), as the bees will abandon the Q-cell to keep brood
warm if the weather turns cold!
Cold weather Queen cell placement.
Make sure the cell is secure!
Warm weather Queen cell placement.
Make sure not to squish the cell!
Successful Emergence!
Page | 5
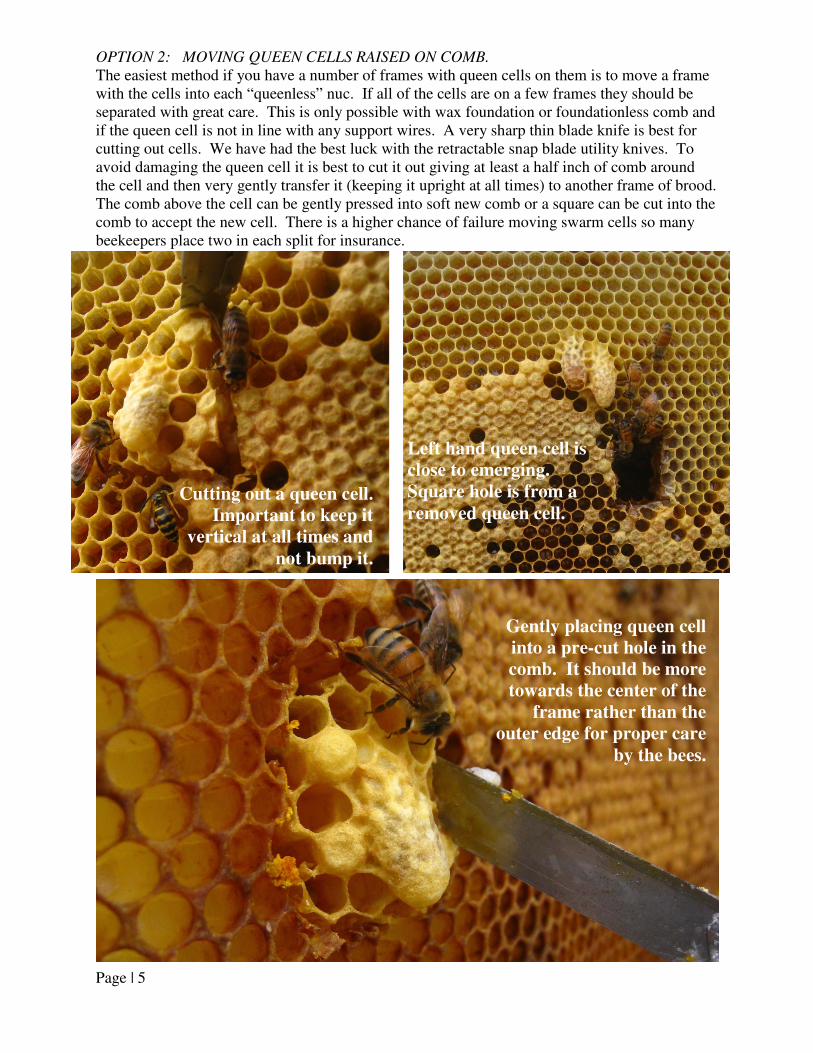
OPTION 2: MOVING QUEEN CELLS RAISED ON COMB.
The easiest method if you have a number of frames with queen cells on them is to move a frame
with the cells into each “queenless” nuc. If all of the cells are on a few frames they should be
separated with great care. This is only possible with wax foundation or foundationless comb and
if the queen cell is not in line with any support wires. A very sharp thin blade knife is best for
cutting out cells. We have had the best luck with the retractable snap blade utility knives. To
avoid damaging the queen cell it is best to cut it out giving at least a half inch of comb around
the cell and then very gently transfer it (keeping it upright at all times) to another frame of brood.
The comb above the cell can be gently pressed into soft new comb or a square can be cut into the
comb to accept the new cell. There is a higher chance of failure moving swarm cells so many
beekeepers place two in each split for insurance.
Cutting out a queen cell.
Important to keep it
vertical at all times and
not bump it.
Left hand queen cell is
close to emerging.
Square hole is from a
removed queen cell.
Gently placing queen cell
into a pre-cut hole in the
comb. It should be more
towards the center of the
frame rather than the
outer edge for proper care
by the bees.
Page | 6
INTRODUCING CELLS TO LAYING WORKER COLONIES
If the colony has become queenless for a long period, the workers may start laying eggs. A sign
of this is multiple eggs in each cells, scattered in an unorganized manner. The placement of
eggs often end up on the sides of the cells as the workers don’t have an adequate abdomen length
to reach the bottom of the cells. Very few of the eggs will be accepted by the bees and will result
in a very scattershot pattern of DRONE brood. Much of the drone brood will be in worker sized
cells so the capped cells will protrude outwards further than regular brood. Re-queening a
“laying worker” colony can be very challenging, so we have found that the easiest method of
dealing with a “laying worker” colony is to simply shake all the bees out in front of other
colonies and use the equipment for new splits. Most of the bees will be accepted into the other
colonies and then you can then make a split from a stronger colony.
However, if you want to keep the laying-worker colony, the best way to re-queen it is to use Q-
cells (versus buying a mated queen). Q-cells have a greater acceptance rate and the cost is far
less if you encounter failure. Laying workers emit enough queen mandibular pheromone to
make them very likely to kill an introduced mated queen, but less likely to destroy a queen cell
or virgin queen. Pheromones from open, un-capped brood suppress workers from laying. If you
have additional colonies you can add a frame of open brood weekly to the “laying worker”
colony until you have the opportunity to introduce a new queen or Q-cell. Placing the queen cell
between two frames of open brood will greatly increase acceptance. Additionally, a plastic cell
protector around the queen cell keeps the bees from tearing down the cell before the virgin
emerges.
Another method sometimes employed (not sure if science supports this) is to carry the colony
several hundred yards away and shake, brush, and jar as many bees as you can out of the hive.
The idea is to get as many laying workers out of the colony, as they won’t accept a new queen.
Then, return the colony to its original location. The theory is that “laying workers” can’t fly but
it probably just disrupts the fragile order of the colony enough that they might accept a new
queen.
PART IV POST- INTRODUCTION CARE Approximately 1 to 2 days after introducing the ripe cell, the virgin queen should hatch. It is
best not to disrupt the colony during this time. However, it is helpful to find out if the virgin has
successfully emerged. We like to do a quick inspection without smoke. To do this, gently pry
apart the frames and carefully lift the frame that the cell was on. If you placed the Q-cell
between two frames it will stick to one when you pry them apart. Inspect the Q-cell to see how
the cell has hatched. If the queen has hatched successfully, there will usually be a near perfect
round opening at the bottom of the cell. Often, the flap is left hanging like a door (see left image
below). However, at times the lid will be flipped shut even after the virgin has emerged, but you
can usually see that it has been previously opened with careful observation.
Page | 7
While inspecting and removing the cell you may see the virgin. If you do, simply slide the frame
back in carefully and close the colony, because virgins often are “flighty” and “skittish” when
they are young and can easily fly off and get lost. If the cell is not open at the bottom, but has
been opened at the side (see picture above on the right) the colony did not accept her, and she
was killed before she could emerge. The most likely causes of this occurring are (in the order of
probability): there is a mated or virgin queen already in the colony, the colony was not queenless
for an adequate time, or laying workers are present leaving the colony in a “hopelessly
queenless” state.
Approximately 2 to 3 days after introduction of the cell, the virgin will be wandering around the
colony spreading her pheromones, and her body will begin to harden up. At about 5 to 9 days of
age she will begin to take orientation flights. By 6 to 12 days after emergence she should be
taking regular mating flights, as long as the weather is optimal (Note: poor weather can delay
this process). Within 14 days after introduction she should be beginning to lay. This is a good
time to check for eggs. A flashlight can help illuminate the eggs. If you have difficulty seeing
eggs you can wait an additional 9 days and you should begin to see sealed brood. Another sign
that a queen is preparing to lay is the change in size of her abdomen. It will become engorged
and elongated, and soon she will not be able to fly. If you are unsure of whether there is a queen
present, look for other signs. For example, the center brood frames will usually be organized
differently in preparation for the new queen to lay. Generally, the workers will clear out the
center area of the comb and it will be empty and shiny ready for her to lay, whereas a
“queenless” colony will place nectar in the center areas of the frames.
Successfully
Hatched
Virgin Queen
Failed
Queen Cell
Introduction
Page | 8
It is important to inspect the colony two to three weeks after introducing the cell to make sure
that the queen has successfully mated and begun laying. There is always a possibility that she
was lost, or eaten (bird or dragon-fly, etc), while on a mating flight. If your colony is
“queenless” you want to take appropriate actions before it becomes a “laying worker” colony. If
you have any doubts about whether your hive is truly “queenless,” you can always introduce a
frame of open brood from another colony and see if they begin making emergency Q-cells with
larva and royal jelly in them within 4 days. However, don't confuse these active queen cells with
empty queen cups, which are often made by colonies during queen cell introductions due to the
reduced queen pheromones.
We hope that you have found this guide helpful. As with all beekeeping topics there are
numerous techniques and approaches to queen rearing and none is perfect. We have found the
above methods to be the simplest, most effective and economical in our operations. Bees
naturally don't always read the books and thus we expect you to find exceptions to our
observations. While queen rearing can be challenging we have found that it has greatly
deepened our understanding and enjoyment of honey bees. May you also get caught up in the
marvel of honeybee propagation.
Best of luck in your queen rearing endeavors!
For local queen cells, virgin queens, or mated queens contact us at:
Ryan Williamson
www.sourwoodfarm.com
Jacob Jordan
www.jordanapiaries.com
Queen Development Time Table (approximate due to temperature and weather conditions)