31
Lansdale Catholic Robotics Programming Best Practices Version: 1.02

Lansdale Catholic Robotics
Programming Best Practices
Version: 1.02
Updated: 2015/12/14

Lansdale Catholic Programming Best Practices
Table of Contents1 Introduction.........................................................................................................................................4
1.1 Change History.............................................................................................................................4
2 Naming................................................................................................................................................5
3 Using Common Flow............................................................................................................................6
3.1 During Teleop: Tank Drive...........................................................................................................6
3.1.1 Inputs...................................................................................................................................6
3.1.2 Flow Option 1.......................................................................................................................6
3.1.3 Flow Option 2.......................................................................................................................6
3.2 During Autonomous: Tank Drive..................................................................................................7
3.2.1 Flow.....................................................................................................................................7
4 Classes for LC.......................................................................................................................................8
4.1 Robot Class..................................................................................................................................8
4.1.1 disabledPeriodic...................................................................................................................8
4.1.2 TeleopPeriodic.....................................................................................................................9
4.1.3 AutonomousPeriodic.........................................................................................................10
4.2 Inputs Class................................................................................................................................12
4.2.1 Cooking Recipe: The Joystick Y value.................................................................................12
4.2.2 Cooking Recipe: Desensitizing the Joystick........................................................................13
4.2.3 Cooking Recipe: Convert Throttle into Integer Number Range..........................................14
4.2.4 Inputs Required Functions.................................................................................................15
4.3 Sensors......................................................................................................................................16
4.3.1 Cooking Recipe: Making Sense of the Sensors...................................................................16
4.3.2 Cooking Recipe: Adjusting Height with a virtual bottom....................................................17
4.3.3 Sensors Class Required Functions......................................................................................18
4.4 RobotBase Class and other output specialty classes..................................................................19
4.4.1 Cooking: Flipping the outputs............................................................................................19
4.4.2 RobotBase Required Functions..........................................................................................19
5 Gotchas..............................................................................................................................................20
5.1 Using Preferences With Booleans..............................................................................................20
5.2 Using Operation Modifying Boolean Flags.................................................................................21
2 | P a g e C o m m e n t s t o p a f w l @ a o l . c o m

Lansdale Catholic Programming Best Practices
3 | P a g e C o m m e n t s t o p a f w l @ a o l . c o m

Lansdale Catholic Programming Best Practices
1 IntroductionThis document will help guide you to the program best practices we use at Lansdale Catholic Robotics. You can modify as along as it make sense to all involved. This is to ensure that we all can understand each other’s code. If you have any questions about any of this please contact Frank Larkin at [email protected].
1.1 Change HistoryDate Version Initials DescriptionDec. 10, 2015 1.00 FWL Initial submissionDec. 13, 2015 1.01 FWL Adding headings and Table of contents. Final flesh out of ideas. Dec. 14, 2015 1.02 FWL Added Gotchas section.
4 | P a g e C o m m e n t s t o p a f w l @ a o l . c o m

Lansdale Catholic Programming Best Practices
2 NamingAll variables will use a naming scheme that will allow us to know what kind in variable that is. Below is a chart of the options.
Type Example Description/ example codeVariables
Boolean b_IsTowerDown true / false variable.Character c_DriveMode Single character.
Float f_WallSensorDistance Floating point number. (not used so much)Double d_WallDistance Double number (decimal number)Integer i_LoopCount Number without decimal.
String s_StepName String of characters
Preference Variables
These are when a variable above is set as a preference variable.
Boolean bp_FastOperation Examples available in the Example CodeCharacter cp_OperationMode
Float fp_WallSensorDistanceDouble dp_DeltaPowerInteger ip_LoopCount
String sp_StepNameWPILib Classes
Motor Controller
mot_FrontLeftDriveMotor
Motor Controller
mot_RearRigthDriveMotor
Relay rel_TowerDriveRelayAnalog Module ana_FrontIRSensor
Digital Input dig_TowerBottomSwitchJoystick joy_RightDriverStick (tank
drive)joy_DriverStick (archade drive)joy_OperatorStick
5 | P a g e C o m m e n t s t o p a f w l @ a o l . c o m
Lansdale Catholic Programming Best Practices
3 Using Common FlowTo make sure we have readability we need a common understanding of flow and naming. This includes variable naming. These are suggestions but the team must agree so it is clear what we are doing.
3.1 During Teleop: Tank Drive3.1.1 InputsJoysticks are created in the inputs class. They give us a double type numbers representing power. As In: getX(), getY(), getZ(), getTwist(), getThrottle() These numbers are read and stored in variables for use outside the inputs class.d_LeftDriverPower = joy_LeftDriverStick.getY();d_RightDriverPower = joy_RightDriverStick.getY();
Note: We can and will cook them before the leave so they make sense to the humans. This is explained later.
3.1.2 Flow Option 1In robotThink or other functions filters manipulate variables not motors as needed. roborBase.d_FrontLeftDrivePower = inputs.d_LeftDriverPower;roborBase.d_FrontRightDrivePower = inputs.d_RightDriverPower;roborBase.d_RearLeftDrivePower = inputs.d_LeftDriverPower;roborBase.d_RearRightDrivePower = inputs.d_RightDriverPower;
Then these numbers are set into motors inside the robotBase or other class.mot_FrontLeftDriveMotor.set(-d_FrontLeftDrivePower) ;mot_FrontRightDriveMotor.set(d_FrontRightDrivePower) ;mot_RearLeftDriveMotor.set(-d_RearLeftDrivePower) ;mot_RearRightDriveMotor.set(d_RearRightDrivePower);
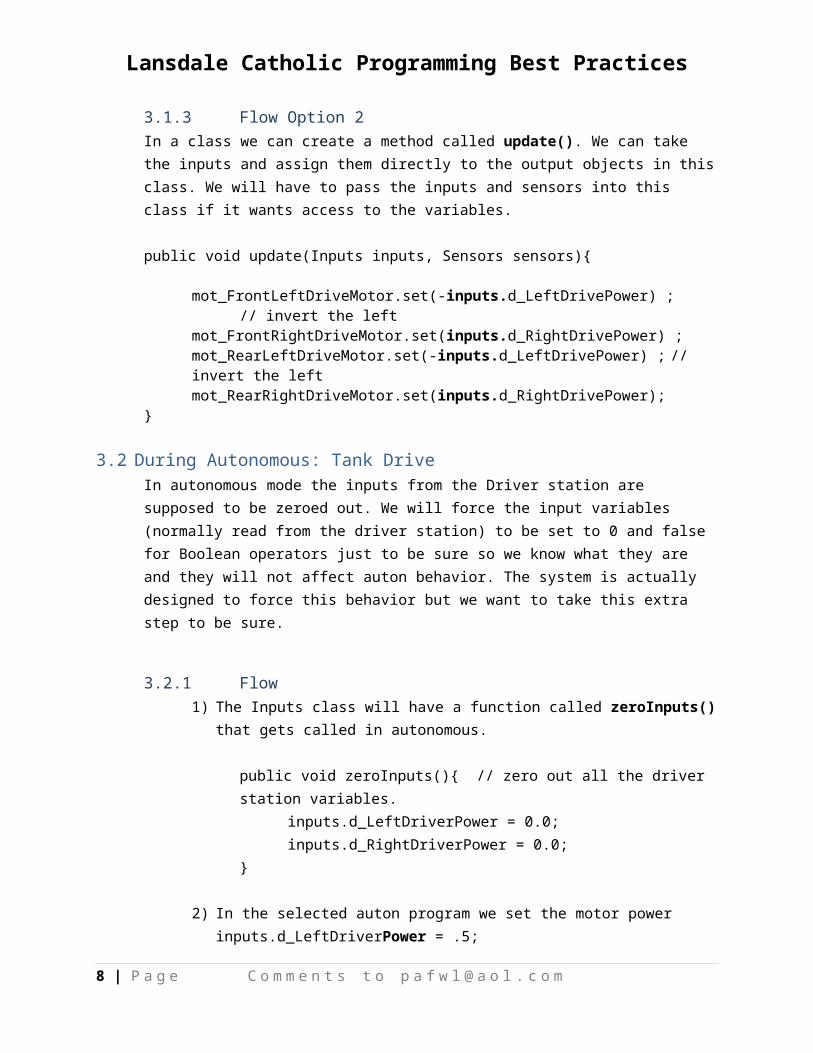
3.1.3 Flow Option 2 In a class we can create a method called update(). We can take the inputs and assign them directly to the output objects in this class. We will have to pass the inputs and sensors into this class if it wants access to the variables.
public void update(Inputs inputs, Sensors sensors){
mot_FrontLeftDriveMotor.set(-inputs.d_LeftDrivePower) ; // invert the leftmot_FrontRightDriveMotor.set(inputs.d_RightDrivePower) ;mot_RearLeftDriveMotor.set(-inputs.d_LeftDrivePower) ; // invert the leftmot_RearRightDriveMotor.set(inputs.d_RightDrivePower);
}
6 | P a g e C o m m e n t s t o p a f w l @ a o l . c o m

Lansdale Catholic Programming Best Practices
3.2 During Autonomous: Tank DriveIn autonomous mode the inputs from the Driver station are supposed to be zeroed out. We will force the input variables (normally read from the driver station) to be set to 0 and false for Boolean operators just to be sure so we know what they are and they will not affect auton behavior. The system is actually designed to force this behavior but we want to take this extra step to be sure.
3.2.1 Flow1) The Inputs class will have a function called zeroInputs() that gets called in
autonomous.
public void zeroInputs(){ // zero out all the driver station variables.inputs.d_LeftDriverPower = 0.0;inputs.d_RightDriverPower = 0.0;
}
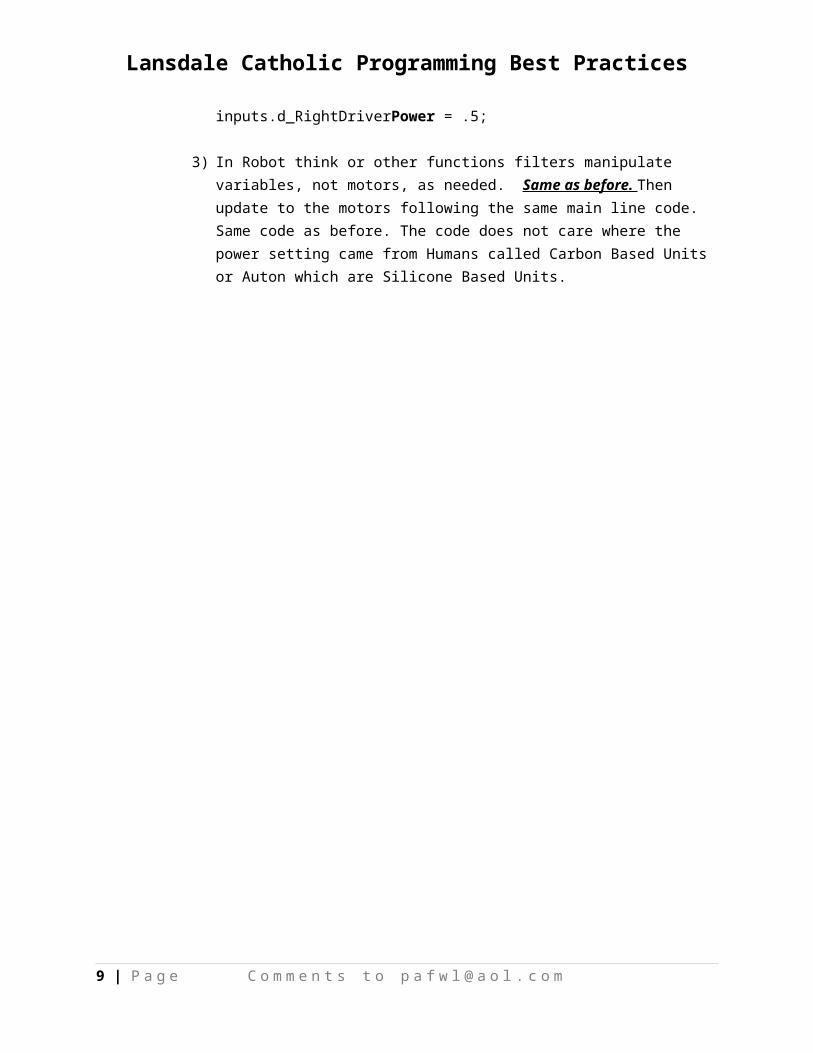
2) In the selected auton program we set the motor power inputs.d_LeftDriverPower = .5;inputs.d_RightDriverPower = .5;
3) In Robot think or other functions filters manipulate variables, not motors, as needed. Same as before. Then update to the motors following the same main line code. Same code as before. The code does not care where the power setting came from Humans called Carbon Based Units or Auton which are Silicone Based Units.
7 | P a g e C o m m e n t s t o p a f w l @ a o l . c o m
Lansdale Catholic Programming Best Practices
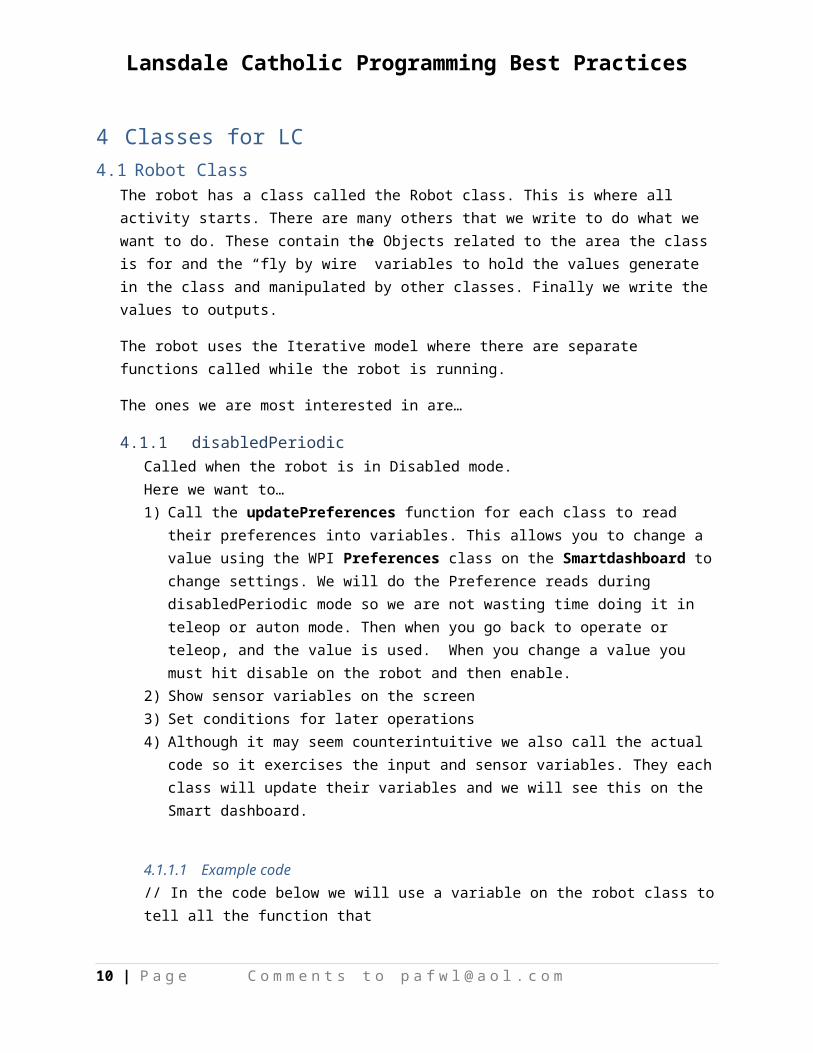
4 Classes for LC4.1 Robot Class
The robot has a class called the Robot class. This is where all activity starts. There are many others that we write to do what we want to do. These contain the Objects related to the area the class is for and the “fly by wire” variables to hold the values generate in the class and manipulated by other classes. Finally we write the values to outputs.
The robot uses the Iterative model where there are separate functions called while the robot is running.
The ones we are most interested in are…
4.1.1 disabledPeriodicCalled when the robot is in Disabled mode. Here we want to…1) Call the updatePreferences function for each class to read their preferences into variables.
This allows you to change a value using the WPI Preferences class on the Smartdashboard to change settings. We will do the Preference reads during disabledPeriodic mode so we are not wasting time doing it in teleop or auton mode. Then when you go back to operate or teleop, and the value is used. When you change a value you must hit disable on the robot and then enable.
2) Show sensor variables on the screen3) Set conditions for later operations4) Although it may seem counterintuitive we also call the actual code so it exercises the input
and sensor variables. They each class will update their variables and we will see this on the Smart dashboard.
4.1.1.1 Example code// In the code below we will use a variable on the robot class to tell all the function that // they should minimize the amount of data displayed to the dashboard. This will be set// fro competition to minimize bandwidth on the FMS network. public void disabledPeriodic() { checkMinDisplay(); // read Preferences to set bp_MinDisplay
// this tells us each class to minimize what we display // call the updatePreferences on all classes inputs.updatePreferences(); auton.updatePreferences(); robotbase.updatePreferences();
8 | P a g e C o m m e n t s t o p a f w l @ a o l . c o m
Lansdale Catholic Programming Best Practices
wedge.updatePreferences(); sensors.updatePreferences();
// exercise the code just as we do in Teleop Periodic//we go through all of this to see things change and check that things are working
// since we are in disabled mode no output will occur. inputs.readValues(); // Zero out the human inputs. sensors.readValues(); // read the sensors
robotThink(); // make any decisions here about what to do if needed
robotbase.update(); tower.update(inputs, sensors); wedge.update(inputs, sensors);
SmartDashboard.putBoolean("R_MinDisplay(bool)", bp_MinDisplay); inputs.outputToDashboard(this.bp_MinDisplay); sensors.outputToDashboard(this.bp_MinDisplay); auton.outputToDashboard(this.bp_MinDisplay); robotbase.outputToDashboard(this.bp_MinDisplay); }
4.1.2 TeleopPeriodicCalled when the robot is in human operated mode. Here we …
1) Call inputs.readValues() to read from the driver station into variables. 2) Call sensors.readValues () to read the sensors into variables.3) Call RobotThink() – (Optional) This will process the main driver variables. We have not
written out to the outputs yet. We may have updated output variables but we did not actually update the motors.
4) Call robotbase.update() – This will write the values we want to the motors and the relays. If we want to have the manipulation code in robotbase then we have to pass the inputs and sensor classes to robotbase as described above.
5) Optionally we may have other classes to control other functions like a wedge or tower. These too will have and update function that we can call. We will have to pass inputs and sensors and possibly other to them for their use.
9 | P a g e C o m m e n t s t o p a f w l @ a o l . c o m
Lansdale Catholic Programming Best Practices
6) Finally we call each class to displayToDashboard(). This will show the variables we want on the dashboard. This can be called with a robot class supplied variable to minimize the amount of data we display.
public void teleopPeriodic() {
inputs.readValues(); sensors.readValues();
robotThink();
robotbase.update(); tower.update(inputs, sensors); wedge.update(inputs, sensors);
// bp_MinDisplay is part of the Robot class. SmartDashboard.putBoolean("R_DebugMode(bool)", bp_MinDisplay); inputs.outputToDashboard(this.bp_MinDisplay); sensors.outputToDashboard(this.bp_MinDisplay); robotbase.outputToDashboard(this.bp_MinDisplay); tower.outputToDashboard(this.bp_MinDisplay); wedge.outputToDashboard(this.bp_MinDisplay); auton.outputToDashboard(this.bp_MinDisplay);
}
4.1.3 AutonomousPeriodicCalled when the robot is in Autonomous. Here we …1) Clear out the variables in the input class by calling inputs.zeroValues(); This prevents them
from contaminating the auto operations. They are supposed to be cleared out by the system when in auto mode. We are just enforcing that to be sure.
2) Call sensors.readValues () to read the sensors into variables.3) Call the autonomous code. At LC this will include a dispatcher method that will decide what
program to run based on the auton.i_ProgramNumber. This can be selected in many ways but most easily by a setting using preferences on the dashboard. In the code we will set the input values as if an operator has pushed a joy stick forward or back or pressed a button. The robot does not know of care. We call this a Virtual Operator.
4) Call all the other class below just like we did in teleop mode.
public void autonomousPeriodic() {
10 | P a g e C o m m e n t s t o p a f w l @ a o l . c o m

Lansdale Catholic Programming Best Practices
inputs.zeroInputs(); // Zero out the human inputs. sensors.readValues(); // read the sensors auton.dispatcher(inputs, sensors, wedge); // send in inputs and sensors and others
// to decide what to do
robotThink(); // make any decisions here about what to do if needed
robotbase.update(); tower.update(inputs, sensors); wedge.update(inputs, sensors); SmartDashboard.putBoolean("R_DebugMode(bool)", bp_MinDisplay); inputs.outputToDashboard(this.bp_MinDisplay); sensors.outputToDashboard(this.bp_MinDisplay); auton.outputToDashboard(this.bp_MinDisplay); robotbase.outputToDashboard(this.bp_MinDisplay); tower.outputToDashboard(this.bp_MinDisplay); wedge.outputToDashboard(this.bp_MinDisplay); }
11 | P a g e C o m m e n t s t o p a f w l @ a o l . c o m

Lansdale Catholic Programming Best Practices
4.2 Inputs ClassWhere all human inputs come from. Typically this is the drive station inputs. All values are modified so they are understood by the developers. This means we “cook” them to make sense to us humans.
Examples:Force positive motor powers when the robot is going forward and negative when going backward. Force positive motor powers when a tower is going up and negative when going down.
4.2.1 Cooking Recipe: The Joystick Y value. Y axis of the Joystick is the one we most use for forward/back, up/down power. Unfortunately values come in as -1.0 full forward, 0.0 center and 1.0 full back. There is a reason for this which we do not care about but ask me if you want and I will tell you. If we did nothing the negative would mean forward and positive back. This is very confusing. In the inputs class we will cook them so that the value we see is 1.0 is full forward, 0.5 = 1/2 forward. 0 = stop, -0.5 = ½ back, -1.0 = full back. This makes sense to everything and every other developer outside the inputs class and that is the whole point.
To flip the value we “invert” it by simply multiplying the value from the joystick by -1.0 or just negating it.
double d_temp = joy_DriverStick.getY(); // get power from joystickd_DriverPower = d_temp * -1; // invert value
Driver Joystick Y Position d_temp Mult by -1 d_DriverPowerPushed full forward -1.0 -1 1.0
Pushed ½ forward -0.5 -1 0.5Untouched, standing straight up 0.0 -1 0.0
Pulled ½ back 0.5 -1 -0.5Pulled full back 1.0 -1 -1.0
These 2 forms are equivalent. This formula can be simplified as…d_DriverPower = joy_DriverStick.getY() * -1; // get and invert the Y power from joystickord_DriverPower = -joy_DriverStick.getY(); // get and invert the Y power from joystick
12 | P a g e C o m m e n t s t o p a f w l @ a o l . c o m

Lansdale Catholic Programming Best Practices
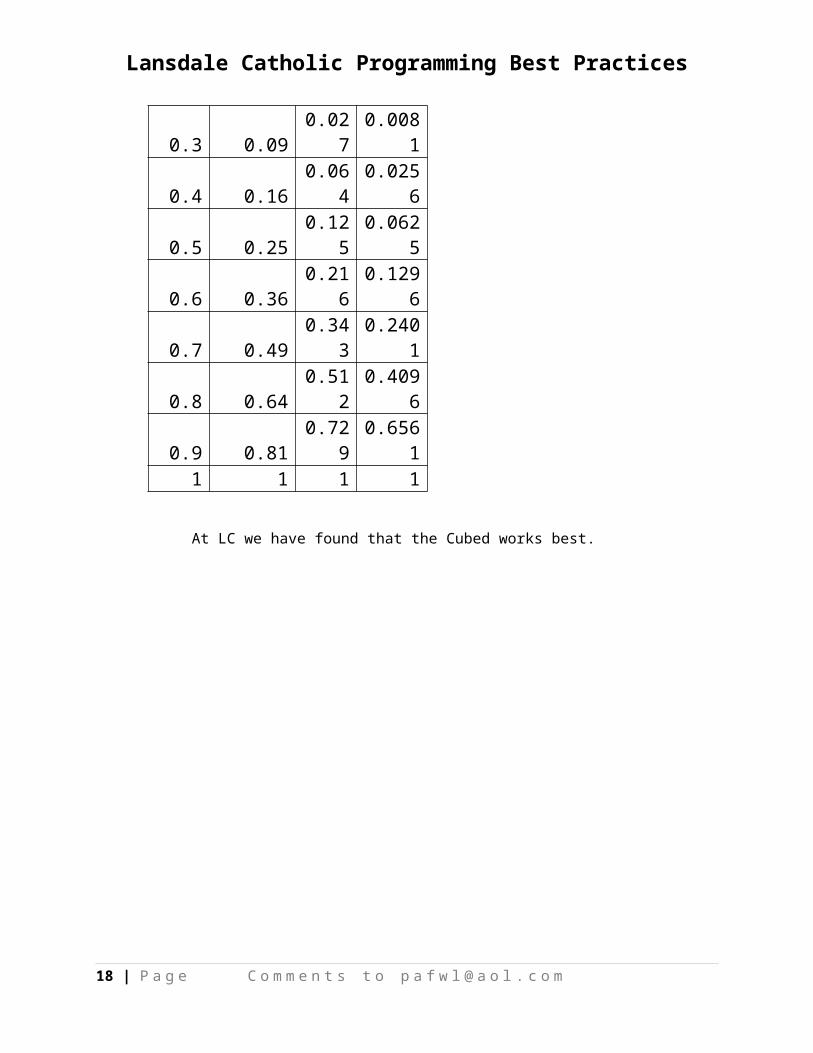
4.2.2 Cooking Recipe: Desensitizing the JoystickHere we want to make it easier to use at low speeds for control but make it full power at high speeds. If we multiply the power by itself many times we get this affect. We start with the value we got from above. Then apply this filter.
d_DriverPower = d_DriverPower * Math.abs(d_DriverPower); // square the value
Here we multiply it by itself 2 times. We use the absolute value function so the sign (+/-) on the right of the * (multiply symbol) is always positive. The important point here is the sign is maintained without any additional code. If we did not do this when we multiplied a negative * negative we get a positive. We would need additional code to fix this. Using Math.abs() eliminates the need. Below is cubing (mult by 3) and quading (mult by 4). Experiment what is best for you robot.
d_DriverPower = d_DriverPower * abs( d_DriverPower * d_DriverPower ) ; // cube the value
d_DriverPower = d_DriverPower * abs( d_DriverPower * d_DriverPower * d_DriverPower ) ;
Throughout the sign is maintained with no additional effort. The chart below shows the effect.
Input Powe
rSquared
OutCubed Out
Quad Out
0 0 0 00.1 0.01 0.001 0.00010.2 0.04 0.008 0.00160.3 0.09 0.027 0.00810.4 0.16 0.064 0.02560.5 0.25 0.125 0.06250.6 0.36 0.216 0.12960.7 0.49 0.343 0.24010.8 0.64 0.512 0.40960.9 0.81 0.729 0.6561
1 1 1 1
At LC we have found that the Cubed works best.
13 | P a g e C o m m e n t s t o p a f w l @ a o l . c o m

Lansdale Catholic Programming Best Practices
4.2.3 Cooking Recipe: Convert Throttle into Integer Number Range.Here we want to take an analog input from a joystick like a throttle and change it to a number range. getThrottle() is an axis and normally too will have a range of -1.0 (highest) to 1.0 (lowest). We can pass it through a few steps to make it a number range. Ultimately we want to get it to a range of 0.0 to 1.0. This then becomes a percentage. Our final step is to multiply by the top of the range and convert to an integer.
double d_temp = joy_DriverStick.getThrottle() * -1.0; // capture and invertd_temp = d_temp + 1.0; // shift range by 1, range 0.0 to 2.0.d_temp = d_temp / 2.0; // divide by 2, range 0.0 to 1.0.i_TowerDesitedPosition = (int) (d_temp * 900.0); // multiply by the max power
Now you have a way to select from 0 to 900.
InputInvert / Negate Add 1 Div 2
Mult by top of range Final Value
-1.00 1.00 2.00 1.00 900 900-0.50 0.50 1.50 0.75 900 6750.00 0.00 1.00 0.50 900 4500.50 -0.50 0.50 0.25 900 2251.00 -1.00 0.00 0.00 900 0
The entire process can be in 1 line but we want clarity. i_TowerDesiredPosition = (int) ((((joy_DriverStick.getThrottle() * -1.0) + 1.0) /2.0 )* 900); ori_TowerDesiredPosition = (int) ((((-joy_DriverStick.getThrottle()) + 1.0) /2.0 )* 900);
The sample code has a function in the Inputs class to do this and show how it is used.
public int convertJoystickAxisToValueRange( double d_InputValue, int i_MaxValue );
You could add code after this to set limits. More cooking…
i_TowerDesiredPosition = convertJoystickAxisToValueRange(-joy_DriverStick.getThrottle(), 900);
if( i_TowerDesiredPosition < 100 ) // set lower limiti_TowerDesiredPosition = 100;
else if( i_TowerDesiredPosition > 800 ) // set upper limiti_TowerDesiredPosition = 800;
Note: Java does not care about the “white space in between characters. It is looking for the semicolon to know the line if finished.
14 | P a g e C o m m e n t s t o p a f w l @ a o l . c o m

Lansdale Catholic Programming Best Practices
4.2.4 Inputs Required FunctionsreadValues() – This will read all the inputs, cook them and save them to the input variables. zeroValues() – Zero out all input variables (not preferences) so that basically the robot will not move. This is called in auton mode. Note: Some variables like a child operation mode will not be zeroed here. You decide. updatePreferences() - Read the preferences from the Preferences systemwriteTelemetry() – Write current variables to the telemetry system. (if we get one)outputToDashboard() – Show what variables we want to the SmartDashboard
15 | P a g e C o m m e n t s t o p a f w l @ a o l . c o m

Lansdale Catholic Programming Best Practices
4.3 SensorsWhere all sensors defined and variables created. Again we want to cook this to be able to give all the developers a clean idea what is going on.
Here we…
1) Connect the sensor to the analog input. They figure something out (turn of a potentiometer, read IR light in a sensor for distance, read ultrasonic detector and determine distance.
2) This is returned to the Analog Input on the robotRIO as a voltage up to 5 volts. 3) The roboRio gives it to us as a number or voltage value. There are many ways to read this
but the one that makes the most sense is GetAverageValue(). This usually returns an integer from 0 to 1024. In roboRio it has been returning up to 2048.
This method “Over Samples” the input and returns the average value it read. It makes for a flatter response to noise. We can cook this again so it makes sense.
4) We can then cook this value as we see fit.
4.3.1 Cooking Recipe: Making Sense of the SensorsSome String potentiometers sensors will go low (0) to high (1024) as you pull out the sting.
i_TowerPotHeight = ana_TowerPotSensor.getAverageValue(); // get average reading
This makes sense to us CBUs. Low or close is down and high or far is up as in a tower.
Many Distance sensors work where a low number means far away and a higher number means we are closer. We may want to switch that. So that high is far away and low is close.
i_WallDistance = i_SensorOffset - ana_IRWallSensor.getAverageValue();
Truth Table (makes it very easy to understand)
Position Reading Offset Offset-ReadingFar away 0 1024 1024
Close 512 1024 512Closer 768 1024 256
Real Close 1000 1024 24
16 | P a g e C o m m e n t s t o p a f w l @ a o l . c o m

Lansdale Catholic Programming Best Practices
4.3.2 Cooking Recipe: Adjusting Height with a virtual bottom. Let’s assume this string pot goes low (0) to high (1024). Down is low and up is high. We now want to set positions so we can have our tower move to these different spots. Placing the string pot so zero is exactly where you want it is not always possible. Actually positioning the pot will be difficult. In addition the string may stretch a little of get wound tighter on the drum. This will affect the zero position.
We need a defined, resettable zero “virtual bottom” position. Then all our measurements are from the virtual bottom to the different points. You set a bottom offset with some string left on the spool. You take the tower to the physical bottom. Then take the reading. This is the bottom offset. When the tower is down we see 100 from the sensor. You then set the bottom offset to 100.
i_TowerBottomOffset = 100;
i_TowerPotHeight = ana_TowerPotSensor.getAverageValue() - i_TowerBottomOffset;
Bottom Offset Truth Table (makes it very easy to understand)
Position Value Read i_TowerBottomOffset I_TowerPotHeight (from VirtBottom)
Full down 100 100 0Up ½ 500 100 400Up ¾ 700 100 600
Up at top 900 100 800
Now if you want go to the middle you move to calculated position 400 (difference from bottom offset (0) to the middle). You may have to reset the bottom offset a few times but all your measurements will then be very close. If you change the sensor you will have to rest the bottom offset.
17 | P a g e C o m m e n t s t o p a f w l @ a o l . c o m
Lansdale Catholic Programming Best Practices
Now you can also set a hard stops. Going down (negative power), anything below 10 from bottom tell motor to stop.
// filter example using these variables in Robot think or another class or functionIf (input.d_TowerPower < 0.0) // going down (- is down)
If ( sensor.i_TowerPotHeight < 10 ) // is tower near bottominput.d_TowerPower = 0.0; // kill tower power
If (input.d_TowerPower > 0.0) { // going up (+ is up)If ( sensor.i_TowerPotHeight > 750 ) // slow down as you get near top
input.d_TowerPower = .1;
If ( sensor.i_TowerPotHeight >= 800 ) // near topinput.d_TowerPower = 0.0; // kill power
}
4.3.3 Sensors Class Required FunctionsreadValues() – This will read all the inputs, cook them and save them to the appropriate variables. updatePreferences() - Read the preferences from the Preferences systemwriteTelemetry() – Write current variables to the telemetry system. (if we get one)outputToDashboard() – Show what variables we want to the SmartDashboard
18 | P a g e C o m m e n t s t o p a f w l @ a o l . c o m

Lansdale Catholic Programming Best Practices
4.4 RobotBase Class and other output specialty classesWhere all basic output objects like motors and relays are defined. This too can have output variables if they are going to be modified by others before they are applied to the motors. If you are going to have a specialty class like wedge, tower or arm, they may have their own motor definitions. It is up to how you design it.
4.4.1 Cooking: Flipping the outputsYou will want to flip the motor power assigned the motors here. A left and a right motor are actually given opposite power so they go in the same direction. Go and try this to see what we mean. Here we flip the power on one side so the effect is that the robot goes in what you consider to be the forward direction. In the example below the right motors, when given positive power make the robot go forward. The left motors have to be flipped, negated or inverted so they move in the same direction as the right.
mot_FrontLeftDriveMotor.set(-d_FrontLeftDrivePower) ;mot_FrontRightDriveMotor.set(d_FrontRightDrivePower) ;mot_RearLeftDriveMotor.set(-d_RearLeftDrivePower) ;mot_RearRightDriveMotor.set(d_RearRightDrivePower);
If your drivetrain guys come in and say, “Hey we just added another stage to the drive train.” Then they laugh and walk away (not very gracious or professional). You do not panic. You just change the signs above at output so that robot will once again move forward with positive power and back with negative. NO OTHER CODE FOR THESE MOTORS WILL NEED TO BE CHANGED!!!!
4.4.2 RobotBase Required Functionsupdate() – This will set the output values to the output objects. updatePreferences() - Read the preferences from the Preferences systemwriteTelemetry() – Write current variables to the telemetry system. outputToDashboard() – Show what variables we want to the SmartDashboard
19 | P a g e C o m m e n t s t o p a f w l @ a o l . c o m

Lansdale Catholic Programming Best Practices
5 Gotchas5.1 Using Preferences With BooleansThe demo code has several Booleans that are set via Preferences. The take either the word true or false. Anything else will crash your code. If you followed the example code, this is updated while in Disabled mode. That is where we read in all the preferences. As an example, the flag below is used to kill the motors while you are experimenting with other things. You do not want the robot to jump off a table.
this.bp_AllowedToDrive = Preferences.getInstance().getBoolean("O_AllowedToDrive(bool)", true);
The robot is running normally and you are disabled. Now you go to the Preferences box to change this from true to false so you can work on it. Instead of typing false you type flase. Once you hit enter, this will cause the robot code to crash throwing an exception.
The good news is you easily see what the problem is.
1) You go back to the Preferences screen first and fix it so it says false. You enter false and hit the enter key.
2) Now to restart the code click the diagnostics box. There you will click the Restart Robot Code button and you should come back fine. If you throw another exception fix that and try again. Try is a few times so you are not afraid to do this and learn it is easily fixable.
Note: This is not just a problem with Booleans. It is a problem with numbers too. If you have a number fiend and you enter any characters you will get an exception.
20 | P a g e C o m m e n t s t o p a f w l @ a o l . c o m
Lansdale Catholic Programming Best Practices
5.2 Using Operation Modifying Boolean FlagsWhen deciding to use Boolean flags it is suggested that they are created in such a way that in normal competition mode all will be set to true. These can be displayed on the SmartDashboard screen. As Boolean Boxes. You have to read the example code to see what these do.
If they are all true they, will display as green by default. Yes, you can change values and mess with it but by default they are a lovely green. This way your operators will look and see all greens before that start.
This can be a challenge in naming. For example I_FastOperation is really for using the robot slowed down with child operators. If the flag was I_ChildOperator, you do not what this in competition, so this would be false. The challenge is to use a name that when set to true is how you want to operate in competition.
Important Note: If these flags are part of the Inputs class you DO NOT WANT them included in the zeroInputs() method. These are outside that as they control reconfiguring the robots operation.
21 | P a g e C o m m e n t s t o p a f w l @ a o l . c o m


