Introduction to Dreamweaver - Buttons with Javascript and Flash This tutorial is designed to show you how to create the two most commonly used buttons in Dreamweaver, other than using text to create a link. The two most common button types in web page design are Flash buttons and Rollover buttons. First start by creating a new page, File > New... Select Category, Basic page and HTML from the Basic page list, then click on Create.
Transcript
Introduction to Dreamweaver - Buttons with Javascript and Flash
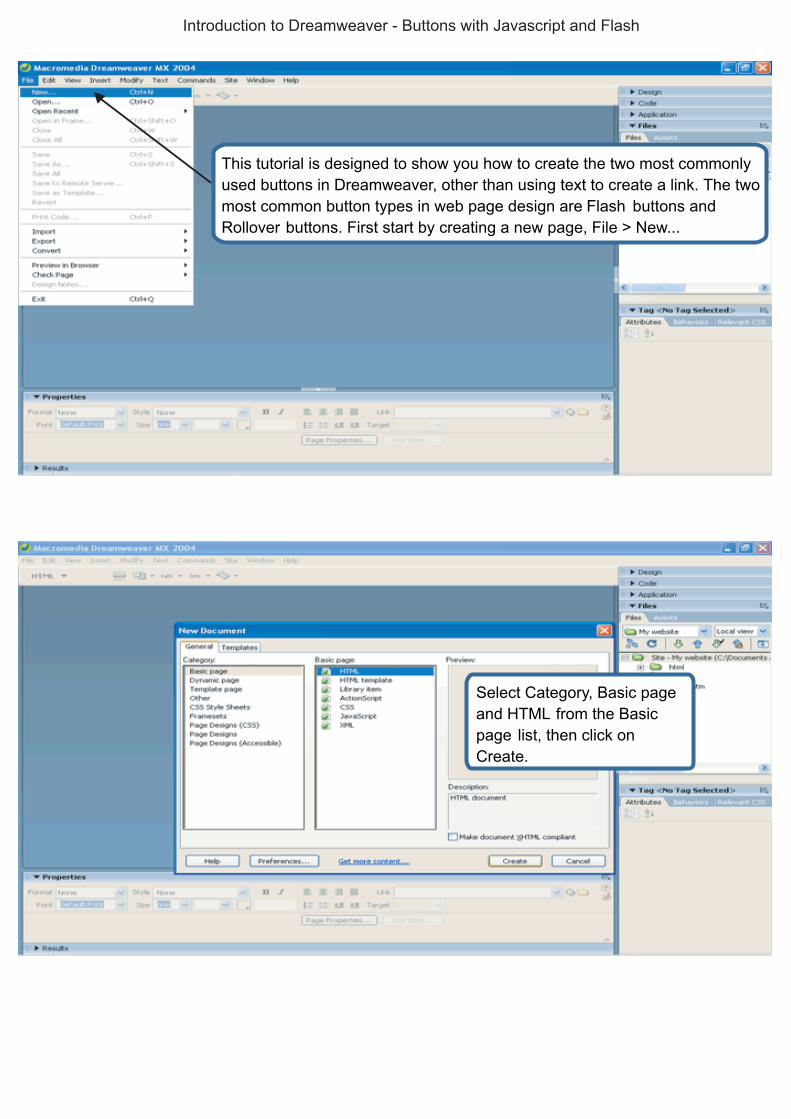
This tutorial is designed to show you how to create the two most commonly used buttons in Dreamweaver, other than using text to create a link. The two most common button types in web page design are Flash buttons and Rollover buttons. First start by creating a new page, File > New...
Select Category, Basic page and HTML from the Basic page list, then click on Create.
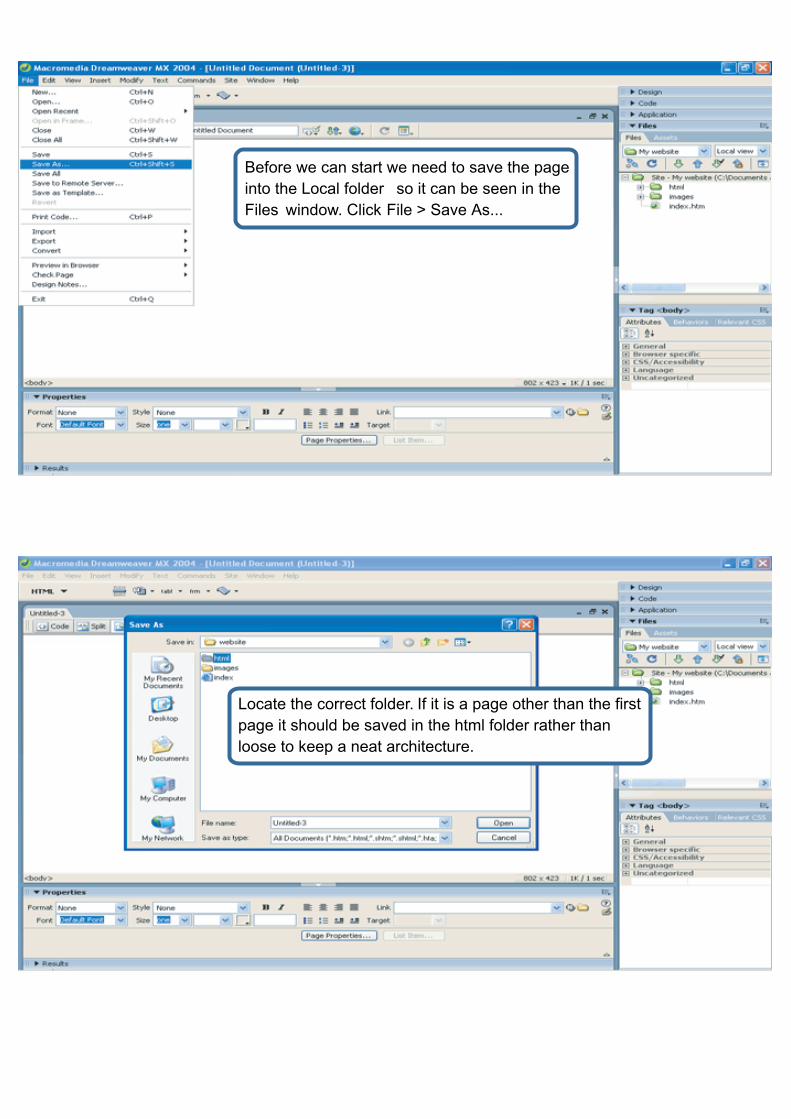
Before we can start we need to save the page into the Local folder so it can be seen in the Files window. Click File > Save As...
Locate the correct folder. If it is a page other than the first page it should be saved in the html folder rather than loose to keep a neat architecture.
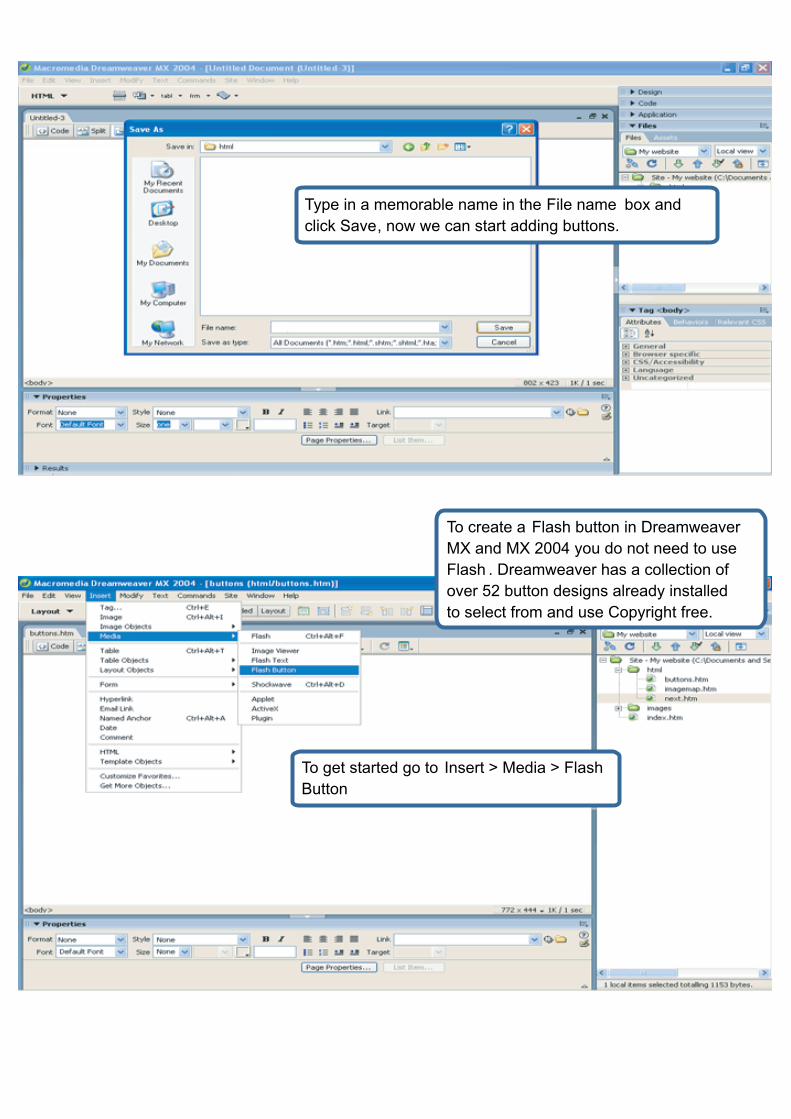
Type in a memorable name in the File name box and click Save, now we can start adding buttons.
To create a Flash button in Dreamweaver MX and MX 2004 you do not need to use Flash . Dreamweaver has a collection of over 52 button designs already installed to select from and use Copyright free.
To get started go to Insert > Media > Flash Button
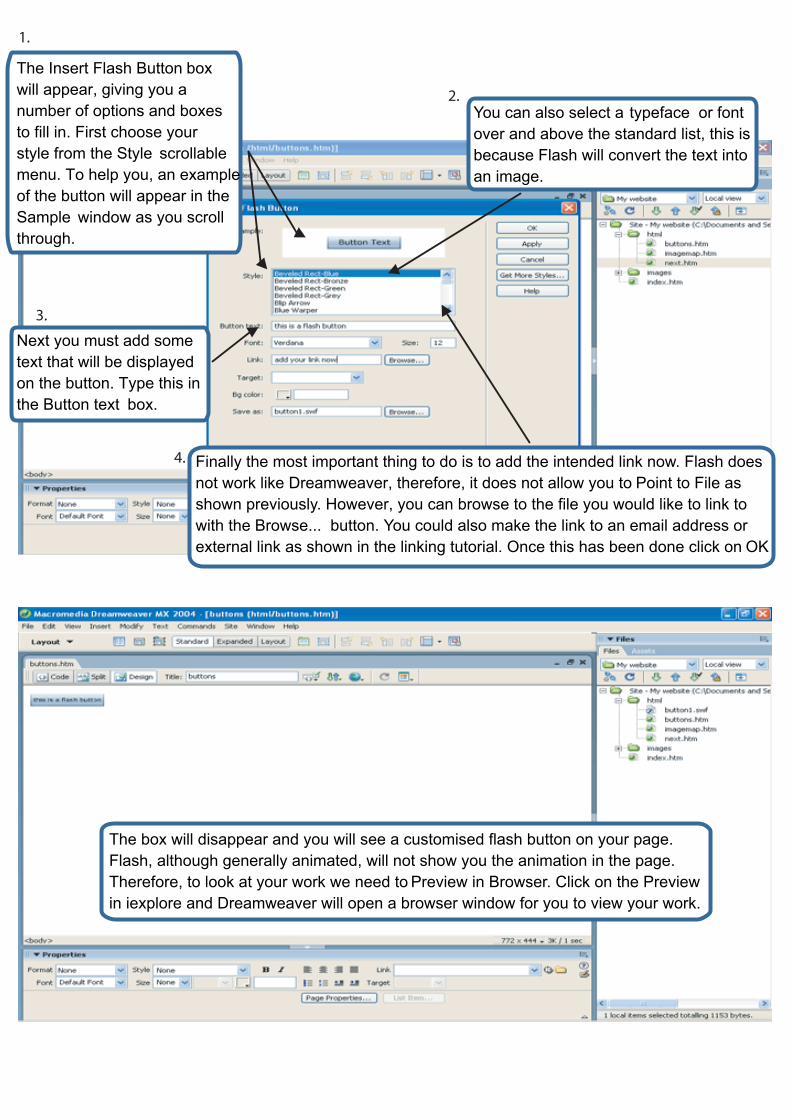
The Insert Flash Button box will appear, giving you a number of options and boxes to fill in. First choose your style from the Style scrollable menu. To help you, an example of the button will appear in the Sample window as you scroll through.
Next you must add some text that will be displayed on the button. Type this in the Button text box.
You can also select a typeface or font over and above the standard list, this is because Flash will convert the text into an image.
Finally the most important thing to do is to add the intended link now. Flash does not work like Dreamweaver, therefore, it does not allow you to Point to File as shown previously. However, you can browse to the file you would like to link to with the Browse... button. You could also make the link to an email address or external link as shown in the linking tutorial. Once this has been done click on OK
The box will disappear and you will see a customised flash button on your page. Flash, although generally animated, will not show you the animation in the page. Therefore, to look at your work we need to Preview in Browser. Click on the Previewin iexplore and Dreamweaver will open a browser window for you to view your work.
1.
2.
3.
4.
To create a more traditional Rollover button click on Insert > Image Objects > Rollover Image
The Insert Rollover Image box appears. First give your Image set a name in the Image name box. This is similar to naming an Image map as discussed earlier, allowing you to add more than one to the same page,. When it comes to buttons for navigating around your website you are going to need more than one.
Next we need to tell Dreamweaver the location of the Original image or Up State as it is known. Click Browse... As mentioned earlier Dreamweaver is not a
graphics package. To create a Rollover button you will need to either download the Working file from the main menu or create your own before moving on.
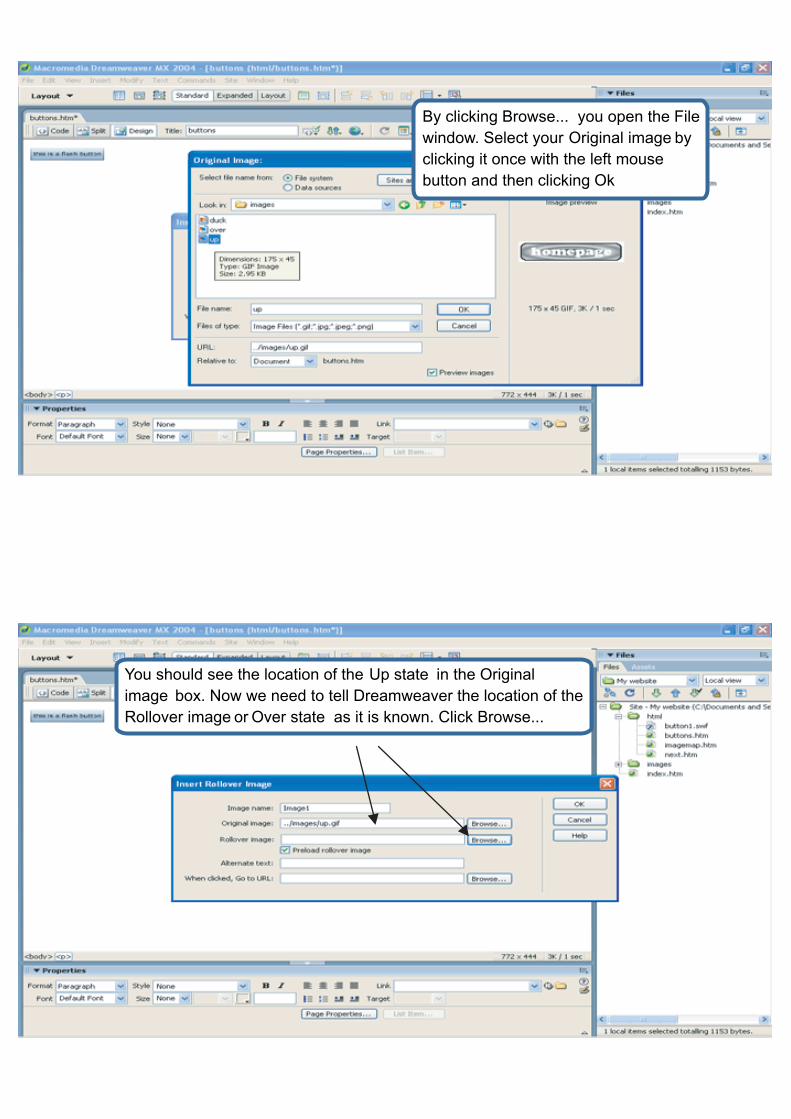
By clicking Browse... you open the File window. Select your Original image by clicking it once with the left mouse button and then clicking Ok
You should see the location of the Up state in the Original image box. Now we need to tell Dreamweaver the location of the Rollover image or Over state as it is known. Click Browse...
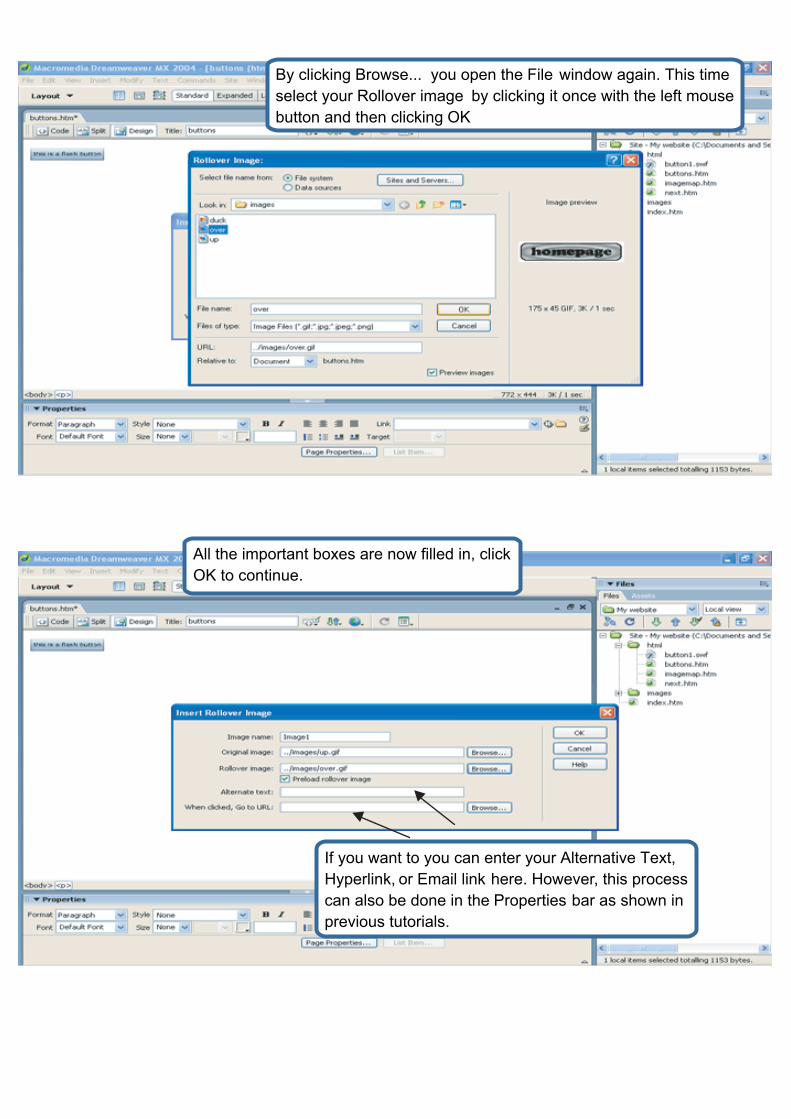
By clicking Browse... you open the File window again. This time select your Rollover image by clicking it once with the left mouse button and then clicking OK
All the important boxes are now filled in, click OK to continue.
If you want to you can enter your Alternative Text,Hyperlink, or Email link here. However, this process can also be done in the Properties bar as shown in previous tutorials.
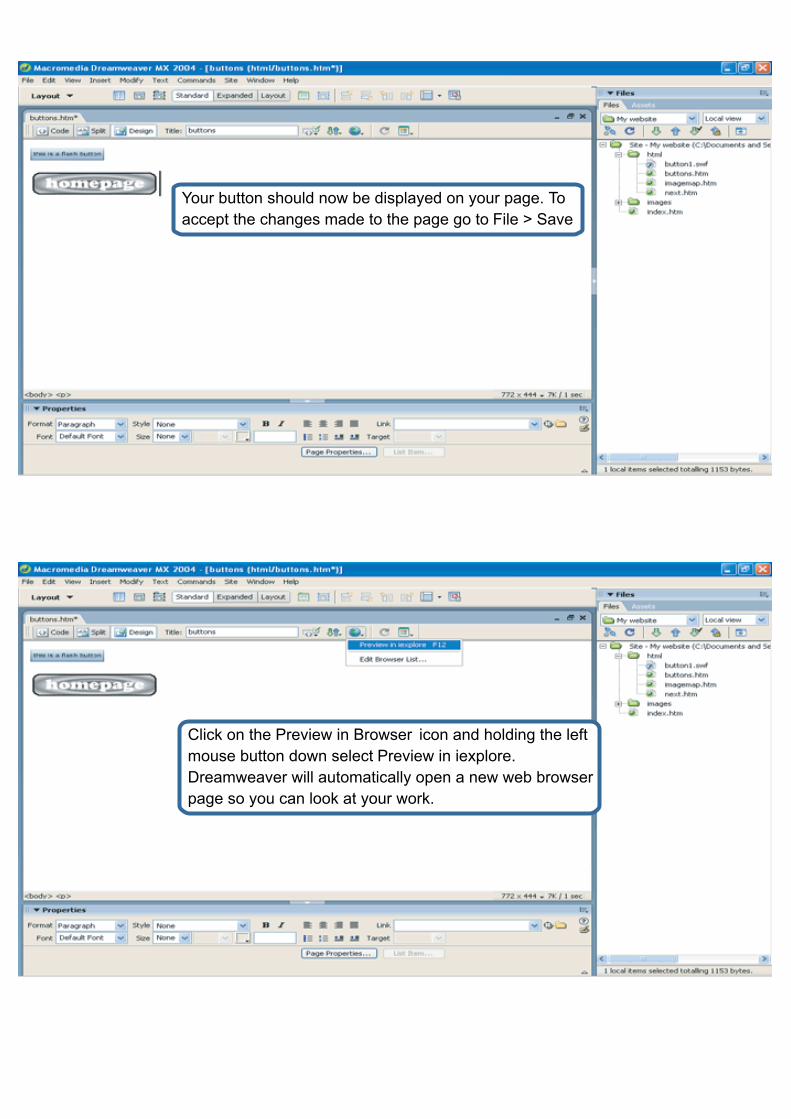
Your button should now be displayed on your page. To accept the changes made to the page go to File > Save
Click on the Preview in Browser icon and holding the left mouse button down select Preview in iexplore.Dreamweaver will automatically open a new web browser page so you can look at your work.
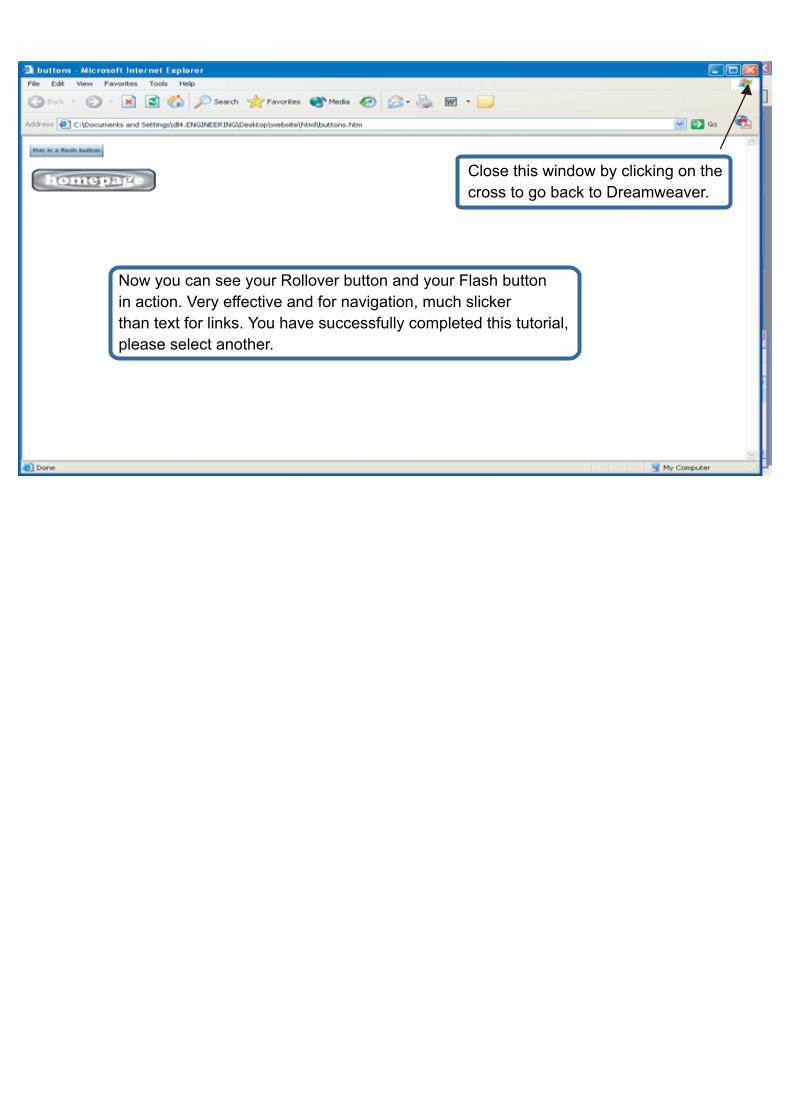
Now you can see your Rollover button and your Flash buttonin action. Very effective and for navigation, much slicker than text for links. You have successfully completed this tutorial,please select another.
Close this window by clicking on the cross to go back to Dreamweaver.