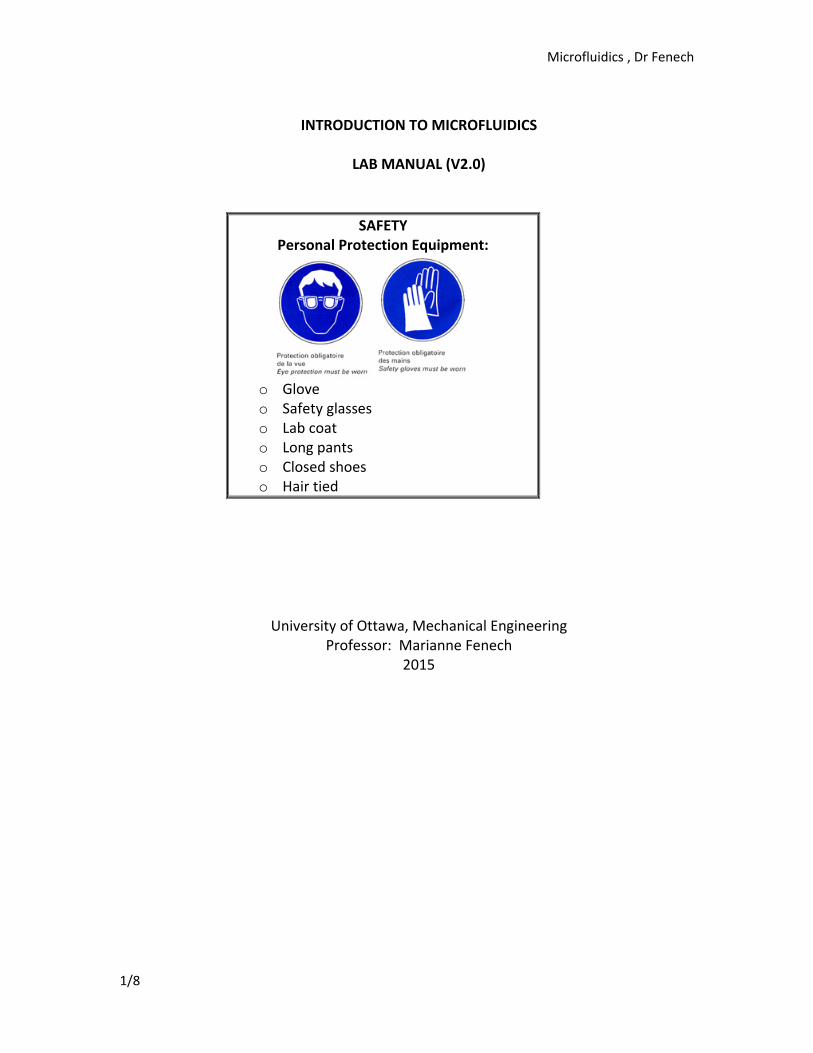
o Glove o Safety glasses o Lab coat o Long pants o Closed shoes o Hair tied
University of Ottawa, Mechanical Engineering Professor: Marianne Fenech
2015
Microfluidics , Dr Fenech
2/8
The objectives
The objectives are:
1‐ To fabricate a basic chip using ‘soft’ microfabrication technics 2‐ to demonstrate key concepts in the applications of microfluidics. Fundamental
concepts in microfluidics include principles of separation, diffusion, and flow regimes.
The basis for most LOC fabrication processes is photolithography. Initially most processes were in silicon, but because of demands for e.g. specific optical characteristics, bio‐ or chemical compatibility, lower production costs and faster prototyping, new processes have been developed such as glass, ceramics and metal etching, deposition and bonding and PDMS processing (e.g., soft lithography).
A‐ Potential hazards ‐ safety controls:
‐ Read MSDS before working with SYLGARD(R) 184 SILICONE ELASTOMER KIT. Fill the box below:
What does MSDS stand for? What are the tow chemicals that have a potential effect(s) on health? What are the potential health effects? What are the first aid measures if eye contact or inhalation? Which Personal Protective Equipment must be used?
‐ To avoid cutting yourself or others be careful when using razor blade or scalpel. In particular the razor blade must be press down on the silicone not slid on.
Microfluidics , Dr Fenech
3/8
‐ To avoid burn when using hop plate, don’t touch the hop plate and use tweezers to handle the hot wafer
B‐ Fabrication
Poly_dimethylsiloxane (PDMS) introduced in the 1998, by utilizing the soft lithographic method of molding and patterning structural features with PDMS, microfluidic devices can be easily fabricated in academic institutions, thus facilitating the growth of academic research in LOC technology.
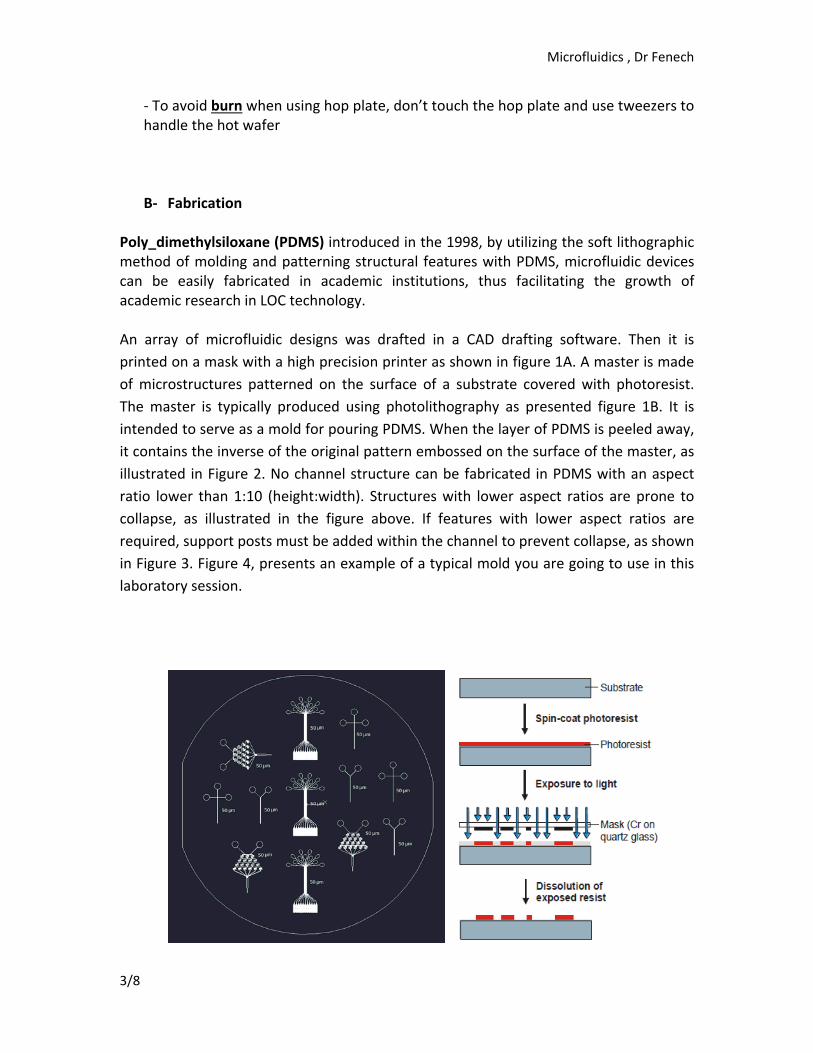
An array of microfluidic designs was drafted in a CAD drafting software. Then it is
printed on a mask with a high precision printer as shown in figure 1A. A master is made
of microstructures patterned on the surface of a substrate covered with photoresist.
The master is typically produced using photolithography as presented figure 1B. It is
intended to serve as a mold for pouring PDMS. When the layer of PDMS is peeled away,
it contains the inverse of the original pattern embossed on the surface of the master, as
illustrated in Figure 2. No channel structure can be fabricated in PDMS with an aspect
ratio lower than 1:10 (height:width). Structures with lower aspect ratios are prone to
collapse, as illustrated in the figure above. If features with lower aspect ratios are
required, support posts must be added within the channel to prevent collapse, as shown
in Figure 3. Figure 4, presents an example of a typical mold you are going to use in this
laboratory session.
Microfluidics , Dr Fenech
4/8
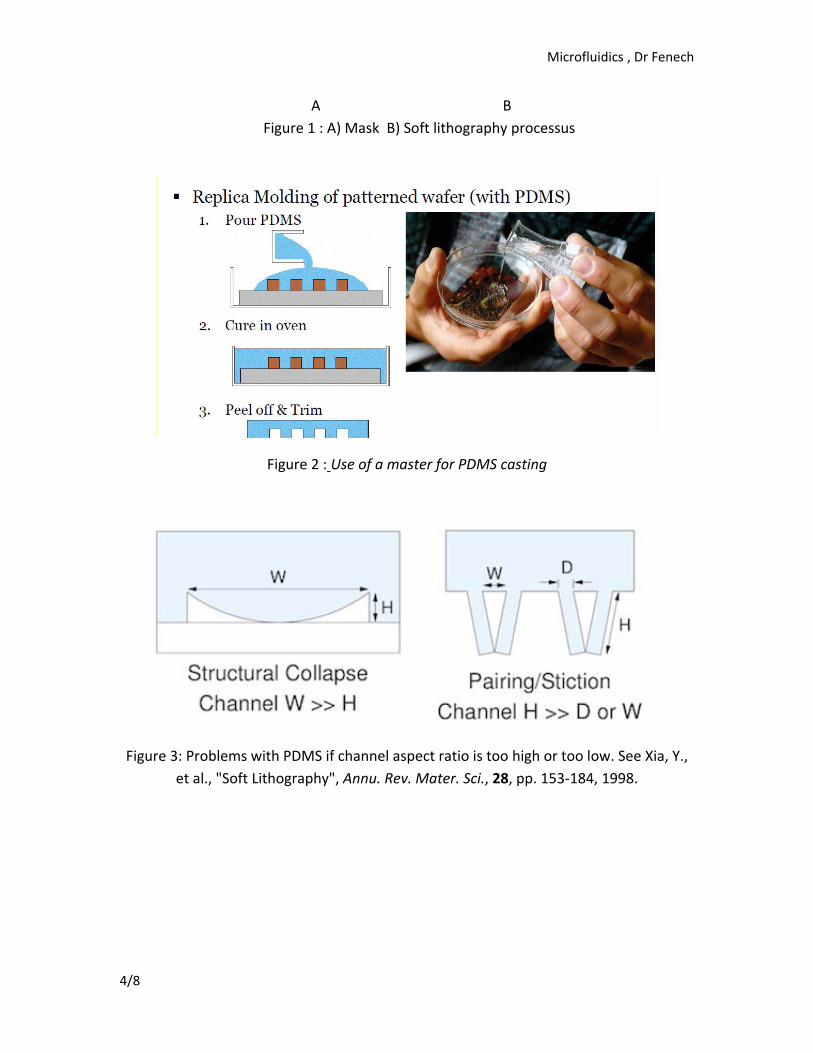
A B
Figure 1 : A) Mask B) Soft lithography processus
Figure 2 : Use of a master for PDMS casting
Figure 3: Problems with PDMS if channel aspect ratio is too high or too low. See Xia, Y.,
et al., "Soft Lithography", Annu. Rev. Mater. Sci., 28, pp. 153‐184, 1998.
Microfluidics , Dr Fenech
5/8
Figure 4 : Exemple of mold
C‐ Materials and Methods
During the lab you will fabricate your own chip, using a premade mold.
1. Verify the content of your microfluid box, note your names and the number of
your box in the lab book. In addition you will need
‐ One bottle of distilled water
‐ glace slides
‐ Few pipette tips
‐ Food colors
2. Prepare the PDMS (with the TA). PDMS comes in two parts, the polymer and a
curing agent. For this we will use 10:1 ratio of polymer to curing agent
respectively. Place the designated dish on the scale and weigh it. Zero the scale.
Pour in the polymer. Note the weight added. Next, using another dish, follow the
same procedure for the curing agent except at 1/10 the amount of curing agent
to a separate dish as you did the polymer. Combine the two parts into one and
mix. Make sure it is well stirred.
Microfluidics , Dr Fenech
6/8
3. In order to degas the silicon, place the container in the vacuum chamber. Seal
the chamber and turn on the device. Let it run for approximately 10 minutes. Let
it run until all of the bubbles have been removed. *Note* you may need to
remove the tube a few times to allow some of the developed foam on top of the
PDMS to disappear.
4. Pour PDMS on the wafer.
5. Set the hotplate temperature to 150ºC. Once at 150ºC, cure the PDMS for 10
minutes.
6. Take the mold off the hot plate using teezers. Be Careful it is hot. Let it cool
down.
7. Once cooled down, cut out your mold from the PDMS. Make sure you are aware
which side has the features. Tape the side with feature to avoid dust
contamination. *Note* At any time, later on, if you notice dust you can clean
the PDMS side that has the features with tape (apply and peel off).
8. Cut the different chips pressing a razor blade from the side with feature to the
smooth side (let the tape on).
9. Punch out the ends, making sure you are punching from the side with features
through to the other side.
Figure 5: Punching of the inlets from the side with features through to the other
side
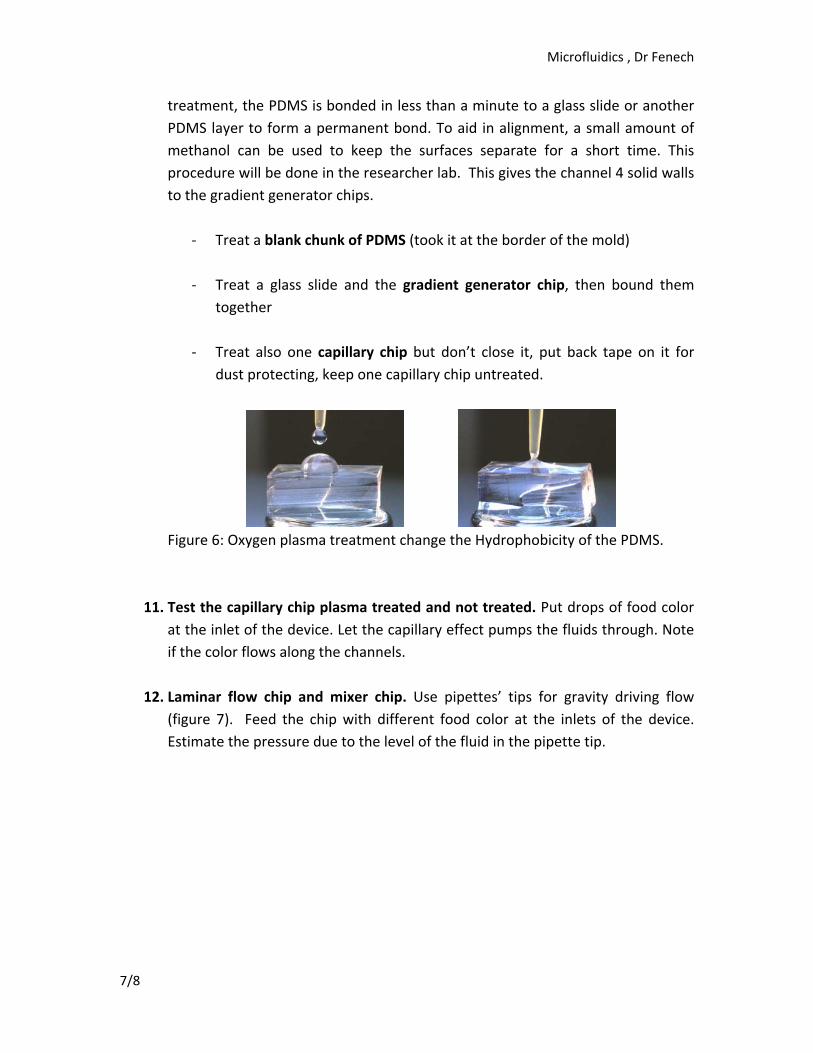
10. Oxygen plasma treatment is a method for treating the PDMS to reduce its
hydrophobicity (figure 6), clean any organics contamination and in addition it
allows it to be bonded to another piece of PDMS or to a glass slide. After
Microfluidics , Dr Fenech
7/8
treatment, the PDMS is bonded in less than a minute to a glass slide or another
PDMS layer to form a permanent bond. To aid in alignment, a small amount of
methanol can be used to keep the surfaces separate for a short time. This
procedure will be done in the researcher lab. This gives the channel 4 solid walls
to the gradient generator chips.
‐ Treat a blank chunk of PDMS (took it at the border of the mold)
‐ Treat a glass slide and the gradient generator chip, then bound them
together
‐ Treat also one capillary chip but don’t close it, put back tape on it for
dust protecting, keep one capillary chip untreated.
Figure 6: Oxygen plasma treatment change the Hydrophobicity of the PDMS.
11. Test the capillary chip plasma treated and not treated. Put drops of food color
at the inlet of the device. Let the capillary effect pumps the fluids through. Note
if the color flows along the channels.
12. Laminar flow chip and mixer chip. Use pipettes’ tips for gravity driving flow
(figure 7). Feed the chip with different food color at the inlets of the device.
Estimate the pressure due to the level of the fluid in the pipette tip.
Microfluidics , Dr Fenech
8/8
Figure 7 : pipettes’ tips for gravity driving flow
13. Verify the content of your microfluid box. Give it back
Bibliography
1. Diep Nguyen, Jolie McLane, Valerie Lew, Jonathan Pegan, and Michelle Khine.
Shrink‐film microfluidic education modules: Complete devices within minutes.
Biomicrofluidics. 2011, Vol. 5.
2. D Junker, M Nannini, S Ricoult, R Safavieh. Hands‐on Interdisciplinary Course on
Micro‐ and Nano‐biotechnologies. 2011.
3. Collectif, editor F. A Gomez, wiley‐intersience .Biological application of microfluidics.


![Advances in Microfluidics‐Based Assisted Reproductive ... · microfluidics has also been used for 3D cell culture and cryo-preservation.[12] Furthermore, droplet-based microfluidics](https://static.documents.pub/doc/80x56/5e831de01be17b7cdc733cfb/advances-in-microfluidicsabased-assisted-reproductive-microfluidics-has-also.jpg)


