Introduction to OpenStack Running a Cloud Computing Infrastructure with OpenStack 6th International Conference on Autonomous Infrastructure, Management and Security04 June 2012, University of Luxembourg Anuj Sehgal [email protected] • http://cnds.jacobs-university.de/
Transcript
Introduction to OpenStack
Running a Cloud Computing Infrastructure with OpenStack
6th International Conference on Autonomous Infrastructure, Management and Security04 June 2012, University of Luxembourg
Introduction to Content Centric Networking and the CCNx framework
Thibault Cholez, University of Luxembourg, Luxemburg
Based on the observation that today's Internet is more about content diffusion than point-to-point communication, Content Centric Networking (CCN) is a new routing paradigm that proposes a radical change on the Internet architecture while being incrementally deployable. CCN is one of the most promising research area for a future Internet, more scalable, secure, collaborative and efficient. It is currently raising the increasing interest of the network community. This workshop aims to give to the audience the key elements to better understand CCN and its possibilities.
x Presentation of CCN o The CCN paradigm o Challenges and research activities
x CCNx tools - how to use the framework to experiment CCN, hands-on exercises o Architecture of CCNx o Provided tools and libraries o Generation of CCN traffic o Writing of a CCN application
Running a Cloud Computing Infrastructure with OpenStack
Anuj Sehgal, Jacobs University Bremen, Germany
Cloud computing enables the delivery of computing resources as a service, rather than a single bundled product. Amongst the many options for running a cloud infrastructure, the open source solution, OpenStack, from NASA and Rackspace has obtained traction due to its high scalability. In the first part of this tutorial, participants will learn to setup a OpenStack compute cloud based on the Nova and Glance services. The participants will gain experience in installing and setting up nova-schedule, nova-api, nova-network and rabbit-mq services. The nova-volume service will also be setup to provide persistent block storage in the cloud using
Introduction to OpenStack AIMS 2012 Tutorial
1
Introduction to OpenStack The OpenStack project was created with the goal of developing reliable, scalable and easily deployable cloud infrastructure software. This chapter provides information on cloud computing and OpenStack.
1. Cloud Computing
Cloud computing is a modern computing paradigm that delivers resources such as processing, storage, network and software are abstractions that are provided as services over the Internet in a remotely accessible fashion.
Users can access cloud applications using web-‐browsers, thin client machines or mobile devices, while all the data and software is stored on servers at a remote location, which are also used to perform all the heavy-‐duty processing. It is believed that cloud computing allows businesses and enterprises to function more efficiently since it offloads management and maintenance tasks, thereby making computing a service rather than a product. The sharing of resources, i.e. computing hardware, is also expected to reduce idle-‐time of machines and increase their productivity.
Due to the shift from computing being a resource to a utility, cloud computing introduces billing models that are based on time and utilities. On-‐demand availability, ease of provisioning, dynamic and virtually infinite scalability are some of the key attributes of cloud computing.
Services within the cloud are typically provided under the following three catagories:
a. Infrastructure as a Service (IaaS). b. Platform as a Service (PaaS). c. Software as a Service (Saas).
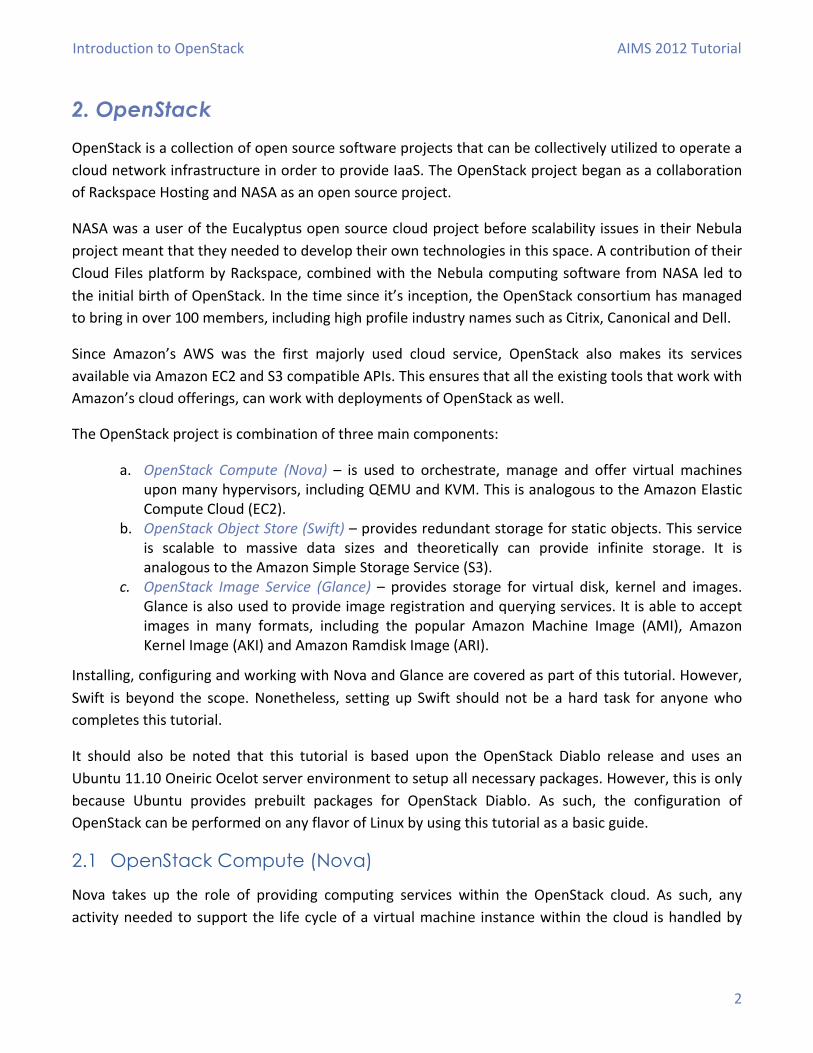
IaaS is the most basic cloud service model under which virtual machines, raw block storage, firewalls, load balancers and networking services are provided. In the PaaS model, a computing platform or solution stack including operating system, programming language execution environment, database, and web server are typically provided. Within the SaaS model, cloud providers install and operate application software in the cloud, which users access using cloud clients on computers, mobile devices, browsers and etc.
Cloud Clients Browsers, Mobile Apps, Etc.
Software as a Service (SaaS) Applications, Services
Platform as a Service (PaaS) APIs, Pre-built components, Development
Environments
Infrastructure as a Service (IaaS) VMs, Load Balancers, DBs, IPs
Physical Hardware Computing, Networking, Storage
Figure 1 -‐ The cloud-‐computing layered model.
Introduction to OpenStack AIMS 2012 Tutorial
2
2. OpenStack
OpenStack is a collection of open source software projects that can be collectively utilized to operate a cloud network infrastructure in order to provide IaaS. The OpenStack project began as a collaboration of Rackspace Hosting and NASA as an open source project.
NASA was a user of the Eucalyptus open source cloud project before scalability issues in their Nebula project meant that they needed to develop their own technologies in this space. A contribution of their Cloud Files platform by Rackspace, combined with the Nebula computing software from NASA led to the initial birth of OpenStack. In the time since it’s inception, the OpenStack consortium has managed to bring in over 100 members, including high profile industry names such as Citrix, Canonical and Dell.
Since Amazon’s AWS was the first majorly used cloud service, OpenStack also makes its services available via Amazon EC2 and S3 compatible APIs. This ensures that all the existing tools that work with Amazon’s cloud offerings, can work with deployments of OpenStack as well.
The OpenStack project is combination of three main components:
a. OpenStack Compute (Nova) – is used to orchestrate, manage and offer virtual machines upon many hypervisors, including QEMU and KVM. This is analogous to the Amazon Elastic Compute Cloud (EC2).
b. OpenStack Object Store (Swift) – provides redundant storage for static objects. This service is scalable to massive data sizes and theoretically can provide infinite storage. It is analogous to the Amazon Simple Storage Service (S3).
c. OpenStack Image Service (Glance) – provides storage for virtual disk, kernel and images. Glance is also used to provide image registration and querying services. It is able to accept images in many formats, including the popular Amazon Machine Image (AMI), Amazon Kernel Image (AKI) and Amazon Ramdisk Image (ARI).
Installing, configuring and working with Nova and Glance are covered as part of this tutorial. However, Swift is beyond the scope. Nonetheless, setting up Swift should not be a hard task for anyone who completes this tutorial.
It should also be noted that this tutorial is based upon the OpenStack Diablo release and uses an Ubuntu 11.10 Oneiric Ocelot server environment to setup all necessary packages. However, this is only because Ubuntu provides prebuilt packages for OpenStack Diablo. As such, the configuration of OpenStack can be performed on any flavor of Linux by using this tutorial as a basic guide.
2.1 OpenStack Compute (Nova)
Nova takes up the role of providing computing services within the OpenStack cloud. As such, any activity needed to support the life cycle of a virtual machine instance within the cloud is handled by
Introduction to OpenStack AIMS 2012 Tutorial
3
Nova. This includes things like managing block storage, networking, scheduling, computing resources, authorization and hypervisors.
However, Nova does not provide any virtualization capabilities by itself. It is designed to use libvirt APIs to interact with any supported hypervisors.
This means that Nova is hypervisor agnostic and provides support for Xen, XenServer/XCP, KVM, UML, VMware vSphere and Hyper-‐V amongst others.
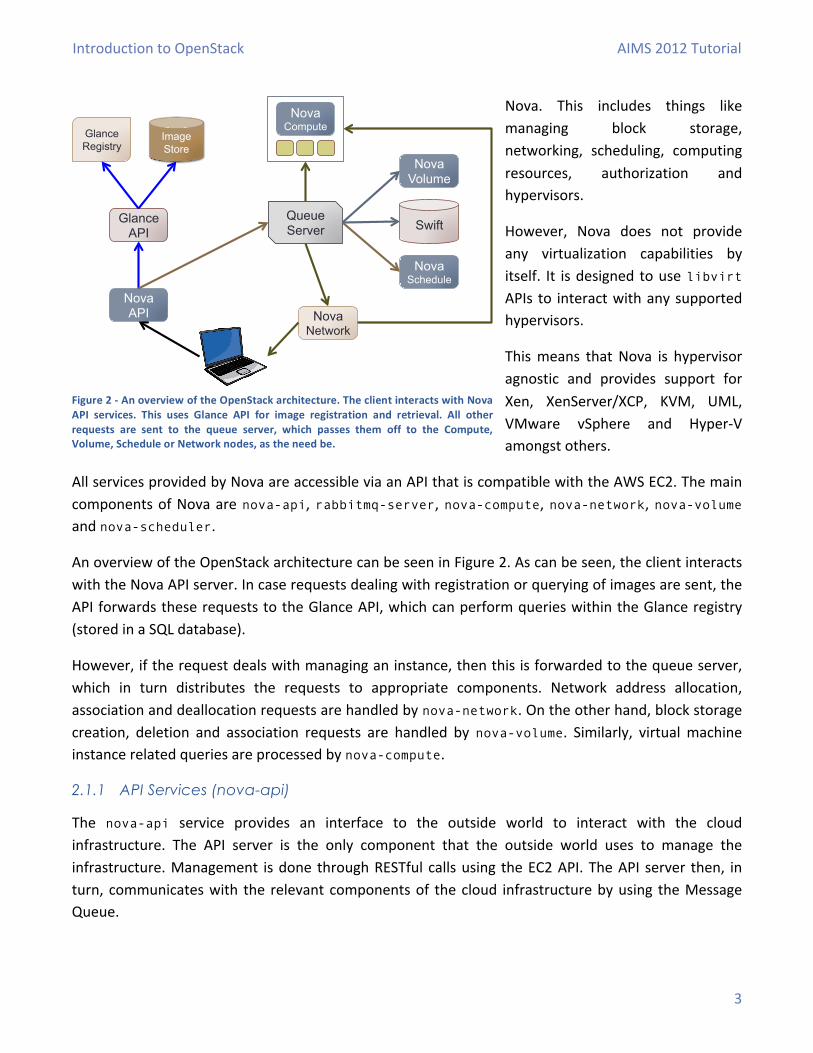
All services provided by Nova are accessible via an API that is compatible with the AWS EC2. The main components of Nova are nova-api, rabbitmq-server, nova-compute, nova-network, nova-volume and nova-scheduler.
An overview of the OpenStack architecture can be seen in Figure 2. As can be seen, the client interacts with the Nova API server. In case requests dealing with registration or querying of images are sent, the API forwards these requests to the Glance API, which can perform queries within the Glance registry (stored in a SQL database).
However, if the request deals with managing an instance, then this is forwarded to the queue server, which in turn distributes the requests to appropriate components. Network address allocation, association and deallocation requests are handled by nova-network. On the other hand, block storage creation, deletion and association requests are handled by nova-volume. Similarly, virtual machine instance related queries are processed by nova-compute.
2.1.1 API Services (nova-api)
The nova-api service provides an interface to the outside world to interact with the cloud infrastructure. The API server is the only component that the outside world uses to manage the infrastructure. Management is done through RESTful calls using the EC2 API. The API server then, in turn, communicates with the relevant components of the cloud infrastructure by using the Message Queue.
Nova API
Glance API
Glance Registry
Image Store
Queue Server Swift
Nova Volume
Nova Schedule
Nova Compute
Nova Network
Figure 2 -‐ An overview of the OpenStack architecture. The client interacts with Nova API services. This uses Glance API for image registration and retrieval. All other requests are sent to the queue server, which passes them off to the Compute, Volume, Schedule or Network nodes, as the need be.
Introduction to OpenStack AIMS 2012 Tutorial
4
2.1.2 Message Queuing (rabbitmq-server)
The OpenStack Cloud Controller communicates with other nova components such as the Scheduler, Network Controller, and Volume Controller by using AMQP (Advanced Message Queue Protocol). OpenStack uses the rabbitmq-server for this purpose. Nova uses asynchronous calls for request-‐response, with a call-‐back that gets triggered once a response is received. Since asynchronous communication is used, none of the user actions get stuck for long in a waiting state. This is especially true since many actions expected by the API calls such as launching an instance or uploading an image are time consuming.
2.1.3 Computing Services (nova-compute)
Servers providing computing services via nova-compute deal with instance management life cycle. They receive requests for life cycle management via the Message Queue and carry out appropriate operations. There are several servers providing computing services in a typical production cloud deployment. An instance is deployed on any of the available compute workers based on the scheduling algorithm used by Nova.
2.1.4 Network Services (nova-api)
The network services provided by nova-api deals with the network configuration of host machines. It does operations like allocating IP addresses, configuring VLANs for projects, implementing security groups and configuring networks for compute nodes.
2.1.5 Block Storage Services (nova-volume)
Block storage services performed by nova-volume include creation, deletion, attaching a volume to an instance, and detaching a volume from an instance. Volumes provide a way of providing persistent storage for use by instances, as the main disk attached to an instance is non-‐persistent and any changes made to it are lost when the volume is detached or the instance is terminated. When a volume is detached from an instance or when an instance, to which the volume is attached, is terminated, it retains the data that was stored on it when it was attached to an instance earlier. This data can be accessed by reattaching the volume to the same instance or by attaching it to another instances.
As such, any valuable data that gets accumulated during the life cycle of an instance should be written to a volume, so that it can be accessed later.
2.1.6 Scheduling Services (nova-scheduler)
The nova-scheduler maps API calls to the appropriate OpenStack components. It picks a server from a pool depending upon the scheduling algorithm in place. A scheduler can base its decisions on various factors such as load, memory, physical distance of the availability zone, CPU architecture, etc.
Introduction to OpenStack AIMS 2012 Tutorial
5
2.2 OpenStack Image Service (Glance)
OpenStack Imaging Service is a lookup and retrieval system for virtual machine images. While it can be configured to use Swift or S3 storage to store the images, it normally uses a regular filesystem on the host for the glance service.
The information regarding registered images is stored in an SQL database, which can be either MySQL, PostgreSQL, SQLite or many other varieties as well.
Introduction to OpenStack AIMS 2012 Tutorial
6
Installation and Configuration The distributed architecture of OpenStack means that all components can be installed on either a single or multiple systems. This means that a single computer could be used to provide API, Scheduler, Network, Compute, Volume, Message Queuing and Glance services. On the other hand, any of these services could be installed on separate hosts as well. In fact, some services, like Volume and Compute, can be installed on multiple servers for load balancing purposes.
In this tutorial, installation on a single server will be covered, however, by simple extension of the configuration file this can be extended to any configuration necessary. An Ubuntu 11.10 server install with OpenSSH and Virtual Machine Host tasks is used as the base.
In case you miss choosing OpenSSH and/or Virtual Machine Host tasks, make sure to install the openssh and qemu packages before proceeding. This can be done by using apt-‐get:
It is assumed that the host has a single network interface named eth0 with an IP address 172.16.4.10. In order to work with nova-volume, the host also has two hard drives; the first contains the base OS installation, while the second one will be used to create LVM volumes used by virtual machine instances.
3 Install MySQL
The Nova installation uses a SQL database to store all metadata and operation information. We will use MySQL, however, you may use any other flavor as well.
Install MySQL server and set the root password as “nova”.
Open /etc/mysql/my.cnf and change the bind-address property to look like:
Once this is done, you must create the Nova database and give permissions to the root user to access this database from any connecting IP address, so that if you decide to add more nodes or create a multi-‐node setup, it will still work without any troubles.
Now that MySQL is setup and ready for Nova, we can proceed with installing the other services.
4 Install RabbitMQ
Before installing RabbitMQ, make sure that your hostname is set to your correct IP address in your /etc/hosts file. Without this correctly entered, RabbitMQ will refuse to start.
Once this is done, install RabbitMQ.
5 Install Glance
Nova can use Glance service to manage Operating System images that it needs for bringing up instances. Installing this is also easy.
There is no need to make any further configuration changes since we are going to let Glance use the local filesystem for storing images and a default SQLite database for metadata.
6 Setup the Nova Cloud Controller
The cloud controller is responsible for the API, Scheduling and Network services. As such, install these along with some other dependencies.
$ mysqladmin -u root -p create nova Enter password: $ mysql -u root -p -e "GRANT ALL PRIVILEGES ON *.* TO 'root'@'%' WITH GRANT OPTION;" Enter password: $ mysql -uroot -p -e "SET PASSWORD FOR 'root'@'%' = PASSWORD('nova');" Enter password:
These install commands added all the packages needed on the cloud controller, along with a large number of dependencies. In addition, the package installation scripts have added a system user nova and added it to the appropriate groups.
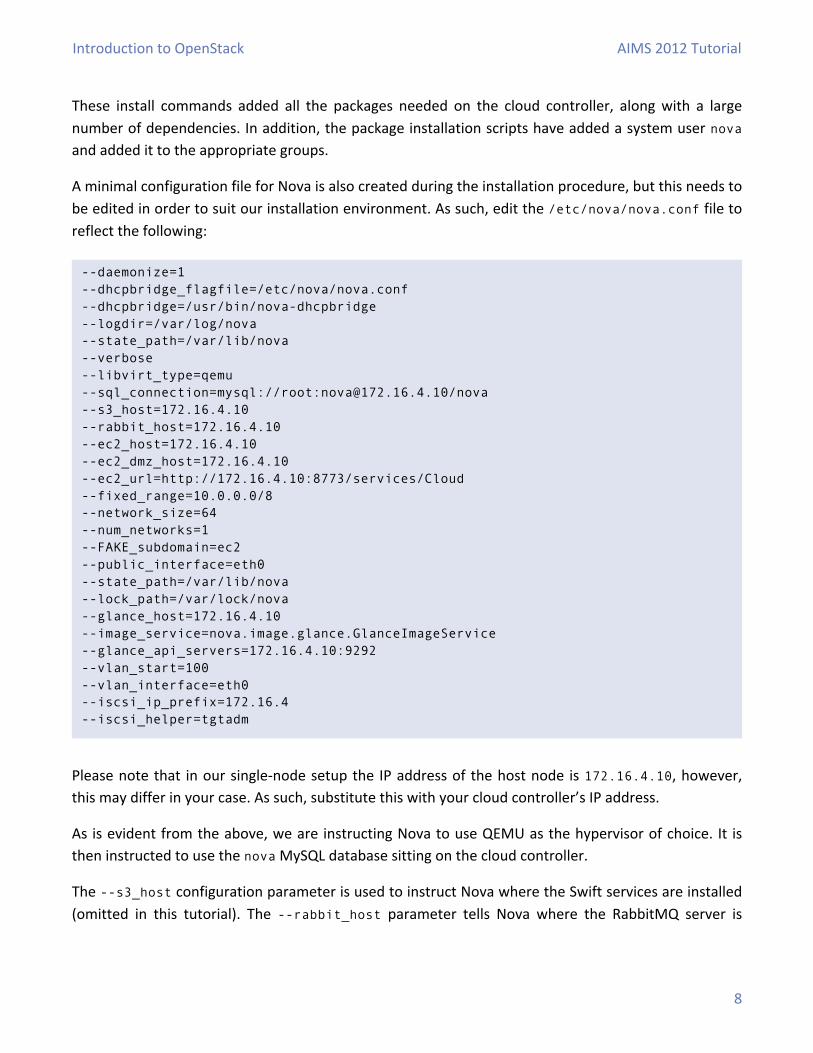
A minimal configuration file for Nova is also created during the installation procedure, but this needs to be edited in order to suit our installation environment. As such, edit the /etc/nova/nova.conf file to reflect the following:
Please note that in our single-‐node setup the IP address of the host node is 172.16.4.10, however, this may differ in your case. As such, substitute this with your cloud controller’s IP address.
As is evident from the above, we are instructing Nova to use QEMU as the hypervisor of choice. It is then instructed to use the nova MySQL database sitting on the cloud controller.
The --s3_host configuration parameter is used to instruct Nova where the Swift services are installed (omitted in this tutorial). The --rabbit_host parameter tells Nova where the RabbitMQ server is
installed; in our case it is on the cloud controller. The –ec2_host parameter is used to configure the target API server, as are all the other ec2 parameters.
Nova is then instructed to use the 10.0.0.0/8 network for its private network between the instances. This network is referred to the fixed network by Nova.
A network size of 64 means that Nova should use up to 64 IPs from the 10.0.0.0/8 network and it is also instructed to create only a single network.
There is only one interface on the host interface, which provides access to the public network. As such, Nova is instructed to use the eth0 interface for all public traffic via the --public_interface option.
It is also essential for Nova to know where Glance is installed, so that it can successfully register and retrieve images when necessary. In our case, this is the same as the cloud controller, and Nova is instructed to use the Glance image service located on the cloud controller via the Glance related switches, i.e. --glance_host, --image_service and --glance_api_servers.
Nova uses VLANs to setup communication between the nova-network host and the virtual machine instances. The --vlan_start option instructs Nova to start numbering the VLANs at 100. Please note that this is the minimum number recommended. The --vlan_interface option should be set to the interface that can provide connectivity between the cloud controller, volume host and compute host. In our case, this is eth0.
Lastly, since it is essential to have persistent storage in the virtual machine instances, nova-volume is used and must be configured. The nova-volume service uses ISCSI to export LVM volumes and attach these to instances. These may then be used for block storage inside instances. The --iscsi_prefix option must be set to the IP prefix of the network which can be used to reach the volume host. The --iscsi_helper option instructs nova-volume and nova-compute to use the tgtadm package for administering the ISCSI volumes.
Please note that in a multi-‐host setup, the nova.conf file must be existent on every host that has any Nova services on it.
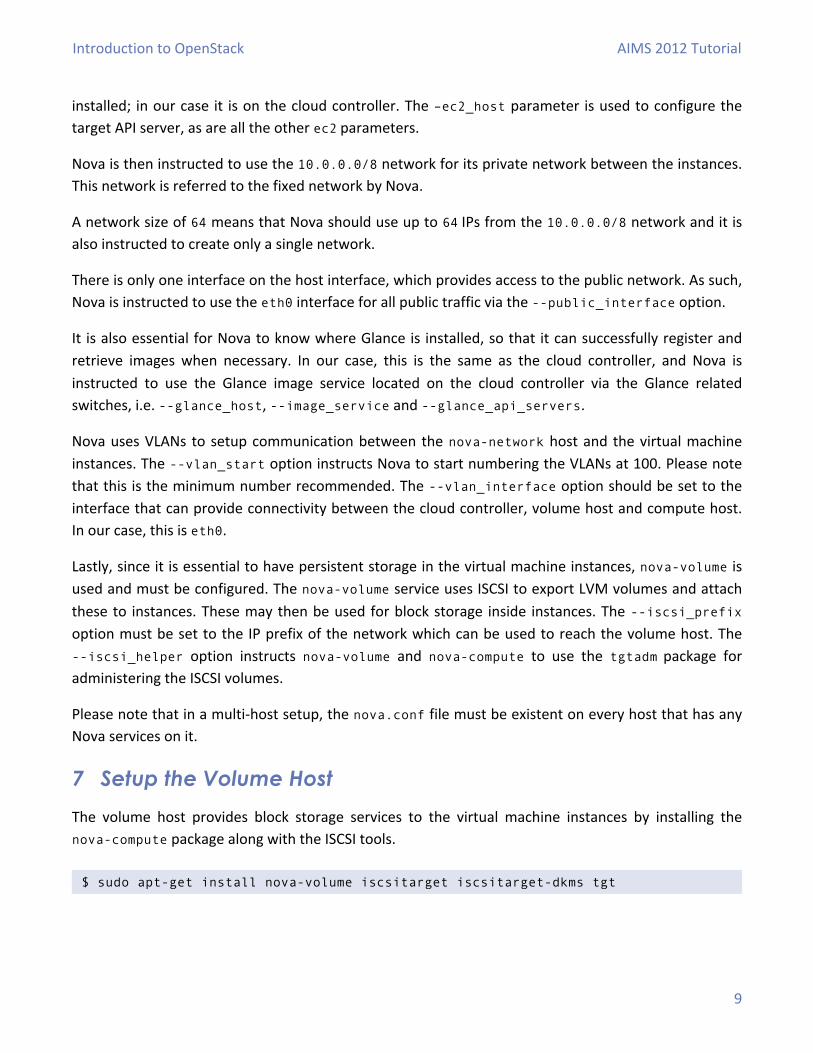
7 Setup the Volume Host
The volume host provides block storage services to the virtual machine instances by installing the nova-compute package along with the ISCSI tools.
Once these are installed, you must enable the iscsitarget service to start by default.
It is advisable for the volume host to have an additional hard drive that can be used to setup the necessary LVM volumes. In our single node environment, the cloud controller is the volume host as well and has a second hard drive, which is visible to the system at /dev/sdb.
As such, a physical volume and volume group named nova-volumes must be created on /dev/sdb.
8 Setup the Compute Host
The compute host uses the nova-‐compute package to provide virtual machine instantiation services. It is also uses the ISCSI tools to discover available appropriate targets and attach them to relevant virtual machines. As such, install the following packages on the compute host.
It is also important to note that when working along with the tgt ISCSI packages, which are the default as well, Nova has a bug that causes it to fail attaching ISCSI volumes to a virtual machine instance. This can be fixed by editing the /usr/lib/python2.7/dist-packages/nova/volume/driver.py file.
Change the following line:
To:
This should be located on, or around, line 536.
$ sudo sed -i ‘s/false/true/g’ /etc/default/iscsitarget
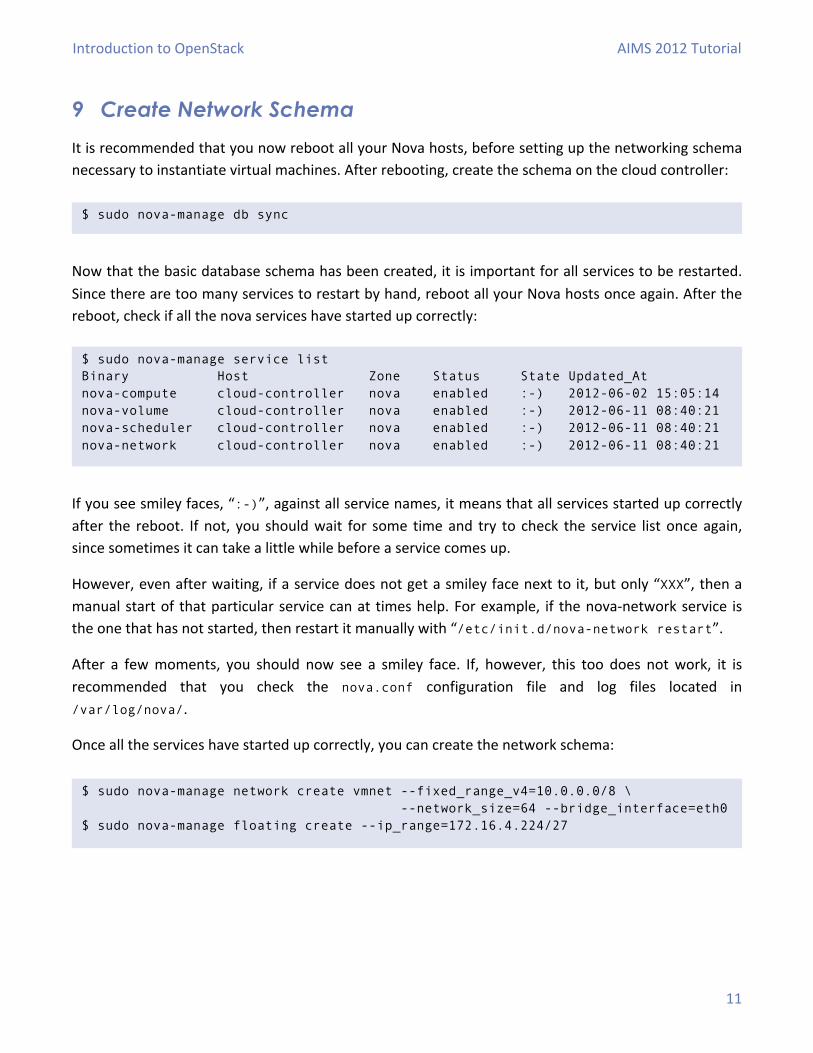
It is recommended that you now reboot all your Nova hosts, before setting up the networking schema necessary to instantiate virtual machines. After rebooting, create the schema on the cloud controller:
Now that the basic database schema has been created, it is important for all services to be restarted. Since there are too many services to restart by hand, reboot all your Nova hosts once again. After the reboot, check if all the nova services have started up correctly:
If you see smiley faces, “:-)”, against all service names, it means that all services started up correctly after the reboot. If not, you should wait for some time and try to check the service list once again, since sometimes it can take a little while before a service comes up.
However, even after waiting, if a service does not get a smiley face next to it, but only “XXX”, then a manual start of that particular service can at times help. For example, if the nova-‐network service is the one that has not started, then restart it manually with “/etc/init.d/nova-network restart”.
After a few moments, you should now see a smiley face. If, however, this too does not work, it is recommended that you check the nova.conf configuration file and log files located in /var/log/nova/.
Once all the services have started up correctly, you can create the network schema:
$ sudo nova-manage db sync
$ sudo nova-manage service list Binary Host Zone Status State Updated_At nova-compute cloud-controller nova enabled :-) 2012-06-02 15:05:14 nova-volume cloud-controller nova enabled :-) 2012-06-11 08:40:21 nova-scheduler cloud-controller nova enabled :-) 2012-06-11 08:40:21 nova-network cloud-controller nova enabled :-) 2012-06-11 08:40:21
The vmnet (or fixed network) is the VLAN created for use between the Nova network host and the virtual machines on the compute node. The parameters used here are the same as in the nova.conf file. On the other hand, the floating network is the block of public IP addresses that are reachable on the eth0 interface and can be handed out to virtual machines on demand.
At this point your basic OpenStack Nova and Glance setup is complete. The following section will cover some important details regarding working with OpenStack. Registering and uploading images to Glance, creating VM instances, configuring network firewall policies, associating public IP addresses, creating persistent block storage and attaching it to VMs is covered.
Introduction to OpenStack AIMS 2012 Tutorial
13
Working with OpenStack Clouds OpenStack Nova clouds are API compatible with Amazon Web Services (AWS), and as such, we will use tools designed to work with AWS. On your client machine you should install the euca2ools package.
10 Create Users and Projects
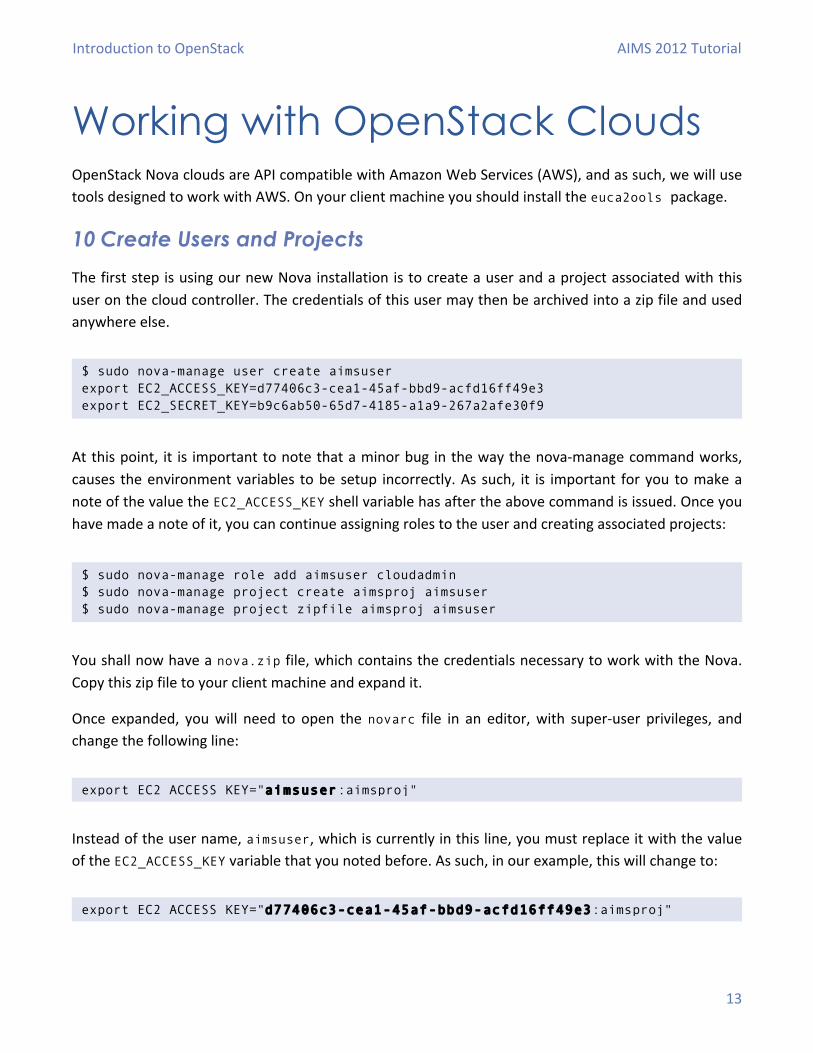
The first step is using our new Nova installation is to create a user and a project associated with this user on the cloud controller. The credentials of this user may then be archived into a zip file and used anywhere else.
At this point, it is important to note that a minor bug in the way the nova-‐manage command works, causes the environment variables to be setup incorrectly. As such, it is important for you to make a note of the value the EC2_ACCESS_KEY shell variable has after the above command is issued. Once you have made a note of it, you can continue assigning roles to the user and creating associated projects:
You shall now have a nova.zip file, which contains the credentials necessary to work with the Nova. Copy this zip file to your client machine and expand it.
Once expanded, you will need to open the novarc file in an editor, with super-‐user privileges, and change the following line:
Instead of the user name, aimsuser, which is currently in this line, you must replace it with the value of the EC2_ACCESS_KEY variable that you noted before. As such, in our example, this will change to:
$ sudo nova-manage user create aimsuser export EC2_ACCESS_KEY=d77406c3-cea1-45af-bbd9-acfd16ff49e3 export EC2_SECRET_KEY=b9c6ab50-65d7-4185-a1a9-267a2afe30f9
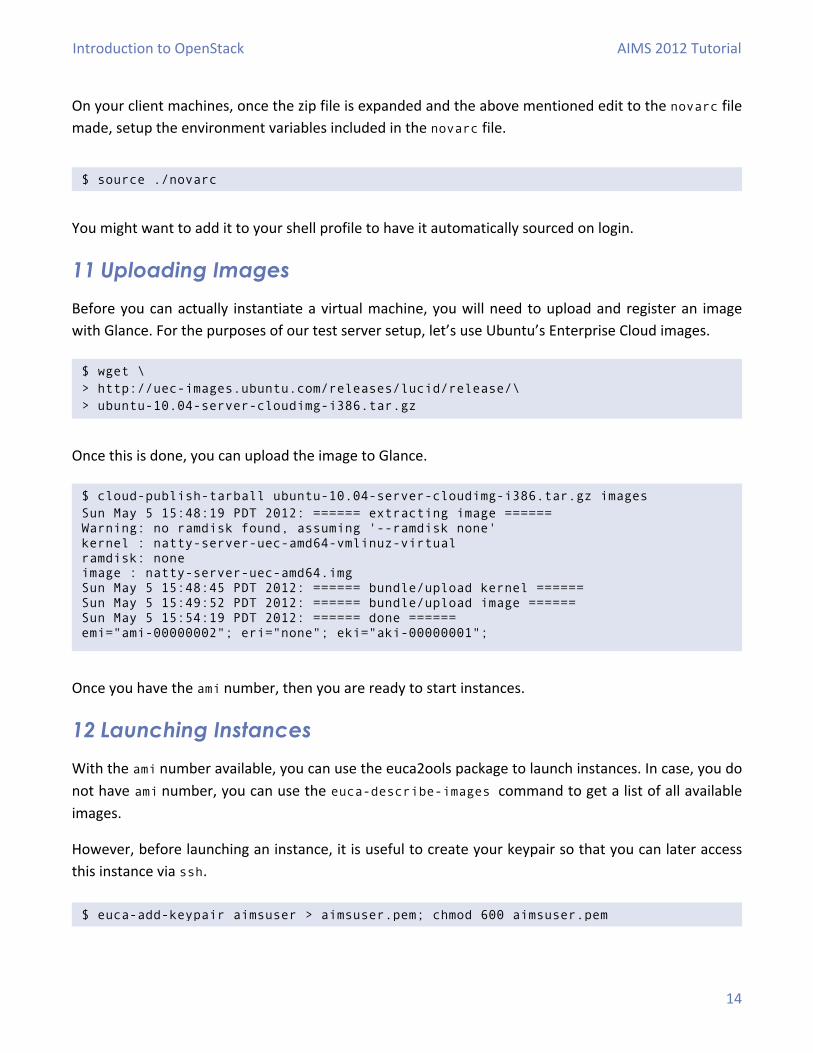
On your client machines, once the zip file is expanded and the above mentioned edit to the novarc file made, setup the environment variables included in the novarc file.
You might want to add it to your shell profile to have it automatically sourced on login.
11 Uploading Images
Before you can actually instantiate a virtual machine, you will need to upload and register an image with Glance. For the purposes of our test server setup, let’s use Ubuntu’s Enterprise Cloud images.
Once this is done, you can upload the image to Glance.
Once you have the ami number, then you are ready to start instances.
12 Launching Instances
With the ami number available, you can use the euca2ools package to launch instances. In case, you do not have ami number, you can use the euca-describe-images command to get a list of all available images.
However, before launching an instance, it is useful to create your keypair so that you can later access this instance via ssh.
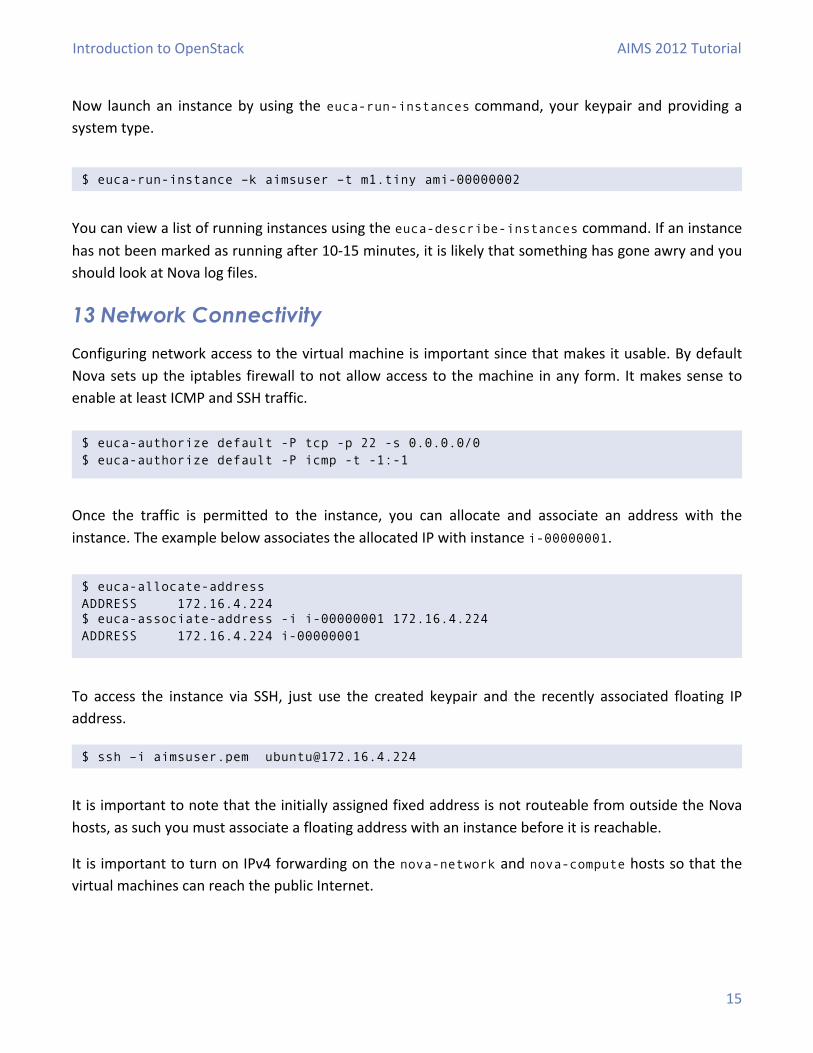
Now launch an instance by using the euca-run-instances command, your keypair and providing a system type.
You can view a list of running instances using the euca-describe-instances command. If an instance has not been marked as running after 10-‐15 minutes, it is likely that something has gone awry and you should look at Nova log files.
13 Network Connectivity
Configuring network access to the virtual machine is important since that makes it usable. By default Nova sets up the iptables firewall to not allow access to the machine in any form. It makes sense to enable at least ICMP and SSH traffic.
Once the traffic is permitted to the instance, you can allocate and associate an address with the instance. The example below associates the allocated IP with instance i-00000001.
To access the instance via SSH, just use the created keypair and the recently associated floating IP address.
It is important to note that the initially assigned fixed address is not routeable from outside the Nova hosts, as such you must associate a floating address with an instance before it is reachable.
It is important to turn on IPv4 forwarding on the nova-network and nova-compute hosts so that the virtual machines can reach the public Internet.
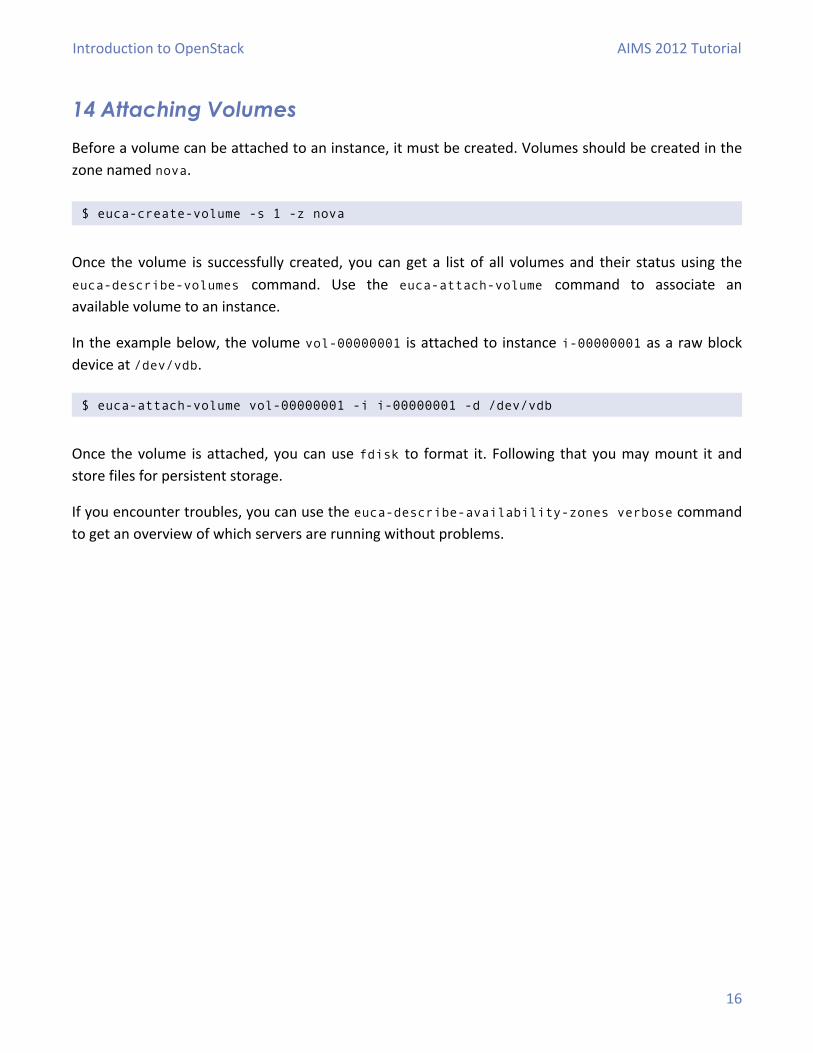
Before a volume can be attached to an instance, it must be created. Volumes should be created in the zone named nova.
Once the volume is successfully created, you can get a list of all volumes and their status using the euca-describe-volumes command. Use the euca-attach-volume command to associate an available volume to an instance.
In the example below, the volume vol-00000001 is attached to instance i-00000001 as a raw block device at /dev/vdb.
Once the volume is attached, you can use fdisk to format it. Following that you may mount it and store files for persistent storage.
If you encounter troubles, you can use the euca-describe-availability-zones verbose command to get an overview of which servers are running without problems.