Published by Articulate® Storyline www.articulate.com Introduction to Primo 1. Getting Started: Introduction to Primo 1.1 Getting Started: Introduction to Primo Notes: Hello, and welcome to this introduction to Primo
Transcript
Published by Articulate® Storyline www.articulate.com
Introduction to Primo
1. Getting Started: Introduction to Primo
1.1 Getting Started: Introduction to Primo
Notes:
Hello, and welcome to this introduction to Primo
Published by Articulate® Storyline www.articulate.com
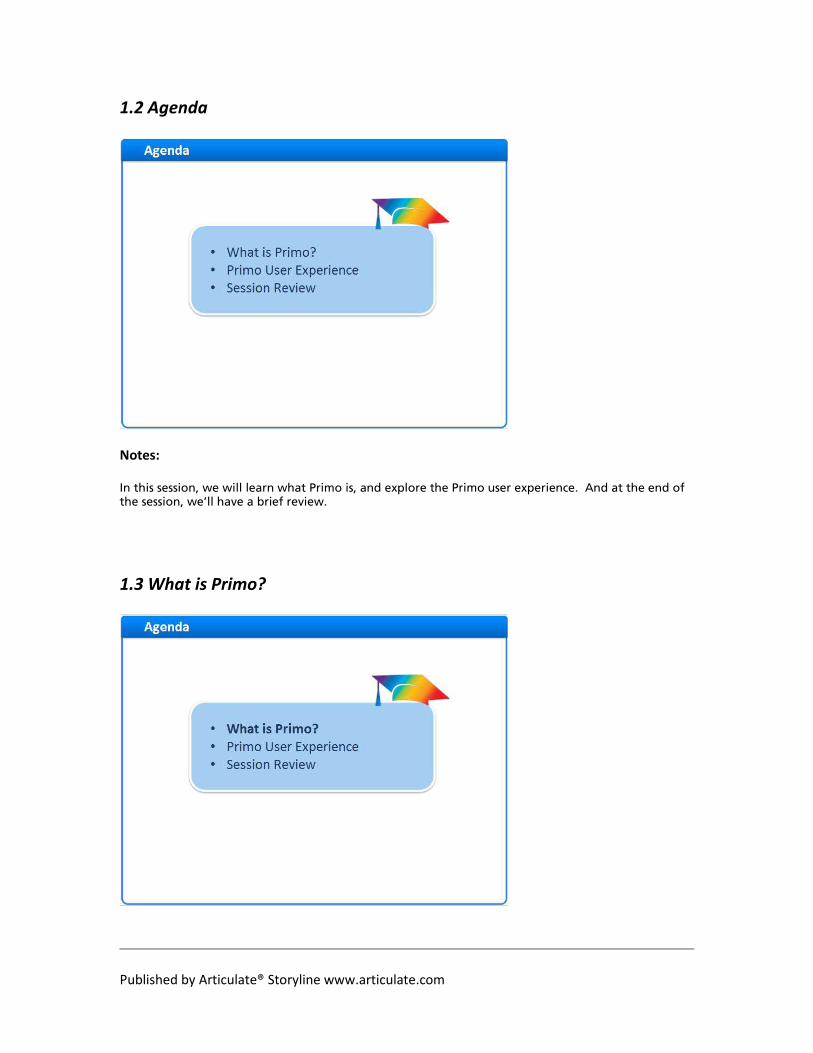
1.2 Agenda
Notes:
In this session, we will learn what Primo is, and explore the Primo user experience. And at the end of the session, we’ll have a brief review.
1.3 What is Primo?
Published by Articulate® Storyline www.articulate.com
Notes:
What is Primo?
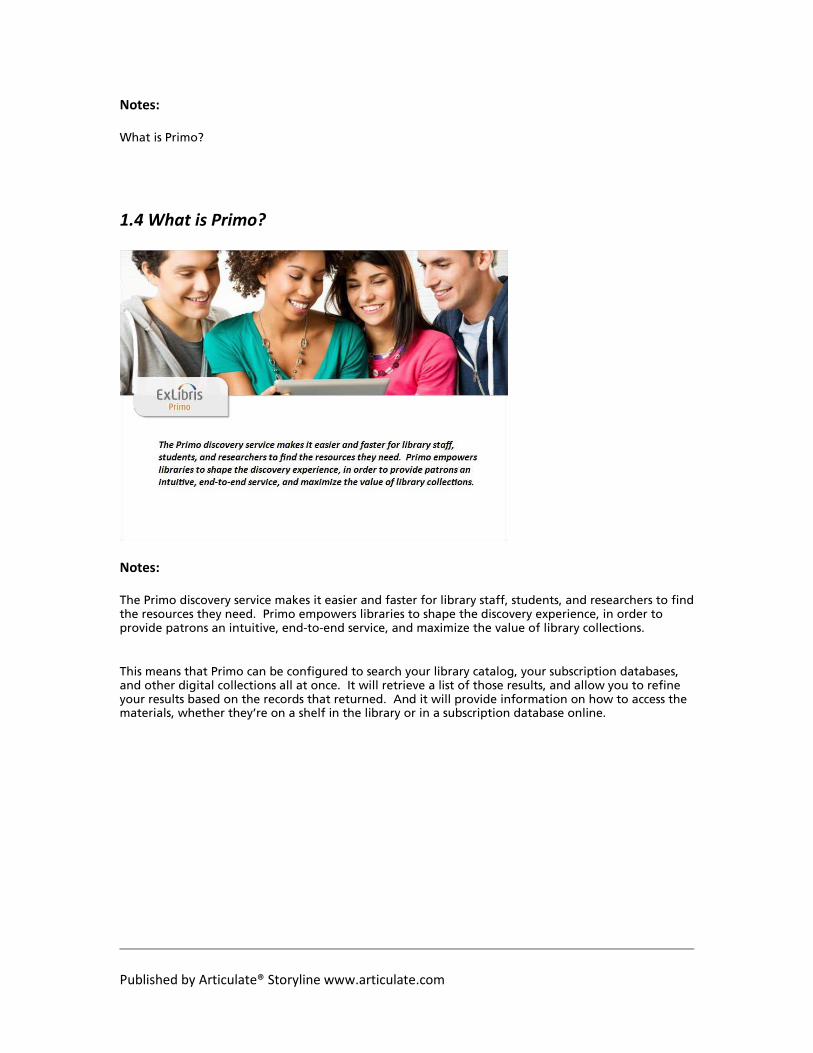
1.4 What is Primo?
Notes:
The Primo discovery service makes it easier and faster for library staff, students, and researchers to find the resources they need. Primo empowers libraries to shape the discovery experience, in order to provide patrons an intuitive, end-to-end service, and maximize the value of library collections.
This means that Primo can be configured to search your library catalog, your subscription databases, and other digital collections all at once. It will retrieve a list of those results, and allow you to refine your results based on the records that returned. And it will provide information on how to access the materials, whether they’re on a shelf in the library or in a subscription database online.
Published by Articulate® Storyline www.articulate.com
1.5 Primo User Experience
Notes:
The Primo User Experience
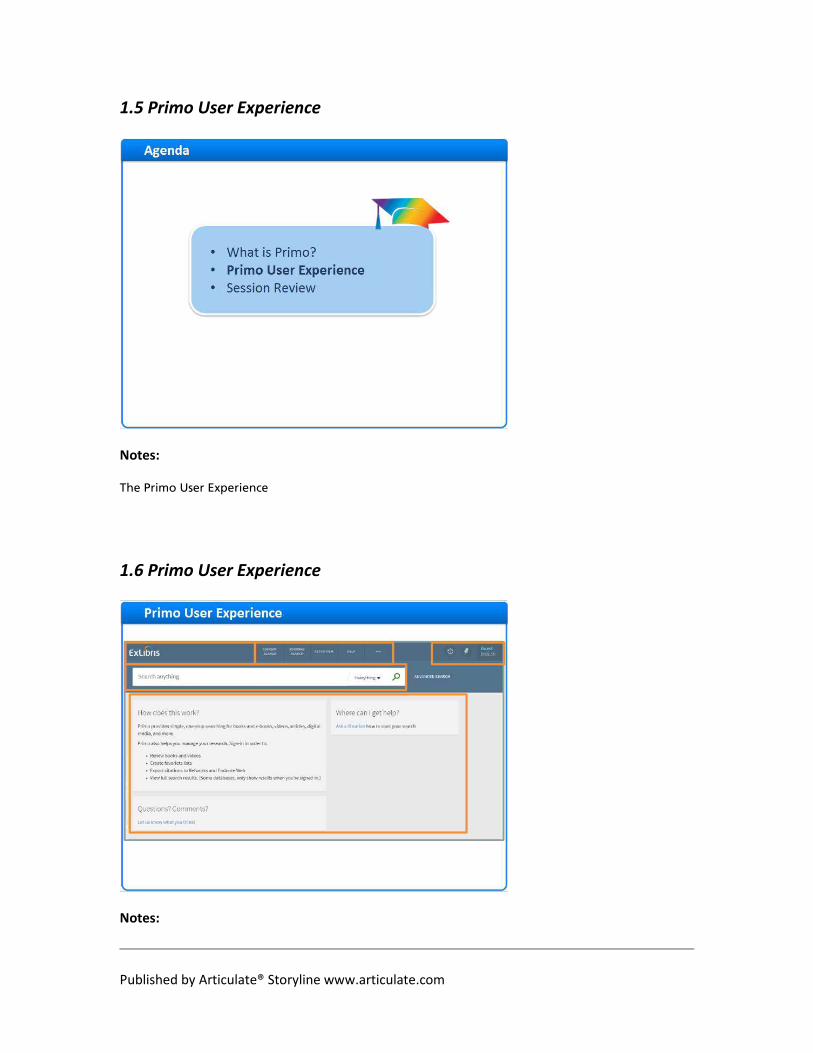
1.6 Primo User Experience
Notes:
Published by Articulate® Storyline www.articulate.com
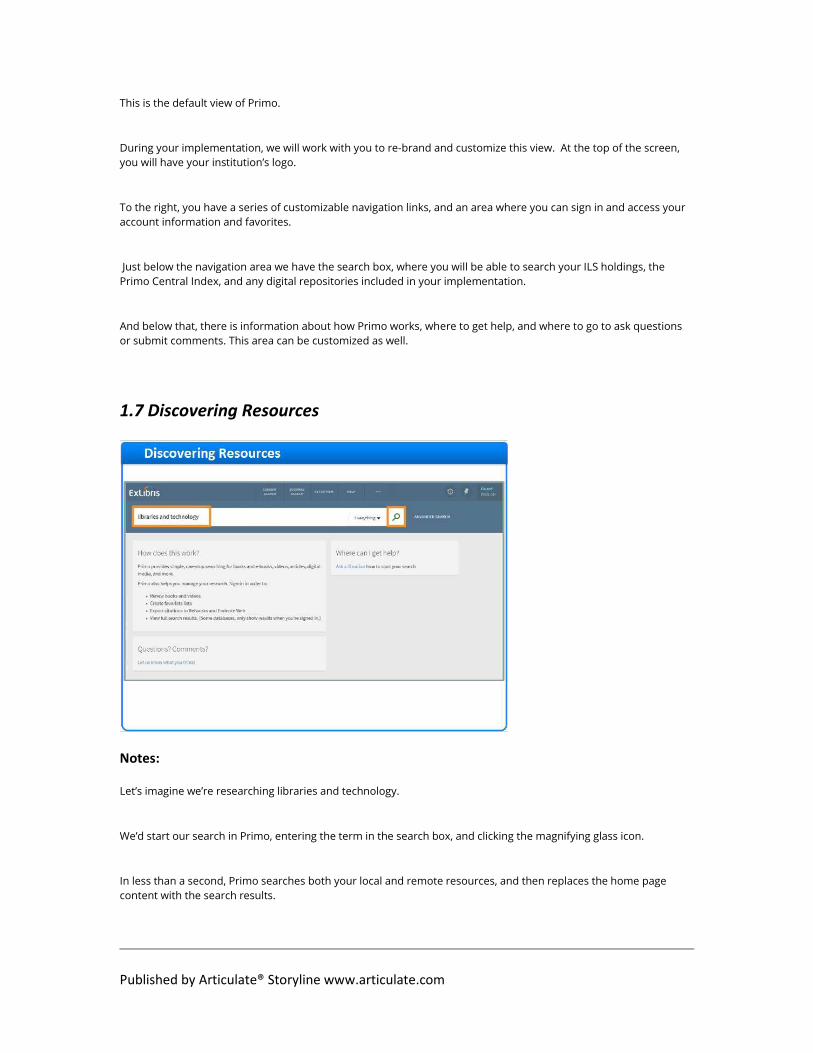
This is the default view of Primo.
During your implementation, we will work with you to re-brand and customize this view. At the top of the screen,
you will have your institution’s logo.
To the right, you have a series of customizable navigation links, and an area where you can sign in and access your
account information and favorites.
Just below the navigation area we have the search box, where you will be able to search your ILS holdings, the
Primo Central Index, and any digital repositories included in your implementation.
And below that, there is information about how Primo works, where to get help, and where to go to ask questions
or submit comments. This area can be customized as well.
1.7 Discovering Resources
Notes:
Let’s imagine we’re researching libraries and technology.
We’d start our search in Primo, entering the term in the search box, and clicking the magnifying glass icon.
In less than a second, Primo searches both your local and remote resources, and then replaces the home page
content with the search results.
Published by Articulate® Storyline www.articulate.com
Search Results (Slide Layer)
1.8 Search Results – Sorting
Notes:
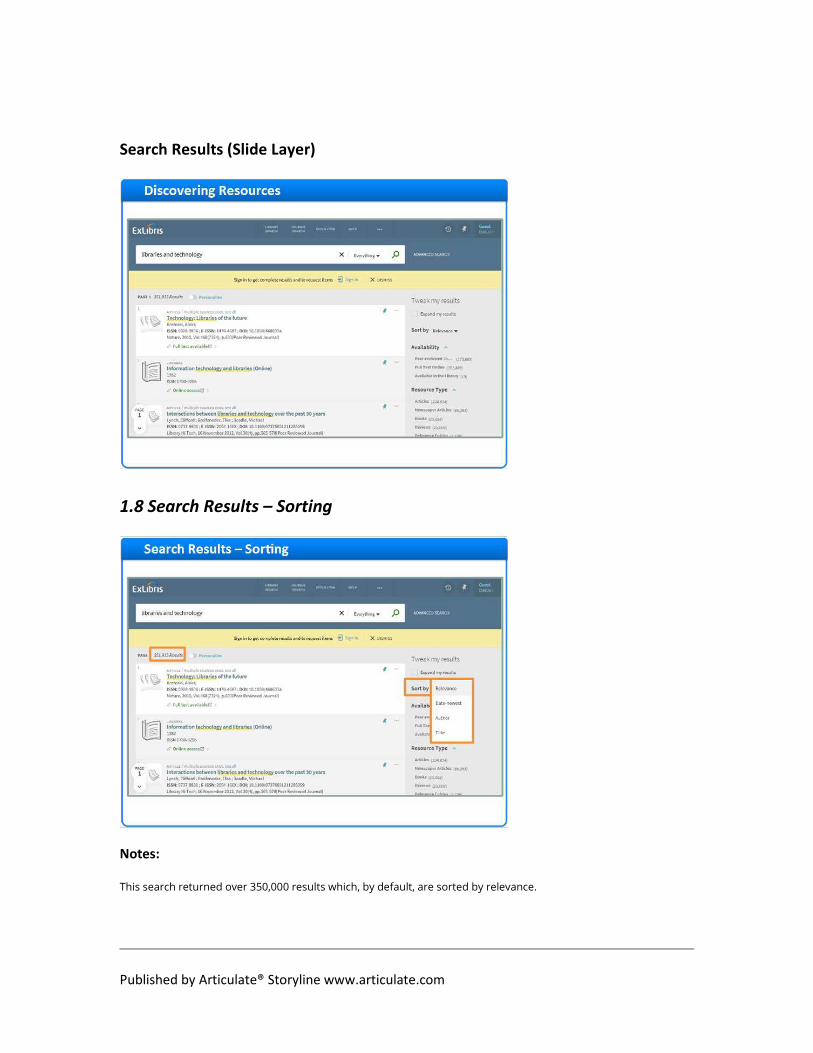
This search returned over 350,000 results which, by default, are sorted by relevance.
Published by Articulate® Storyline www.articulate.com
Primo uses a proprietary algorithm to determine how relevant each result is to the search term. Results that are
highly relevant are placed at the top of the search results, while less relevant results are placed further down in the
list.
It is also possible to sort results based on other criteria, such as date, author, and title.
1.9 Search Results – Refining Results
Notes:
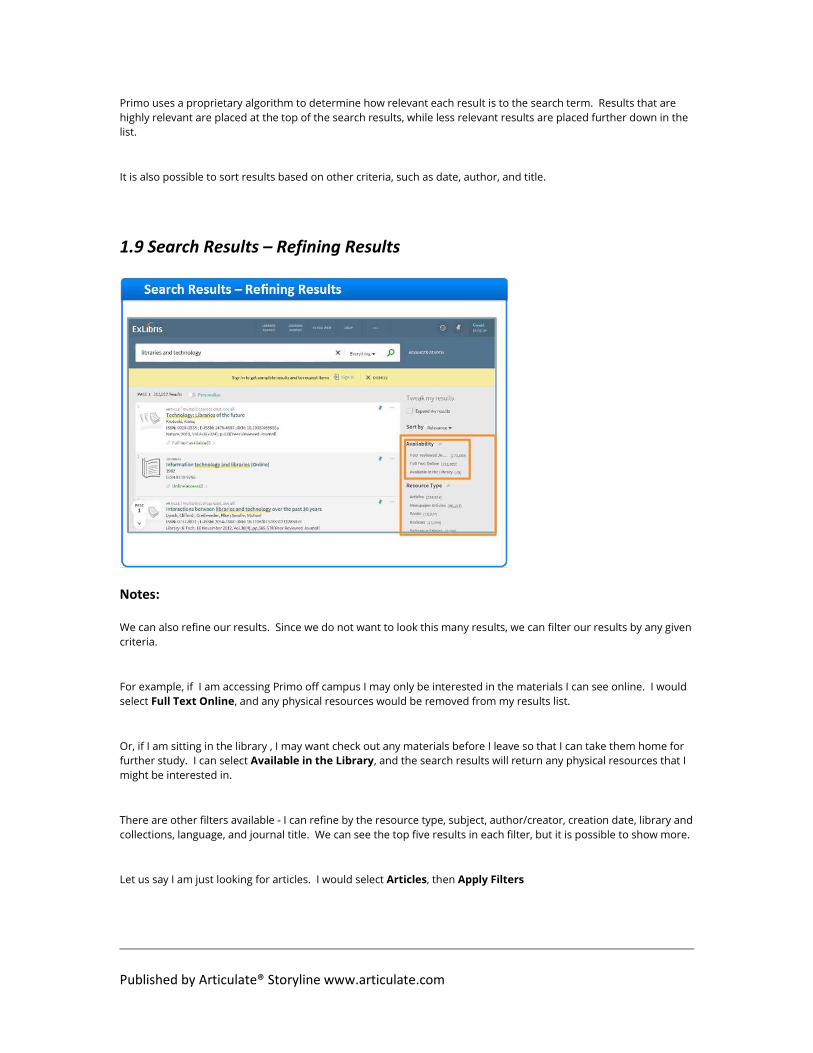
We can also refine our results. Since we do not want to look this many results, we can filter our results by any given
criteria.
For example, if I am accessing Primo off campus I may only be interested in the materials I can see online. I would
select Full Text Online, and any physical resources would be removed from my results list.
Or, if I am sitting in the library , I may want check out any materials before I leave so that I can take them home for
further study. I can select Available in the Library, and the search results will return any physical resources that I
might be interested in.
There are other filters available - I can refine by the resource type, subject, author/creator, creation date, library and
collections, language, and journal title. We can see the top five results in each filter, but it is possible to show more.
Let us say I am just looking for articles. I would select Articles, then Apply Filters
Published by Articulate® Storyline www.articulate.com
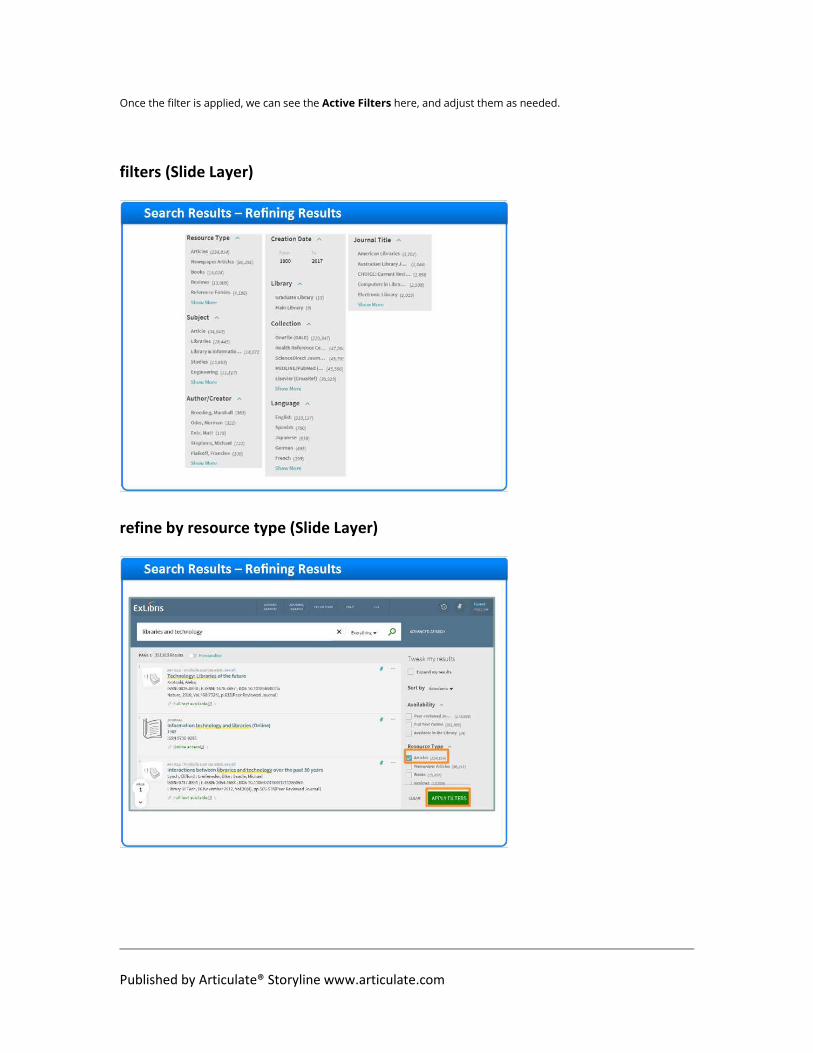
Once the filter is applied, we can see the Active Filters here, and adjust them as needed.
filters (Slide Layer)
refine by resource type (Slide Layer)
Published by Articulate® Storyline www.articulate.com
filter applied (Slide Layer)
1.10 Search Results – Brief Results
Notes:
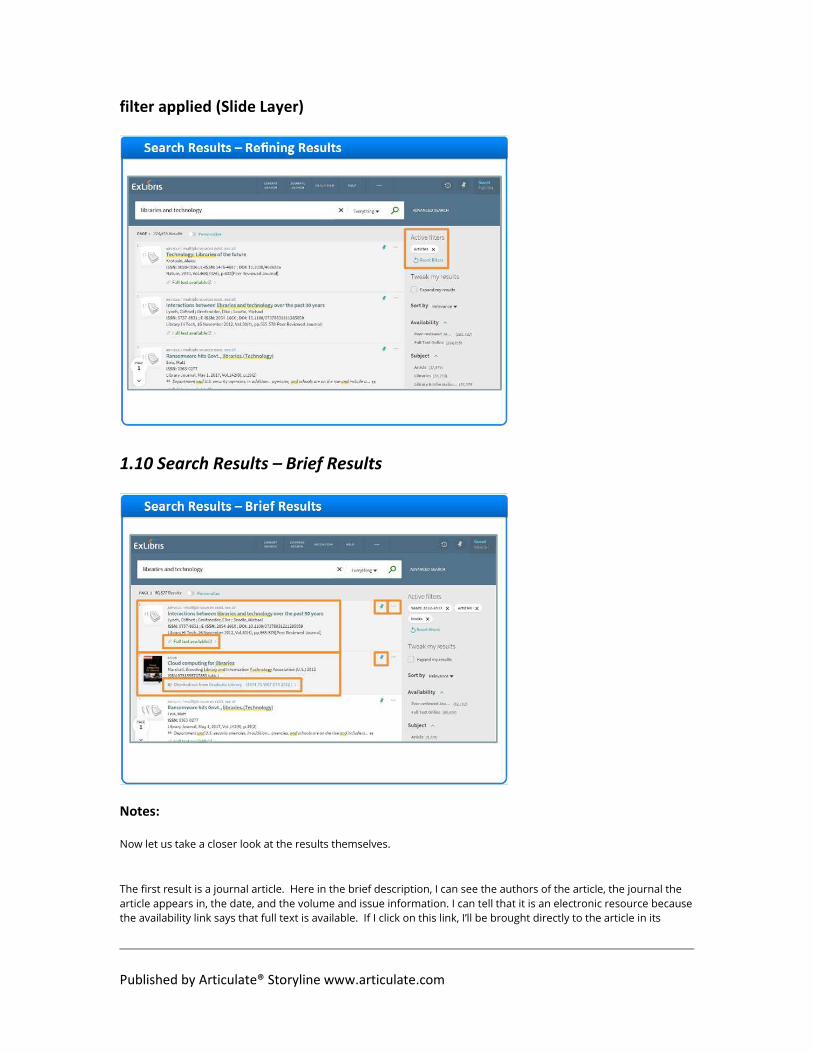
Now let us take a closer look at the results themselves.
The first result is a journal article. Here in the brief description, I can see the authors of the article, the journal the
article appears in, the date, and the volume and issue information. I can tell that it is an electronic resource because
the availability link says that full text is available. If I click on this link, I’ll be brought directly to the article in its
Published by Articulate® Storyline www.articulate.com
subscription database.
The second result is a book. Again I can see details about this book - the author, publisher, publication date, and
ISBN. And I can tell that it’s a physical resource because the availability link says that the book is checked out of the
Graduate Library.
I can add both of these records to my favorites by clicking on the pin icon. If I click on the ellipses I have options to
export the record out to various citation managers, create a permanent link to this record, print the record, and
email the record.
I’m going to click on the X to exit out of this pop-up.
options (Slide Layer)
Published by Articulate® Storyline www.articulate.com
1.11 Search Results – Full Result (Electronic)
Notes:
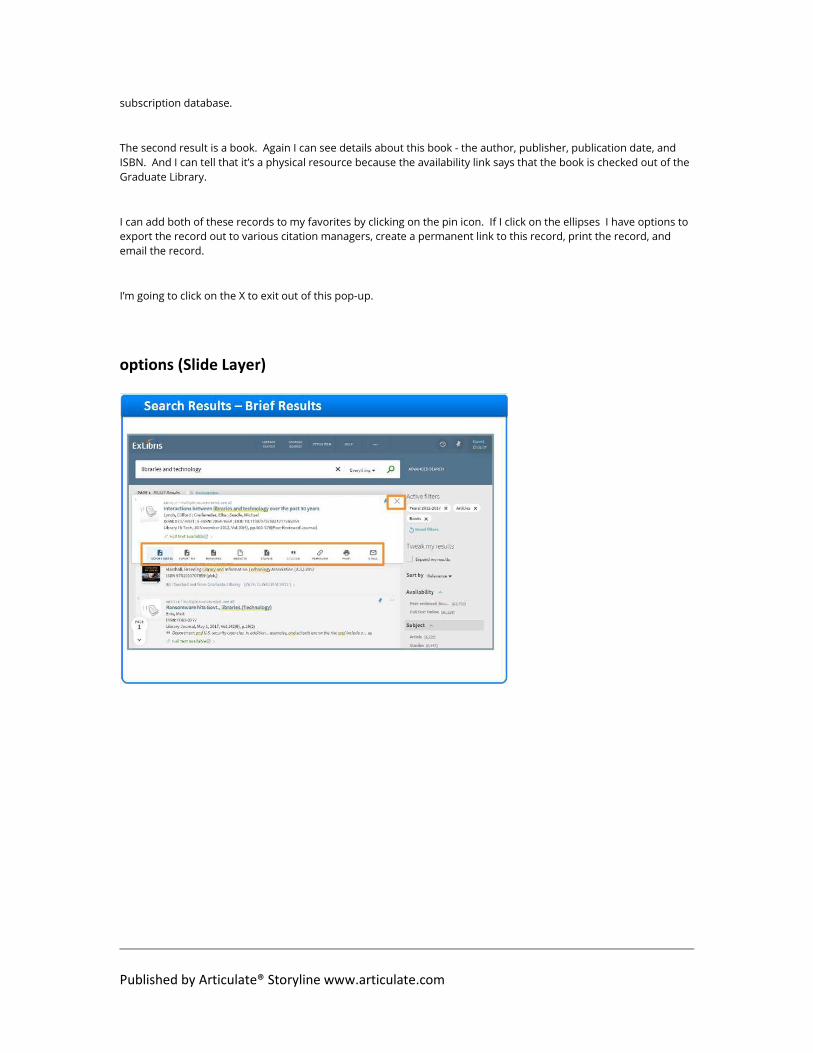
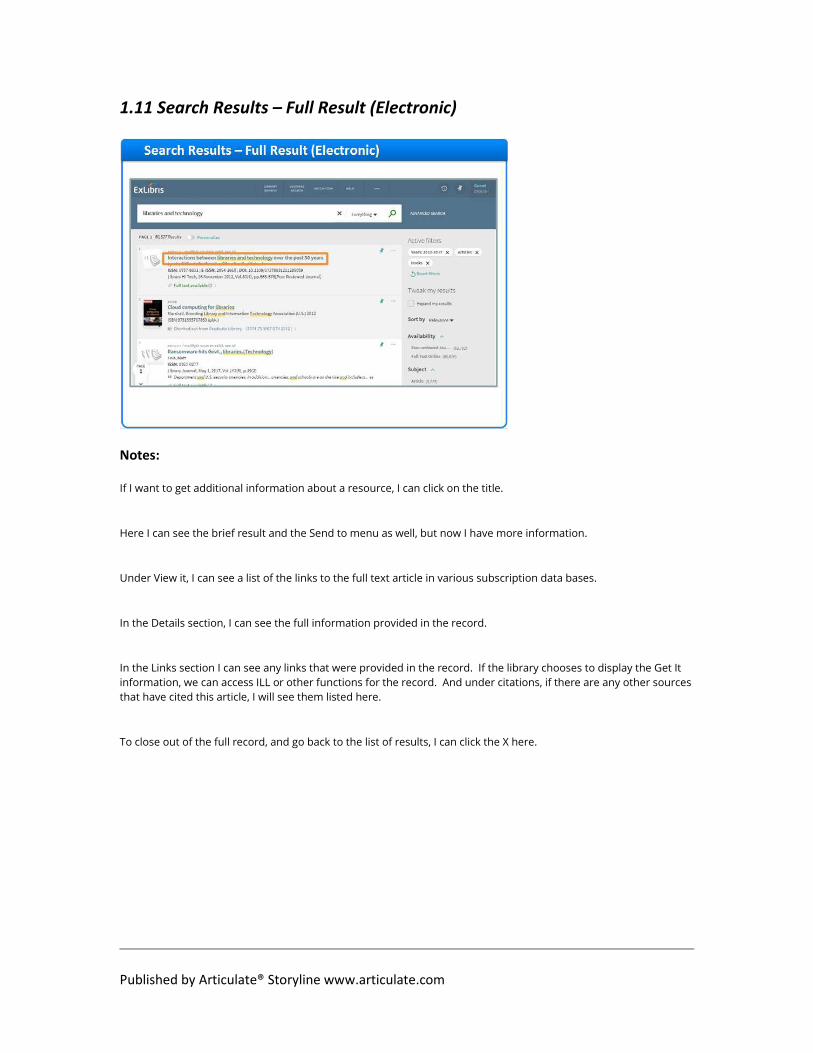
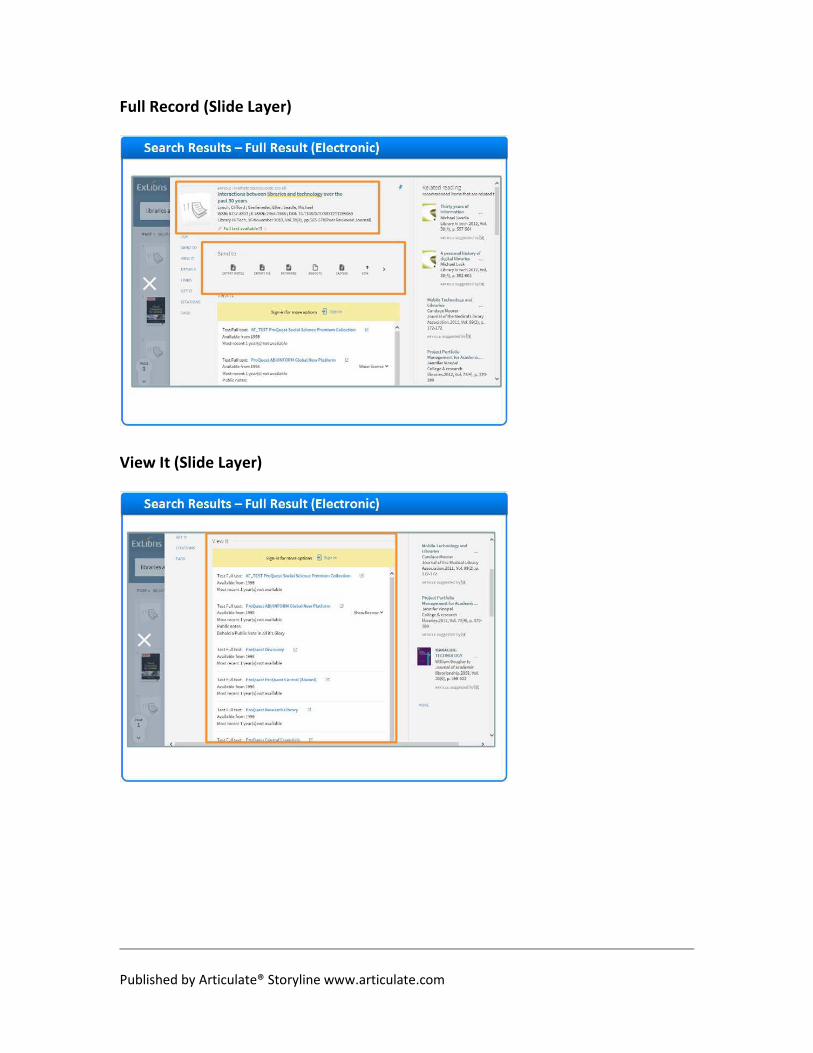
If I want to get additional information about a resource, I can click on the title.
Here I can see the brief result and the Send to menu as well, but now I have more information.
Under View it, I can see a list of the links to the full text article in various subscription data bases.
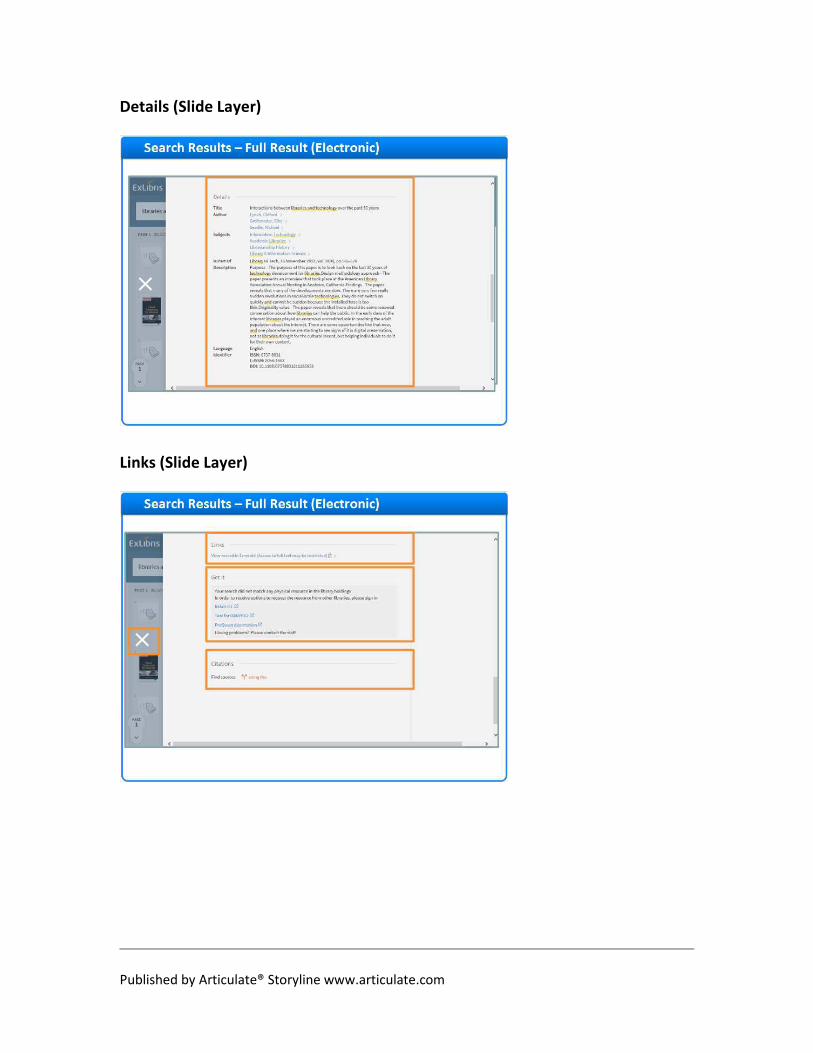
In the Details section, I can see the full information provided in the record.
In the Links section I can see any links that were provided in the record. If the library chooses to display the Get It
information, we can access ILL or other functions for the record. And under citations, if there are any other sources
that have cited this article, I will see them listed here.
To close out of the full record, and go back to the list of results, I can click the X here.
Published by Articulate® Storyline www.articulate.com
Full Record (Slide Layer)
View It (Slide Layer)
Published by Articulate® Storyline www.articulate.com
Details (Slide Layer)
Links (Slide Layer)
Published by Articulate® Storyline www.articulate.com
1.12 Search Results – Full Result (Physical)
Notes:
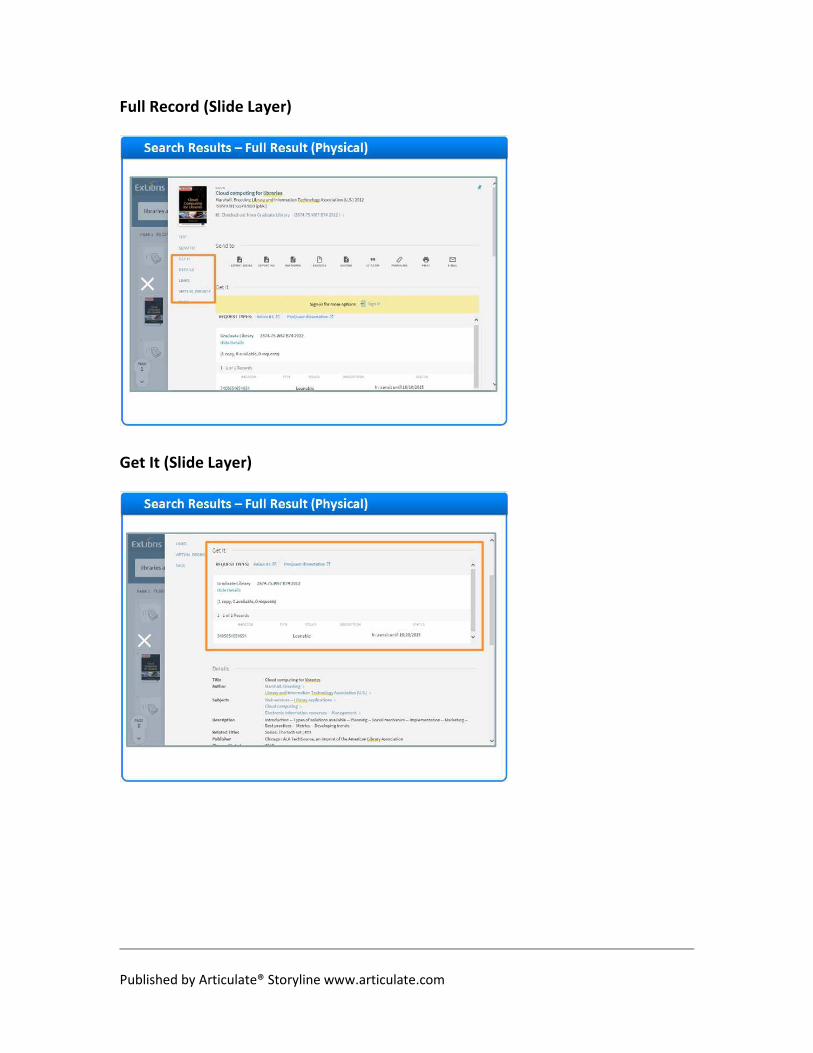
Let’s look at the full record for the physical resource Cloud computing for libraries.
Notice that I have some of the same sections, but there are a few differences.
In the Get It section, I can request the item, and see more information about where the resource is located, if there
are multiple copies, and it’s current status.
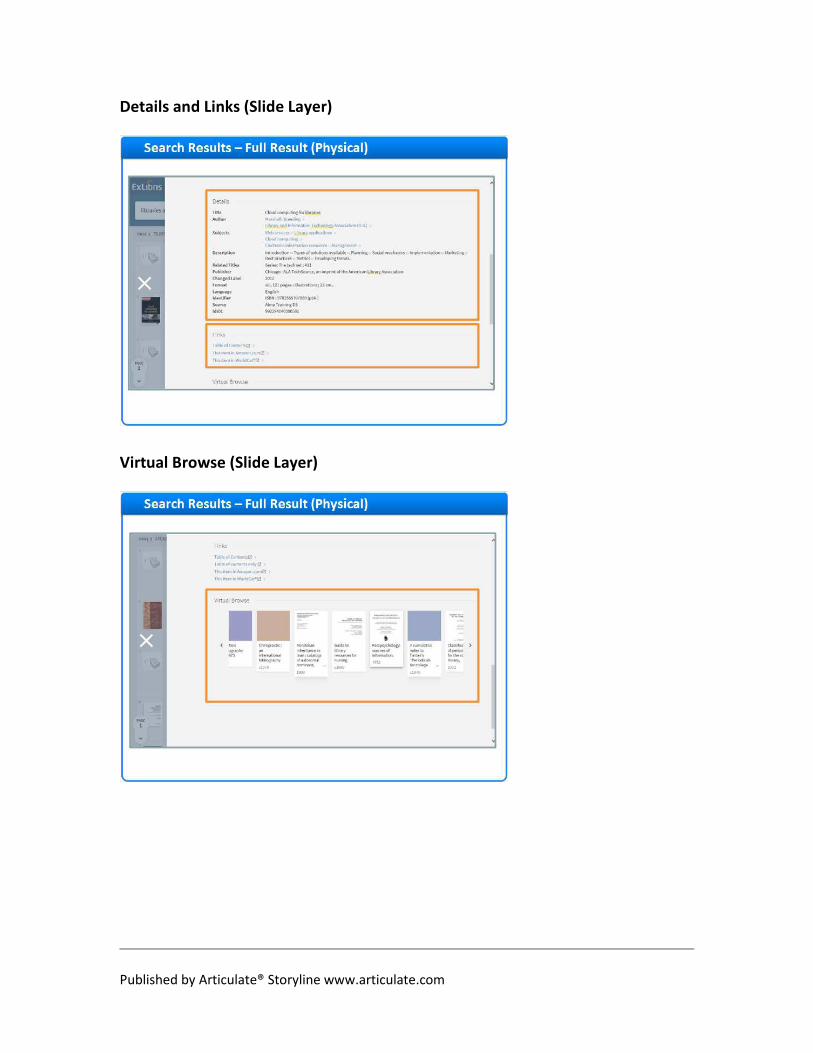
The Details section contains the full information for the record. In the Links section I can access the table of
contents for this resource, and see it in Amazon or WorldCat.
For physical records, Primo provides a Virtual Browse feature that allows us to see the books that are next to this
one on the shelf.
Let’s return to the list of results.
Published by Articulate® Storyline www.articulate.com
Full Record (Slide Layer)
Get It (Slide Layer)
Published by Articulate® Storyline www.articulate.com
Details and Links (Slide Layer)
Virtual Browse (Slide Layer)
Published by Articulate® Storyline www.articulate.com
1.13 Search Results – Favorites
Notes:
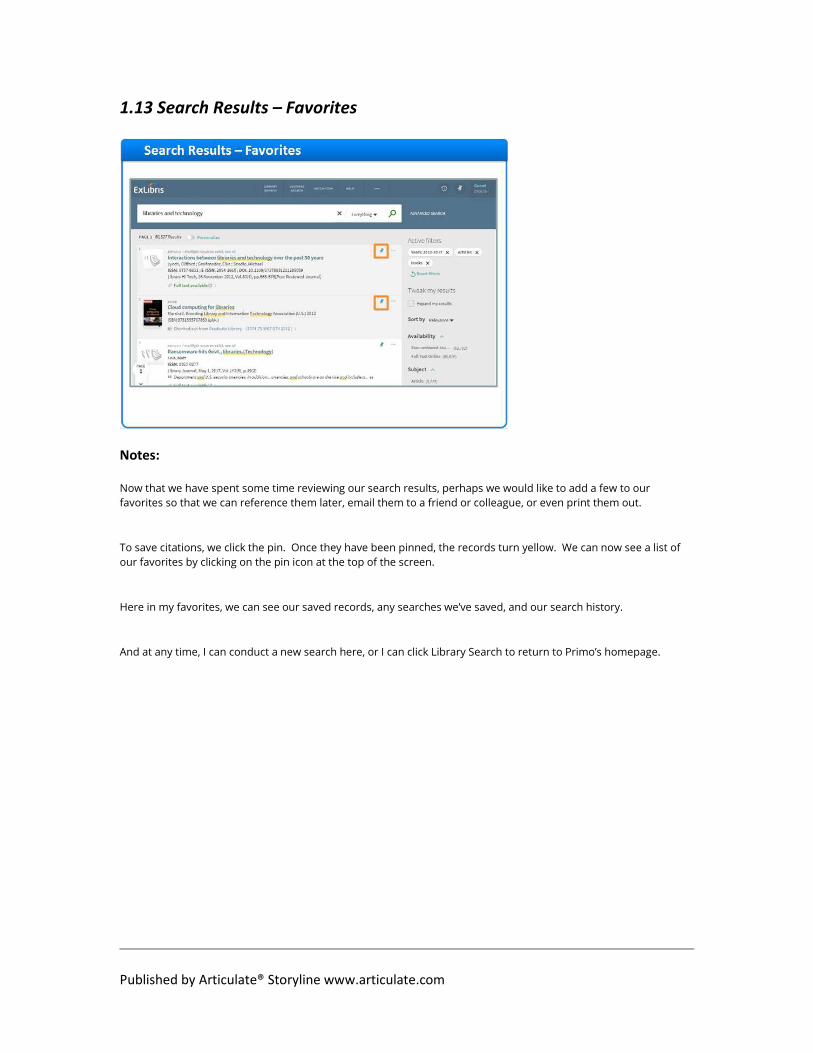
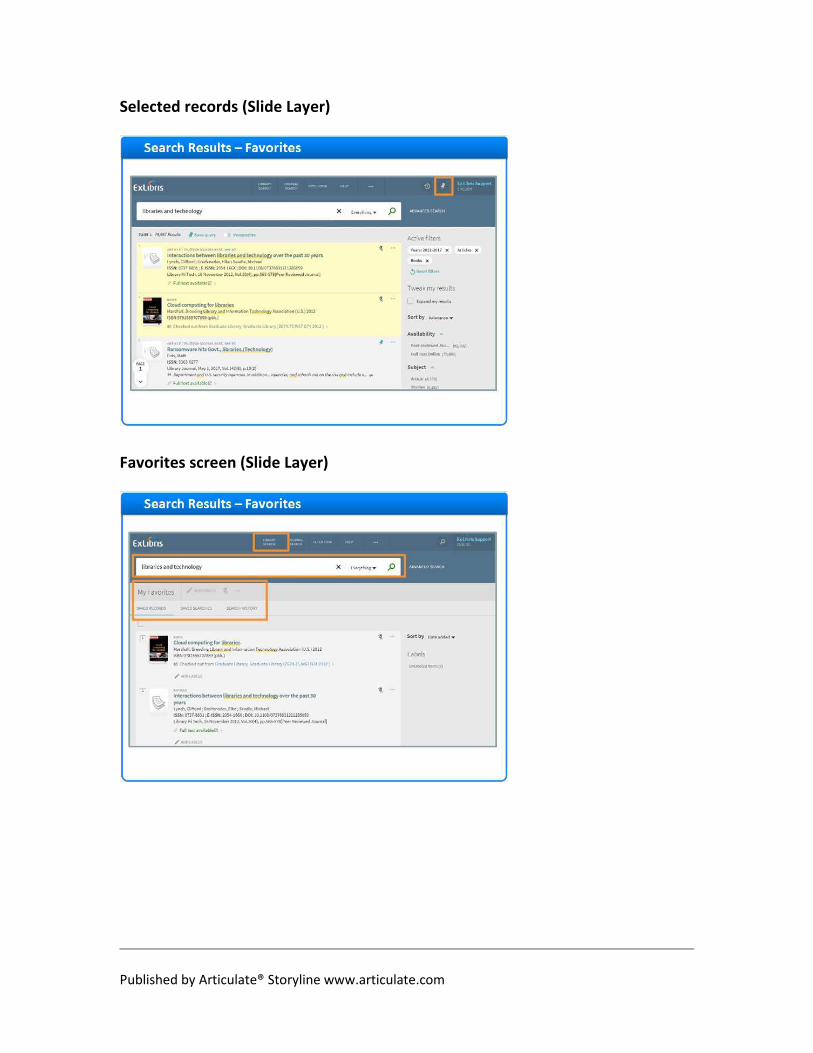
Now that we have spent some time reviewing our search results, perhaps we would like to add a few to our
favorites so that we can reference them later, email them to a friend or colleague, or even print them out.
To save citations, we click the pin. Once they have been pinned, the records turn yellow. We can now see a list of
our favorites by clicking on the pin icon at the top of the screen.
Here in my favorites, we can see our saved records, any searches we’ve saved, and our search history.
And at any time, I can conduct a new search here, or I can click Library Search to return to Primo’s homepage.
Published by Articulate® Storyline www.articulate.com
Selected records (Slide Layer)
Favorites screen (Slide Layer)
Published by Articulate® Storyline www.articulate.com
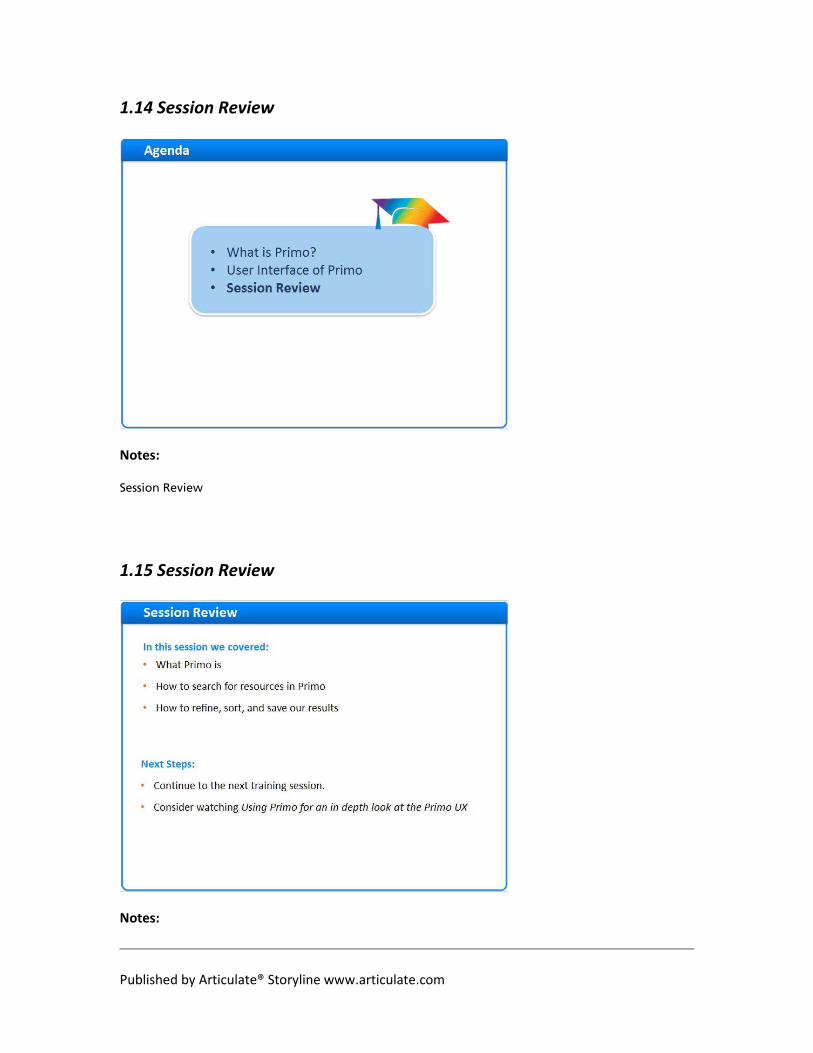
1.14 Session Review
Notes:
Session Review
1.15 Session Review
Notes:
Published by Articulate® Storyline www.articulate.com
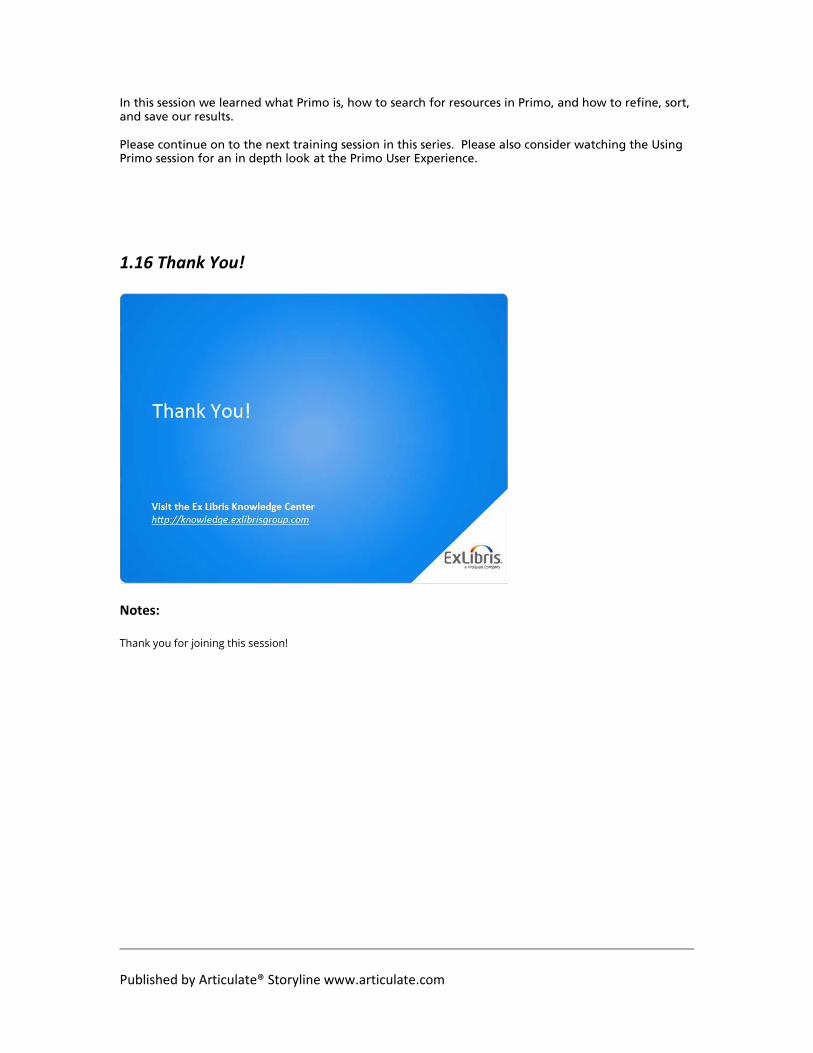
In this session we learned what Primo is, how to search for resources in Primo, and how to refine, sort, and save our results. Please continue on to the next training session in this series. Please also consider watching the Using Primo session for an in depth look at the Primo User Experience.
1.16 Thank You!
Notes:
Thank you for joining this session!
Published by Articulate® Storyline www.articulate.com
1.17 About this Training
Notes:
1 (Slide Layer)
Published by Articulate® Storyline www.articulate.com
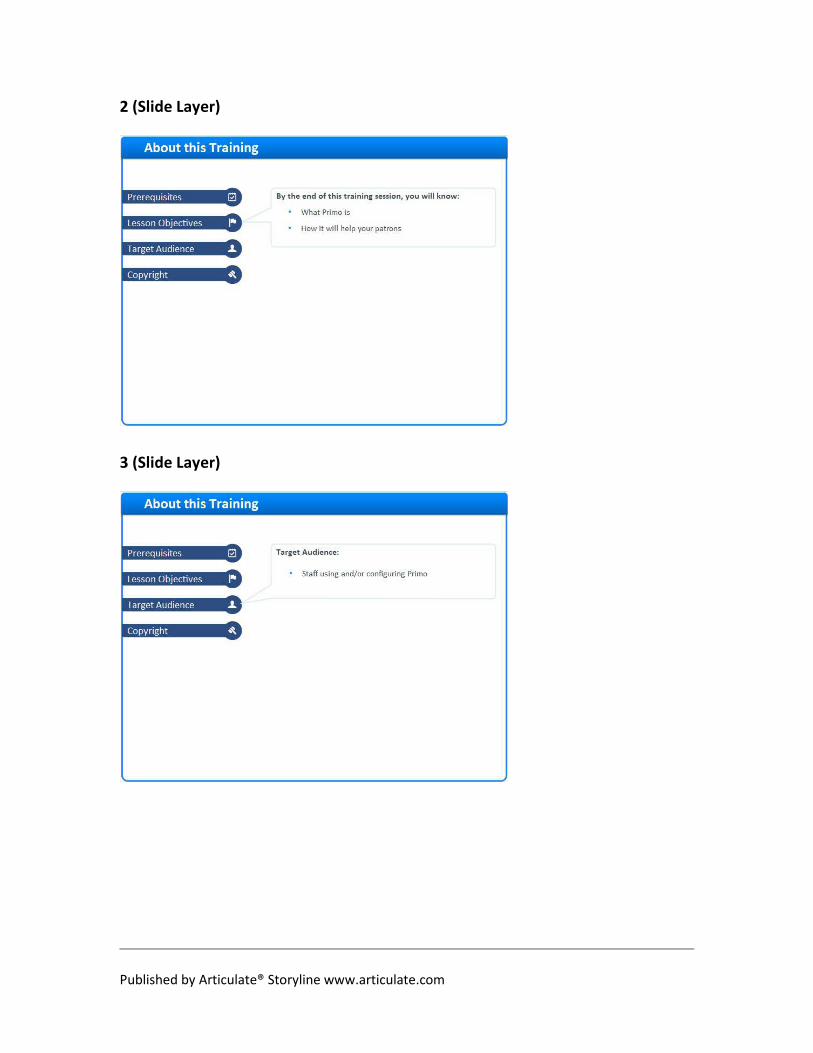
2 (Slide Layer)
3 (Slide Layer)
Published by Articulate® Storyline www.articulate.com