Page 1
INDIVIDUAL PORTFOLIO ARTIFACT SUBMISSION SYSTEM
IPASS User Guide
IDAHO STATE DEPARTMENT OF EDUCATION
ASSESSMENT AND ACCOUNTABILITY | SCIENCE ALTERNATE ASSESSMENT
650 W STATE STREET, 2ND FLOOR
BOISE, IDAHO 83702
208 332 6800 OFFICE
WWW.SDE.IDAHO.GOV
REVISED JANUARY 2018
Page 2
REVISED January 2018 IPASS User Guide / Assessment and Accountability / SDE / 2
TABLE OF CONTENTS
Table of Contents ......................................................................................................................... 2
IPASS Submission Deadline ........................................................................................................ 3
Evidence Formatting .................................................................................................................... 3
Accessing IPASS ............................................................................................................................ 3
New ISEE Users ............................................................................................................................ 4
Logging On to ISEE for the First Time................................................................................... 4
If You Do Not Have an Account or District is Missing ......................................................... 5
Assessment Coordinators ............................................................................................................ 6
Logging On ................................................................................................................................. 6
IPASS .......................................................................................................................................... 7
Enrolling Teachers in IPASS .................................................................................................... 9
Enrolling Students in IPASS ................................................................................................... 11
Assigning Students to Teachers ........................................................................................... 12
Teachers ....................................................................................................................................... 13
Logging On ............................................................................................................................... 13
Accessing the Student Portfolio ............................................................................................ 14
Student Response Check ....................................................................................................... 15
Entering Baseline Data ........................................................................................................... 17
Uploading Artifacts .................................................................................................................. 19
Setting the Score for Student Artifacts ................................................................................ 19
Submitting Student Portfolio for Scoring ............................................................................. 20
Page 3
REVISED January 2018 IPASS User Guide / Assessment and Accountability / SDE / 3
IPASS SUBMISSION DEADLINE
Deadline for submitting completed portfolios is March 31, 2018, at midnight. No submissions
will be accepted after that time.
EVIDENCE FORMATTING
Before beginning the upload process, it is important to make sure all evidence submitted is
correctly formatted. Please upload in these compatible formats:
Microsoft documents (.doc, .docx)
PDF documents (.pdf)
JPEG images (.jpg)
PNG images (.png)
GIF images (.gif)
TIFF images (.tiff)
Flash video (.flv)
MPEG-4 video (.mp4)
QuickTime Movie video (.mov)
AVI video (.avi)
ACCESSING IPASS
Go to the IPASS website.
Page 4
REVISED January 2018 IPASS User Guide / Assessment and Accountability / SDE / 4
NEW ISEE USERS
Logging On to ISEE for the First Time
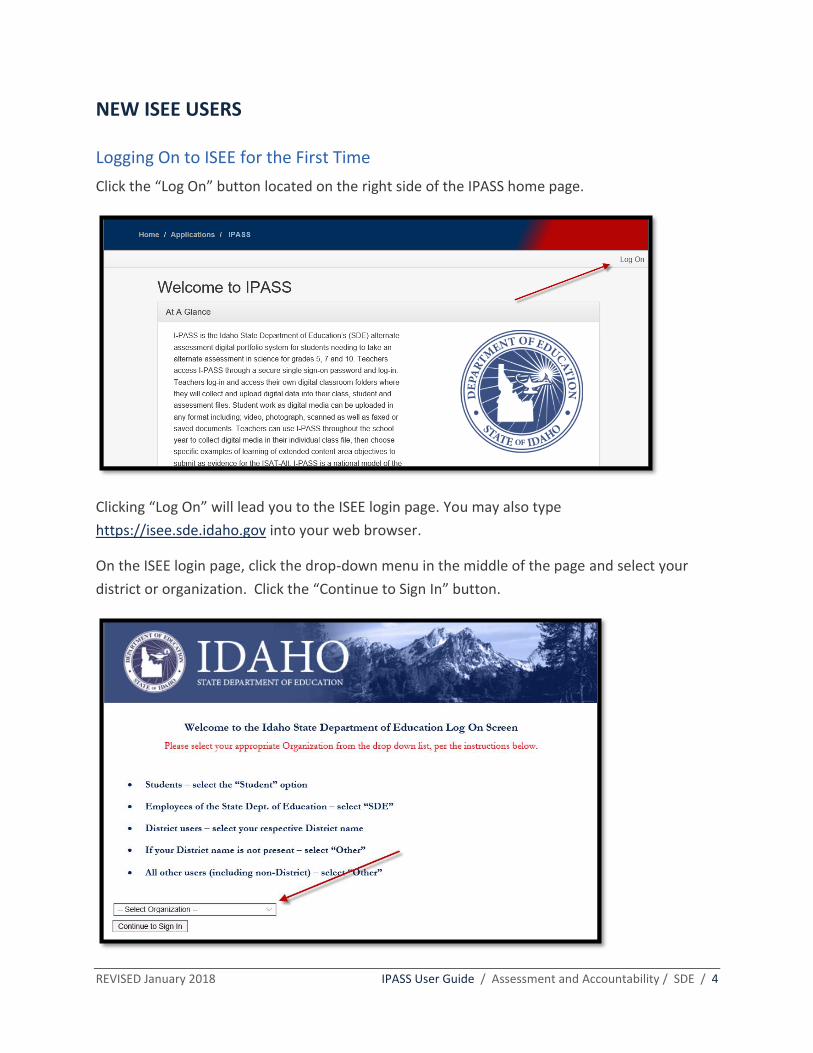
Click the “Log On” button located on the right side of the IPASS home page.
Clicking “Log On” will lead you to the ISEE login page. You may also type
https://isee.sde.idaho.gov into your web browser.
On the ISEE login page, click the drop-down menu in the middle of the page and select your
district or organization. Click the “Continue to Sign In” button.
Page 5
REVISED January 2018 IPASS User Guide / Assessment and Accountability / SDE / 5
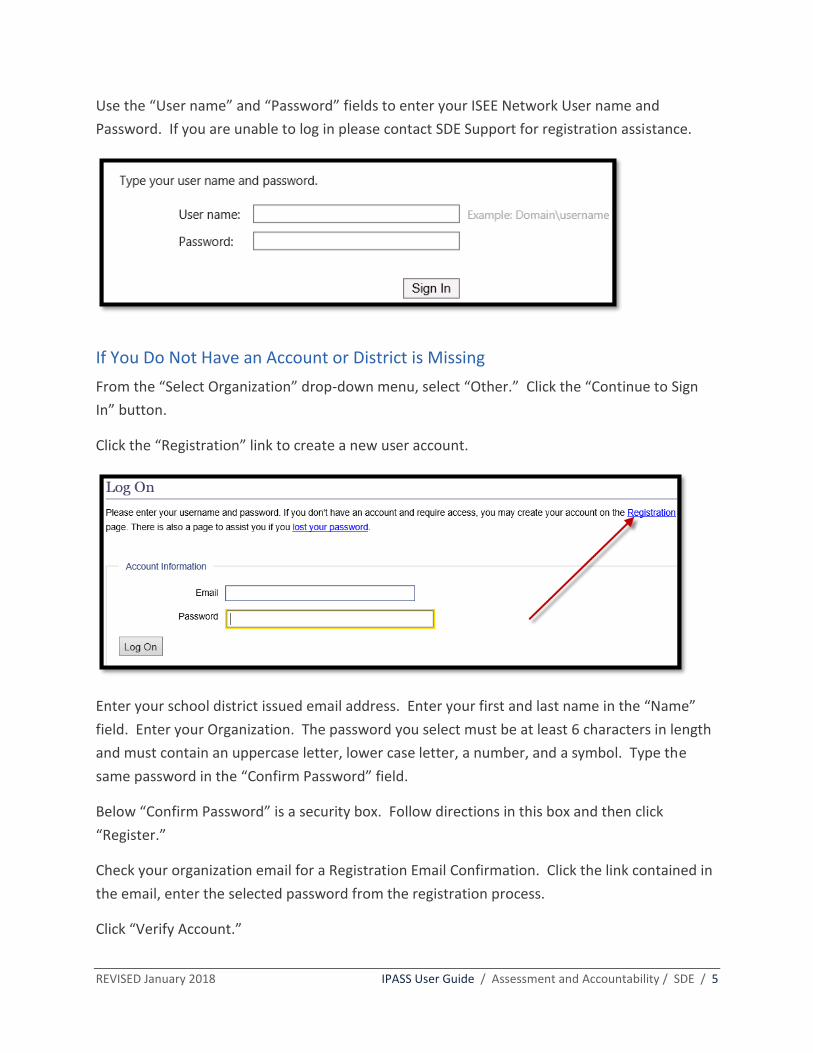
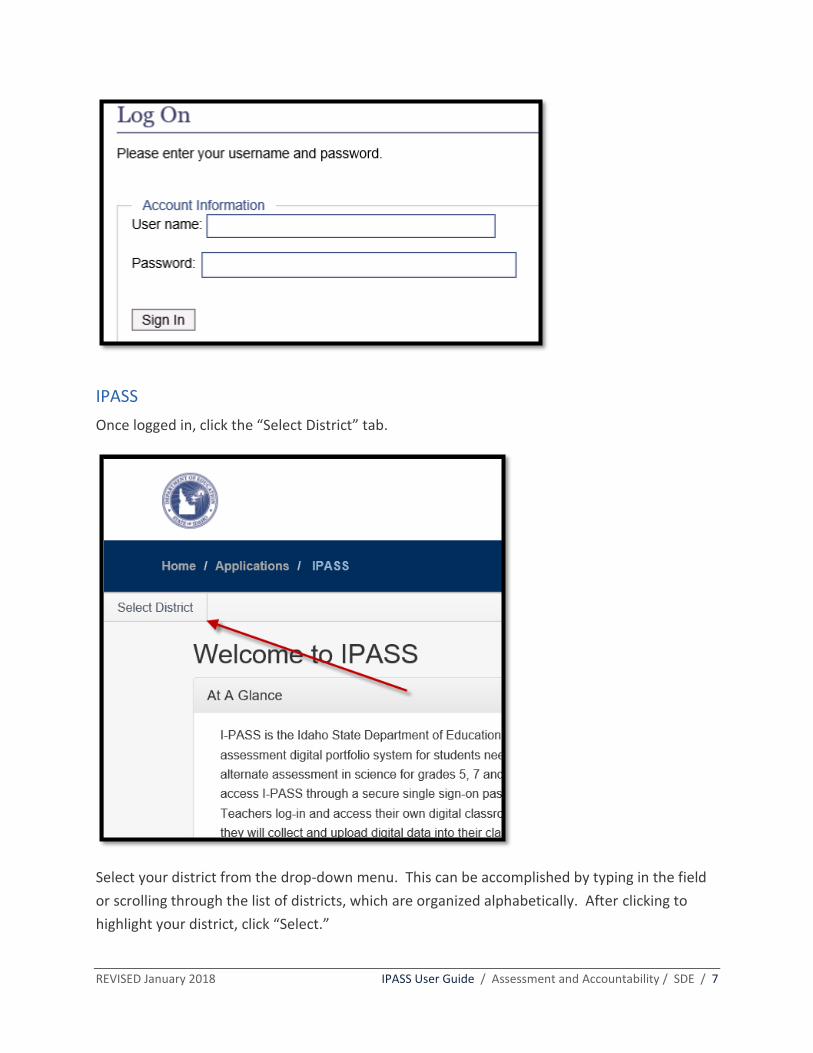
Use the “User name” and “Password” fields to enter your ISEE Network User name and
Password. If you are unable to log in please contact SDE Support for registration assistance.
If You Do Not Have an Account or District is Missing
From the “Select Organization” drop-down menu, select “Other.” Click the “Continue to Sign
In” button.
Click the “Registration” link to create a new user account.
Enter your school district issued email address. Enter your first and last name in the “Name”
field. Enter your Organization. The password you select must be at least 6 characters in length
and must contain an uppercase letter, lower case letter, a number, and a symbol. Type the
same password in the “Confirm Password” field.
Below “Confirm Password” is a security box. Follow directions in this box and then click
“Register.”
Check your organization email for a Registration Email Confirmation. Click the link contained in
the email, enter the selected password from the registration process.
Click “Verify Account.”
Page 6
REVISED January 2018 IPASS User Guide / Assessment and Accountability / SDE / 6
ASSESSMENT COORDINATORS
Logging On
Click the “Log On” button located on the right side of the IPASS home page.
After clicking “Log On” you may see the Idaho State Department of Education Log On Screen.
On this screen, please select your organization or district from the drop-down menu. After
selecting your organization, click on “Continue to Sign In.”
To log in to IPASS, enter your ISEE login information, click “Continue to Sign In.” If you are
unable to log in, please contact SDE Support for registration assistance.
Page 7
REVISED January 2018 IPASS User Guide / Assessment and Accountability / SDE / 7
IPASS
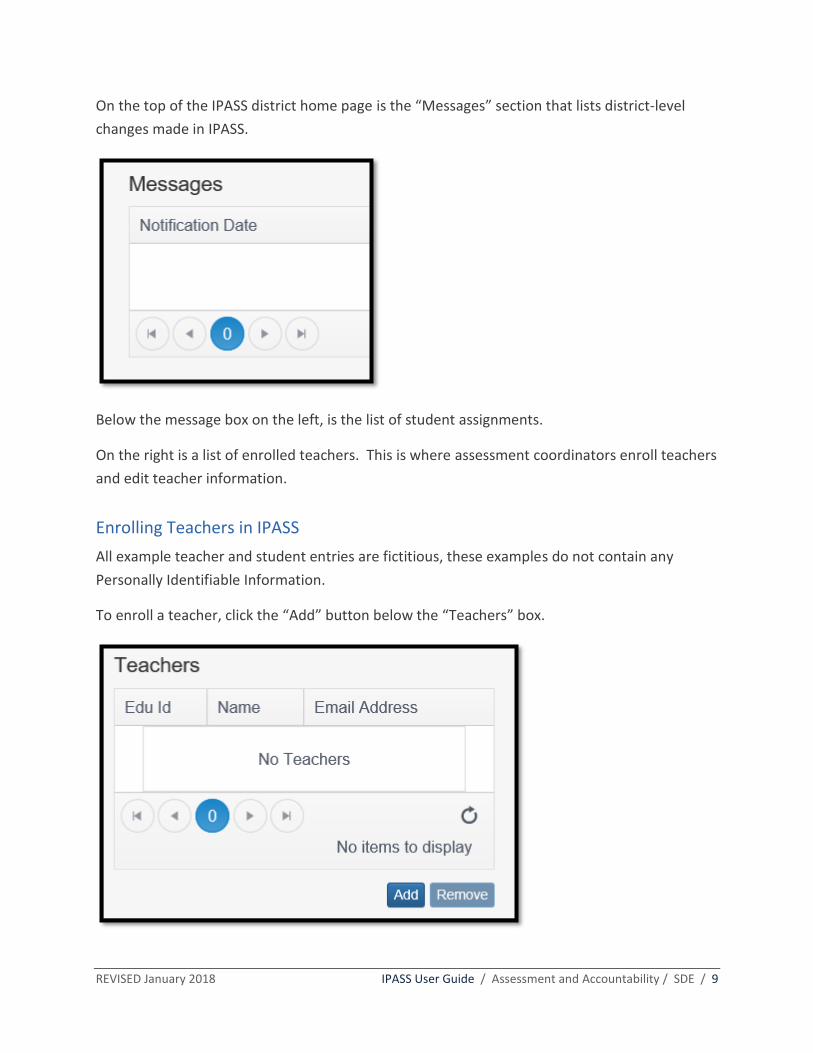
Once logged in, click the “Select District” tab.
Select your district from the drop-down menu. This can be accomplished by typing in the field
or scrolling through the list of districts, which are organized alphabetically. After clicking to
highlight your district, click “Select.”
Page 8
REVISED January 2018 IPASS User Guide / Assessment and Accountability / SDE / 8
Next, click on the “Student Assignment” tab.
Page 9
REVISED January 2018 IPASS User Guide / Assessment and Accountability / SDE / 9
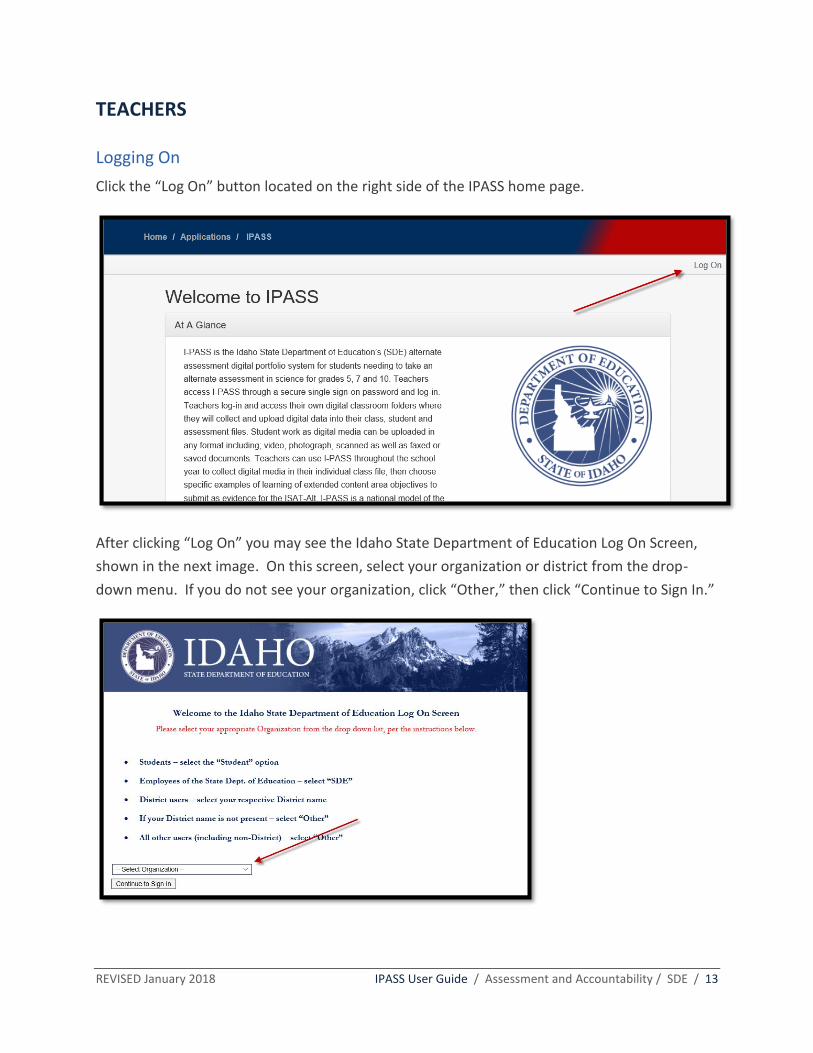
On the top of the IPASS district home page is the “Messages” section that lists district-level
changes made in IPASS.
Below the message box on the left, is the list of student assignments.
On the right is a list of enrolled teachers. This is where assessment coordinators enroll teachers
and edit teacher information.
Enrolling Teachers in IPASS
All example teacher and student entries are fictitious, these examples do not contain any
Personally Identifiable Information.
To enroll a teacher, click the “Add” button below the “Teachers” box.
Page 10
REVISED January 2018 IPASS User Guide / Assessment and Accountability / SDE / 10
Use teacher EduIDs to enroll teachers in IPASS. Information in the “Given Name(s)” field should
include first name and middle initial. “Family Name(s)” will be the teacher’s last name. In the
example in the next image, the Given Name is “Adult A” (middle initial “A”) and the Family
name is “Test.” After entering all teacher information, click “Add.”
The next screen lists the entered teacher; click on the teacher to highlight the field and then
click “Select.”
Removing a teacher does not remove a student’s portfolio.
Page 11
REVISED January 2018 IPASS User Guide / Assessment and Accountability / SDE / 11
Enrolling Students in IPASS
All example teacher and student entries are fictitious, these examples do not contain any
Personally Identifiable Information.
To create a student assignment, click the “Add” button below the “Student Assignments” box.
Use student EduIDs to enroll students in IPASS. Information in the “Given Name(s)” field should
include first name and middle initial. “Family Name(s)” should be the student’s last name. In
the example in the next image, the given name is “Adult A” (middle initial “A”) and the Family
Name is “Test.” After entering all student information, click “Add.” Note: It is important to use
the student’s detailed information to ensure enrolling the correct student.
Page 12
REVISED January 2018 IPASS User Guide / Assessment and Accountability / SDE / 12
The new IPASS does not rely on ISEE data uploads, but pulls student information based on their
State Student ID number. If a previously enrolled student is missing from the student list on the
district page, check the message field at the top of the district home page. If a student is in the
wrong school or district, contact that school or district to check the student’s enrollment status.
Assigning Students to Teachers
To assign a student to a teacher, first select “Grade” level of the student from the drop-down
menu on the left, then select “School” the student attends in the drop-down menu on the right.
Once finished entering grade and school, click once on the teacher on the left.
After highlighting the teacher, the arrow on the right of the teacher will become enabled. Click
this arrow to move the teacher to the “Assigned Teacher(s)” box. Click “Save.”
Page 13
REVISED January 2018 IPASS User Guide / Assessment and Accountability / SDE / 13
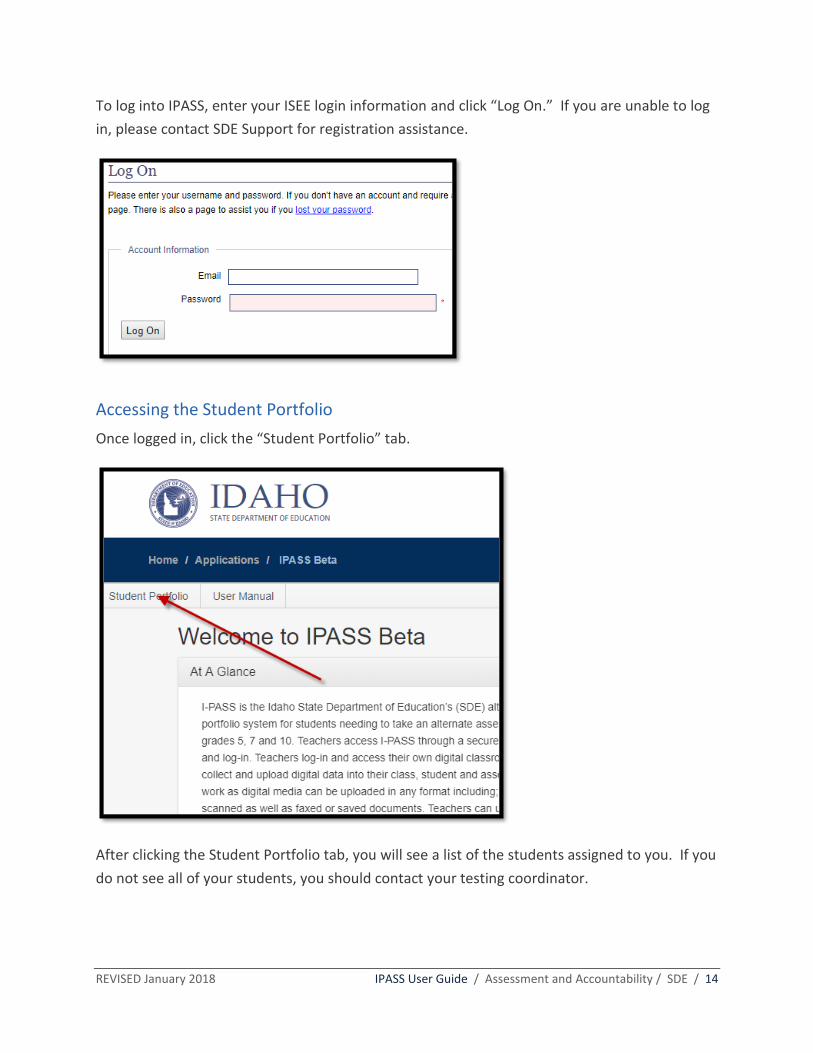
TEACHERS
Logging On
Click the “Log On” button located on the right side of the IPASS home page.
After clicking “Log On” you may see the Idaho State Department of Education Log On Screen,
shown in the next image. On this screen, select your organization or district from the drop-
down menu. If you do not see your organization, click “Other,” then click “Continue to Sign In.”
Page 14
REVISED January 2018 IPASS User Guide / Assessment and Accountability / SDE / 14
To log into IPASS, enter your ISEE login information and click “Log On.” If you are unable to log
in, please contact SDE Support for registration assistance.
Accessing the Student Portfolio
Once logged in, click the “Student Portfolio” tab.
After clicking the Student Portfolio tab, you will see a list of the students assigned to you. If you
do not see all of your students, you should contact your testing coordinator.
Page 15
REVISED January 2018 IPASS User Guide / Assessment and Accountability / SDE / 15
The far-right column displays the status of each student’s portfolio status (“Not Started,” “In
Progress,” etc.). The first time you access the student’s portfolio, you click on the student who
is “Not Started,” then click the blue “Check Student Response” button.
Once you have completed the student response check, notice that the student’s status changes
to “In Progress.” To upload and score artifacts for students “In Progress,” click on the student,
then click the blue “Edit Portfolio” button.
Student Response Check
The first step in completing a student’s Science ISAT-Alt Portfolio in IPASS is to complete the
Student Response Check. As described above, click the student in the “Not Started” status,
then click the blue “Check Student Response” button.
Page 16
REVISED January 2018 IPASS User Guide / Assessment and Accountability / SDE / 16
If the student has a consistent observable mode of responding you will click “Yes,” as illustrated
in the next image.
After clicking “Yes,” you will receive a pop-up asking you to verify the Student Response Check.
Click “Ok” to verify that the student demonstrates a consistent observable response. Clicking
“Ok” changes the student’s status to “In Progress” and allows the teacher to enter “the next
phase of settling baseline scores and artifact submission.”
WARNING: Once submitted, this process CAN NOT be undone.
If the student does not have a consistent observable mode of communication you would click
“No,” as illustrated in the next image.
Page 17
REVISED January 2018 IPASS User Guide / Assessment and Accountability / SDE / 17
After clicking “No,” you will receive a pop-up asking you to verify the Student Response Check.
Click “Ok” to verify that the student does not demonstrate a consistent observable response.
Clicking “Ok” changes the student’s status to “Scoring Completed.” It is important to note that
clicking to verify “No” on the “Student Response Check” window results in the student’s
portfolio being scored at the lowest attainable score and marked complete. The student gets
counted as having participated in the Science ISAT-Alt assessment.
WARNING: Once submitted, this process CAN NOT be undone.
Entering Baseline Data
Click on the student for whom you want to enter baseline data, upload, and/or score artifacts,
then click the blue “Edit Portfolio” button.
Page 18
REVISED January 2018 IPASS User Guide / Assessment and Accountability / SDE / 18
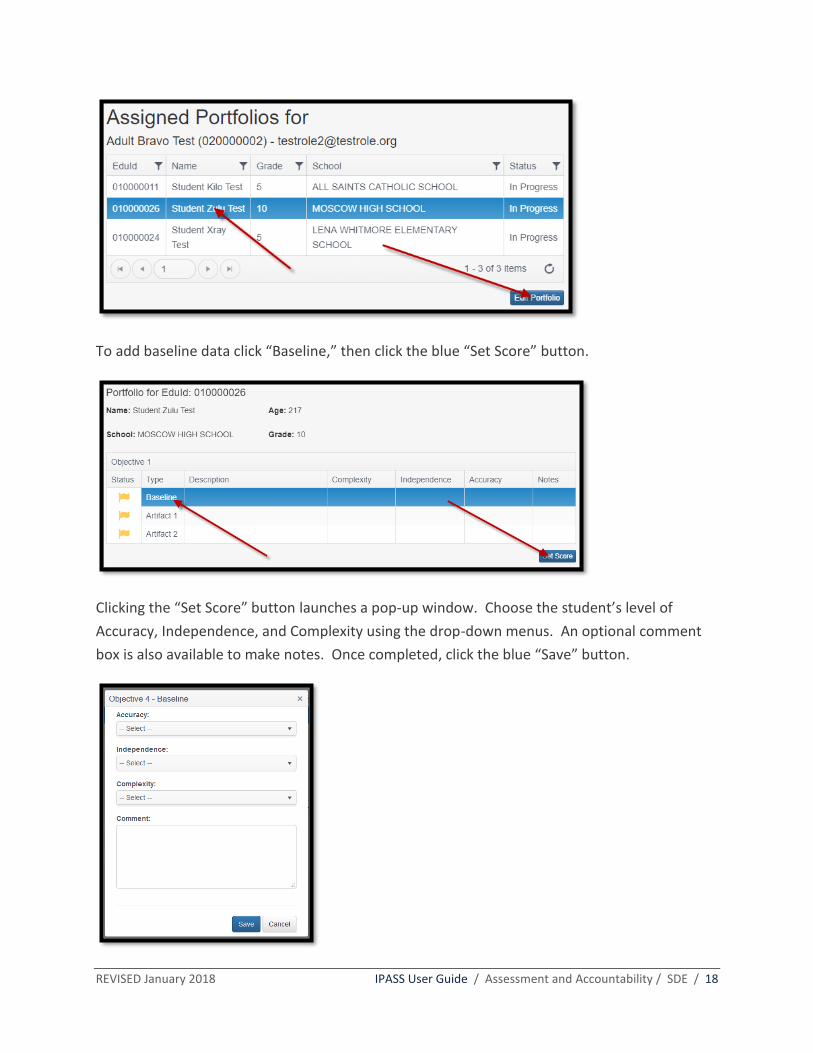
To add baseline data click “Baseline,” then click the blue “Set Score” button.
Clicking the “Set Score” button launches a pop-up window. Choose the student’s level of
Accuracy, Independence, and Complexity using the drop-down menus. An optional comment
box is also available to make notes. Once completed, click the blue “Save” button.
Page 19
REVISED January 2018 IPASS User Guide / Assessment and Accountability / SDE / 19
Uploading Artifacts
Upload artifacts using file types listed under “Evidence Formatting” on page three
(.docx, .pdf, .jpg, .mp4, etc.).
Click to highlight the line for the artifact you want to upload. For example, click to highlight
“Artifact 1,” then click the blue “Edit Artifact” button to launch the artifact upload window.
Enter a description of the file you will upload. Click “Select files…,” navigate to the file location,
select the file you wish to upload, and then click “Upload.”
After clicking the upload button the filename will turn green, indicating that the file has been
uploaded. To finalize the upload, click the “X” located in the top right corner of the window.
If the chosen file appears in red, then the file format is not compatible with IPASS. When this
occurs, click the “X” next to the red filename to remove it.
You may edit the description of an artifact and/or replace an uploaded artifact using the same
process. To edit only the description, type in the new description and click the blue “Update”
button, located to the right of the description. The window will close automatically.
Setting the Score for Student Artifacts
After uploading each student artifact, you will highlight the line of the artifact, then click the
blue “Set Score” button. Clicking the “Set Score” button launches a window with drop-down
Page 20
REVISED January 2018 IPASS User Guide / Assessment and Accountability / SDE / 20
menus, similar to the window used for entering baseline data. Choose the student’s level of
Accuracy, Independence, and Complexity for the artifact using the drop-down menus. An
optional comment box is also available to make notes. Once completed, click the blue “Save”
button. Complete this procedure for all artifacts.
NOTE: If you make changes to an artifact after you have scored it, IPASS will clear the scores
and you will have to reenter scores for the new artifact.
Submitting Student Portfolio for Scoring
Once you finish entering all baseline and artifact scores for all objectives, the blue “Submit for
Scoring” button will activate at the bottom of the page. Click “Submit for Scoring” to submit to
the Idaho State Department of Education.
The “Unsubmit” button is functional, allowing you to make changes to any part of the student
portfolio, until portfolio scoring begins. You may not edit a student’s portfolio once state-level
scoring begins.
You may continue to check the status of a student’s portfolio once scoring beings from the list
of your students on the “Student Portfolio” page.