117
IPitomy Confidential i IPitomy IP550 SIP IP Phone User Guide
| Date post: | 17-May-2018 |
| Category: |
Documents |
| Upload: | phungtuyen |
| View: | 226 times |
| Download: | 0 times |
IPitomy Confidential i
IPitomy IP550
SIP IP Phone
User Guide

Table of Contents
IPitomy Confidential ii
Table of Contents
CHAPTER 1 INTRODUCTION............................................................................................................ 1
IP Phone Features ......................................................................................................................................... 1 Package Contents .......................................................................................................................................... 1
CHAPTER 2 INSTALLATION ............................................................................................................. 2
Requirements................................................................................................................................................. 2 Procedure....................................................................................................................................................... 2
CHAPTER 3 OPERATION.................................................................................................................... 3
Phone Faceplate............................................................................................................................................. 3 Dialpad, Navigation, Soft, and Programmable Keys................................................................................ 3
0~9, *, #, A~Z, a~z...........................................3
Navigation Keys................................................3
Soft Keys .............................................................3
Programmable Keys........................................3 Function Keys........................................................................................................................................... 4
Menu.....................................................................4
Phonebook ..........................................................4
Transfer ...............................................................4
Service .................................................................4
Hang Up..............................................................4
To terminate an active session ......................................4
Redial ...................................................................4
Conference .........................................................4
Hold ......................................................................4
Vol Down ............................................................4
Vol Up..................................................................4
Speaker/Headset ...............................................4
Mute......................................................................4 LED Indicators ......................................................................................................................................... 4
MWI/ALERT ......................................................4
Speaker/Headset ...............................................4
Hold ......................................................................4
Mute......................................................................4
L1~L4...................................................................4 LCD Icons ................................................................................................................................................ 4
No Serv ................................................................4
DND .....................................................................4
FWD .....................................................................4
3-person symbol................................................5
Mail symbol........................................................5 Standby Mode................................................................................................................................................ 6 Making a Telephone Call.............................................................................................................................. 6 Dialing from the Call List............................................................................................................................. 6
Last Number Redialing............................................................................................................................. 6 Calling From Missed Call List ................................................................................................................. 7 Calling From Called List .......................................................................................................................... 7

Table of Contents
IPitomy Confidential iii
Answering a Call ........................................................................................................................................... 7 Muting a Call ................................................................................................................................................. 8 Volume Adjustment ...................................................................................................................................... 8 Changing Ringer Volume ............................................................................................................................. 8 Transferring a Call ....................................................................................................................................... 8 Making the Second Call................................................................................................................................ 8
Switching Between Two Calls ................................................................................................................. 9 3-Way Conferencing ................................................................................................................................ 9
Using Speed Dial............................................................................................................................................ 9 Do Not Disturb............................................................................................................................................... 9 Using Headset ................................................................................................................................................ 9
Placing Calls Using Headset .................................................................................................................... 9 Switch Audio Between Headset and Speaker......................................................................................... 10 Terminating Calls Using Headset........................................................................................................... 10
Using Phone Book ....................................................................................................................................... 11 Create Contacts....................................................................................................................................... 11 Delete from List...................................................................................................................................... 11 Call from List ......................................................................................................................................... 11
CHAPTER 4 USING THE MENU....................................................................................................... 12
Accessing Menu Functions ......................................................................................................................... 12 Entering IP Address.................................................................................................................................... 12 Menu Tree.................................................................................................................................................... 13
CHAPTER 5 WEB SETUP................................................................................................................... 14
Overview ...................................................................................................................................................... 14 Configuration Program .............................................................................................................................. 14
Preparation ............................................................................................................................................. 14 Using Your Web Browser ...................................................................................................................... 14 Login ...................................................................................................................................................... 15
Network Screen ........................................................................................................................................... 16 Password Screen.......................................................................................................................................... 18 Status Screen ............................................................................................................................................... 19 Phone Lock Screen...................................................................................................................................... 20 Soft Keys Screens ........................................................................................................................................ 21 Programmable Keys Screen ....................................................................................................................... 23 Preferences Screen ...................................................................................................................................... 24 Reset Screen................................................................................................................................................. 26 Call Forward Screen ................................................................................................................................... 27 System Configuration Backup Screen....................................................................................................... 28 Configuration Server Screen...................................................................................................................... 29 Firmware Upgrade Screen ......................................................................................................................... 30 Set Log Level Screen................................................................................................................................... 31 Event Logs Screen ....................................................................................................................................... 32
CHAPTER 6 SIP-RELATED SETTINGS .......................................................................................... 33
Global SIP Screen ....................................................................................................................................... 33 Line Screens................................................................................................................................................. 35
APPENDIX A TROUBLESHOOTING ............................................................................................. 37
Overview ...................................................................................................................................................... 37 General Problems........................................................................................................................................ 37
APPENDIX B SPECIFICATIONS .................................................................................................... 38
IP Phone ....................................................................................................................................................... 38
APPENDIX C MMI SPECIFICATIONS....................................................................................... 39
1. DISPLAY RULE............................................................................................................................................. 39
1.1 Idle Display ............................................................................................................................................ 39

Table of Contents
IPitomy Confidential iv
2. BASIC CALL FEATURES ............................................................................................................................ 40
2.1 Placing, Answering and Ending Calls ................................................................................................. 40 2.1.1 Placing Calls.................................................................................................................................. 40
Inter-Digit Timeout...............................................40 2.1.3 Incoming Call ................................................................................................................................ 44 2.1.3.1 Waiting Call ............................................................................................................................... 45
2.2 Redial...................................................................................................................................................... 47 2.3 Call Hold ................................................................................................................................................ 48 2.4 Call Hold Retrieve................................................................................................................................. 49 2.5 3-Way Conference................................................................................................................................. 50 2.6 Call Transfer.......................................................................................................................................... 51
2.6.1 Attended Transfer .......................................................................................................................... 51 2.6.2 Blind Transfer................................................................................................................................ 52
2.7 Call Mute ............................................................................................................................................... 54 2.9 Volume Control ..................................................................................................................................... 55 2.10 Voice Mail ............................................................................................................................................ 56 2.11 Status Icon............................................................................................................................................ 57 2.12 Line Status ........................................................................................................................................... 58
3. PROGRAMMING VIA PHONE UI ............................................................................................................. 60
3.1 Language................................................................................................................................................ 61 3.2 Time and Date ....................................................................................................................................... 62
3.2.1 Time Server ................................................................................................................................... 63 3.2.2 Time Format .................................................................................................................................. 63 3.2.6 Time Zone ..................................................................................................................................... 65
3.3 Tones ...................................................................................................................................................... 66 3.3.1 Set Ring Tone................................................................................................................................ 66 3.3.2 Tone Set......................................................................................................................................... 66
3.4 Display.................................................................................................................................................... 68 3.4.1 Contrast Level ............................................................................................................................... 68 3.4.2 Backlight ....................................................................................................................................... 68
3.5 Call Forward.......................................................................................................................................... 70 3.6 Network.................................................................................................................................................. 74
3.6.1 DHCP ............................................................................................................................................ 74 3.6.2 IP Address ..................................................................................................................................... 76 3.6.3 Subnet Mask .................................................................................................................................. 77 3.6.4 Gateway......................................................................................................................................... 78 3.6.5 DNS............................................................................................................................................... 79 3.6.6 VLAN............................................................................................................................................ 80 3.6.7 Type of Service / DiffServ............................................................................................................. 82
3.7 SIP Settings ............................................................................................................................................ 83 3.7.1 Proxy IP......................................................................................................................................... 85 3.7.2 Proxy Port...................................................................................................................................... 86 3.7.3 Phone Number ............................................................................................................................... 87 3.7.4 Screen Name.................................................................................................................................. 88 3.7.5 Authentication Name..................................................................................................................... 89 3.7.6 Authentication Password ............................................................................................................... 90 3.7.7 RTP Port Base ............................................................................................................................... 91 3.7.8 Auto Prov. ..................................................................................................................................... 92
3.8 Phone Status .......................................................................................................................................... 93 3.8.1 Network Status .............................................................................................................................. 93 3.8.2 Firmware Version.......................................................................................................................... 94 3.8.3 Restart Phone................................................................................................................................. 94 3.8.4 Factory Default.............................................................................................................................. 94
3.9 Password ................................................................................................................................................ 98 3.10 Phone Lock ........................................................................................................................................ 100 3.11 PHONE BOOK.................................................................................................................................. 100 3.12 Service ................................................................................................................................................ 103
3.12.1 Dialed Call list........................................................................................................................... 104 3.12.2 Missed Call list. ......................................................................................................................... 104
4.SOFT KEY ..................................................................................................................................................... 106
4.1 Programmable functions .................................................................................................................... 106

Table of Contents
IPitomy Confidential v
4.1.1 DND ............................................................................................................................................ 106 4.1.2 Busy Lamp Field ......................................................................................................................... 107
4.2 State-Based Soft Keys ......................................................................................................................... 108 4.2.1 Idle state ...................................................................................................................................... 109 4.2.2 Connected state............................................................................................................................ 110 4.2.3 Incoming state ............................................................................................................................. 111 4.2.4 Outgoing state.............................................................................................................................. 112

IPitomy Confidential 1
Chapter 1Chapter 1Chapter 1Chapter 1
IntroductionIntroductionIntroductionIntroduction This Chapter provides an overview of the IP Phone features and capabilities.
The IP Phone is a device that provides voice communication over IP network.
IP Phone Features
The IP Phone incorporates many advanced features, designed to offer sophisticated functions
together with easy operation. Key features of the IP phone include:
� 128 x 64 pixel based LCD with backlight
� 5 status icons indicating No-Service, DND, Call Forward, Conference, and Voice Mail
� Manage four lines supporting four registrations and up to four simultaneous calls
� Automatic provisioning via TFTP
� Secondary SIP servers support
� Dynamic IP address via DHCP client or statically configured
� NAT traversal support (UPnP)
� DTMF relay through RFC2833 or SIP INFO method
� Multi-country call-progress tone sets provided
� Full-duplex hands-free operation
� Configuration through keypad or integrated web interface
� Asterisk PBX features support
� Maintaining call records for 10 dialed calls, and 10 missed calls
� Up to 200 records of personal phone book
� Dialing from call records
� Six ring tones supported
� Adjustable voice volume
� Message waiting indicator
� Two 10/100Base-T Ethernet switch interfaces connect to LAN and a PC
Package Contents
The following items should be included:
• The IP Phone
• Stand
• Handset
• Spiral handset connecting cable
• Power Adapter
• One Ethernet UTP cable
If any of the above items are damaged or missing, please contact your dealer immediately.
1111
IPitomy Confidential 2
Chapter Chapter Chapter Chapter 2222
InstallationInstallationInstallationInstallation This Chapter covers the physical installation of the IP Phone.
Requirements
• Network cables. Use standard 10/100BaseT network (UTP) cables with RJ45 connectors.
• For Internet Access, an Internet Access account from ISPs, and either a DSL or Cable
modem is required.
Procedure
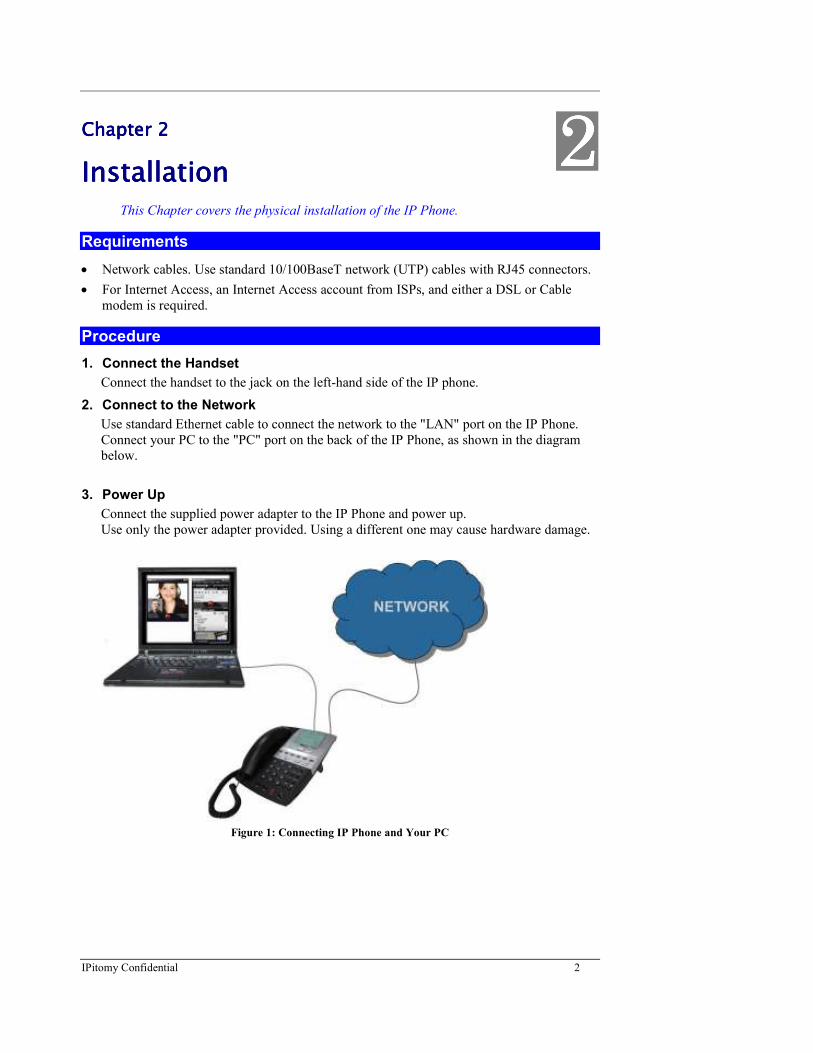
1. Connect the Handset
Connect the handset to the jack on the left-hand side of the IP phone.
2. Connect to the Network
Use standard Ethernet cable to connect the network to the "LAN" port on the IP Phone.
Connect your PC to the "PC" port on the back of the IP Phone, as shown in the diagram
below.
3. Power Up
Connect the supplied power adapter to the IP Phone and power up.
Use only the power adapter provided. Using a different one may cause hardware damage.
Figure 1: Connecting IP Phone and Your PC
2222

Operation
IPitomy Confidential 3
Chapter Chapter Chapter Chapter 3333
OpOpOpOperationerationerationeration This Chapter details the operation of the IP Phone.
Key sequences of activating call features described in this Chapter is based on factory default settings.
Phone Faceplate
Figure 2: IP Phone Faceplate
Dialpad, Navigation, Soft, and Programmable Keys
1 0~9, *, #, A~Z, a~z Normal digits.
2 Navigation Keys Navigation buttons: Up, Down, Left, and Right.
4 Soft Keys Customer-definable keys with text display and LED
5 Programmable Keys Customer-definable keys with LED
3333
Soft Keys
Navigation Keys
LCD
Programmable Keys
Line Keys
Function Keys
Dialpad

Operation
IPitomy Confidential 4
Function Keys
1 Menu Provide access to the main menu in idle mode.
2 Phonebook Provide access to phone book menu.
3 Transfer Initiate call transfer.
4 Service Access to Dialed and Missed call list
5 Hang Up Terminate an active session
6 Redial Browse recently 10 outgoing call numbers.
7 Conference Enable 3-way conference call.
8 Hold Hold the current call for initiating second call or switch be-
tween calls.
9 Vol Down Decrease the volume of speaker, handset and ringer.
10 Vol Up Increase the volume of speaker, handset and ringer.
11 Speaker/Headset Toggle between handsfree and headset modes.
12 Mute Disable and re-enable the microphone.
LED Indicators
17 MWI/ALERT Fast Flashing – An incoming call is ringing to the phone.
Slow Flashing – Voice messages left in voice mail server.
18 Speaker/Headset On – in handsfree mode.
Slow Flashing – in headset mode.
19 Hold On – A call is on hold.
Off – No call is on hold..
20 Mute On – Mute is enabled.
Off – Mute is not enabled.
21 L1~L4 On – Line is active
Slow Flashing – Line in on hold
Off – Line is available
LCD Icons
22 No Serv When lit, indicating the current Line is not registered, “No
Service”
23 DND When lit, indicating the phone rejects any incoming call.
24 FWD When lit, Call forward feature is enabled for the current
Line.

Operation
IPitomy Confidential 5
25 3-person symbol When lit, indicating the phone is under 3-way conference.
26 Mail symbol When lit, indicating the Line has voicemail(s).

Operation
IPitomy Confidential 6
Standby Mode
In standby (idle) mode, the IP Phone displays the line number and extension number/user
name in the first line of the LCD panel, the network status is displayed in the second line.
Date and time information is displayed in line 4. Users can make and receive calls only when
the IP Phone has successfully registered to a SIP server.
L1 2343 Louis
Network Connected
Sun Sep 8 05:10
Making a Telephone Call
To place a call:
1. Key in the phone number you wish to call.
2. Pick up the HANDSET or press SPEAKER to dial the number.
L1 Louis
3202
Cancel
You can also pick up the HANDSET or press the SPEAKER first then dial the number.
Dialing from the Call List
The IP Phone stores the last 10 called and 10 missed calls. Each of the stored numbers is
represented by a code from 1 to 10, with 10 representing the most recent number. You can
access the stored phone numbers by pressing the navigation key and press soft key 1 to check
the details of the number.
Last Number Redialing
To redial one of 10 most recently called numbers:
1. Press Redial, the LCD panel shows the first 5 most recently called numbers of 10.
1*1200
2 1232
3 1203
4 2345
5 1222
Detail
Quit
2. Press the up/down navigation key to the desired number , user may click all the way
downwards with the up/down navigation key to get the 10th number. .
3. Press Detail for checking the chosen account.
4. Press Dial or Quit to dial or quit to the upper menu. The” Dial” or “Quit to dial” function
has to be first defined in soft keys settings in the webpage. ( See manual Page 21)

Operation
IPitomy Confidential 7
To quit the redial menu, press Menu or Quit soft key.
Calling From Missed Call List
To call one of the 10 last missed calls:
1. Press Service button to check the missed call list.
2. Press the defined associated soft keys to make call or quit.
For more detailed operation information, please refer to Appendix for MMI specifications.
Calling From Called List
To call one of the 10 last called list:
1. Press Service button to check the called list.
2. Press the defined associated soft keys to make call or quit checking.
For more detailed operation information, please refer to Appendix for MMI specifications.
Answering a Call
When someone calls you, the caller’s name and number are displayed on the third line of the
LCD panel. To answer the call, simply pick up the HANDSET or press Speaker/Headset button.
L1 Louis
3203 Remus
Answer
Ignore
For more detailed operation information, please refer to Appendix for MMI specifications.

Operation
IPitomy Confidential 8
Muting a Call
You may mute the microphone during a call by pressing Mute key. To re-enable the micro-
phone, press Mute key again.
When mute function is enabled, the MUTE LED is turned ON.
Volume Adjustment
The volume for the receiver and speaker can be changed during a call. Use Volume Up and
Volume Down keys to adjust the volume.
Changing Ringer Volume
You may adjust the ring volume when the IP Phone is in standby mode. Use Volume Up and
Volume Down keys to adjust the volume.
Transferring a Call
There are two types of transferring calls, blind transfer and attended transfer. To transfer a call
blindly, press Transfer key and dial the number to which the call will be transferred to, then
press the Transfer key again.
To do attended transfer, press Transfer key and dial the number to which you want to transfer
the call. After the party answers the call, press Transfer key again to transfer the call.
For more detailed operation information, please refer to Appendix for MMI specifications.
Making the Second Call
To make the second call:
1. Press Hold key. The first call will be put on hold.
2. Press another Line key and dial the second number when you hear the dial tone.
After the second party answers the call, you may switch between the two calls by pressing the
associated Line key.
For more detailed operation information, please refer to Appendix for MMI specifications.

Operation
IPitomy Confidential 9
Switching Between Two Calls
To switch back and forth between the first and the second call, press the associated Line key.
For more detailed operation information, please refer to Appendix for MMI specifications.
3-Way Conferencing
To start a 3-way conference, you’ll need to press Conference key to hold the 1st call and
make another call. When the 2nd call is established, press Conference key again for 3-way
conference.
For more detailed operation information, please refer to Appendix for MMI specifications.
Using Speed Dial
The IP Phone provides user-specific speed dial feature via both soft keys and programmable
keys.
To set the speed dial number:
1. Set up in the web page, either in Softkeys 1~10, Softkeys 11~20, or Programmable Keys
page, the correct type, label, value and line.
2. Press the associated soft or programmable key.
3. The call can be made to the value via line specified.
For more detailed operation information, please refer to Chapter 5.
Do Not Disturb
The IP Phone provides Do Not Disturb feature via soft or programmable keys. Unlike many
other features provided in the phone, the DND is provided as a phone feature. That is, once
enabled or disabled, the phone will reject or receive incoming calls.
To set the DND:
1. Set up in the web page, either in Softkeys 1~10, Softkeys 11~20, or Programmable Keys
page, the correct type and the states.
2. Press the associated soft or programmable key.
3. The DND feature is enabled or disabled.
Using Headset
When Speaker key is pressed twice, handsfree will be replaced by headset automatically.
Placing Calls Using Headset
Press Speaker key twice will automatically seize a line just like user goes off-hook.

Operation
IPitomy Confidential 10
Switch Audio Between Headset and Speaker
Pressing Speaker key while in headset mode switches the audio paths from headset to
speaker.
Pressing Speaker key while in speaker mode switches the audio paths from speaker to head-
set.
Terminating Calls Using Headset
Pressing Hang Up key when conversation is in progress will end the call.

Operation
IPitomy Confidential 11
Using Phone Book
Pressing Phonebook key to enter phone book menu.
Press Add New to add
a new entry
Detail Delete
Search
Add New Quit
Create Contacts
Press Add New to start editing. Use keypad to input name and number.
Name:
Number:
Line1
Save
Backspace
Cancel
Use Navigator up/down keys to choose the field to enter. Use Navigator left/right keys to
choose if it is either Home/ Mobile/Office number of the added name. Press Save if you want
to record the entries.
For more operational details, please refer to Appendix C for MMI specifications.
Delete from List
Choose the item you want to delete (the one with a leading *), and press Delete key.
1 Louis
2 Remus
3 Eugene
4*Edison
5 Melinda
Detail Delete
Search
Add New Quit
Call from List
Select the item you want to call (the one with a leading *), press Detail key, and then press
Dial
4 Edison
HOME
Line3
Dial
SetLabel
Edit Quit
For more operational details, please refer to Appendix C for MMI specifications.

IPitomy Confidential 12
Chapter Chapter Chapter Chapter 4444
Using the MenuUsing the MenuUsing the MenuUsing the Menu The LCD panel provides functions that allow you to read and modify IP
Phone’s settings. You can navigate through the menu and access these func-
tions by using the keypad. Please note that if the settings are line-related
parameters, only Line 1 is configured.
Accessing Menu Functions
The IP Phone implements a menu tree that allows you to display and modify the current
settings. Each sub-menu in the tree is represented by a number, and each active item is led by
a *. To access a sub-menu, press the navigation key to choose, and press associated softkey to
examine/change the settings.
The Menu key allows you to enter the main menu. Pressing this key in menu mode moves
back to the main menu.
To access a sub-menu, press the navigation key and the soft key(s).
Entering IP Address
Use the numeric keys to enter IP address and net mask. Use Dot’.’ Soft key to input "." (dot).
For more operational details, please refer to Appendix C MMI specifications.
4444
Using the Menu
IPitomy Confidential 13
Menu Tree
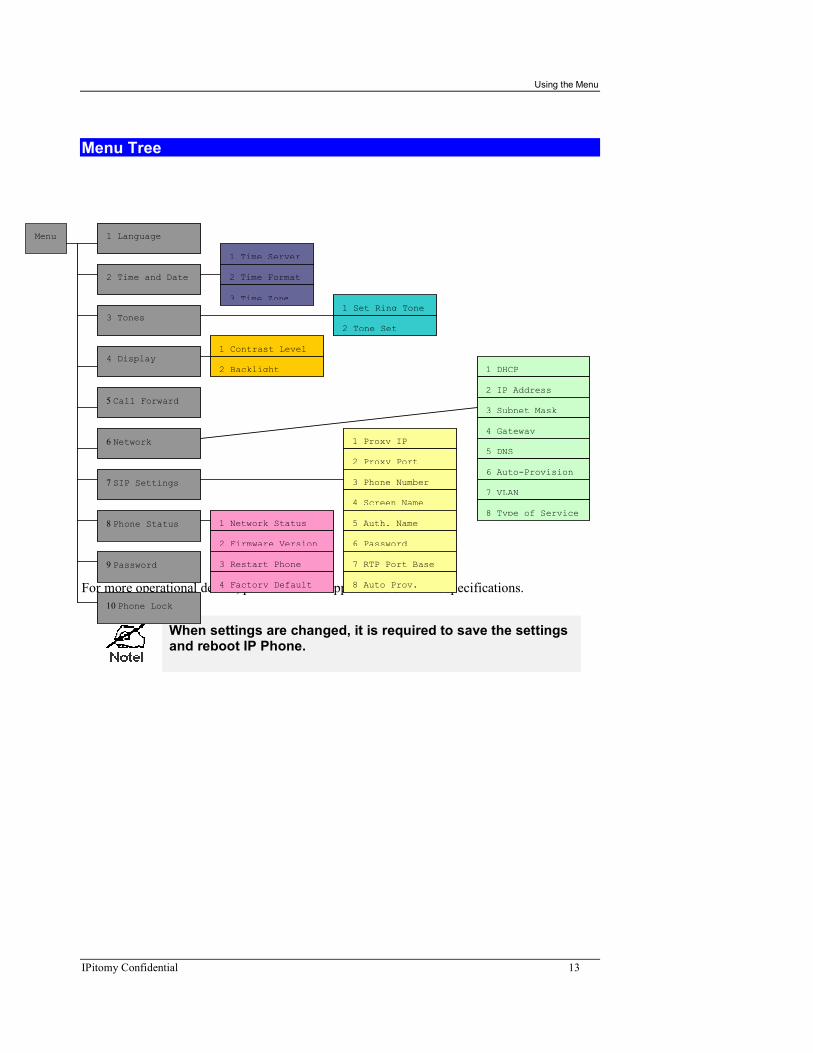
For more operational details, please refer to Appendix C for MMI specifications.
When settings are changed, it is required to save the settings and reboot IP Phone.
Menu
1 Language
2 Time and Date
3 Tones
4 Display
5 Call Forward
6 Network
7 SIP Settings
8 Phone Status
9 Password
10 Phone Lock
1 Time Server
2 Time Format
3 Time Zone 1 Set Ring Tone
2 Tone Set
1 Contrast Level
2 Backlight 1 DHCP
2 IP Address
3 Subnet Mask
4 Gateway
5 DNS
6 Auto-Provision
7 VLAN
8 Type of Service
1 Proxy IP
2 Proxy Port
3 Phone Number
4 Screen Name
5 Auth. Name
6 Password
1 Network Status
2 Firmware Version
3 Restart Phone
4 Factory Default
7 RTP Port Base
8 Auto Prov.

IPitomy Confidential 14
Chapter Chapter Chapter Chapter 5555
Web SetupWeb SetupWeb SetupWeb Setup The IP Phone can be configured via Web browser. The built-in Web server pro-
vides a user-friendly interface for setting and modifying parameters.
Overview
This chapter describes the setup procedure for configuring the IP Phone from a web browser.
After changing the settings, some new settings won’t take effect until being saved and IP phone restarted. Use the Reset button on the Reset screen to restart the IP Phone.
Configuration Program
The IP Phone contains an HTTP server. This enables you to connect and configure via web
browser. Your web browser must support JavaScript. The configuration program has been
tested on the following browsers:
• Firefox V2.02 or later
• Internet Explorer V6 or later
Preparation
Before attempting to configure the IP Phone, please ensure that:
• Your PC can establish a physical connection to network. The PC and the IP Phone must
be on the same LAN segment.
• The IP Phone must be installed and powered ON.
• By default, IP Phone will have a dynamic IP address, you can check it from Menu; press
Menu key, choose Network and select IP Address to check the IP address. The default
password is 1234.
Using Your Web Browser
To establish a connection from your PC to the IP Phone:
1. Start your web browser.
2. In the Address box, enter "HTTP://" and the IP Address of the IP Phone, for example:
192.168.1.250.
http://192.168.1.250/
5555

Setup
IPitomy Confidential 15
Login
After connecting to the IP Phone from a web browser, you will see the following Login screen
.
By default, the user name is “admin” and the default password is “1234”.
Figure 3: Login Screen
Enter the user name and password and click the OK button to log in the IP Phone.
Setup
IPitomy Confidential 16
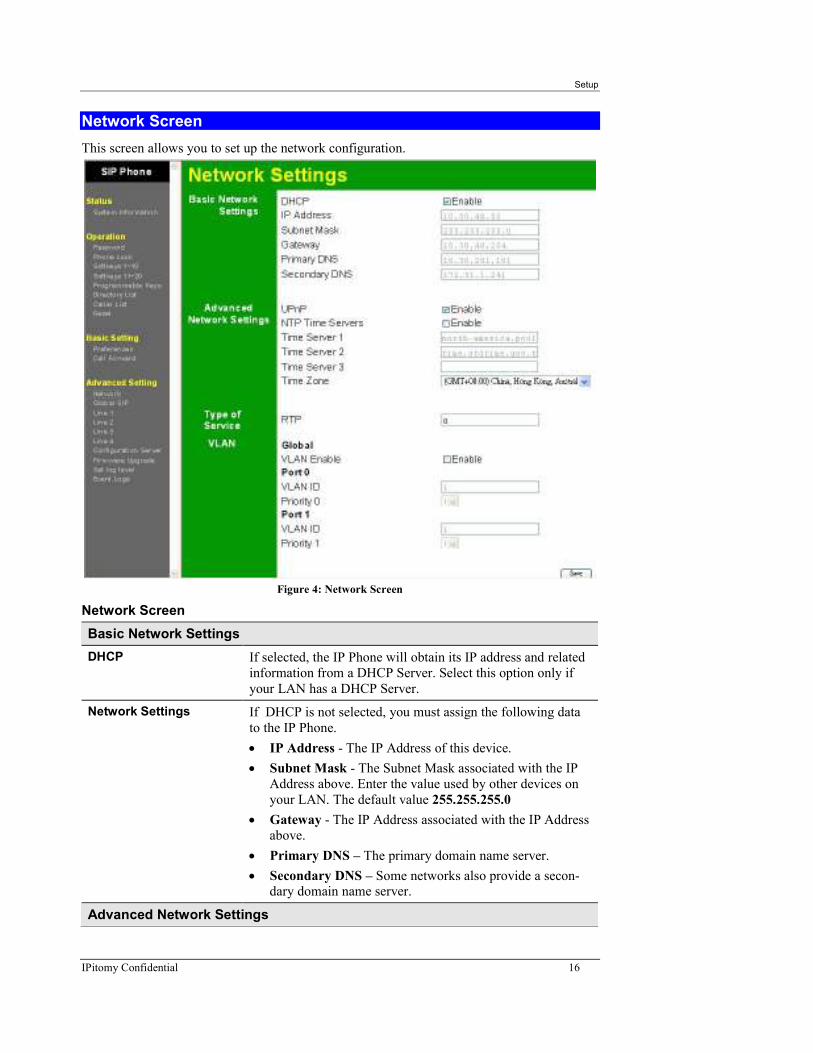
Network Screen
This screen allows you to set up the network configuration.
Figure 4: Network Screen
Network Screen
Basic Network Settings
DHCP If selected, the IP Phone will obtain its IP address and related
information from a DHCP Server. Select this option only if
your LAN has a DHCP Server.
Network Settings If DHCP is not selected, you must assign the following data
to the IP Phone.
• IP Address - The IP Address of this device.
• Subnet Mask - The Subnet Mask associated with the IP
Address above. Enter the value used by other devices on
your LAN. The default value 255.255.255.0
• Gateway - The IP Address associated with the IP Address
above.
• Primary DNS – The primary domain name server.
• Secondary DNS – Some networks also provide a secon-dary domain name server.
Advanced Network Settings

Setup
IPitomy Confidential 17
UPnP This option provides the NAT traverse of an IP phone behind
a NAT router. If selected, the IP Phone will obtain the public
gateway IP address, and the RTP ports mapped from UPnP
server. Select this option only if your LAN has an UPnP
Server.
NTP Time Servers Checking this button enables the NTP protocol to obtain time
and date from Internet.
Time Server 1~3 Specifies the NTP time servers.
Time Zone Choose the Time Zone for your location from the drop-down
list.
Type of Service
RTP Setting this value other than 0 will enable the ToS of voice
packets (RTP).
VLAN
Global VLAN Enable Checking the box will enable the VLAN settings below.
VLAN ID for Port 0 and Port 1
Setting the ID value will identify the associated port to a
specific VLAN.
VLAN Priority for Port 0 and Port 1
Setting the priority values will prioritize the packets on the
port.

Setup
IPitomy Confidential 18
Password Screen
The password screen allows you to assign a new user name and password to the IP Phone.
Once a user name and/or password has been set (recommended), you will be prompted to
enter newly configured username / password at re-entry to the Web GUI.
Figure 5: Password Screen
Password Screen
Password
User Name Enter new user name if desired.
Current Password Enter the existing password in this field.
User Password Enter the new password here.
Password Confirm Enter the new password again. This entry must match the
value above.

Setup
IPitomy Confidential 19
Status Screen
The Status screen appears when you successfully log in to the web server.
Figure 6: Status Screen
Status Screen
Network Status
Link State Indicates the LINK status of ports 0 and 1.
MAC Address The MAC address of the IP phone.
Firmware Version The application firmware version.
Boot Version The current version of the boot loader.
Date/Time The build date and time of the application firmware.

Setup
IPitomy Confidential 20
Phone Lock Screen
This page allows you to lock the phone and the only phone numbers allowed to dial out when
phone is locked.

Setup
IPitomy Confidential 21
Soft Keys Screens
These two pages, Softkeys 1~10 and Softkeys 11~20, allow you to define the feature of each
of the 6 soft keys.
One of 10 features can be selected for each soft and programmable key, the features are:
- None: Leave the key as a blank entry,
- Speed dial: You can dial to a person (Label) with the pre-defined number (Value) through
the pre-defined Line. The Labels can be seen beside the soft key when phone is in idle,
connected, incoming and outgoing states.
- Do Not Disturb: The DND feature can be turned on/off by pressing the soft key. DND
label displays beside the soft key, and can be seen when phone is in idle, connected, in-
coming and outgoing states.
- BLF: This is a server-specific feature which monitors other phones on the network by
sending SUBSCRIBE and receiving NOTIFY methods. You may input the person (Label)

Setup
IPitomy Confidential 22
you want to monitor with phone number (Value) and the Line to monitor through. BLF
behaves when phone is in idle, connected, incoming and outgoing states.
� The LED beside the soft key is Off when the monitored phone is in idle state, press-
ing the soft key can make call to the monitored phone.
� The LED is on when the monitored phone is in busy state.
� The LED is blinking when the monitored phone is ringing.
- Prefix: This feature allows for call placement with pre-defined keys before entering the
destination number. When a Prefix soft key is pressed, the phone will dial the prefix num-
ber (Value) denoted by Label through the pre-defined Line, and waits for user to dial the
destination number. The Prefix is displayed in idle and connected states. Please note that
the phone will take no action when the Prefix is pressed under idle mode via a UN-
REGISTERed Line.
- Park: A server-specific feature. When Park is defined (Label) for a specific number
(Value) through a specific Line, the number will be sent to the server for parking an in-
coming call to server. Note that the Park is only available in connected state.
- Pickup: A server specific feature. When the Label, Value and Line is determined, phone
A will send the Value to server for phone B which is registered to the to the same server to
pick up a ringing call at phone A. This feature is only available in idle mode.
- Intercom: A server-specific feature, which requests a destination phone to pick up auto-
matically. Only the Label can be modified, and be displayed in idle mode. Refer to
Preferences Screen for setting outgoing intercom calls. Depending on the setting of the
destination phone, the call may be picked up automatically or rejected. Please refer to the
Preferences Setting for details.
- Call Retrieve: Server-specific feature to retrieve a call from server. The Label, Value and
Line is effective only in idle mode.
- Last Call Return: Only the Label in idle mode the feature is effective. The phone will
record the last incoming call number and line number.
Setup
IPitomy Confidential 23
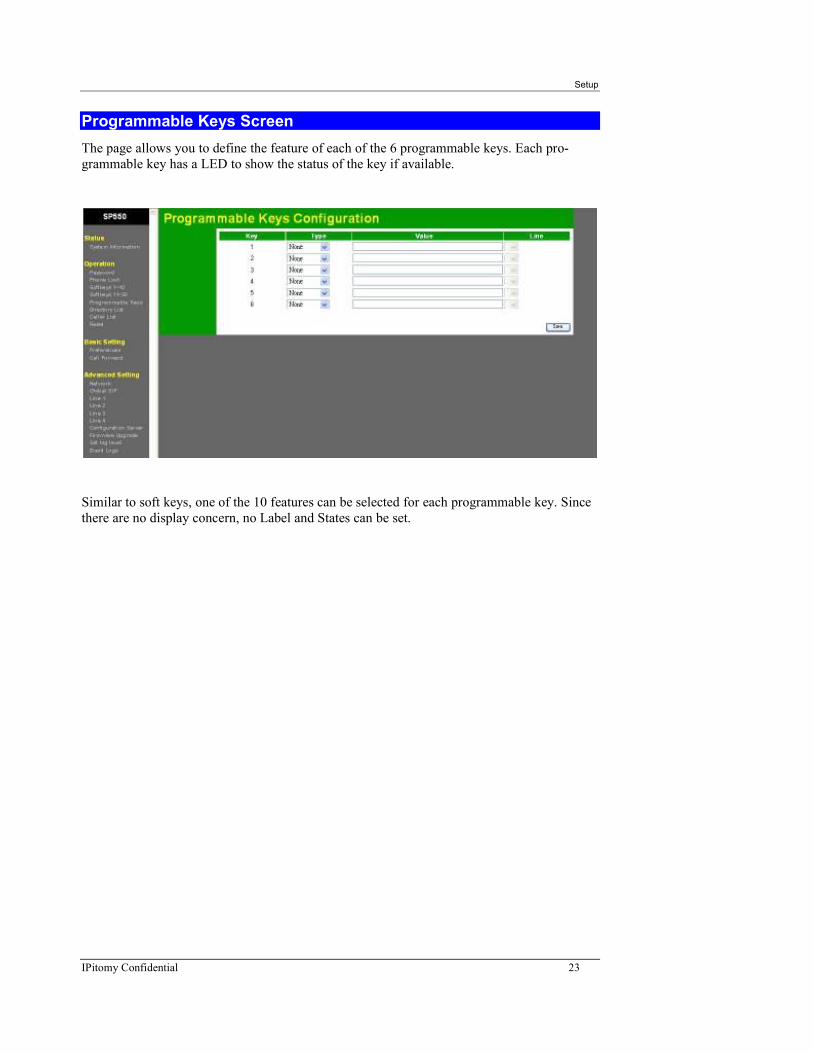
Programmable Keys Screen
The page allows you to define the feature of each of the 6 programmable keys. Each pro-
grammable key has a LED to show the status of the key if available.
Similar to soft keys, one of the 10 features can be selected for each programmable key. Since
there are no display concern, no Label and States can be set.

Setup
IPitomy Confidential 24
Preferences Screen
The page allows you to define your own preferences.
General
Digit Timeout (sec) Specify the inter-digit timeout period in seconds.
Suppress DTMF Play-back
Play no digit sound for security reasons.
Play Call Waiting Tone Enable/Disable call-waiting tone in an active conversation.
Stuttered Dial Tone Enable/Disable stuttered dial tones when you have voice
mail(s).
Incoming Intercom Settings
Type Enable/Disable the outgoing Intercom capability.
Prefix Code The server-specific key string for placing an outgoing
Intercom call.
Line Specifies the Line through which the call is made.
Outgoing Intercom Settings
Auto-Answer The server-specific key string for placing an outgoing
Intercom call.
Microphone Mute Mute/Un-mute microphone when receiving an incoming
Intercom call. Effective when Auto-Answer enabled.
Setup
IPitomy Confidential 25
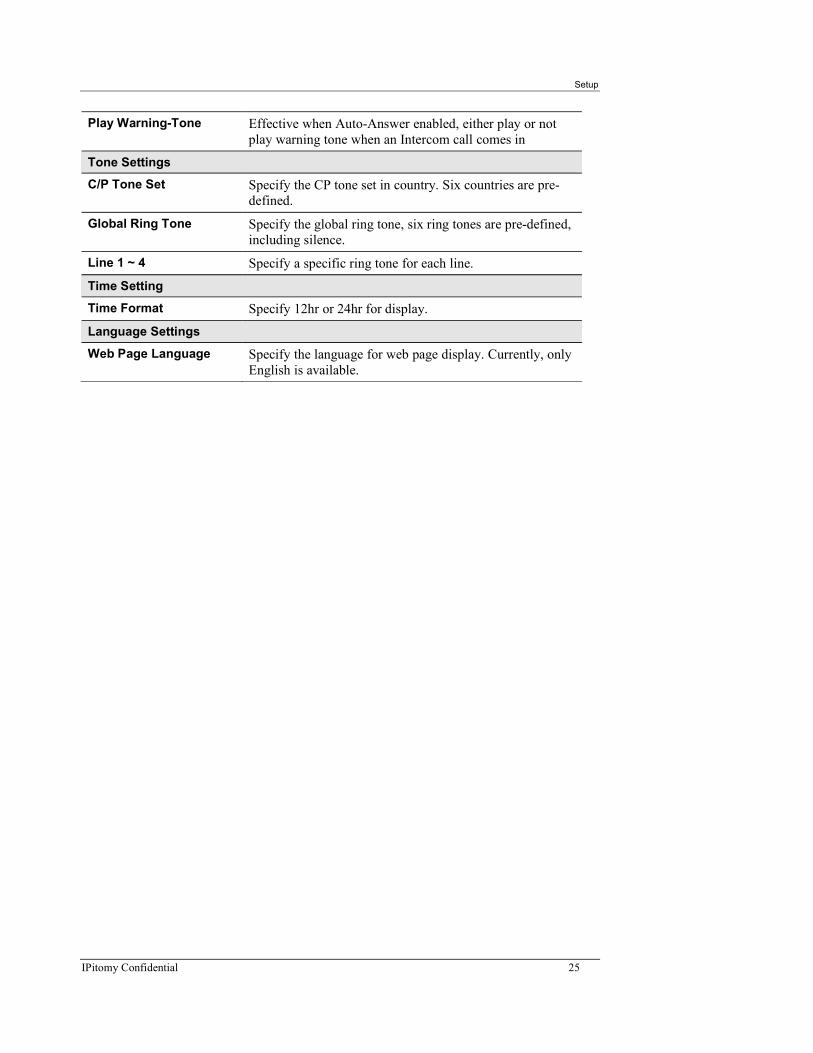
Play Warning-Tone Effective when Auto-Answer enabled, either play or not
play warning tone when an Intercom call comes in
Tone Settings
C/P Tone Set Specify the CP tone set in country. Six countries are pre-
defined.
Global Ring Tone Specify the global ring tone, six ring tones are pre-defined,
including silence.
Line 1 ~ 4 Specify a specific ring tone for each line.
Time Setting
Time Format Specify 12hr or 24hr for display.
Language Settings
Web Page Language Specify the language for web page display. Currently, only
English is available.
Setup
IPitomy Confidential 26
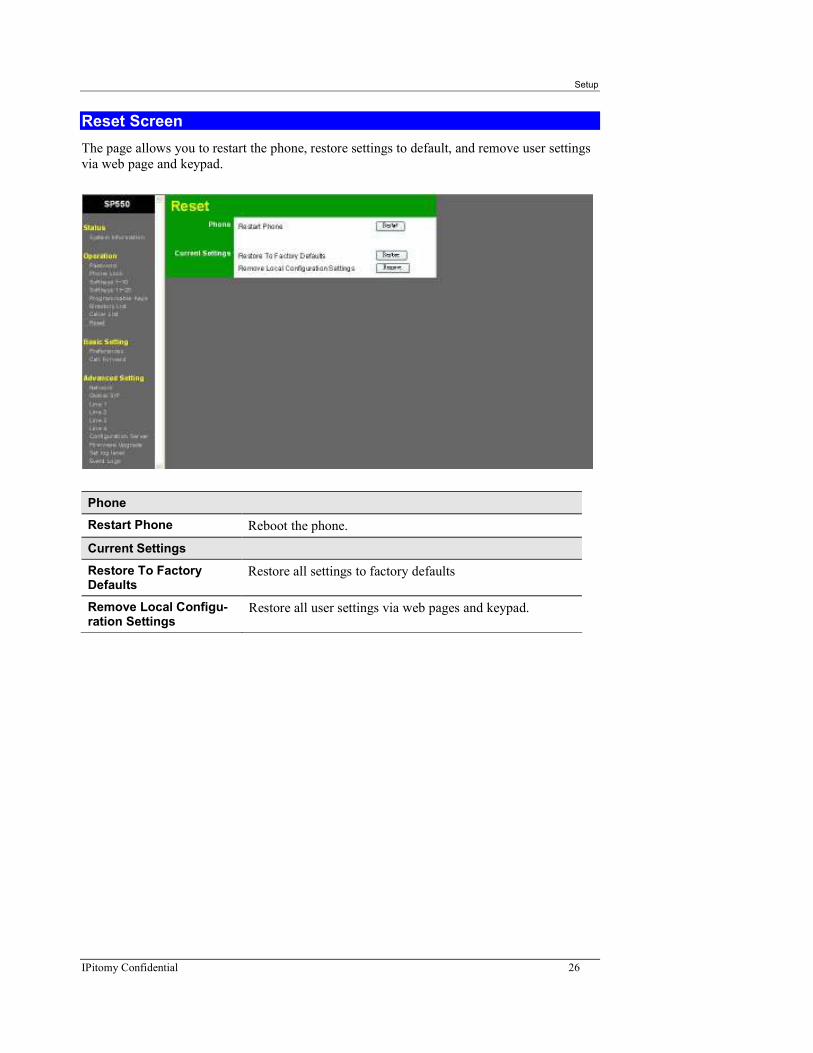
Reset Screen
The page allows you to restart the phone, restore settings to default, and remove user settings
via web page and keypad.
Phone
Restart Phone Reboot the phone.
Current Settings
Restore To Factory Defaults
Restore all settings to factory defaults
Remove Local Configu-ration Settings
Restore all user settings via web pages and keypad.

Setup
IPitomy Confidential 27
Call Forward Screen
The page allows you to set one of the three call forward modes per line or globally.
Global Settings
Mode Either Off, All, Busy, or No-Answer can be selected.
Number The destination you want to forward the incoming call.
Time Effective only for No-Answer mode.
Local Line Line1~Line4
Mode Either Off, All, Busy, or No-Answer can be selected.
Forward Number The destination you want to forward the incoming call for
the Line.
Time Effective only for the Line in No-Answer mode.
Note: Per line settings, when enabled, over-write the global settings.
Setup
IPitomy Confidential 28
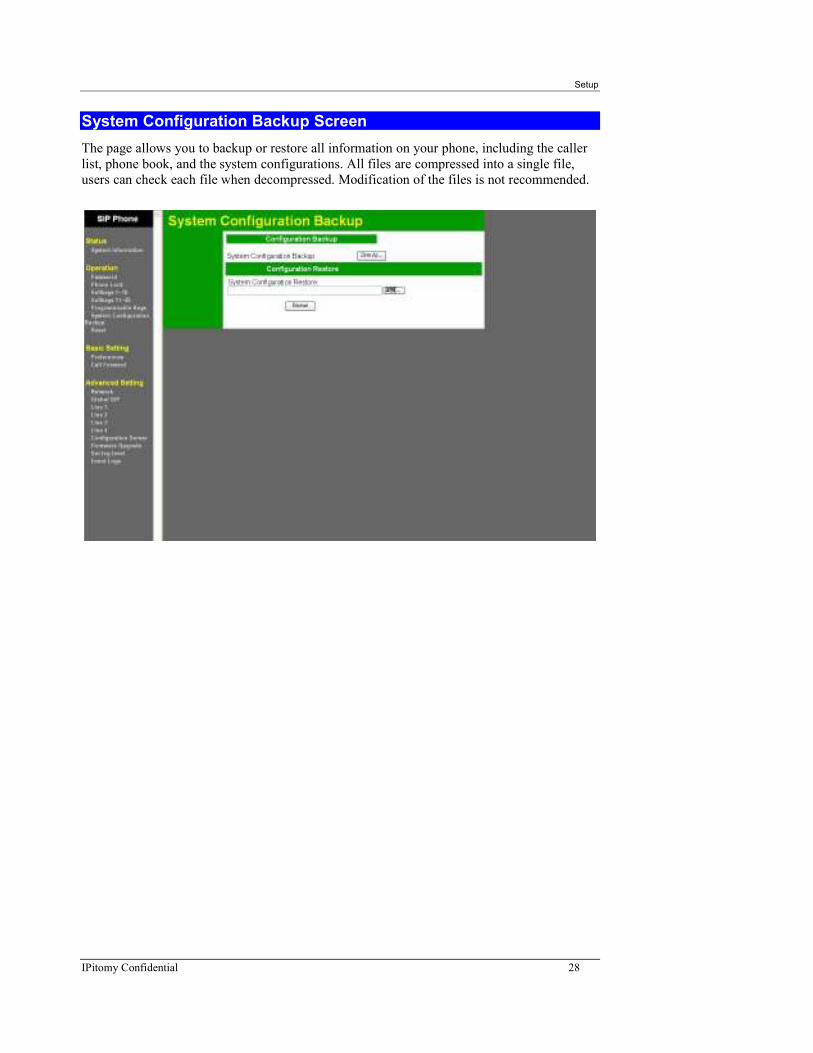
System Configuration Backup Screen
The page allows you to backup or restore all information on your phone, including the caller
list, phone book, and the system configurations. All files are compressed into a single file,
users can check each file when decompressed. Modification of the files is not recommended.

Setup
IPitomy Confidential 29
Configuration Server Screen
The page allows you to set up the configuration server parameters using TFTP protocol,
suitable for an auto-provisioning system. The flow and contents of auto-provisioning can be
various with different projects.
Settings
TFTP Server Specify where the TFTP server is located.
Auto-Resync
Mode It can be NONE, Configuration Files, Firmware Upgrade,
or BOTH.
Duration Defines how long the period the phone should be re-
synchronize with the server settings.

Setup
IPitomy Confidential 30
Firmware Upgrade Screen
The page allows you to upgrade the application firmware.

Setup
IPitomy Confidential 31
Set Log Level Screen
The page allows you to set the levels of debug logs.

Setup
IPitomy Confidential 32
Event Logs Screen
The page allows you to see the debug logs specified by the log levels. The message logs help
to debug the troubles you are encountering.

IPitomy Confidential 33
Chapter 6Chapter 6Chapter 6Chapter 6
SIPSIPSIPSIP----Related Related Related Related SettingsSettingsSettingsSettings This Chapter explains when and how to use the IP Phone's "VOIP" feature.
Global SIP Screen
The page allows you to set up SIP parameters that apply to all four lines.
Advanced SIP Settings
Explicit MWI Subscrip-tion
Enable/Disable the subscription of message waiting.
Explicit MWI Subscrip-tion Period
Specify the period of re-subscribe for the message waiting.
Session Timer The session timer defined in "draft-sip-session-timer"
T1 Timer The T1 timer defined in RFC 3261
T2 Timer The T2 timer defined in RFC 3261
Transaction Timer The T4 timer defined in RFC 3261
Transport Protocol UDP or TCP can be selected, UDP recommended.
Registration Failed Retry Timer
The timer to retry registration when several tries have failed
6666

Advanced Administration
IPitomy Confidential 34
BLF Subscription Period The period that re-send the SUBSCRIBE for BLF monitor-
ing
RTP Settings
Base RTP Port Specify the base port number for voice packets
DTMF Method The method to carry the DTMF information during a con-
versation, can be RTP, RFC2833 or SIP INFO.
SIP Port Setting
SIP Signaling Port Specify the SIP signaling port number for SIP packets ex-
changes, default is 5060
Preferred Codec in Order
Preferred Codec Total of four voice codecs, G.711u, G.711A, G.722 and
G.729 can be selected in order. 1 denotes the most prefer-
able, and 4 the least.
Silence Suppression Enable/Disable the silence suppression. Silence packets
(small packets) will be sent when enabled and user is not
talking.

Advanced Administration
IPitomy Confidential 35
Line Screens
These four pages allow you to set up the phone-specific information and the SIP servers for
each Line.
Basic SIP Authentication Settings
Screen Name The name displayed at the very right to LCD line 1. Also,
the name used when sending INVITE method.
Phone Number The phone number used in INVITE method, and also the
number others can call you.
Authentication Name The authentication name used when server requests to.
Password The authentication password used when server requests to.
Basic SIP Network Settings
Proxy Server The SIP proxy and Registrar server where all signaling
packets headed for.
Proxy Port The port number of the proxy/registrar server. Default is
5060.
Backup Proxy Server The backup SIP proxy and Registrar server where all sig-
naling packets headed for.
Backup Proxy Port The port number of the backup proxy/registrar server.
Outbound Proxy Server The outbound proxy server where all signaling and voice
packets headed for. Default is 5082.
Outbound Proxy Port The port number of the outbound proxy server.

Advanced Administration
IPitomy Confidential 36
Registration Period The period when the line should re-send the REGISTER
method.
IPitomy Confidential 37
Appendix AAppendix AAppendix AAppendix A
TroubleshootingTroubleshootingTroubleshootingTroubleshooting This Appendix covers the most likely problems and their solutions.
Overview
This chapter covers some common problems that may be encountered while using the IP
Phone and possible solutions to them. If you follow the suggested steps and the IP Phone still
does not function properly, contact your dealer for further advice.
General Problems
Problem 1: Can't connect to the IP Phone to configure it.
Solution 1: Check the following:
• The IP Phone is properly installed, LAN/PC connections are OK, and
it is powered ON.
• Ensure that your PC and the IP Phone are on the same network seg-ment. (If you don't have a router, this must be the case.)
• If your PC is set to "Obtain an IP Address automatically" (DHCP
client), restart it.
Problem 2: Can't make changes effective immediately after setting via web or
keypad.
Solution 2: • Some of parameters cannot be effective right after settings, please make sure the changes are saved and restart your phone and check if
the changes take effective.
• Generally speaking, if the changes are made to network and/or SIP, a phone restart will be necessary.

IPitomy Confidential 38
Appendix BAppendix BAppendix BAppendix B
SpecificationsSpecificationsSpecificationsSpecifications
IP Phone
Model IP550
VoIP Signaling Protocol Session Initiation Protocol (SIP)
Voice Codecs G.711, G.729AB, G.722
Network Interface: 2 RJ45 10/100 Mbps Ethernet ports to PC and LAN
Keypad 44 keys
Standard keypad: 12
Navigation Keys: 4
Fixed Function keys: 12
Soft Keys: 6
Programmable Keys: 6
Line Keys: 4
LCD 128 x 64 Hi-resolution Pixel Based LCD with Backlight and
five status icons
LED Indicators 1 for Incoming ring and Message Waiting
4 for Line keys
3 for Mute, Hold and Speaker/Headset Keys
12 for Soft and Programmable Keys
1 for Ethernet Link Status
Power Adapter 5V/1A DC External
802.3af Power Over Ethernet
Dimensions 185mm(W) * 240mm(D) * 120mm(H)
Operating Temperature 0° C to 40° C
Storage Temperature -20° C to 70° C
Regulation CE, FCC Class B

IPitomy Confidential 39
AppendixAppendixAppendixAppendix C C C C
MMI SpecificationsMMI SpecificationsMMI SpecificationsMMI Specifications
1. Display Rule1. Display Rule1. Display Rule1. Display Rule
LCM visual space has 128x64 pixels and one line of icons. Each character is designed to use 8x6 pixels. Totally
LCM display area can afford 8 lines and 21 characters per line.
Icons Icons show some specific status of the phone, including No Service for registration
information, DND for Do not disturb, Forward for call forwarding, Conference for
3-way conference, & Voicemail for indicating voice mail existence.
Line 1~5 Lin1~5 are for showing the phone states, and call information. Phone states include
network status and time information. Call information includes the outgo-
ing/incoming call information and the registration line information.
Line 6~8 Line 6~8 are for operations of soft keys. Two type of soft key are contained in
SP550, pre-defined and state-based soft key. Predefined keys are fixed name/value
in SP550. User could define up to 20 sets of state-based soft key.
1.1 Idle Display
During idle state, Screen name and the extension number of a line are shown on line 1. SIP Line1~4 could be
switched by left/right navigation keypad. Network link status is shown on line 2 and a LED on the top. If phone
connects to network successfully, message “Network Connected” should be displayed on line 2 for Ethernet
link status. Date/Time information is shown on line 4.
Idle state:
No
Serv
DND FWD
L1 5555 Louis
Network Connected
Sat Jan 1 3:00
Comment:

IPitomy Confidential 40
2. 2. 2. 2. Basic Call FeaturesBasic Call FeaturesBasic Call FeaturesBasic Call Features
2.1 Placing, Answering and Ending Calls
2.1.1 Placing Calls
Use Handset or press Line Key or Speaker key.
Pick up handset or press
Line Key
L1 5555 Louis
Dial
More
Dial a number Dial a number.
L1 5555 Louis
3202
Dial
More
Inter-Digit Timeout
Inter-digit timeout Dialed digits will be sent out after inter-digit timer expires. Inter-digit
Timer is programmable.
L1 5555 Louis
3202
Cancel
More
Press Dial Soft Key

IPitomy Confidential 41
Press Dial soft key to dial out immediately.
L1 5555 Louis
3202
Dial
More
Answered
Remote answers Remote end answers.
L1 5555 Louis
3202
Drop
More
Pre-Dial
Dial a number without lifting handset or pressing Line key or speaker
key.
L1 5555 Louis
3202
Dial
Backspace Quit
Dial out Press Dial or lift handset or press Line key or speaker to dial out.

IPitomy Confidential 42
L1 5555 Louis
3202
Cancel
Answered
Remote answers Remote end answers.
L1 5555 Louis
3202
Drop

IPitomy Confidential 43
2.1.2 Ending Calls
While in a call conversation
L1 5555 Louis
3202
Drop
More
Hang Up or press Hangup key or Drop softkey
Handset or Hangup key
or Drop softkey
pressed
Hang up the Handset or press Hangup key or Drop softkey, call is termi-
nated and display is changed to show idle state message.
L1 5555 Louis
Network Connected
Sat Jan 1 3:00am
Remote End Terminates The Call
During call conversation.
L1 5555 Louis
3202
Drop
More
IPitomy Confidential 44
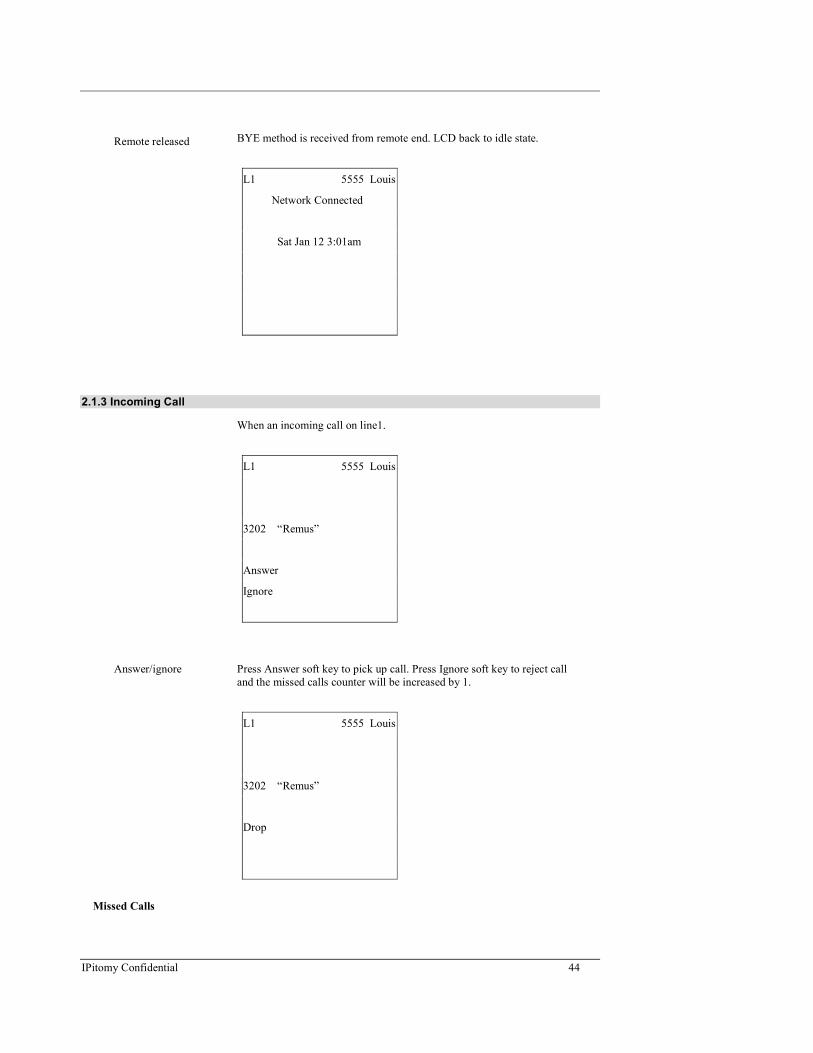
Remote released BYE method is received from remote end. LCD back to idle state.
L1 5555 Louis
Network Connected
Sat Jan 12 3:01am
2.1.3 Incoming Call
When an incoming call on line1.
L1 5555 Louis
3202 “Remus”
Answer
Ignore
Answer/ignore Press Answer soft key to pick up call. Press Ignore soft key to reject call
and the missed calls counter will be increased by 1.
L1 5555 Louis
3202 “Remus”
Drop
Missed Calls

IPitomy Confidential 45
Missed Calls counter will show on idle screen if user misses calls.
L1 5555 Louis
Network Connected
4 Missed Calls
Sat Jan 1 2:11am
2.1.3.1 Waiting Call
When a call is in progress in Line 1.
L1 5555 Louis
3202
Drop

IPitomy Confidential 46
Another call is coming in
at L2
Waiting call info is displayed, and Answer and Ignore soft keys shown
L1 5555 Louis
3202
5555 “Anderson”
Answer
Ignore
Press Answer to answer
the waiting call
L2 screen shows up
L2
5555 “Anderson”
Drop
Press Ignore to send BYE
to the waiting call
IPitomy Confidential 47
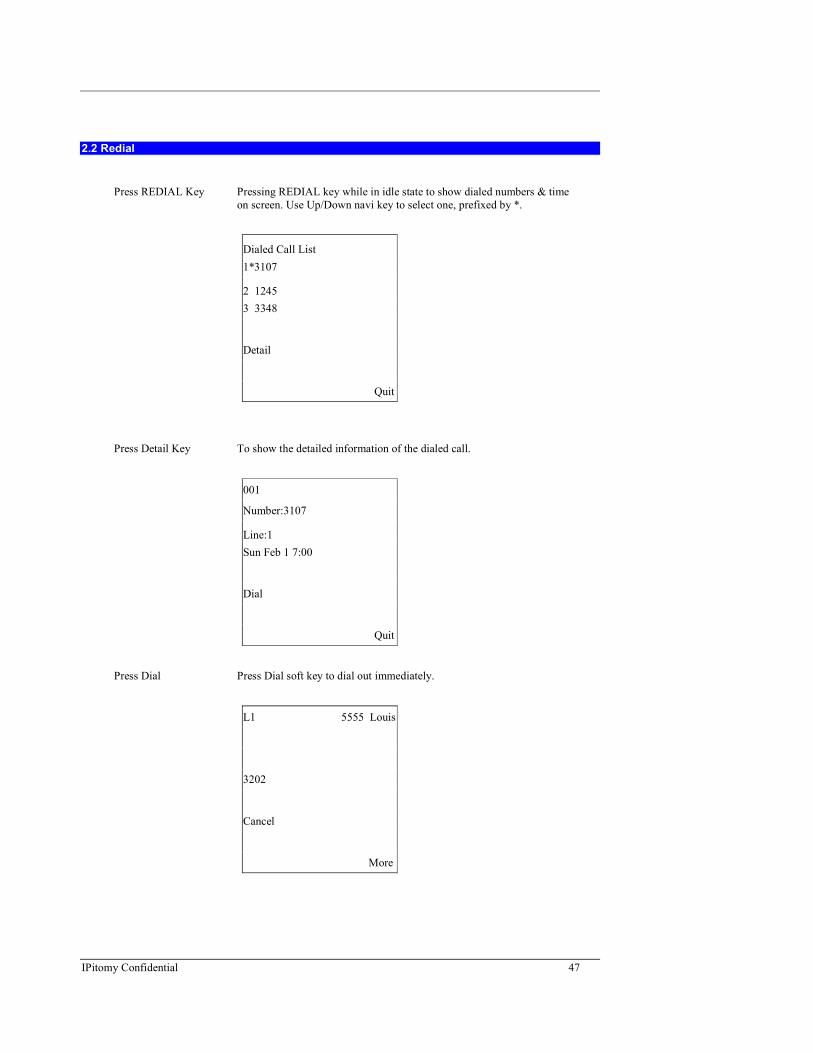
2.2 Redial
Press REDIAL Key Pressing REDIAL key while in idle state to show dialed numbers & time
on screen. Use Up/Down navi key to select one, prefixed by *.
Dialed Call List
1*3107
2 1245
3 3348
Detail
Quit
Press Detail Key To show the detailed information of the dialed call.
001
Number:3107
Line:1
Sun Feb 1 7:00
Dial
Quit
Press Dial Press Dial soft key to dial out immediately.
L1 5555 Louis
3202
Cancel
More

IPitomy Confidential 48
2.3 Call Hold
While call is in conversation:
L1 5555 Louis
3207 “3207”
Drop
More
Use HOLD Key
Press HOLD Key Press HOLD key to hold current call. Led of line 1 blinks slowly, HOLD
led turns on.
L1 5555 Louis
3202 “3207”
More
Access New Line
Press Line Button When access Line2 ~ 4, Line 1 is put on hold. Led of line 1 flash slowly.
L2
Dial
More
IPitomy Confidential 49
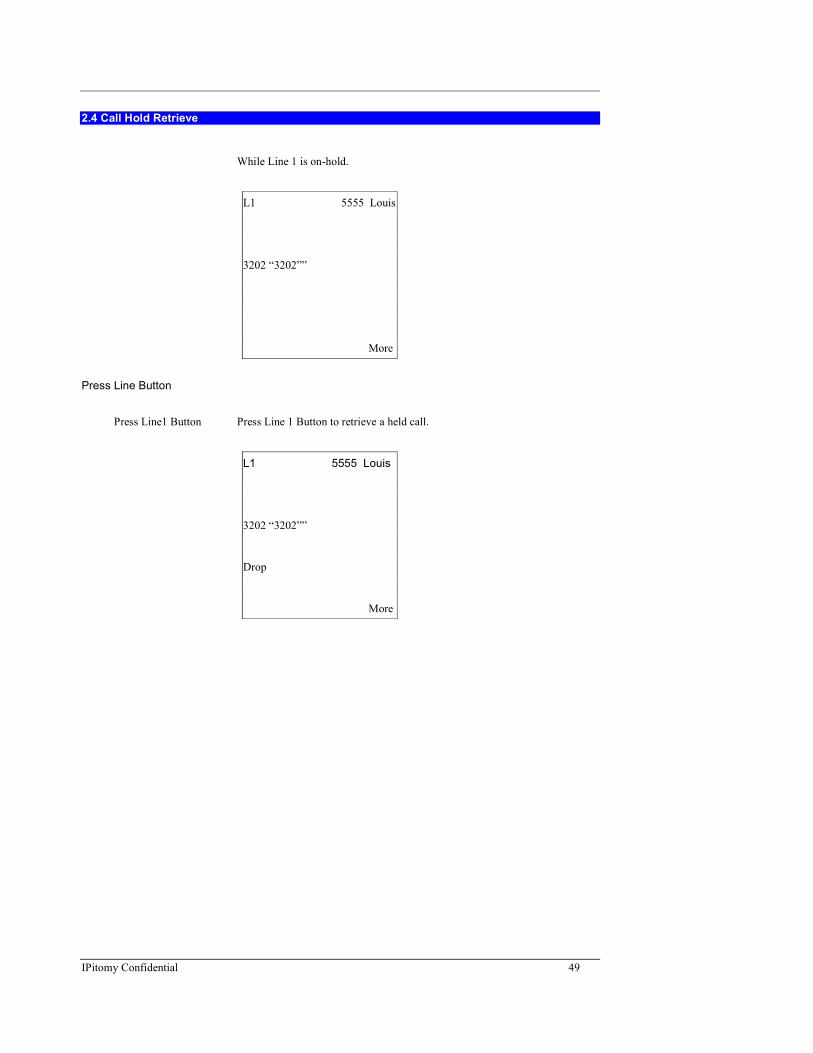
2.4 Call Hold Retrieve
While Line 1 is on-hold.
L1 5555 Louis
3202 “3202””
More
Press Line Button
Press Line1 Button Press Line 1 Button to retrieve a held call.
L1 5555 Louis
3202 “3202””
Drop
More

IPitomy Confidential 50
2.5 3-Way Conference
While a call is in conversation on line 1. �5555 Call 3202 and in con-
versation
L1 5555 Louis
3202 “Nick””
Drop
Press Conference key Press Conf soft key to start a 2nd call. �Dial 3203
L3
1. 3202 “Nick”
2. 3203
Drop
Press Conference key
again
To start 3-way conference. �5555 ,3202 and 3203 in conversation
L3
1. 3202 “Nick”
2. 3203
Drop
IPitomy Confidential 51
2.6 Call Transfer
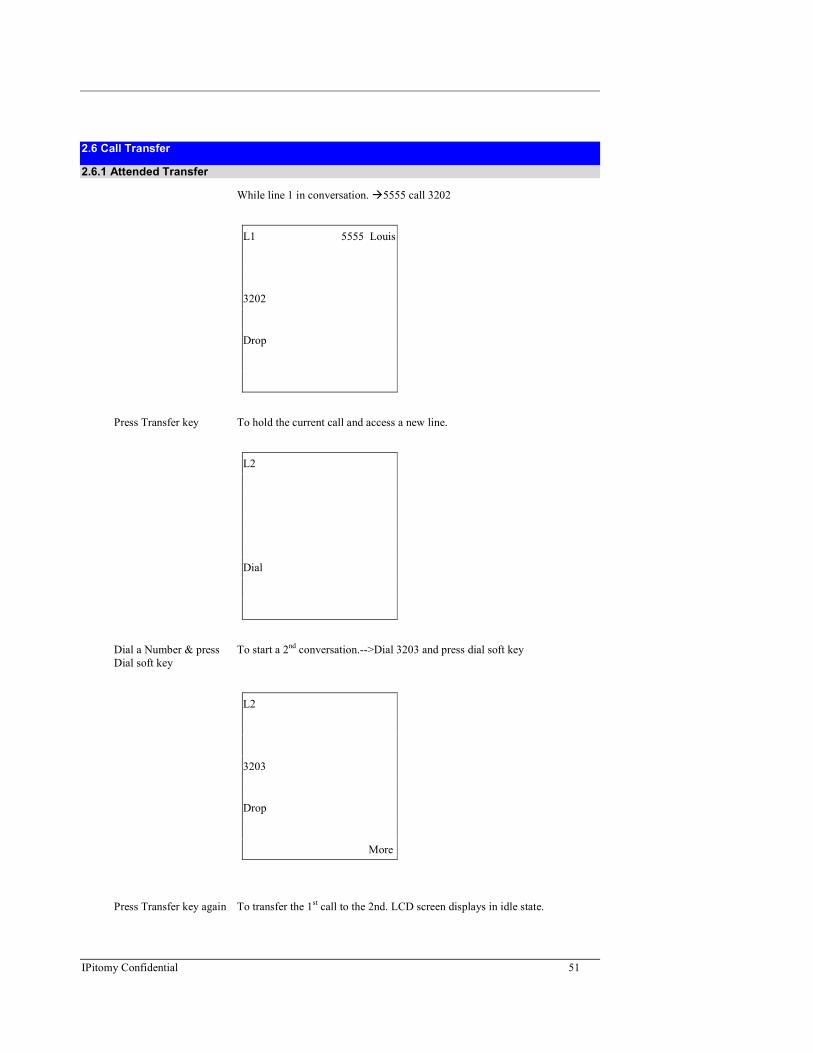
2.6.1 Attended Transfer
While line 1 in conversation. �5555 call 3202
L1 5555 Louis
3202
Drop
Press Transfer key To hold the current call and access a new line.
L2
Dial
Dial a Number & press
Dial soft key
To start a 2nd conversation.-->Dial 3203 and press dial soft key
L2
3203
Drop
More
Press Transfer key again To transfer the 1st call to the 2nd. LCD screen displays in idle state.

IPitomy Confidential 52
L2
Network Connected
Mon Sep 8 14:00
2.6.2 Blind Transfer
While line 1 in conversation.
L1 5555 Louis
3202
Drop
More
Press Transfer key To hold the current call and access a new line.
L3
3203
Dial
More
Dial the 2nd call and press
Transfer key again
Blind transfer takes place, LCD screen goes back to idle state.

IPitomy Confidential 53
L3
Network Connected
Sat Jan 1 3:00

IPitomy Confidential 54
2.7 Call Mute
Mute can be enabled only while call conversation is in progress.
L1 5555 Louis
3202 “3202””
Drop
More
Activate Mute
Press MUTE Key Press Mute key to prohibit voice from being transmitted. Incoming voice
can still be heard during Mute is enabled. The Mute LED is ON.
L1 5555 Louis
3202 “3202””
Drop
More
Deactivate Mute By MUTE Key
Press MUTE Key Press MUTE key to deactivate Mute function. The Mute led turns OFF.
L1 5555 Louis
3202 “3202””
Drop
More
IPitomy Confidential 55
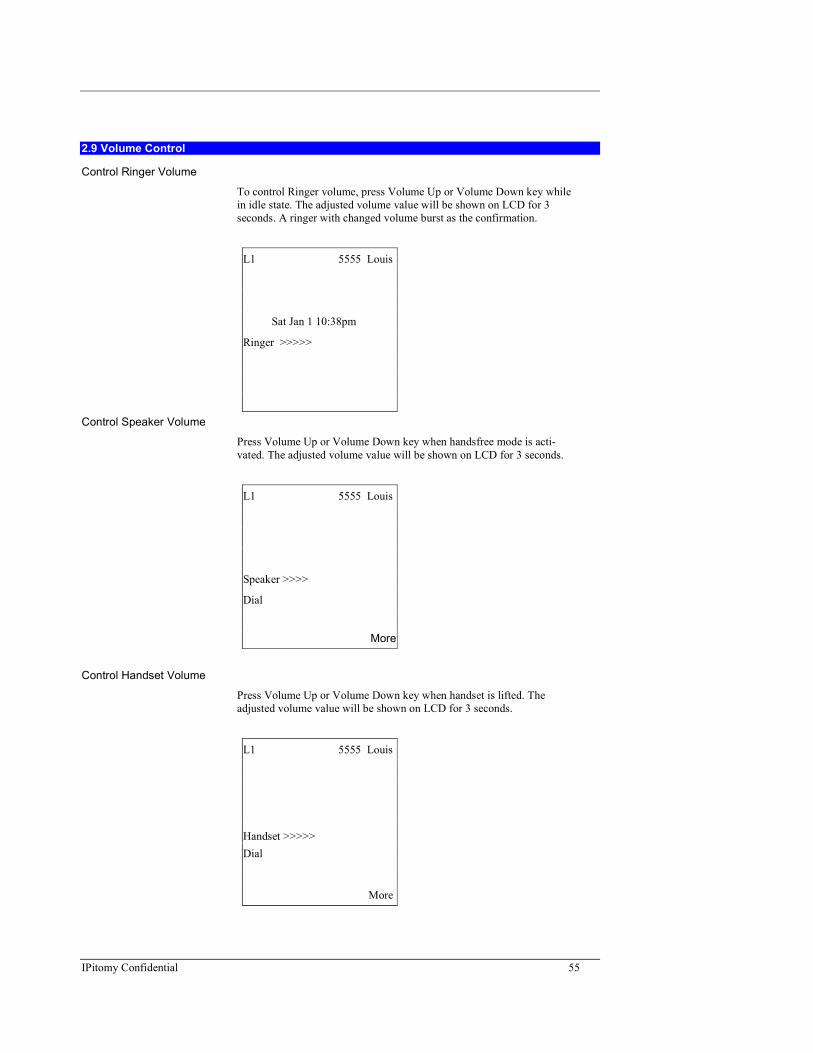
2.9 Volume Control
Control Ringer Volume
To control Ringer volume, press Volume Up or Volume Down key while
in idle state. The adjusted volume value will be shown on LCD for 3
seconds. A ringer with changed volume burst as the confirmation.
L1 5555 Louis
Sat Jan 1 10:38pm
Ringer >>>>>
Control Speaker Volume
Press Volume Up or Volume Down key when handsfree mode is acti-
vated. The adjusted volume value will be shown on LCD for 3 seconds.
L1 5555 Louis
Speaker >>>>
Dial
More
Control Handset Volume
Press Volume Up or Volume Down key when handset is lifted. The
adjusted volume value will be shown on LCD for 3 seconds.
L1 5555 Louis
Handset >>>>>
Dial
More
IPitomy Confidential 56
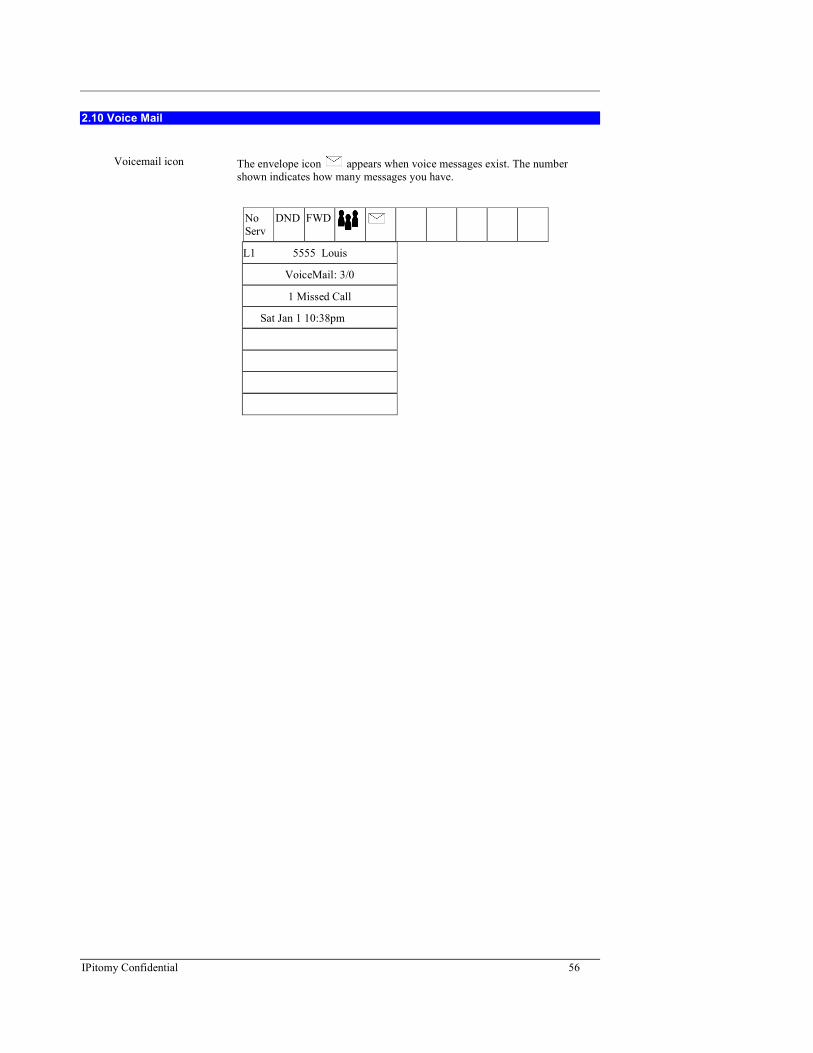
2.10 Voice Mail
Voicemail icon The envelope icon appears when voice messages exist. The number
shown indicates how many messages you have.
No
Serv
DND FWD
L1 5555 Louis
VoiceMail: 3/0
1 Missed Call
Sat Jan 1 10:38pm
IPitomy Confidential 57
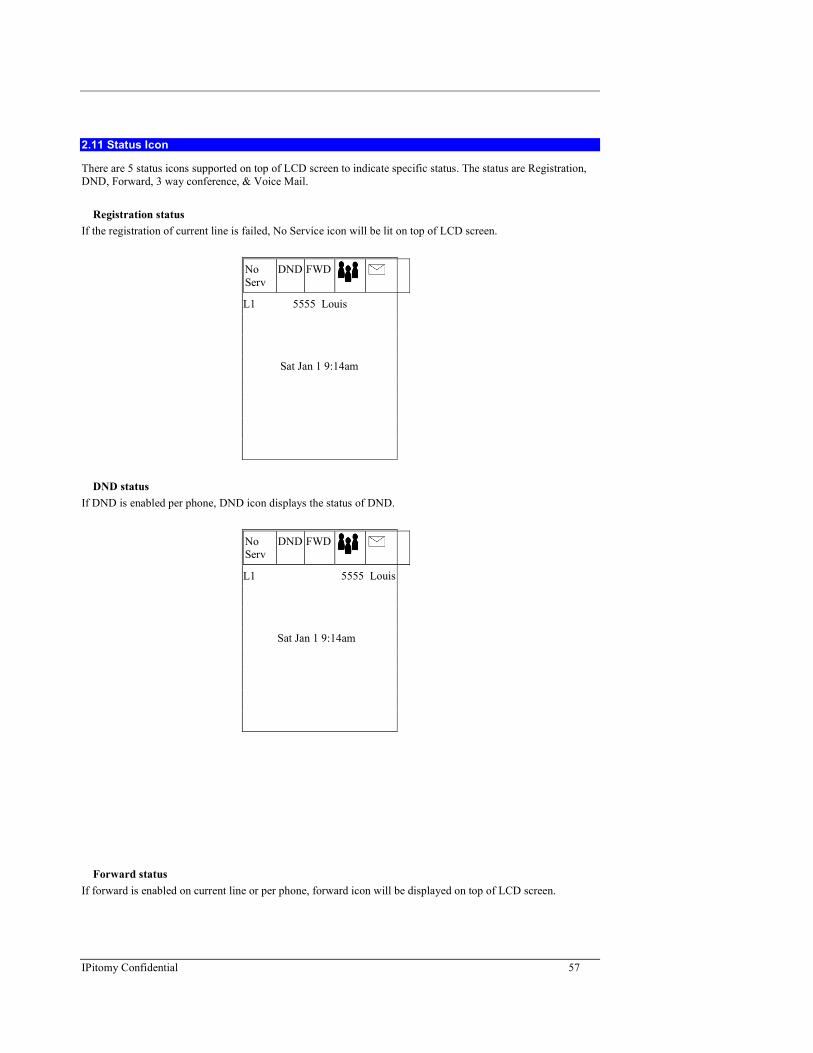
2.11 Status Icon
There are 5 status icons supported on top of LCD screen to indicate specific status. The status are Registration,
DND, Forward, 3 way conference, & Voice Mail.
Registration status
If the registration of current line is failed, No Service icon will be lit on top of LCD screen.
No
Serv
DND FWD
L1 5555 Louis
Sat Jan 1 9:14am
DND status
If DND is enabled per phone, DND icon displays the status of DND.
No
Serv
DND FWD
L1 5555 Louis
Sat Jan 1 9:14am
Forward status
If forward is enabled on current line or per phone, forward icon will be displayed on top of LCD screen.

IPitomy Confidential 58
No
Serv
DND FWD
L1 5555 Louis
Sat Jan 1 9:14am
3-ways conference status
If a conference call is on going, Conf icon will be lit on top of LCD screen.
No
Serv
DND FWD
L1 5555 Louis
1. 3202
2. 3203
Drop
More
VM status
If current line has voice mails, VM icon will be lit on top of LCD screen.
No
Serv
DND FWD
L1 5555 Louis
Sat Jan 1 9:14am
2.12 Line Status
Line function: Each LED of the line hard key shows the status of the line. The following table provides a
description for each LED status.

IPitomy Confidential 59
Activity Light Definition
Idle Off There is no call activity for the line
.
Off-hook or during a call On A call is connected to the IP phone
on this line.
Ringing Fast flashing A call is ringing at this line.
On Hold Slow flashing This line is on hold.
IPitomy Confidential 60
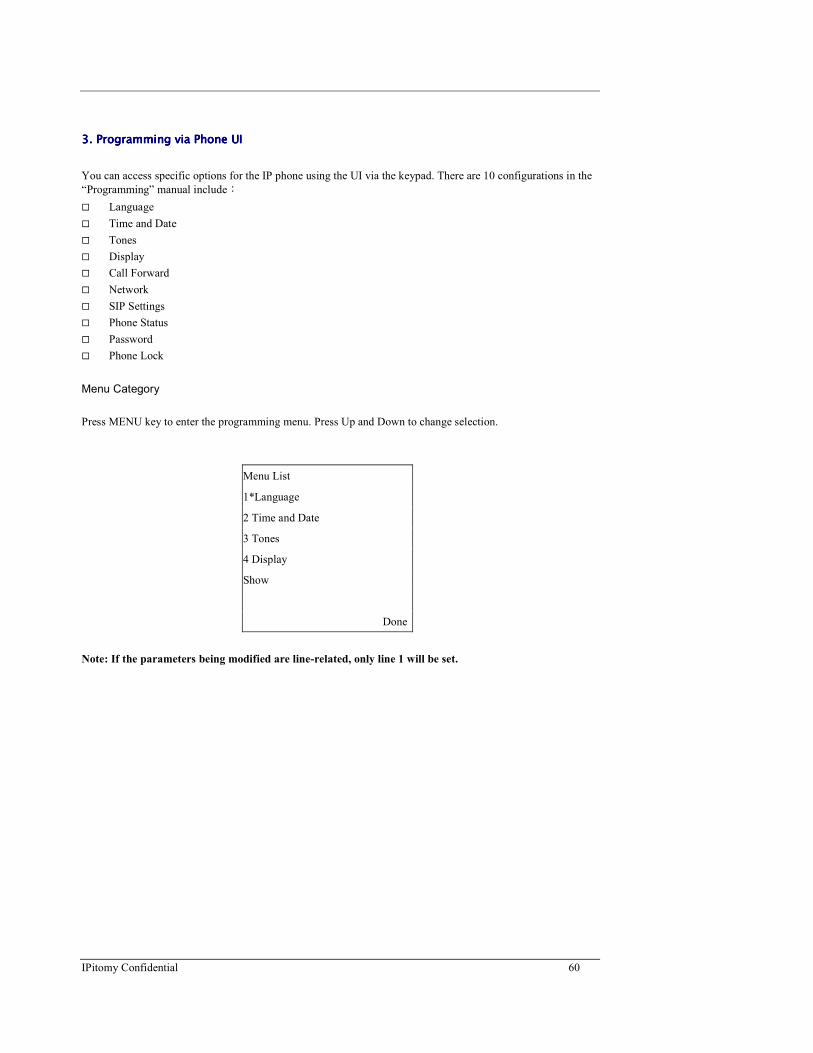
3. Programming3. Programming3. Programming3. Programming via Phone UI via Phone UI via Phone UI via Phone UI
You can access specific options for the IP phone using the UI via the keypad. There are 10 configurations in the
“Programming” manual include:
� Language
� Time and Date
� Tones
� Display
� Call Forward
� Network
� SIP Settings
� Phone Status
� Password
� Phone Lock
Menu Category
Press MENU key to enter the programming menu. Press Up and Down to change selection.
Menu List
1*Language
2 Time and Date
3 Tones
4 Display
Show
Done
Note: If the parameters being modified are line-related, only line 1 will be set.

IPitomy Confidential 61
3.1 Language
Select Language or press item number to enter Language menu. After changing the language setting, all of
display LCD screen (menus, services, options, configuration parameters, etc…) display in that language. Only
one language is active at the same time, i.e., a download of a new language pack is required for each language
change. ISO 8859-1 font set is supported, all fonts except English needs verifications from customers.
Menu List
1* Language
2 Time and Date.
3 Tones
4 Display
Show
Done
Press Change soft key to select Language setting.
Language
English
Change
Cancel
Done
SP550 supports the font set defined in ISO 8859-1.
IPitomy Confidential 62
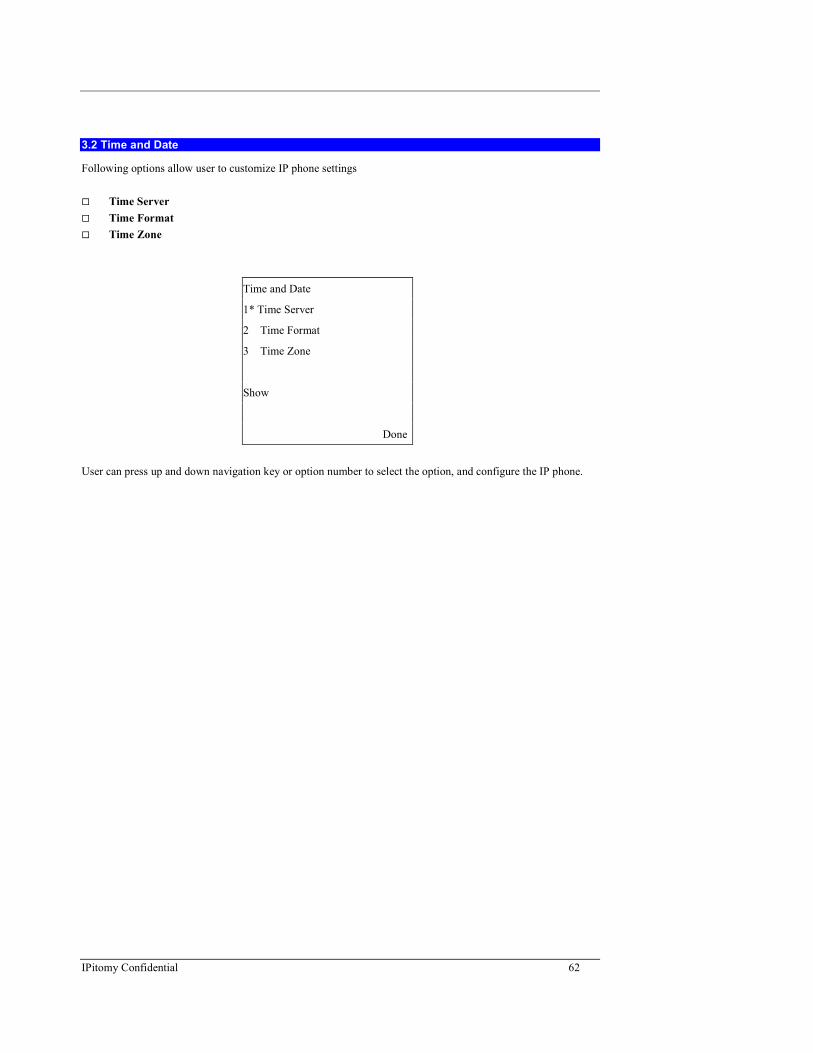
3.2 Time and Date
Following options allow user to customize IP phone settings
� Time Server
� Time Format
� Time Zone
Time and Date
1* Time Server
2 Time Format
3 Time Zone
Show
Done
User can press up and down navigation key or option number to select the option, and configure the IP phone.

IPitomy Confidential 63
3.2.1 Time Server
Select “Time Server” option to configure time server.
Time and Date
1*Time Server 1
2 Time Server 2
3 Time Server 3
Show
Done
Set up Time Server 1~3 Use keypad and soft keys to setup IP address.
Time Server 1
Time Server Address:
0.0.0.0
Backspace
Dot “.” Cancel
Done
3.2.2 Time Format
In this option, user can change time format between 12h and 24h in the IP phone.
Select “Time Format” option to configure time format .
Time and Date
Time Format
12h
Change
Cancel
Done

IPitomy Confidential 64
Press Change to configure time format .
Time and Date
Time Format
24h
Change
Cancel
Done
IPitomy Confidential 65
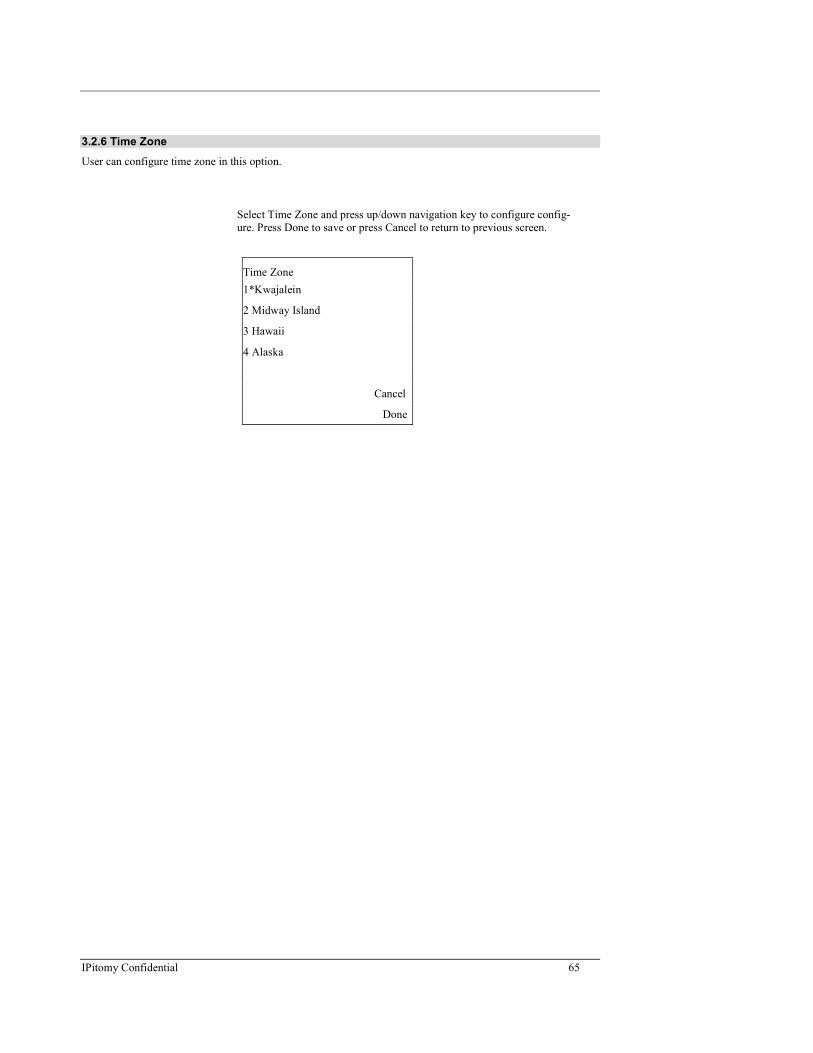
3.2.6 Time Zone
User can configure time zone in this option.
Select Time Zone and press up/down navigation key to configure config-
ure. Press Done to save or press Cancel to return to previous screen.
Time Zone
1*Kwajalein
2 Midway Island
3 Hawaii
4 Alaska
Cancel
Done
IPitomy Confidential 66
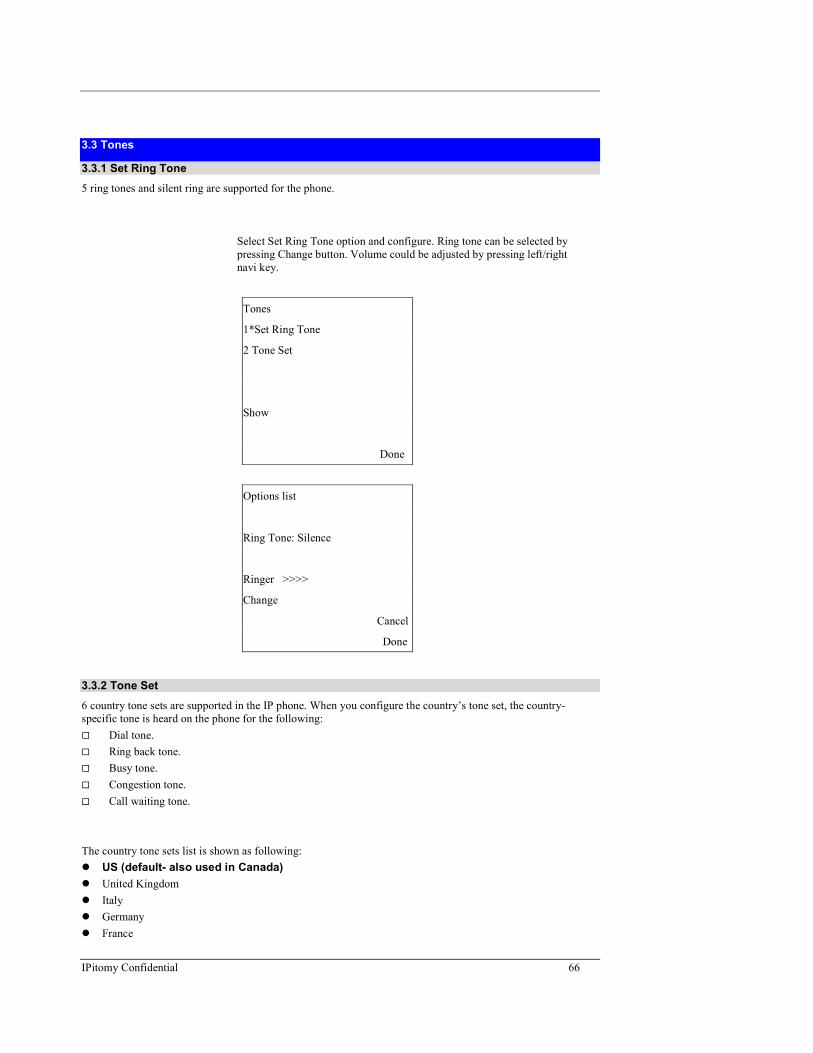
3.3 Tones
3.3.1 Set Ring Tone
5 ring tones and silent ring are supported for the phone.
Select Set Ring Tone option and configure. Ring tone can be selected by
pressing Change button. Volume could be adjusted by pressing left/right
navi key.
Tones
1*Set Ring Tone
2 Tone Set
Show
Done
Options list
Ring Tone: Silence
Ringer >>>>
Change
Cancel
Done
3.3.2 Tone Set
6 country tone sets are supported in the IP phone. When you configure the country’s tone set, the country-
specific tone is heard on the phone for the following:
� Dial tone.
� Ring back tone.
� Busy tone.
� Congestion tone.
� Call waiting tone.
The country tone sets list is shown as following:
� US (default- also used in Canada)
� United Kingdom
� Italy
� Germany
� France

IPitomy Confidential 67
� Australia
IPitomy Confidential 68
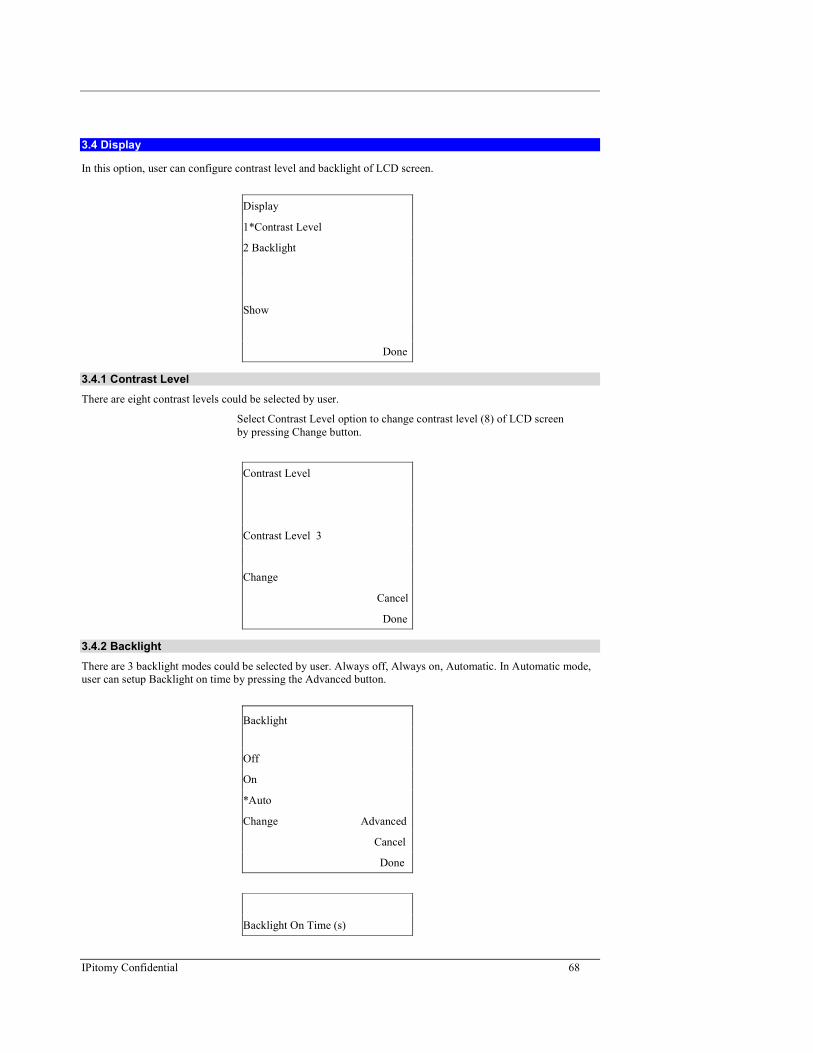
3.4 Display
In this option, user can configure contrast level and backlight of LCD screen.
Display
1*Contrast Level
2 Backlight
Show
Done
3.4.1 Contrast Level
There are eight contrast levels could be selected by user.
Select Contrast Level option to change contrast level (8) of LCD screen
by pressing Change button.
Contrast Level
Contrast Level 3
Change
Cancel
Done
3.4.2 Backlight
There are 3 backlight modes could be selected by user. Always off, Always on, Automatic. In Automatic mode,
user can setup Backlight on time by pressing the Advanced button.
Backlight
Off
On
*Auto
Change Advanced
Cancel
Done
Backlight On Time (s)

IPitomy Confidential 69
10
Backspace
Clear Cancel
Done

IPitomy Confidential 70
3.5 Call Forward
Three call forward modes are supported in the IP phone, All, Busy, and No Answer. User can set the following:
� Destination number.
� Call forward mode.
� Period of seconds before forwarding the call (active only for no-answer forward)
Turn Off Any Call Forward
Select Call Forward option and configure the IP phone.
Call Forward
Number:
Mode: Off
Seconds: 2
Backspace
Cancel
Done
Call Forward All
Select “ALL” in Mode option, by pressing Left/Right button, and setup
destination phone number. IP phone will forward any incoming call to
destination phone number.
Call Forward
Number:3202
Mode: ALL
Seconds: 2
Backspace
Cancel
Done
L1 1111 Louis
Network Connected

IPitomy Confidential 71
Sat Jan 1 12:30am
CFWD

IPitomy Confidential 72
Call Forward No answer
Select “NoAns” in Mode option then setup destination phone number and
the period of seconds. IP phone will forward any incoming call to desti-
nation phone number if it is not answered in the specified period. The
period is adjustable when the Seconds field is active, and Left/Right
button to decrease/increase.
Call Forward
Number:3202
Mode: NoAns
Seconds: 5
Backspace
Cancel
Done
L1 1111 Louis
Network Connected
Sat Jan 1 12:30am
CFWD No Answer
Call Forward Busy
Select “Busy” in Mode option then setup destination phone number. IP
phone will forward any incoming call to destination phone number if it is
already in use (one line is busy).
Call Forward
Number:3202
Mode: Busy
Seconds: 5
Backspace
Cancel
Done
L1 1111 Louis

IPitomy Confidential 73
Network Connected
Sat Jan 1 12:30am
CFWD Busy
IPitomy Confidential 74
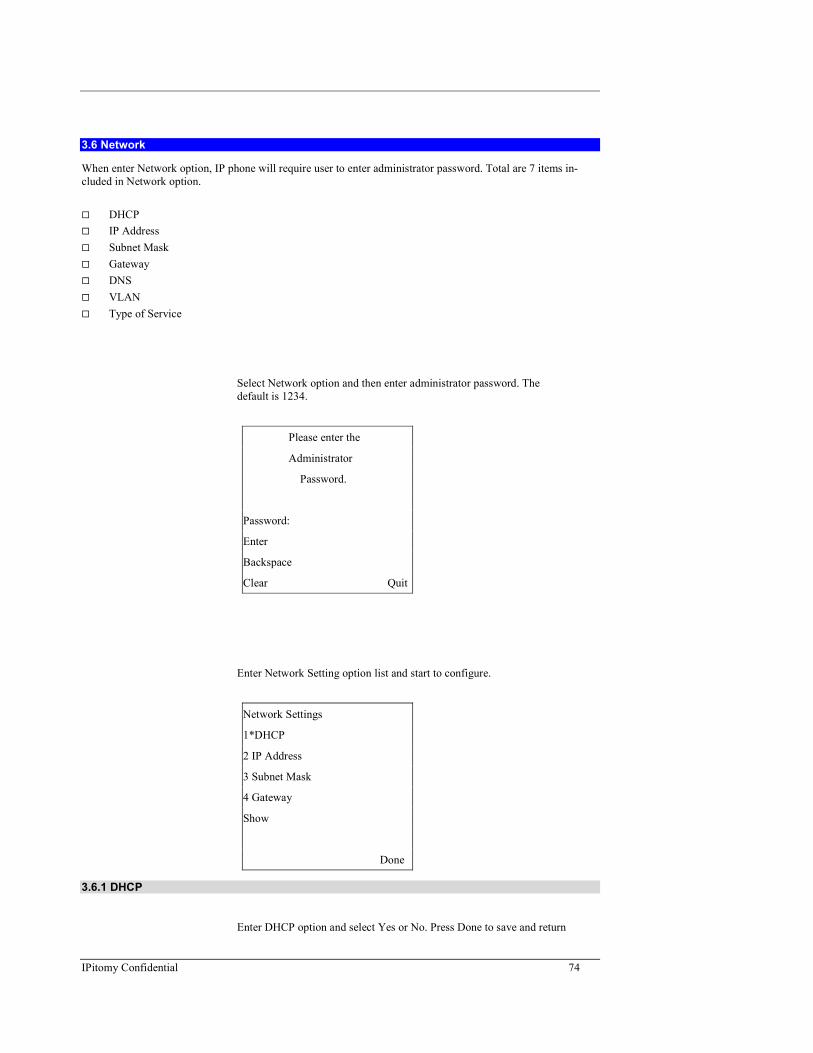
3.6 Network
When enter Network option, IP phone will require user to enter administrator password. Total are 7 items in-
cluded in Network option.
� DHCP
� IP Address
� Subnet Mask
� Gateway
� DNS
� VLAN
� Type of Service
Select Network option and then enter administrator password. The
default is 1234.
Please enter the
Administrator
Password.
Password:
Enter
Backspace
Clear Quit
Enter Network Setting option list and start to configure.
Network Settings
1*DHCP
2 IP Address
3 Subnet Mask
4 Gateway
Show
Done
3.6.1 DHCP
Enter DHCP option and select Yes or No. Press Done to save and return

IPitomy Confidential 75
to previous menu
Network Settings
Use DHCP
Yes
Change
Cancel
Done
Press Done and restart message will show on LCD screen if this option
has been changed. Press Restart to restart IP phone. Press Cancel to
return to previous menu.
Are you sure you wish to
Restart the phone?
Restart
Cancel

IPitomy Confidential 76
3.6.2 IP Address
Enter IP Address option and setup IP address of IP phone if DHCP mode
is No. Press Cancel to abort this option. Press Done to save IP address
and return to previous screen.
Network Settings
IP Address
10.30.48.47
Backspace
Dot ’.‘ Cancel
Done
Press Cancel to return to previous menu.
Network Settings
1*DHCP
2 IP Address
3 Subnet Mask
4 Gateway
Show
Done
Press Done and restart message will show on LCD screen if this option
has been changed. Press Restart to restart IP phone. Press Cancel to
return to previous menu.
Are you sure you wish to
Restart the phone?
Restart
Cancel

IPitomy Confidential 77
3.6.3 Subnet Mask
Enter Subnet Mask option and setup Subnet Mask address of IP phone if
DHCP mode is No. Press Cancel to abort this option. Press Done to save
Subnet Mask address and return to previous screen.
Network Settings
Subnet Mask
255.255.255.0
Backspace
Dot ’.‘ Cancel
Done
Press Cancel to return to previous menu.
Network Settings
1*DHCP
2 IP Address
3 Subnet Mask
4 Gateway
Show
Done
Press Done and restart message will show on LCD screen if this option
has been changed. Press Restart to restart IP phone. Press Cancel to
return to previous menu.
Are you sure you wish to
Restart the phone?
Restart
Cancel

IPitomy Confidential 78
3.6.4 Gateway
Enter Subnet Mask option and setup Subnet Mask address of IP phone if
DHCP mode is No. Press Cancel to abort this option. Press Done to save
Gateway IP address and return to previous screen.
Network Settings
Gateway IP Address
192.168.1.1
Backspace
Dot ’.‘ Cancel
Done
Press Cancel to return to previous menu.
Network Settings
1*DHCP
2 IP Address
3 Subnet Mask
4 Gateway
Show
Done
Press Done and restart message will show on LCD screen if this option
has been changed. Press Restart to restart IP phone. Press Cancel to
return to previous menu.
Are you sure you wish to
Restart the phone?
Restart
Cancel

IPitomy Confidential 79
3.6.5 DNS
Enter DNS option and setup DNS address of IP phone if DHCP mode is
No. Press Cancel to abort this option. Press Done to save DNS address
and return to previous screen.
Network Settings
DNS
10.30.201.50
Backspace
Dot ’.‘ Cancel
Done
Press Cancel to return to previous menu.
Network Settings
1*DHCP
2 IP Address
3 Subnet Mask
4 Gateway
Show
Done
Press Done and restart message will show on LCD screen if this option
has been changed. Press Restart to restart IP phone. Press Cancel to
return to previous menu.
Are you sure you wish to
Restart the phone?
Restart
Cancel
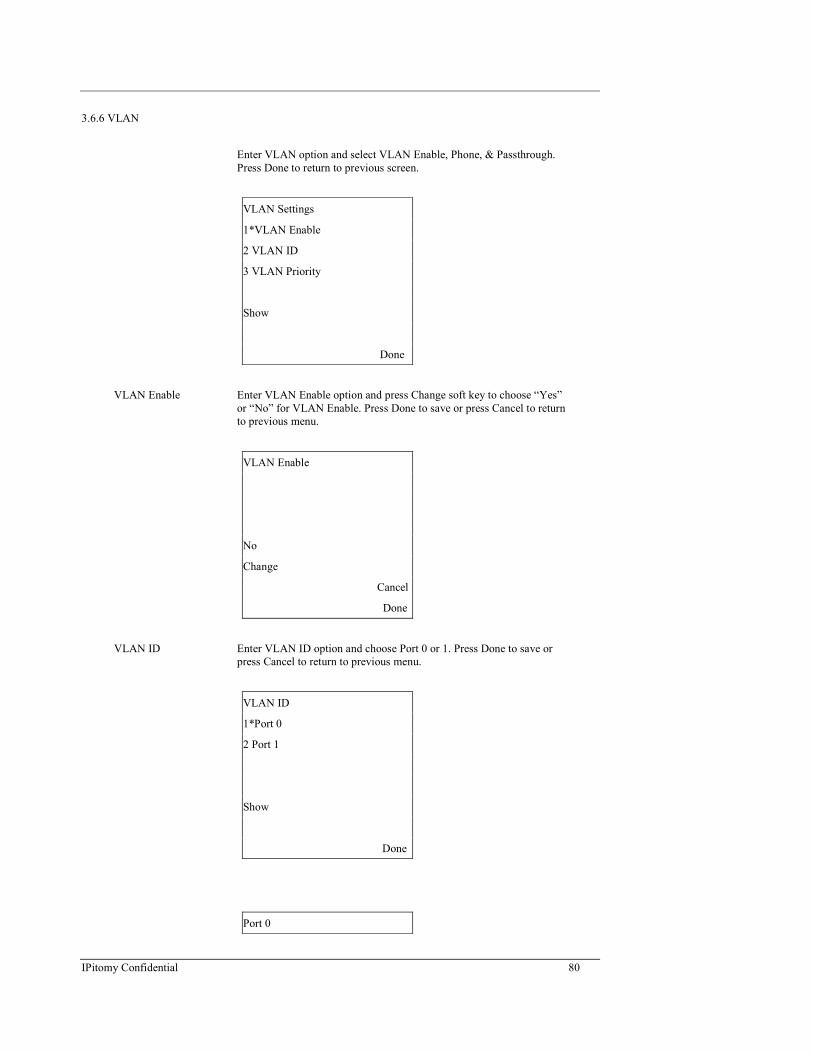
IPitomy Confidential 80
3.6.6 VLAN
Enter VLAN option and select VLAN Enable, Phone, & Passthrough.
Press Done to return to previous screen.
VLAN Settings
1*VLAN Enable
2 VLAN ID
3 VLAN Priority
Show
Done
VLAN Enable Enter VLAN Enable option and press Change soft key to choose “Yes”
or “No” for VLAN Enable. Press Done to save or press Cancel to return
to previous menu.
VLAN Enable
No
Change
Cancel
Done
VLAN ID Enter VLAN ID option and choose Port 0 or 1. Press Done to save or
press Cancel to return to previous menu.
VLAN ID
1*Port 0
2 Port 1
Show
Done
Port 0

IPitomy Confidential 81
Phone VLAN ID
1
Backspace
Cancel
Done
VLAN Priority Enter VLAN Priority option and choose Port 0 or 1. Press Done to save
or press Cancel to return to previous menu.
VLAN Priority
1*Port0
2 Port1
Show
Done
Port 0 Enter VLAN ID and enter ID number range from 1-4094. Press Done to
save or press Cancel to return to previous menu.
Port 0
Priority
0
Backspace
Cancel
Done
Port 1 Enter VLAN Priority and enter ID number range from 1-4094. Press
Done to save or press Cancel to return to previous menu.
Port 1
Priority
1
Backspace
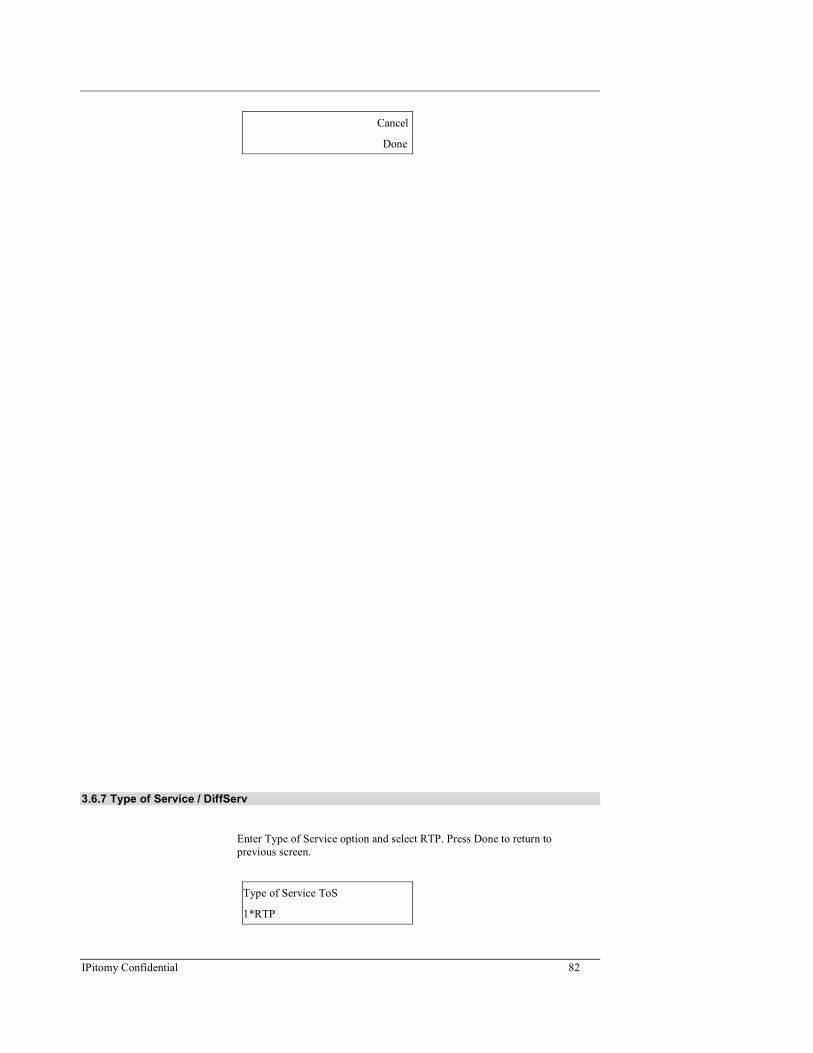
IPitomy Confidential 82
Cancel
Done
3.6.7 Type of Service / DiffServ
Enter Type of Service option and select RTP. Press Done to return to
previous screen.
Type of Service ToS
1*RTP

IPitomy Confidential 83
Show
Done
RTP Enter RTP enter RTP number. Press Done to save or press Cancel to
return to previous menu.
Type of Service ToS
RTP
32
Backspace
Cancel
Done
3.7 SIP Settings
User could configure the following SIP parameters via IP phone UI.
Proxy IP
Proxy Port
Phone Number
Screen Name
Auth. Name
Auth. Password
RTP Port Base
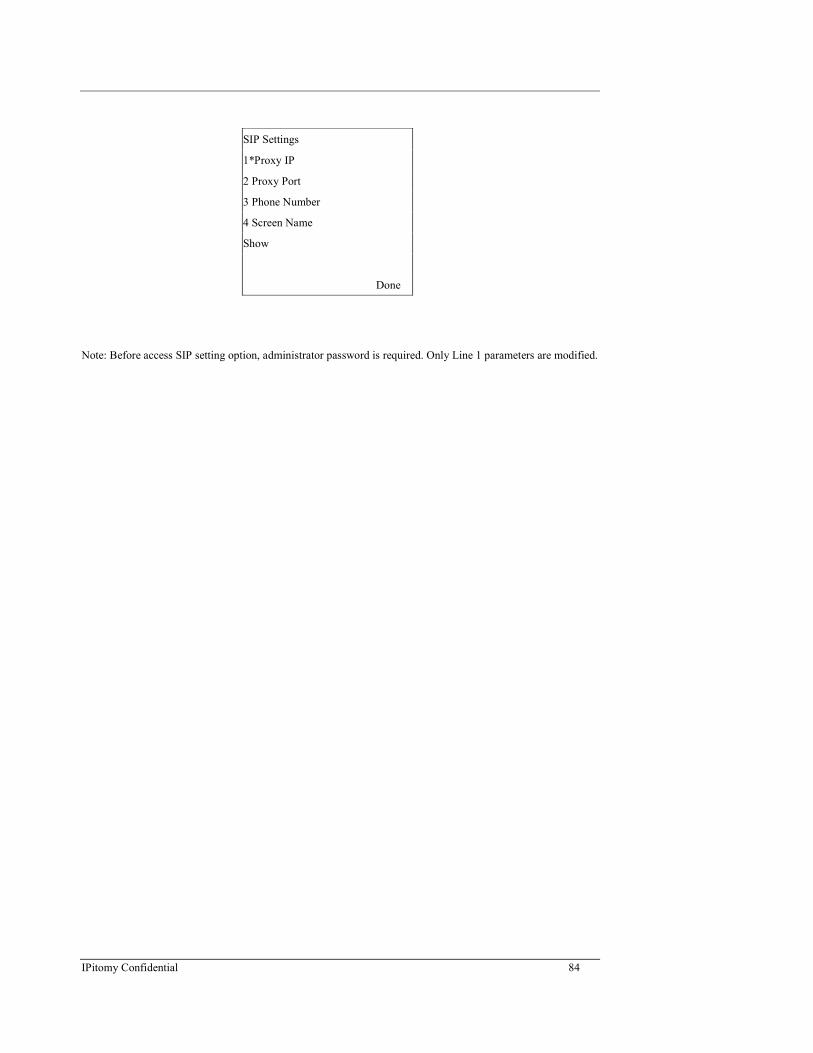
IPitomy Confidential 84
SIP Settings
1*Proxy IP
2 Proxy Port
3 Phone Number
4 Screen Name
Show
Done
Note: Before access SIP setting option, administrator password is required. Only Line 1 parameters are modified.
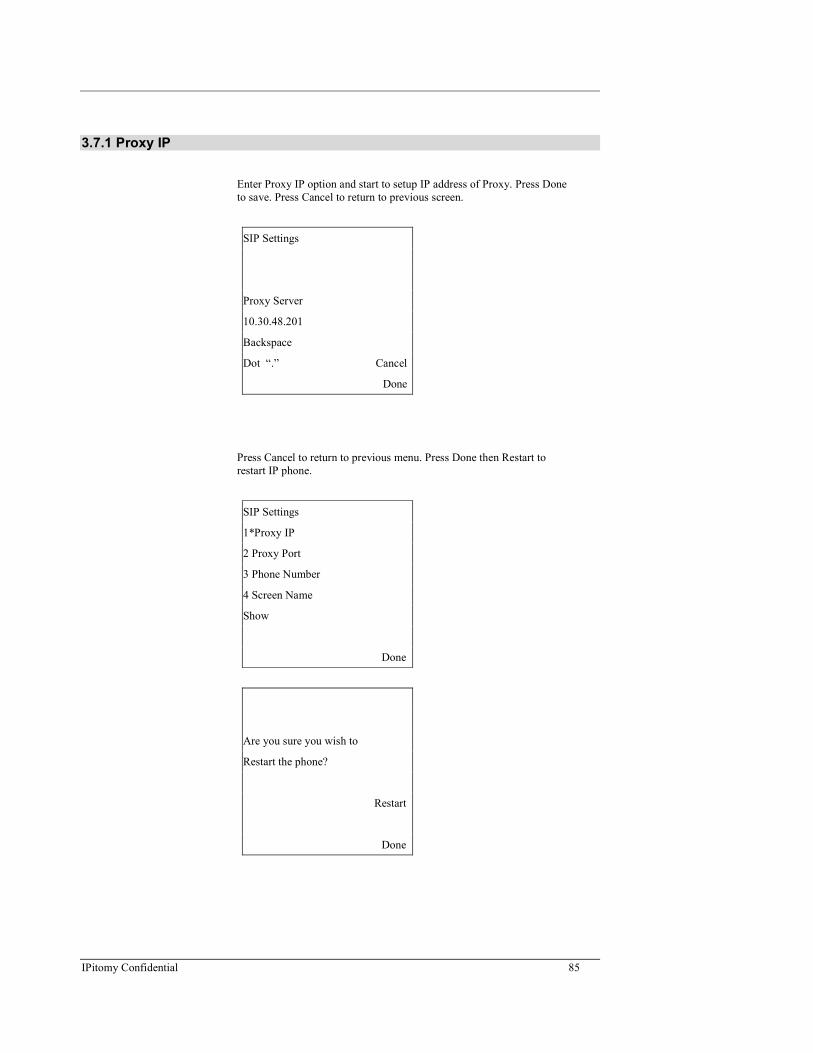
IPitomy Confidential 85
3.7.1 Proxy IP
Enter Proxy IP option and start to setup IP address of Proxy. Press Done
to save. Press Cancel to return to previous screen.
SIP Settings
Proxy Server
10.30.48.201
Backspace
Dot “.” Cancel
Done
Press Cancel to return to previous menu. Press Done then Restart to
restart IP phone.
SIP Settings
1*Proxy IP
2 Proxy Port
3 Phone Number
4 Screen Name
Show
Done
Are you sure you wish to
Restart the phone?
Restart
Done
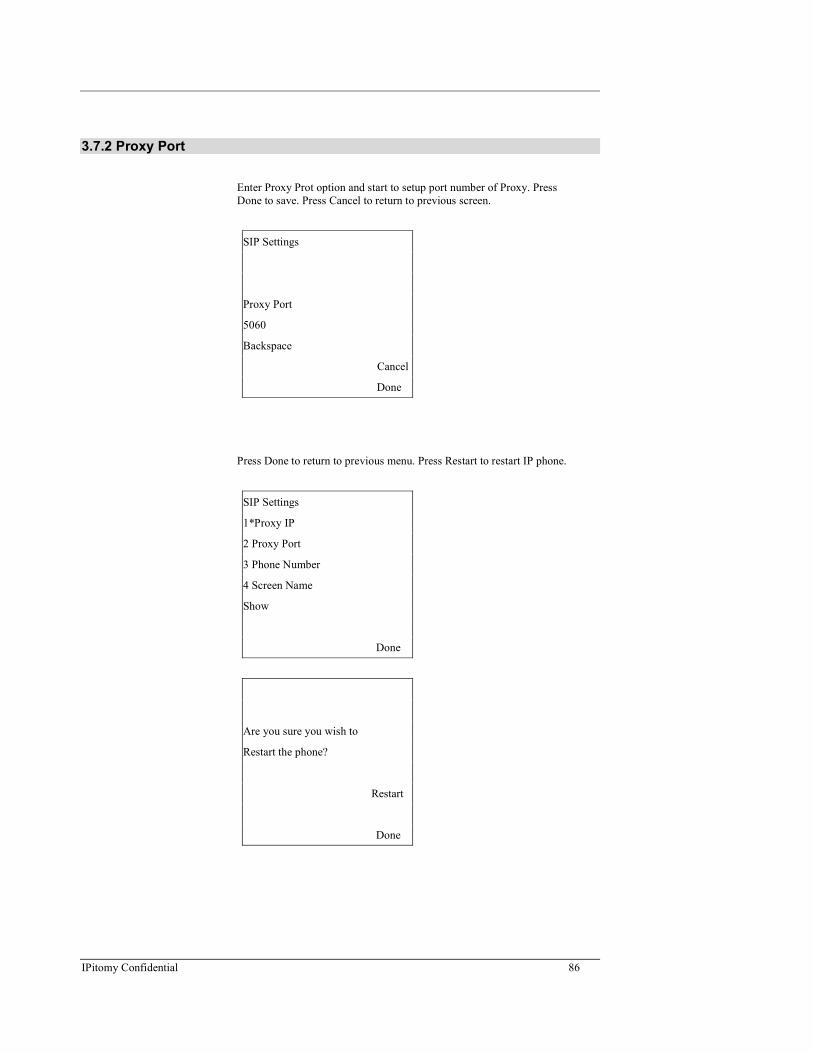
IPitomy Confidential 86
3.7.2 Proxy Port
Enter Proxy Prot option and start to setup port number of Proxy. Press
Done to save. Press Cancel to return to previous screen.
SIP Settings
Proxy Port
5060
Backspace
Cancel
Done
Press Done to return to previous menu. Press Restart to restart IP phone.
SIP Settings
1*Proxy IP
2 Proxy Port
3 Phone Number
4 Screen Name
Show
Done
Are you sure you wish to
Restart the phone?
Restart
Done

IPitomy Confidential 87
3.7.3 Phone Number
Enter Registrar Server option and start to setup IP address of Registrar
server. Press Done to save. Press Cancel to return to previous screen.
SIP Settings
Phone Number
3106
Backspace NextSpace
Cancel
Done
Press Done to return to previous menu. Press Restart to restart IP phone.
SIP Settings
1*Proxy IP
2 Proxy Port
3 Phone Number
4 Screen Name
Show
Done
Are you sure you wish to
Restart the phone?
Restart
Done
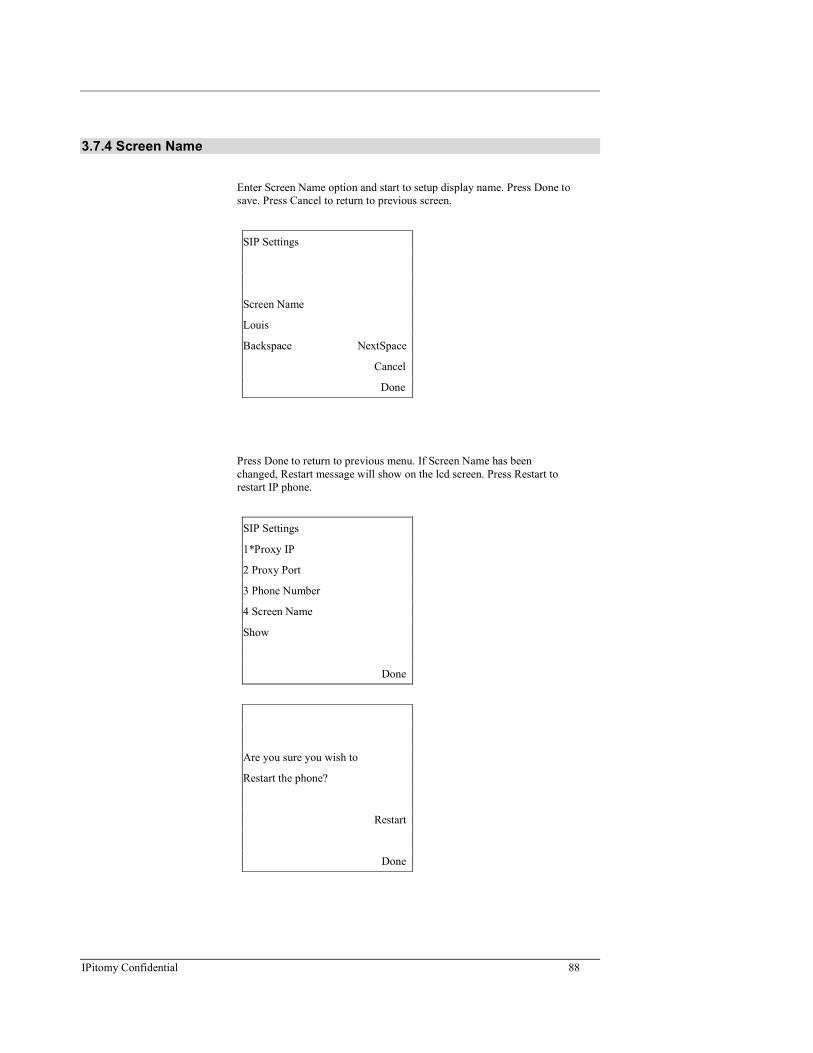
IPitomy Confidential 88
3.7.4 Screen Name
Enter Screen Name option and start to setup display name. Press Done to
save. Press Cancel to return to previous screen.
SIP Settings
Screen Name
Louis
Backspace NextSpace
Cancel
Done
Press Done to return to previous menu. If Screen Name has been
changed, Restart message will show on the lcd screen. Press Restart to
restart IP phone.
SIP Settings
1*Proxy IP
2 Proxy Port
3 Phone Number
4 Screen Name
Show
Done
Are you sure you wish to
Restart the phone?
Restart
Done

IPitomy Confidential 89
3.7.5 Authentication Name
Enter Authentication Name option and start to setup authentication name.
Press Done to save. Press Cancel to return to previous screen.
SIP Settings
Authentication Name
Louis
Backspace NextSpace
Cancel
Done
Press Done to return to previous menu. If Authentication Name has been
changed, Restart message will show on the lcd screen. Press Restart to
restart IP phone.
SIP Settings
1*Proxy IP
2 Proxy Port
3 Phone Number
4 Screen Name
Show
Done
Are you sure you wish to
Restart the phone?
Restart
Done

IPitomy Confidential 90
3.7.6 Authentication Password
Enter Password option and start to setup Password. Press Done to save.
Press Cancel to return to previous screen.
SIP Settings
Password
3202
Backspace Nextpace
Cancel
Done
Press Done to return to previous menu. If Password has been changed,
Restart message will show on the lcd screen. Press Restart to restart IP
phone.
SIP Settings
1*Proxy IP
2 Proxy Port
3 Phone Number
4 Screen Name
Show
Done
Are you sure you wish to
Restart the phone?
Restart
Done
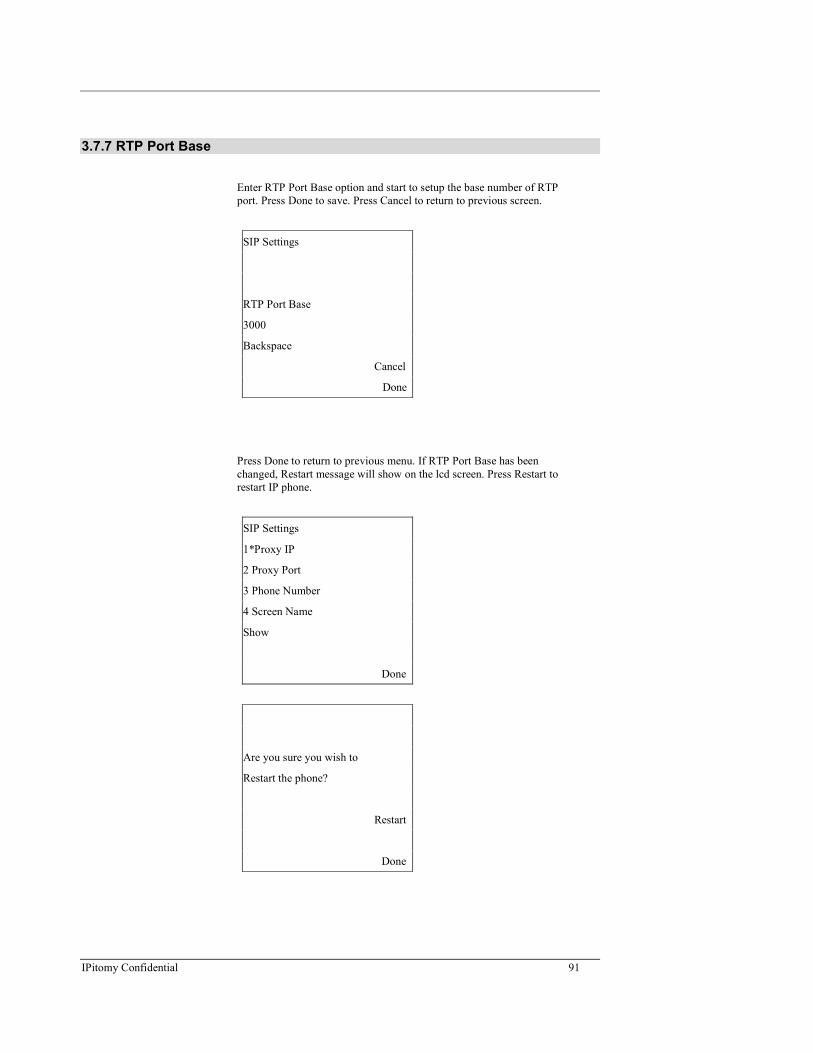
IPitomy Confidential 91
3.7.7 RTP Port Base
Enter RTP Port Base option and start to setup the base number of RTP
port. Press Done to save. Press Cancel to return to previous screen.
SIP Settings
RTP Port Base
3000
Backspace
Cancel
Done
Press Done to return to previous menu. If RTP Port Base has been
changed, Restart message will show on the lcd screen. Press Restart to
restart IP phone.
SIP Settings
1*Proxy IP
2 Proxy Port
3 Phone Number
4 Screen Name
Show
Done
Are you sure you wish to
Restart the phone?
Restart
Done

IPitomy Confidential 92
3.7.8 Auto Prov.
Enter Auto Prov. option starts the auto-provision process. Current im-
plementation works with some Asterisk IP PBXs, such as IP1000, and
IP1500 soon.
Auto Prov.
Extension Number
3400
Backspace NextsSpace
Cancel
Done
Press the desired extension number, 3400 in this example, and press Done key. The auto-provision process starts
negotiating with the PBX for establishing a correct extension.

IPitomy Confidential 93
3.8 Phone Status
User can check Network Status/Firmware version, restart IP phone, and restore factory default in this option.
Phone Status
1*Network Status
2 Firmware Version
3 Restart Phone
4 Factory default
Show
Done
3.8.1 Network Status
Enter Network Status option to view the status of IP phone.
LinkSt. Port0: UP
LinkSt. Port1: DOWN
IP Addr 10.30.48.47
MAC Addr 00-08-5D-1A-04-36
Done
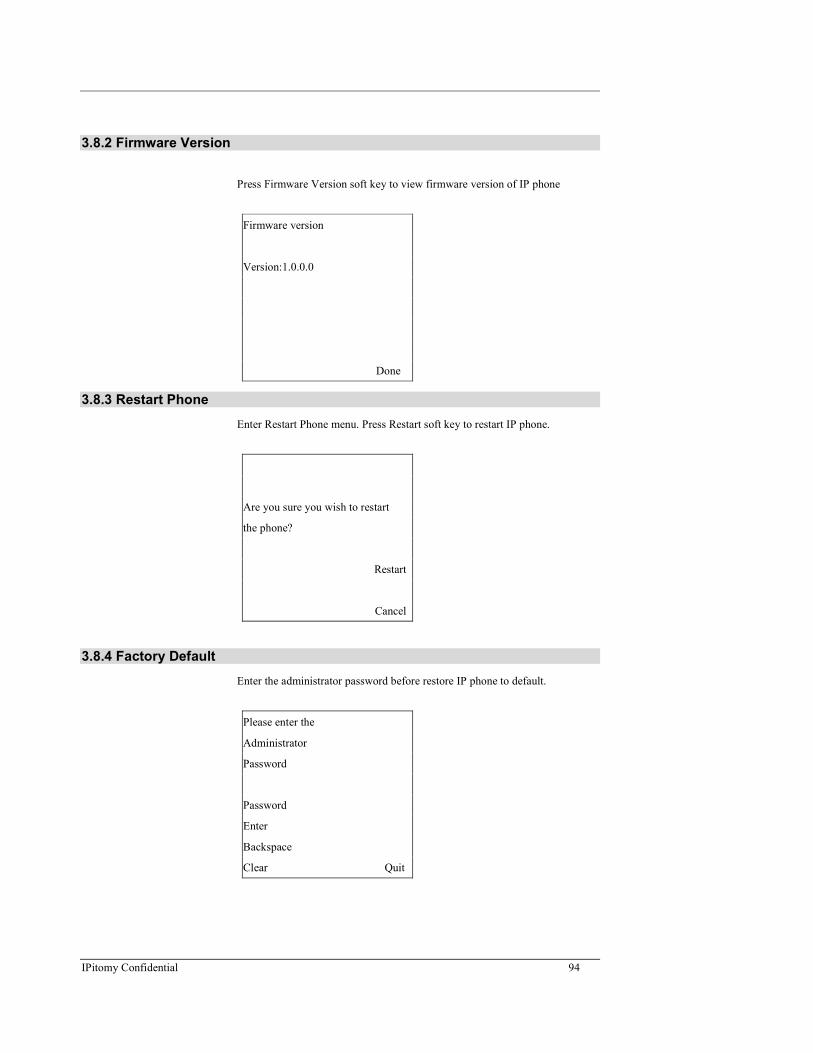
IPitomy Confidential 94
3.8.2 Firmware Version
Press Firmware Version soft key to view firmware version of IP phone
Firmware version
Version:1.0.0.0
Done
3.8.3 Restart Phone
Enter Restart Phone menu. Press Restart soft key to restart IP phone.
Are you sure you wish to restart
the phone?
Restart
Cancel
3.8.4 Factory Default
Enter the administrator password before restore IP phone to default.
Please enter the
Administrator
Password
Password
Enter
Backspace
Clear Quit

IPitomy Confidential 95
Select Factory defaults to restore or Remove local config to restore.
Factory Defaults
1*Factory defaults
2 Remove local config
Show
Done
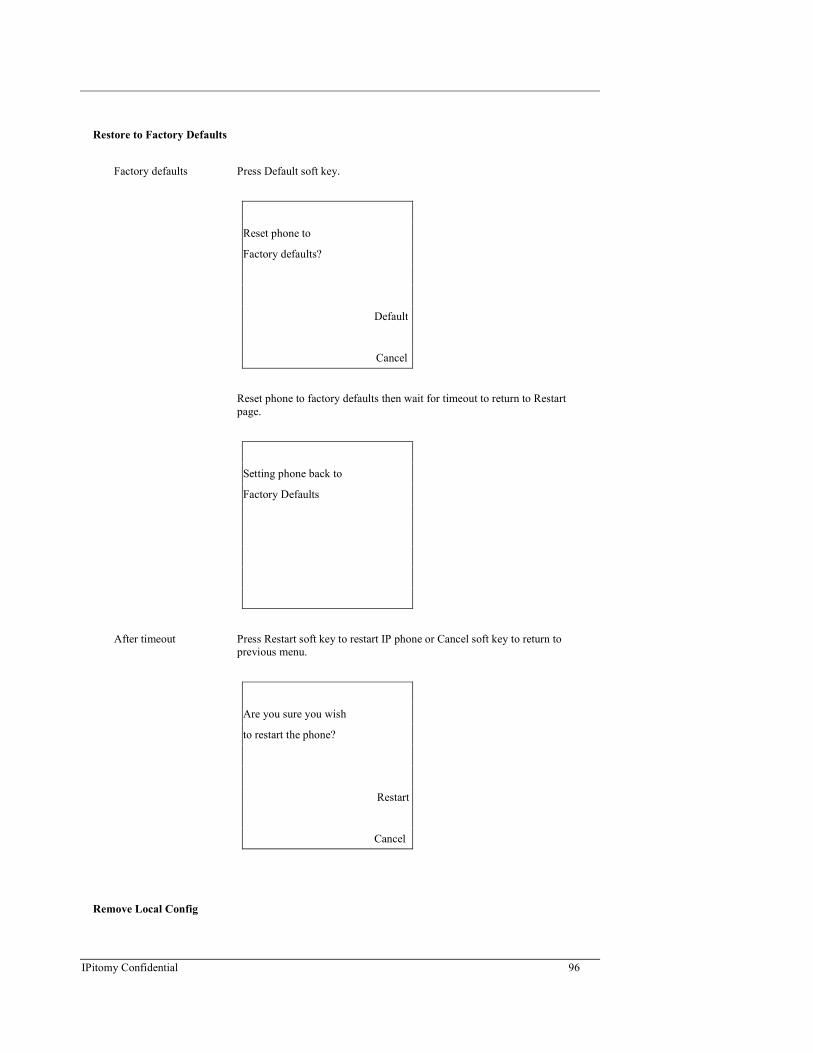
IPitomy Confidential 96
Restore to Factory Defaults
Factory defaults Press Default soft key.
Reset phone to
Factory defaults?
Default
Cancel
Reset phone to factory defaults then wait for timeout to return to Restart
page.
Setting phone back to
Factory Defaults
After timeout Press Restart soft key to restart IP phone or Cancel soft key to return to
previous menu.
Are you sure you wish
to restart the phone?
Restart
Cancel
Remove Local Config

IPitomy Confidential 97
Remove local config By pressing Default soft key.
Remove local
Config setting?
Default
Cancel
Removed phone back to local config then wait for timeout to return to
Restart page.
Remove local config
After timeout Press Restart soft key to restart IP phone or Cancel soft key to return to
previous menu.
Are you sure you wish
to restart the phone?
Restart
Cancel
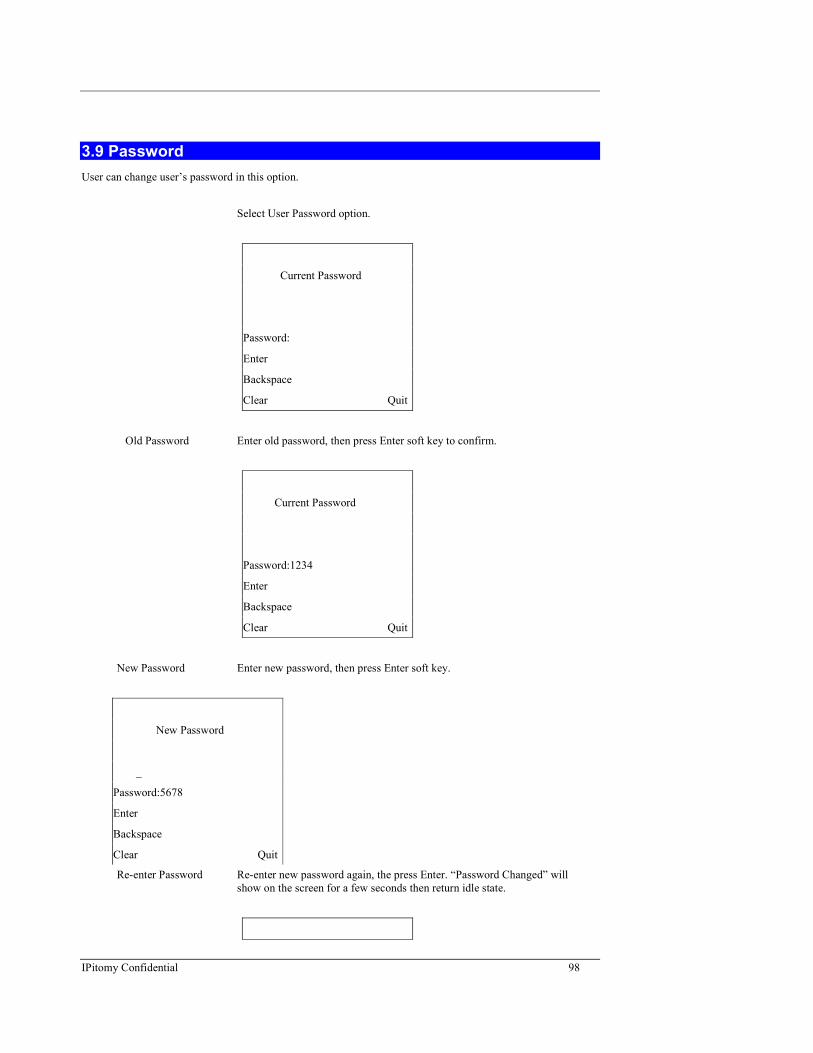
IPitomy Confidential 98
3.9 Password
User can change user’s password in this option.
Select User Password option.
Current Password
Password:
Enter
Backspace
Clear Quit
Old Password Enter old password, then press Enter soft key to confirm.
Current Password
Password:1234
Enter
Backspace
Clear Quit
New Password Enter new password, then press Enter soft key.
New Password
_
Password:5678
Enter
Backspace
Clear Quit
Re-enter Password Re-enter new password again, the press Enter. “Password Changed” will
show on the screen for a few seconds then return idle state.

IPitomy Confidential 99
New Password
_
Password:5678
Enter
Backspace
Clear Quit
Password Changed
OK
Wrong Password If Enter wrong password, then press Enter soft key to Re-enter password
again. If Re-enter wrong password, then it will be showed Invalid Pass-
word and system will auto return to previous menu
Current Password
Invalid Password
Quit
Current Password
Password:
Enter
Backspace
Clear Quit

IPitomy Confidential 100
3.10 Phone Lock
User can enable Phone Lock function in this option.
Select Phone Lock option. Press Lock to lock the IP phone and return
previous screen, or press Cancel to return previous screen.
Phone Lock
Lock the phone?
Cancel
Lock
LCD screen shows phone is locked in idle mode
L1 2552 Louis
Network Connected
Phone is locked
Sun Sep 8 21:04
3.11 PHONE BOOK
User can press “PHONE BOOK” predefined key to access or edit phone book of the IP phone.
Press PHONE BOOK key to enter phone book mode and press up or
down key to look for each user
1*Louis
2 Remus
3 Michael
4 Eugene
Detail Delete
Search
Add New Quit
Search

IPitomy Confidential 101
Press Search soft key to look up. Enter first digit to search in phone book
list & Phone book list will be shown in order. “Searching…” appears
when searching is in progress. Press Quit to return previous screen.
1.*David
2.Eugene
3.Michael
4.Remus
Backspace
Search
Quit
Detail
If any entry found Press Detail soft key to access this item. Press Quit to return previous
screen.
1 David
HOME
3202
Line 1
Dial
Set Label
Edit Quit
Press left/right navigation
key
To change the attribute of the record, either HOME, OFFICE or
MOBILE is available for the attribute. Press Set Label to set it.
1 David
MOBILE
5899983
Line 1
Dial Delete
Set Label
Edit Quit
Dial out Press Dial soft key to dial out.
L1 1111 Louis

IPitomy Confidential 102
3202
Cancel
More
Edit Press Edit soft key to edit current entry. Press up/down navigation key to
edit name, phone number, access line.
Louis
3202
Line : 1
Save
Backspace
Cancel
Press Save soft key to save this entry. Press OK soft key to return phone
book list menu.
Entry Saved
OK
Delete
Press Delete soft key to delete the selected entry.

IPitomy Confidential 103
Item is Erased
Add New
Press Add New soft key to add a new phone book entry. Use up and
down navigation key and keypad to edit name, number and line.
Name:
Joseph
Number:
3203
Line1
Save
Backspace
Cancel
Save new entry Press Save soft key to save the new entry. And press OK to return phone
book menu.
Entry Saved
OK
3.12 Service
User can press SERVICE predefined key to access Dialed Call list and Missed Call list.
Press SERVICE key Dial Call list and Miss Call list are shown on the IP phone screen.

IPitomy Confidential 104
SERVICE
1.*Dialed Call list
2. Missed Call list
Show
Quit
3.12.1 Dialed Call list
Select Dialed Call list option
Dialed Call list
1.*Louis
2.Remus
3.Time
4.Eugene
Detail
Quit
Dial out Press Dial soft key to dial out and wait for remote answer. Press Quit soft
key to return previous screen.
L1 1111 Louis
3202
Dial
Quit
3.12.2 Missed Call list.
Select Missed Call list option
Note: No missed call can be showing if no CID detected
Missed Call list
1.*”Louis”(3107)

IPitomy Confidential 105
2.”Remus”(3108)
3.”Time”(3109)
4. ()
Detail
Quit
Detail Press Detail soft key to see detail information. Press Quit soft key to
return previous screen.
001
Name:”3202”
Number:3102
Thu Nov 29 11:56am
Dial
Quit
Dial out Press Dial soft key to dial out and wait for remote answer.
L1 1111 Louis
3202
Cancel
More

IPitomy Confidential 106
4.Soft Key4.Soft Key4.Soft Key4.Soft Key
4.1 Programmable functions
SP550 supports up to 10 programmable functions to soft keys which are explained as following:
Soft key function Description
None Indicates pressing the softkey will do nothing.
Speeddial Indicates pressing the softkey will automatically dial
a pre-defined series of digits for a fast dial.
Do Not Disturb (DND) Indicates pressing the softkey will enable/disable
“do not disturb” feature.
BLF Indicates the softkey is configured for Busy Lamp
Field use.
Last Call Return (LCR) Indicates the softkey is set to be as a “last call return”
key.
Park Indicates the softkey is set to be a park key to park a
call.
Call retrieve Indicates the softkey is set to retrieve a parked call
Call pickup Indicates the softkey is set to be pickup key to pick
up ringing call in the same group.
Intercom Inicates the softkey is set to dial an auto-answer call,
the destination extension number must follow.
Prefix Indicates the softkey is set to dial a series of pre-
defined digits and waits users to dial the extension.
This is usually used to dial the server-specific string
of digits for some specific services.
4.1.1 DND
DND: When user press DND soft key to enable/disable “Do not Disturb”, the LED of soft key will be turn on/off
and the color is green.
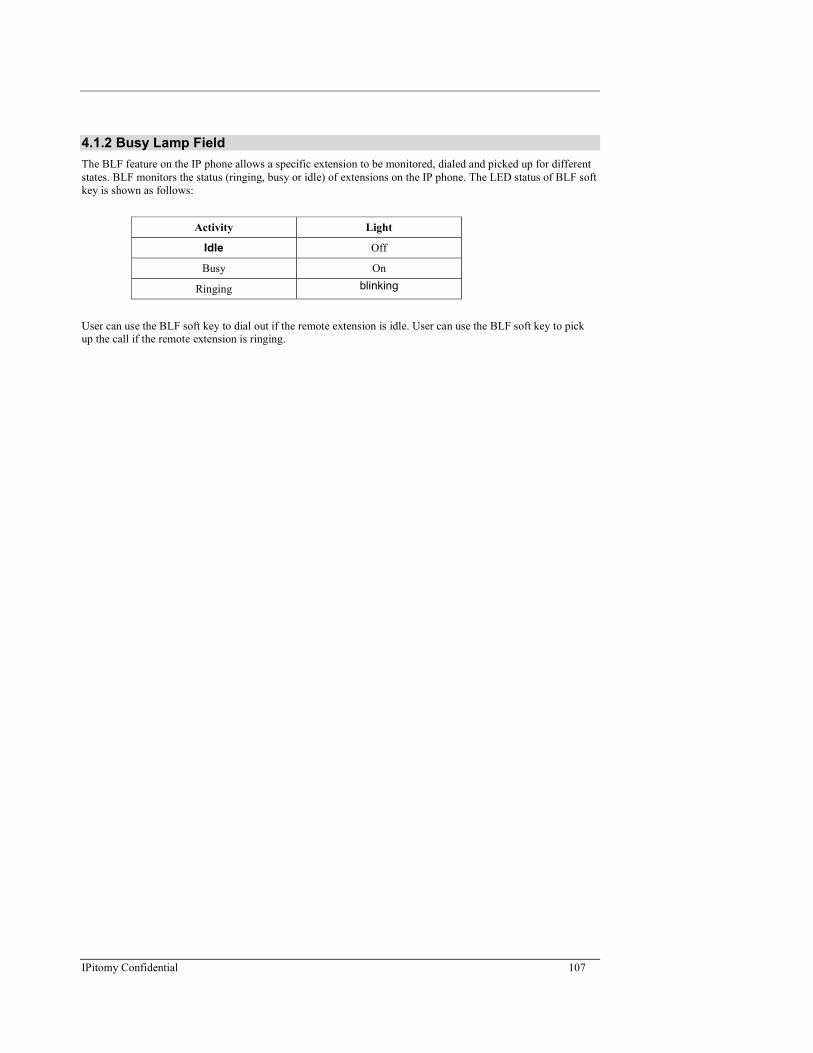
IPitomy Confidential 107
4.1.2 Busy Lamp Field
The BLF feature on the IP phone allows a specific extension to be monitored, dialed and picked up for different
states. BLF monitors the status (ringing, busy or idle) of extensions on the IP phone. The LED status of BLF soft
key is shown as follows:
Activity Light
Idle Off
Busy On
Ringing blinking
User can use the BLF soft key to dial out if the remote extension is idle. User can use the BLF soft key to pick
up the call if the remote extension is ringing.

IPitomy Confidential 108
4.2 State-Based Soft Keys
On SP550 soft keys, user can configure a specific state to display when a soft key is being used. Available states
you can configure for each soft key include:
� Idle
� Connected
� Incoming
� Outgoing
The following table identifies the applicable default states for each soft keys type on the IP phone.
Soft key type Default States
None All states disabled
Speed dial Idle, connected, incoming, outgoing,
Do Not Disturb (DND) Idle, connected, incoming, outgoing,
BLF Idle, connected, incoming, outgoing,
Last Call Return (LCR) Idle,
Park Connected,
Call retrieve Idle,
Call pickup Idle, incoming,
Intercom Idle, outgoing
Prefix Idle, connected,
Table 4.1
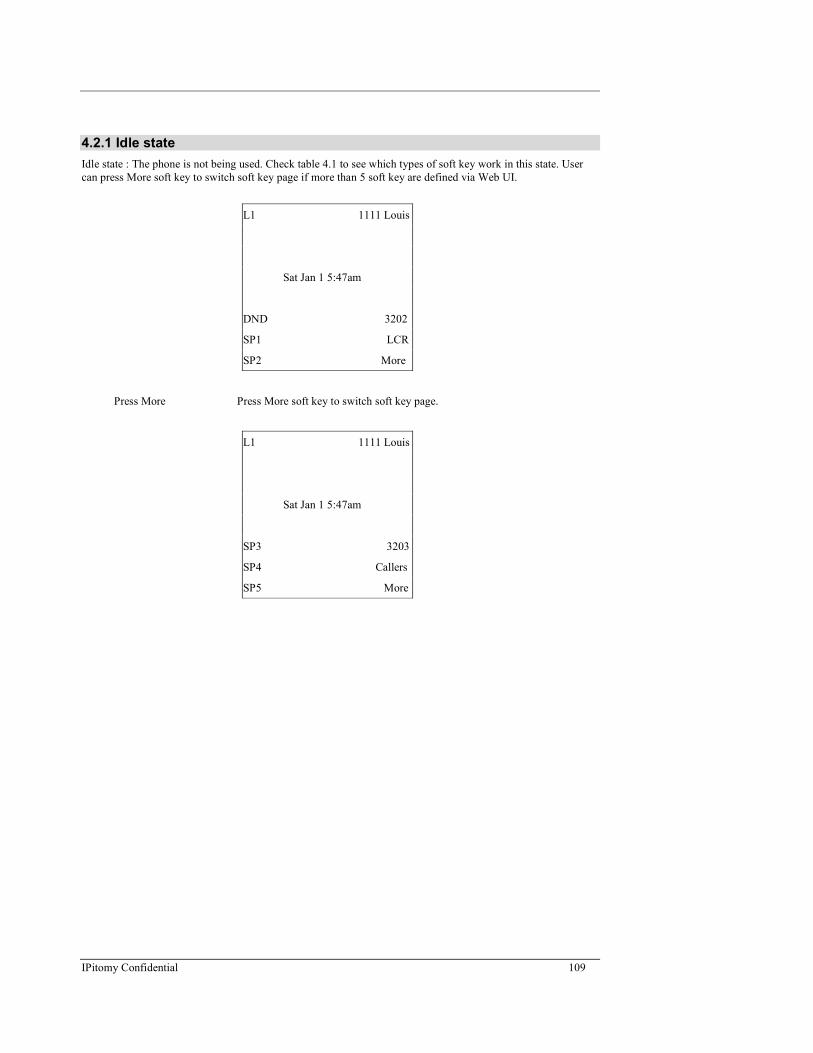
IPitomy Confidential 109
4.2.1 Idle state
Idle state : The phone is not being used. Check table 4.1 to see which types of soft key work in this state. User
can press More soft key to switch soft key page if more than 5 soft key are defined via Web UI.
L1 1111 Louis
Sat Jan 1 5:47am
DND 3202
SP1 LCR
SP2 More
Press More Press More soft key to switch soft key page.
L1 1111 Louis
Sat Jan 1 5:47am
SP3 3203
SP4 Callers
SP5 More

IPitomy Confidential 110
4.2.2 Connected state
Connected state: The current line is in an active or the call is on hold.
Check table 4.1 to see which types of soft key work in this state. Predefined soft keys will show on this state
first, press More soft key to show Stated-Based soft keys.
L1 1111 Louis
3202
Drop
More
Press More Press More soft key to switch soft key page.
L1 1111 Louis
3202
SP1 3203
SP2 Callers
DND More

IPitomy Confidential 111
4.2.3 Incoming state
Incoming state: The phone is ringing.
Check table 4.1 to see which types of soft key work in this state. Predefined soft keys will show on this state
first, press More soft key to show Stated-Based soft keys.
L1 1111 Louis
3202
Answer
Ignore
More
Press More Press More soft key to switch soft key page.
L1 1111 Louis
3202
SP1 3203
SP2 Callers
DND More
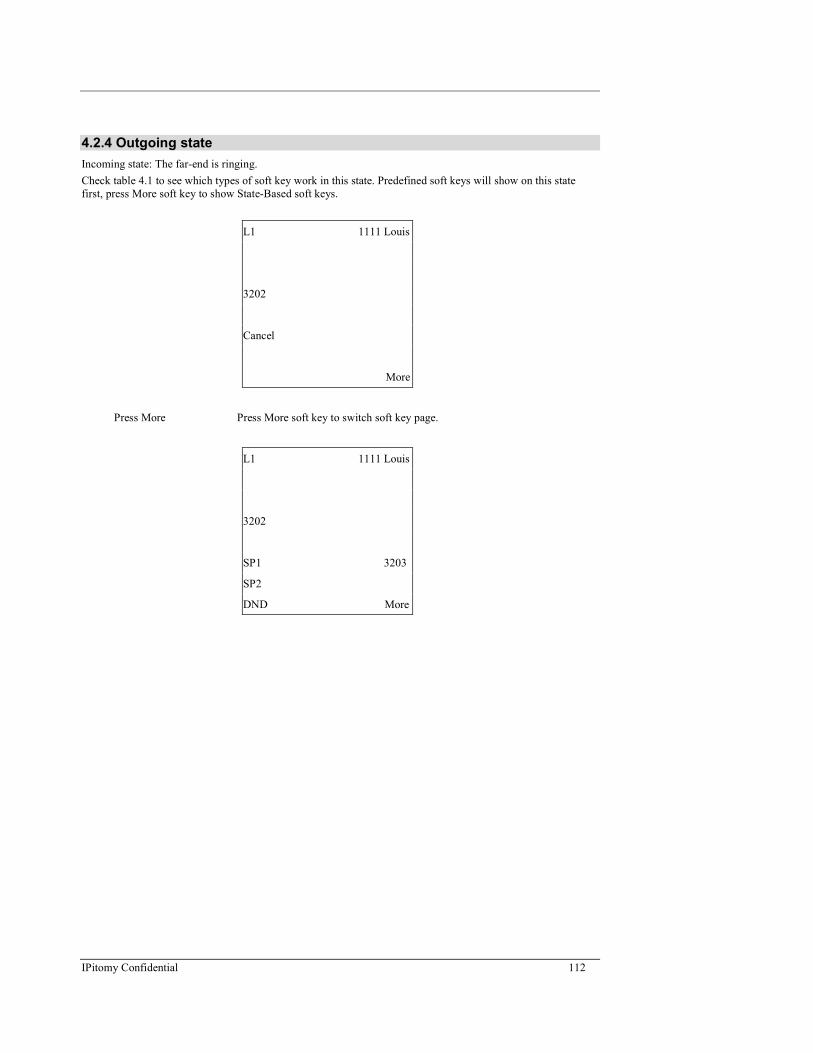
IPitomy Confidential 112
4.2.4 Outgoing state
Incoming state: The far-end is ringing.
Check table 4.1 to see which types of soft key work in this state. Predefined soft keys will show on this state
first, press More soft key to show State-Based soft keys.
L1 1111 Louis
3202
Cancel
More
Press More Press More soft key to switch soft key page.
L1 1111 Louis
3202
SP1 3203
SP2
DND More


