23
Java GUI building with the AWT
| Date post: | 31-Dec-2015 |
| Category: |
Documents |
| Upload: | lisa-richardson |
| View: | 227 times |
| Download: | 0 times |

Java
GUI building with the AWT

AWT (Abstract Window Toolkit)
• Present in all Java implementations
• Described in (almost) every Java textbook
• Adequate for many applications
• Uses the controls defined by your OS– therefore it's "least common denominator"
• Difficult to build an attractive GUI• import java.awt.*;

Swing
• Requires Java 2 or a separate (huge) download
• More controls, and they are more flexible
• Gives a choice of “look and feel” packages
• Much easier to build an attractive GUI• import javax.swing.*; // Mac or PCimport com.sun.java.swing.*; // UNIX
Swing vs. AWT
• Swing is bigger and slower• Swing is more flexible and better looking• Swing and AWT are incompatible--you can use
either, but you can’t mix them• Learning the AWT is a good start on learning
Swing• AWT: Button b = new Button (“OK”);
Swing: Jbutton b = new Jbutton(“OK”);

To build a GUI...
• Make somewhere to display things--a Frame, a Window, or an Applet
• Create controls (buttons, text areas, etc.)
• Add your controls to your display area
• Arrange, or lay out, your controls
• Attach Listeners actions to your controls

Containers and Components
• The job of a Container is to hold and display Components. A Container is also a Component
• Some common subclasses of Component are Button, Checkbox, Label, Scrollbar, TextField, and TextArea
• Some Container subclasses are Panel (and Applet), Window, and Frame

An Applet is panel is a container
java.lang.Object | +----java.awt.Component | +----java.awt.Container | +----java.awt.Panel | +----java.applet.Applet
…so you can display things in it

To create an applet
• class MyApplet extends Applet { … }– this is the only way to make an Applet
• You can add components to the applet• It’s best to add components in init( )• You can paint directly on the applet, but…• …it’s better to paint on another component• Do all painting from paint(Graphics g)

Some types of components

Creating components
• Label lab = new Label (”Hi, Dave!");• Button but = new Button ("Click me!");• Checkbox toggle = new Checkbox (”toggle");• TextField txt = new TextField (”Initial text.", 20);
• Scrollbar scrolly = new Scrollbar (Scrollbar.HORIZONTAL, initialValue, bubbleSize, minValue, maxValue);

Adding components to the Applet
class MyApplet extends Applet { public void init () { add (lab); // same as this.add(lab) add (but); add (toggle); add (txt); add (scrolly);

Arranging components
• Every Container has a layout manager• The default layout for a Panel is FlowLayout• An Applet is a Panel• The default layout for a Applet is FlowLayout• You could set it explicitly with
setLayout (new FlowLayout( ));• You could change it to some other layout manager

FlowLayout
• Use add (component); to add to a component using a FlowLayout
• Components are added left-to-right
• If no room, a new row is started
• Exact layout depends on size of Applet
• Components are made as small as possible
• FlowLayout is convenient but often ugly
BorderLayout
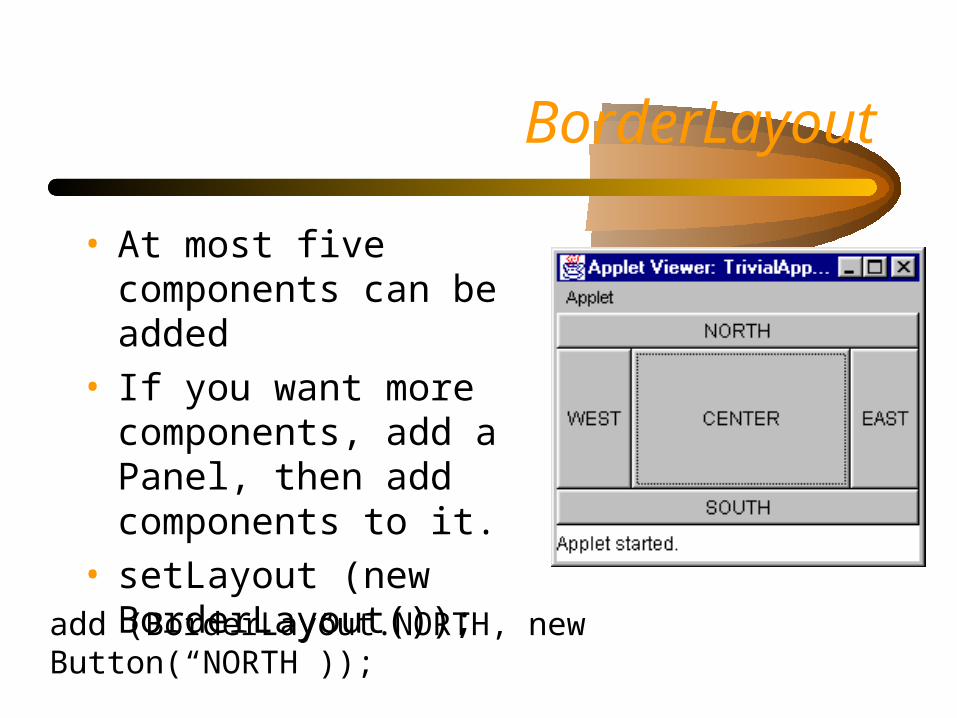
• At most five components can be added
• If you want more components, add a Panel, then add components to it.
• setLayout (new BorderLayout());
add (BorderLayout.NORTH, new Button(“NORTH”));

BorderLayout with five Buttons
public void init() { setLayout (new BorderLayout ()); add (BorderLayout.NORTH, new Button ("NORTH")); add (BorderLayout.SOUTH, new Button ("SOUTH")); add (BorderLayout.EAST, new Button ("EAST")); add (BorderLayout.WEST, new Button ("WEST")); add (BorderLayout.CENTER, new Button ("CENTER"));}
Using a Panel
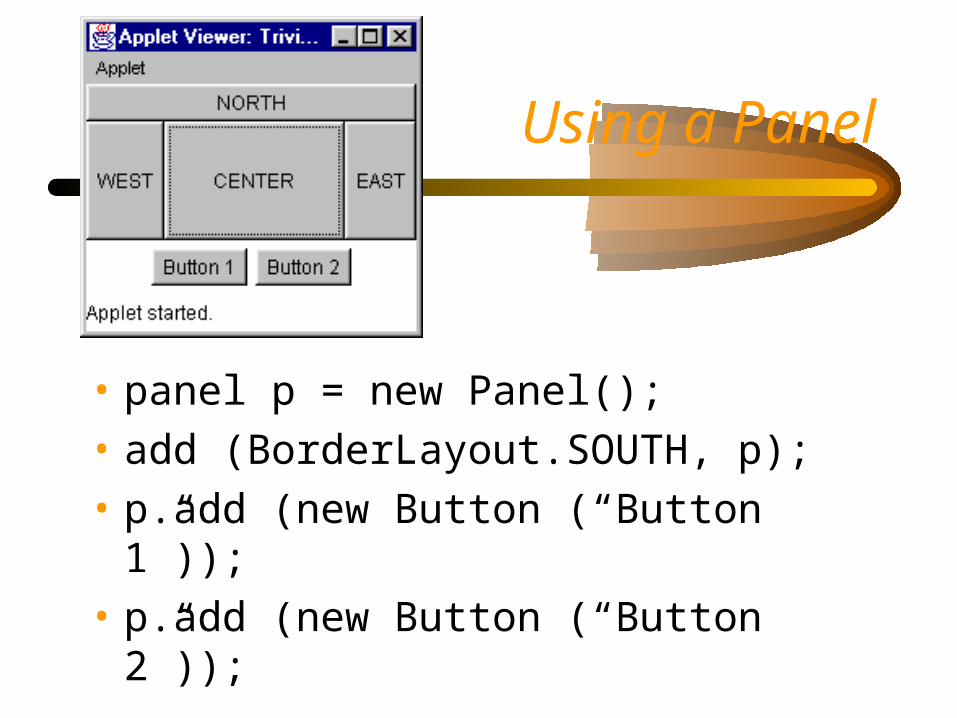
• panel p = new Panel();• add (BorderLayout.SOUTH, p);• p.add (new Button (“Button 1”));• p.add (new Button (“Button 2”));

Making components active
• Most components already appear to do something--buttons click, text appears
• To associate an action with a component, attach a listener to it
• Components send events, listeners listen for events
• Different components may send different events, and require different listeners

Listeners
• Listeners are interfaces, not classes
• class MyButtonListener implements ActionListener {
• An interface is a group of methods that must be supplied
• When you say implements, you are promising to supply those methods
Writing a Listener
• For a Button, you need an ActionListener• b1.addActionListener
(new MyButtonListener ( ));• An ActionListener must have an
actionPerformed( ) method
• public void actionPerformed(ActionEvent e) {…}

MyButtonListener
public void init () { ... b1.addActionListener (new MyButtonListener ());}
class MyButtonListener implements ActionListener { public void actionPerformed (ActionEvent e) { showStatus ("Ouch!"); }}

Listeners for TextFields
• An ActionListener listens for hitting the return key
• An ActionListener demandspublic void actionPerformed (ActionEvent e)
• use getText( ) to get the text
• A TextListener listens for any and all keys• A TextListener demands
public void textValueChanged(TextEvent e)

Summary I: Building a GUI
• Create an applet by extending Applet• Choose a layout manager (FlowLayout is
the default)
• Create more complex layouts by putting Panels in the Applet; each Panel can have its own layout manager
• Create other components and add them to whichever Panels you like

Summary II: Building a GUI
• For each active component, look up what kind of Listeners it can have
• Create (implement) the Listeners, typically one Listener per active component
• For each Listener you implement, supply the methods that it requires
• Finally, don't forget to supply the HTML


