JNCIAJuniper™ Networks Certified Internet Associate
Study Guide - Chapter 4
by Joseph M. Soricelliwith John L. Hammond, Galina Diker Pildush,Thomas E. Van Meter, and Todd M. Warble
This book was originally developed by Juniper Networks Inc. in conjunction with Sybex Inc. It is being offered in electronic format because the original book (ISBN: 0-7821-4071-8) is now out of print. Every effort has been made to remove the original publisher's name and references to the original bound book and its accompanying CD. The original paper book may still be available in used book stores or by contacting, John Wiley & Sons, Publishers. www.wiley.com.
This publication may be used in assisting students to prepare for a Juniper JNCIA exam but Juniper Networks Inc. cannot warrant that use of this publication will ensure passing the relevant exam.
List the main reasons to create and apply policies
�
Define the locations within a BGP configuration where a
policy may be applied
�
Identify the components of a route filter and the various
match types
�
Evaluate the outcome of a policy
In this chapter, we explore how you implement a basic routing policy in a Juniper Networks router. We first examine why you need a routing policy and when it would be appropriate to imple-
ment it. Then we see how to create policies and, finally, how to apply policies within the JUNOS software.
A routing policy is an integral part of any effective network. Without it, a network is subject to the rules of its Interior Gateway Protocol (IGP) and Border Gateway Protocol (BGP) config-uration. Using routing policies allows you to modify or ignore the default behavior of the rout-ing protocols. This gives you a significant amount of control over the routing behavior of the network. A complete understanding of how and when to use a routing policy is essential to run-ning an optimal network, so let’s start there.
What Is a Routing Policy?
Although it is tempting to jump right into configuring routing policies, we first need to understand why policies are needed and how they are implemented. In this section, we review the purpose of routing tables, the selection process for active routes, and reasons for modifying the selection pro-cess. After that, we consider how routing policies affect the router’s view of the network.
The Routing Table
If you think back to
Routing 101
, you will recall that a router is a Layer 3 device that utilizes IP addresses to determine the best path to an end destination. The router works with the routing protocols to learn about the network’s destinations. For the most part, the end goal of the rout-ing protocols is the same—to learn about all possible routes and to send those routes to all pos-sible neighbors. How this is actually accomplished varies, but the general goal remains the same.
A router stores all the routes (and paths) that it learns about in a routing table. The router then references this table to make forwarding decisions. As you saw in Chapter 3, “Protocol-Independent Routing,” a Juniper Networks router uses
preference
as a selection process to determine the active route for each destination. Once the network installs this route in the for-warding table, it can simply forward all user packets out of the proper interface.
The active route plays another important role. The routing protocols will send the active routes in the routing table to all their neighbors. Through this learn-and-send process, each router is able to build its own map of the entire network. In a fully operational and converged network, all routers should see a valid path to any destination. This simple process is highly effective. In some cases, it works extremely well. So why change it?
What Is a Routing Policy?
151
Why Modify the Routing Table?
Using the default behavior of routing protocols is certainly enough to maintain connectivity in a simple network, but what happens when the network grows in complexity? A single protocol often cannot maintain enough information to ensure that all routers are utilizing the best paths available. The key word in the previous sentence is
best
. In short, different protocols define the best path differently. Making sure that the best path is taken, even in a small network, can be a very tricky proposition.
The JUNOS software routing policy framework is your tool to guarantee that the best path in your network is the one you want to use. It can override and alter the selections made by the routing protocols and inject new information into the network. Let’s see how this might work.
Modifying the Default Protocol Route Selection
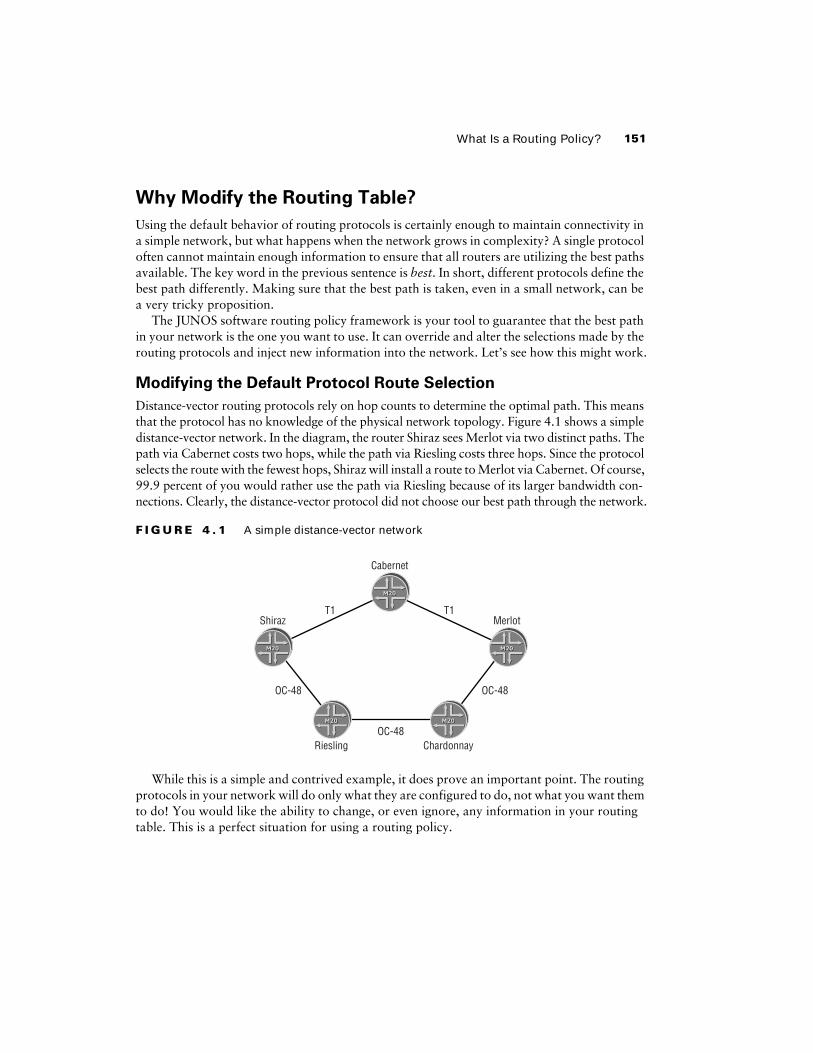
Distance-vector routing protocols rely on hop counts to determine the optimal path. This means that the protocol has no knowledge of the physical network topology. Figure 4.1 shows a simple distance-vector network. In the diagram, the router Shiraz sees Merlot via two distinct paths. The path via Cabernet costs two hops, while the path via Riesling costs three hops. Since the protocol selects the route with the fewest hops, Shiraz will install a route to Merlot via Cabernet. Of course, 99.9 percent of you would rather use the path via Riesling because of its larger bandwidth con-nections. Clearly, the distance-vector protocol did not choose our best path through the network.
F I G U R E 4 . 1
A simple distance-vector network
While this is a simple and contrived example, it does prove an important point. The routing protocols in your network will do only what they are configured to do, not what you want them to do! You would like the ability to change, or even ignore, any information in your routing table. This is a perfect situation for using a routing policy.
OC-48 OC-48
OC-48
T1 T1
Cabernet
Shiraz Merlot
ChardonnayRiesling
152
Chapter 4 �
Routing Policy
Redistributing Routes
You can also use routing policies to redistribute routes from one protocol into another. Remem-ber, routing protocols advertise only routes that have been learned by that specific protocol. To move routes from one protocol into another, a policy is again required.
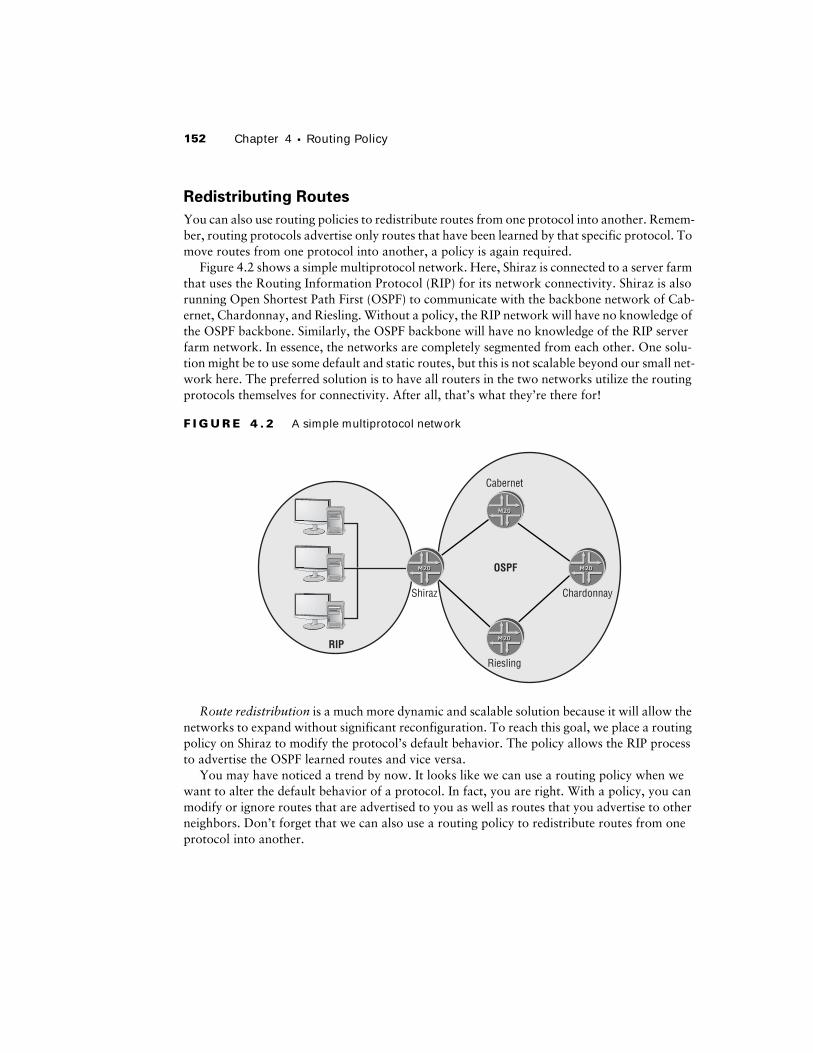
Figure 4.2 shows a simple multiprotocol network. Here, Shiraz is connected to a server farm that uses the Routing Information Protocol (RIP) for its network connectivity. Shiraz is also running Open Shortest Path First (OSPF) to communicate with the backbone network of Cab-ernet, Chardonnay, and Riesling. Without a policy, the RIP network will have no knowledge of the OSPF backbone. Similarly, the OSPF backbone will have no knowledge of the RIP server farm network. In essence, the networks are completely segmented from each other. One solu-tion might be to use some default and static routes, but this is not scalable beyond our small net-work here. The preferred solution is to have all routers in the two networks utilize the routing protocols themselves for connectivity. After all, that’s what they’re there for!
F I G U R E 4 . 2
A simple multiprotocol network
Route redistribution
is a much more dynamic and scalable solution because it will allow the networks to expand without significant reconfiguration. To reach this goal, we place a routing policy on Shiraz to modify the protocol’s default behavior. The policy allows the RIP process to advertise the OSPF learned routes and vice versa.
You may have noticed a trend by now. It looks like we can use a routing policy when we want to alter the default behavior of a protocol. In fact, you are right. With a policy, you can modify or ignore routes that are advertised to you as well as routes that you advertise to other neighbors. Don’t forget that we can also use a routing policy to redistribute routes from one protocol into another.
Shiraz Chardonnay
Cabernet
Riesling
OSPF
RIP
Forming a Policy
153
Changing the Map
When you modify or ignore (suppress) the routes that are sent and received by the local router, you change the network map. It is extremely important that you understand which router’s map you are changing.
By changing a route’s properties prior to installing it into your routing table, you have mod-ified how the local router perceives the network. If you change a route’s properties prior to send-ing it to your neighbors, you will be modifying the remote router’s perception of the network. So the question becomes, whose behavior do you want to modify? How might you apply a rout-ing policy to accomplish that?
The application of a routing policy is always performed from the perspective of the routing table. Routes being placed into the routing table are said to be “inbound.” Routes being extracted from the routing table are said to be “outbound.” When your goal is to modify your view of the network, you need to apply a policy to all inbound routes. If your goal is to modify your neigh-bor’s view of the network, you apply a policy to all outbound routes. In the section “Applying Routing Policies” later in this chapter, you’ll see how to accomplish this within the JUNOS soft-ware. For now, it is important to keep the directionality of inbound and outbound very distinct.
Forming a Policy
There are two main steps to forming a routing policy—writing the policy and applying the pol-icy. The focus for this section will be on writing your policies, including some best practices. We examine the various components of a routing policy and then discuss identifying routes of inter-est to you. Once you’ve identified the “interesting” routes, you need to do something with them. This is the job of an action. Finally, we look at the default policy already in place for each rout-ing protocol.
Composing a Routing Policy
It probably goes without saying that before you compose your routing policy, you had better know what you are going to do with it. That concept is doubly important within the JUNOS software. A specific set of rules governs the processing of policies and how they are evaluated on the router. This evaluation process might lead you to decide to segment your policies, so let’s take a look at that approach as well. Let’s also discuss some industry best practices.
Policy Processing
All active routes in the routing table are evaluated individually against all applied routing pol-icies. The policies are evaluated in order of application in a daisy-chain fashion called a
policy chain
. A route will proceed through each policy until a
match
is found for that route. In addi-tion, the matching policy must also contain a
terminating action
.
154
Chapter 4 �
Routing Policy
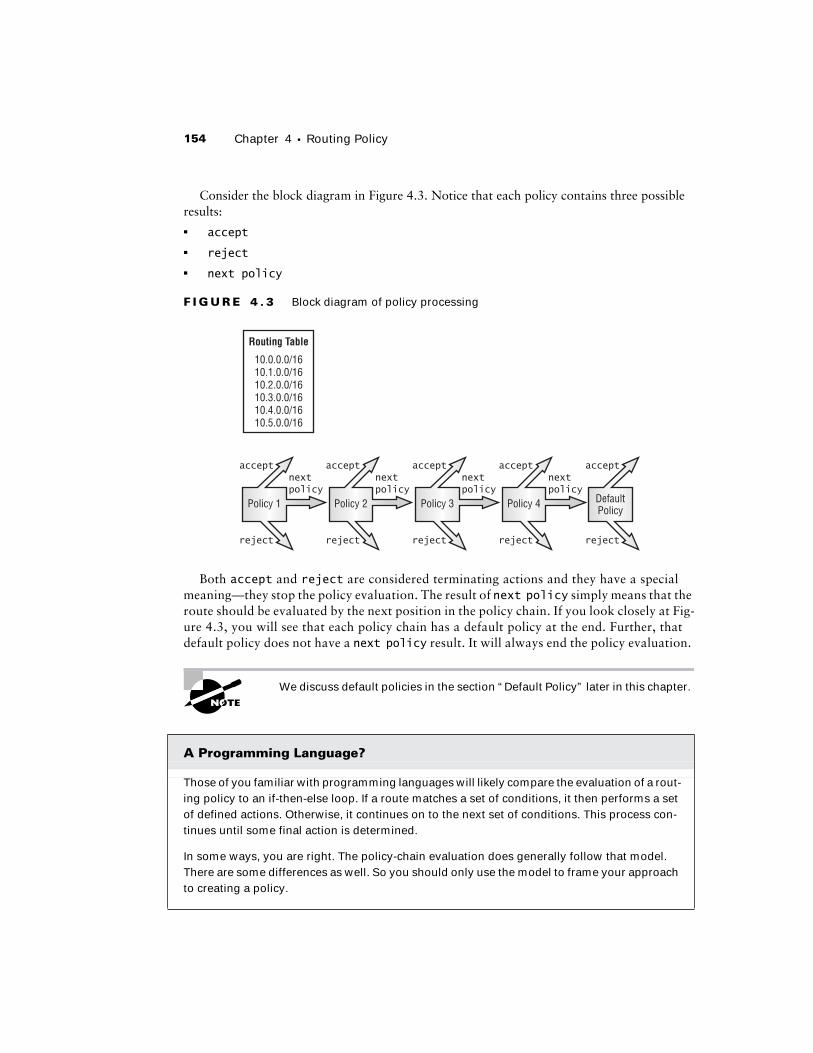
Consider the block diagram in Figure 4.3. Notice that each policy contains three possible results:�
accept
�
reject
�
next policy
F I G U R E 4 . 3
Block diagram of policy processing
Both
accept
and
reject
are considered terminating actions and they have a special meaning—they stop the policy evaluation. The result of
next policy
simply means that the route should be evaluated by the next position in the policy chain. If you look closely at Fig-ure 4.3, you will see that each policy chain has a default policy at the end. Further, that default policy does not have a
next policy
result. It will always end the policy evaluation.
We discuss default policies in the section “Default Policy” later in this chapter.
A Programming Language?
Those of you familiar with programming languages will likely compare the evaluation of a rout-ing policy to an if-then-else loop. If a route matches a set of conditions, it then performs a set of defined actions. Otherwise, it continues on to the next set of conditions. This process con-tinues until some final action is determined.
In some ways, you are right. The policy-chain evaluation does generally follow that model. There are some differences as well. So you should only use the model to frame your approach to creating a policy.
Using Figure 4.3 as a guide, the 10.0.0.0 /16 route is first evaluated against Policy 1. If the route doesn’t match Policy 1, it moves to Policy 2 and is evaluated there. A nonmatch within Policy 2 causes the route to proceed to Policy 3. This process continues until the route encoun-ters a terminating action.
The terminating results of
accept
and
reject
are represented by the JUNOS software key-words of
accept
and
reject
. When a route matches a policy with an action of
accept
, the route is used. Should a route match a policy with an action of
reject
, the route is ignored. By using this simple guide, you can easily determine which routes will be included in a routing table and which ones will be omitted.
Routing policies are constructed in a very systematic method to allow for maximum scal-ability and flexibility. A basic routing policy looks like this:
policy-options {
policy-statement
policy-name
{
from {
match-conditions
;
}
then {
actions
;
}
}
}
Notice that the policy is broken into the two sections we have been discussing. There are match conditions and there are actions. What you will not see is the implied result of
next policy
. By default, any route that does not fit the match conditions will proceed to the next applied policy. We discuss the specific match conditions and actions in the “Match Conditions” and “Actions” sections later in this chapter.
The JUNOS software policy configuration allows you to customize the names of your policies. This makes it easier to identify their purpose at a later time. This naming structure provides for some creativity on your part. While you can call your policy anything you want, it is recommended that you define the policy name so its intended use is self-evident. For example, a policy designed to tag routes from Customer A might be named
tag-customerA
.
The naming of policies and terms within the JUNOS software are case sensi-tive in nature. For example,
policy-a
is different from
Policy-A
, which is dif-
ferent from
PoLiCy-A
.
Policy Segmentation
As the complexity of your network grows, so will the number of your routing policies. A policy chain can be applied in numerous ways, but the order of its evaluation is always the same. If you want to use multiple policies to accomplish your goal, it is critical that you place them in the
156
Chapter 4 �
Routing Policy
correct order. You can fix an out-of-order policy chain by using the
insert
command, which we talk about later in the “Useful JUNOS software Commands” section.
The flexibility of creating multiple specific policies and then applying those policies in a policy chain brings with it an inherent complexity. You must be very conscious of the order in which your policies are applied. You could eas-ily apply a routing policy that rejects an important route prior to a policy that is supposed to accept it. Once a route is rejected via a terminating action, it is
not evaluated by any further policies.
You can simplify a complex policy chain somewhat by using a single routing policy to accomplish all of your goals. This means that your complex policy chain is now turned into a complex single policy with multiple, distinct sections. These policy sections are called
terms
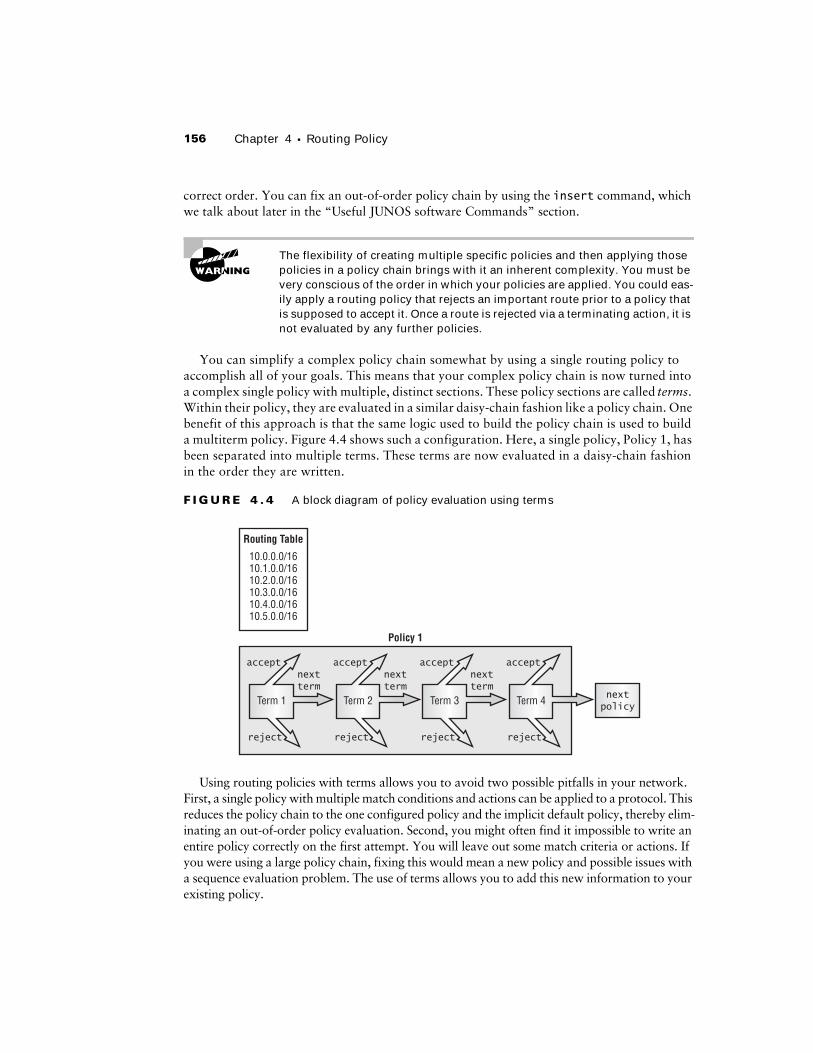
. Within their policy, they are evaluated in a similar daisy-chain fashion like a policy chain. One benefit of this approach is that the same logic used to build the policy chain is used to build a multiterm policy. Figure 4.4 shows such a configuration. Here, a single policy, Policy 1, has been separated into multiple terms. These terms are now evaluated in a daisy-chain fashion in the order they are written.
F I G U R E 4 . 4
A block diagram of policy evaluation using terms
Using routing policies with terms allows you to avoid two possible pitfalls in your network. First, a single policy with multiple match conditions and actions can be applied to a protocol. This reduces the policy chain to the one configured policy and the implicit default policy, thereby elim-inating an out-of-order policy evaluation. Second, you might often find it impossible to write an entire policy correctly on the first attempt. You will leave out some match criteria or actions. If you were using a large policy chain, fixing this would mean a new policy and possible issues with a sequence evaluation problem. The use of terms allows you to add this new information to your existing policy.
A multiterm policy looks similar to the following:
policy-options {
policy-statement
policy-name
{
term
term-name
{
from {
match-conditions
;
}
then {
actions
;
}
}
term term-name {
from {
match-conditions;
}
then {
actions;
}
}
}
}
Like the policies themselves, terms let you define a name to identify its purpose. Again, we highly recommend that the name you give the term be as descriptive as possible. This makes troubleshooting your configuration much easier.
A routing policy does not require the use of terms, but omitting them can cause you some heartburn later. The absence of a term in a policy means that the policy can contain only one set of match conditions and actions. If you ever want to add other match/action pairs in the future, you would need to delete and re-create the policy from scratch. If you create the policy using terms to begin with, however, adding a new set of conditions and actions is quite easy. The one thing to keep in mind is that new terms are always added to the end of the existing policy. If this is not the best location, you have the ability to move them within the policy by using the insert command. Again, you can find more information about the insert command in the “Useful JUNOS software Commands” section later in this chapter.
Now that you have seen the evaluation order of policy terms and policy chains, let’s examine the details of an individual term. The logical place to start is with the match conditions that qualify a route for a policy action.
Match Conditions
To allow you to properly identify active routes in the routing table, the JUNOS software provides a number of match conditions for routing policies. You can identify these conditions within the
158 Chapter 4 � Routing Policy
policy by using the keyword from or to. We first examine the differences between from and to when using a match condition. Then we look at how to match on specific routes using route filters.
It is worth emphasizing that a routing policy in the JUNOS software will eval-uate only active routes in the routing table. All inactive routes located in the table will not be evaluated by a policy. We explain active versus nonactive routes in Chapter 3.
from and to
The match conditions available within the JUNOS software provide numerous ways to identify routes of interest. All of the criteria will be defined using either the from or the to syntax.
Table 4.1 details some of the possible match criteria that you can use in a routing policy. Spe-cifically, they are items that are used with the from keyword. One useful match criterion is the neighbor address. Matching on the address of a neighbor is fairly intuitive. When used with the from keyword, routes that are sent by that address will match the policy. Look at this policy:
policy-options {
policy-statement bgp-import {
term coming-from-ISPA {
from neighbor 2.2.2.2;
then reject;
}
}
}
The term coming-from-ISPA specifies that the routes being received from the BGP neighbor of 2.2.2.2 should match this policy.
The protocol match condition is another widely used match criterion. This criterion essentially means, “How did the route get placed into the routing table?” Some of the options for the protocol match condition are listed in Table 4.1. While it is fairly obvious that matching on protocol ospf will locate all OSPF routes, using the protocol aggregate match criterion may not initially make sense. After all, aggregate routes are not found using a routing protocol—they are locally configured on the router. Just keep in mind that all routes in the routing table are assigned a protocol, as we dis-cussed in Chapter 3. The protocol match condition looks for those assigned values only.
Table 4.1 lists a number of the match conditions used in routing policies, but by no means is it a complete list. Please consult the JUNOS software documentation for the complete list of all policy match conditions.
Forming a Policy 159
You can also use the level match criterion with the to keyword. This means that only the routes being sent to that level will match. Consider the following section of code:
policy-options {
policy-statement isis-export {
term sending-to-neighborA {
T A B L E 4 . 1 from Match Conditions
Match Condition Description
area area-id Used in an export policy to identify routes learned from a particular area. (OSPF only)
as-path name Identifies routes with the named AS Path. (BGP only)
community [names] Identifies routes with the named community assigned. (BGP only)
level level Used in an export policy to identify routes that are coming from a particular level. (IS-IS only)
local-preference value Identifies the Local Preference value of BGP routes. (BGP only)
metric metric Identifies routes with the specified metric. For BGP, the metric action identifies the MED route attribute.
neighbor address Identifies the neighbor from which a route was learned.
next-hop address Identifies routes with the specified physical next-hop address. For BGP routes, it identifies the BGP protocol next hop.
origin value Identifies the BGP Origin attribute. (BGP only)
preference preference Identifies routes with the specified preference.
protocol protocol Identifies how the router learned the route. Possible options include: aggregate, bgp, direct, isis, ospf, rip, or static.
rib routing-table Identifies the routing table where routes are located.
160 Chapter 4 � Routing Policy
to level 2;
then accept;
}
}
}
The term sending-to-neighborA matches only on routes being sent to the ISIS level 2.The to keyword has far fewer match conditions (as seen in Table 4.2) associated with it than
does the from keyword. As such, it is not used very often in routing policies.
As you examine the various match criteria in the JUNOS software, it might appear that a number of them are associated with BGP routes. In fact, you would be correct to think so. This is due to the large amount of information contained within a BGP route. For example, a few of the BGP route properties include Local Preference, AS Path, Origin, and MED. In addition, you can tag BGP routes with a user-defined value called a community. By comparison, OSPF attributes only include metric and a user-defined tag field. We don’t want to imply here, how-ever, that a routing policy is not effective on an IGP—it is. We are simply saying that more match criteria is available for BGP.
Defining Multiple Criteria
As you build your policies, you may find it necessary to identify your “interesting” routes by using more than a single property. You accomplish this by specifying multiple match conditions within a policy term. This imposes a logical AND on your candidate route. It will match the pol-icy term only if it also matches all of the specified conditions.
T A B L E 4 . 2 to Match Conditions
Match Condition Description
level level Used in an export policy to identify routes that are going to a particular level. (IS-IS only)
rib routing-table Identifies the routing table where candidate routes will be placed.
Forming a Policy 161
As an example, let’s say that you wanted to accept all BGP routes from neighbor 1.1.1.1 only if the routes have a MED value of 10. You could configure a policy that looks like the following:
policy-options {
policy-statement bgp-import {
term coming-from-neighborA {
from {
neighbor 1.1.1.1;
metric 10;
}
then accept;
}
term deny-other-neighborA {
from neighbor 1.1.1.1;
then reject;
}
}
}
The term coming-from-neighborA will match only routes that have been advertised from neighbor 1.1.1.1 and that also have a MED value of 10. These routes will be accepted into the routing table. To ensure that no other routes from that neighbor are accepted, you create a sec-ond term called deny-other-neighborA. This term looks for all other routes from neighbor 1.1.1.1 and rejects them. We use this “extra” term to avoid the processing of the default BGP policy that is implied at the end of the policy chain. To learn the implication of the default rout-ing policies, see the section “Default Policy” later in this chapter.
Route Filters
The match criterion that we’ve looked at so far has selected groups of routes based on some general attributes. What happens if you know the exact route that you want? The way to match against a particular route in a policy is to use a route filter. To truly understand the operation of a route filter, you need to be familiar with a device used for binary number matching known as a radix tree (sometimes called a radix trie). In the sections that follow, we examine the IP route relationship, perform route lookups, and use a radix tree and route fil-ters to match IP routes.
Radix Tree
Binary math is a necessary evil for computers since they can only understand voltage (a value of 1) or no voltage (a value of 0). This on/off concept leads us into a binary notation. A radix tree uses binary lookups to identify IP addresses (routes). Remember that an IP address is really a 32-bit number represented in a dotted decimal format for easy comprehension by humans. These 8-bit groupings can each have a value between 0 and 255. A radix tree can be a graphical representation of these binary numbers.
162 Chapter 4 � Routing Policy
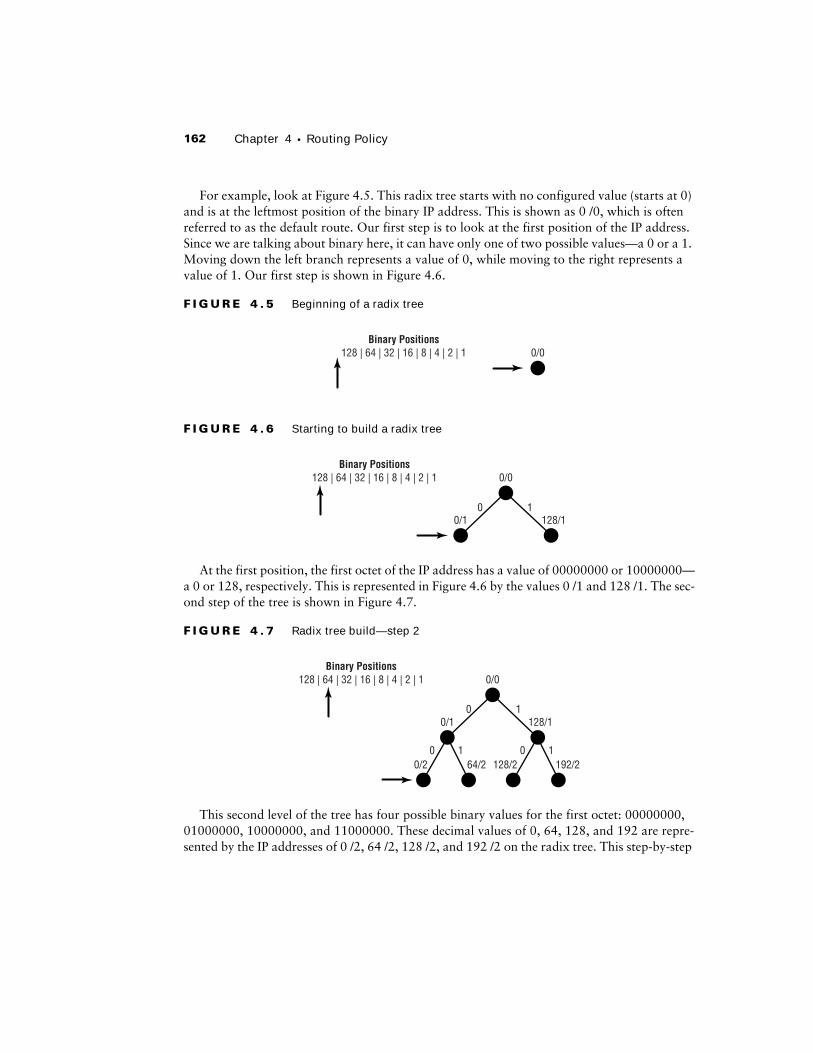
For example, look at Figure 4.5. This radix tree starts with no configured value (starts at 0) and is at the leftmost position of the binary IP address. This is shown as 0 /0, which is often referred to as the default route. Our first step is to look at the first position of the IP address. Since we are talking about binary here, it can have only one of two possible values—a 0 or a 1. Moving down the left branch represents a value of 0, while moving to the right represents a value of 1. Our first step is shown in Figure 4.6.
F I G U R E 4 . 5 Beginning of a radix tree
F I G U R E 4 . 6 Starting to build a radix tree
At the first position, the first octet of the IP address has a value of 00000000 or 10000000—a 0 or 128, respectively. This is represented in Figure 4.6 by the values 0 /1 and 128 /1. The sec-ond step of the tree is shown in Figure 4.7.
F I G U R E 4 . 7 Radix tree build—step 2
This second level of the tree has four possible binary values for the first octet: 00000000, 01000000, 10000000, and 11000000. These decimal values of 0, 64, 128, and 192 are repre-sented by the IP addresses of 0 /2, 64 /2, 128 /2, and 192 /2 on the radix tree. This step-by-step
process continues on for 33 total levels. In the end, we effectively represent every possible IP address.
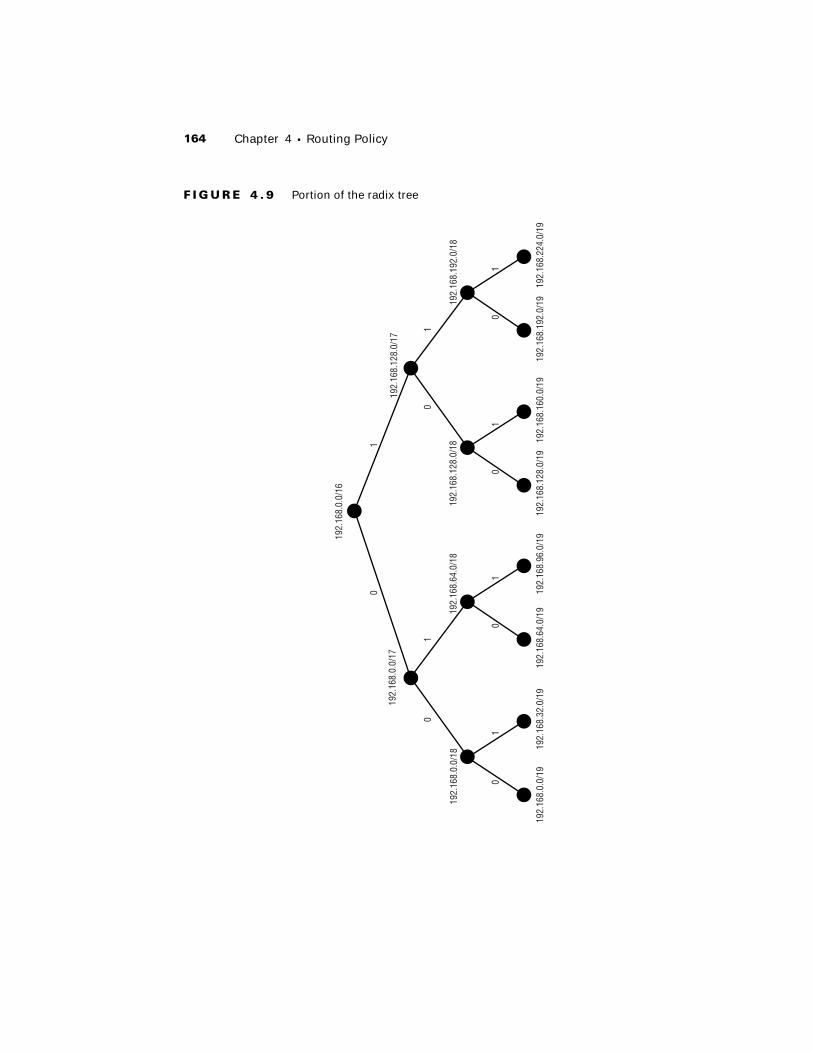
The radix tree structure is also very helpful when locating a group of routes that all share the same most significant bits. Figure 4.8 shows the point in the radix tree that represents the 192.168.0.0 /16 network. All of the routes that are more specific than 192.168.0.0 /16 are shown in the highlighted section.
F I G U R E 4 . 8 Locating a group of routes
If we now focus in on the specific structure of the radix tree that starts at 192.168.0.0 /16, then we’ll see something similar to Figure 4.9.
While the figure stops at the 19th level of the tree, please be aware that it actu-ally continues down to the 32nd level. This shortened version, however, will suffice for our discussion of route filters.
JUNOS software Syntax
To find a specific route, or a group of routes, within a routing policy you utilize the route filter match condition. The route filter syntax within the JUNOS software looks similar to the following:
The prefix and prefix-length variables are simply the reference point on the radix tree where you would like to start finding a route. One of six possible match type keywords describes the additional routes on the radix tree that will match the route filter. If any optional actions are defined, they will be processed immediately, allowing the policy to skip actions configured using the then statement. (See the section “Actions” later in this chapter for more on policy actions.)
192.168.0.0 /16
164 Chapter 4 � Routing Policy
F I G U R E 4 . 9 Portion of the radix tree
01
01
01
01
01
01
01
192.
168.
0.0/
16
192.
168.
0.0/
1719
2.16
8.12
8.0/
17
192.
168.
64.0
/18
192.
168.
128.
0/18
192.
168.
192.
0/18
192.
168.
0.0/
18
192.
168.
0.0/
1919
2.16
8.32
.0/1
919
2.16
8.64
.0/1
919
2.16
8.96
.0/1
919
2.16
8.12
8.0/
1919
2.16
8.16
0.0/
1919
2.16
8.19
2.0/
1919
2.16
8.22
4.0/
19
Forming a Policy 165
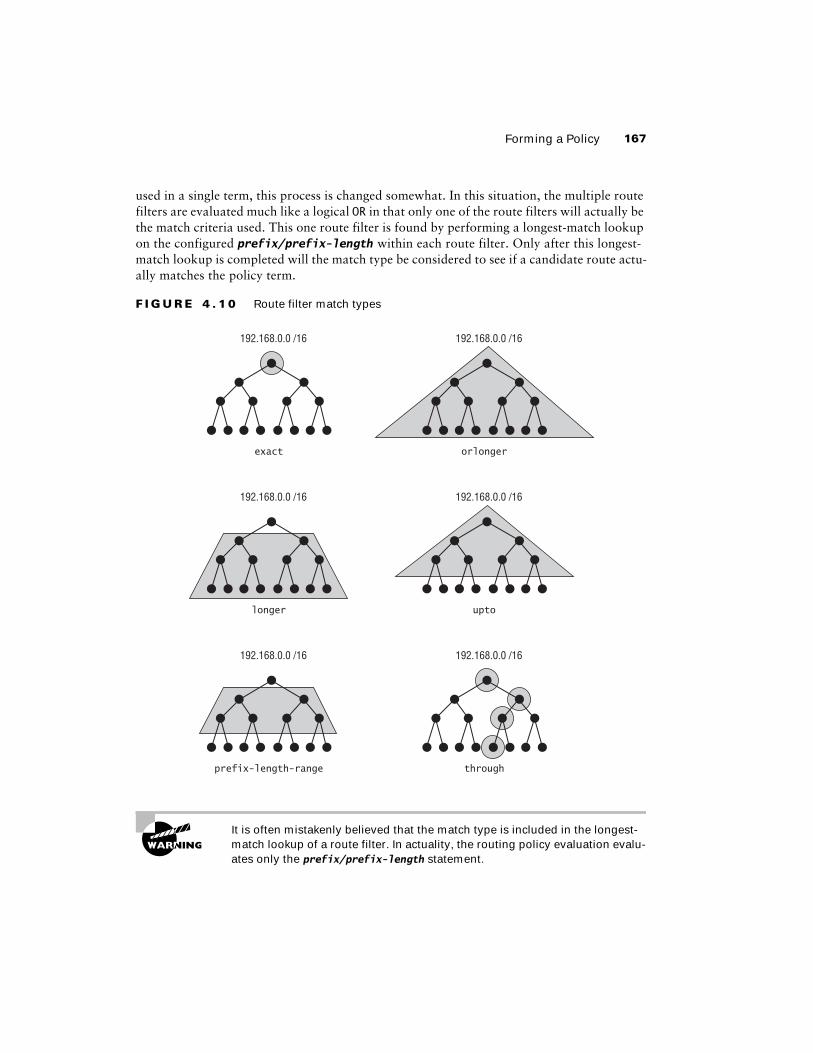
Each of the route filter match types locates a different set of routes on the radix tree. Let’s take a look at each of the match types, along with a sample syntax output:
exact The exact match type will locate only the route at the specified point in the tree.
The following route filter matches only the 192.168.0.0 /16 route—no other routes will be selected:
route-filter 192.168.0.0/16 exact;
orlonger The orlonger match type will also match the route specified in the route filter. In addition, it will match all routes more specific than the specified route. This more specific match will continue until the bottom of the radix tree (the 32nd level) is reached. This match type is similar to a greater-than-or-equals-to operation in mathematics.
The following route filter matches the 192.168.0.0 /16 route and all routes below it in the radix tree:
route-filter 192.168.0.0/16 orlonger;
longer The longer match type is similar to the orlonger match type. The difference between them is that longer will only match routes that are more specific than the specified route. This match type is analogous to the mathematical greater-than operation.
The following route filter matches only the routes below the 192.168.0.0 /16 route in the radix tree starting with 192.168.0.0 /17 and 192.168.128.0 /17:
route-filter 192.168.0.0/16 longer;
upto The upto match type provides the router with a starting prefix and an ending prefix length. The match type locates the route specified in the route filter and starts to match all routes more specific than the specified route. The route matching stops when it reaches the level in the radix tree configured in the route filter. This behavior mimics the orlonger function except now we’re specifying a bottom boundary in the tree lookup instead of letting it continue to the 32nd level of the tree.
The following route filter matches the 192.168.0.0 /16 route. It then starts matching all of the more specific routes until it reaches the 18th level of the tree and matches those routes. In this way, upto is an inclusive match type. If we look back at Figure 4.9, we’ll see that this route filter locates seven total routes.
route-filter 192.168.0.0/16 upto /18;
prefix-length-range Much like the relationship between orlonger and longer, the prefix-length-range and the upto match types are very similar. Recall that upto allows you to configure a bottom boundary in the radix tree lookup. prefix-length-range also provides this capability but adds to it the ability to specify a starting boundary in the radix tree as well. It is important to remember that all routes located by this match type will still share the same more significant bits as configured in the prefix/prefix-length portion of the route filter.
166 Chapter 4 � Routing Policy
The following route filter starts looking for routes at the 192.168.0.0 /16 level of the radix tree. It starts to match routes at the 17th level of the tree and stops matching routes at the 18th level. Like upto, this is also an inclusive match type. Using Figure 4.9 as a reference again, we’ll see that this route filter locates six total routes.
through The through match type is very different from the others we’ve talked about. The configuration for this match type requires you to specify both a starting route and an ending route. The route filter matches both of these routes exactly and then further locates only the routes on the radix tree that connect the two.
The following route filter matches the 192.168.0.0 /16 and 192.168.128.0 /19 routes. It also matches the 192.168.128.0 /17 and 192.168.128.0 /18 routes because they are the routes between the start and end points. A quick look back at Figure 4.9 can verify this.
route-filter 192.168.0.0/16 through 192.168.128.0/19;
While it’s nice to talk about these match types in English, the descriptions can be very con-fusing. Figure 4.10 shows us the match types in a graphical format. This often helps to solidify the concept in our minds.
Using Multiple Route Filters
In the “from and to” section earlier in this chapter, we saw that the application of multiple match conditions in a term results in a logical AND operation. When multiple route filters are
Route Aggregation in BGP
The longer route filter match type is useful when aggregating route information in BGP. Let’s say that the local router is receiving the routes 192.168.1.0 /24, 192.168.2.0 /24, and 192.168.3.0 /24. You have created a local aggregate route of 192.168.0.0 /22 to summarize these routes. The aggregate route is being exported to your upstream BGP peer by an export policy using the from protocol aggregate match criteria. Unfortunately for you, the three more specific routes are also still being sent to that peer.
The default BGP policy (discussed in the “Default Policy” section later in this chapter) will match all BGP routes in the routing table and export them to all peers. This is not what you wanted to do admin-istratively, but the defaults get in your way. Sounds like a job for a routing policy! Specifically, you need to match on all routes that are more specific than your aggregate route without also matching on your aggregate. One effective way to accomplish this is to add a term to the current policy that rejects routes that match route-filter 192.168.0.0/22 longer. The new term should be placed prior to the term that exports the aggregate route to effectively filter the more specific routes.
Forming a Policy 167
used in a single term, this process is changed somewhat. In this situation, the multiple route filters are evaluated much like a logical OR in that only one of the route filters will actually be the match criteria used. This one route filter is found by performing a longest-match lookup on the configured prefix/prefix-length within each route filter. Only after this longest-match lookup is completed will the match type be considered to see if a candidate route actu-ally matches the policy term.
F I G U R E 4 . 1 0 Route filter match types
It is often mistakenly believed that the match type is included in the longest-match lookup of a route filter. In actuality, the routing policy evaluation evalu-ates only the prefix/prefix-length statement.
192.168.0.0 /16
exact
192.168.0.0 /16
orlonger
192.168.0.0 /16
longer
192.168.0.0 /16
upto
192.168.0.0 /16
prefix-length-range
192.168.0.0 /16
through
168 Chapter 4 � Routing Policy
Let’s investigate this concept a little more by looking at the following policy:
policy-options {
policy-statement bgp-export {
term coming-from-neighborA {
from {
route-filter 192.168.0.0/16 orlonger;
route-filter 192.168.0.0/24 exact;
}
then accept;
}
}
}
When evaluating the 192.168.0.128 /25 route against this policy, we first perform our longest-match lookup on the configured route filters. The 192.168.0.0 /16 route filter and our candidate route share only the first 16 bits in common while the 192.168.0.0 /24 route filter shares 24 bits in common with our candidate route. Because 24 bits is clearly greater than 16, the second configured route filter will be the one we use as a match criterion for this term. Now it’s time to worry about the match type. The 192.168.0.0 /24 route filter specifies the exact match type and our candidate route of 192.168.0.128 /25 is not an exact match. There-fore, 192.168.0.128 /25 does not match the criterion in the policy term, and it will be evalu-ated by the next policy in the policy chain. It is not evaluated against the first route filter in the policy.
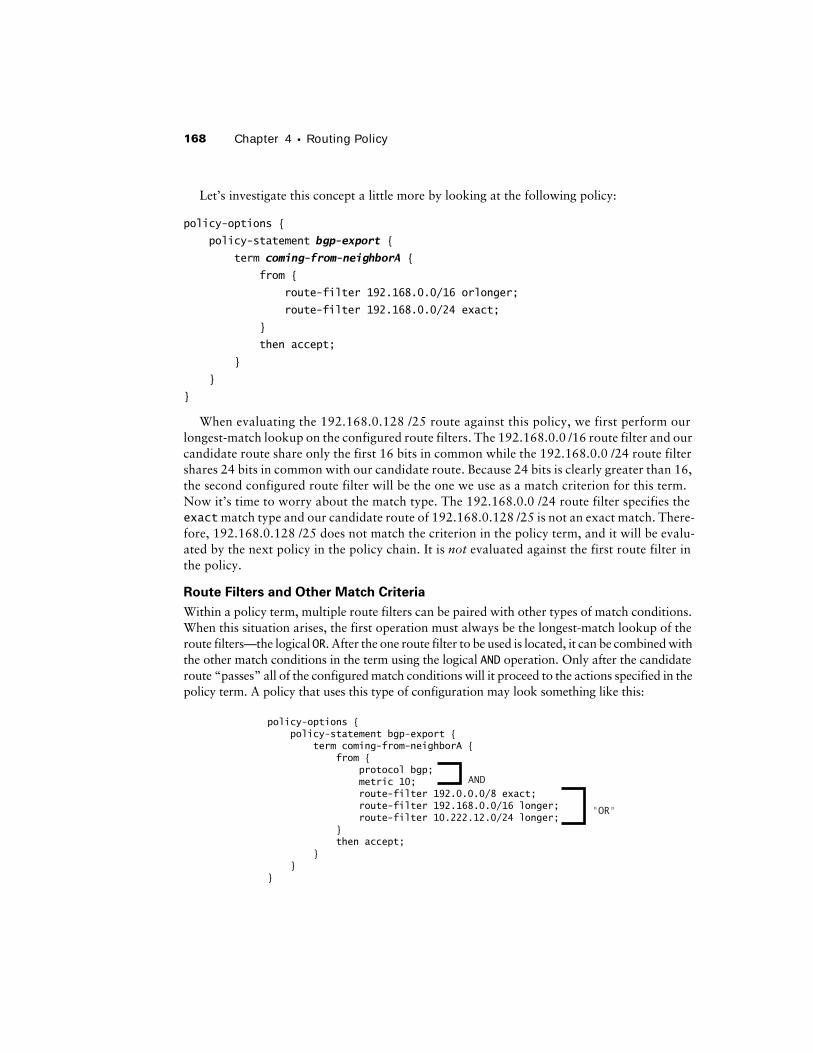
Route Filters and Other Match Criteria
Within a policy term, multiple route filters can be paired with other types of match conditions. When this situation arises, the first operation must always be the longest-match lookup of the route filters—the logical OR. After the one route filter to be used is located, it can be combined with the other match conditions in the term using the logical AND operation. Only after the candidate route “passes” all of the configured match conditions will it proceed to the actions specified in the policy term. A policy that uses this type of configuration may look something like this:
policy-options { policy-statement bgp-export { term coming-from-neighborA { from { protocol bgp; metric 10; route-filter 192.0.0.0/8 exact; route-filter 192.168.0.0/16 longer; route-filter 10.222.12.0/24 longer; } then accept; } }}
AND
"OR"
Forming a Policy 169
Absence of Match Criteria
Up to this point, we’ve talked about a lot of different match criteria that we can use in a policy term. All of these configuration options are, however, completely optional in their usage. You can configure a policy without either a from or a to match condition. Take this section of code:
policy-options {
policy-statement ibgp-export {
term accept-all-routes {
then accept;
}
}
}
When no match criteria are used, every active route in the routing table will match the policy. In other words, the absence of match criteria means that all routes match. All routes then take the configured actions of the policy term. In the case of this particular policy, all routes would be accepted by the policy.
Finding routes in the routing table is only the first step in using a routing policy. After they are located, we must then decide what to actually do with them. This is the job of a policy action.
Actions
You’ve seen how to easily identify routes from the routing table using the JUNOS software match criteria. We now need to explore further the options that are available in the then por-tion of a policy for performing some sort of action on a candidate route. We first review the terminating actions before looking at using flow control within the policy evaluation. We then discuss how to modify the properties of our candidate route.
Terminating Actions
For the sake of completeness, let’s take another look at the terminating actions of accept and reject. We first talked about these actions in the “Policy Processing” section earlier in this chapter. As we mentioned, the presence of a terminating action within a policy term will halt the evaluation of the policy chain. In addition, the terminating actions affect whether the rout-ing information is used.
When a candidate route matches the criterion of an inbound policy term and the action of accept has been configured, that route is placed into the routing table. The accept action used in an outbound policy term means that the candidate route is advertised out of the routing table.
The function of the reject action is quite the opposite. An inbound policy term match with an action of reject does not place the route into the routing table. Likewise, the out-bound action of reject does not advertise the route out of the routing table.
170 Chapter 4 � Routing Policy
Flow Control
Instead of stopping the evaluation of a policy chain via a terminating action, you have the ability to alter the evaluation process. This is accomplished with a flow control action of next term or next policy. These actions allow a candidate route to break out of the normal daisy-chain policy evaluation. Look at this policy:
policy-options {
policy-statement bgp-import {
term coming-from-neighborA {
from {
neighbor 1.1.1.1;
metric 10;
}
then next policy;
}
term deny-other-neighborA {
from neighbor 1.1.1.1;
then reject;
}
}
}
Routes arriving from the BGP neighbor of 1.1.1.1 that also have a MED of 10 will match the first policy term of coming-from-neighborA. The configured action of next policy directs the candidate routes to the next policy in the policy chain without any other immediate actions taken. All other routes from neighbor 1.1.1.1 match the second policy term of deny-other-neighborA and are immediately rejected. This policy allows us to selectively avoid the daisy-chain processing for a portion of the received routes.
Action Modifiers
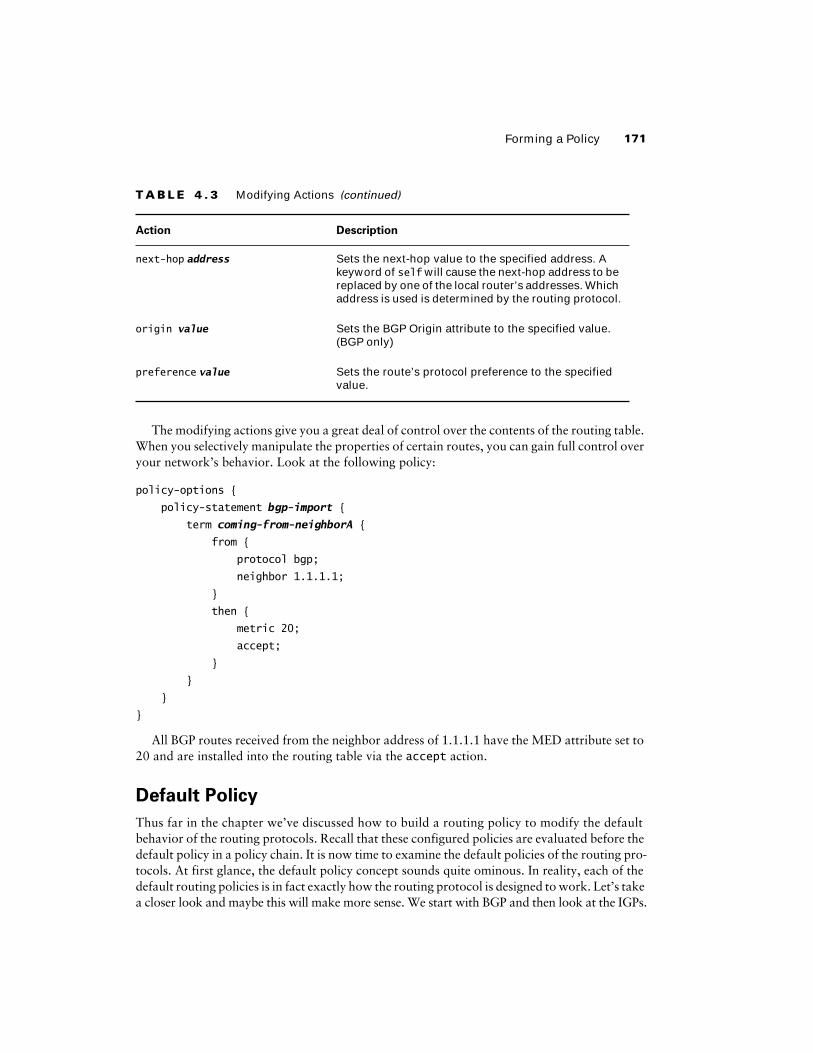
Before a candidate route is accepted or rejected by a terminating action, you can modify the attributes of the route. A partial list of possible modifying actions is shown in Table 4.3. Again, for a more complete listing, please refer to the JUNOS software documentation.
T A B L E 4 . 3 Modifying Actions
Action Description
local-preference value Sets the BGP local preference attribute to the speci-fied value. (BGP only)
metric value Sets the metric to the specified value. Sets the BGP MED attribute to the specified value. (BGP only)
Forming a Policy 171
The modifying actions give you a great deal of control over the contents of the routing table. When you selectively manipulate the properties of certain routes, you can gain full control over your network’s behavior. Look at the following policy:
policy-options {
policy-statement bgp-import {
term coming-from-neighborA {
from {
protocol bgp;
neighbor 1.1.1.1;
}
then {
metric 20;
accept;
}
}
}
}
All BGP routes received from the neighbor address of 1.1.1.1 have the MED attribute set to 20 and are installed into the routing table via the accept action.
Default Policy
Thus far in the chapter we’ve discussed how to build a routing policy to modify the default behavior of the routing protocols. Recall that these configured policies are evaluated before the default policy in a policy chain. It is now time to examine the default policies of the routing pro-tocols. At first glance, the default policy concept sounds quite ominous. In reality, each of the default routing policies is in fact exactly how the routing protocol is designed to work. Let’s take a closer look and maybe this will make more sense. We start with BGP and then look at the IGPs.
next-hop address Sets the next-hop value to the specified address. A keyword of self will cause the next-hop address to be replaced by one of the local router’s addresses. Which address is used is determined by the routing protocol.
origin value Sets the BGP Origin attribute to the specified value. (BGP only)
preference value Sets the route’s protocol preference to the specified value.
T A B L E 4 . 3 Modifying Actions (continued)
Action Description
172 Chapter 4 � Routing Policy
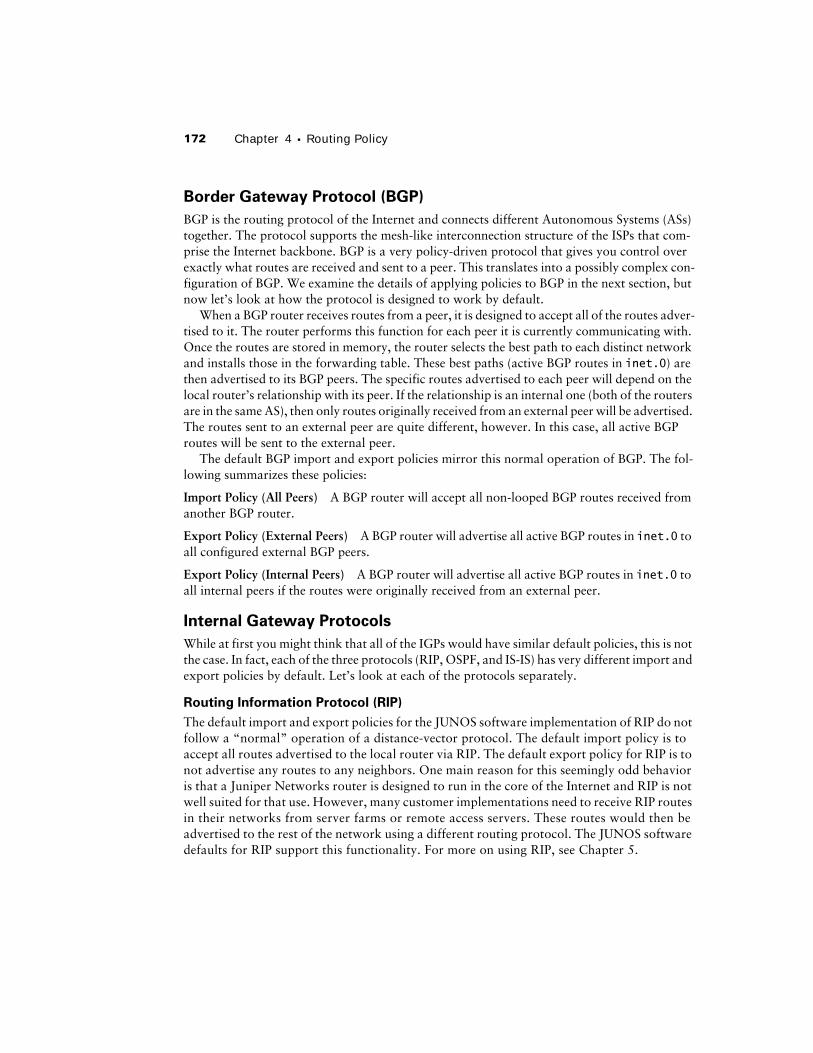
Border Gateway Protocol (BGP)
BGP is the routing protocol of the Internet and connects different Autonomous Systems (ASs) together. The protocol supports the mesh-like interconnection structure of the ISPs that com-prise the Internet backbone. BGP is a very policy-driven protocol that gives you control over exactly what routes are received and sent to a peer. This translates into a possibly complex con-figuration of BGP. We examine the details of applying policies to BGP in the next section, but now let’s look at how the protocol is designed to work by default.
When a BGP router receives routes from a peer, it is designed to accept all of the routes adver-tised to it. The router performs this function for each peer it is currently communicating with. Once the routes are stored in memory, the router selects the best path to each distinct network and installs those in the forwarding table. These best paths (active BGP routes in inet.0) are then advertised to its BGP peers. The specific routes advertised to each peer will depend on the local router’s relationship with its peer. If the relationship is an internal one (both of the routers are in the same AS), then only routes originally received from an external peer will be advertised. The routes sent to an external peer are quite different, however. In this case, all active BGP routes will be sent to the external peer.
The default BGP import and export policies mirror this normal operation of BGP. The fol-lowing summarizes these policies:
Import Policy (All Peers) A BGP router will accept all non-looped BGP routes received from another BGP router.
Export Policy (External Peers) A BGP router will advertise all active BGP routes in inet.0 to all configured external BGP peers.
Export Policy (Internal Peers) A BGP router will advertise all active BGP routes in inet.0 to all internal peers if the routes were originally received from an external peer.
Internal Gateway Protocols
While at first you might think that all of the IGPs would have similar default policies, this is not the case. In fact, each of the three protocols (RIP, OSPF, and IS-IS) has very different import and export policies by default. Let’s look at each of the protocols separately.
Routing Information Protocol (RIP)
The default import and export policies for the JUNOS software implementation of RIP do not follow a “normal” operation of a distance-vector protocol. The default import policy is to accept all routes advertised to the local router via RIP. The default export policy for RIP is to not advertise any routes to any neighbors. One main reason for this seemingly odd behavior is that a Juniper Networks router is designed to run in the core of the Internet and RIP is not well suited for that use. However, many customer implementations need to receive RIP routes in their networks from server farms or remote access servers. These routes would then be advertised to the rest of the network using a different routing protocol. The JUNOS software defaults for RIP support this functionality. For more on using RIP, see Chapter 5.
Applying Routing Policies 173
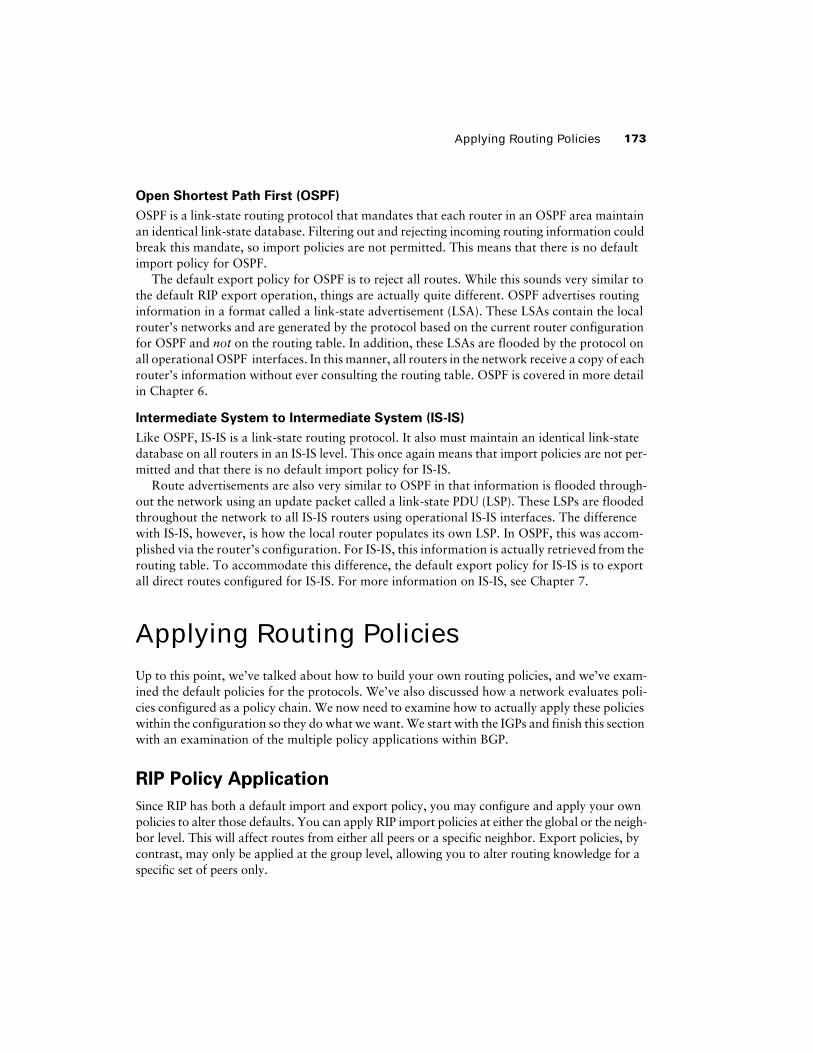
Open Shortest Path First (OSPF)
OSPF is a link-state routing protocol that mandates that each router in an OSPF area maintain an identical link-state database. Filtering out and rejecting incoming routing information could break this mandate, so import policies are not permitted. This means that there is no default import policy for OSPF.
The default export policy for OSPF is to reject all routes. While this sounds very similar to the default RIP export operation, things are actually quite different. OSPF advertises routing information in a format called a link-state advertisement (LSA). These LSAs contain the local router’s networks and are generated by the protocol based on the current router configuration for OSPF and not on the routing table. In addition, these LSAs are flooded by the protocol on all operational OSPF interfaces. In this manner, all routers in the network receive a copy of each router’s information without ever consulting the routing table. OSPF is covered in more detail in Chapter 6.
Intermediate System to Intermediate System (IS-IS)
Like OSPF, IS-IS is a link-state routing protocol. It also must maintain an identical link-state database on all routers in an IS-IS level. This once again means that import policies are not per-mitted and that there is no default import policy for IS-IS.
Route advertisements are also very similar to OSPF in that information is flooded through-out the network using an update packet called a link-state PDU (LSP). These LSPs are flooded throughout the network to all IS-IS routers using operational IS-IS interfaces. The difference with IS-IS, however, is how the local router populates its own LSP. In OSPF, this was accom-plished via the router’s configuration. For IS-IS, this information is actually retrieved from the routing table. To accommodate this difference, the default export policy for IS-IS is to export all direct routes configured for IS-IS. For more information on IS-IS, see Chapter 7.
Applying Routing PoliciesUp to this point, we’ve talked about how to build your own routing policies, and we’ve exam-ined the default policies for the protocols. We’ve also discussed how a network evaluates poli-cies configured as a policy chain. We now need to examine how to actually apply these policies within the configuration so they do what we want. We start with the IGPs and finish this section with an examination of the multiple policy applications within BGP.
RIP Policy Application
Since RIP has both a default import and export policy, you may configure and apply your own policies to alter those defaults. You can apply RIP import policies at either the global or the neigh-bor level. This will affect routes from either all peers or a specific neighbor. Export policies, by contrast, may only be applied at the group level, allowing you to alter routing knowledge for a specific set of peers only.
174 Chapter 4 � Routing Policy
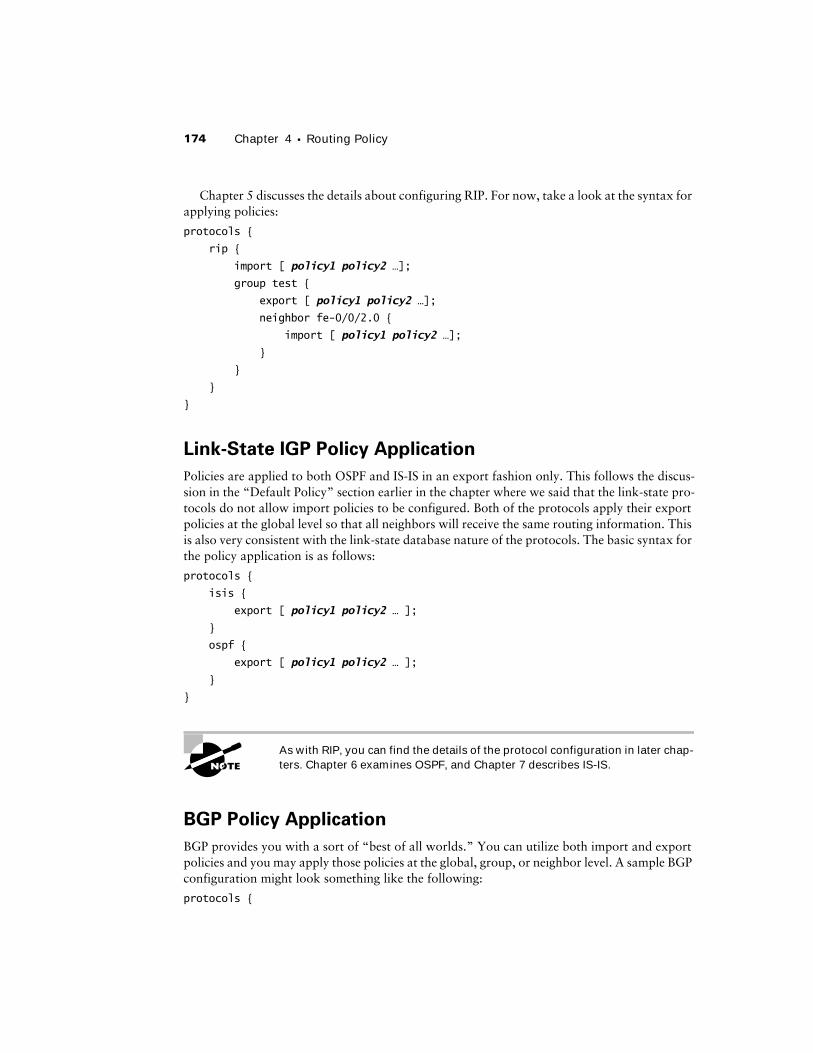
Chapter 5 discusses the details about configuring RIP. For now, take a look at the syntax for applying policies:
protocols {
rip {
import [ policy1 policy2 …];
group test {
export [ policy1 policy2 …];
neighbor fe-0/0/2.0 {
import [ policy1 policy2 …];
}
}
}
}
Link-State IGP Policy Application
Policies are applied to both OSPF and IS-IS in an export fashion only. This follows the discus-sion in the “Default Policy” section earlier in the chapter where we said that the link-state pro-tocols do not allow import policies to be configured. Both of the protocols apply their export policies at the global level so that all neighbors will receive the same routing information. This is also very consistent with the link-state database nature of the protocols. The basic syntax for the policy application is as follows:
protocols {
isis {
export [ policy1 policy2 … ];
}
ospf {
export [ policy1 policy2 … ];
}
}
As with RIP, you can find the details of the protocol configuration in later chap-ters. Chapter 6 examines OSPF, and Chapter 7 describes IS-IS.
BGP Policy Application
BGP provides you with a sort of “best of all worlds.” You can utilize both import and export policies and you may apply those policies at the global, group, or neighbor level. A sample BGP configuration might look something like the following:
protocols {
Applying Routing Policies 175
bgp {
import [ policy1 policy2 …];
export [ policy1 policy2 …];
group external-peers {
type external;
import [ policy1 policy2 …];
export [ policy1 policy2 …];
peer-as 65521;
neighbor 1.1.1.1 {
import [ policy1 policy2 …];
export [ policy1 policy2 …];
}
}
}
}
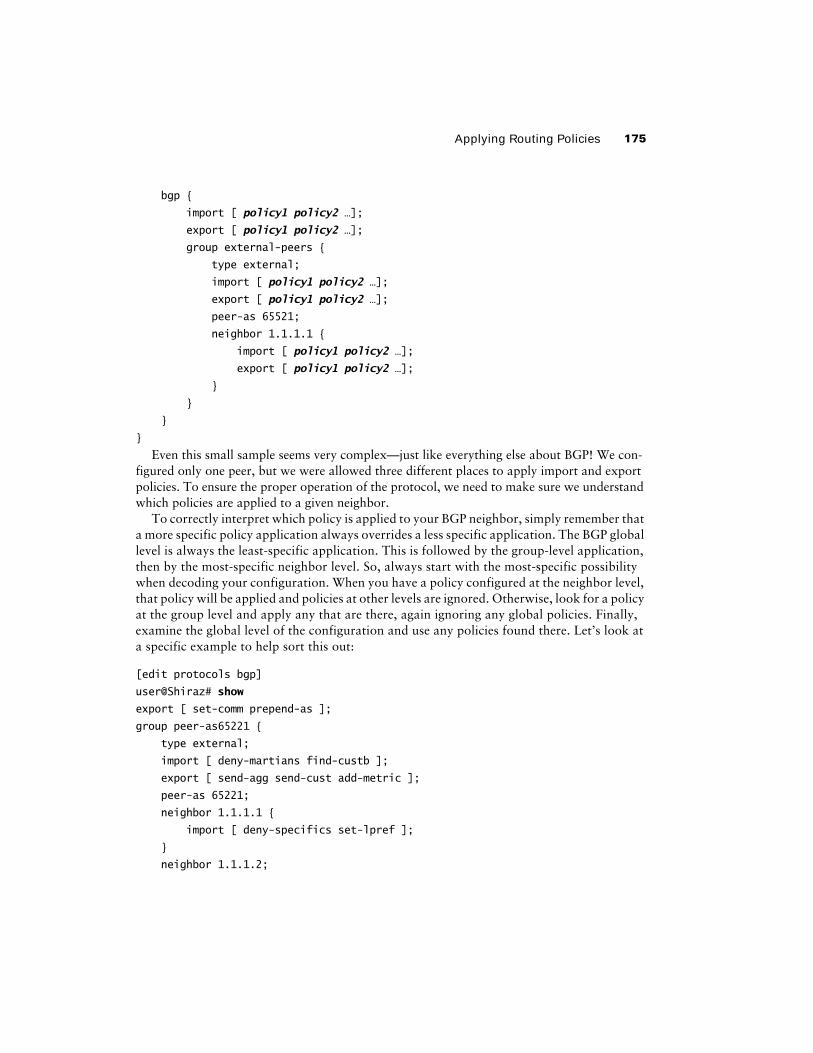
Even this small sample seems very complex—just like everything else about BGP! We con-figured only one peer, but we were allowed three different places to apply import and export policies. To ensure the proper operation of the protocol, we need to make sure we understand which policies are applied to a given neighbor.
To correctly interpret which policy is applied to your BGP neighbor, simply remember that a more specific policy application always overrides a less specific application. The BGP global level is always the least-specific application. This is followed by the group-level application, then by the most-specific neighbor level. So, always start with the most-specific possibility when decoding your configuration. When you have a policy configured at the neighbor level, that policy will be applied and policies at other levels are ignored. Otherwise, look for a policy at the group level and apply any that are there, again ignoring any global policies. Finally, examine the global level of the configuration and use any policies found there. Let’s look at a specific example to help sort this out:
[edit protocols bgp]
user@Shiraz# show
export [ set-comm prepend-as ];
group peer-as65221 {
type external;
import [ deny-martians find-custb ];
export [ send-agg send-cust add-metric ];
peer-as 65221;
neighbor 1.1.1.1 {
import [ deny-specifics set-lpref ];
}
neighbor 1.1.1.2;
176 Chapter 4 � Routing Policy
neighbor 1.1.1.3 {
export [ set-med prepend-as ];
}
}
group internal {
type internal;
local-address 2.2.2.10;
import add-metric2;
neighbor 2.2.2.2 {
export send-transit;
}
neighbor 2.2.2.3;
neighbor 2.2.2.4;
}
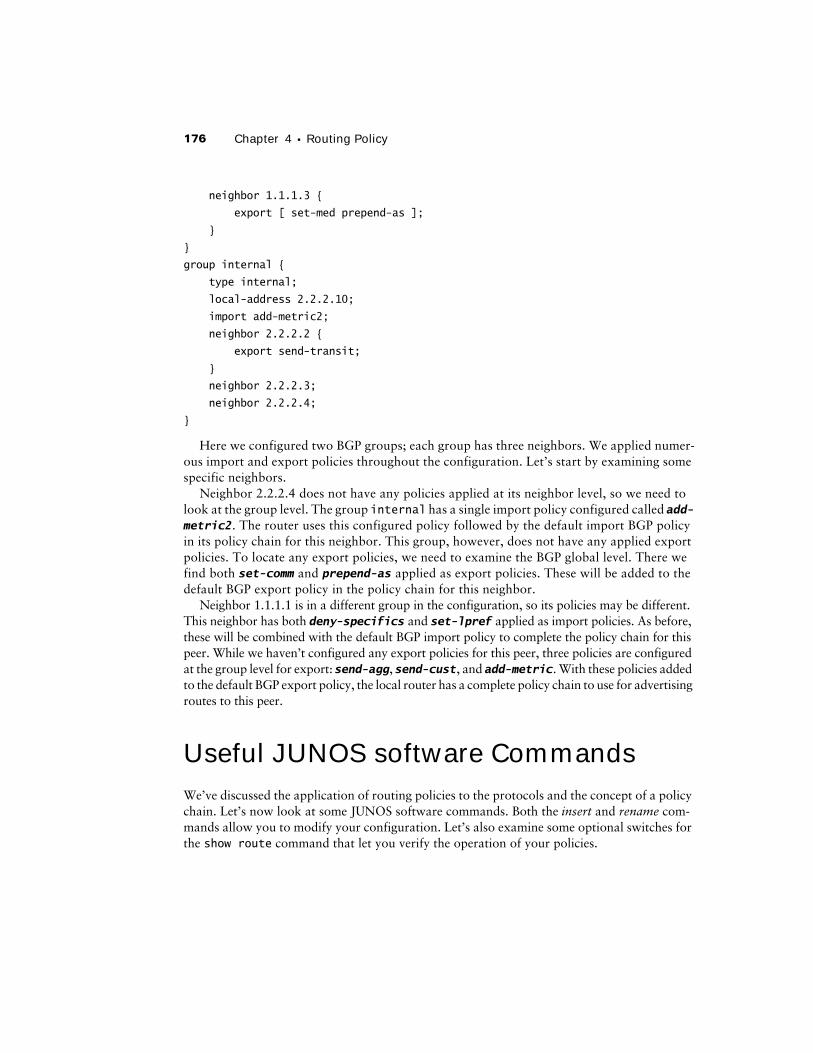
Here we configured two BGP groups; each group has three neighbors. We applied numer-ous import and export policies throughout the configuration. Let’s start by examining some specific neighbors.
Neighbor 2.2.2.4 does not have any policies applied at its neighbor level, so we need to look at the group level. The group internal has a single import policy configured called add-metric2. The router uses this configured policy followed by the default import BGP policy in its policy chain for this neighbor. This group, however, does not have any applied export policies. To locate any export policies, we need to examine the BGP global level. There we find both set-comm and prepend-as applied as export policies. These will be added to the default BGP export policy in the policy chain for this neighbor.
Neighbor 1.1.1.1 is in a different group in the configuration, so its policies may be different. This neighbor has both deny-specifics and set-lpref applied as import policies. As before, these will be combined with the default BGP import policy to complete the policy chain for this peer. While we haven’t configured any export policies for this peer, three policies are configured at the group level for export: send-agg, send-cust, and add-metric. With these policies added to the default BGP export policy, the local router has a complete policy chain to use for advertising routes to this peer.
Useful JUNOS software CommandsWe’ve discussed the application of routing policies to the protocols and the concept of a policy chain. Let’s now look at some JUNOS software commands. Both the insert and rename com-mands allow you to modify your configuration. Let’s also examine some optional switches for the show route command that let you verify the operation of your policies.
Useful JUNOS software Commands 177
Configuring Multiple Policies
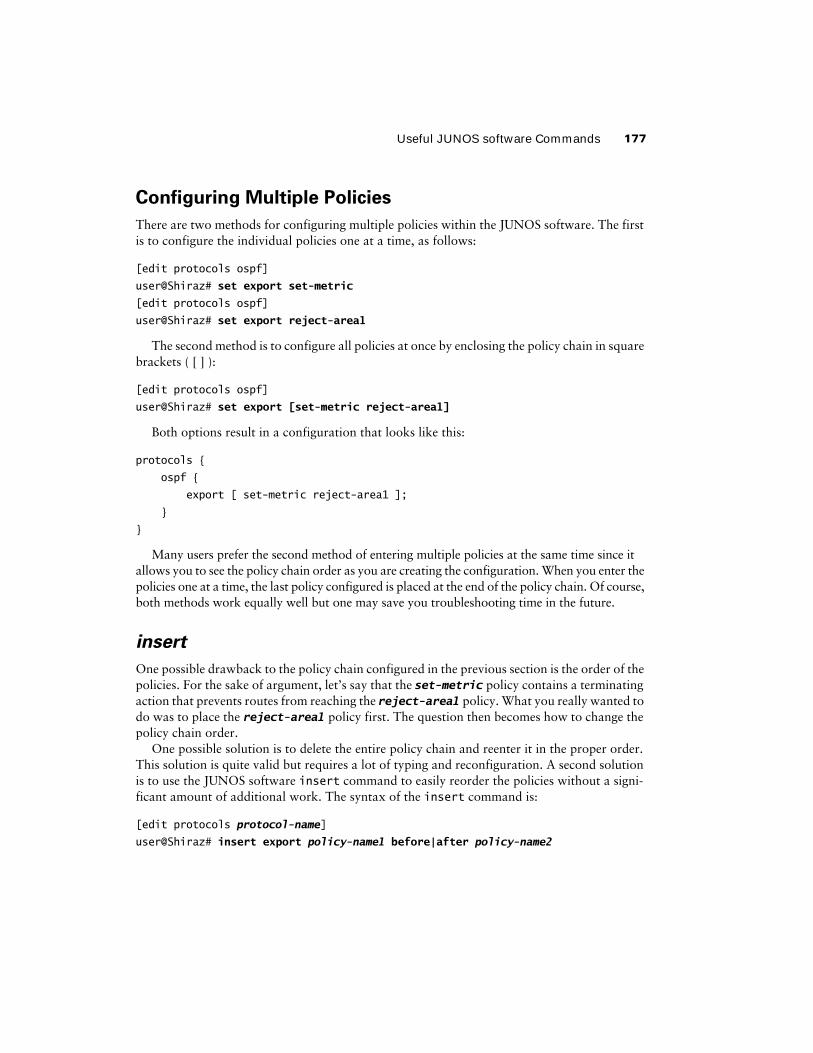
There are two methods for configuring multiple policies within the JUNOS software. The first is to configure the individual policies one at a time, as follows:
[edit protocols ospf]
user@Shiraz# set export set-metric
[edit protocols ospf]
user@Shiraz# set export reject-area1
The second method is to configure all policies at once by enclosing the policy chain in square brackets ( [ ] ):
[edit protocols ospf]
user@Shiraz# set export [set-metric reject-area1]
Both options result in a configuration that looks like this:
protocols {
ospf {
export [ set-metric reject-area1 ];
}
}
Many users prefer the second method of entering multiple policies at the same time since it allows you to see the policy chain order as you are creating the configuration. When you enter the policies one at a time, the last policy configured is placed at the end of the policy chain. Of course, both methods work equally well but one may save you troubleshooting time in the future.
insert
One possible drawback to the policy chain configured in the previous section is the order of the policies. For the sake of argument, let’s say that the set-metric policy contains a terminating action that prevents routes from reaching the reject-area1 policy. What you really wanted to do was to place the reject-area1 policy first. The question then becomes how to change the policy chain order.
One possible solution is to delete the entire policy chain and reenter it in the proper order. This solution is quite valid but requires a lot of typing and reconfiguration. A second solution is to use the JUNOS software insert command to easily reorder the policies without a signi-ficant amount of additional work. The syntax of the insert command is:
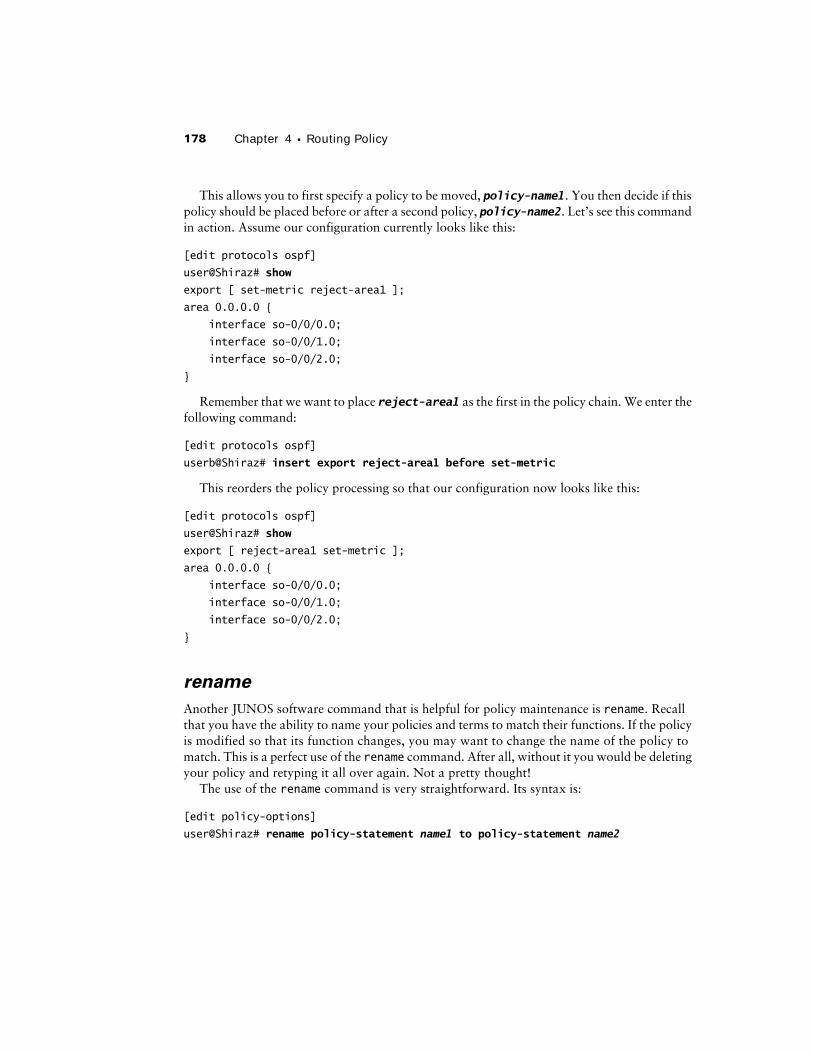
This allows you to first specify a policy to be moved, policy-name1. You then decide if this policy should be placed before or after a second policy, policy-name2. Let’s see this command in action. Assume our configuration currently looks like this:
[edit protocols ospf]
user@Shiraz# show
export [ set-metric reject-area1 ];
area 0.0.0.0 {
interface so-0/0/0.0;
interface so-0/0/1.0;
interface so-0/0/2.0;
}
Remember that we want to place reject-area1 as the first in the policy chain. We enter the following command:
[edit protocols ospf]
userb@Shiraz# insert export reject-area1 before set-metric
This reorders the policy processing so that our configuration now looks like this:
[edit protocols ospf]
user@Shiraz# show
export [ reject-area1 set-metric ];
area 0.0.0.0 {
interface so-0/0/0.0;
interface so-0/0/1.0;
interface so-0/0/2.0;
}
rename
Another JUNOS software command that is helpful for policy maintenance is rename. Recall that you have the ability to name your policies and terms to match their functions. If the policy is modified so that its function changes, you may want to change the name of the policy to match. This is a perfect use of the rename command. After all, without it you would be deleting your policy and retyping it all over again. Not a pretty thought!
The use of the rename command is very straightforward. Its syntax is:
[edit policy-options]
user@Shiraz# rename policy-statement name1 to policy-statement name2
Useful JUNOS software Commands 179
The same command can be used to rename terms in a policy such as:
user@Shiraz# rename term term-name1 to term term-name2
Let’s change the reject-area1 policy we used earlier to the following:
[edit policy-options]
user@Shiraz# show
policy-statement reject-area1 {
term area-1-routes {
from area 1;
then accept;
}
}
We can see that the policy name no longer matches the purpose of the policy. After all, the pol-icy is accepting routes and not rejecting them. To change the name of the policy, we enter the fol-lowing command:
[edit policy-options]
user@Shiraz# rename policy-statement reject-area1 to policy-statement accept-area1
This renames the policy so that our configuration now looks like this:
[edit policy-options]
user@Shiraz# show
policy-statement accept-area1 {
term area-1-routes {
from area 1;
then accept;
}
}
Other Uses for rename
While the rename command is helpful for managing policy and term names, it has other valuable uses. In the larger scope of things, this JUNOS software command can change the name of any current user-defined string in the candidate configuration. This includes interface names, unit numbers, and IP addresses.
180 Chapter 4 � Routing Policy
show route Options
Up to this point in the chapter, everything we’ve talked about has been focused on the local router and its policies. What we could really use now is a way to verify that our policies are working as we expect them to. Of course, we can visit the neighboring routers and examine their routing tables. Or we can use some JUNOS software options within the show route command. That sounds like more fun, so let’s investigate that.
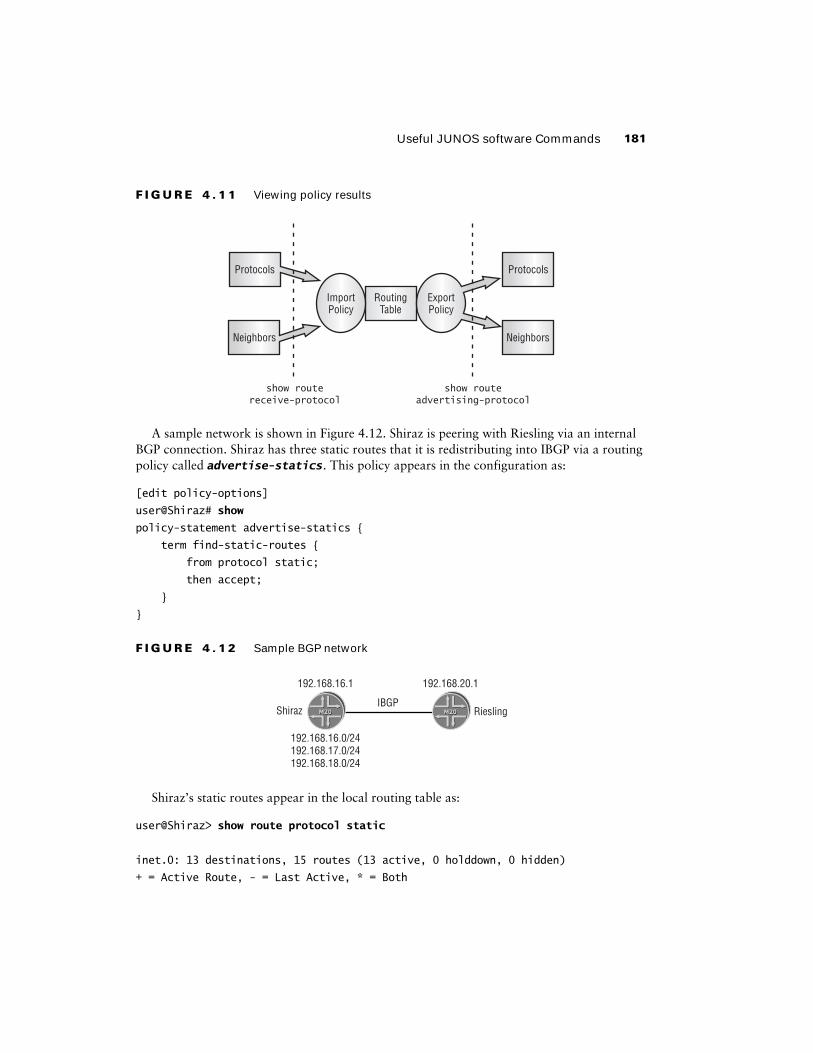
Recall that all policy processing is done from the perspective of the local routing table. This is graphically depicted in Figure 4.11. As routes are advertised to the local router, they pass through any import policies prior to being installed in the local routing table. You can view the received routes before the policies have been applied by using the show route receive-protocol command. Effectively, this is the view of your neighbor’s routing table. Similarly, you can view outbound routes after any export policies have been applied by executing the show route advertising-protocol command. This shows you what your neighbor will receive from you.
These commands work very well with protocols that place and extract their routing infor-mation directly from the routing table—in other words, protocols like RIP and BGP. Recall from the discussion in the “Default Policy” section earlier that the link-state protocols flood their information in LSAs and LSPs. Since these updates do not use the routing table to propa-gate routing information, the advertising-protocol and receive-protocol options are ineffective. Let’s use BGP to illustrate the use of these options.
Let’s say that we’ve assigned the interface fe-0/0/0.0 an IP address of 10.10.10.1 /24. Because of a network topology change, we need to change this address to 172.16.10.1 /24. You enter configuration mode on the router and type:
[edit interfaces]
user@Shiraz# set fe-0/0/0 unit 0 family inet address 172.16.10.1/24
You have now added a second IP address to the interface and haven’t removed the first one. In short, the JUNOS software default for family addresses is to not overwrite them in the con-figuration. The solution to this problem is to simply delete the first IP address by using:
[edit interfaces]
user@Shiraz# delete fe-0/0/0 unit 0 family inet address 10.10.10.1/24
Here’s where the power of the rename command can come in handy. Just as with a routing pol-icy, you do not have to first delete the old address and then enter the new one. You can simply rename the current address:
[edit interfaces fe-0/0/0 unit 0 family inet]
user@Shiraz# rename address 10.10.10.1/24 to address 172.16.10.1/24
This simple step is highly effective and can save you troubleshooting time in the future.
Useful JUNOS software Commands 181
F I G U R E 4 . 1 1 Viewing policy results
A sample network is shown in Figure 4.12. Shiraz is peering with Riesling via an internal BGP connection. Shiraz has three static routes that it is redistributing into IBGP via a routing policy called advertise-statics. This policy appears in the configuration as:
[edit policy-options]
user@Shiraz# show
policy-statement advertise-statics {
term find-static-routes {
from protocol static;
then accept;
}
}
F I G U R E 4 . 1 2 Sample BGP network
Shiraz’s static routes appear in the local routing table as:
Remember that the default BGP export policy is to advertise only BGP routes. The appearance of these local static routes being advertised to Riesling means that the advertise-statics policy properly appears before the default policy in the export policy chain.
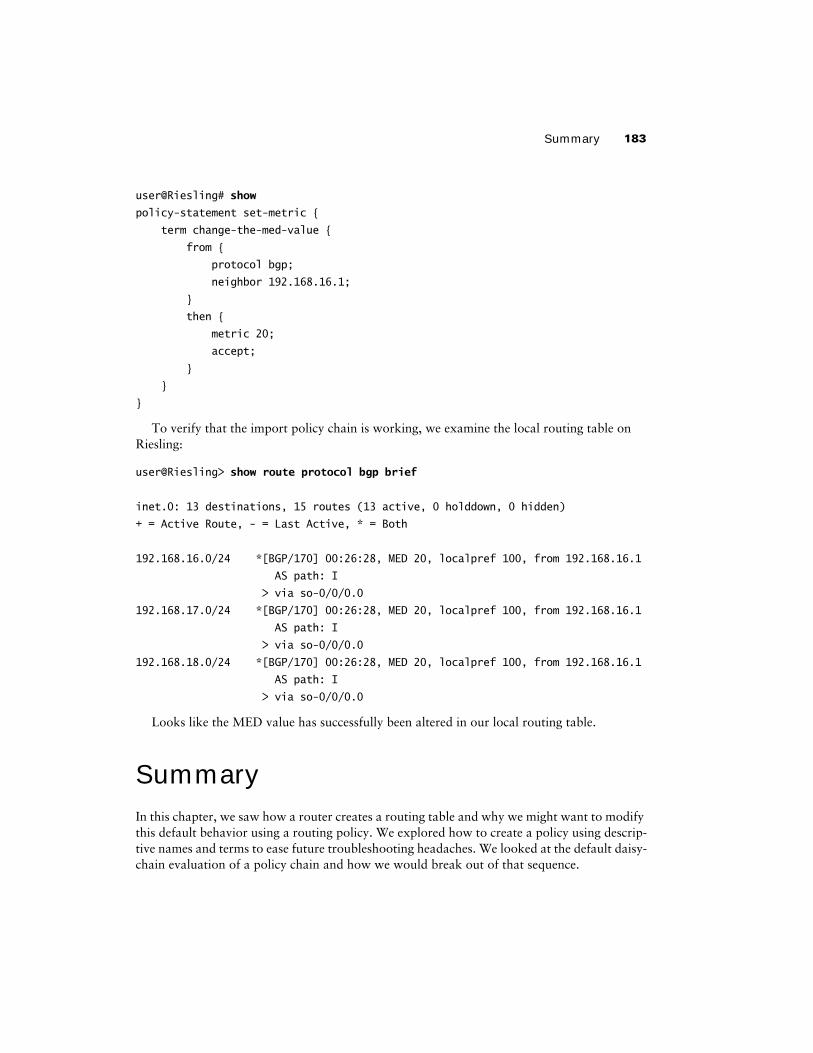
On the other side of the network, Riesling is using an import policy called set-metric that sets the BGP MED attribute to a value of 20. We should first verify that we are actually receiving routes from Shiraz. The output of the show route receive-protocol command displays:
user@Riesling> show route receive-protocol bgp 192.168.16.1 brief
192.168.16.0/24 *[BGP/170] 00:26:28, MED 20, localpref 100, from 192.168.16.1
AS path: I
> via so-0/0/0.0
192.168.17.0/24 *[BGP/170] 00:26:28, MED 20, localpref 100, from 192.168.16.1
AS path: I
> via so-0/0/0.0
192.168.18.0/24 *[BGP/170] 00:26:28, MED 20, localpref 100, from 192.168.16.1
AS path: I
> via so-0/0/0.0
Looks like the MED value has successfully been altered in our local routing table.
SummaryIn this chapter, we saw how a router creates a routing table and why we might want to modify this default behavior using a routing policy. We explored how to create a policy using descrip-tive names and terms to ease future troubleshooting headaches. We looked at the default daisy-chain evaluation of a policy chain and how we would break out of that sequence.
184 Chapter 4 � Routing Policy
We then analyzed the match conditions and actions used in a routing policy to identify routes and take some action (flow control or modification) on them. After that, we examined the default policy for each of the routing protocols. Then it came time to apply our configured policies. We analyzed the application of a policy to both the IGPs as well as BGP. Finally, we covered some of the commands available to you in the JUNOS software for managing policies.
Overall, we’ve seen that routing policy is an intricate part of life within a Juniper Networks environment. Throughout the course of this book, we will use routing policies again and again to enable features within the JUNOS software.
Exam EssentialsBe able to describe how routing policy manipulates the default routing behavior. Policies consist of match/action pairs that allow you to specify routes of interest and manipulate the route properties. The policies are applied in a daisy-chain fashion to all routes in the routing table.
Understand that routing policy allows control of the network map. Using both import and export policies controls how the local router and your neighbors view your network. Routes can be ignored, suppressed, or have attributes modified.
Know the various matching criteria available to locate a candidate route. Various match cri-teria are used to locate a candidate route. Options include generic information (incoming inter-face), protocol-specific information (which protocol is using the route), or an individual route using a route filter.
Be able to identify the possible actions taken on a route. Actions can suppress or advertise a route via accept and reject. They can also modify route properties and alter the default pro-cessing of a policy chain.
Understand that policy application varies for each protocol. Each routing protocol allows its information to be modified differently. Some allow only an application at the global level while others permit per-group or per-neighbor applications.
Identify JUNOS software commands that provide for user flexibility. Various commands allow you to rename and reorder policies as you see fit. They also provide the ability to view routes prior to and immediately after policy application.
Key Terms 185
Key TermsBefore you take the exam, be certain you are familiar with the following terms:
action prefix-length-range
exact rename
flow control action route redistribution
from route filter
insert show route advertising-protocol
longer show route receive-protocol
match terminating action
match type terms
orlonger through
policy chain to
preference upto
186 Chapter 4 � Routing Policy
Review Questions1. By default, which routes are sent to an IBGP neighbor?
A. All active routes in inet.0
B. All active BGP routes
C. All active BGP routes learned via IBGP neighbors
D. All active BGP routes learned via EBGP neighbors
2. By default, an OSPF router will export which of the following routes from the routing table?
A. All OSPF routes
B. All IGP routes, including IS-IS
C. All routes within inet.0
D. No routes will be exported.
3. How would you block a route (10.0.0.0 /16) from a BGP neighbor?
A. Apply an import policy that matches on 10.0.0.0 /16 and rejects it.
B. Create a static route to 10.0.0.0 /16 with a next hop of discard.
C. Create a firewall filter that blocks packets from that address.
D. Apply an export policy that matches on 10.0.0.0 /16 and rejects it.
4. When is the default routing policy applied?
A. During the evaluation of each applied policy
B. Only when explicitly referenced
C. At the beginning of every policy chain
D. At the end of every policy chain
5. Why would you create an export policy? (Choose all that apply.)
A. To send RIP routes to a RIP neighbor
B. To suppress route advertisements
C. To limit bandwidth to a neighbor
D. To prevent denial-of-service attacks
Review Questions 187
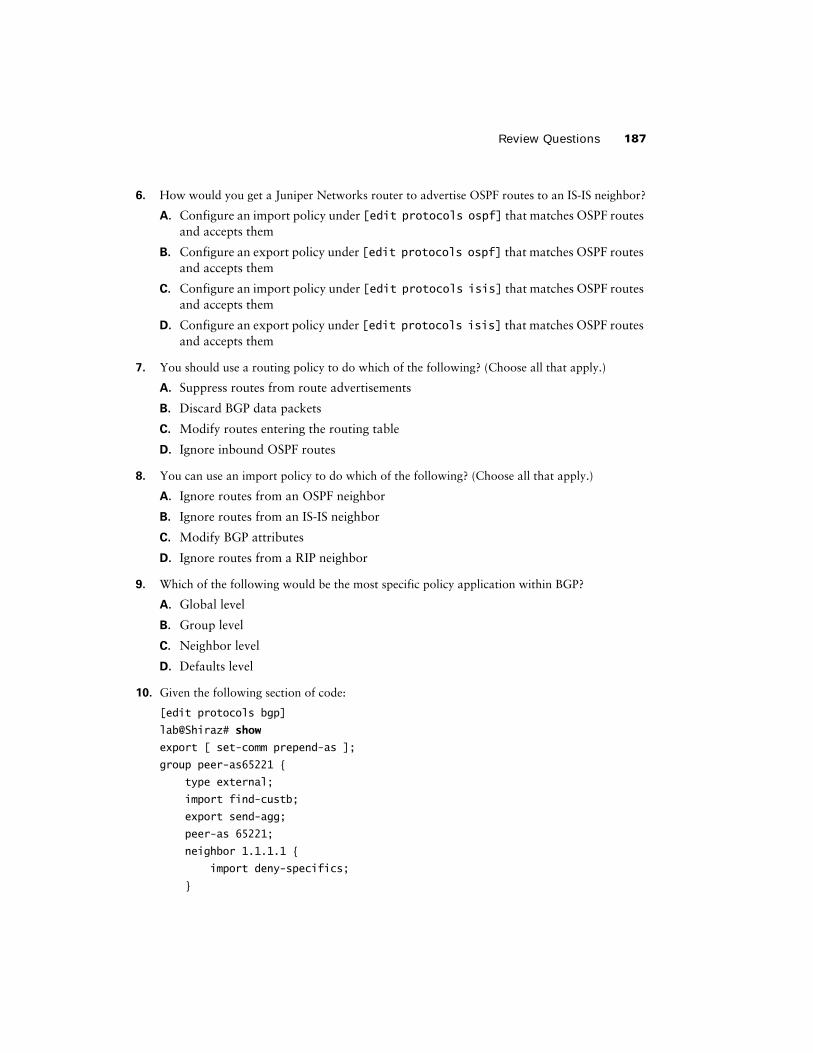
6. How would you get a Juniper Networks router to advertise OSPF routes to an IS-IS neighbor?
A. Configure an import policy under [edit protocols ospf] that matches OSPF routes and accepts them
B. Configure an export policy under [edit protocols ospf] that matches OSPF routes and accepts them
C. Configure an import policy under [edit protocols isis] that matches OSPF routes and accepts them
D. Configure an export policy under [edit protocols isis] that matches OSPF routes and accepts them
7. You should use a routing policy to do which of the following? (Choose all that apply.)
A. Suppress routes from route advertisements
B. Discard BGP data packets
C. Modify routes entering the routing table
D. Ignore inbound OSPF routes
8. You can use an import policy to do which of the following? (Choose all that apply.)
A. Ignore routes from an OSPF neighbor
B. Ignore routes from an IS-IS neighbor
C. Modify BGP attributes
D. Ignore routes from a RIP neighbor
9. Which of the following would be the most specific policy application within BGP?
A. Global level
B. Group level
C. Neighbor level
D. Defaults level
10. Given the following section of code:
[edit protocols bgp]
lab@Shiraz# show
export [ set-comm prepend-as ];
group peer-as65221 {
type external;
import find-custb;
export send-agg;
peer-as 65221;
neighbor 1.1.1.1 {
import deny-specifics;
}
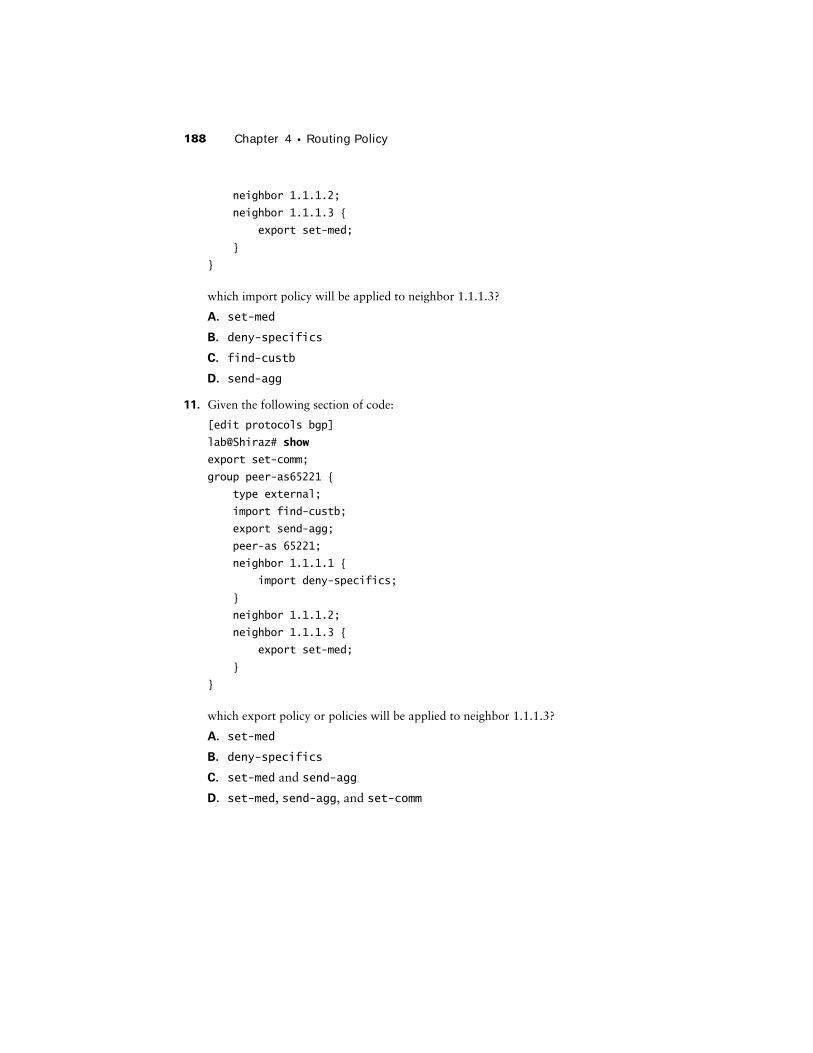
188 Chapter 4 � Routing Policy
neighbor 1.1.1.2;
neighbor 1.1.1.3 {
export set-med;
}
}
which import policy will be applied to neighbor 1.1.1.3?
A. set-med
B. deny-specifics
C. find-custb
D. send-agg
11. Given the following section of code:
[edit protocols bgp]
lab@Shiraz# show
export set-comm;
group peer-as65221 {
type external;
import find-custb;
export send-agg;
peer-as 65221;
neighbor 1.1.1.1 {
import deny-specifics;
}
neighbor 1.1.1.2;
neighbor 1.1.1.3 {
export set-med;
}
}
which export policy or policies will be applied to neighbor 1.1.1.3?
A. set-med
B. deny-specifics
C. set-med and send-agg
D. set-med, send-agg, and set-comm
Review Questions 189
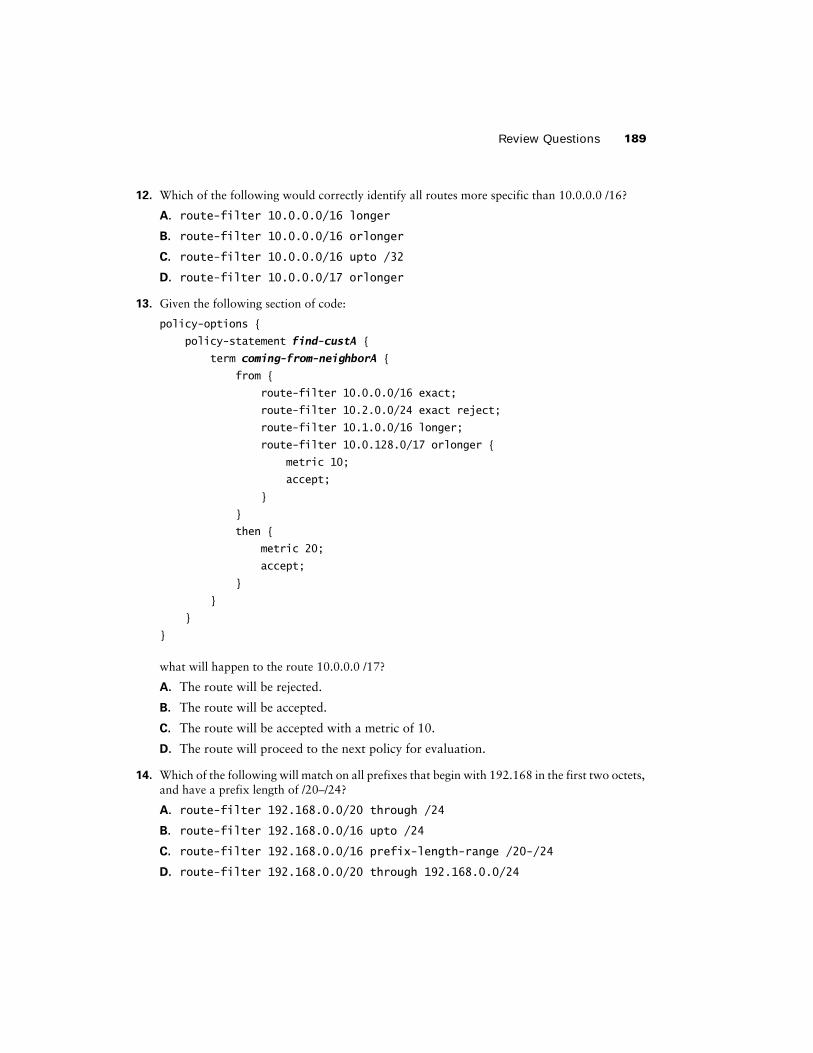
12. Which of the following would correctly identify all routes more specific than 10.0.0.0 /16?
A. route-filter 10.0.0.0/16 longer
B. route-filter 10.0.0.0/16 orlonger
C. route-filter 10.0.0.0/16 upto /32
D. route-filter 10.0.0.0/17 orlonger
13. Given the following section of code:
policy-options {
policy-statement find-custA {
term coming-from-neighborA {
from {
route-filter 10.0.0.0/16 exact;
route-filter 10.2.0.0/24 exact reject;
route-filter 10.1.0.0/16 longer;
route-filter 10.0.128.0/17 orlonger {
metric 10;
accept;
}
}
then {
metric 20;
accept;
}
}
}
}
what will happen to the route 10.0.0.0 /17?
A. The route will be rejected.
B. The route will be accepted.
C. The route will be accepted with a metric of 10.
D. The route will proceed to the next policy for evaluation.
14. Which of the following will match on all prefixes that begin with 192.168 in the first two octets, and have a prefix length of /20–/24?
A. route-filter 192.168.0.0/20 through /24
B. route-filter 192.168.0.0/16 upto /24
C. route-filter 192.168.0.0/16 prefix-length-range /20-/24
D. route-filter 192.168.0.0/20 through 192.168.0.0/24
190 Chapter 4 � Routing Policy
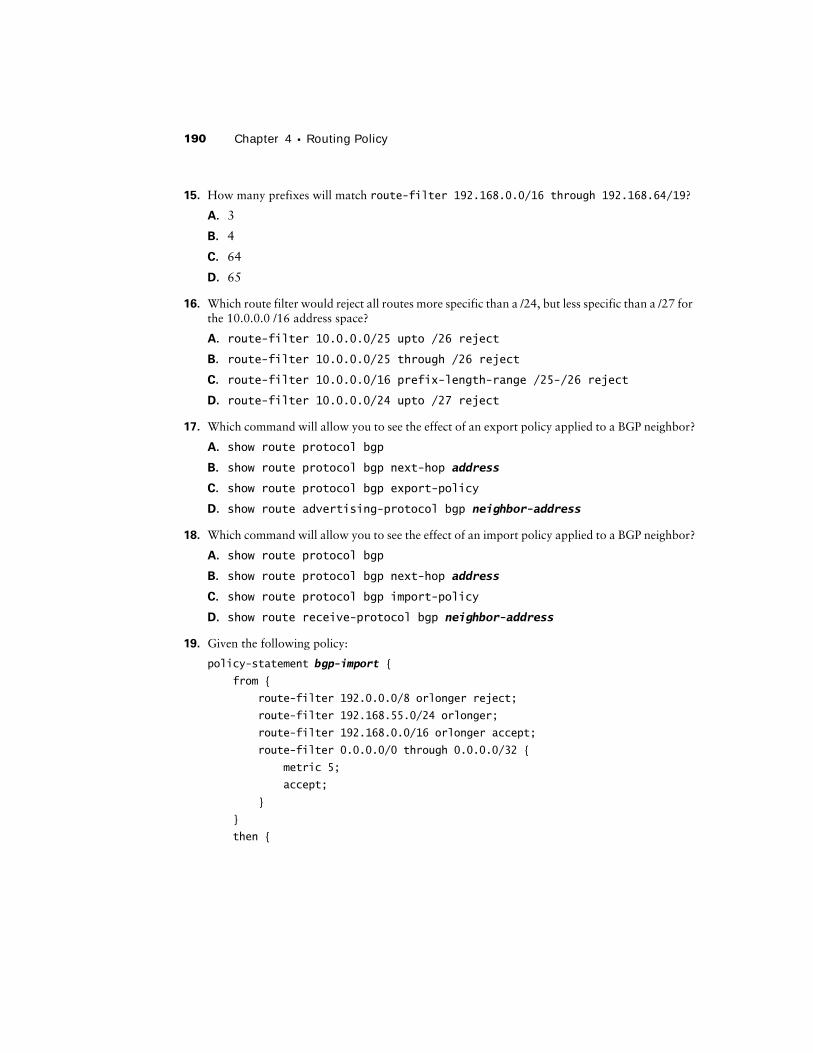
15. How many prefixes will match route-filter 192.168.0.0/16 through 192.168.64/19?
A. 3
B. 4
C. 64
D. 65
16. Which route filter would reject all routes more specific than a /24, but less specific than a /27 for the 10.0.0.0 /16 address space?
A. route-filter 10.0.0.0/25 upto /26 reject
B. route-filter 10.0.0.0/25 through /26 reject
C. route-filter 10.0.0.0/16 prefix-length-range /25-/26 reject
D. route-filter 10.0.0.0/24 upto /27 reject
17. Which command will allow you to see the effect of an export policy applied to a BGP neighbor?
A. show route protocol bgp
B. show route protocol bgp next-hop address
C. show route protocol bgp export-policy
D. show route advertising-protocol bgp neighbor-address
18. Which command will allow you to see the effect of an import policy applied to a BGP neighbor?
A. show route protocol bgp
B. show route protocol bgp next-hop address
C. show route protocol bgp import-policy
D. show route receive-protocol bgp neighbor-address
19. Given the following policy:
policy-statement bgp-import {
from {
route-filter 192.0.0.0/8 orlonger reject;
route-filter 192.168.55.0/24 orlonger;
route-filter 192.168.0.0/16 orlonger accept;
route-filter 0.0.0.0/0 through 0.0.0.0/32 {
metric 5;
accept;
}
}
then {
Review Questions 191
metric 10;
accept;
}
}
what will happen to the route 192.168.192.0 /18?
A. It will be rejected.
B. It will be accepted.
C. It will be accepted with a metric of 10.
D. It will not match this policy.
20. Given the same policy as found in question 19, what will happen to the route 192.168.56.0 /24?
A. It will be rejected.
B. It will be accepted.
C. It will be accepted with a metric of 10.
D. It will not match this policy.
192 Chapter 4 � Routing Policy
Answers to Review Questions1. D. Only active BGP routes are advertised in BGP. In an IBGP session, only EBGP routes
are sent.
2. D. By default, OSPF does not extract information from the routing table.
3. A. Import policies affect information received from network peers.
4. D. The routing protocols default policy is always applied at the end of the policy chain.
5. A, B. RIP will not send any routes by default. A policy is needed in order to send RIP routes to a RIP neighbor. Also, a policy is needed to suppress any route advertisements that would occur normally.
6. D. In order to properly redistribute routes from OSPF into IS-IS, you must create a policy that matches on OSPF routes and then export it into IS-IS.
7. A, C. You can use a routing policy to suppress routes as they are being sent to neighbors in route advertisements. You can also use a policy to modify routes as they enter the local routing table.
8. C, D. First, remember that the link-state protocols do not allow import policies. Second, inbound routing policy is used to modify routes or to ignore routes prior to being installed in the local routing table.
9. C. Within BGP, there are three main places where you can apply a policy: the global level, the group level, and the neighbor level. Of these, the neighbor level is the most specific option.
10. C. Since there is no import policy applied at the neighbor level, the router will next look at the group level. The policy find-custb is applied as an import policy at the group level and will therefore apply to neighbor 1.1.1.3.
11. A. Since neighbor 1.1.1.3 has a neighbor-level export policy applied, only that policy will be applied. This is due to the fact that the protocol default policy will be applied after set-med, which will terminate all route processing.
12. A. The longer keyword identifies all prefixes more specific than 10.0.0.0 /16. If we used either the upto or orlonger keyword, the route 10.0.0.0 /16 would also be included. The 10.0.0.0/17 orlonger option ignores the 10.0.128.0 /17 point on the radix tree and all points more spe-cific than it.
13. D. The route matches the first route filter since it is the longest match. The exact keyword forces the route filter to not match the criterion for the policy term so the route will drop to the next policy in the chain.
14. C. Only the prefix-length-range option allows you to specify a starting point and a range of prefixes to match. The upto option requires that the starting point be one of the matches, and the through option matches only the points that connect the ending point to the starting point.
Answers to Review Questions 193
15. B. Remember that the through action matches only points that connect the starting point to the end point. This route filter would match routes 192.168.0.0 /16, 192.168.0.0 /17, 192.168.64.0 /18, and 192.168.64.0 /19.
16. C. Only the prefix-length-range keyword allows you to specify a starting point and a range of prefixes that will match.
17. D. To see routes after you have applied an export routing policy, you can use option D locally or telnet to the neighboring router and examine its routing table.
18. A. To see the effect of an import routing policy, you need to look at your local routing table using show route. Using option D shows you the routes prior to your applied import policy.
19. B. This route will first look for the longest match and find route-filter 192.168.0.0/16 orlonger. The route matches this route filter and executes the immediate action of accept.
20. B. This route will first look for the longest match and find route-filter 192.168.0.0/16 orlonger. The route matches this route filter and executes the immediate action of accept.