12
Fitting Kit K422 GB GB GB GB Fitting Instructions for Basic Carrier x 4 x 4 x 8 x 4 x 4 x 4 x 4 x 4 1 Revision No: 7C

Fitting Kit
K422
GBGBGBGB Fitting Instructions for Basic Carrier
x 4 x 4 x 8 x 4
x 4 x 4 x 4 x 4
1Revision No: 7C

Fitting Kit K422GB
MAX kgs (lbs)
W/P WHD
Audi
A6 Avant, 5dr Estate 05-+ ZA 75 kgs (165 lbs) 75 kgs (165 lbs)
A6 Avant, 5dr Estate 05-+ EU 75 kgs (165 lbs) 75 kgs (165 lbs)
A6 Avant, 5dr Wagon 06-+ US 75 kgs (165 lbs) 75 kgs (165 lbs)
A6 Avant, 5dr Wagon Jan 05-+ NZ 75 kgs (165 lbs) 75 kgs (165 lbs)
A6 Avant, 5dr Wagon Jan 05-+ AU 75 kgs (165 lbs) 75 kgs (165 lbs)
2
Fitting Kit K422GB
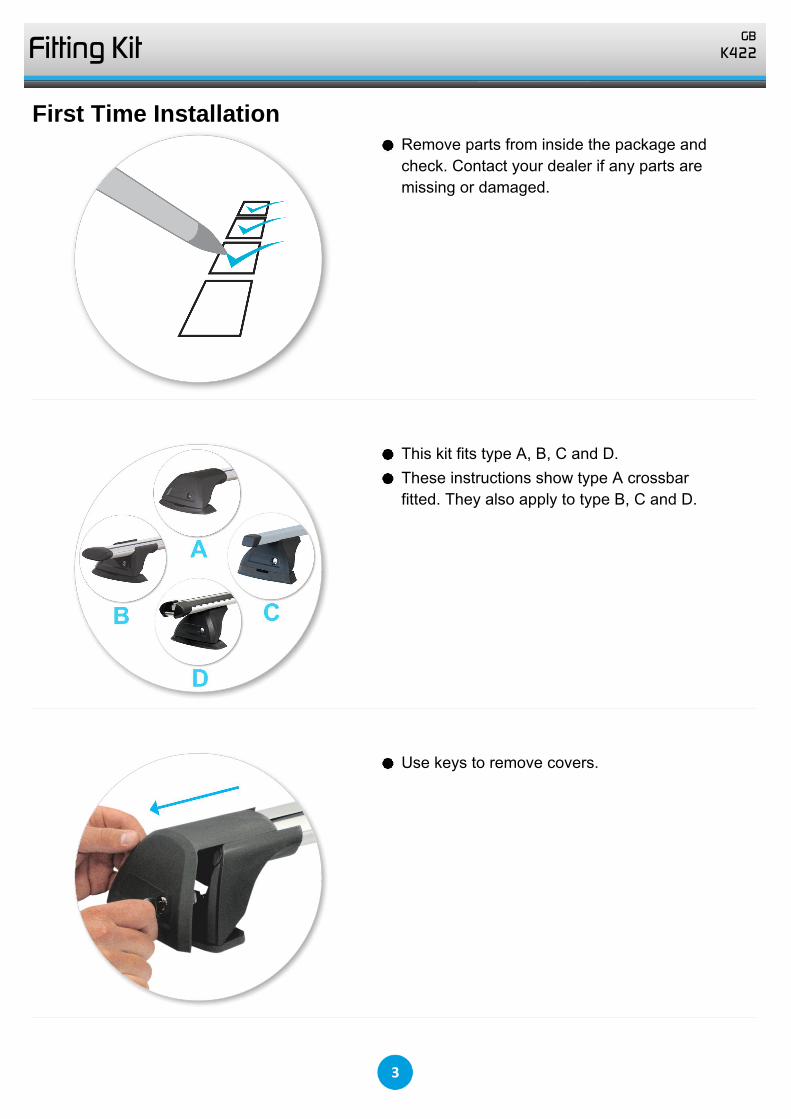
First Time InstallationRemove parts from inside the package and check. Contact your dealer if any parts are missing or damaged.
This kit fits type A, B, C and D.These instructions show type A crossbar fitted. They also apply to type B, C and D.
Use keys to remove covers.
3

Fitting Kit K422GB
Use hex screwdriver to reverse adjusting screw 10 turns.
Press adjusting screw and pull crossbar legs out. Refer to the crossbar instructions for crossbar adjustment.Ensure each end of the crossbar is adjusted equally.
Set bars to length (refer to the crossbar instructions for crossbar adjustment).Clamps onto flush roof rail. Pins locate on inside of rail.Please check the rear of this manual for information relating specifically to your vehicle.
4

Fitting Kit K422GB
Tighten adjusting screw to 5 Nm (3.7 ft lb).
Remove plastic clamp block by gripping bar leg with fingers and push firmly with thumbs until clamp block drops out behind leg.
Remove both pins from each leg. Use tapered end of spanner located inside left hand cover to assist.
5

Fitting Kit K422GB
Detach foot from leg. Store loose parts in a safe place.Repeat for all legs.
Select four feet assemblies and match the left and right assemblies to the left and right roof rack legs.Assemble foot from kit into leg by pressing it down.Ensure foot interlocks with leg.
Using short capscrew and washer, secure assembly onto leg (use Hex Screwdriver supplied with crossbar to assist)Do not over tighten.Repeat for all legs.
6

Fitting Kit K422GB
Use two M5 x 12 mm self tapping screws to secure the assembly onto the leg.Do not over tighten.
FitmentLocate two holes at each position along the inside of the roof rails.Place crossbars approximately above these holes on roof rails.Ensure back edge of foot sits flush with the back edge of vehicle roof rail.
Apply protective strip as shown. Trim if required.
7

Fitting Kit K422GB
Ensure the two pins of the clamp engages correctly with the holes in the roof rail.Place one hand on the leg and apply downward pressure.Slide clamp through opening in leg.
Thread the coach bolt through the clamp and the leg.
Tighten the red plastic knob.Ensure the clamp engages correctly on inside of roof rail.Ensure the red plastic knob is in the position shown when fully tightened.Do not over tighten.Repeat for all four positions.
8
Fitting Kit K422GB
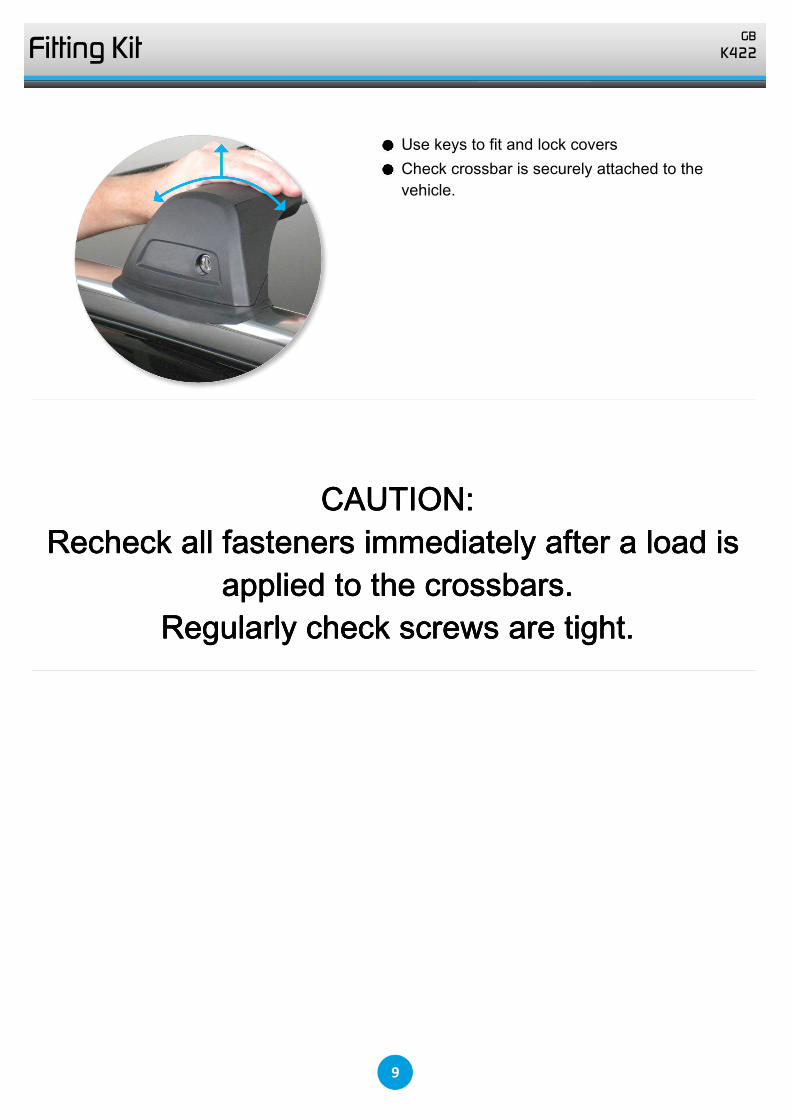
Use keys to fit and lock coversCheck crossbar is securely attached to the vehicle.
CAUTION:CAUTION:CAUTION:CAUTION:Recheck all fasteners immediately after a load is Recheck all fasteners immediately after a load is Recheck all fasteners immediately after a load is Recheck all fasteners immediately after a load is
applied to the crossbars.applied to the crossbars.applied to the crossbars.applied to the crossbars.Regularly check screws are tight.Regularly check screws are tight.Regularly check screws are tight.Regularly check screws are tight.
9

Fitting Kit K422GB
MaintenanceClean the car roof and surfaces of the product that will be in contact with the car roof.Follow the fitting instructions for fitting the product to your vehicle. Make sure all steps are carried out in order.Set crossbars a minimum distance of 700mm (27 1/2") apart where no other distance is specified in the fitting instructions. This is especially important when carrying long loads.Check unit is securely attached whenever you refit it to the vehicle. If the unit feels loose, refer to the fitting instructions and readjust.Some glass/panoramic roofs and radio antennae may not be able to be used when the product is fitted.Do not modify this product.Refer to the maximum permitted load capacity specified in the fitting instructions. Do not exceed the vehicle manufacturers roof load rating if it is lower than the maximum load capacity specified in the fitting instructions.Loads should not overhang the sides of the product and be evenly distributed with the lowest possible centre of gravity.Long loads should be secured with non-elastic straps to the front and rear of the vehicle.Objects with pointed ends (e.g. ski poles) should be carried with the pointed ends to the rear of the vehicle.Remove all loose or removable objects from the load prior to loading.Make sure all loads are securely fastened with non-elastic straps. Check regularly during longer journeys.
10

Fitting Kit K422GB
A loaded roof rack system can alter the performance of your vehicle. Be especially aware of the effects of side winds, changing of direction, and braking performance. Avoid rapid acceleration and deceleration. Drive carefully.Note that the total height of the vehicle increases when upright loads are carried.Products should be locked during transport if they have locks fitted.Check and replace worn out or defective parts.Keep the product clean and maintained.Never drive into a car wash with the roof rack system fitted.Lubricate locks and adjusting screws at regular intervals.Remove the products from the vehicle when not in use. Make sure all loose parts are stored safely.
Yakima Australia Pty Ltd17 Hinkler CourtBrendale QLD 4500AUSTRALIA
www.whispbar.comwww.whispbar.com.auwww.whispbar.co.nzwww.whispbar.co.ukwww.whispbar.co.zawww.whispbar.euwww.whispbar.ca
11

Fitting Kit K422
A B C 1 2 3
X
880mm 860mm- 710mm -Audi A6 Avant, 5dr Estate 05-+ (EU) -34 5/8" 33 7/8"- 27 15/16ths" - -
880mm 860mm- 710mm -Audi A6 Avant, 5dr Estate 05-+ (ZA) -34 5/8" 33 7/8"- 27 15/16ths" - -
880mm 860mm- 710mm -Audi A6 Avant, 5dr Wagon 06-+ (US) -34 5/8" 33 7/8"- 27 15/16ths" - -
880mm 860mm- 710mm -Audi A6 Avant, 5dr Wagon Jan 05-+ (AU) -34 5/8" 33 7/8"- 27 15/16ths" - -
880mm 860mm- 710mm -Audi A6 Avant, 5dr Wagon Jan 05-+ (NZ) -34 5/8" 33 7/8"- 27 15/16ths" - -
12


