30
KaaS Deployment Guide version beta

KaaS Deployment Guideversion beta

ContentsCopyright notice 1Preface 2
Intended audience 2Documentation history 2
Introduction 3Deploy a baremetal-based management cluster 4
Workflow overview 4Bootstrap a management cluster 5
Prepare the seed node 5Verify the seed node 7Prepare metadata and deploy the KaaS management cluster 8
Deprecated bootstrap parameters 14Deploy an OpenStack-based management cluster 16
Prerequisites 16Bootstrap a management cluster 16
Deploy an AWS-based management cluster 19Prerequisites 19Bootstrap a management cluster 19
Troubleshooting 22Collect the bootstrap logs 22DNS settings 22Default network address 23TLS handshake timeout 24
Configure authentication for KaaS 25Configure the IAM parameters 25Configure LDAP for IAM 26Configure Google OAuth IdP for IAM 27
Mirantis Kubernetes-as-a-Service Deployment Guide version beta
©2020, Mirantis Inc. Page i
Copyright notice2020 Mirantis, Inc. All rights reserved.This product is protected by U.S. and international copyright and intellectual property laws. Nopart of this publication may be reproduced in any written, electronic, recording, or photocopyingform without written permission of Mirantis, Inc.Mirantis, Inc. reserves the right to modify the content of this document at any time without priornotice. Functionality described in the document may not be available at the moment. Thedocument contains the latest information at the time of publication.Mirantis, Inc. and the Mirantis Logo are trademarks of Mirantis, Inc. and/or its affiliates in theUnited States an other countries. Third party trademarks, service marks, and names mentionedin this document are the properties of their respective owners.
Mirantis Kubernetes-as-a-Service Deployment Guide version beta
©2020, Mirantis Inc. Page 1

PrefaceThis documentation provides information on how to use Mirantis products to deploy cloudenvironments. The information is for reference purposes and is subject to change.
Intended audienceThis documentation assumes that the reader is familiar with network and cloud concepts and isintended for the following users:
• Infrastructure Operator
• Is member of the IT operations team• Has working knowledge of Linux, virtualization, Kubernetes API and CLI, and OpenStack
to support the application development team• Accesses Mirantis KaaS and Kubernetes through a local machine or web UI• Provides verified artifacts through a central repository to the Tenant DevOps engineers
• Tenant DevOps engineer
• Is member of the application development team and reports to line-of-business (LOB)• Has working knowledge of Linux, virtualization, Kubernetes API and CLI to support
application owners• Accesses Mirantis KaaS and Kubernetes through a local machine or web UI• Consumes artifacts from a central repository approved by the Infrastructure Operator
Documentation historyThe documentation set refers to Mirantis KaaS beta as to the latest released beta version of theproduct. For details about the KaaS beta minor releases dates, refer to KaaS releases.
Mirantis Kubernetes-as-a-Service Deployment Guide version beta
©2020, Mirantis Inc. Page 2
IntroductionMirantis KaaS enables you to create, scale, and upgrade Kubernetes clusters on demand througha declarative API with a centralized identity and access management.Mirantis KaaS is installed once to deploy the KaaS management cluster. The KaaS managementcluster is deployed through the bootstrap procedure on either the OpenStack or bare metalprovider. StackLight can be installed on both types of the KaaS clusters, management and child,to provide metrics for each cluster separately. The baremetal-based deployment includes Cephas a distributed storage system.
Mirantis Kubernetes-as-a-Service Deployment Guide version beta
©2020, Mirantis Inc. Page 3

Deploy a baremetal-based management clusterWorkflow overviewThe bare metal management system enables the Infrastructure Operator to deploy MirantisKaaS on a set of bare metal servers. It also enables Mirantis KaaS to deploy child clusters onbare metal servers without a pre-provisioned operating system.The Infrastructure Operator performs the following steps to install KaaS in a bare metalenvironment:
1. Install and connect hardware servers as described in KaaS Reference Architecture:Baremetal-based KaaS cluster.
Caution!
The baremetal-based Mirantis KaaS does not manage the underlay networking fabricbut requires specific network configuration to operate.
2. Install Ubuntu 18.04 operating system on one of the bare metal machines to create a seednode.
3. Copy the bootstrap tarball to the seed node.4. Obtain your license file that will be required during the bootstrap.5. Create the configuration files for the bootstrap script that contain all necessary
configuration data to deploy the KaaS management cluster including the bare metal hostsmetadata.
6. Available since KaaS release 1.6.0 Validate the deployment templates using the fast preflightcommand before the KaaS management cluster bootstrap to ensure that the templateparameters for the Baseboard Management Controller (BMC) access credentials and PXEservice are configured correctly for the bootstrap to succeed.
7. Available since KaaS release 1.10.0 Simulate the main stages of the KaaS management clusterdeployment using the full preflight command to verify that the cluster network and nodes inthe BareMetalHost template are configured correctly.
8. Run the bootstrap script for unattended installation of the KaaS management cluster ontothe selected bare metal hosts.
Using the bootstrap script, the KaaS bare metal management system prepares the seed node forthe KaaS management cluster and starts the deployment of KaaS itself. The bootstrap scriptperforms all necessary operations to perform the automated KaaS management cluster setup.The deployment diagram below illustrates the bootstrap workflow of a KaaS managementcluster.
Mirantis Kubernetes-as-a-Service Deployment Guide version beta
©2020, Mirantis Inc. Page 4
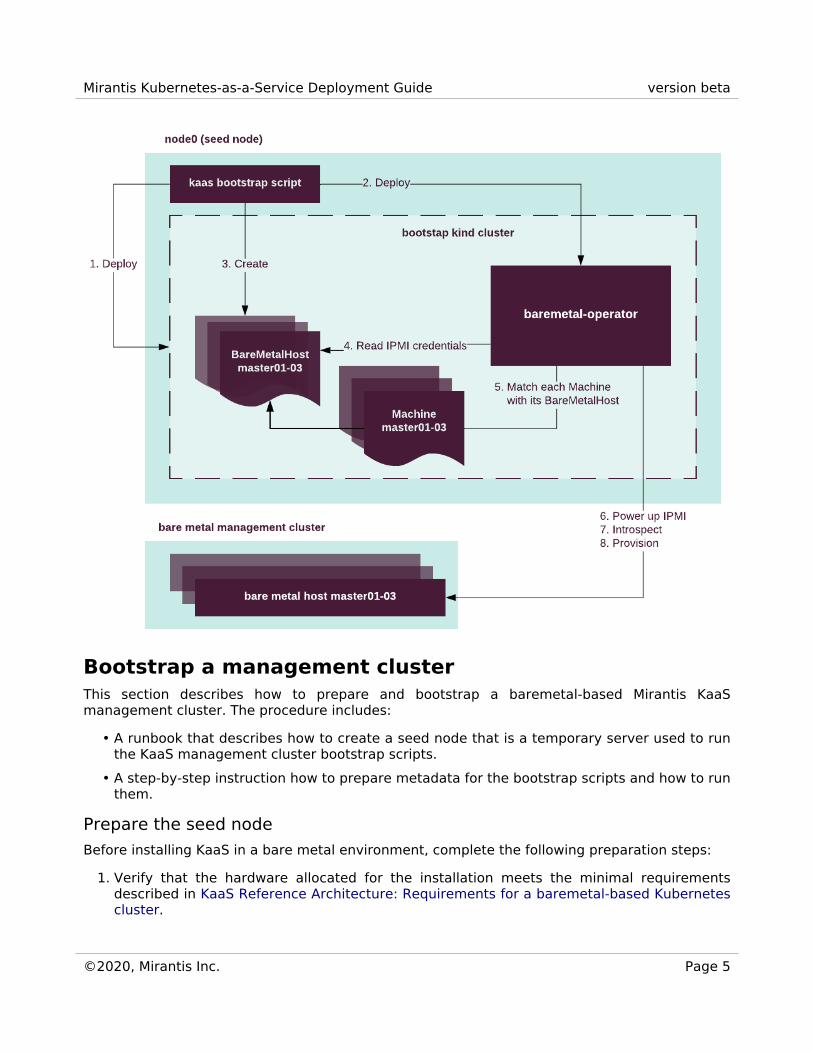
Bootstrap a management clusterThis section describes how to prepare and bootstrap a baremetal-based Mirantis KaaSmanagement cluster. The procedure includes:
• A runbook that describes how to create a seed node that is a temporary server used to runthe KaaS management cluster bootstrap scripts.
• A step-by-step instruction how to prepare metadata for the bootstrap scripts and how to runthem.
Prepare the seed nodeBefore installing KaaS in a bare metal environment, complete the following preparation steps:
1. Verify that the hardware allocated for the installation meets the minimal requirementsdescribed in KaaS Reference Architecture: Requirements for a baremetal-based Kubernetescluster.
Mirantis Kubernetes-as-a-Service Deployment Guide version beta
©2020, Mirantis Inc. Page 5
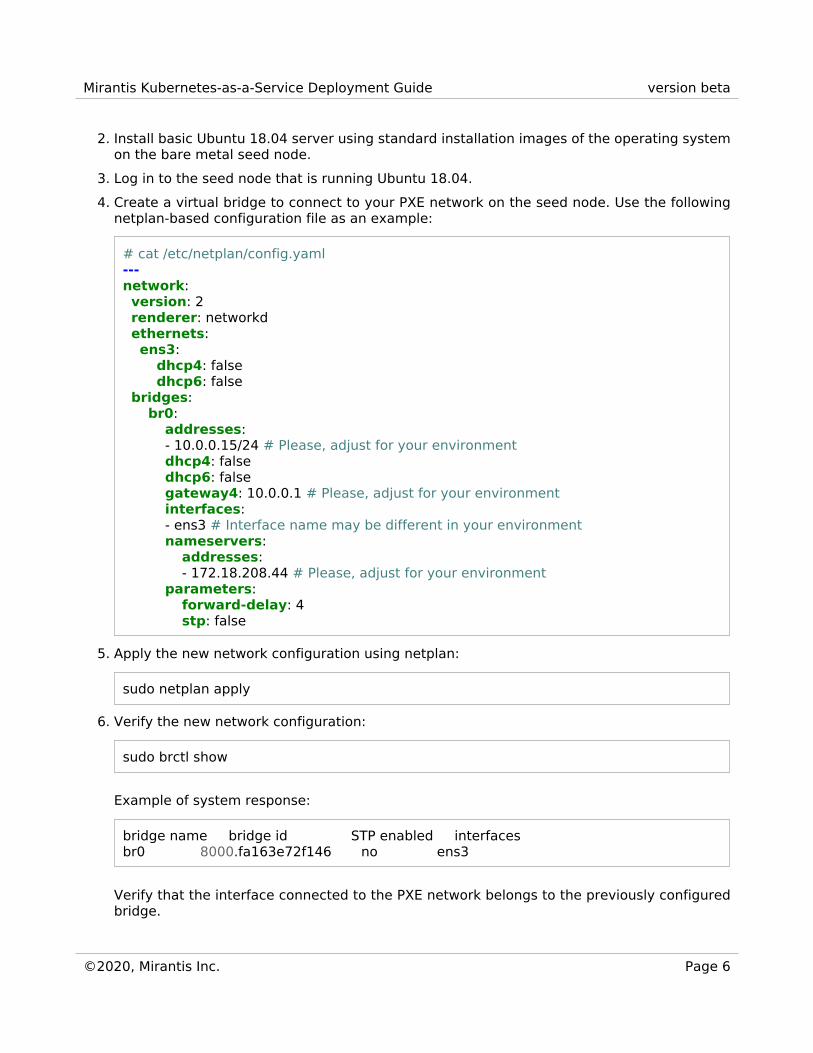
2. Install basic Ubuntu 18.04 server using standard installation images of the operating systemon the bare metal seed node.
3. Log in to the seed node that is running Ubuntu 18.04.4. Create a virtual bridge to connect to your PXE network on the seed node. Use the following
netplan-based configuration file as an example:
# cat /etc/netplan/config.yaml---network: version: 2 renderer: networkd ethernets: ens3: dhcp4: false dhcp6: false bridges: br0: addresses: - 10.0.0.15/24 # Please, adjust for your environment dhcp4: false dhcp6: false gateway4: 10.0.0.1 # Please, adjust for your environment interfaces: - ens3 # Interface name may be different in your environment nameservers: addresses: - 172.18.208.44 # Please, adjust for your environment parameters: forward-delay: 4 stp: false
5. Apply the new network configuration using netplan:
sudo netplan apply
6. Verify the new network configuration:
sudo brctl show
Example of system response:
bridge name bridge id STP enabled interfacesbr0 8000.fa163e72f146 no ens3
Verify that the interface connected to the PXE network belongs to the previously configuredbridge.
Mirantis Kubernetes-as-a-Service Deployment Guide version beta
©2020, Mirantis Inc. Page 6
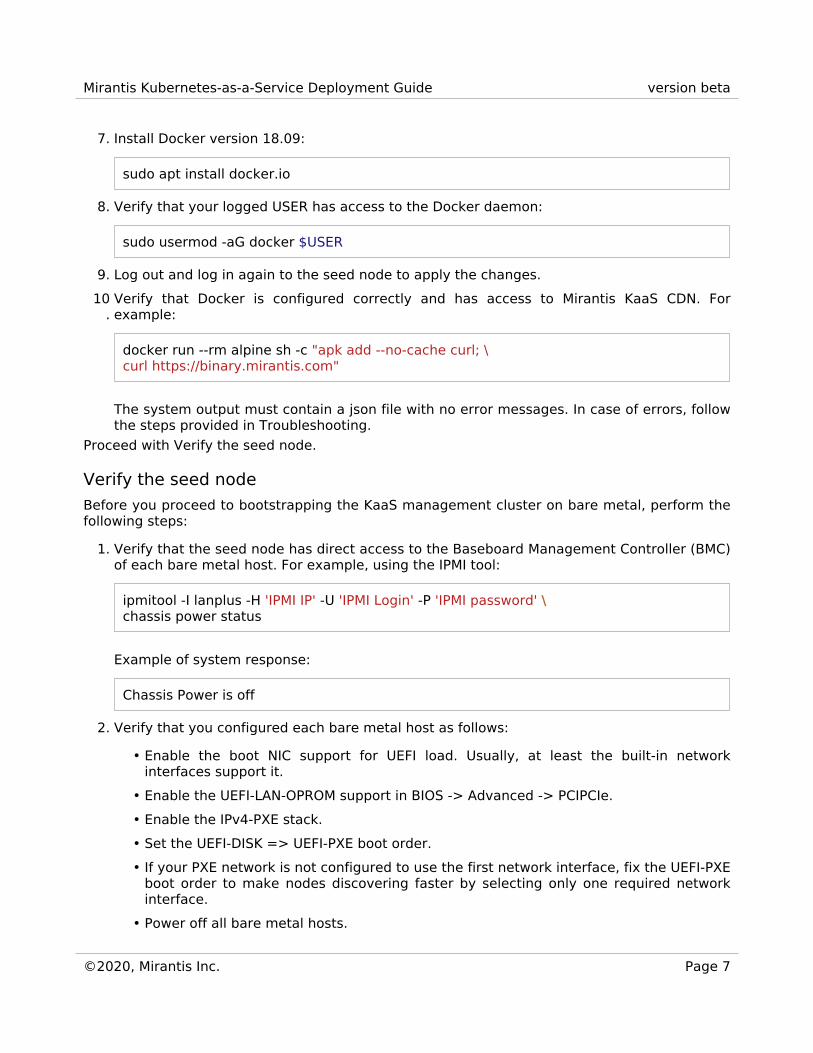
7. Install Docker version 18.09:
sudo apt install docker.io
8. Verify that your logged USER has access to the Docker daemon:
sudo usermod -aG docker $USER
9. Log out and log in again to the seed node to apply the changes.10
.Verify that Docker is configured correctly and has access to Mirantis KaaS CDN. Forexample:
docker run --rm alpine sh -c "apk add --no-cache curl; \curl https://binary.mirantis.com"
The system output must contain a json file with no error messages. In case of errors, followthe steps provided in Troubleshooting.
Proceed with Verify the seed node.
Verify the seed nodeBefore you proceed to bootstrapping the KaaS management cluster on bare metal, perform thefollowing steps:
1. Verify that the seed node has direct access to the Baseboard Management Controller (BMC)of each bare metal host. For example, using the IPMI tool:
ipmitool -I lanplus -H 'IPMI IP' -U 'IPMI Login' -P 'IPMI password' \chassis power status
Example of system response:
Chassis Power is off
2. Verify that you configured each bare metal host as follows:
• Enable the boot NIC support for UEFI load. Usually, at least the built-in networkinterfaces support it.
• Enable the UEFI-LAN-OPROM support in BIOS -> Advanced -> PCIPCIe.• Enable the IPv4-PXE stack.• Set the UEFI-DISK => UEFI-PXE boot order.• If your PXE network is not configured to use the first network interface, fix the UEFI-PXE
boot order to make nodes discovering faster by selecting only one required networkinterface.
• Power off all bare metal hosts.
Mirantis Kubernetes-as-a-Service Deployment Guide version beta
©2020, Mirantis Inc. Page 7
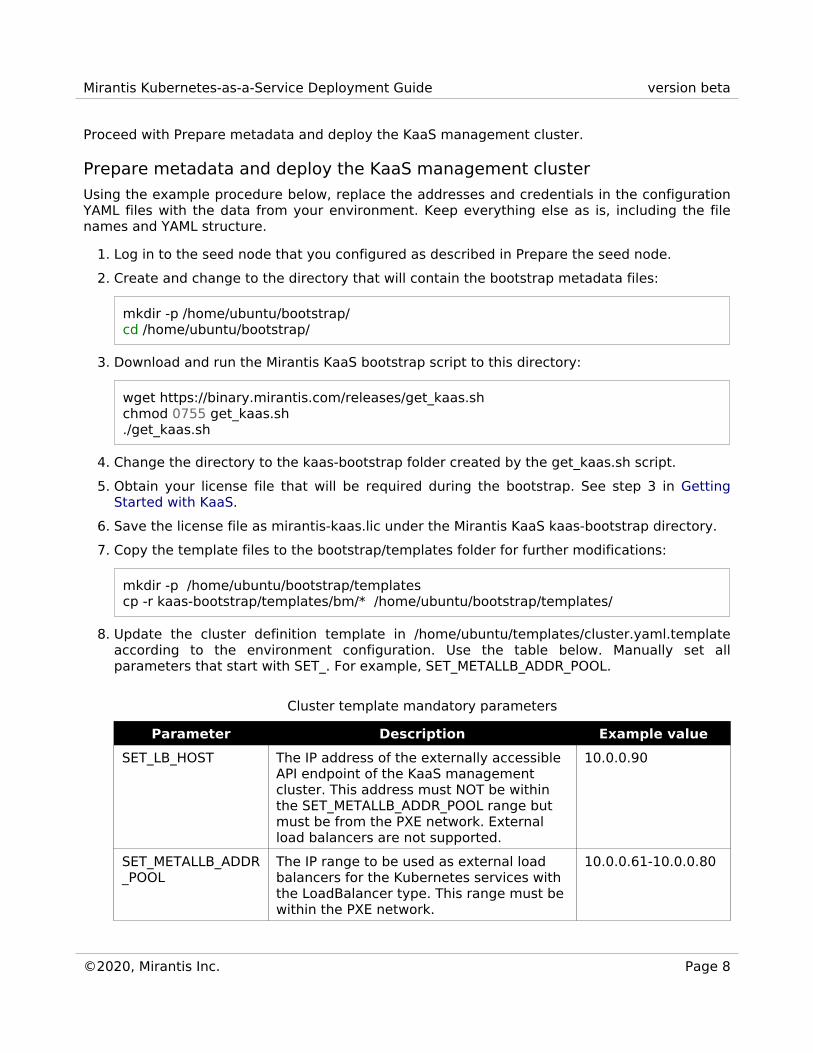
Proceed with Prepare metadata and deploy the KaaS management cluster.
Prepare metadata and deploy the KaaS management clusterUsing the example procedure below, replace the addresses and credentials in the configurationYAML files with the data from your environment. Keep everything else as is, including the filenames and YAML structure.
1. Log in to the seed node that you configured as described in Prepare the seed node.2. Create and change to the directory that will contain the bootstrap metadata files:
mkdir -p /home/ubuntu/bootstrap/cd /home/ubuntu/bootstrap/
3. Download and run the Mirantis KaaS bootstrap script to this directory:
wget https://binary.mirantis.com/releases/get_kaas.shchmod 0755 get_kaas.sh./get_kaas.sh
4. Change the directory to the kaas-bootstrap folder created by the get_kaas.sh script.5. Obtain your license file that will be required during the bootstrap. See step 3 in Getting
Started with KaaS.6. Save the license file as mirantis-kaas.lic under the Mirantis KaaS kaas-bootstrap directory.7. Copy the template files to the bootstrap/templates folder for further modifications:
mkdir -p /home/ubuntu/bootstrap/templatescp -r kaas-bootstrap/templates/bm/* /home/ubuntu/bootstrap/templates/
8. Update the cluster definition template in /home/ubuntu/templates/cluster.yaml.templateaccording to the environment configuration. Use the table below. Manually set allparameters that start with SET_. For example, SET_METALLB_ADDR_POOL.
Cluster template mandatory parameters
Parameter Description Example valueSET_LB_HOST The IP address of the externally accessible
API endpoint of the KaaS managementcluster. This address must NOT be withinthe SET_METALLB_ADDR_POOL range butmust be from the PXE network. Externalload balancers are not supported.
10.0.0.90
SET_METALLB_ADDR_POOL
The IP range to be used as external loadbalancers for the Kubernetes services withthe LoadBalancer type. This range must bewithin the PXE network.
10.0.0.61-10.0.0.80
Mirantis Kubernetes-as-a-Service Deployment Guide version beta
©2020, Mirantis Inc. Page 8
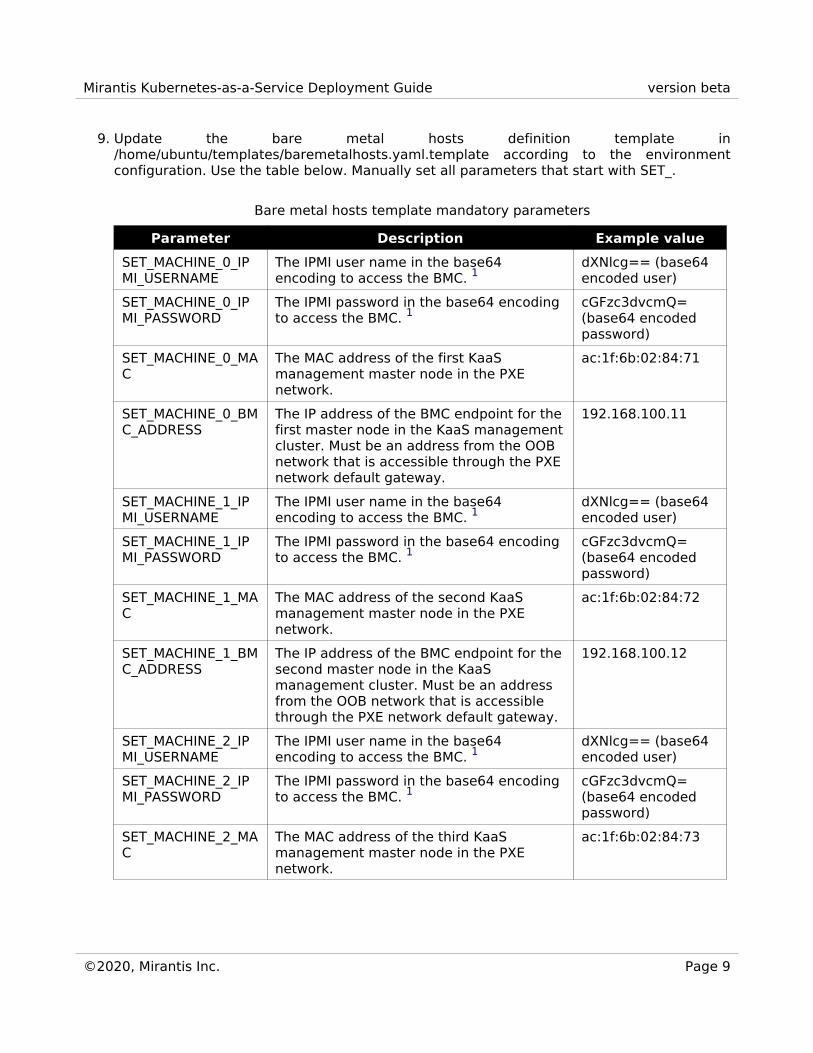
9. Update the bare metal hosts definition template in/home/ubuntu/templates/baremetalhosts.yaml.template according to the environmentconfiguration. Use the table below. Manually set all parameters that start with SET_.
Bare metal hosts template mandatory parameters
Parameter Description Example valueSET_MACHINE_0_IPMI_USERNAME
The IPMI user name in the base64encoding to access the BMC. 1
dXNlcg== (base64encoded user)
SET_MACHINE_0_IPMI_PASSWORD
The IPMI password in the base64 encodingto access the BMC. 1
cGFzc3dvcmQ=(base64 encodedpassword)
SET_MACHINE_0_MAC
The MAC address of the first KaaSmanagement master node in the PXEnetwork.
ac:1f:6b:02:84:71
SET_MACHINE_0_BMC_ADDRESS
The IP address of the BMC endpoint for thefirst master node in the KaaS managementcluster. Must be an address from the OOBnetwork that is accessible through the PXEnetwork default gateway.
192.168.100.11
SET_MACHINE_1_IPMI_USERNAME
The IPMI user name in the base64encoding to access the BMC. 1
dXNlcg== (base64encoded user)
SET_MACHINE_1_IPMI_PASSWORD
The IPMI password in the base64 encodingto access the BMC. 1
cGFzc3dvcmQ=(base64 encodedpassword)
SET_MACHINE_1_MAC
The MAC address of the second KaaSmanagement master node in the PXEnetwork.
ac:1f:6b:02:84:72
SET_MACHINE_1_BMC_ADDRESS
The IP address of the BMC endpoint for thesecond master node in the KaaSmanagement cluster. Must be an addressfrom the OOB network that is accessiblethrough the PXE network default gateway.
192.168.100.12
SET_MACHINE_2_IPMI_USERNAME
The IPMI user name in the base64encoding to access the BMC. 1
dXNlcg== (base64encoded user)
SET_MACHINE_2_IPMI_PASSWORD
The IPMI password in the base64 encodingto access the BMC. 1
cGFzc3dvcmQ=(base64 encodedpassword)
SET_MACHINE_2_MAC
The MAC address of the third KaaSmanagement master node in the PXEnetwork.
ac:1f:6b:02:84:73
Mirantis Kubernetes-as-a-Service Deployment Guide version beta
©2020, Mirantis Inc. Page 9

SET_MACHINE_2_BMC_ADDRESS
The IP address of the BMC endpoint for thethird master node in the KaaSmanagement cluster. Must be an addressfrom the OOB network that is accessiblethrough the PXE network default gateway.
192.168.100.13
1(1, 2, 3, 4, 5,6)
You can obtain the base64-encoded user name and password using thefollowing command in your Linux console:
$ echo -n <username|password> | base64
10.Update the IP address pools definition template in/home/ubuntu/templates/ipam-objects.yaml.template according to the environmentconfiguration. Use the table below. Manually set all parameters that start with SET_. Forexample, SET_IPAM_POOL_RANGE.
IP address pools template mandatory parameters
Parameter Description Example valueSET_IPAM_CIDR The address of PXE network in CIDR
notation.10.0.0.0/24
SET_PXE_NW_GW The default gateway in the PXE network.Since this is the only network that KaaS willuse, this gateway must provide access to:
• The Internet to download the Mirantisartifacts
• The OOB network of the KaaS cluster
10.0.0.1
SET_PXE_NW_DNS An external (non-Kubernetes) DNS serveraccessible from the PXE network. Thisserver will be used by the bare metal hostsin all KaaS clusters.
172.18.176.6
SET_IPAM_POOL_RANGE
This pool range includes addresses that willbe allocated to bare metal hosts in all KaaSclusters. The size of this range limits thenumber of hosts that can be deployed bythe instance of KaaS.
10.0.0.100-10.0.0.252
SET_LB_HOST 2 The IP address of the externally accessibleAPI endpoint of the KaaS managementcluster. This address must NOT be withinthe SET_METALLB_ADDR_POOL range butmust be from the PXE network. Externalload balancers are not supported.
10.0.0.90
Mirantis Kubernetes-as-a-Service Deployment Guide version beta
©2020, Mirantis Inc. Page 10

SET_METALLB_ADDR_POOL 2
The IP range to be used as external loadbalancers for the Kubernetes services withthe LoadBalancer type. This range must bewithin the PXE network.
10.0.0.61-10.0.0.80
2(1, 2) Use the same value that you used for this parameter in thecluster.yaml.template file (see above).
11.Configure the IAM parameters.
12.Configure the Ceph cluster:
1. Set up the disk configuration according to your hardware node specification in/home/ubuntu/templates/kaascephcluster.yaml.template. Also, verify that thestorageDevices section has a valid list of the HDD device names. For example:
# This part of KaaSCephCluster should contain valid device namesstorageDevices:- name: sdb role: hdd
# Each storageDevices dicts can have several devicesstorageDevices:- name: sdb role: hdd- name: sdc role: hdd
# Do not to include first devices here (like vda or sda)# because they will be allocated for operating system
2. Verify that the machine names in the spec:nodes structure are relevant to themetadata:name structure data in machines.yaml.template.
13.Verify that the /bootstrap/ directory contains the following files:
# tree /home/ubuntu/bootstrap/ ├── kaas-bootstrap │ ├── bootstrap.sh │ └── ..... └── templates ├── baremetalhosts.yaml.template ├── cluster.yaml.template ├── kaascephcluster.yaml.template ├── ipam-objects.yaml.template └── machines.yaml.template
14.Export all required parameters using the table below.
Mirantis Kubernetes-as-a-Service Deployment Guide version beta
©2020, Mirantis Inc. Page 11

WarningFor debugging purposes, the HOME directory is overwritten in this step to obtain alltemporary files in the kaas-bootstrap folder.
cd /home/ubuntu/bootstrap/kaas-bootstrap/export KAAS_BM_ENABLED="true"#export KAAS_BM_PXE_IP="10.0.0.20"export KAAS_BM_PXE_MASK="24"export KAAS_BM_PXE_BRIDGE="br0"#export KAAS_BM_BM_DHCP_RANGE="10.0.0.30,10.0.0.49"#export KEYCLOAK_FLOATING_IP="10.0.0.70"export IAM_FLOATING_IP="10.0.0.71"export PROXY_FLOATING_IP="10.0.0.72"export KAAS_BM_FULL_PREFLIGHT="true"export HOME="/home/ubuntu/bootstrap/kaas-bootstrap/"export TEMPLATES_DIR="/home/ubuntu/bootstrap/templates/"
Bare metal prerequisites data
Parameter Description Example valueKAAS_BM_PXE_IP The provisioning IP address. This address
will be assigned to the interface of theseed node defined by theKAAS_BM_PXE_BRIDGE parameter (seebelow). The PXE service of the bootstrapcluster will use this address to networkboot the bare metal hosts for the KaaSmanagement cluster.
10.0.0.20
KAAS_BM_PXE_MASK
The CIDR prefix for the PXE network. It willbe used with all of the addresses belowwhen assigning them to interfaces.
24
KAAS_BM_PXE_BRIDGE
The PXE network bridge name. The namemust match the name of the bridgecreated on the seed node during thePrepare the seed node stage.
br0
KAAS_BM_BM_DHCP_RANGE
The start_ip and end_ip addresses must bewithin the PXE network. This range will beused by Dnsmasq to provide IP adressesfor nodes during provisioning.
10.0.0.30,10.0.0.49
Mirantis Kubernetes-as-a-Service Deployment Guide version beta
©2020, Mirantis Inc. Page 12
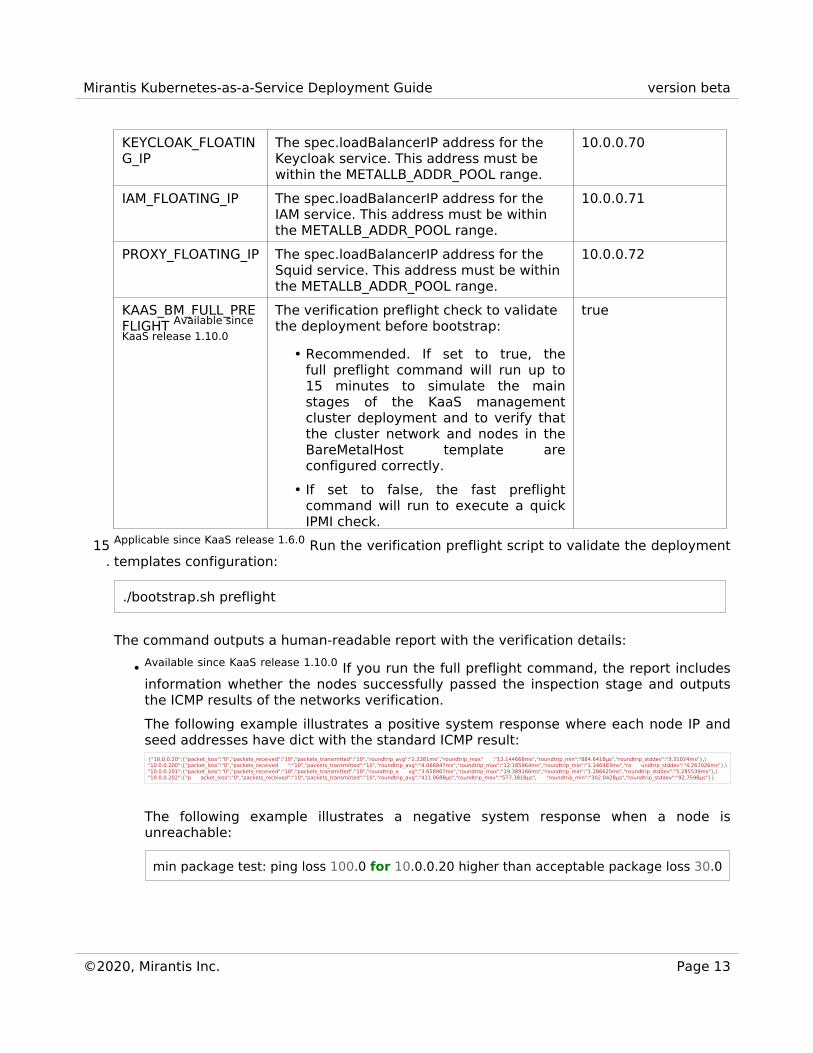
KEYCLOAK_FLOATING_IP
The spec.loadBalancerIP address for theKeycloak service. This address must bewithin the METALLB_ADDR_POOL range.
10.0.0.70
IAM_FLOATING_IP The spec.loadBalancerIP address for theIAM service. This address must be withinthe METALLB_ADDR_POOL range.
10.0.0.71
PROXY_FLOATING_IP The spec.loadBalancerIP address for theSquid service. This address must be withinthe METALLB_ADDR_POOL range.
10.0.0.72
KAAS_BM_FULL_PREFLIGHT Available sinceKaaS release 1.10.0
The verification preflight check to validatethe deployment before bootstrap:
• Recommended. If set to true, thefull preflight command will run up to15 minutes to simulate the mainstages of the KaaS managementcluster deployment and to verify thatthe cluster network and nodes in theBareMetalHost template areconfigured correctly.
• If set to false, the fast preflightcommand will run to execute a quickIPMI check.
true
15.
Applicable since KaaS release 1.6.0 Run the verification preflight script to validate the deploymenttemplates configuration:
./bootstrap.sh preflight
The command outputs a human-readable report with the verification details:
• Available since KaaS release 1.10.0 If you run the full preflight command, the report includesinformation whether the nodes successfully passed the inspection stage and outputsthe ICMP results of the networks verification.The following example illustrates a positive system response where each node IP andseed addresses have dict with the standard ICMP result:
{"10.0.0.20":{"packet_loss":"0","packets_received":"10","packets_transmitted":"10","roundtrip_avg":"2.2381ms","roundtrip_max" :"12.144668ms","roundtrip_min":"884.641Вµs","roundtrip_stddev":"3.31024ms"},\"10.0.0.200":{"packet_loss":"0","packets_received ":"10","packets_transmitted":"10","roundtrip_avg":"4.066847ms","roundtrip_max":"12.185964ms","roundtrip_min":"1.146483ms","ro undtrip_stddev":"4.267026ms"},\"10.0.0.201":{"packet_loss":"0","packets_received":"10","packets_transmitted":"10","roundtrip_a vg":"3.658907ms","roundtrip_max":"19.389166ms","roundtrip_min":"1.286625ms","roundtrip_stddev":"5.285539ms"},\"10.0.0.202":{"p acket_loss":"0","packets_received":"10","packets_transmitted":"10","roundtrip_avg":"411.068Вµs","roundtrip_max":"577.381Вµs", "roundtrip_min":"302.042Вµs","roundtrip_stddev":"92.759Вµs"}}
The following example illustrates a negative system response when a node isunreachable:
min package test: ping loss 100.0 for 10.0.0.20 higher than acceptable package loss 30.0
Mirantis Kubernetes-as-a-Service Deployment Guide version beta
©2020, Mirantis Inc. Page 13

• Available since KaaS release 1.6.0 If you run the fast preflight command, the report includesthe list of verified bare metal nodes and their Chassis Power status. This status is basedon the deployment templates configuration used during the verification.
Caution!
If the report contains information about missing dependencies or incorrectconfiguration, fix the issues before proceeding to the next step.
16.Run the bootstrap script:
./bootstrap.sh all
WarningDuring the bootstrap process, do not manually restart or power off any of the baremetal hosts.
When the bootstrap is complete:
• The script creates the kubeconfig file in the directory where the script is located. Thisfile contains the admin credentials for the KaaS management cluster.
• The system outputs the URL and credentials for the KaaS web UI.• The system outputs the URL for Keycloak.• The KaaS bootstrap cluster resources are freed up.
Save the management cluster details in a secure location.
Seealso
• Deprecated bootstrap parameters• KaaS User Guide: Connect to a KaaS cluster
Deprecated bootstrap parametersThe following tables list the bootstrap templates and CLI parameters that were deprecated andremoved from the bare metal provider installations within the scope of the Mirantis KaaS betarelease development.
Mirantis Kubernetes-as-a-Service Deployment Guide version beta
©2020, Mirantis Inc. Page 14

Deprecated bootstrap templates parameters
Parameter Deprecated in Removed in DescriptionSET_DHCP_RANGE_PARAMS
1.6.0 1.7.0 This parameter defined DHCPrange and other parameters forthe PXE boot of bare metalhosts.
SET_MASTER0_PROVISIONING_INTERFACE
1.6.0 1.7.0 This parameter defined thename of the interface on thefirst master node in the KaaSmanagement cluster that isconnected to the PXE network.
SET_MASTER0_ADDR SET_MASTER1_ADDR SET_MASTER2_ADDR
1.6.0 1.7.0 These parameters defined IPaddresses of the master nodesof the KaaS managementcluster.
Deprecated bootstrap CLI parameters
Parameter Deprecated in Removed in DescriptionKAAS_BM_IRONIC_LB_IP
1.9.0 1.10.0 This parameter defined thespec.loadBalancerIP address forthe Ironic service.
KAAS_BM_IRONIC_INSPECTOR_LB_IP
1.9.0 1.10.0 This parameter defined thespec.loadBalancerIP address forthe Ironic Inspector service.
KAAS_BM_HTTPD_LB_IP
1.9.0 1.10.0 This parameter defined thespec.loadBalancerIP address forthe httpd service.
Mirantis Kubernetes-as-a-Service Deployment Guide version beta
©2020, Mirantis Inc. Page 15
Deploy an OpenStack-based managementclusterThis section describes how to bootstrap an OpenStack-based KaaS management cluster.
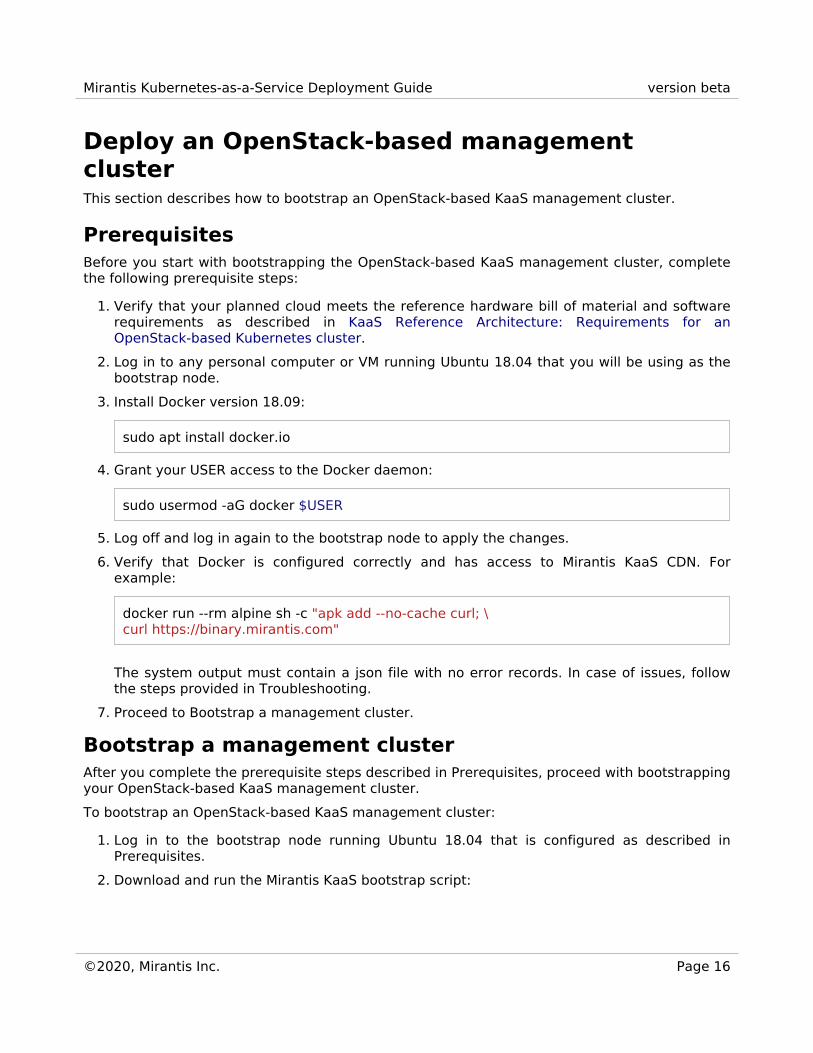
PrerequisitesBefore you start with bootstrapping the OpenStack-based KaaS management cluster, completethe following prerequisite steps:
1. Verify that your planned cloud meets the reference hardware bill of material and softwarerequirements as described in KaaS Reference Architecture: Requirements for anOpenStack-based Kubernetes cluster.
2. Log in to any personal computer or VM running Ubuntu 18.04 that you will be using as thebootstrap node.
3. Install Docker version 18.09:
sudo apt install docker.io
4. Grant your USER access to the Docker daemon:
sudo usermod -aG docker $USER
5. Log off and log in again to the bootstrap node to apply the changes.6. Verify that Docker is configured correctly and has access to Mirantis KaaS CDN. For
example:
docker run --rm alpine sh -c "apk add --no-cache curl; \curl https://binary.mirantis.com"
The system output must contain a json file with no error records. In case of issues, followthe steps provided in Troubleshooting.
7. Proceed to Bootstrap a management cluster.
Bootstrap a management clusterAfter you complete the prerequisite steps described in Prerequisites, proceed with bootstrappingyour OpenStack-based KaaS management cluster.To bootstrap an OpenStack-based KaaS management cluster:
1. Log in to the bootstrap node running Ubuntu 18.04 that is configured as described inPrerequisites.
2. Download and run the Mirantis KaaS bootstrap script:
Mirantis Kubernetes-as-a-Service Deployment Guide version beta
©2020, Mirantis Inc. Page 16

wget https://binary.mirantis.com/releases/get_kaas.shchmod 0755 get_kaas.sh./get_kaas.sh
3. Change the directory to the kaas-bootstrap folder created by the get_kaas.sh script.4. Obtain your license file that will be required during the bootstrap. See step 3 in Getting
Started with KaaS.5. Save the license file as mirantis-kaas.lic under the Mirantis KaaS bootstrap directory.6. Log in to the OpenStack Horizon.7. In the Project section, select API Access.8. In the right-side drop-down menu Download OpenStack RC File, select OpenStack
clouds.yaml File.9. Add the downloaded clouds.yaml file to the directory with the bootstrap.sh script.
10.In clouds.yaml, add the password field with your OpenStack password under theclouds/openstack/auth section.Example:
clouds: openstack: auth: auth_url: https://auth.openstack.example.com:5000/v3 username: your_username password: your_secret_password project_id: your_project_id user_domain_name: your_ldap_password region_name: RegionOne interface: public identity_api_version: 3
11.Verify access to the target cloud endpoint from Docker. For example:
docker run --rm alpine sh -c "apk add --no-cache curl; \curl https://auth.openstack.example.com:5000/v3"
The system output must contain a json file with no error records. In case of issues, followthe steps provided in Troubleshooting.
12.In templates/machines.yaml.template, modify the spec:providerSpec:value sections forset: master and set: node by substituting the flavor and image parameters with thecorresponding values of your OpenStack cluster. For example:
spec: providerSpec: value:
Mirantis Kubernetes-as-a-Service Deployment Guide version beta
©2020, Mirantis Inc. Page 17

apiVersion: "openstackproviderconfig.k8s.io/v1alpha1" kind: "OpenstackMachineProviderSpec" flavor: kaas.minimal image: bionic-server-cloudimg-amd64-20190612
Also, modify other parameters as required.13
.Modify the templates/cluster.yaml.template parameters as required.
14.Configure the IAM parameters.
15.Run the bootstrap script:
./bootstrap.sh all
When the bootstrap is complete:
• The script creates the kubeconfig file in the directory where the script is located. Thisfile contains the admin credentials for the KaaS management cluster.
• The system outputs the URL and credentials for the KaaS web UI.• The system outputs the URL for Keycloak.• The KaaS bootstrap cluster resources are freed up.
Save the management cluster details in a secure location.16
.In case of deployment issues, collect and inspect the bootstrap and management clusterlogs as described in Troubleshooting.
Now, you can proceed with managing the KaaS management cluster using the KaaS web UI anddeploying the KaaS child clusters as described in Create an OpenStack-based KaaS child cluster.
SeealsoKaaS User Guide: Connect to a KaaS cluster
Mirantis Kubernetes-as-a-Service Deployment Guide version beta
©2020, Mirantis Inc. Page 18

Deploy an AWS-based management clusterThis section describes how to bootstrap a KaaS management cluster that is based on theAmazon Web Services (AWS) cloud provider.
PrerequisitesBefore you start with bootstrapping the AWS-based KaaS management cluster, complete thefollowing prerequisite steps:
1. Inspect the Requirements for an AWS-based Kubernetes cluster to understand the potentialimpact of the KaaS deployment on your AWS cloud usage.
2. Log in to any personal computer or VM running Ubuntu 18.04 that you will be using as thebootstrap node.
3. Install Docker version 18.09:
sudo apt install docker.io
4. Grant your USER access to the Docker daemon:
sudo usermod -aG docker $USER
5. Log out and log in again to the bootstrap node to apply the changes.6. Verify that Docker is configured and works correctly. For example:
docker run --rm alpine sh -c "apk add --no-cache curl; \curl https://binary.mirantis.com"
The system output must contain a json file with no error records. In case of issues, followthe steps provided in Troubleshooting.
7. Proceed to Bootstrap a management cluster.
Bootstrap a management clusterAfter you complete the prerequisite steps described in Prerequisites, proceed with bootstrappingyour AWS-based KaaS management cluster.To bootstrap an AWS-based KaaS management cluster:
1. Log in to the bootstrap node running Ubuntu 18.04 that is configured as described inPrerequisites.
2. Download and run the Mirantis KaaS bootstrap script:
wget https://binary.mirantis.com/releases/get_kaas.sh
chmod 0755 get_kaas.sh
Mirantis Kubernetes-as-a-Service Deployment Guide version beta
©2020, Mirantis Inc. Page 19
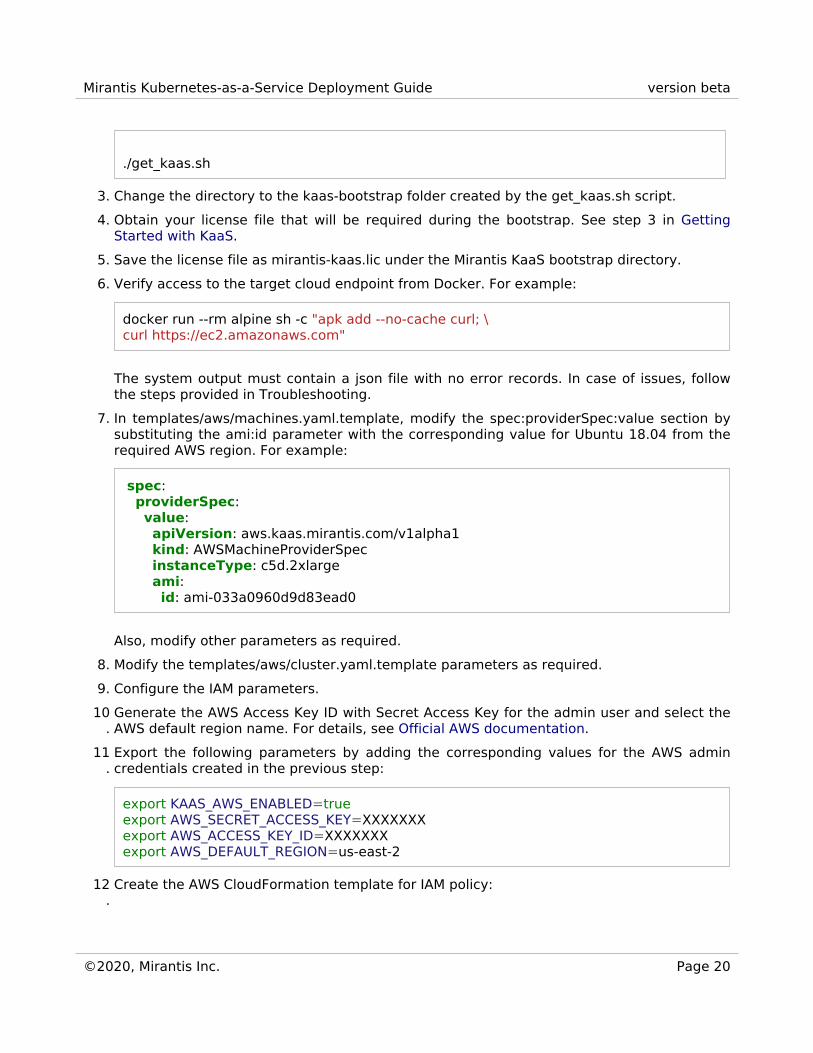
./get_kaas.sh
3. Change the directory to the kaas-bootstrap folder created by the get_kaas.sh script.4. Obtain your license file that will be required during the bootstrap. See step 3 in Getting
Started with KaaS.5. Save the license file as mirantis-kaas.lic under the Mirantis KaaS bootstrap directory.6. Verify access to the target cloud endpoint from Docker. For example:
docker run --rm alpine sh -c "apk add --no-cache curl; \curl https://ec2.amazonaws.com"
The system output must contain a json file with no error records. In case of issues, followthe steps provided in Troubleshooting.
7. In templates/aws/machines.yaml.template, modify the spec:providerSpec:value section bysubstituting the ami:id parameter with the corresponding value for Ubuntu 18.04 from therequired AWS region. For example:
spec: providerSpec: value: apiVersion: aws.kaas.mirantis.com/v1alpha1 kind: AWSMachineProviderSpec instanceType: c5d.2xlarge ami: id: ami-033a0960d9d83ead0
Also, modify other parameters as required.8. Modify the templates/aws/cluster.yaml.template parameters as required.9. Configure the IAM parameters.
10.Generate the AWS Access Key ID with Secret Access Key for the admin user and select theAWS default region name. For details, see Official AWS documentation.
11.Export the following parameters by adding the corresponding values for the AWS admincredentials created in the previous step:
export KAAS_AWS_ENABLED=trueexport AWS_SECRET_ACCESS_KEY=XXXXXXXexport AWS_ACCESS_KEY_ID=XXXXXXXexport AWS_DEFAULT_REGION=us-east-2
12.Create the AWS CloudFormation template for IAM policy:
Mirantis Kubernetes-as-a-Service Deployment Guide version beta
©2020, Mirantis Inc. Page 20

./kaas bootstrap aws policy
13.Generate the AWS Access Key ID with Secret Access Key for thebootstrapper.cluster-api-provider-aws.kaas.mirantis.com user, that was created in theprevious step, and select the AWS default region name.
14.Export the AWS bootstrapper.cluster-api-provider-aws.kaas.mirantis.com user credentialsthat were created in the previous step:
export KAAS_AWS_ENABLED=trueexport AWS_SECRET_ACCESS_KEY=XXXXXXXexport AWS_ACCESS_KEY_ID=XXXXXXXexport AWS_DEFAULT_REGION=us-east-2
15.Run the bootstrap script:
./bootstrap.sh all
When the bootstrap is complete:
• The script creates the kubeconfig file in the directory where the script is located. Thisfile contains the admin credentials for the KaaS management cluster.
• The system outputs the URL and credentials for the KaaS web UI.• The system outputs the URL for Keycloak.• The KaaS bootstrap cluster resources are freed up.
Save the management cluster details in a secure location.16
.In case of deployment issues, collect and inspect the bootstrap and management clusterlogs as described in Troubleshooting.
Now, you can proceed with managing the KaaS management cluster using the KaaS web UI anddeploying the KaaS child clusters as described in Create an AWS-based KaaS child cluster.
SeealsoKaaS User Guide: Connect to a KaaS cluster
Mirantis Kubernetes-as-a-Service Deployment Guide version beta
©2020, Mirantis Inc. Page 21
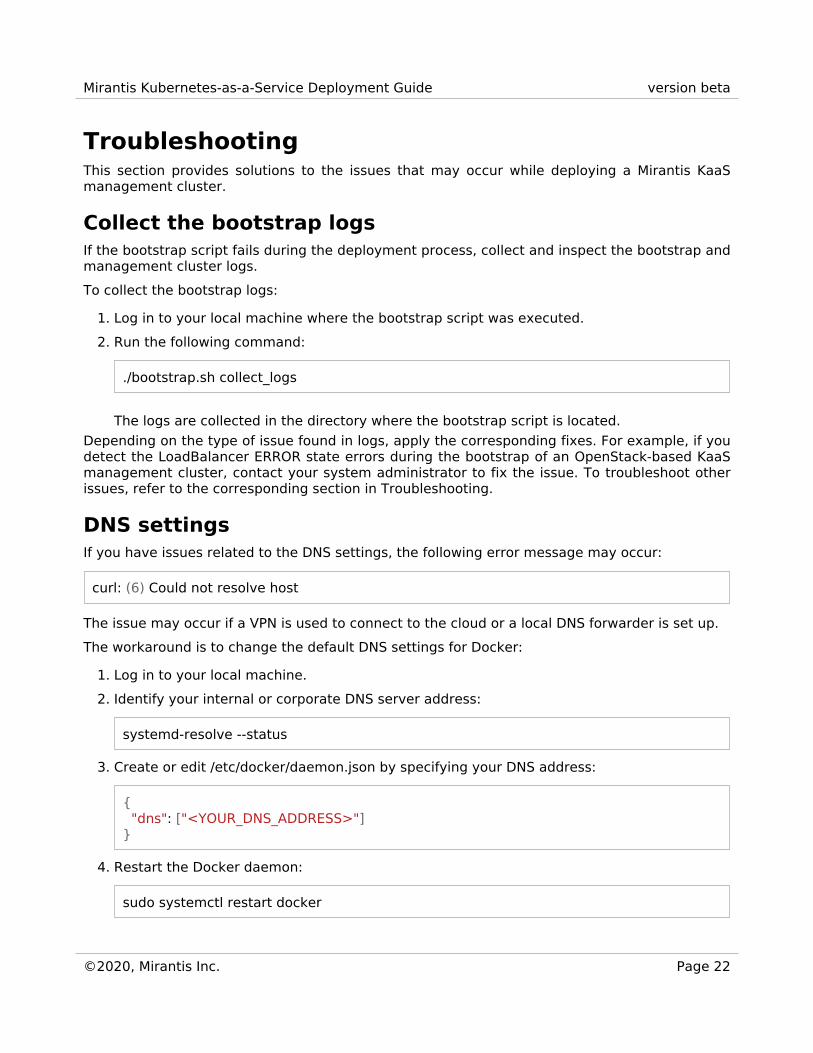
TroubleshootingThis section provides solutions to the issues that may occur while deploying a Mirantis KaaSmanagement cluster.
Collect the bootstrap logsIf the bootstrap script fails during the deployment process, collect and inspect the bootstrap andmanagement cluster logs.To collect the bootstrap logs:
1. Log in to your local machine where the bootstrap script was executed.2. Run the following command:
./bootstrap.sh collect_logs
The logs are collected in the directory where the bootstrap script is located.Depending on the type of issue found in logs, apply the corresponding fixes. For example, if youdetect the LoadBalancer ERROR state errors during the bootstrap of an OpenStack-based KaaSmanagement cluster, contact your system administrator to fix the issue. To troubleshoot otherissues, refer to the corresponding section in Troubleshooting.
DNS settingsIf you have issues related to the DNS settings, the following error message may occur:
curl: (6) Could not resolve host
The issue may occur if a VPN is used to connect to the cloud or a local DNS forwarder is set up.The workaround is to change the default DNS settings for Docker:
1. Log in to your local machine.2. Identify your internal or corporate DNS server address:
systemd-resolve --status
3. Create or edit /etc/docker/daemon.json by specifying your DNS address:
{ "dns": ["<YOUR_DNS_ADDRESS>"]}
4. Restart the Docker daemon:
sudo systemctl restart docker
Mirantis Kubernetes-as-a-Service Deployment Guide version beta
©2020, Mirantis Inc. Page 22

Default network addressIf you have issues related to the default network address configuration, cURL either hangs or thefollowing error occurs:
curl: (7) Failed to connect to xxx.xxx.xxx.xxx port xxxx: Host is unreachable
The issue may occur because the default Docker network address 172.17.0.0/16 overlaps withyour cloud address or other addresses of the network configuration.Workaround:
1. Log in to your local machine.2. Verify routing to the IP addresses of the target cloud endpoints:
1. Obtain the IP address of your target cloud. For example:
nslookup auth.openstack.example.com
Example of system response:
Name: auth.openstack.example.comAddress: 172.17.246.119
2. Verify that this IP address is not routed through docker0 but through any otherinterface, for example, ens3:
ip r get 172.17.246.119
Example of the system response if the routing is configured correctly:
172.17.246.119 via 172.18.194.1 dev ens3 src 172.18.1.1 uid 1000 cache
Example of the system response if the routing is configured incorrectly:
172.17.246.119 via 172.18.194.1 dev docker0 src 172.18.1.1 uid 1000 cache
3. If the routing is incorrect, change the IP address of the default Docker bridge:
1. Create or edit /etc/docker/daemon.json by adding the "bip" option:
{ "bip": "192.168.91.1/24"}
Mirantis Kubernetes-as-a-Service Deployment Guide version beta
©2020, Mirantis Inc. Page 23
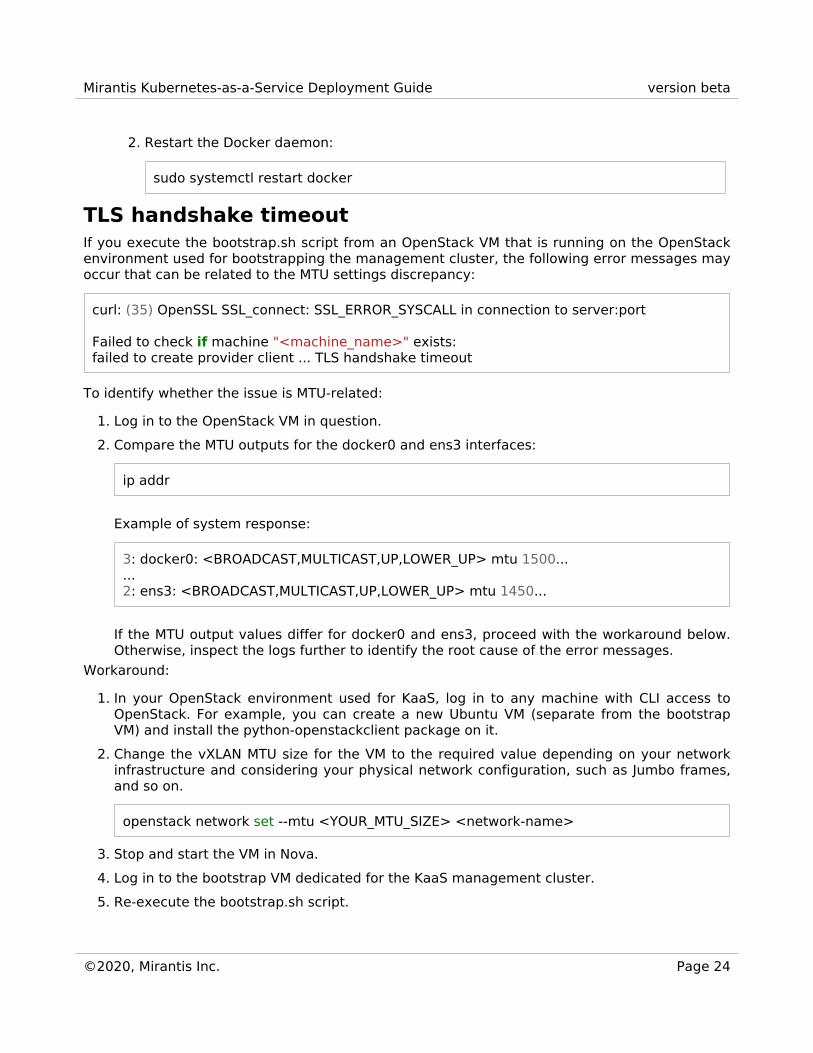
2. Restart the Docker daemon:
sudo systemctl restart docker
TLS handshake timeoutIf you execute the bootstrap.sh script from an OpenStack VM that is running on the OpenStackenvironment used for bootstrapping the management cluster, the following error messages mayoccur that can be related to the MTU settings discrepancy:
curl: (35) OpenSSL SSL_connect: SSL_ERROR_SYSCALL in connection to server:port
Failed to check if machine "<machine_name>" exists:failed to create provider client ... TLS handshake timeout
To identify whether the issue is MTU-related:
1. Log in to the OpenStack VM in question.2. Compare the MTU outputs for the docker0 and ens3 interfaces:
ip addr
Example of system response:
3: docker0: <BROADCAST,MULTICAST,UP,LOWER_UP> mtu 1500......2: ens3: <BROADCAST,MULTICAST,UP,LOWER_UP> mtu 1450...
If the MTU output values differ for docker0 and ens3, proceed with the workaround below.Otherwise, inspect the logs further to identify the root cause of the error messages.
Workaround:
1. In your OpenStack environment used for KaaS, log in to any machine with CLI access toOpenStack. For example, you can create a new Ubuntu VM (separate from the bootstrapVM) and install the python-openstackclient package on it.
2. Change the vXLAN MTU size for the VM to the required value depending on your networkinfrastructure and considering your physical network configuration, such as Jumbo frames,and so on.
openstack network set --mtu <YOUR_MTU_SIZE> <network-name>
3. Stop and start the VM in Nova.4. Log in to the bootstrap VM dedicated for the KaaS management cluster.5. Re-execute the bootstrap.sh script.
Mirantis Kubernetes-as-a-Service Deployment Guide version beta
©2020, Mirantis Inc. Page 24
Configure authentication for KaaSThis section describes how to configure authentication for KaaS depending on the externalIdentity Provider type integrated to your deployment.
Configure the IAM parametersBefore bootstrapping a KaaS management cluster, configure the IAM parameters for an IdentityProvider and for the IAM roles with passwords.After you complete the prerequisite steps depending on the provider type of your choice anddownload the bootstrap script, configure cluster.yaml.template for IAM as described below.To configure cluster.yaml.template for IAM:
1. Choose from the following options:
• For a baremetal-based KaaS cluster, open the templates/bm/cluster.yaml.template filefor editing.
• For an OpenStack or AWS-based KaaS cluster, open thetemplates/cluster.yaml.template file for editing.
2. Configure the external Identity Provider parameters:
• For LDAP, configure the keycloak:userFederation:providers: andkeycloak:userFederation:mappers: sections. For details, see Configure LDAP for IAM.
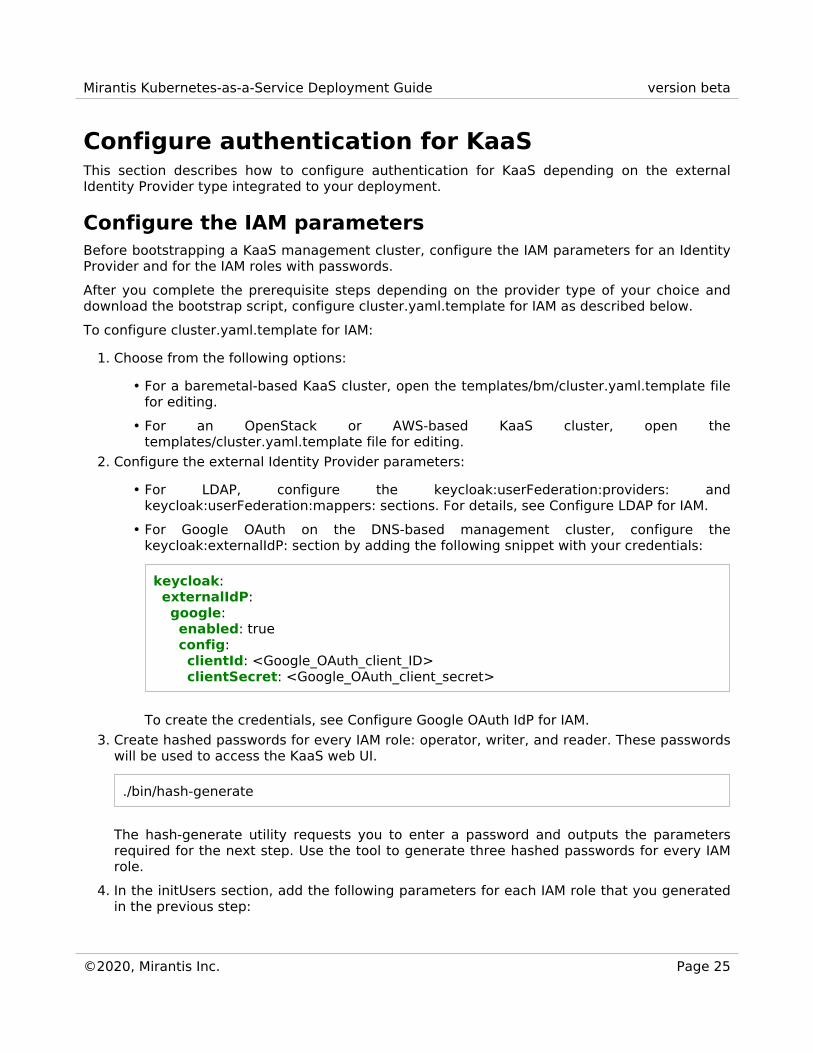
• For Google OAuth on the DNS-based management cluster, configure thekeycloak:externalIdP: section by adding the following snippet with your credentials:
keycloak: externalIdP: google: enabled: true config: clientId: <Google_OAuth_client_ID> clientSecret: <Google_OAuth_client_secret>
To create the credentials, see Configure Google OAuth IdP for IAM.3. Create hashed passwords for every IAM role: operator, writer, and reader. These passwords
will be used to access the KaaS web UI.
./bin/hash-generate
The hash-generate utility requests you to enter a password and outputs the parametersrequired for the next step. Use the tool to generate three hashed passwords for every IAMrole.
4. In the initUsers section, add the following parameters for each IAM role that you generatedin the previous step:
Mirantis Kubernetes-as-a-Service Deployment Guide version beta
©2020, Mirantis Inc. Page 25

• passwordSalt - base64-encoded randomly generated sequence of bytes.• passwordHash - base64-encoded password hash generated using
passwordHashAlgorithm with passwordHashIterations. Supported algorithms includepbkdf2-sha256 and pbkdf-sha512.
For example:
passwordSalt: 6ibPZdUfQK8PsOpSmyVJnA==passwordHash: 23W1l65FBdI3NL7LMiUQG9Cu62bWLTqIsOgdW8xNsqw=passwordHashAlgorithm: pbkdf2-sha256passwordHashIterations: 300000
Now, return to the deployment instruction depending on the provider type of your KaaSmanagement cluster:
• For a baremetal-based KaaS cluster, see step 12 of the Prepare metadata and deploy theKaaS management cluster section in Bootstrap a baremetal-based management cluster.
• For an OpenStack-based KaaS cluster, see step 15 in Bootstrap an OpenStack-basedmanagement cluster.
• For an AWS-based KaaS cluster, see step 10 in Bootstrap an AWS-based managementcluster.
Configure LDAP for IAMIf you integrate LDAP for IAM to KaaS, add the required LDAP configuration totemplates/cluster.yaml.template during the bootstrap of the KaaS management cluster. Fordetails, see Bootstrap a management cluster.LDAP configuration example:
keycloak: userFederation: providers: - displayName: "<LDAP_NAME>" providerName: "ldap" priority: 1 fullSyncPeriod: -1 changedSyncPeriod: -1 config: pagination: "true" debug: "false" searchScope: "1" connectionPooling: "true" usersDn: "<DN>" # "ou=People, o=<ORGANIZATION>, dc=<DOMAIN_COMPONENT>" userObjectClasses: "inetOrgPerson,organizationalPerson" usernameLDAPAttribute: "uid" rdnLDAPAttribute: "uid" vendor: "ad" editMode: "READ_ONLY"
Mirantis Kubernetes-as-a-Service Deployment Guide version beta
©2020, Mirantis Inc. Page 26
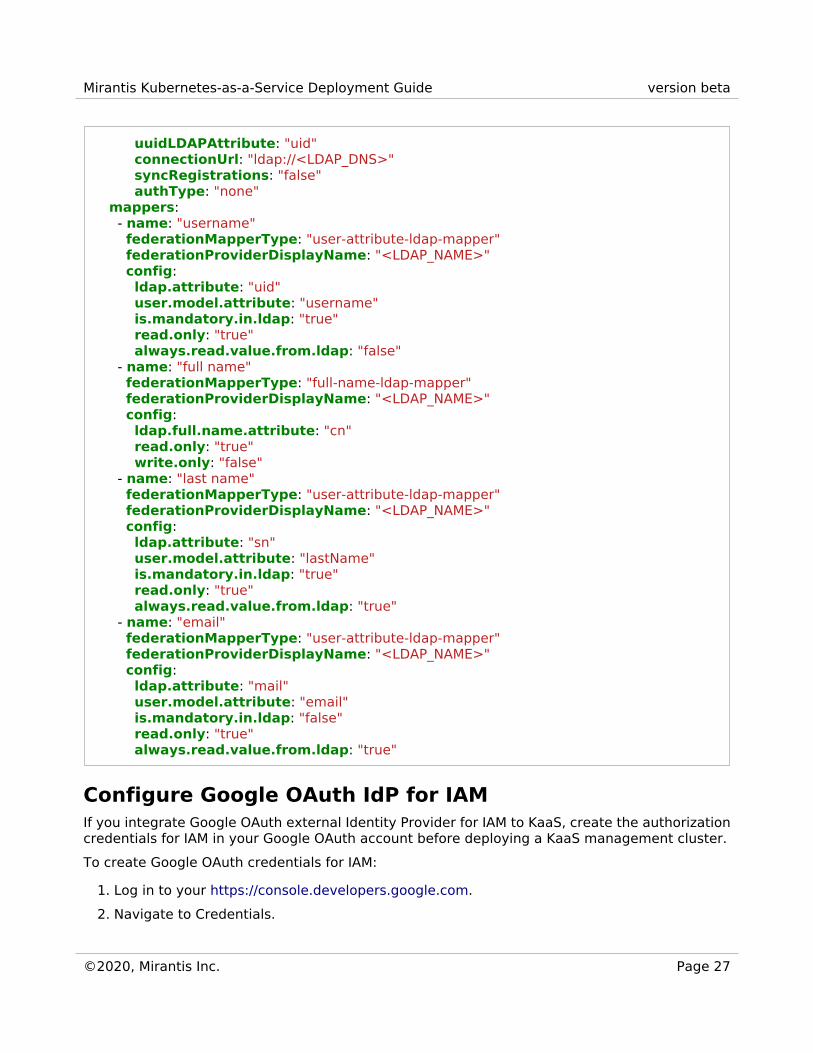
uuidLDAPAttribute: "uid" connectionUrl: "ldap://<LDAP_DNS>" syncRegistrations: "false" authType: "none" mappers: - name: "username" federationMapperType: "user-attribute-ldap-mapper" federationProviderDisplayName: "<LDAP_NAME>" config: ldap.attribute: "uid" user.model.attribute: "username" is.mandatory.in.ldap: "true" read.only: "true" always.read.value.from.ldap: "false" - name: "full name" federationMapperType: "full-name-ldap-mapper" federationProviderDisplayName: "<LDAP_NAME>" config: ldap.full.name.attribute: "cn" read.only: "true" write.only: "false" - name: "last name" federationMapperType: "user-attribute-ldap-mapper" federationProviderDisplayName: "<LDAP_NAME>" config: ldap.attribute: "sn" user.model.attribute: "lastName" is.mandatory.in.ldap: "true" read.only: "true" always.read.value.from.ldap: "true" - name: "email" federationMapperType: "user-attribute-ldap-mapper" federationProviderDisplayName: "<LDAP_NAME>" config: ldap.attribute: "mail" user.model.attribute: "email" is.mandatory.in.ldap: "false" read.only: "true" always.read.value.from.ldap: "true"
Configure Google OAuth IdP for IAMIf you integrate Google OAuth external Identity Provider for IAM to KaaS, create the authorizationcredentials for IAM in your Google OAuth account before deploying a KaaS management cluster.To create Google OAuth credentials for IAM:
1. Log in to your https://console.developers.google.com.2. Navigate to Credentials.
Mirantis Kubernetes-as-a-Service Deployment Guide version beta
©2020, Mirantis Inc. Page 27

3. In the APIs Credentials menu, select OAuth client ID.4. In the window that opens:
1. In the Application type menu, select Web application.2. In the Authorized redirect URIs field, type in
<keycloak-url>/auth/realms/iam/broker/google/endpoint, where <keycloak-url> is thecorresponding DNS address.
3. Press Enter to add the URI.4. Click Create.
A page with your client ID and client secret opens. Save these credentials for furtherusage.
5. Proceed to the Bootstrap a management cluster procedure. The Google OAuth credentialsare required in the step 12 of that procedure.
Mirantis Kubernetes-as-a-Service Deployment Guide version beta
©2020, Mirantis Inc. Page 28


