28
KILLEEN ISD CISCO IP COMMUNICATIONS END USER TRAINING
KILLEEN ISD CISCO IP COMMUNICATIONS
END USER TRAINING
COURSE OUTLINE
Phone Overview Basic Phone Opera�on Voicemail Q & A
SECTION 1 – PHONE OVERVIEW
By the end of this sec�on you will be able to complete the following: Understand the phone layout Understand the phone bu�ons Understand the phones so�keys
Section 1 – Phone Overview
GETTING TO KNOW YOUR PHONE
Section 1 – Phone Overview
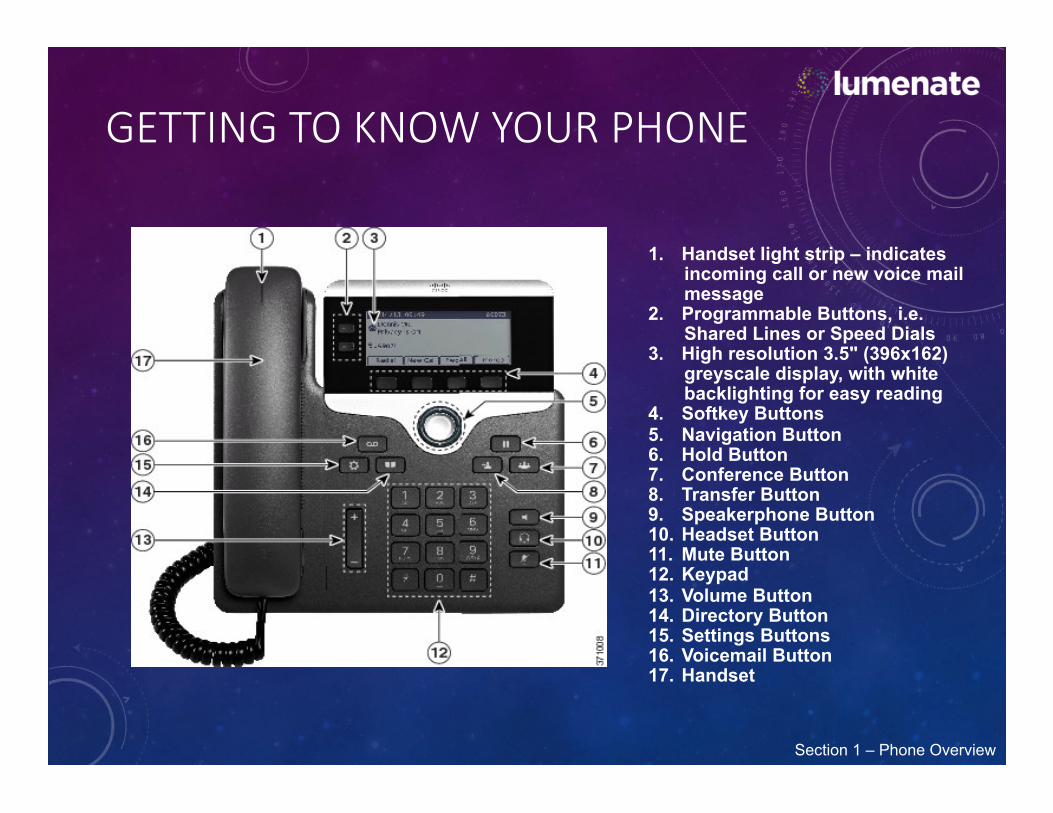
1. Handset light strip – indicates incoming call or new voice mail message
2. Programmable Buttons, i.e. Shared Lines or Speed Dials
3. High resolution 3.5" (396x162) greyscale display, with white backlighting for easy reading
4. Softkey Buttons 5. Navigation Button 6. Hold Button 7. Conference Button 8. Transfer Button 9. Speakerphone Button 10. Headset Button 11. Mute Button 12. Keypad 13. Volume Button 14. Directory Button 15. Settings Buttons 16. Voicemail Button 17. Handset
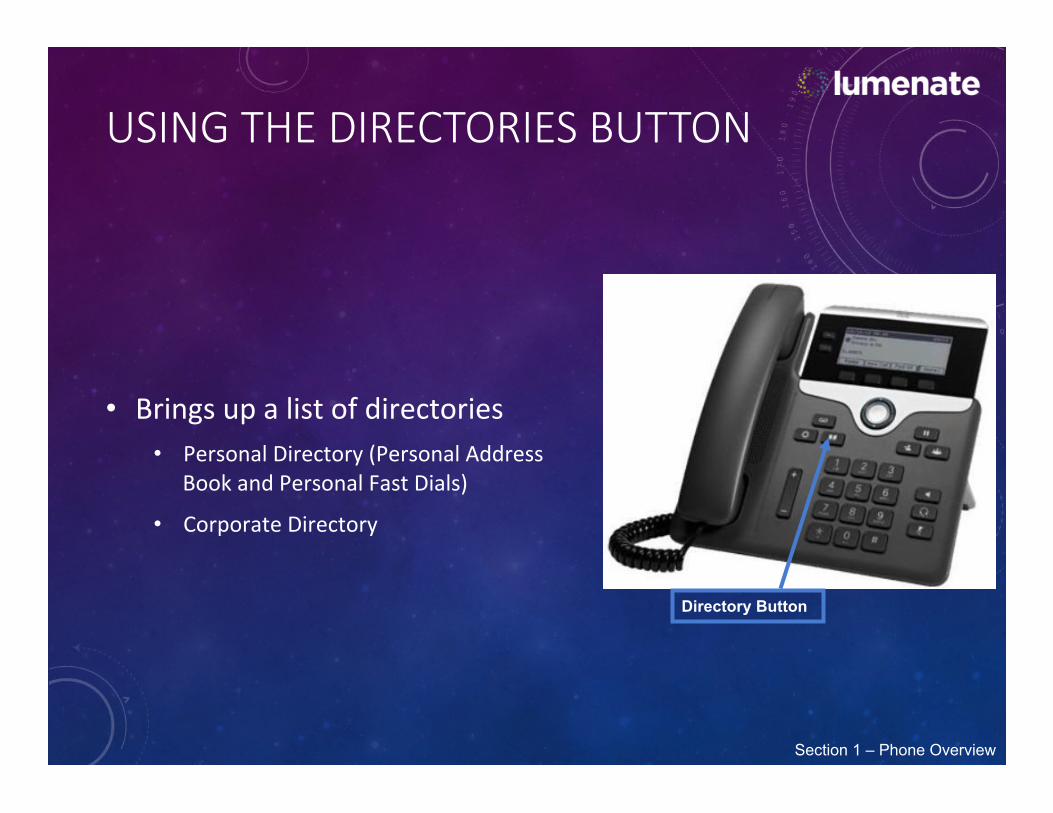
USING THE DIRECTORIES BUTTON
Brings up a list of directories Personal Directory (Personal Address Book and Personal Fast Dials)
Corporate Directory
Section 1 – Phone Overview
Directory Button
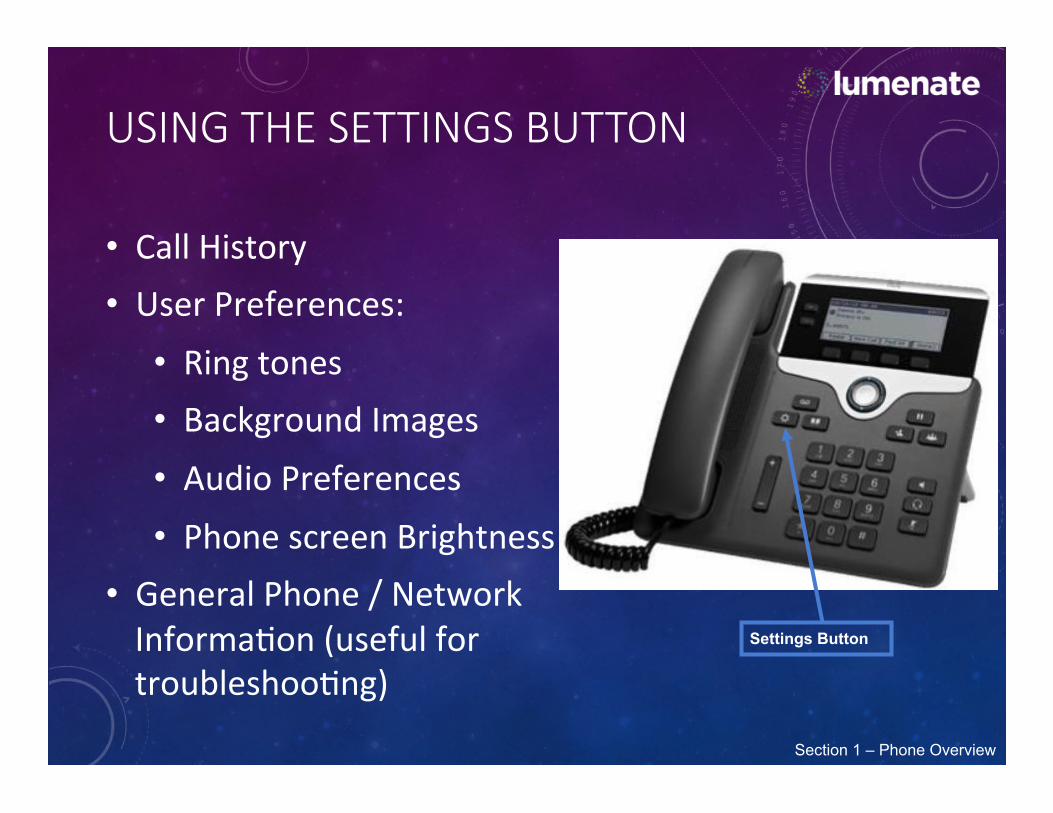
USING THE SETTINGS BUTTON
Call History User Preferences:
Ring tones Background Images Audio Preferences Phone screen Brightness
General Phone / Network Informa�on (useful for troubleshoo�ng)
Section 1 – Phone Overview
Settings Button
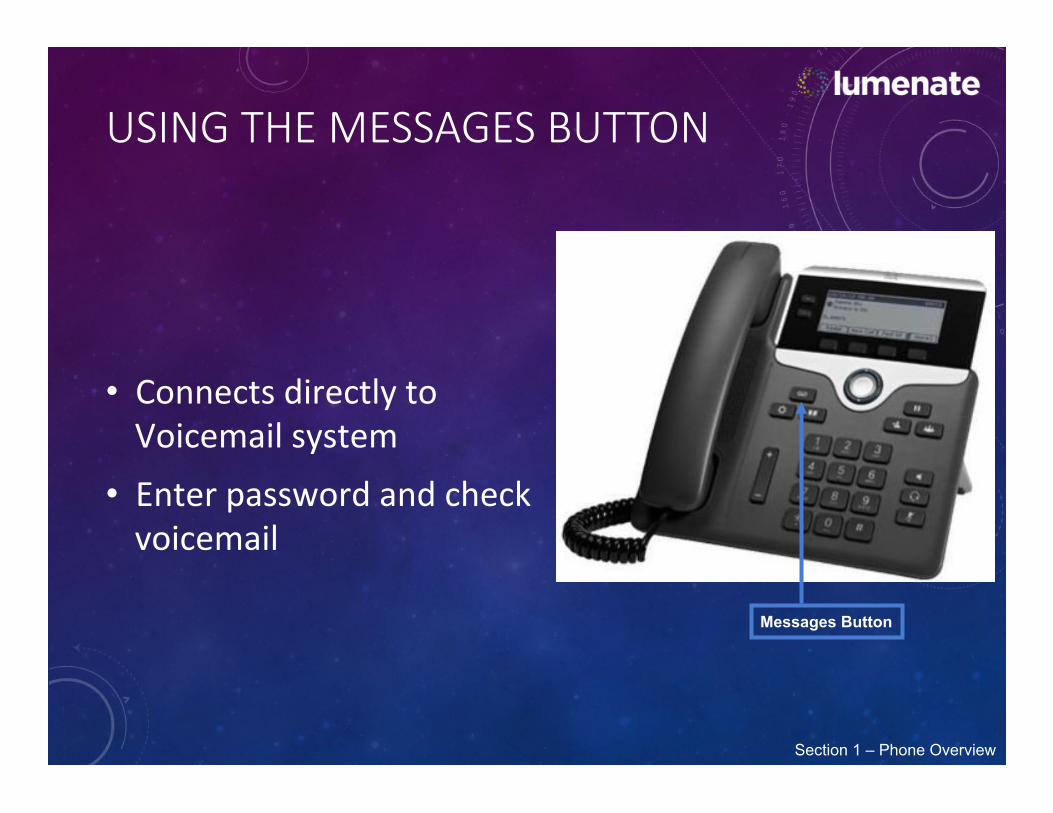
USING THE MESSAGES BUTTON
Connects directly to Voicemail system Enter password and check voicemail
Section 1 – Phone Overview
Messages Button
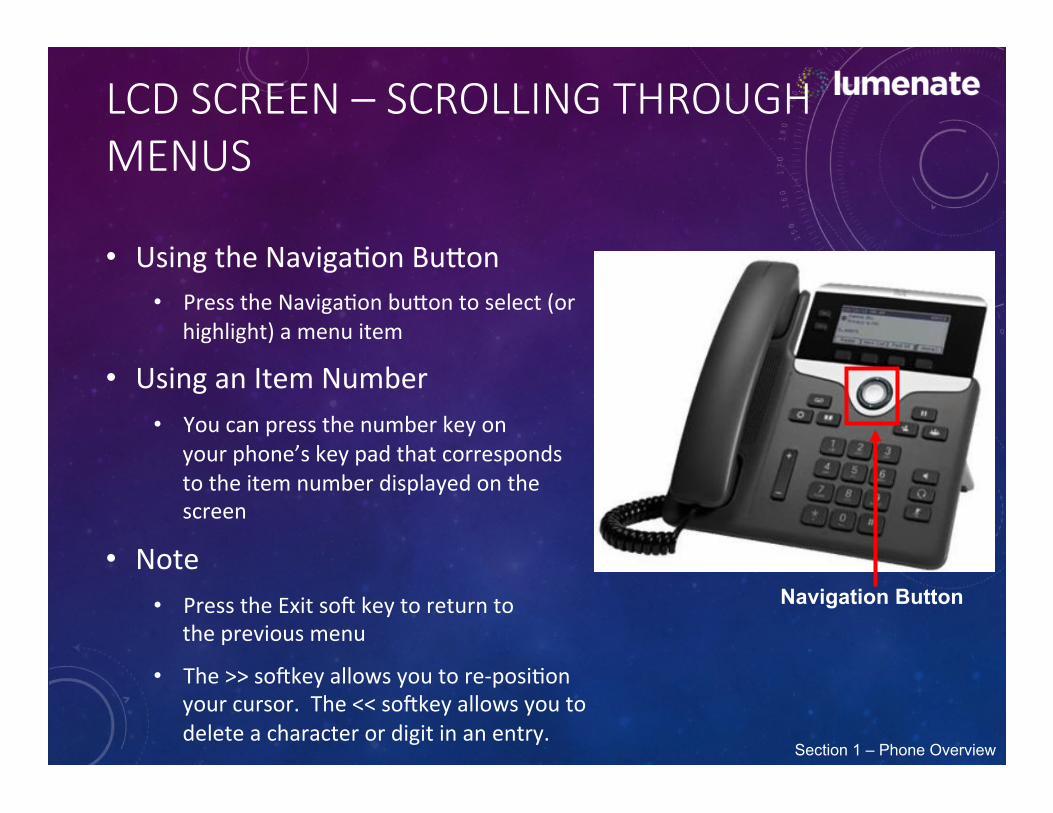
LCD SCREEN – SCROLLING THROUGH MENUS
Using the Naviga�on Bu�on Press the Naviga�on bu�on to select (or highlight) a menu item
Using an Item Number You can press the number key on your phone’s key pad that corresponds to the item number displayed on the screen
Note Press the Exit so� key to return to the previous menu
The >> so�key allows you to re-‐posi�on your cursor. The << so�key allows you to delete a character or digit in an entry.
Section 1 – Phone Overview
Navigation Button
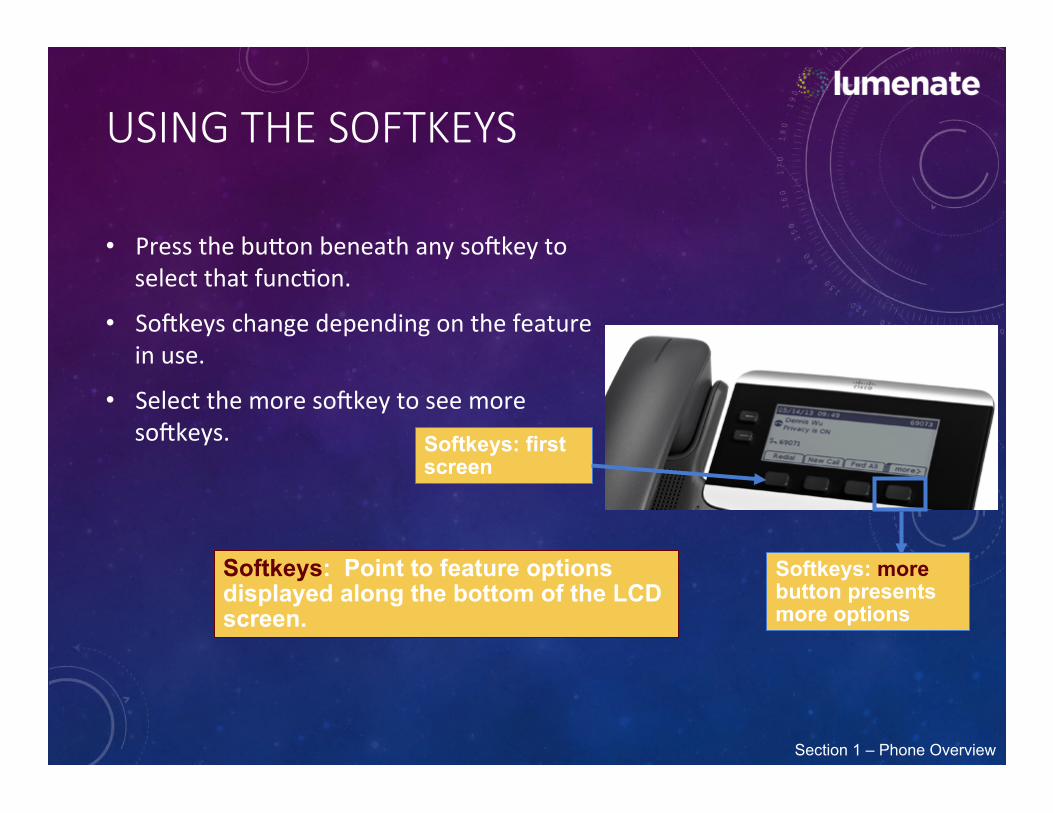
USING THE SOFTKEYS
Press the bu�on beneath any so�key to select that func�on.
So�keys change depending on the feature in use.
Select the more so�key to see more so�keys.
Softkeys: more button presents more options
Softkeys: Point to feature options displayed along the bottom of the LCD screen.
Section 1 – Phone Overview
Softkeys: first screen
SECTION 2 – BASIC PHONE OPERATION
By the end of this sec�on you will be able to complete the following: Place a call Answer a call Use hold, transfer, and conferencing func�ons
Section 2 – Basic Phone Operation

PLACING A CALL
There are many ways to place a phone call. You can simply:
Li� the handset Dial the phone number
Other ways include the following: Dial the phone number Do one of the following:
Li� the handset Press the line bu�on for the line you wish to call on (Speaker bu�on lights)
Press the Speaker bu�on Press the Headset bu�on
Section 2 – Basic Phone Operation
Handset
Line Buttons
Speaker Headset
DIALING THE NUMBER OVERVIEW
Inside Calls: Simply dial the 5-‐digit extension number (use the Directories bu�on to look up other IP phone users) – all KISD 5-‐digit extensions start with a 6!
Outside Local Calls: Dial “9” + the number Outside Long Distance Calls: 9, 1 and then the 10 digit des�na�on (e.g. 9,1,512-‐555-‐5555)
Section 2 – Basic Phone Operation
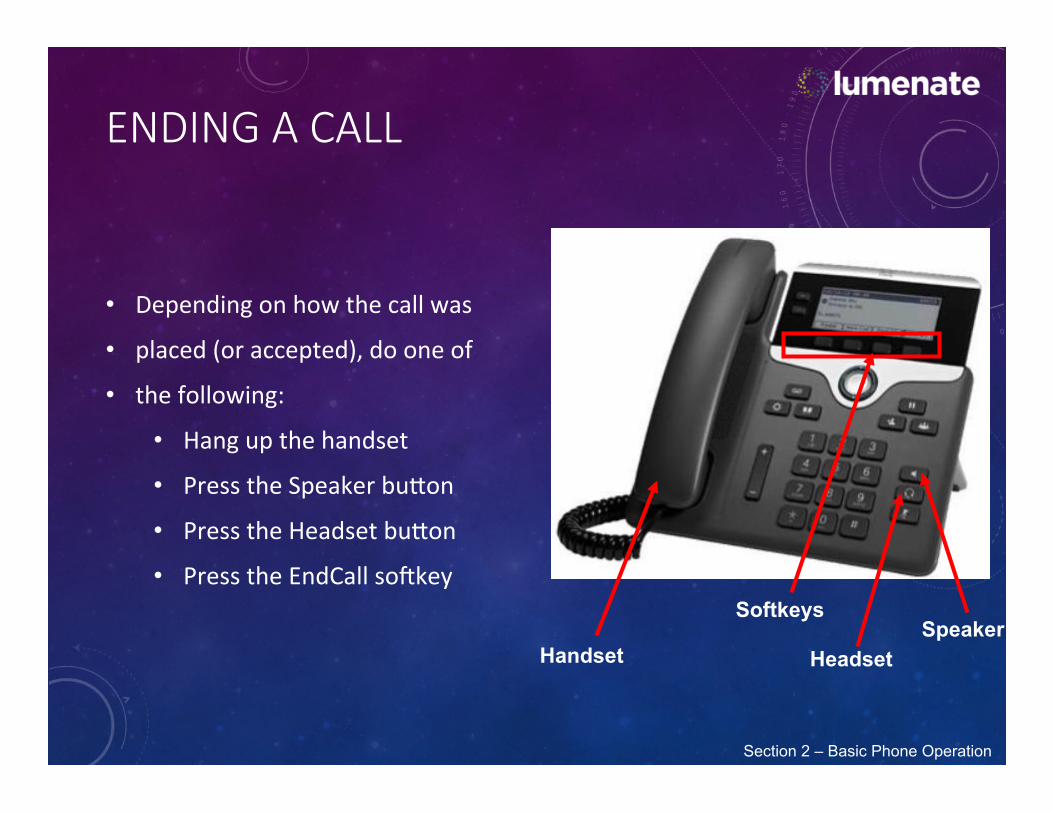
ENDING A CALL
Depending on how the call was placed (or accepted), do one of the following:
Hang up the handset Press the Speaker bu�on Press the Headset bu�on Press the EndCall so�key
Section 2 – Basic Phone Operation
Handset Headset Speaker Softkeys
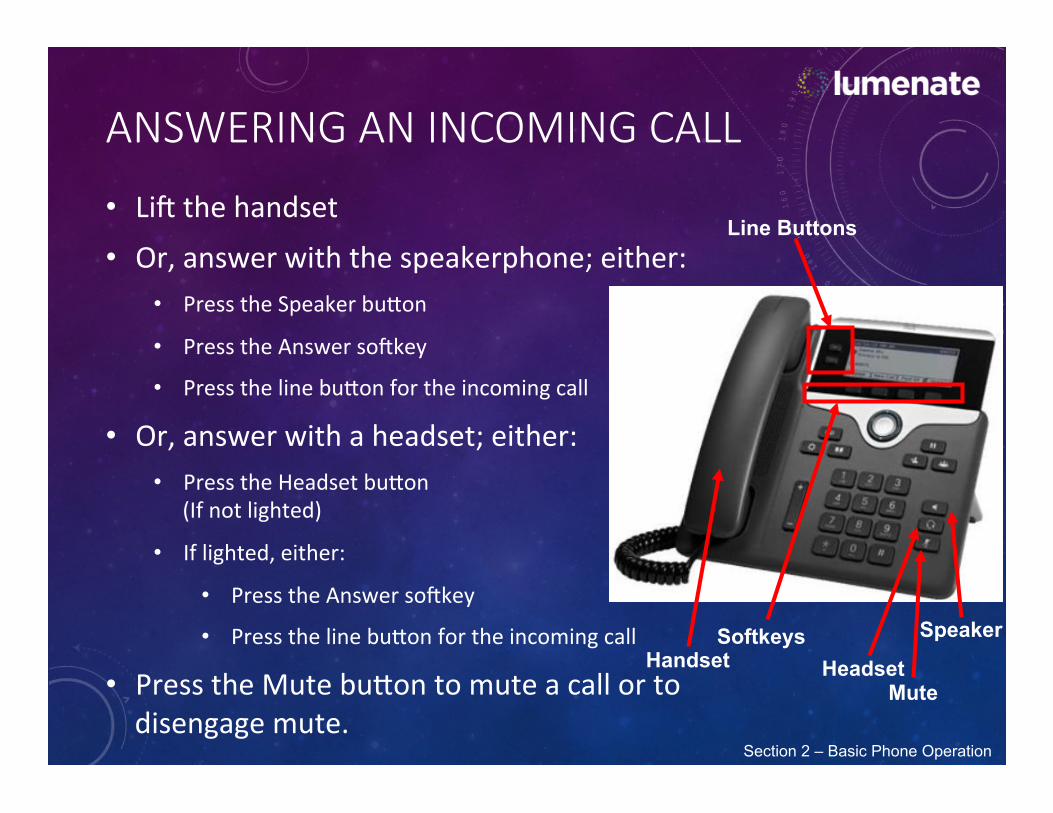
ANSWERING AN INCOMING CALL
Li� the handset Or, answer with the speakerphone; either:
Press the Speaker bu�on Press the Answer so�key Press the line bu�on for the incoming call
Or, answer with a headset; either: Press the Headset bu�on (If not lighted)
If lighted, either: Press the Answer so�key Press the line bu�on for the incoming call
Press the Mute bu�on to mute a call or to disengage mute.
Section 2 – Basic Phone Operation
Speaker Mute Headset
Line Buttons
Softkeys Handset

PUTTING A CALL ON HOLD
Press the Hold key. To return to the call, press the Resume so�key.
If you have mul�ple calls on hold: Use the Naviga�on key to select the call to resume
Press the Resume so�key
Section 2 – Basic Phone Operation
Navigation Softkeys Hold
TRANSFERRING AN INCOMING CALL Answer the call – don’t put the call on Hold! Press Transfer key. This puts the ac�ve call on hold. Dial the number that the call will be transferred to. When the dialed number rings, either:
Press the Transfer key again, or wait for the party to answer so you can announce the call, and then press the Transfer key.
You will have to hit the Transfer key TWICE! If the party refuses the call, goes to voicemail, or the call does not complete successfully, press the Resume so�key to re-‐join the original call.
To Transfer direct to a user’s voicemail, press *<user extension> and then select the Transfer so�key
You can transfer to external numbers, too, if needed! Section 2 – Basic Phone Operation
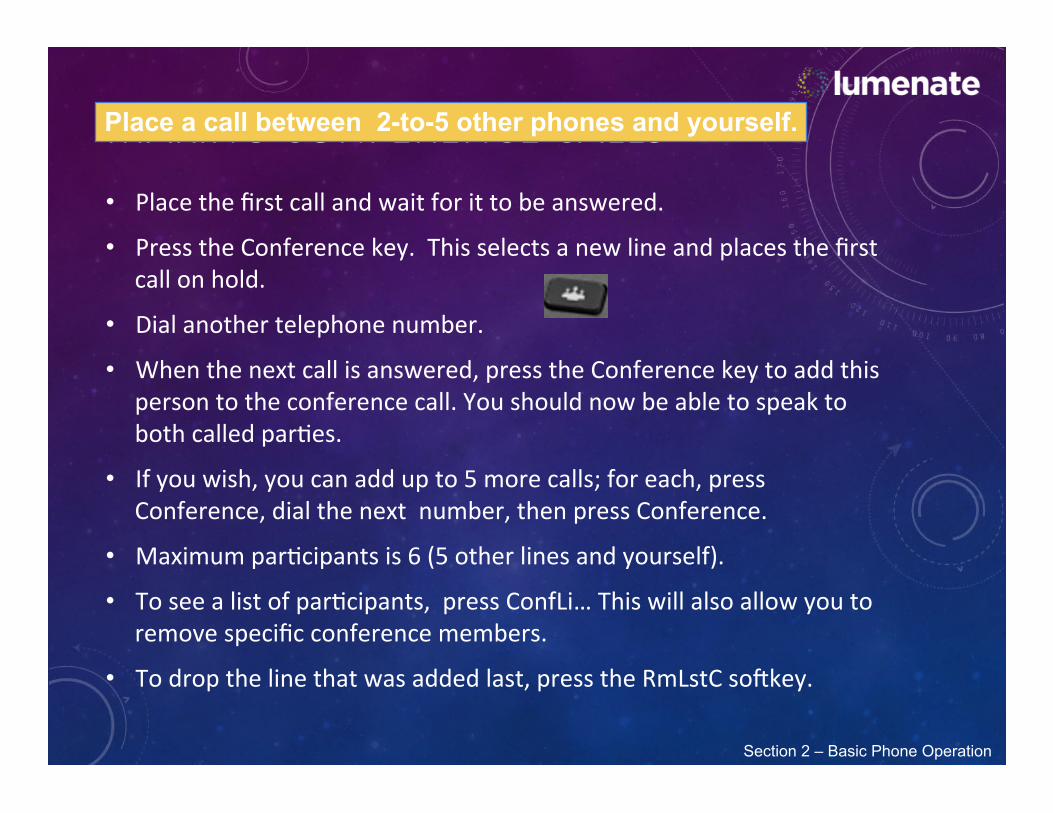
MAKING CONFERENCE CALLS Place the first call and wait for it to be answered. Press the Conference key. This selects a new line and places the first call on hold.
Dial another telephone number. When the next call is answered, press the Conference key to add this person to the conference call. You should now be able to speak to both called par�es.
If you wish, you can add up to 5 more calls; for each, press Conference, dial the next number, then press Conference.
Maximum par�cipants is 6 (5 other lines and yourself). To see a list of par�cipants, press ConfLi… This will also allow you to remove specific conference members.
To drop the line that was added last, press the RmLstC so�key.
Place a call between 2-to-5 other phones and yourself.
Section 2 – Basic Phone Operation
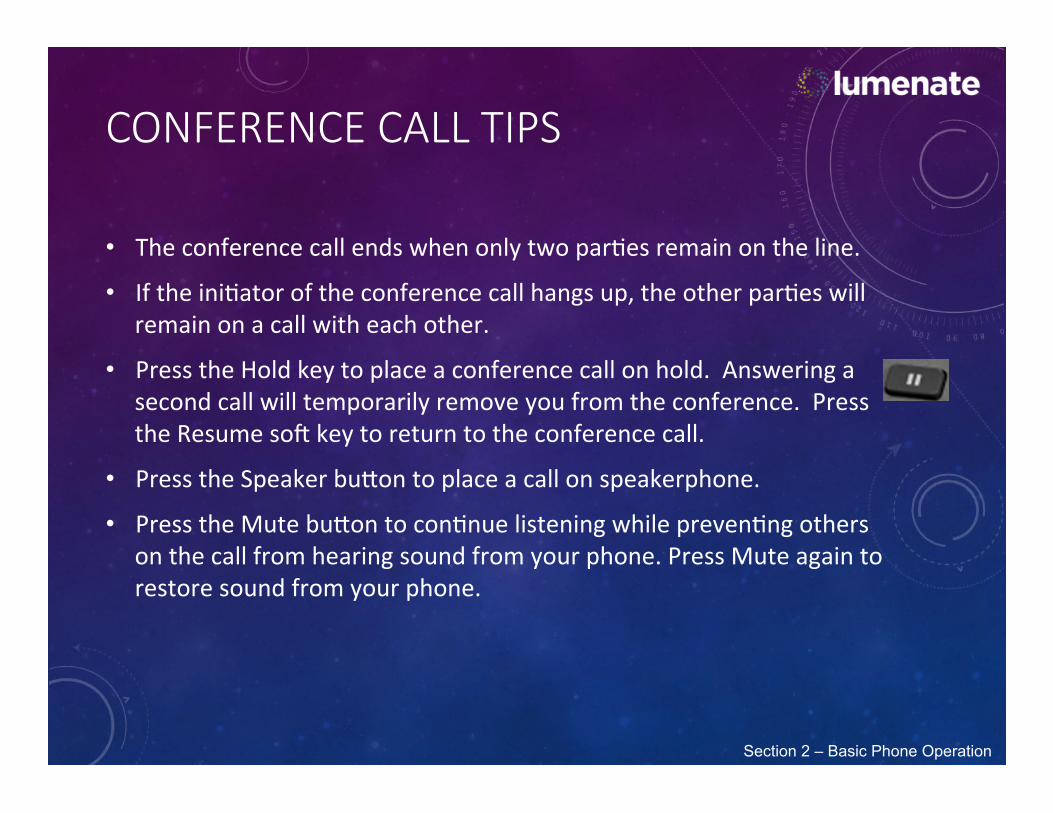
CONFERENCE CALL TIPS
The conference call ends when only two par�es remain on the line. If the ini�ator of the conference call hangs up, the other par�es will remain on a call with each other.
Press the Hold key to place a conference call on hold. Answering a second call will temporarily remove you from the conference. Press the Resume so� key to return to the conference call.
Press the Speaker bu�on to place a call on speakerphone. Press the Mute bu�on to con�nue listening while preven�ng others on the call from hearing sound from your phone. Press Mute again to restore sound from your phone.
Section 2 – Basic Phone Operation
SECTION 3 -‐ VOICEMAIL
By the end of this sec�on you will be able to complete the following: Perform the ini�al subscriber setup process Retrieve, forward, save, and delete voice mail Set voice mail passwords
Section 3 – Unity Connection Voicemail

WHAT IS MY LOGIN INFORMATION?
The Default Login Informa�on is Unity Connec�on User ID to Retrieve Voicemail: 5-‐digit extension
Unity PIN: 2580 (1st �me, then change)
Section 2 – Basic Phone Operation
UNITY CONNECTION VOICEMAIL
There are several ways to access voicemail, including the messages bu�on on your phone, using other PMC phones, and dialing in remotely
You can listen to, forward, delete, and Mark as Read / Unread
Section 3 – Unity Connection Voicemail
BECOMING A SUBSCRIBER Press the Messages bu�on on your handset. Enter your default PIN (2580) followed by # Listen carefully to the prompts and respond as prompted:
Record your name Record a custom gree�ng that outside callers will hear when you do not answer your phone
Change your phone PIN Press # to accept the default directory lis�ng (Later, you can change any of these se�ngs)
The system will tell you when you have finished; you are then a Unity Connec�on subscriber.
If you hang up before finishing, you will be prompted the next �me you press Messages.
Section 3 – Unity Connection Voicemail
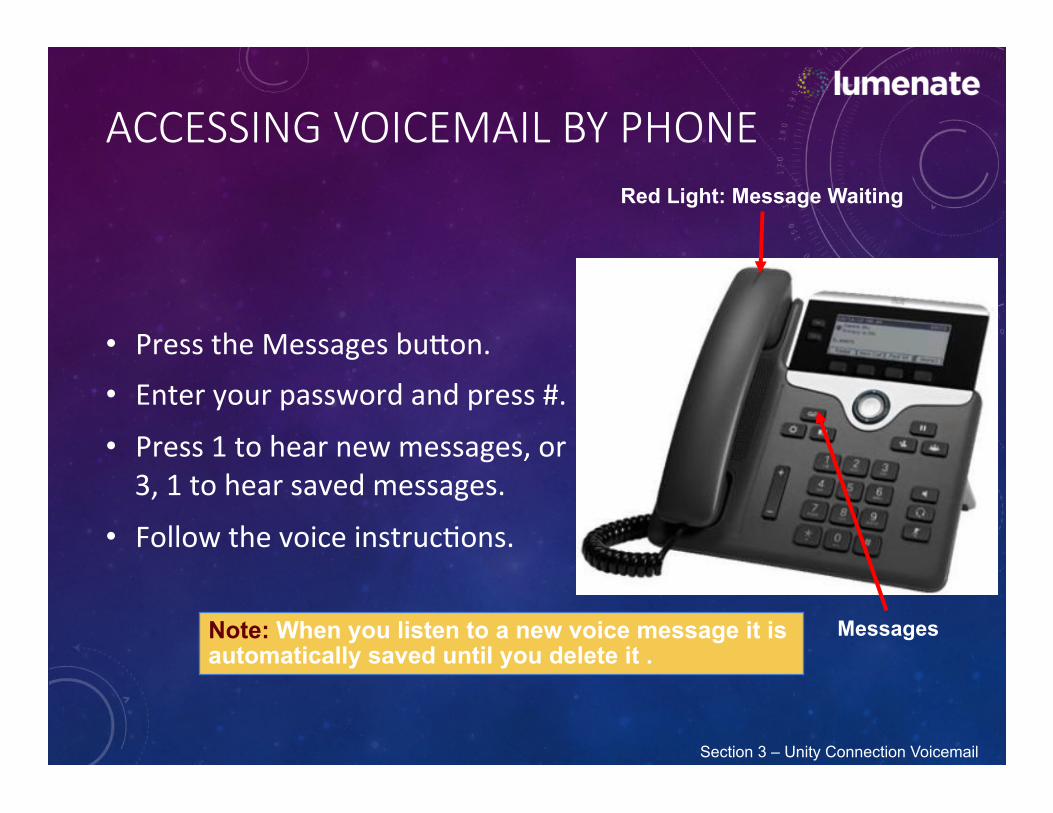
ACCESSING VOICEMAIL BY PHONE
Press the Messages bu�on. Enter your password and press #. Press 1 to hear new messages, or 3, 1 to hear saved messages.
Follow the voice instruc�ons.
Red Light: Message Waiting
Note: When you listen to a new voice message it is automatically saved until you delete it .
Section 3 – Unity Connection Voicemail
Messages
ACCESSING VOICEMAIL FROM ANOTHER PHONE
Dial 254-‐336-‐5500 if you are outside the office. When the call is answered, press * When prompted, enter your 5-‐digit extension and press #.
Enter your password and press #. Follow the voice instruc�ons.
Section 3 – Unity Connection Voicemail
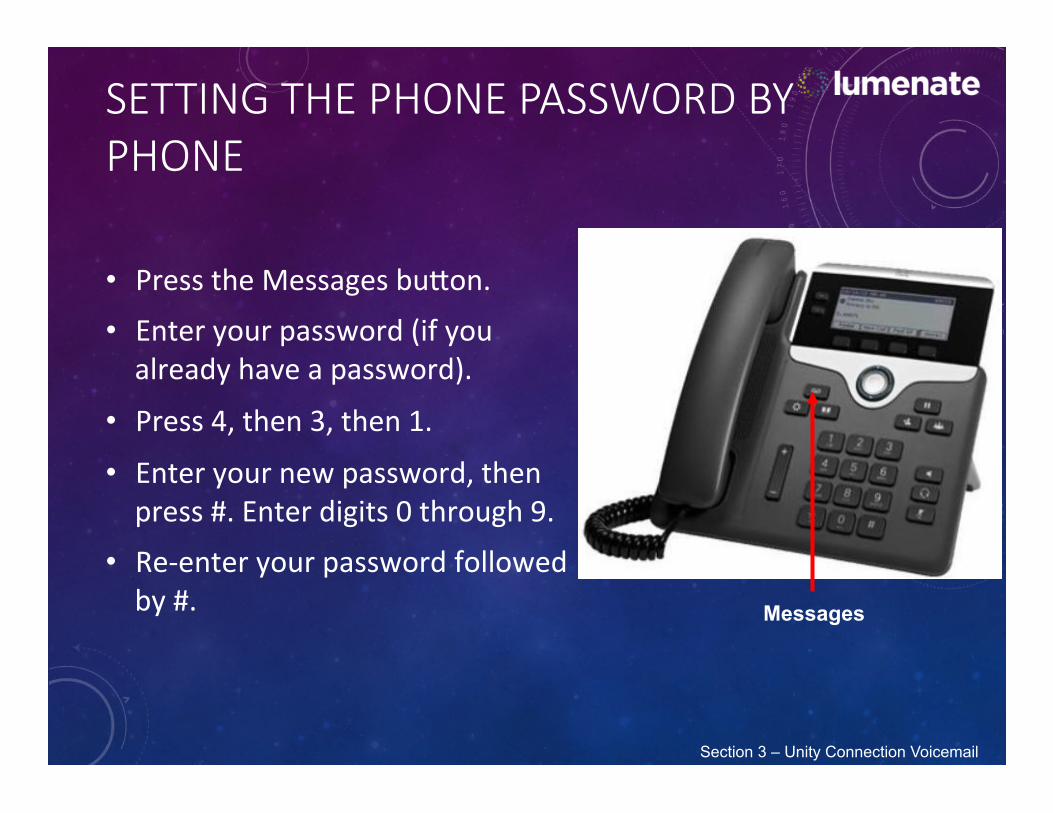
SETTING THE PHONE PASSWORD BY PHONE
Press the Messages bu�on. Enter your password (if you already have a password).
Press 4, then 3, then 1. Enter your new password, then press #. Enter digits 0 through 9.
Re-‐enter your password followed by #.
Section 3 – Unity Connection Voicemail
Messages
SAVING VOICE MESSAGES BY PHONE
Press the Messages bu�on. Enter your password. Press 1 to hear new messages. During or a�er playback, press 7,7 to save the message with the op�on of performing addi�onal func�ons. Or simply hang up, and the message is saved unless you delete it.
Section 3 – Unity Connection Voicemail
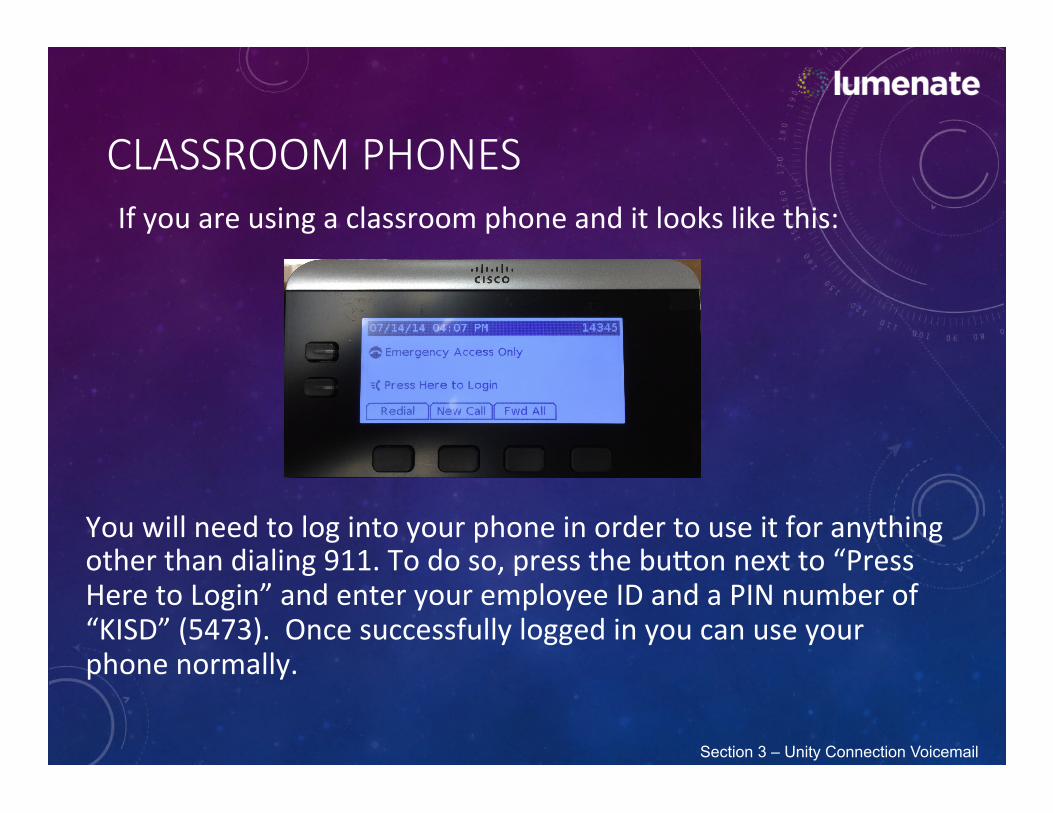
CLASSROOM PHONES If you are using a classroom phone and it looks like this:
Section 3 – Unity Connection Voicemail
You will need to log into your phone in order to use it for anything other than dialing 911. To do so, press the bu�on next to “Press Here to Login” and enter your employee ID and a PIN number of “KISD” (5473). Once successfully logged in you can use your phone normally.

QUESTIONS?
28


![Killeen, Thomas B. TOCs/Killeen, Thomas B.toc.pdf · 2012-12-17 · 2 INTERVIEW [Note: This transcript was not edited by Mr. Killeen.] SUMMARY: This history of Thomas B. Killeen focuses](https://static.documents.pub/doc/80x56/5fba91d984c64d2537799e12/killeen-thomas-b-tocskilleen-thomas-btocpdf-2012-12-17-2-interview-note.jpg)

