33
Free Sample
| Date post: | 15-Apr-2017 |
| Category: |
Technology |
| Upload: | packt-publishing |
| View: | 479 times |
| Download: | 2 times |
Free Sample
In this package, you will find: • The author biography • A preview chapter from the book, Chapter 2 'Input, Motion, and Touch' • A synopsis of the book’s content • More information on Kivy Cookbook
About the Author
Hugo Solis is an assistant professor in the physics department at the University of Costa Rica. In the same institution, he collaborates with CITIC and CICIMA. His current research interests include computational cosmology, complexity, and the infl uence of hydrogen on material properties. He has wide experience in languages, including C/C++ and Python for scientifi c programming and visualization. He is a member of the Free Software Foundation and has contributed code to some free software projects. He has also been a technical reviewer for Mastering Object-oriented Python, Kivy: Interactive Applications in Python, and Learning Object-Oriented Programming by Packt Publishing. Currently, he is in charge of the IFT, a Costa Rican scientifi c nonprofi t organization for the multidisciplinary practice of physics (http://iftucr.org).
PrefaceThe book is full of practical task-based recipes to be performed while developing multitouch applications with Kivy. The focus of this book is to guide you through the Kivy framework to develop apps and get your apps ready for distribution in App Stores and Android devices. We'll focus on common, real-world scenarios. You'll be able to leverage these recipes right away, which allows you to create most diverse apps and learn how to distribute them using the Kivy framework, and widen your profi ciency in developing multitouch applications with Kivy.
What this book covers
Chapter 1, Kivy and the Kv Language, introduces the Python code, Kv language, widgets, and Kivy garden. The topics covered in this chapter lay the foundation for the remaining code samples in each chapter.
Chapter 2, Input, Motion, and Touch, demonstrates some of the most common recipient-related management tasks, such as evolving to the touchscreen, using the gyroscope, and detecting multitapping. You'll also learn how to recognize touch shapes, record gestures, and differentiate between touch and motion events.
Chapter 3, Events, shows how to schedule a one-time event and a repetitive event. Triggering events, defi ning widget events, creating custom events are also covered in this chapter.
Chapter 4, Widgets, covers the manipulation of widget tree, traversing of tree. It also covers the FloatLayout, BoxLayout, StackLayout, AnchorLayout, and action bar.
Chapter 5, Graphics – Canvas and Instructions, explains various methods, such as separating with the screen manager, using context instructions, and using drawing instructions. You'll learn how to modify with multitouching and storing and retrieving the coordinate space context.
Chapter 6, Advancing Graphics – Shaders and Rendering, covers Carousel, layouts, and shaders. The other topics covered in this chapter are rendering in a Framebuffer and optimizing graphics.
Preface
Chapter 7, The API in Detail, introduces API and covers the logging objects, parsing, applying utils, using spelling, adding effects, and adding text.
Chapter 8, Packaging our Apps for PC, shows how to perform packing for Windows, Linux, and MacOs. It also shows multimedia for Windows and running apps in Windows and MacOS.
Chapter 9, Kivy for Mobile Devices, explains various methods, such as packaging for iOS and resizing the screen into iOS. You'll learn preparing for the App Store, packaging for Android, and resizing the screen into Android.
23
2Input, Motion,
and Touch
In this chapter, we will cover:
Using the mouse
Evolving to the touchscreen
Working with the accelerometer
Using the gyroscope
The Differences between the touch and motion events
Recognizing touch shapes
Detecting multitapping
Grabbing touch events
Recording gestures
IntroductionThe Kivy framework is able to handle most common types of input and actions such as mouse, touchscreen, accelerometer, and gyroscope that will be reviewed in this chapter. It handles the native multitouch protocols on the following platforms: Tuio, WM_Touch, MacMultitouchSupport, MT Protocol A/B, and Android.
The class of all input events is motion event. It generates two kinds of events; one of them is touch events—a motion event that contains at least an x and y position. All the touch events are dispatched across the widget tree. The no-touch events are the rest. The accelerometer is a continuous event, without position. It never starts or stops. These events are not dispatched across the widget tree.
Input, Motion, and Touch
24
Using the mouseThis recipe will teach you how to use the fi rst kind of input, probably the most used, the mouse. We will consider the mouse input as a touch event, so the (x, y) position of the touch (0-1 range) will be scaled to the window size (width/height) and dispatched to the following:
on_touch_down: An event is fi red when a touch down event is initiated. Subsequently, the respective widget's on_touch_down() method is called.
on_touch_move: An event is fi red when a touch event moves (changes location). Subsequently, the respective widget's on_touch_move() method is called.
on_touch_up: An event is fi red when a down event is released (terminated). Subsequently, the respective widget's on_touch_up() method is called.
Getting readyIn this recipe, we will use the Kv language for the design of the widgets, so you will need to be familiar with the language or have completed the previous chapter. Also, this recipe will use the common Button widget for reference.
How to do it…Follow the steps in this recipe:
1. First, let's start with the KV fi le:
<MyW>: Button: id: button1 text: 'Hello'
In the class of the widget in the Python code, we need to override the method on_touch_down because the method is already defi ned in the Kivy framework.
2. Change the button text with the information in touch.button:
import kivykivy.require('1.9.0')
from kivy.app import Appfrom kivy.uix.widget import Widget
class MyW(Widget):
def on_touch_down(self, touch): if 'button' in touch.profile:

Chapter 2
25
self.ids.button1.text = touch.button
class e1App(App):
def build(self): return MyW()
if __name__ == '__main__': e1App().run()
How it works…Let's start with the KV fi le. The fi rst line is the name of the rule, similar to the class name in the Python fi le. The second line is the defi nition of the button widget, and the third line is the ID of the button, which is necessary to do the call of the widget inside the Python code, and the fourth line is the defi nition of the text in the button.
With regard to the Python code, the initial four lines are usual to use Kivy and the button widget. Note the following fi fth line:
class MyW(Widget):
This is where we defi ne the class associated with our rule in the KV fi le. Now consider the sixth line:
def on_touch_down(self, touch):
Here, we start the declaration of the dispatched on_touch_down method; you must note the parameter touch in the declaration, and this parameter is necessary to call the event using the input—in this case—the mouse. Next, the seventh line is:
if 'button' in touch.profile:
This is a verifi cation line, because we need to be sure that the input device used in the platform, where we are running our code, supports the button profi le. If this line is not present when the next line is performed, the app could crash. Finally, the eighth line:
self.ids.button1.text = touch.button
This line is where we do the call to the button profi le, which gives the information on which mouse button is touched by the user (the right one, left one, scroll up, and so on). Using this information, we change the text in our button that has ID button1. The last lines of the Python code are usual to run and display our Kivy interface. Just remember that the initial part of the name of the classis as follows:
class e1App(App):
Input, Motion, and Touch
26
Note that it will be the same as the KV fi le, so the name of the KV fi le in this case is e1.kv.
A last thing to remark is that we do not limit the input event to the button, so the touch can occur anywhere within the window.
There's more…Another interesting profi le that we could call for the mouse is the pos attribute, which provides us with the position vector of the click in the window. Let's change the seventh line of the Python code to:
self.ids.button1.text = str(touch.pos)
When we are calling the pos profi le and changing the text in the button widget to the position where the click is performed, the str() built-in object is important because the touch.pos return is a vector. This means that we need to convert to a string to avoid compatibility issues.
See alsoIf you want to run your interface, take a look at our recipe Running your code. To get further details about widgets, see the recipes in Chapter 4, Widgets.
Evolving to the touchscreenIn this recipe, we are evolving to the touchscreen. Here, you will see the basic differences between the mouse and the touchscreen. This will give us more options than with the mouse device.
Getting readyFor this recipe, we will use the Kv language for the design of the widgets, so make sure that you are confi dent with it and refresh your knowledge if necessary. Also, this recipe will use the common button and label widgets for reference. Obviously, to get more benefi t, a touchscreen device is useful to run the code.
How to do it…Perform the following steps:
1. In the KV fi le, declare the button and the label:
<MyW>: Button: id: button1

Chapter 2
27
text: 'Hello' Label: id: label1 pos: 100, 100 text: 'My label before press the screen'
2. In the class of the widget in the Python code, we need to override the method on_touch_down
3. Change the button text with the information in touch.button
4. Change the label text with the information in touch.pressure
import kivykivy.require('1.9.0')
from kivy.app import Appfrom kivy.uix.widget import Widget
class MyW(Widget):
def on_touch_down(self, touch): if 'button' in touch.profile: self.ids.button1.text = touch.button
if 'pressure' in touch.profile: self.ids.label1.text =\ str(touch.pressure)
class e2App(App):
def build(self): return MyW()
if __name__ == '__main__': e2App().run()
How it works…Well, let's fi rst review the KV fi le. The fi rst line is the name of the rule, the same as of the class in the Python fi le. The second line is the defi nition of the button widget, the third line is the ID of the button, which is necessary to do the call of the widget inside the Python code, and the fourth line is the defi nition of the text in the button. The fi fth line is the defi nition of the label widget. The sixth line is where we give the ID to the label, the seventh line is where we give the position to the label. I should point out that the button is using the default position (0, 0), so we will have to give a different position to the label widget to avoid overlapping. The eight is the defi nition of the initial text in the label.
Input, Motion, and Touch
28
With regard to the Python code, the initial four lines are usual to use Kivy and the widgets. Note the fi fth one:
class MyW(Widget):
This is where we defi ne the class associated with our rule in the KV fi le. The sixth line:
def on_touch_down(self, touch):
Here, we start the declaration of the dispatched on_touch_down method. You must note the parameter touch in the declaration as this parameter is necessary to call the event, which is done by the input (in this case, the mouse). The seventh line is:
if 'button' in touch.profile:
It is a verifi cation line because we need to be sure that the input device used in the platform, where we are running our code, supports the button profi le. If this line is not present when the next one is performed, the app could crash. The eighth line is:
self.ids.button1.text = touch.button
This line is where we do the call to the profi le button, which gives the information of what button is touched by the user (the right, left, scroll up button, and so on) and we changed the text in the button with the ID button1 with that information. The ninth line is:
if 'pressure' in touch.profile:
This is the other verifi cation line and is important because, due to the fact that pressure is specifi c to some touchscreen devices, it is necessary to avoid crashes. The tenth and eleventh line:
self.ids.label1.text =\str(touch.pressure)
Those lines are where we change the text of the label to the pressure value of the specifi c touch.
The last lines of the Python code are usual to run and display our Kivy interface. Just remember that the initial part of the name of the class is:
class e2App(App):
It will be the same in relation to the KV fi le. For example, the name of the KV fi le in this case is e2.kv.
The fi nal thing to remark is that we do not limit the input event to the button, so the touch can occur anywhere within the window or the screen.
Chapter 2
29
There's more…Actually, your device could have more profi les than we saw in this recipe. Let's change the code to know that for your specifi c device. Remove the ninth line and change the tenth and eleventh lines to:
self.ids.label1.text =\str(touch.profile)
These lines will change the label's text for all the profi les available for your device. Thus, you can get more yield of your app.
See alsoIf you want to run your interface, take a look at our recipe Running your code, and to get more detail about widgets, see the recipes in Chapter 4, Widgets. If you want to run the code in a mobile device, see Chapter 9, Kivy for Mobile Devices.
Working with the accelerometerNowadays, it is common that mobile devices are equipped with an accelerometer. Thereby, it is relevant to consider this input to develop fancy apps. The accelerometer is one kind of event that is considered as a no-touch event because it has neither start nor an end, it is always providing information.
Getting readyIn this recipe, we will use the Kv language for the design of the widgets, so, again, you will need to be familiar with the Kv language. Also, this recipe will use the common button and label widgets for reference. Obviously, to get more benefi t, a device with an accelerometer is useful to run the code.
It is necessary to install a package for the use of the accelerometer in any mobile device; there is a way to deal with every specifi c device, but we do not have to reinvent the wheel. Let's use a Plyer package, which is an effort from many of the Kivy developers. To install the package from the shell, use:
$ sudo pip plyer install
Here where we are using pip to install the Plyer package, if you do not have pip installed in your computer, see the recipe Using Kivy Garden in Chapter 1, Kivy and the Kv language.

Input, Motion, and Touch
30
How to do it…To complete this recipe, follow these steps:
1. In the KV fi le, defi ne the four labels and the button:
<Accel>: Label: id: label1 pos: 150, 300 text: 'X: '
Label: id: label2 pos: 150, 250 text: 'Y: '
Label: id: label3 pos: 150, 200 text: 'Z: '
Label: id: status pos: 150, 150 text: ''
Button: id: button1 pos: 150, 50 text: 'Start' on_press: root.pressed1()
2. In the Python fi le, import the usual packages to use Kivys.
3. Import the Clock and Plyer packages.
4. In the class for the rule, defi ne a class to standby the accelerometer.
5. Defi ne the method to start to retrieve data from the accelerometer.
6. Defi ne the method when the button is pressed:
from kivy.app import Appfrom kivy.properties import ObjectPropertyfrom kivy.uix.widget import Widget
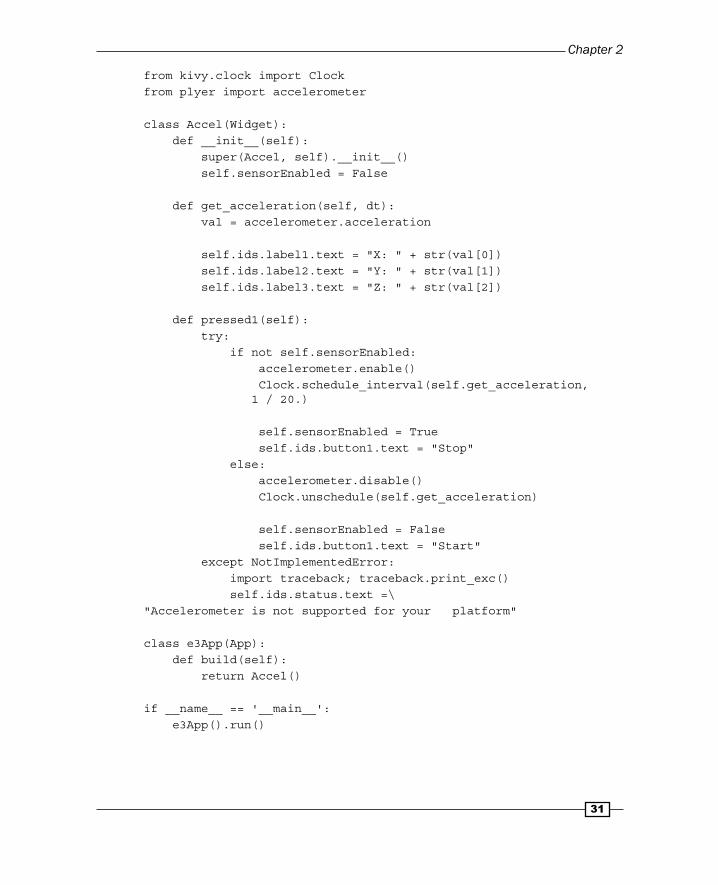
Chapter 2
31
from kivy.clock import Clockfrom plyer import accelerometer
class Accel(Widget): def __init__(self): super(Accel, self).__init__() self.sensorEnabled = False
def get_acceleration(self, dt): val = accelerometer.acceleration
self.ids.label1.text = "X: " + str(val[0]) self.ids.label2.text = "Y: " + str(val[1]) self.ids.label3.text = "Z: " + str(val[2])
def pressed1(self): try: if not self.sensorEnabled: accelerometer.enable() Clock.schedule_interval(self.get_acceleration, 1 / 20.)
self.sensorEnabled = True self.ids.button1.text = "Stop" else: accelerometer.disable() Clock.unschedule(self.get_acceleration)
self.sensorEnabled = False self.ids.button1.text = "Start" except NotImplementedError: import traceback; traceback.print_exc() self.ids.status.text =\ "Accelerometer is not supported for your platform"
class e3App(App): def build(self): return Accel()
if __name__ == '__main__': e3App().run()
Input, Motion, and Touch
32
How it works…First, review the KV fi le. Note that the fi rst line is the name of the rule, similar to the class in the Python fi le. Included in the next lines are the defi nitions of the four labels that we will use, so note the text of the label with the ID status. It will likely be blank, but it will be visible only when we modify this fi eld from the Python code.
In the Python code, the fi rst three lines are usual to import kivy and the widgets. The fourth line:
from kivy.clock import Clock
This will import the clock, which is used to get the accelerometer value in a time lap because, as we already said, this input is continuously providing data. The fi fth line:
from plyer import accelerometer
This is importing the package plyer, which is the one that makes it possible to retrieve the data from an iOS or Android device. The sixth line:
class Accel(Widget):
This is the line where the class for the rule starts. Its name must be the same as the Kivy rule. The seventh, eighth, and ninth lines are:
def __init__(self): super(Accel, self).__init__() self.sensorEnabled = False
These defi ne the method that initializes the class and put in standby the accelerometer to be used later. The tenth, eleventh, twelfth, thirteenth, and fourteenth lines are:
def get_acceleration(self, dt): val = accelerometer.acceleration self.ids.label1.text = "X: " + str(val[0]) self.ids.label2.text = "Y: " + str(val[1]) self.ids.label3.text = "Z: " + str(val[2])
These lines are used to retrieve the data of the accelerometer and will modify the text of the fi rst three labels with the data of the acceleration. Now, look at the fi fteenth line:
def pressed1(self):
This is where we defi ne the method performed when the button is pressed. In the sixteenth line, we start a try sentence to start getting data from the accelerometer. In the seventeenth line, it is shown that if the accelerometer is disabled, enable it or vice versa. The eighteenth line is:
Clock.schedule_interval(self.get_acceleration, 1 / 20.)
Chapter 2
33
In this line, we do the acquisition of the acceleration in time intervals. The acceleration is acquired by calling the get_acceleration method. The next class is usual to display our Kivy interface.
There's more…Also, the plyer package allows you to interact with the compass and the GPS of the mobile device using a similar procedure. In the case of the compass, it is very easy to change. The change in the code is the word gyroscope for compass and acceleration for orientation.
See alsoTo get more details about widgets, see the recipes in Chapter 4, Widgets, and if you want to run the code in a mobile device, see Chapter 9, Kivy for Mobile Devices.
Using the gyroscopeMobile devices today also have a gyroscope. The gyroscope is considered as a no-touch event. This kind of event does not have a start or an end; it is always providing information.
Getting readyFor this recipe, we will use the Kv language for the design of the widgets. Also, this recipe will use the common button and label widgets for reference. Obviously, to run the code of this recipe properly, a device with a gyroscope is necessary.
It is necessary to install a package to use the gyroscope with any mobile device. While there is a way to deal with specifi c devices, we do not have to reinvent the wheel. Let's use the plyer package, which is an effort from many of the Kivy developers. To install the package from the shell, use:
$ sudo pip plyer install
How to do it…To complete this recipe, follow these steps:
1. In the KV fi le, defi ne the four labels and the button:
<Acce>: Label: id: label1 pos: 150, 300
Input, Motion, and Touch
34
text: 'X: '
Label: id: label2 pos: 150, 250 text: 'Y: '
Label: id: label3 pos: 150, 200 text: 'Z: '
Label: id: status pos: 150, 150 text: ''
Button: id: button1 pos: 150, 50 text: 'Start' on_press: root.pressed1()
2. In the Python fi le, import the usual packages to use Kivy.
3. Import the Clock and plyer packages.
4. In the class for the rule, defi ne a class to stand by the gyroscope.
5. Defi ne the method to start to retrieve data from the gyroscope.
6. Defi ne the method when the button is pressed:
from kivy.app import Appfrom kivy.properties import ObjectPropertyfrom kivy.uix.widget import Widget
from kivy.clock import Clockfrom plyer import gyroscope
class Acce(Widget): def __init__(self): super(Acce, self).__init__() self.sensorEnabled = False
def get_orientation(self, dt): val = gyroscope.orientation
Chapter 2
35
self.ids.label1.text = "X: " + str(val[0]) self.ids.label2.text = "Y: " + str(val[1]) self.ids.label3.text = "Z: " + str(val[2])
def pressed1(self): try: if not self.sensorEnabled: gyroscope.enable() Clock.schedule_interval(self.get_orientation, 1 / 20.)
self.sensorEnabled = True self.ids.button1.text = "Stop" else: gyroscope.disable() Clock.unschedule(self.get_orientation)
self.sensorEnabled = False self.ids.button1.text = "Start" except NotImplementedError: import traceback; traceback.print_exc() self.ids.status.text =\"Gyroscope is not supported for your platform"
class e4App(App): def build(self): return Acce()
if __name__ == '__main__': e4App().run()
How it works…The KV fi le that we are using is similar to the last recipe's KV fi le. We defi ne four labels and the start button.
In the Python code, the fi rst three lines are usual to import kivy and the widgets. The fourth line:
from kivy.clock import Clock
We are importing the clock, which is used to get the accelerometer value in a time lap because, as we already said, this input is continuously providing data. The fi fth line:
from plyer import gyroscope
Input, Motion, and Touch
36
This is importing the package plyer, which is the one that makes it possible to retrieve the data from an iOS or Android device. The sixth line:
class Acce(Widget):
It is the line where the class for the rule starts and its name must be the same as in the Kivy rule. The seventh, eighth, and ninth lines are:
def __init__(self): super(Acce, self).__init__() self.sensorEnabled = False
Those are where we defi ne the methods that initialize the class and put the accelerometer on standby to be used later. The tenth, eleventh, twelfth, thirteenth, and fourteenth lines are as follows:
def get_orientation(self, dt): val = gyroscope.orientation self.ids.label1.text = "X: " + str(val[0]) self.ids.label2.text = "Y: " + str(val[1]) self.ids.label3.text = "Z: " + str(val[2])
Those lines are allowing us to retrieve data from the gyroscope and enabling us to modify the text of the fi rst three labels with the data of the orientation. The fi fteenth line:
def pressed1(self):
It is where we defi ne the method performed when the button is pressed. In the sixteenth line, we start a try sentence to start to get data from the gyroscope. With the seventeenth line, we can open an if sentence for the case that the gyroscope is unable, enable it. The eighteenth line:
Clock.schedule_interval(self.get_orientation, 1 / 20.)
In this line, we can get the intervals of the orientation by calling the get_orientation method. The next class is the usual one to display our Kivy interface.
See alsoIf you want to run the code in a mobile device, see Chapter 9, Kivy for Mobile Devices.
Chapter 2
37
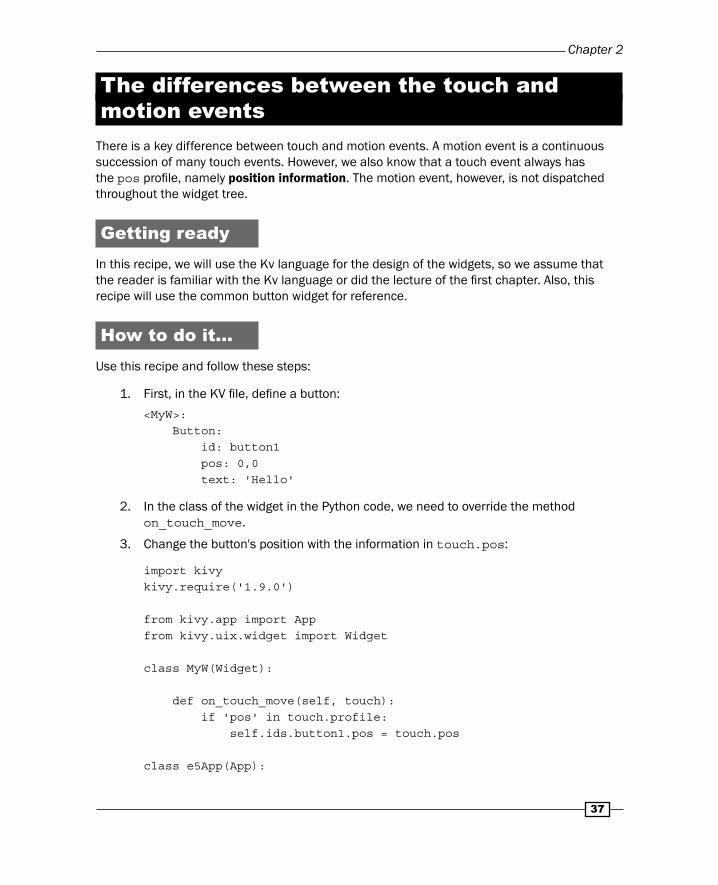
The differences between the touch and motion events
There is a key difference between touch and motion events. A motion event is a continuous succession of many touch events. However, we also know that a touch event always has the pos profi le, namely position information. The motion event, however, is not dispatched throughout the widget tree.
Getting readyIn this recipe, we will use the Kv language for the design of the widgets, so we assume that the reader is familiar with the Kv language or did the lecture of the fi rst chapter. Also, this recipe will use the common button widget for reference.
How to do it…Use this recipe and follow these steps:
1. First, in the KV fi le, defi ne a button:
<MyW>: Button: id: button1 pos: 0,0 text: 'Hello'
2. In the class of the widget in the Python code, we need to override the method on_touch_move.
3. Change the button's position with the information in touch.pos:
import kivykivy.require('1.9.0')
from kivy.app import Appfrom kivy.uix.widget import Widget
class MyW(Widget):
def on_touch_move(self, touch): if 'pos' in touch.profile: self.ids.button1.pos = touch.pos
class e5App(App):
Input, Motion, and Touch
38
def build(self): return MyW()
if __name__ == '__main__': e5App().run()
How it works…Let's start with the KV fi le, the fi rst line is the name of the rule, similar to the class in the Python fi le. The second line is the defi nition of the button widget, the third line is the ID of the button, which is necessary to do the call of the widget inside the Python code, the fourth line specifi es the initial position of the button, and the fi fth line is the defi nition of the text in the button.
In the Python code, the initial four lines are usual to use Kivy and the button widget. The fi fth one:
class MyW(Widget):
It is where we defi ne the class associated with our rule in the KV fi le. The sixth line:
def on_touch_move(self, touch):
Here, we start the declaration of the dispatched on_touch_move method; you must note the parameter touch in the declaration, as this parameter is necessary to call the event using the input. Now the seventh line:
if 'pos' in touch.profile:
This is a verifi cation line, because we need to be sure that the input device used in the platform, where we are running our code, supports the button profi le. If this line is not present when the next one is performed, the app could crash. The eighth line:
self.ids.button1.pos = touch.pos
This line is where we do the call to the profi le position, which gives the information of where the touch occurs, and we changed the position of the button with the ID button1 with that information. The last lines of the Python code are usual to run and display our Kivy interface. Just remember that the initial part of the name of the class is:
class e5App(App):
It will be same as the KV fi le; the name of the KV fi le in this case is e5.kv.
The last thing to remark is that we do not limit the input event to the button, so the touch can occur anywhere in the window.
Chapter 2
39
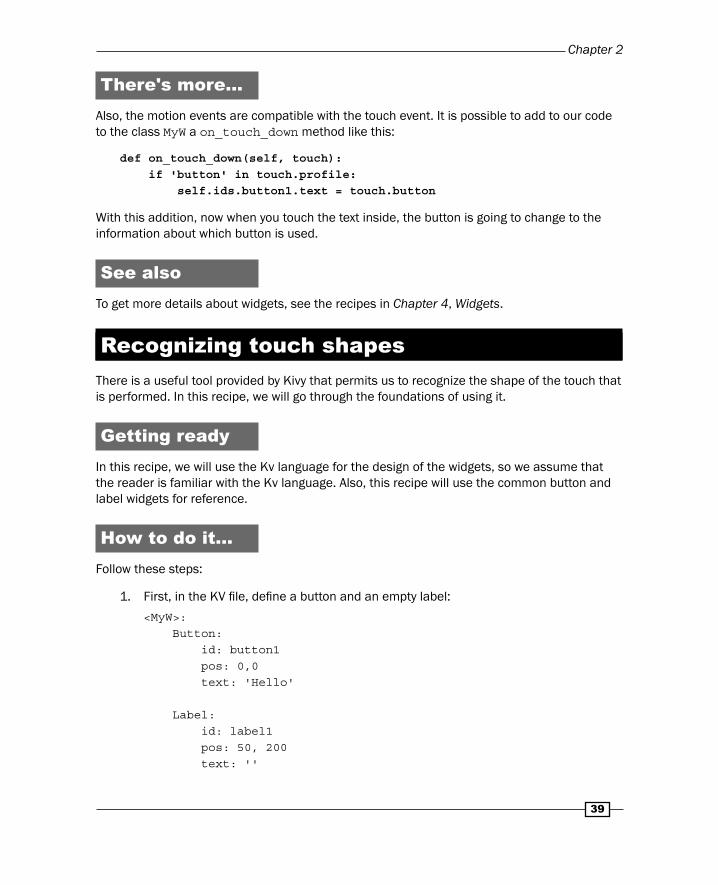
There's more…Also, the motion events are compatible with the touch event. It is possible to add to our code to the class MyW a on_touch_down method like this:
def on_touch_down(self, touch): if 'button' in touch.profile: self.ids.button1.text = touch.button
With this addition, now when you touch the text inside, the button is going to change to the information about which button is used.
See alsoTo get more details about widgets, see the recipes in Chapter 4, Widgets.
Recognizing touch shapesThere is a useful tool provided by Kivy that permits us to recognize the shape of the touch that is performed. In this recipe, we will go through the foundations of using it.
Getting readyIn this recipe, we will use the Kv language for the design of the widgets, so we assume that the reader is familiar with the Kv language. Also, this recipe will use the common button and label widgets for reference.
How to do it…Follow these steps:
1. First, in the KV fi le, defi ne a button and an empty label:
<MyW>: Button: id: button1 pos: 0,0 text: 'Hello'
Label: id: label1 pos: 50, 200 text: ''
Input, Motion, and Touch
40
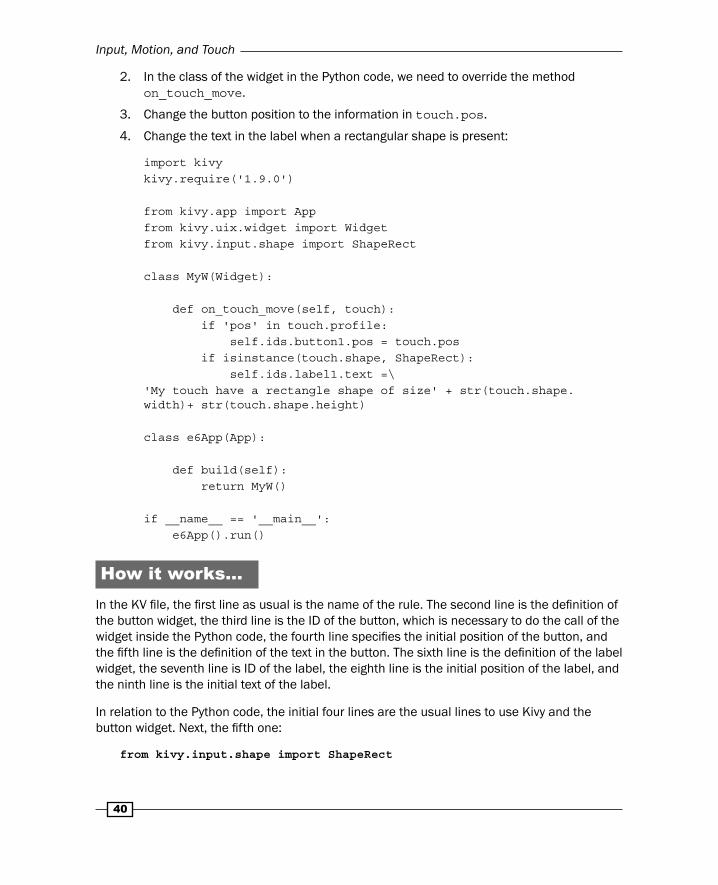
2. In the class of the widget in the Python code, we need to override the method on_touch_move.
3. Change the button position to the information in touch.pos.
4. Change the text in the label when a rectangular shape is present:
import kivykivy.require('1.9.0')
from kivy.app import Appfrom kivy.uix.widget import Widgetfrom kivy.input.shape import ShapeRect
class MyW(Widget):
def on_touch_move(self, touch): if 'pos' in touch.profile: self.ids.button1.pos = touch.pos if isinstance(touch.shape, ShapeRect): self.ids.label1.text =\'My touch have a rectangle shape of size' + str(touch.shape.width)+ str(touch.shape.height)
class e6App(App):
def build(self): return MyW()
if __name__ == '__main__': e6App().run()
How it works…In the KV fi le, the fi rst line as usual is the name of the rule. The second line is the defi nition of the button widget, the third line is the ID of the button, which is necessary to do the call of the widget inside the Python code, the fourth line specifi es the initial position of the button, and the fi fth line is the defi nition of the text in the button. The sixth line is the defi nition of the label widget, the seventh line is ID of the label, the eighth line is the initial position of the label, and the ninth line is the initial text of the label.
In relation to the Python code, the initial four lines are the usual lines to use Kivy and the button widget. Next, the fi fth one:
from kivy.input.shape import ShapeRect
Chapter 2
41
In this line, we import the information of ShapeRect to be compared with the touch performed in the app. The sixth line is:
class MyW(Widget):
This is where we defi ne the class associated with our rule in the KV fi le. The seventh line:
def on_touch_move(self, touch):
Here, we start the declaration of the dispatched on_touch_move method; you must note the parameter touch in the declaration, and this parameter is necessary to call the event by the input. The eighth and ninth lines are:
if 'pos' in touch.profile: self.ids.button1.pos = touch.pos
Those lines change the position of the button. The tenth line is:
if isinstance(touch.shape, ShapeRect):
It is where the comparison between the imported shape and the shape of the touch is performed. The eleventh line will change the label text with the dimension of the touch if this is rectangular. The last lines of the Python code are the usual lines to run and display our Kivy interface. Just remember that the initial part of the name of the class is:
class e6App(App):
It will be the same of the KV fi le; the name of the KV fi le in this case is e6.kv
See alsoIf you want to run your interface, take a look at our recipe Running your code, and to get more details about widgets, see the recipes in Chapter 4, Widgets.
Detecting multitappingThe multitapping detection is a useful tool in the development of an app. When more than a touch occurs in a zone, it is what we call a multitap.
Getting readyWe will work with the on_touch_down method, so it could be useful to go through the recipe Evolving to the touchscreen in this chapter. Also, this recipe will use the common button and label widgets for reference.

Input, Motion, and Touch
42
How to do it…Follow these steps in this recipe:
1. First, in the KV fi le, defi ne a button and an empty label:
<MyW>: Button: id: button1 pos: 0,0 text: 'Hello'
Label: id: label1 pos: 200, 200 text: ''
2. In the class of the widget in the Python code, we need to override the method on_touch_down.
3. Change the text in the label when a double tap is present.
4. Change the text in the label when a triple tap is present:
import kivykivy.require('1.9.0')
from kivy.app import Appfrom kivy.uix.widget import Widget
class MyW(Widget):
def on_touch_down(self, touch): if touch.is_double_tap: self.ids.label1.text = 'Touch is a double tap ! - The interval is: '+ str(touch.double_tap_time) elif touch.is_triple_tap: self.ids.label1.text = "Touch is a triple tap ! - The interval is: {0} \nand distance between previous is {1}".format(touch.triple_tap_time, touch.triple_tap_distance)
class e7App(App): def build(self): return MyW()
if __name__ == '__main__': e7App().run()
Chapter 2
43
How it works…We are again using our KV fi le with a simple button and empty label with the ID button1 and label1 respectively.
In the Python code, the initial four lines are usual to use Kivy and the button widget. The fi fth line is:
class MyW(Widget):
It is where we defi ne the class associated with our rule in the KV fi le. The sixth line is:
def on_touch_down(self, touch):
Here, we start the declaration of the dispatched on_touch_down method; you must note the parameter touch in the declaration and this parameter is necessary to call the event by the input. The seventh and eighth lines are:
if touch.is_double_tap:self.ids.label1.text = 'Touch is a double tap ! - The interval is: '+ str(touch.double_tap_time)
These lines are where we detect if the tap is double. If it is true, we change the text of the label defi ned in the KV fi le with the string Touch is a double tap! – The interval is: plus the time that the double tap takes. The ninth and tenth lines:
elif touch.is_triple_tap:self.ids.label1.text = "Touch is a triple tap ! - The interval is: {0} \nand distance between previous is {1}".format(touch.triple_tap_time, touch.triple_tap_distance)
Those lines change the text of the label if the touch in a triple tab. The last lines of the Python code are the usual lines to run and display our Kivy interface. Just remember that the initial part of the name of the class is:
class e7App(App):
It will be similar to the KV fi le; the name of the KV fi le in this case is e7.kv.
Grabbing touch eventsThere are some moments or areas where we do not want the touch performed in the same way. Therefore, we can grab some inputs to give them special treatment.
Input, Motion, and Touch
44
Getting readyWe will continue working with the touch profi le, so it could be useful to review the previous recipes for a deeper understanding, also we will use the same KV fi le with the common button and label widgets whereby you will fi nd a detailed explanation of the KV fi le in the recipe Recognizing touch shapes.
How to do it…This recipe following the next steps:
1. In the KV fi le, defi ne a button and a empty label:
<MyW>: Button: id: button1 pos: 0,0 text: 'Hello'
Label: id: label1 pos: 200, 200 text: ''
2. In the class of the widget in the Python code, we need to override the method on_touch_down.
3. If the touch coincides with the button area, grab the touch.
4. In the class of the widget in the Python code, we also need to override the method on_touch_up.
5. If the touch is grabbed, change the text of the label and ungrab the touch.
6. Otherwise change the text of the label of that of a different text:
import kivykivy.require('1.9.0')
from kivy.app import Appfrom kivy.uix.widget import Widget
class MyW(Widget):
def on_touch_down(self, touch): if self.ids.button1.collide_point(*touch.pos): touch.grab(self) return True
def on_touch_up(self, touch):
Chapter 2
45
if touch.grab_current is self:
self.ids.label1.text =\ 'Click on the screen but over the Button' touch.ungrab(self) return True else: self.ids.label1.text =\'Click on the screen'
class e8App(App):
def build(self): return MyW()
if __name__ == '__main__': e8App().run()
How it works…Again, in the KV fi le, we have the defi nition of a button and a empty label.
In the Python code, the initial four lines are the usual lines to use Kivy and the button widget. The fi fth line is:
class MyW(Widget):
This is where we defi ne the class associated with our rule in the KV fi le. The sixth line is:
def on_touch_down(self, touch):
Here, we start the declaration of the dispatched on_touch_down method; you must note the parameter touch in the declaration and this parameter is necessary to call the event do it by the input. The seventh, eighth, and ninth lines are:
if self.ids.button1.collide_point(*touch.pos): touch.grab(self) return True
In these lines, we check whether the touch falls in the area of the button, and if so, we grab the touch. In the tenth line, we defi ne the dispatched on_touch_up to make the decision of what to do with the grabbed touch. In the eleventh line, there is the if statement where if the touch is grabbed, we change the label to the text 'Click on the screen but over the Button' In the thirteen line, we ungrab the touch:
touch.ungrab(self)

Input, Motion, and Touch
46
In the fi fteenth line, we have the else statement where we change the text of the label to 'Click on the screen'. This section is optional, but you're strongly encouraged to include it and your editor may want to discuss with you why you have not.
The last lines of the Python code are the usual lines to run and display our Kivy interface. Just remember that the initial part of the name of the class is:
class e8App(App):
It will be the same as the KV fi le; the name of the KV fi le in this case is e8.kv.
Recording gesturesA gesture is a particular succession of touches, which we will give some special signifi cance to. Kivy eases the way to handle gestures.
Getting readyIn this recipe, we will use some predefi ned graphics in the Kivy framework just to highlight the gesture, and you do not need any further knowledge about it. Also, we have a predefi ned gesture that is provided in this recipe to you.
How to do it…In this recipe, we have the next steps:
1. Call the gesture database.
2. Make a method to categorize the gesture.
3. Set a marker for the initial touch.
4. Record the touch.
5. Do the comparison with the predefi ned gesture.
6. Print the result:
from kivy.app import App
from kivy.uix.widget import Widgetfrom kivy.uix.button import Buttonfrom kivy.graphics import Color, Ellipse, Linefrom kivy.gesture import Gesture, GestureDatabase
gdb = GestureDatabase()
check =\ gdb.str_to_gesture('eNq1l0tuI0cMhvd9EXsTofgmL6BsA/
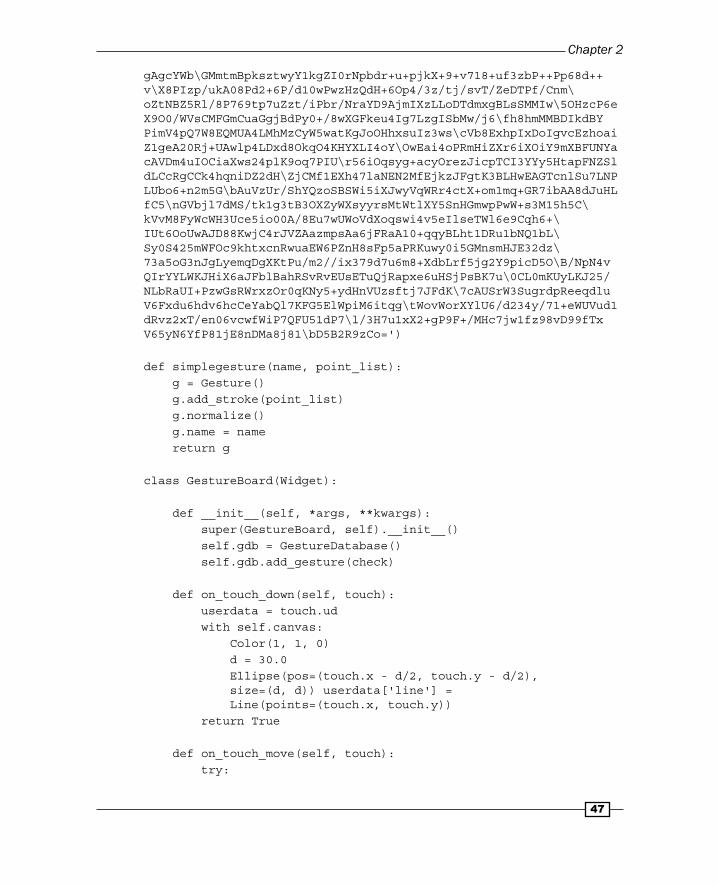
Chapter 2
47
gAgcYWb\GMmtmBpksztwyY1kgZI0rNpbdr+u+pjkX+9+v718+uf3zbP++Pp68d++v\X8PIzp/ukA08Pd2+6P/d10wPwzHzQdH+6Op4/3z/tj/svT/ZeDTPf/Cnm\oZtNBZ5Rl/8P769tp7uZzt/iPbr/NraYD9AjmIXzLLoDTdmxgBLsSMMIw\5OHzcP6eX9O0/WVsCMFGmCuaGgjBdPy0+/8wXGFkeu4Ig7LzgISbMw/j6\fh8hmMMBDIkdBYPimV4pQ7W8EQMUA4LMhMzCyW5watKgJoOHhxsuIz3ws\cVb8ExhpIxDoIgvcEzhoaiZ1geA20Rj+UAwlp4LDxd8OkqO4KHYXLI4oY\OwEai4oPRmHiZXr6iXOiY9mXBFUNYacAVDm4uIOCiaXws24plK9oq7PIU\r56iOqsyg+acyOrezJicpTCI3YYy5HtapFNZSldLCcRgCCk4hqniDZ2dH\ZjCMf1EXh47laNEN2MfEjkzJFgtK3BLHwEAGTcnlSu7LNPLUbo6+n2m5G\bAuVzUr/ShYQzoSBSWi5iXJwyVqWRr4ctX+om1mq+GR7ibAA8dJuHLfC5\nGVbjl7dMS/tk1g3tB3OXZyWXsyyrsMtWtlXY5SnHGmwpPwW+s3M15h5C\kVvM8FyWcWH3Uce5io00A/8Eu7wUWoVdXoqswi4v5eIlseTWl6e9Cqh6+\IUt6OoUwAJD88KwjC4rJVZAazmpsAa6jFRaA10+qqyBLht1DRu1bNQ1bL\Sy0S425mWFOc9khtxcnRwuaEW6PZnH8sFp5aPRKuwy0i5GMnsmHJE32dz\73a5oG3nJgLyemqDgXKtPu/m2//ix379d7u6m8+XdbLrf5jg2Y9picD5O\B/NpN4vQIrYYLWKJHiX6aJFblBahRSvRvEUsETuQjRapxe6uHSjPsBK7u\0CL0mKUyLKJ25/NLbRaUI+PzwGsRWrxzOr0qKNy5+ydHnVUzsftj7JFdK\7cAUSrW3SugrdpReeqdluV6Fxdu6hdv6hcCeYabQl7KFG5ElWpiM6itqg\tWovWorXYlU6/d234y/71+eWUVud1dRvz2xT/en06vcwfWiP7QFU51dP7\l/3H7u1xX2+gP9F+/MHc7jw1fz98vD99fTxV65yN6YfP81jE8nDMa8j81\bD5B2R9zCo=')
def simplegesture(name, point_list): g = Gesture() g.add_stroke(point_list) g.normalize() g.name = name return g
class GestureBoard(Widget):
def __init__(self, *args, **kwargs): super(GestureBoard, self).__init__() self.gdb = GestureDatabase() self.gdb.add_gesture(check)
def on_touch_down(self, touch): userdata = touch.ud with self.canvas: Color(1, 1, 0) d = 30.0 Ellipse(pos=(touch.x - d/2, touch.y - d/2), size=(d, d)) userdata['line'] = Line(points=(touch.x, touch.y)) return True
def on_touch_move(self, touch): try:

Input, Motion, and Touch
48
touch.ud['line'].points += [touch.x, touch.y] return True except (KeyError) as e: pass
def on_touch_up(self, touch): g = simplegesture('',list(zip(touch.ud['line']. points[::2],touch.ud['line'].points[1::2])))print("gesture representation:",self.gdb.gesture_to_str(g)) print("check:", g.get_score(check)) g2 = self.gdb.find(g, minscore=0.70) print(g2) if g2: if g2[1] == check: print("check") self.canvas.clear()
class e9App(App): def build(self): return GestureBoard()
if __name__ == '__main__': e9App().run()
How it works…As usual, the fi rst three lines are to use Kivy and the widgets. The fourth line is where we import predefi ned graphics to later represent the start of the gesture. In the fi fth line, we import the gesture profi le and the database structure. In the sixth line, we initialize the gesture database. The seventh line is read from the terminal using a code like this for a gesture with the fi gure of a check (check mark). Next, we defi ne the method simplegesture:
def simplegesture(name, point_list): g = Gesture() g.add_stroke(point_list) g.normalize() g.name = name return g
Chapter 2
49
This method returns a gesture from a list of points. In the class of the widget, we defi ne the initial method where we start the gesture database and we add the check gesture. In the on_touch_down defi nition, we put a circle in the fi rst touch and added this position to the list of touches. In the on_touch_move method we added the rest of the points of the gesture to the list of touches. In the on_touch_up method, which is triggered when the gesture is released, we convert the list of touches to a gesture using the method simplegesture. Also in this method, we have the line:
g2 = self.gdb.find(g, minscore=0.70)
In the preceding line, we evaluate if the gesture is the gesture database with a 70 percent tolerance and we print the result with the next lines in the terminal.
There's more…Now, you have a way to record a gesture and you can feed the gesture database with different gestures. An important recommendation to do this is to separate the predefi ned gestures in to another fi le, which will contain only this information.
See alsoTo get more details about widgets, see the recipes in Chapter 4, Widgets, and for graphics, see Chapter 5, Graphics – Canvas and Instructions.
Where to buy this book You can buy Kivy Cookbook from the Packt Publishing website. Alternatively, you can buy the book from Amazon, BN.com, Computer Manuals and most internet book retailers.
Click here for ordering and shipping details.
www.PacktPub.com
Stay Connected:
Get more information Kivy Cookbook


