CompTIA Network+ ® Lab Series Network Concepts Lab 9: Network Troubleshooting Objective 1.7: Summarize DNS concepts and components Objective 1.8: Given a scenario, implement network troubleshooting methodology Objective 2.3: Explain the purpose and properties of DHCP Objective 4.3: Given a scenario, use appropriate software tools to troubleshoot connectivity Document Version: 2015-09-18 This work by the National Information Security and Geospatial Technologies Consortium (NISGTC), and except where otherwise noted, is licensed under the Creative Commons Attribution 3.0 Unported License. Development was funded by the Department of Labor (DOL) Trade Adjustment Assistance Community College and Career Training (TAACCCT) Grant No. TC-22525-11-60-A-48; The National Information Security, Geospatial Technologies Consortium (NISGTC) is an entity of Collin College of Texas, Bellevue College of Washington, Bunker Hill Community College of Massachusetts, Del Mar College of Texas, Moraine Valley Community College of Illinois, Rio Salado College of Arizona, and Salt Lake Community College of Utah. This workforce solution was funded by a grant awarded by the U.S. Department of Labor's Employment and Training Administration. The solution was created by the grantee and does not necessarily reflect the official position of the U.S. Department of Labor. The Department of Labor makes no guarantees, warranties or assurances of any kind, express or implied, with respect to such information, including any information on linked sites, and including, but not limited to accuracy of the information or its completeness, timeliness, usefulness, adequacy, continued availability or ownership.
Transcript
CompTIA Network+® Lab Series
Network Concepts
Lab 9: Network Troubleshooting Objective 1.7: Summarize DNS concepts and components Objective 1.8: Given a scenario, implement network troubleshooting methodology Objective 2.3: Explain the purpose and properties of DHCP Objective 4.3: Given a scenario, use appropriate software tools to troubleshoot connectivity
Document Version: 2015-09-18
This work by the National Information Security and Geospatial Technologies Consortium (NISGTC), and except where otherwise noted, is licensed under the Creative Commons Attribution 3.0 Unported License.
Development was funded by the Department of Labor (DOL) Trade Adjustment Assistance Community College and Career Training (TAACCCT) Grant No. TC-22525-11-60-A-48; The National Information Security, Geospatial Technologies Consortium (NISGTC) is an entity of Collin College of Texas, Bellevue College of Washington, Bunker Hill Community College of Massachusetts, Del Mar College of Texas, Moraine Valley Community College of Illinois, Rio Salado College of Arizona, and Salt Lake Community College of Utah.
This workforce solution was funded by a grant awarded by the U.S. Department of Labor's Employment and Training Administration. The solution was created by the grantee and does not necessarily reflect the official position of the U.S. Department of Labor. The Department of Labor makes no guarantees, warranties or assurances of any kind, express or implied, with respect to such information, including any information on linked sites, and including, but not limited to accuracy of the information or its completeness, timeliness, usefulness, adequacy, continued availability or ownership.
This work by the National Information Security and Geospatial Technologies Consortium (NISGTC), and except where otherwise noted, is licensed under the Creative Commons Attribution 3.0 Unported License.
Contents 1 Troubleshoot a Suspected DNS Issue Using CLI Utilities ............................................... 7
1.1 Using the Problem-Solving Process Troubleshoot a Suspected DNS Issue .... 7
This work by the National Information Security and Geospatial Technologies Consortium (NISGTC), and except where otherwise noted, is licensed under the Creative Commons Attribution 3.0 Unported License.
Introduction
This lab is part of a series of lab exercises designed to supplement coursework and provide students with a hands-on training experience based on real world applications. This series of lab exercises is intended to support courseware for CompTIA Network+® certification. Networks are important to business processes and when they are not fully operational it is costly and frustrating to the users. Network administrators need to understand not just how to keep the network functional, but also how to approach troubleshooting problems when a network is not fully operational. This lab will review troubleshooting and a methodology that will provide ideas on where to start in the problem-solving effort. This methodology will be used as a guide in troubleshooting two protocols widely used in networks and it is important to be able to diagnose issues with them. DNS and DHCP will be the two protocols focused on in this exercise. This lab includes the following tasks:
1. Using the Problem Solving Process Troubleshoot a Suspected DNS Issue using CLI utilities and Resolve the Issue
2. Configure an Operational DHCP Scope of Addresses 3. Observe the Effects of a Deactivated DHCP Scope and Resolve the Problem
Objective: Network Troubleshooting Successful troubleshooting requires a logical and methodical process. The following are steps for troubleshooting and problem solving network problems as recommended by CompTIA. You should be familiar with these steps to demonstrate Network+ mastery:
Identify the problem.
Gather Information
Consider Possible Causes
Devise a Solution
Implement the Solution
Test the Solution
Document the Solution Key terms for this lab: Domain Name Service (DNS) – the protocol used to resolve and map hostnames and domain names into IP addresses on the Internet. DNS uses UDP port 53 for initiating requests. Name servers, or DNS servers are servers that contain databases of associated names and IP addresses and provide this information to resolvers (hosts) on request.
Lab 9: Troubleshooting Networks
4
This work by the National Information Security and Geospatial Technologies Consortium (NISGTC), and except where otherwise noted, is licensed under the Creative Commons Attribution 3.0 Unported License.
Nslookup: a utility used to perform query testing of DNS servers and obtain detailed responses at the command prompt. This information can be useful for diagnosing and solving name resolution problems. Dynamic Host Configuration Protocol (DHCP) – protocol used to automatically assign network configuration parameters to devices on a network. Parameters include IP address, subnet mask, default gateway, server addresses such as DNS, and lease time. DHCP uses port number 67 to communicate from client to server and port 68 from server to client. DHCP Scope – the consecutive range of possible IP addresses that the DHCP server can lease to clients on a network or subnet. Scopes typically define a single physical subnet on your network to which DHCP services are offered. Scopes are the primary way for the DHCP server to manage distribution and assignment of IP addresses and any related configuration parameters to DHCP clients on the network. Command Line Interface (CLI) – a text-based method of accessing the shell of an operating system. Usually CLI provides a more powerful, direct way of executing programs and utilities. Universal Resource Locator (URL) – the named address of a resource on the Internet. Fully Qualified Domain Name – the complete domain name for a specific computer, or host, on the Internet. The FQDN consists of two parts: the hostname and the domain name. ipconfig – The ipconfig command is used to view or modify a computer's IP addresses, to release and then renew the IP address, and flush the DNS resolver cache. Ping – used to verify basic TCP/IP connectivity to a network host. APIPA (Automatic Private IP Addressing) – A Microsoft Windows feature used when there is a failure in DHCP servers, allowing DHCP clients to obtain IP addresses. APIPA allocates IP addresses in the private range 169.254.0.1 to 169.254.255.254 and are displayed in ipconfig /all as autoconfiguration IPv4 addresses. When the DHCP server is operational clients correctly update their addresses automatically.
Lab 9: Troubleshooting Networks
5
This work by the National Information Security and Geospatial Technologies Consortium (NISGTC), and except where otherwise noted, is licensed under the Creative Commons Attribution 3.0 Unported License.
Lab Topology
Lab 9: Troubleshooting Networks
6
This work by the National Information Security and Geospatial Technologies Consortium (NISGTC), and except where otherwise noted, is licensed under the Creative Commons Attribution 3.0 Unported License.
Lab Settings
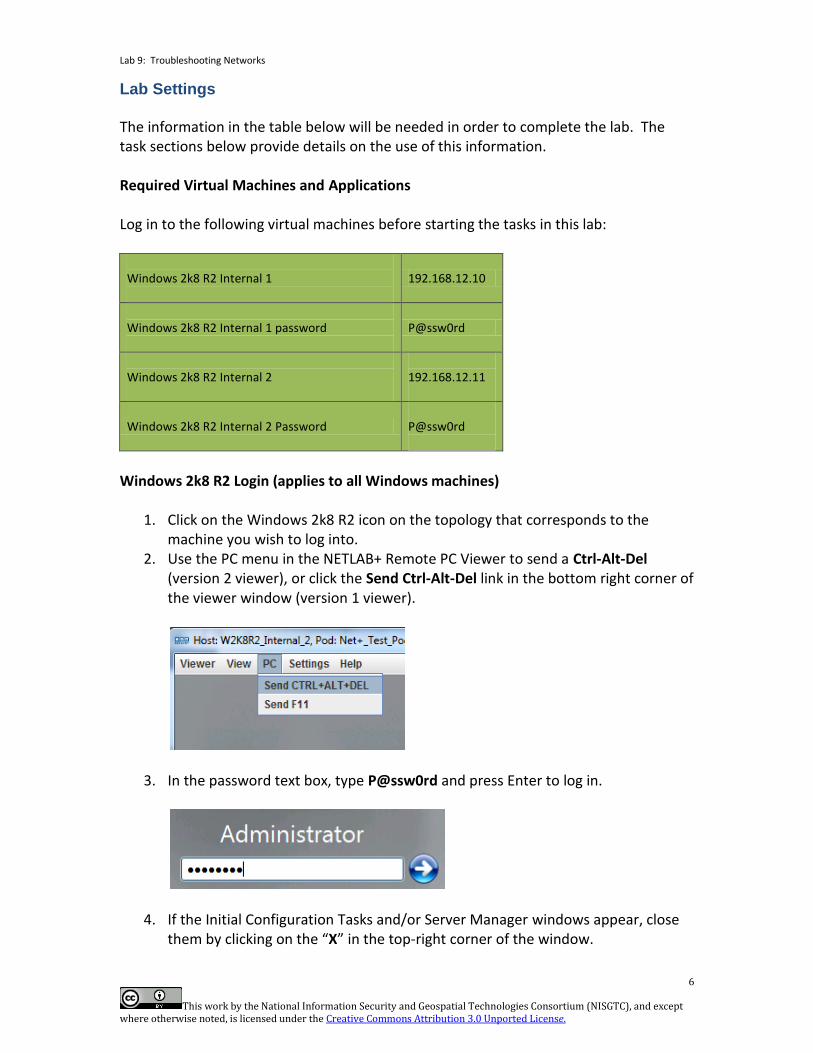
The information in the table below will be needed in order to complete the lab. The task sections below provide details on the use of this information. Required Virtual Machines and Applications Log in to the following virtual machines before starting the tasks in this lab:
Windows 2k8 R2 Internal 1
192.168.12.10
Windows 2k8 R2 Internal 1 password
P@ssw0rd
Windows 2k8 R2 Internal 2
192.168.12.11
Windows 2k8 R2 Internal 2 Password P@ssw0rd
Windows 2k8 R2 Login (applies to all Windows machines)
1. Click on the Windows 2k8 R2 icon on the topology that corresponds to the machine you wish to log into.
2. Use the PC menu in the NETLAB+ Remote PC Viewer to send a Ctrl-Alt-Del (version 2 viewer), or click the Send Ctrl-Alt-Del link in the bottom right corner of the viewer window (version 1 viewer).
3. In the password text box, type P@ssw0rd and press Enter to log in.
4. If the Initial Configuration Tasks and/or Server Manager windows appear, close them by clicking on the “X” in the top-right corner of the window.
Lab 9: Troubleshooting Networks
7
This work by the National Information Security and Geospatial Technologies Consortium (NISGTC), and except where otherwise noted, is licensed under the Creative Commons Attribution 3.0 Unported License.
1 Troubleshoot a Suspected DNS Issue Using CLI Utilities
Scenario: Users are complaining that the new company website at http://www.ips.com cannot be accessed. They were informed of the new website in a company memo. As a member of the IT support group you are tasked with troubleshooting and resolving the issue. 1.1 Using the Problem-Solving Process Troubleshoot a Suspected DNS Issue
Through your training, you know the first thing you need to do is isolate the problem. Based on your experience, this appears to be a DNS problem, but to be sure you will use a logical and methodical process of problem-solving to resolve the issue. You begin gathering information by speaking with one of the users experiencing the access problem, asking the user questions and based on the information received you consider possible causes. Problems with network connectivity and DNS are two possibilities that you suspect as causes. You remember that DNS is a protocol that is part of the TCP/IP suite of protocols. It is used to resolve the URL or website addresses that are readable to people into numerical IP addresses that are readable by computers. The DNS server keeps records of the addresses that are readable to people to IP address resolutions. The local computer will also build a cache of addresses that have been previously resolved by the DNS server. The user’s computer accesses the correct DNS server by its configured TCP/IP settings. DNS is implemented in two software components; the DNS server and the DNS client. Your user’s machine is the DNS client. Using utilities such as ipconfig /all, ping, and nslookup, you will troubleshoot to find a solution the problem. Once solved, you will implement the solution, document it, and explain the situation to the user. You start the investigation by checking to see if there are any other network connectivity issues.
1. Use the instructions provided in the Lab Settings section to log onto the Windows 2k8 R2 Internal 1 machine, if you are not logged in already. If the Server Manager window appears, please close it.
2. Go to Start > Search box and type cmd and then press Enter. 3. Issue the ping command to the loopback address 127.0.0.1 to verify the TCP
This work by the National Information Security and Geospatial Technologies Consortium (NISGTC), and except where otherwise noted, is licensed under the Creative Commons Attribution 3.0 Unported License.
4. Issue the ping command to the host IP address to test the IP configurations of the local host (the user’s computer). Refer to the table in the Lab Settings section to find the IP address of the Windows 2k8 R2 Internal 1 machine (192.168.12.10). It is successful.
The previous tests have helped to determine that the computer has its TCP/IP setting configured and the stack is functioning properly. Next, the tests will determine that the TCP/IP setting on the host computer are correct in relation to the network it is configured for, particularly those settings that are used for DNS name resolution since that is one of the potential causes of the existing problem.
5. At the command prompt, type ipconfig /all. This will display the full TCP/IP configuration for all NICs on the system, including DNS, DHCP, and WINS settings.
Lab 9: Troubleshooting Networks
9
This work by the National Information Security and Geospatial Technologies Consortium (NISGTC), and except where otherwise noted, is licensed under the Creative Commons Attribution 3.0 Unported License.
6. Locate the default gateway IP address from the ipconfig /all output. Ping the default gateway to verify the router that takes you outside your local LAN is accessible. It is successful. This will help you narrow down what could be causing the original problem of not being able to access the new website at http://www.ips.com by eliminating lack of network connectivity.
You have eliminated loss of network connectivity within the LAN as the cause of the problem by proving connectivity to local hosts. Now it is time to test connectivity to the DNS server to be sure that the user’s computer can access it.
7. Locate the DNS server IP address from the ipconfig /all output. At the command prompt, ping the DNS server to make sure it is accessible from the user’s computer. It is successful. This proves that the DNS server is accessible, but that does not mean that DNS is functioning properly because you are still using an IP address in your testing.
8. At the command prompt, type nslookup ?. Nslookup is a command-line utility for testing and troubleshooting DNS servers. Nslookup ? shows available commands in the utility.
This work by the National Information Security and Geospatial Technologies Consortium (NISGTC), and except where otherwise noted, is licensed under the Creative Commons Attribution 3.0 Unported License.
9. Nslookup can be used to test DNS failures. At the command prompt, type nslookup followed by the IP address of the user’s computer.
Nslookup is useful in this situation because it has allowed you to verify that name resolution is working. The output has returned the name and IP address of the DNS server that resolved the name. It also shows you the fully qualified domain name and the IP address of the host you specified in the command that is that of the user’s computer.
10. You have now determined that network connectivity is functional and DNS is working properly. Now, type nslookup www.ips.com to learn if the DNS server is resolving the name to an IP address. Based on your findings, it can be concluded that the URL provided may be incorrect.
11. By contacting the department that distributed the memo and checking the URL of the new website, you learn that the correct URL is http://www.isp.com. Type nslookup again with the correct URL to see that DNS is now resolving it.
This work by the National Information Security and Geospatial Technologies Consortium (NISGTC), and except where otherwise noted, is licensed under the Creative Commons Attribution 3.0 Unported License.
12. Open a web browser and try to access the new website using the corrected URL, http://www.isp.com. The website opens in the browser.
1.2 Conclusion
There are many useful CLI utilities that can be used for troubleshooting and problem solving on the network. Even with all the tools available, it is still important to work through solving problems using a logical and methodical process. A good starting point for troubleshooting is to identify the problem and gather information about what is wrong and who is affected. This makes it easier to come up with possible causes and work toward solutions of the problem. 1.3 Review Questions
1. What does the nslookup command do?
2. What utility can be used to find out the IP address, subnet mask and default
gateway configured on a computer?
3. What is the function of the DNS protocol?
4. If a client does not have the correct DNS server address specified in its TCP/IP properties, what will occur?
This work by the National Information Security and Geospatial Technologies Consortium (NISGTC), and except where otherwise noted, is licensed under the Creative Commons Attribution 3.0 Unported License.
2 Configure an Operational DHCP Scope of Addresses
A DHCP server is used to automatically assign TCP/IP configuration parameters to devices on a network such as: IP address, subnet mask, default gateway, and server addresses such as DNS. The DHCP Scope is the consecutive range of IP addresses that the DHCP server can lease to clients on a network or subnet. In this task, you will configure DHCP on a server and test it to be sure the client is receiving the correct DHCP configurations. 2.1 Configure a DHCP Server Scope
1. Use the instructions in the Lab Settings section to log into the Windows 2k8 R2
Internal 1 machine, if you are not logged in already. 2. Click Start > Administrative Tools -> DHCP
3. Click on the + next to the w2k8r2internal1.netplus.com machine to expand.
Lab 9: Troubleshooting Networks
13
This work by the National Information Security and Geospatial Technologies Consortium (NISGTC), and except where otherwise noted, is licensed under the Creative Commons Attribution 3.0 Unported License.
4. Right-click on IPv4 and select New Scope from the shortcut menu.
5. The Welcome to the New Scope Wizard screen appears. Click Next.
Lab 9: Troubleshooting Networks
14
This work by the National Information Security and Geospatial Technologies Consortium (NISGTC), and except where otherwise noted, is licensed under the Creative Commons Attribution 3.0 Unported License.
6. On the Scope Name Wizard screen, type in the name, Internal1 and a description, DHCP. These are just variables decided by the network administrator so a name or description would be selected according to the company conventions. Click Next.
7. On the IP Address Range Wizard screen, type the Start and End IP address. Use the start address, 192.168.12.3, and the end address, 192.168.12.30. These addresses need to be usable IP addresses within the same network/subnet as the host to which they will be assigned. You may also need to configure a length or subnet mask. The length and subnet mask are used to indicate the number of bits being used to identify the network portion of the host IP address. In this case, you will accept the default settings because that is the correct subnet for this scenario. Click Next.
Lab 9: Troubleshooting Networks
15
This work by the National Information Security and Geospatial Technologies Consortium (NISGTC), and except where otherwise noted, is licensed under the Creative Commons Attribution 3.0 Unported License.
8. On the Add Exclusions and Delay Wizard screen, enter a valid start and end IP address. For this scope, the start IP address for excluding IP address from being dynamically assigned to hosts is 192.168.12.3 and the end address in the range is 192.168.12.14. This range of addresses is selected to be left out of the scope because some of them are statically assigned to other devices on the network and since IP addresses need to be unique within a network excluding these from possibly being assigned again will prevent duplicate IP address problems on the network. Type the addresses into the wizard and be sure to click Add to save the settings. Leave the Subnet delay at the default setting. Click Next.
9. On the Lease Duration Wizard screen, accept defaults and click Next. DHCP allocates the IP address for specified periods of time known as a lease. The Lease duration specifies the time, in seconds, from address assignment until the client's lease on the address expires.
Lab 9: Troubleshooting Networks
16
This work by the National Information Security and Geospatial Technologies Consortium (NISGTC), and except where otherwise noted, is licensed under the Creative Commons Attribution 3.0 Unported License.
10. A host IP address, subnet mask, default gateway are the main options that need to be configured through DHCP. If a system is part of a domain or needs to connect to the Internet the domain name and DNS server options need to be configured. For Windows systems WINS can also be configured. On the Configure DHCP Options Wizard screen, click the Yes button and click Next.
11. On the Router (Default Gateway) Wizard screen, type in 192.168.12.1, click Add and then click Next.
Lab 9: Troubleshooting Networks
17
This work by the National Information Security and Geospatial Technologies Consortium (NISGTC), and except where otherwise noted, is licensed under the Creative Commons Attribution 3.0 Unported License.
12. There is no domain to configure for this network. Notice the DNS server IP address has already been added to the options to be configured on the DHCP clients. On the Domain Name and DNS Servers Wizard screen, click Next.
13. You will not be configuring a WINS setting on this scope. On the WINS Servers Wizard Screen, click Next.
Lab 9: Troubleshooting Networks
18
This work by the National Information Security and Geospatial Technologies Consortium (NISGTC), and except where otherwise noted, is licensed under the Creative Commons Attribution 3.0 Unported License.
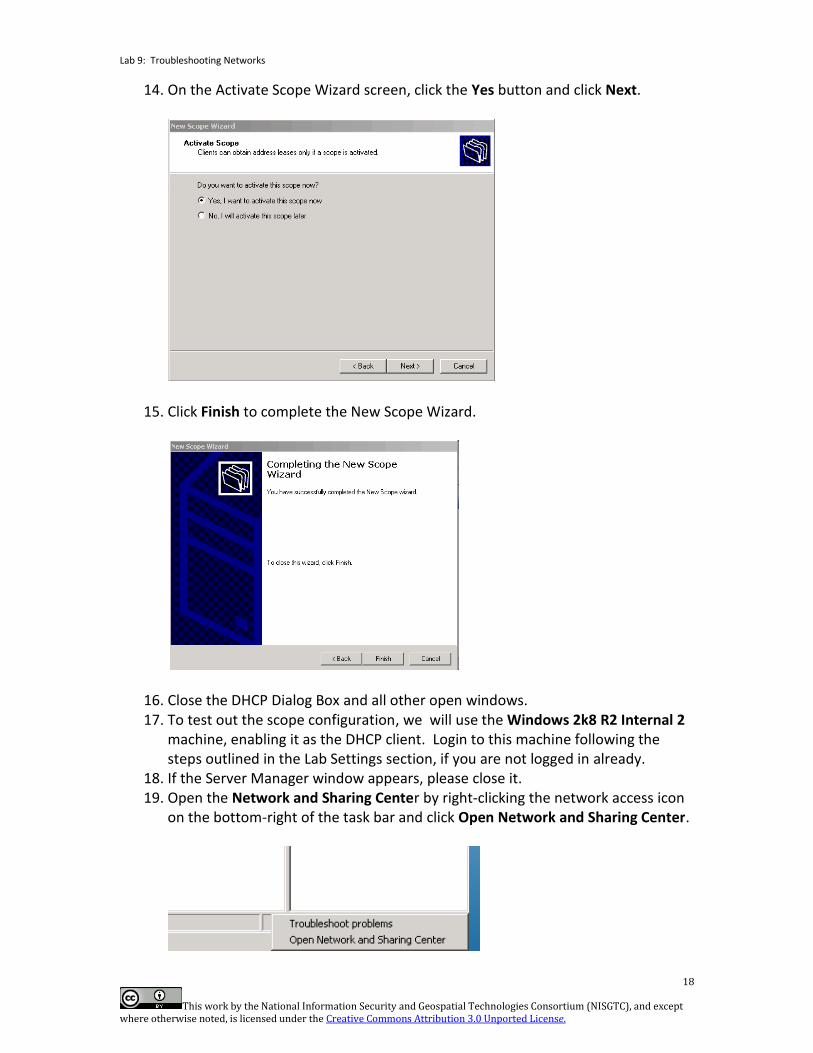
14. On the Activate Scope Wizard screen, click the Yes button and click Next.
15. Click Finish to complete the New Scope Wizard.
16. Close the DHCP Dialog Box and all other open windows. 17. To test out the scope configuration, we will use the Windows 2k8 R2 Internal 2
machine, enabling it as the DHCP client. Login to this machine following the steps outlined in the Lab Settings section, if you are not logged in already.
18. If the Server Manager window appears, please close it. 19. Open the Network and Sharing Center by right-clicking the network access icon
on the bottom-right of the task bar and click Open Network and Sharing Center.
Lab 9: Troubleshooting Networks
19
This work by the National Information Security and Geospatial Technologies Consortium (NISGTC), and except where otherwise noted, is licensed under the Creative Commons Attribution 3.0 Unported License.
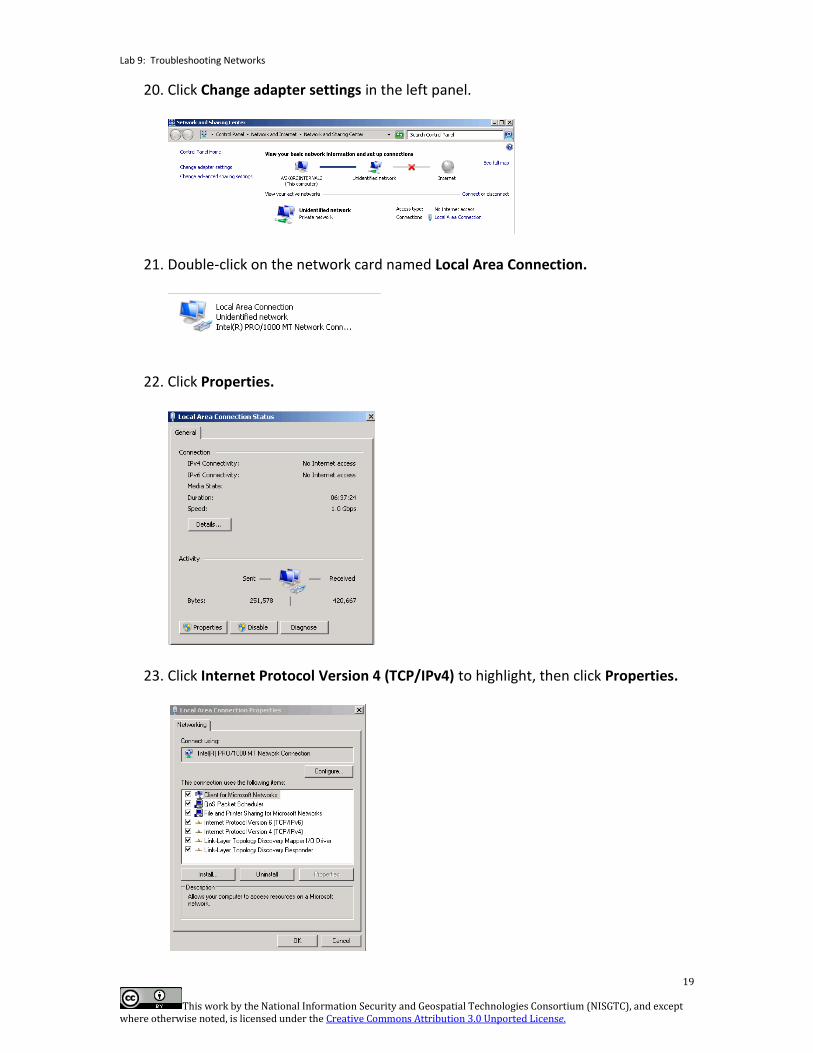
20. Click Change adapter settings in the left panel.
21. Double-click on the network card named Local Area Connection.
22. Click Properties.
23. Click Internet Protocol Version 4 (TCP/IPv4) to highlight, then click Properties.
Lab 9: Troubleshooting Networks
20
This work by the National Information Security and Geospatial Technologies Consortium (NISGTC), and except where otherwise noted, is licensed under the Creative Commons Attribution 3.0 Unported License.
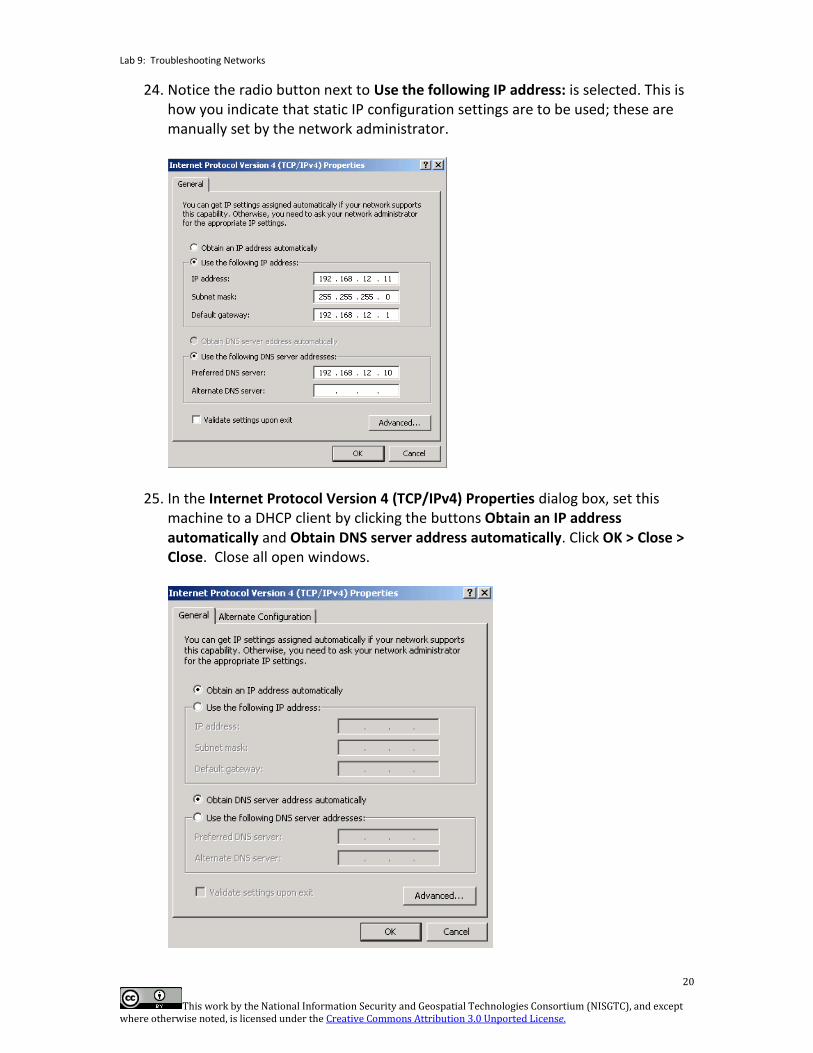
24. Notice the radio button next to Use the following IP address: is selected. This is how you indicate that static IP configuration settings are to be used; these are manually set by the network administrator.
25. In the Internet Protocol Version 4 (TCP/IPv4) Properties dialog box, set this machine to a DHCP client by clicking the buttons Obtain an IP address automatically and Obtain DNS server address automatically. Click OK > Close > Close. Close all open windows.
Lab 9: Troubleshooting Networks
21
This work by the National Information Security and Geospatial Technologies Consortium (NISGTC), and except where otherwise noted, is licensed under the Creative Commons Attribution 3.0 Unported License.
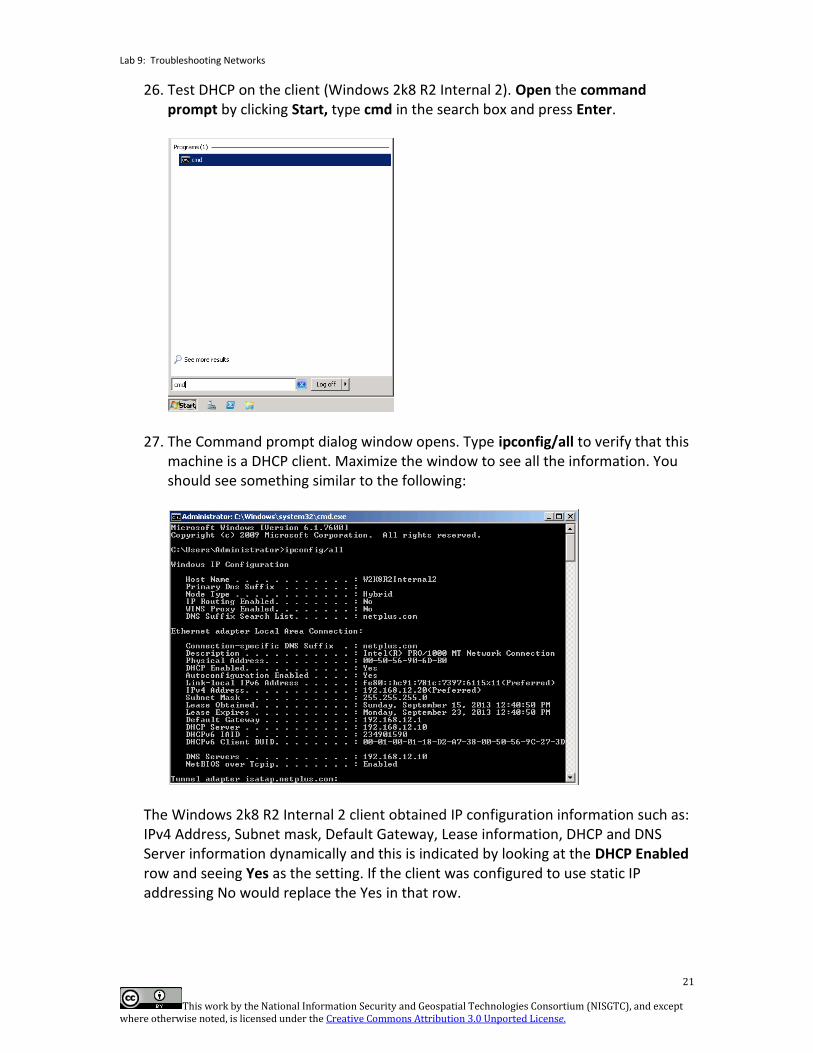
26. Test DHCP on the client (Windows 2k8 R2 Internal 2). Open the command prompt by clicking Start, type cmd in the search box and press Enter.
27. The Command prompt dialog window opens. Type ipconfig/all to verify that this machine is a DHCP client. Maximize the window to see all the information. You should see something similar to the following:
The Windows 2k8 R2 Internal 2 client obtained IP configuration information such as: IPv4 Address, Subnet mask, Default Gateway, Lease information, DHCP and DNS Server information dynamically and this is indicated by looking at the DHCP Enabled row and seeing Yes as the setting. If the client was configured to use static IP addressing No would replace the Yes in that row.
Lab 9: Troubleshooting Networks
22
This work by the National Information Security and Geospatial Technologies Consortium (NISGTC), and except where otherwise noted, is licensed under the Creative Commons Attribution 3.0 Unported License.
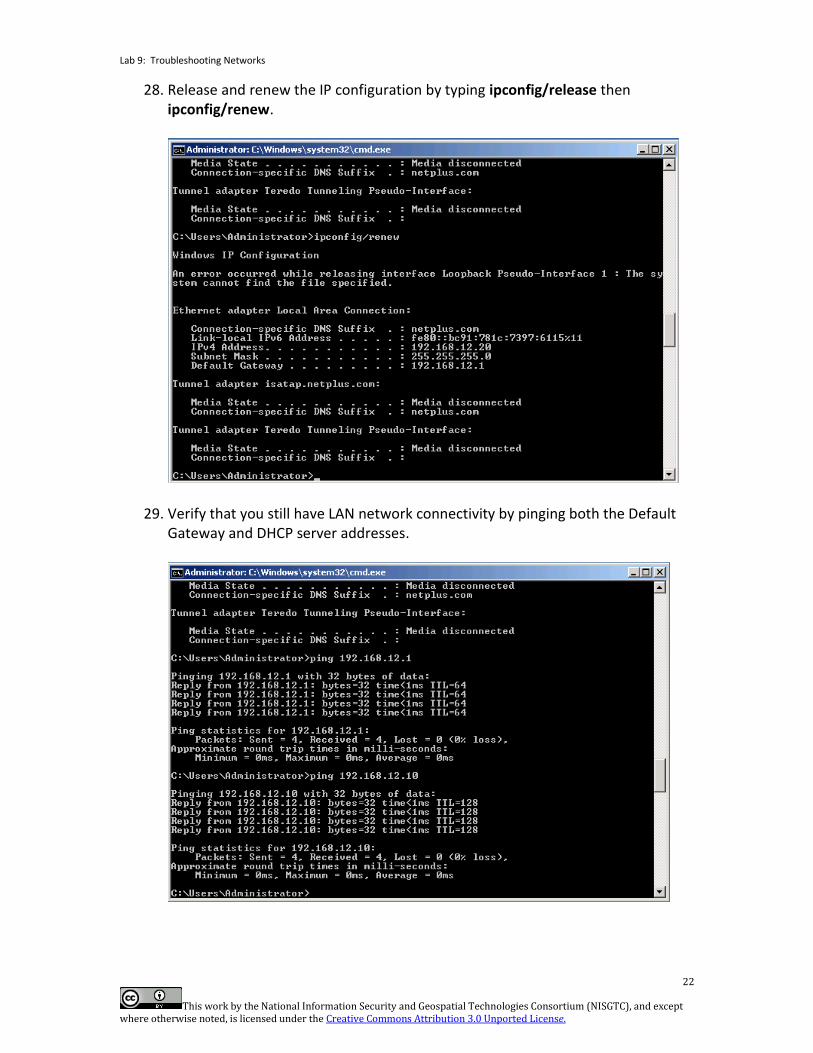
28. Release and renew the IP configuration by typing ipconfig/release then ipconfig/renew.
29. Verify that you still have LAN network connectivity by pinging both the Default Gateway and DHCP server addresses.
Lab 9: Troubleshooting Networks
23
This work by the National Information Security and Geospatial Technologies Consortium (NISGTC), and except where otherwise noted, is licensed under the Creative Commons Attribution 3.0 Unported License.
2.2 Conclusion
Setting up a DHCP Server is a step-by-step process requiring planning in order to provide accurate IP configuration parameters to client devices. Settings such as the size of the DHCP pool, addresses of key devices to exclude, DNS server and Default Gateway parameters are paramount to ensure proper Scope configuration. Testing and verification commands such as ipconfig, ipconfig/all, ipconfig/release and ipconfig/renew are significant in ensuring DHCP works as planned. 2.3 Review Questions
1. What IPv4 address was assigned to the Windows 2k8 R2 Internal 2 machine by
the DHCP server?
2. Could this machine have leased a different IP address?
3. According the DHCP server configurations, what range of IP addresses could this machine been assigned by DHCP?
4. After configuring the host as a DHCP client, was it dynamically allocated DHCP and DNS server addresses correctly?
Lab 9: Troubleshooting Networks
24
This work by the National Information Security and Geospatial Technologies Consortium (NISGTC), and except where otherwise noted, is licensed under the Creative Commons Attribution 3.0 Unported License.
3 Observe the Effects of a Deactivated Scope and Resolve the Configuration
To complete this, lab you will now misconfigure the DHCP server scope and observe the effects of incorrect DHCP settings on a network. 3.1 Deactivate the DHCP Scope, Observe the Effects and Resolve the Problem
1. On the DHCP server (Windows 2k8 R2 Internal 1) machine, click Start >
Administrative Tools > DHCP.
2. Maximize and resize the windows to suit your viewing preference. Click the + next to the w2k8r2internal1.netplus.com and IPv4 to expand them. Highlight Scope [192.168.12.0], right-click and select Deactivate. When you are asked if you are sure you want to deactivate the scope click Yes.
Lab 9: Troubleshooting Networks
25
This work by the National Information Security and Geospatial Technologies Consortium (NISGTC), and except where otherwise noted, is licensed under the Creative Commons Attribution 3.0 Unported License.
3. Go back to the DHCP client machine (Windows 2k8 R2 Internal 2) and at the command prompt type ipconfig release. Then, type ipconfig /all. Notice that DHCP Enabled is still set to Yes but the TCP/IP configurations are APIPA addresses (autoconfiguration IPv4 address of 169.254.x.x) because the DHCP server is unavailable.
4. Now return to the DHCP server machine (Windows 2k8 R2 Internal 1).If necessary, click the + next to the w2k8r2internal1.netplus.com and IPv4 to expand them. Highlight Scope [192.168.12.0], right-click and select Activate.
5. On more time, return to the DHCP client machine (Windows 2k8 R2 Internal 2) and type ipconfig /renew to reset the TCP/IP configuration settings.
6. Ping the DHCP server machine (Windows 2k8 R2 Internal 1) to verify that the settings are correct and there is network connectivity.
3.2 Conclusion
The DHCP protocol allows a server to dynamically distribute IP addressing and configuration information to clients. Normally, the DHCP server provides the client with at least this basic information: IP Address, Subnet Mask, and Default Gateway. By using DHCP server computers to centrally manage IP addresses and other related configuration parameters, network administrators are relieved of the trouble of manually configuring TCP/IP settings on all network hosts. 3.3 Review Questions
1. What is the function of the ipconfig/release and the ipconfig/renew commands?
2. What type of devices would be better served to have static IP configuration?