37
Red Hat JBoss AMQ 7.0 Using the AMQ JMS Client For Use with AMQ Clients 1.2 Last Updated: 2017-12-15

Red Hat JBoss AMQ 7.0
Using the AMQ JMS Client
For Use with AMQ Clients 1.2
Last Updated: 2017-12-15


Red Hat JBoss AMQ 7.0 Using the AMQ JMS Client
For Use with AMQ Clients 1.2

Legal Notice
Copyright © 2017 Red Hat, Inc.
The text of and illustrations in this document are licensed by Red Hat under a Creative CommonsAttribution–Share Alike 3.0 Unported license ("CC-BY-SA"). An explanation of CC-BY-SA isavailable athttp://creativecommons.org/licenses/by-sa/3.0/. In accordance with CC-BY-SA, if you distribute this document or an adaptation of it, you mustprovide the URL for the original version.
Red Hat, as the licensor of this document, waives the right to enforce, and agrees not to assert,Section 4d of CC-BY-SA to the fullest extent permitted by applicable law.
Red Hat, Red Hat Enterprise Linux, the Shadowman logo, JBoss, OpenShift, Fedora, the Infinitylogo, and RHCE are trademarks of Red Hat, Inc., registered in the United States and othercountries.
Linux ® is the registered trademark of Linus Torvalds in the United States and other countries.
Java ® is a registered trademark of Oracle and/or its affiliates.
XFS ® is a trademark of Silicon Graphics International Corp. or its subsidiaries in the UnitedStates and/or other countries.
MySQL ® is a registered trademark of MySQL AB in the United States, the European Union andother countries.
Node.js ® is an official trademark of Joyent. Red Hat Software Collections is not formally relatedto or endorsed by the official Joyent Node.js open source or commercial project.
The OpenStack ® Word Mark and OpenStack logo are either registered trademarks/service marksor trademarks/service marks of the OpenStack Foundation, in the United States and othercountries and are used with the OpenStack Foundation's permission. We are not affiliated with,endorsed or sponsored by the OpenStack Foundation, or the OpenStack community.
All other trademarks are the property of their respective owners.
Abstract
This guide describes how to install and configure the client, run hands-on examples, and use yourclient with other AMQ components.

. . . . . . . . . . . . . . . . . . . . . . . . . . . . . . . . . . . . . . . . . . . . . . . . . . . . . . . . . . . . . . . . . . . . . . . . . . . . . . . . . . . . . . . . . . . . . . . . . . . . . . . . . . . . . . . . . . . . . . . . . . . . . . . . . . . . . . . . . . . . . . . . . . . . . . . . . . . . . . . . . . . . . . . . . . . . . . . . . . . . . . . . . . . . . . . . . . . . . . . . . . . . . . . . . . . . . . . . . . . . . . . . . . . . . . . . . . . . . . . . . . . . . . . . . . . . . . . . . . . . . . . . . . . . . . . . . . . . . . . .
. . . . . . . . . . . . . . . . . . . . . . . . . . . . . . . . . . . . . . . . . . . . . . . . . . . . . . . . . . . . . . . . . . . . . . . . . . . . . . . . . . . . . . . . . . . . . . . . . . . . . . . . . . . . . . . . . . . . . . . . . . . . . . . . . . . . . . . . . . . . . . . . . . . . . . . . . . . . . . . . . . . . . . . . . . . . . . . . . . . . . . . . . . . . . . . . . . . . . . . . . . . . . . . . . . . . . . . . . . . . . . . . . . . . . . . . . . . . . . . . . . . . . . . . . . . . . . . . . . . . . . . . . . . . . . . . . . . . . . . .
. . . . . . . . . . . . . . . . . . . . . . . . . . . . . . . . . . . . . . . . . . . . . . . . . . . . . . . . . . . . . . . . . . . . . . . . . . . . . . . . . . . . . . . . . . . . . . . . . . . . . . . . . . . . . . . . . . . . . . . . . . . . . . . . . . . . . . . . . . . . . . . . . . . . . . . . . . . . . . . . . . . . . . . . . . . . . . . . . . . . . . . . . . . . . . . . . . . . . . . . . . . . . . . . . . . . . . . . . . . . . . . . . . . . . . . . . . . . . . . . . . . . . . . . . . . . . . . . . . . . . . . . . . . . . . . . . . . . . . . .
. . . . . . . . . . . . . . . . . . . . . . . . . . . . . . . . . . . . . . . . . . . . . . . . . . . . . . . . . . . . . . . . . . . . . . . . . . . . . . . . . . . . . . . . . . . . . . . . . . . . . . . . . . . . . . . . . . . . . . . . . . . . . . . . . . . . . . . . . . . . . . . . . . . . . . . . . . . . . . . . . . . . . . . . . . . . . . . . . . . . . . . . . . . . . . . . . . . . . . . . . . . . . . . . . . . . . . . . . . . . . . . . . . . . . . . . . . . . . . . . . . . . . . . . . . . . . . . . . . . . . . . . . . . . . . . . . . . . . . . .
. . . . . . . . . . . . . . . . . . . . . . . . . . . . . . . . . . . . . . . . . . . . . . . . . . . . . . . . . . . . . . . . . . . . . . . . . . . . . . . . . . . . . . . . . . . . . . . . . . . . . . . . . . . . . . . . . . . . . . . . . . . . . . . . . . . . . . . . . . . . . . . . . . . . . . . . . . . . . . . . . . . . . . . . . . . . . . . . . . . . . . . . . . . . . . . . . . . . . . . . . . . . . . . . . . . . . . . . . . . . . . . . . . . . . . . . . . . . . . . . . . . . . . . . . . . . . . . . . . . . . . . . . . . . . . . . . . . . . . . .
. . . . . . . . . . . . . . . . . . . . . . . . . . . . . . . . . . . . . . . . . . . . . . . . . . . . . . . . . . . . . . . . . . . . . . . . . . . . . . . . . . . . . . . . . . . . . . . . . . . . . . . . . . . . . . . . . . . . . . . . . . . . . . . . . . . . . . . . . . . . . . . . . . . . . . . . . . . . . . . . . . . . . . . . . . . . . . . . . . . . . . . . . . . . . . . . . . . . . . . . . . . . . . . . . . . . . . . . . . . . . . . . . . . . . . . . . . . . . . . . . . . . . . . . . . . . . . . . . . . . . . . . . . . . . . . . . . . . . . . .
Table of Contents
CHAPTER 1. OVERVIEW1.1. KEY FEATURES1.2. SUPPORTED STANDARDS AND PROTOCOLS1.3. SUPPORTED CONFIGURATIONS1.4. TERMS AND CONCEPTS1.5. DOCUMENT CONVENTIONS
The sudo CommandAbout the Use of File Paths in this Document
CHAPTER 2. INSTALLATION2.1. PREREQUISITES2.2. INSTALLING ON RED HAT ENTERPRISE LINUX2.3. INSTALLING ON MICROSOFT WINDOWS2.4. CONFIGURING MAVEN
CHAPTER 3. GETTING STARTED3.1. PREPARING THE BROKER3.2. RUNNING HELLO WORLD
CHAPTER 4. CONFIGURATION4.1. CONFIGURING A JNDI INITIALCONTEXT
Configuring an InitialContext Using a jndi.properties FileConfiguring an InitialContext Using System PropertiesConfiguring an InitialContext ProgrammaticallyJNDI Property Syntax
4.2. CONNECTION URIS4.3. CONNECTION URI OPTIONS
4.3.1. JMS OptionsPrefetch Policy OptionsRedelivery Policy OptionsMessage ID Policy OptionsPresettle Policy OptionsDeserialization Policy Options
4.3.2. TCP Transport Options4.3.3. SSL/TLS Transport Options4.3.4. AMQP Options4.3.5. Failover Options4.3.6. Discovery Options
4.4. SECURITY4.4.1. Authenticating Using Kerberos
4.5. LOGGING
CHAPTER 5. EXAMPLES5.1. CONFIGURING THE JNDI CONTEXT5.2. SENDING MESSAGES5.3. RECEIVING MESSAGES
CHAPTER 6. INTEROPERABILITY6.1. INTEROPERATING WITH OTHER AMQP CLIENTS
6.1.1. Sending Messages6.1.1.1. Message Type6.1.1.2. Message Properties
6.1.2. Receiving Messages
44445666
77777
111111
1313131313141415151616161617171819
2021222223
24242426
292929293030
Table of Contents
1

. . . . . . . . . . . . . . . . . . . . . . . . . . . . . . . . . . . . . . . . . . . . . . . . . . . . . . . . . . . . . . . . . . . . . . . . . . . . . . . . . . . . . . . . . . . . . . . . . . . . . . . . . . . . . . . . . . . . . . . . . . . . . . . . . . . . . . . . . . . . . . . . . . . . . . . . . . . . . . . . . . . . . . . . . . . . . . . . . . . . . . . . . . . . . . . . . . . . . . . . . . . . . . . . . . . . . . . . . . . . . . . . . . . . . . . . . . . . . . . . . . . . . . . . . . . . . . . . . . . . . . . . . . . . . . . . . . . . . . . .
6.1.2.1. Message Type6.1.2.2. Message Properties
6.2. CONNECTING TO AMQ BROKER6.3. CONNECTING TO AMQ INTERCONNECT
APPENDIX A. USING YOUR SUBSCRIPTIONAccessing Your AccountActivating a SubscriptionDownloading Zip and Tar FilesRegistering Your System for Packages
30313232
3333333333
Red Hat JBoss AMQ 7.0 Using the AMQ JMS Client
2

Table of Contents
3

CHAPTER 1. OVERVIEWAMQ JMS is a Java Message Service (JMS) 2.0 client for use in messaging applications that send andreceive AMQP messages.
AMQ JMS is part of AMQ Clients, a suite of messaging libraries supporting multiple languages andplatforms. See Introducing Red Hat JBoss AMQ 7 for an overview of the clients and other AMQcomponents. See AMQ Clients 1.2 Release Notes for information about this release.
AMQ JMS is based on the JMS client from Apache Qpid.
1.1. KEY FEATURES
AMQ JMS gives you all of the features of JMS with the power of AMQP.
JMS 2.0 compatible
SSL/TLS and SASL for secure communication
Heartbeating and automatic reconnect for reliable network connections
Ready for use with OSGi containers
Pure-Java implementation
1.2. SUPPORTED STANDARDS AND PROTOCOLS
AMQ JMS supports the following industry-recognized standards and network protocols.
Version 2.0 of the Java Message Service API
Version 1.0 of the Advanced Message Queueing Protocol (AMQP)
Version 1.0 of the AMQP JMS Mapping
Modern TCP with IPv6
NOTE
The details of distributed transactions (XA) within AMQP are not provided in the 1.0version of the specification. If your environment requires support for distributedtransactions, it is recommended that you use the AMQ Core Protocol JMS.
1.3. SUPPORTED CONFIGURATIONS
AMQ JMS supports the following OS and language versions. See Red Hat JBoss AMQ 7 SupportedConfigurations for more information.
Red Hat Enterprise Linux 6 and 7 with the following JDKs.
OpenJDK 8
Oracle JDK 8
IBM JDK 8
Red Hat JBoss AMQ 7.0 Using the AMQ JMS Client
4

HP-UX 11i with HP-UX JVM 8
IBM AIX 7.1 with IBM JDK 8
Oracle Solaris 10 and 11 with Oracle JDK 8
Microsoft Windows Server 2012 R2 with Oracle JDK 8
1.4. TERMS AND CONCEPTS
This section introduces the core API entities and describes how they operate together.
Table 1.1. API Terms
Entity Description
ConnectionFactory
An entry point for creating connections
Connection A channel for communication between two peers on a network
Session A serialized context for producing and consuming messages
MessageProducer A channel for sending messages to a destination
MessageConsumer A channel for receiving messages from a destination
Destination A named location for messages, either a queue or a topic
Queue A stored sequence of messages
Topic A stored sequence of messages for multicast distribution
Message A mutable holder of application content
AMQ JMS sends and receives messages. Messages are transferred between connected peers usingmessage producers and consumers. Producers and consumers are established over sessions. Sessionsare established over connections. Connections are created by connection factories.
A sending peer creates a producer to send messages. The producer has a destination that identifies atarget queue or topic at the remote peer. A receiving peer creates a consumer to receive messages.Like the producer, the consumer has a destination that identifies a source queue or topic at the remotepeer.
A destination is either a queue or a topic. In JMS, queues and topics are client-side representations ofnamed broker entities that hold messages.
A queue implements point-to-point semantics. Each message is seen by only one consumer, and themessage is removed from the queue after it is read. A topic implements publish-subscribe semantics.Each message is seen by multiple consumers, and the message remains available to other consumersafter it is read.
CHAPTER 1. OVERVIEW
5

See the JMS tutorial for more information.
1.5. DOCUMENT CONVENTIONS
This document uses the following conventions for the sudo command and file paths.
The sudo CommandIn this document, sudo is used for any command that requires root privileges. You should alwaysexercise caution when using sudo, as any changes can affect the entire system.
For more information about using sudo, see The sudo Command.
About the Use of File Paths in this DocumentIn this document, all file paths are valid for Linux, UNIX, and similar operating systems (for example, /home/...). If you are using Microsoft Windows, you should use the equivalent Microsoft Windowspaths (for example, C:\Users\...).
Red Hat JBoss AMQ 7.0 Using the AMQ JMS Client
6

CHAPTER 2. INSTALLATIONThis chapter guides you through the steps required to install AMQ JMS in your environment.
2.1. PREREQUISITES
To begin installation, use your subscription to access AMQ distribution archives and packagerepositories.
To compile the examples or your own application, make sure you have Apache Maven installed.
2.2. INSTALLING ON RED HAT ENTERPRISE LINUX
1. Open a browser and log in to the Red Hat Customer Portal Product Downloads page ataccess.redhat.com/downloads.
2. Locate the Red Hat JBoss AMQ Clients entry in the JBOSS INTEGRATION ANDAUTOMATION category.
3. Click Red Hat JBoss AMQ Clients . The Software Downloads page opens.
4. Download the AMQ JMS Client zip file.
5. Use the unzip command to extract the file contents into a directory of your choosing.
$ unzip apache-qpid-jms-VERSION.zip
6. Configure Maven to discover the client.
2.3. INSTALLING ON MICROSOFT WINDOWS
1. Open a browser and log in to the Red Hat Customer Portal Product Downloads page ataccess.redhat.com/downloads.
2. Locate the Red Hat JBoss AMQ Clients entry in the JBOSS INTEGRATION ANDAUTOMATION category.
3. Click Red Hat JBoss AMQ Clients . The Software Downloads page opens.
4. Download the AMQ JMS Client zip file.
5. Extract the file contents into a directory of your choosing by right-clicking on the zip file andselecting Extract All .
6. Configure Maven to discover the client.
2.4. CONFIGURING MAVEN
The client uses Apache Maven as its build tool.
To build and run the client examples, or to use the client in dependent Maven application builds, youmust first configure Maven to discover a repository for the client. To do so, you must update or createthe Maven settings.xml file. It is typically located at one of the following locations.
CHAPTER 2. INSTALLATION
7

Table 2.1. File Location
Operating System Location of File
Linux /home/USERNAME/.m2/settings.xml
Windows C:\Users\USERNAME\.m2\settings.xml
The client can be accessed by configuring Maven in one of two ways depending on your needs:
1. Using the JBoss Enterprise Maven RepositoryThe AMQ JMS Client 1.2 can be used from the JBoss Enterprise Maven Repository .
The contents of a settings.xml configured to use the repository would resemble thefollowing example.
<settings> <profiles> <!-- Configure the JBoss GA Maven repository --> <profile> <id>jboss-ga-repository</id> <repositories> <repository> <id>jboss-ga-repository</id> <url>https://maven.repository.redhat.com/ga</url> <releases> <enabled>true</enabled> </releases> <snapshots> <enabled>false</enabled> </snapshots> </repository> </repositories> <pluginRepositories> <pluginRepository> <id>jboss-ga-repository</id> <url>http://maven.repository.redhat.com/ga</url> <releases> <enabled>true</enabled> </releases> <snapshots> <enabled>false</enabled> </snapshots> </pluginRepository> </pluginRepositories> </profile> <!-- Configure the JBoss Early Access Maven repository --> <profile> <id>jboss-earlyaccess-repository</id> <repositories> <repository> <id>jboss-earlyaccess-repository</id> <url>https://maven.repository.redhat.com/earlyaccess/all/</url>
Red Hat JBoss AMQ 7.0 Using the AMQ JMS Client
8

2. Using a File-based Maven RepositoryAlternatively, you can download the AMQ JMS Client 1.2 Maven Repository zip file from the RedHat Customer Portal, extract it, and configure Maven to utilize this locally instead.
The contents of a settings.xml configured to use the file-based repository should resemblethe following example. Remember to update the URL to the actual path of the extractedrepository.
<releases> <enabled>true</enabled> </releases> <snapshots> <enabled>false</enabled> </snapshots> </repository> <pluginRepositories> <pluginRepository> <id>jboss-earlyaccess-repository</id> <url>http://maven.repository.redhat.com/earlyaccess/all/</url> <releases> <enabled>true</enabled> </releases> <snapshots> <enabled>false</enabled> </snapshots> </pluginRepository> </pluginRepositories> </repositories> </profile> </profiles> <activeProfiles> <!-- Optionally, make the repository active by default --> <activeProfile>jboss-ga-repository</activeProfile> <activeProfile>jboss-earlyaccess-repository</activeProfile> </activeProfiles></settings>
<settings> <profiles> <!-- Configure the File Based Maven repository --> <profile> <id>amq-jms-client</id> <repositories> <repository> <id>amq-qpid-jms</id> <url>file:///path/to/extracted/maven-repository</url> <!-- If using Windows, an example URL might be: file://C:\path\to\installation\maven-repository --> <releases> <enabled>true</enabled> </releases> <snapshots> <enabled>false</enabled> </snapshots> </repository>
CHAPTER 2. INSTALLATION
9

</repositories> <pluginRepositories> <pluginRepository> <id>jboss-amq-repository</id> <url>file:///path/to/extracted/maven-repository</url> <releases> <enabled>true</enabled> </releases> <snapshots> <enabled>false</enabled> </snapshots> </pluginRepository> </pluginRepositories> </profile> </profiles> <activeProfiles> <!-- Optionally, make the repository active by default --> <activeProfile>amq-jms-client</activeProfile> </activeProfiles></settings>
Red Hat JBoss AMQ 7.0 Using the AMQ JMS Client
10

CHAPTER 3. GETTING STARTEDThis chapter guides you through a simple exercise to help you get started using AMQ JMS. Beforestarting, make sure you have completed the steps in the Chapter 2, Installation chapter for yourenvironment.
To build the examples, you must first configure Maven to discover the client repository .
3.1. PREPARING THE BROKER
The example programs require a running broker with a queue named queue. Follow these steps todefine the queue and start the broker.
1. Install the broker.
2. Create a broker instance . Enable anonymous access.
3. Start the broker instance and check the console for any critical errors logged during startup.
$ BROKER_INSTANCE_DIR/bin/artemis run[...]14:43:20,158 INFO [org.apache.activemq.artemis.integration.bootstrap] AMQ101000: Starting ActiveMQ Artemis Server[...]15:01:39,686 INFO [org.apache.activemq.artemis.core.server] AMQ221020: Started Acceptor at 0.0.0.0:5672 for protocols [AMQP][...]15:01:39,691 INFO [org.apache.activemq.artemis.core.server] AMQ221007: Server is now live
4. Use the artemis queue command to create a queue called queue.
$ BROKER_INSTANCE_DIR/bin/artemis queue create --name queue --auto-create-address --anycast
You are prompted to answer a series of questions. For yes|no questions, type N; otherwise,press Enter to accept the default value.
3.2. RUNNING HELLO WORLD
Use Maven to build the examples by running the following command in the INSTALL_DIR/examplesdirectory.
NOTE
In this example, the addition of dependency:copy-dependencies results in thedependencies being copied into the target/dependency directory.
mvn clean package dependency:copy-dependencies -DincludeScope=runtime -DskipTests
Run the HelloWorld example by using one of the following commands.
CHAPTER 3. GETTING STARTED
11

Linux: java -cp "target/classes/:target/dependency/*" org.apache.qpid.jms.example.HelloWorldWindows: java -cp "target\classes\;target\dependency\*" org.apache.qpid.jms.example.HelloWorld
The HelloWorld example creates a connection to the broker, creates a MessageConsumer and MessageProducer for the queue called queue, sends a Hello world! TextMessage, receives it, andprints its contents to the terminal.
For example, running it on Linux results in the following output.
$ java -cp "target/classes/:target/dependency/*" org.apache.qpid.jms.example.HelloWorldHello world!
The source code for the example can be found in the INSTALL_DIR/src/main/java directory, withthe JNDI and logging configuration found in the INSTALL_DIR/src/main/resources directory.
Red Hat JBoss AMQ 7.0 Using the AMQ JMS Client
12
CHAPTER 4. CONFIGURATIONThis section details various configuration options for the client, such as how to configure and create aJNDI InitialContext, the syntax for its related configuration, and various URI options that can beset when defining a ConnectionFactory.
4.1. CONFIGURING A JNDI INITIALCONTEXT
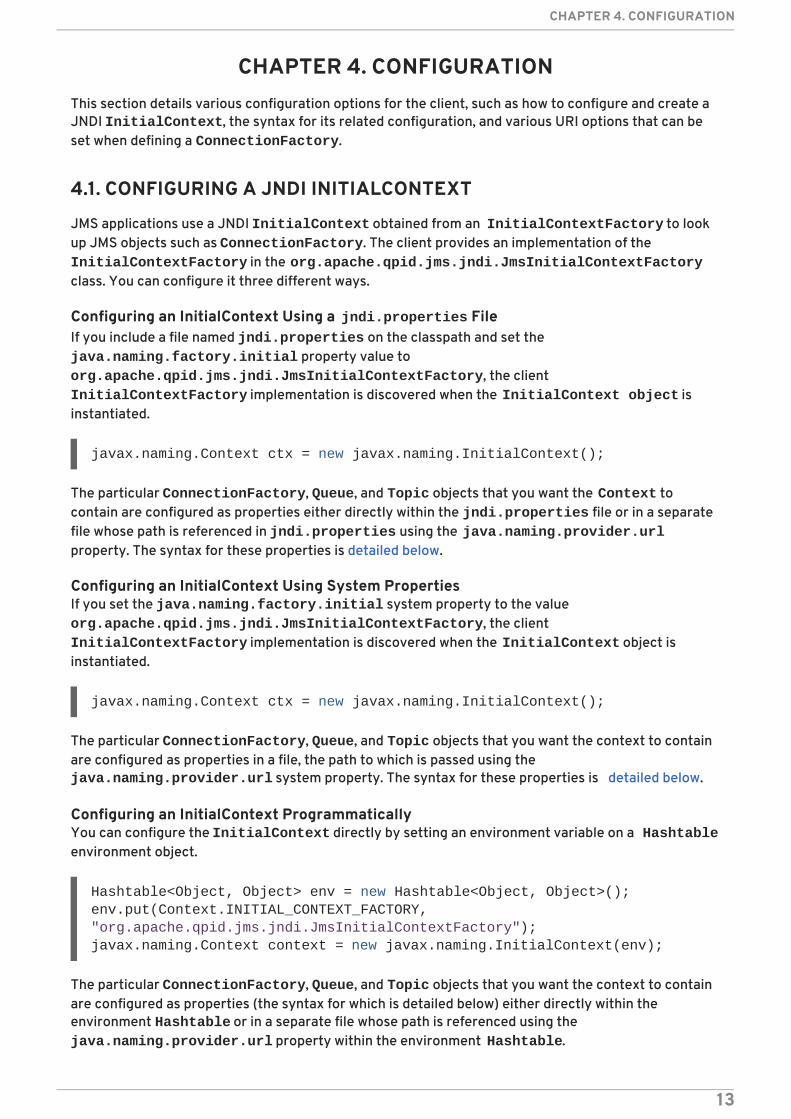
JMS applications use a JNDI InitialContext obtained from an InitialContextFactory to lookup JMS objects such as ConnectionFactory. The client provides an implementation of the InitialContextFactory in the org.apache.qpid.jms.jndi.JmsInitialContextFactoryclass. You can configure it three different ways.
Configuring an InitialContext Using a jndi.properties FileIf you include a file named jndi.properties on the classpath and set the java.naming.factory.initial property value to org.apache.qpid.jms.jndi.JmsInitialContextFactory, the client InitialContextFactory implementation is discovered when the InitialContext object isinstantiated.
The particular ConnectionFactory, Queue, and Topic objects that you want the Context tocontain are configured as properties either directly within the jndi.properties file or in a separatefile whose path is referenced in jndi.properties using the java.naming.provider.urlproperty. The syntax for these properties is detailed below.
Configuring an InitialContext Using System PropertiesIf you set the java.naming.factory.initial system property to the value org.apache.qpid.jms.jndi.JmsInitialContextFactory, the client InitialContextFactory implementation is discovered when the InitialContext object isinstantiated.
The particular ConnectionFactory, Queue, and Topic objects that you want the context to containare configured as properties in a file, the path to which is passed using the java.naming.provider.url system property. The syntax for these properties is detailed below.
Configuring an InitialContext ProgrammaticallyYou can configure the InitialContext directly by setting an environment variable on a Hashtableenvironment object.
The particular ConnectionFactory, Queue, and Topic objects that you want the context to containare configured as properties (the syntax for which is detailed below) either directly within theenvironment Hashtable or in a separate file whose path is referenced using the java.naming.provider.url property within the environment Hashtable.
javax.naming.Context ctx = new javax.naming.InitialContext();
javax.naming.Context ctx = new javax.naming.InitialContext();
Hashtable<Object, Object> env = new Hashtable<Object, Object>();env.put(Context.INITIAL_CONTEXT_FACTORY, "org.apache.qpid.jms.jndi.JmsInitialContextFactory");javax.naming.Context context = new javax.naming.InitialContext(env);
CHAPTER 4. CONFIGURATION
13

JNDI Property SyntaxThe property syntax used in the properties file or environment Hashtable is as follows:
To define a ConnectionFactory, use format connectionfactory.LOOKUP_NAME = CONNECTION_URI.
To define a Queue, use format queue.LOOKUP_NAME = QUEUE_NAME.
To define a Topic use format topic.LOOKUP_NAME = TOPIC_NAME.
For more details about the connection URI, see the next section.
As an example, consider the following properties that define a ConnectionFactory, Queue, and Topic.
connectionfactory.myFactoryLookup = amqp://localhost:5672queue.myQueueLookup = queueAtopic.myTopicLookup = topicA
These objects could then be looked up from a Context as follows.
4.2. CONNECTION URIS
A ConnectionFactory is configured using a connection URI.
Connection URI Format
amqp[s]://hostname:port[?option=value[&option2=value...]]
The available connection settings are detailed in the Section 4.3, “Connection URI Options” section.
When failover is configured, the client can reconnect to another server automatically if the connectionto the current server is lost. Failover URIs start with the prefix failover: and contain a comma-separated list of server URIs inside parentheses. Additional options are specified at the end.
Failover URI Format
failover:(amqp://host1:port[,amqp://host2:port...])[?option=value[&option2=value...]]
As with the connection URI example, the client can be configured with a number of different settingsusing the URI in a failover configuration. These settings are detailed below, with the failover optionssection being of particular interest.
When the amqps scheme is used to specify an SSL/TLS connection, the hostname segment from theURI can be used by the JVM’s TLS SNI (Server Name Indication) extension to communicate the desiredserver hostname during a TLS handshake. The SNI extension is automatically included if a Fully
ConnectionFactory factory = (ConnectionFactory) context.lookup("myFactoryLookup");Queue queue = (Queue) context.lookup("myQueueLookup");Topic topic = (Topic) context.lookup("myTopicLookup");
Red Hat JBoss AMQ 7.0 Using the AMQ JMS Client
14

Qualified Domain Name (for example, "myhost.mydomain") is specified, but not when an unqualifiedname (for example, "myhost") or a bare IP address is used.
4.3. CONNECTION URI OPTIONS
4.3.1. JMS Options
These options control the behaviour of JMS objects such as Connection, Session, MessageConsumer, and MessageProducer.
jms.username - The username used to authenticate the connection.
jms.password - The password used to authenticate the connection.
jms.clientID - The client ID that is applied to the connection.
jms.forceAsyncSend - If enabled, all messages from a MessageProducer are sentasynchronously. Otherwise, only certain kinds, such as non-persistent messages or thoseinside a transaction, are sent asynchronously. Default is false.
jms.forceSyncSend - If enabled, all messages from a MessageProducer are sentsynchronously. Default is false.
jms.forceAsyncAcks - If enabled, all message acknowledgments are sent asynchronously.Default is false.
jms.localMessageExpiry - If enabled, any expired messages received by a MessageConsumerare filtered out and not delivered. Default is true.
jms.localMessagePriority - If enabled, prefetched messages are reordered locally based ontheir message priority value. Default is false.
jms.validatePropertyNames - If enabled, message property names are required to be validJava identifiers. Default is true.
jms.receiveLocalOnly - If enabled, calls to receive with a timeout argument will check aconsumer’s local message buffer only. Otherwise, if the timeout expires, the remote peer ischecked to ensure there are really no messages. Default is false.
jms.receiveNoWaitLocalOnly - If enabled, calls to receiveNoWait will check a consumer’slocal message buffer only. Otherwise, the remote peer is checked to ensure there are really nomessages available. Default is false.
jms.queuePrefix - An optional prefix value added to the name of any Queue created from a Session.
jms.topicPrefix - An optional prefix value added to the name of any Topic created from a Session.
jms.closeTimeout - The time in milliseconds for which the client will wait for normal resourceclosure before returning. Default is 60000 (60 seconds).
jms.connectTimeout - The time in milliseconds for which the client will wait for connectionestablishment before returning with an error. Default is 15000 (15 seconds).
CHAPTER 4. CONFIGURATION
15

jms.sendTimeout - The time in milliseconds for which the client will wait for completion of asynchronous message send before returning an error. By default the client will wait indefinitelyfor a send to complete.
jms.requestTimeout - The time in milliseconds for which the client will wait for completion ofvarious synchronous interactions like opening a producer or consumer (excluding send) with theremote peer before returning an error. By default the client will wait indefinitely for a requestto complete.
jms.clientIDPrefix - An optional prefix value used to generate client ID values when a new Connection is created by the ConnectionFactory. Default is ID:.
jms.connectionIDPrefix - An optional prefix value used to generate connection ID values whena new Connection is created by the ConnectionFactory. This connection ID is used whenlogging some information from the Connection object, so a configurable prefix can makebreadcrumbing the logs easier. Default is ID:.
jms.populateJMSXUserID - If enabled, populate the JMSXUserID property for each sentmessage using the authenticated username from the connection. Default is false.
jms.awaitClientID - If enabled, a connection with no ClientID configured in the URI will wait fora ClientID to be set programmatically, or the connection being used otherwise to signal nonecan be set, before sending the AMQP connection Open. Default is true.
jms.useDaemonThread - If enabled, a connection will use a daemon thread for its executor,rather than a non-daemon thread. Default is false.
Prefetch Policy OptionsPrefetch policy determines how many messages each MessageConsumer will fetch from the remotepeer and hold in a local "prefetch" buffer.
jms.prefetchPolicy.queuePrefetch - Default is 1000.
jms.prefetchPolicy.topicPrefetch - Default is 1000.
jms.prefetchPolicy.queueBrowserPrefetch - Default is 1000.
jms.prefetchPolicy.durableTopicPrefetch - Default is 1000.
jms.prefetchPolicy.all - Used to set all prefetch values at once.
Redelivery Policy OptionsRedelivery policy controls how redelivered messages are handled on the client.
jms.redeliveryPolicy.maxRedeliveries - Controls when an incoming message is rejectedbased on the number of times it has been redelivered. A value of 0 indicates that no messageredeliveries are accepted. A value of 5 allows a message to be redelivered five times, and soon. Default is -1, meaning no limit.
Message ID Policy OptionsMessage ID policy controls the data type of the message ID assigned to messages sent from the client.
jms.messageIDPolicy.messageIDType - By default, a generated String value is used for themessage ID on outgoing messages. Other available types are UUID, UUID_STRING, and PREFIXED_UUID_STRING.
Presettle Policy Options
Red Hat JBoss AMQ 7.0 Using the AMQ JMS Client
16

Presettle policy controls when a producer or consumer instance will be configured to use AMQPpresettled messaging semantics.
jms.presettlePolicy.presettleAll - If enabled, all producers and non-transacted consumerscreated operate in presettled mode. Default is false.
jms.presettlePolicy.presettleProducers - If enabled, all producers operate in presettledmode. Default is false.
jms.presettlePolicy.presettleTopicProducers - If enabled, any producer that is sending to a Topic or TemporaryTopic destination will operate in presettled mode. Default is false.
jms.presettlePolicy.presettleQueueProducers - If enabled, any producer that is sending to a Queue or TemporaryQueue destination will operate in presettled mode. Default is false.
jms.presettlePolicy.presettleTransactedProducers - If enabled, any producer that is createdin a transacted Session will operate in presettled mode. Default is false.
jms.presettlePolicy.presettleConsumers - If enabled, all consumers operate in presettledmode. Default is false.
jms.presettlePolicy.presettleTopicConsumers - If enabled, any consumer that is receivingfrom a Topic or TemporaryTopic destination will operate in presettled mode. Default isfalse.
jms.presettlePolicy.presettleQueueConsumers - If enabled, any consumer that is receivingfrom a Queue or TemporaryQueue destination will operate in presettled mode. Default isfalse.
Deserialization Policy OptionsDeserialization policy provides a means of controlling which Java types are trusted to be deserializedfrom the object stream while retrieving the body from an incoming ObjectMessage composed ofserialized Java Object content. By default all types are trusted during an attempt to deserialize thebody. The default deserialization policy provides URI options that allow specifying a whitelist and ablacklist of Java class or package names.
jms.deserializationPolicy.whiteList - A comma-separated list of class and package namesthat should be allowed when deserializing the contents of an ObjectMessage, unlessoverridden by blackList. The names in this list are not pattern values. The exact class orpackage name must be configured, as in java.util.Map or java.util. Package matchesinclude sub-packages. Default is to allow all.
jms.deserializationPolicy.blackList - A comma-separated list of class and package names thatshould be rejected when deserializing the contents of a ObjectMessage. The names in thislist are not pattern values. The exact class or package name must be configured, as in java.util.Map or java.util. Package matches include sub-packages. Default is to preventnone.
4.3.2. TCP Transport Options
When connected to a remote server using plain TCP, the following options specify the behavior of theunderlying socket. These options are appended to the connection URI along with any otherconfiguration options.
Example: A Connection URI with Transport Options
CHAPTER 4. CONFIGURATION
17

amqp://localhost:5672?jms.clientID=foo&transport.connectTimeout=30000
The complete set of TCP transport options is listed below.
transport.sendBufferSize - Default is 64k.
transport.receiveBufferSize - Default is 64k.
transport.trafficClass - Default is 0.
transport.connectTimeout - Default is 60 seconds.
transport.soTimeout - Default is -1.
transport.soLinger - Default is -1.
transport.tcpKeepAlive - Default is false.
transport.tcpNoDelay - Default is true.
transport.useEpoll - When available, use the native epoll IO layer instead of the NIO layer. Thiscan improve performance. Default is true.
4.3.3. SSL/TLS Transport Options
The SSL/TLS transport is enabled by using the amqps URI scheme. Because the SSL/TLS transportextends the functionality of the TCP-based transport, all of the TCP transport options are valid on anSSL/TLS transport URI.
Example: A Simple SSL/TLS Connection URI
amqps://myhost.mydomain:5671
The complete set of SSL/TLS transport options is listed below.
transport.keyStoreLocation - Default is to read from the system property javax.net.ssl.keyStore.
transport.keyStorePassword - Default is to read from the system property javax.net.ssl.keyStorePassword.
transport.trustStoreLocation - Default is to read from the system property javax.net.ssl.trustStore.
transport.trustStorePassword - Default is to read from the system property javax.net.ssl.trustStorePassword.
transport.keyStoreType - The type of key store being used. Default is to read from the systemproperty javax.net.ssl.keyStoreType. If the property is not set, the default is JKS.
transport.trustStoreType - The type of trust store being used. Default is to read from thesystem property javax.net.ssl.trustStoreType. If the property is not set, the default is JKS.
transport.storeType - Sets both keyStoreType and trustStoreType to the same value. Ifnot set, keyStoreType and trustStoreType will default to the values specified above.
Red Hat JBoss AMQ 7.0 Using the AMQ JMS Client
18

transport.contextProtocol - The protocol argument used when getting an SSLContext.Default is TLS.
transport.enabledCipherSuites - A comma-separated list of cipher suites to enable. Nodefault, meaning the context default ciphers are used. Any disabled ciphers are removed fromthis list.
transport.disabledCipherSuites - A comma-separated list cipher suites to disable. Cipherslisted here are removed from the enabled ciphers. No default.
transport.enabledProtocols - A comma-separated list of protocols to enable. No default,meaning the context-default protocols are used. Any disabled protocols are removed from thislist.
transport.disabledProtocols - A comma-separated list of protocols to disable. Protocols listedhere are removed from the enabled protocol list. Default is SSLv2Hello,SSLv3.
transport.trustAll - If enabled, trust the provided server certificate implicitly, regardless of anyconfigured trust store. Default is false.
transport.verifyHost - If enabled, verify that the connection hostname matches the providedserver certificate. Default is true.
transport.keyAlias - The alias to use when selecting a key pair from the key store if requiredto send a client certificate to the server. No default.
4.3.4. AMQP Options
The following options apply to aspects of behavior related to the AMQP wire protocol.
amqp.idleTimeout - The time in milliseconds after which the connection will be failed if thepeer sends no AMQP frames. Default is 60000 (1 minute).
amqp.vhost - The virtual host to connect to. Used to populate the SASL and AMQP hostnamefields. Default is the main hostname from the connection URI.
amqp.saslLayer - If enabled, SASL is used when establishing connections. Default is true.
amqp.saslMechanisms - A comma-separated list of SASL mechanisms the client should allowselection of, if offered by the server and usable with the configured credentials. The supportedmechanisms are EXTERNAL, SCRAM-SHA-256, SCRAM-SHA-1, CRAM-MD5, PLAIN,ANONYMOUS, and GSSAPI for Kerberos. Default is to allow selection from all mechanismsexcept GSSAPI, which must be explicitly included here to enable.
amqp.maxFrameSize - The maximum AMQP frame size in bytes allowed by the client. Thisvalue will be advertised to the remote peer. Default is 1048576 (1 MiB).
amqp.drainTimeout - The time in milliseconds that the client will wait for a response from theremote peer when a consumer drain request is made. If no response is seen in the allottedtimeout period, the link will be considered failed and the associated consumer will be closed.Default is 60000 (1 minute).
amqp.allowNonSecureRedirects - Controls whether the client allows an AMQP redirect to analternative host over a connection that is not secure when the existing connection is secure,such as redirecting an SSL/TLS connection to a raw TCP connection. Default is false.
CHAPTER 4. CONFIGURATION
19

4.3.5. Failover Options
Failover URIs start with the prefix failover: and contain a comma-separated list of server URIsinside parentheses. Additional options are specified at the end. Options prefixed with jms. are appliedto the overall failover URI, outside of parentheses, and affect the Connection object for its lifetime.
Example: A Failover URI with Failover Options
failover:(amqp://host1:5672,amqp://host2:5672)?jms.clientID=foo&failover.maxReconnectAttempts=20
The individual broker details within the parentheses can use the transport. or amqp. optionsdefined earlier. These are applied as each host is connected to.
Example: A Failover URI with Per-connection Transport and AMQP Options
failover:(amqp://host1:5672?amqp.option=value,amqp://host2:5672?transport.option=value)?jms.clientID=foo
All of the configuration options for failover are listed below.
failover.initialReconnectDelay - The time in milliseconds the client will wait before the firstattempt to reconnect to a remote peer. Default is 0, meaning the first attempt happensimmediately.
failover.reconnectDelay - The time in milliseconds between reconnection attempts. If thebackoff option is not enabled, this value remains constant. Default is 10.
failover.maxReconnectDelay - The maximum time that the client will wait before attemptingto reconnect. This value is only used when the backoff feature is enabled to ensure that thedelay does not grow too large. Default is 30 seconds.
failover.useReconnectBackOff - If enabled, the time between reconnection attempts growsbased on a configured multiplier. Default is true.
failover.reconnectBackOffMultiplier - The multiplier used to grow the reconnection delayvalue. Default is 2.0.
failover.maxReconnectAttempts - The number of reconnection attempts allowed beforereporting the connection as failed to the client. Default is -1, meaning no limit.
failover.startupMaxReconnectAttempts - For a client that has never connected to a remotepeer before, this option controls how many attempts are made to connect before reporting theconnection as failed. Default is to use the value of maxReconnectAttempts.
failover.warnAfterReconnectAttempts - Controls how often the client will log a messageindicating that failover reconnection is being attempted. Default is to log every 10 connectionattempts.
failover.randomize - If enabled, the set of failover URIs is randomly shuffled before attemptingto connect to one of them. This can help to distribute client connections more evenly acrossmultiple remote peers. Default is false.
failover.amqpOpenServerListAction - Controls how the failover transport behaves when theconnection "open" frame from the server provides a list of failover hosts to the client. Validvalues are REPLACE, ADD, or IGNORE. If REPLACE is configured, all failover URIs other than the
Red Hat JBoss AMQ 7.0 Using the AMQ JMS Client
20

one for the current server are replaced with those provided by the server. If ADD is configured,the URIs provided by the server are added to the existing set of failover URIs, withdeduplication. If IGNORE is configured, any updates from the server are ignored and nochanges are made to the set of failover URIs in use. Default is REPLACE.
The failover URI also supports defining nested options as a means of specifying AMQP and transportoption values applicable to all the individual nested broker URIs. This is accomplished using the same transport. and amqp. URI options outlined earlier for a non-failover broker URI but prefixed withfailover.nested.. For example, to apply the same value for the amqp.vhost option to every brokerconnected to you might have a URI like the following.
Example: A Failover URI with Shared Transport and AMQP Options
failover:(amqp://host1:5672,amqp://host2:5672)?jms.clientID=foo&failover.nested.amqp.vhost=myhost
4.3.6. Discovery Options
The client has an optional discovery module that provides a customized failover layer where the brokerURIs to connect to are not given in the initial URI but instead are discovered by interacting with adiscovery agent. There are currently two discovery agent implementations: a file watcher that loadsURIs from a file and a multicast listener that works with ActiveMQ 5.x brokers that are configured tobroadcast their broker addresses for listening clients.
The general set of failover-related options when using discovery are the same as those detailed earlier,with the main prefix changed from failover. to discovery., and with the nested prefix used tosupply URI options common to all the discovered broker URIs. For example, without the agent URIdetails, a general discovery URI might look like the following.
Example: A Discovery URI
discovery:(<agent-uri>)?discovery.maxReconnectAttempts=20&discovery.discovered.jms.clientID=foo
To use the file watcher discovery agent, create an agent URI like the following.
Example: A Discovery URI Using the File Watcher Agent
discovery:(file:///path/to/monitored-file?updateInterval=60000)
The URI options for the file watcher discovery agent are listed below.
updateInterval - The time in milliseconds between checks for file changes. Default is 30000(30 seconds).
To use the multicast discovery agent with an ActiveMQ 5.x broker, create an agent URI like thefollowing:
Example: A Discovery URI Using the Multicast Listener Agent
discovery:(multicast://default?group=default)
CHAPTER 4. CONFIGURATION
21

Note that the use of default as the host in the multicast agent URI above is a special value that issubstituted by the agent with the default 239.255.2.3:6155. You can change this to specify theactual IP address and port in use with your multicast configuration.
The URI option for the multicast discovery agent is listed below.
group - The multicast group used to listen for updates. Default is default.
4.4. SECURITY
AMQ JMS has a range of security-related configuration options that can be leveraged according toyour application’s needs.
Basic user credentials such as username and password should be passed directly to the ConnectionFactory when creating the Connection within the application. However, if you areusing the no-argument factory method, it is also possible to supply user credentials in the connectionURI. For more information, see the Section 4.3.1, “JMS Options” section.
Another common security consideration is use of SSL/TLS. The client connects to servers over anSSL/TLS transport when the amqps URI scheme is specified in the connection URI, with variousoptions available to configure behavior. For more information, see the Section 4.3.3, “SSL/TLSTransport Options” section.
In concert with the earlier items, it may be desirable to restrict the client to allow use of only particularSASL mechanisms from those that may be offered by a server, rather than selecting from all itsupports. For more information, see the Section 4.3.4, “AMQP Options” section.
Applications calling getObject() on a received ObjectMessage may wish to restrict the typescreated during deserialization. Note that message bodies composed using the AMQP type system donot use the ObjectInputStream mechanism and therefore do not require this precaution. For moreinformation, see the the section called “Deserialization Policy Options” section.
4.4.1. Authenticating Using Kerberos
The client can be configured to authenticate using Kerberos when used with an appropriatelyconfigured server. To enable Kerberos, use the following steps.
1. Configure the client to use the GSSAPI mechanism for SASL authentication using the amqp.saslMechanisms URI option.
amqp://myhost:5672?amqp.saslMechanisms=GSSAPIfailover:(amqp://myhost:5672?amqp.saslMechanisms=GSSAPI)
2. Set the java.security.auth.login.config system property to the path of a JAAS loginconfiguration file containing appropriate configuration for a Kerberos LoginModule.
-Djava.security.auth.login.config=LOGIN_CONFIG_FILE
The login configuration file might look like the following example.
amqp-jms-client { com.sun.security.auth.module.Krb5LoginModule required useTicketCache=true;};
Red Hat JBoss AMQ 7.0 Using the AMQ JMS Client
22

The precise configuration used will depend on how you wish the credentials to be established for theconnection, and the particular LoginModule in use. For details of the Oracle Krb5LoginModule, seethe Oracle Krb5LoginModule class reference . For details of the IBM Java 8 Krb5LoginModule, seethe IBM Krb5LoginModule class reference .
It is possible to configure a LoginModule to establish the credentials to use for the Kerberos process,such as specifying a principal and whether to use an existing ticket cache or keytab. If, however, the LoginModule configuration does not provide the means to establish all necessary credentials, it maythen request and be passed the username and password values from the client Connection object ifthey were either supplied when creating the Connection using the ConnectionFactory orpreviously configured via its URI options.
Note that Kerberos is supported only for authentication purposes. Use SSL/TLS connections forencryption.
The following connection URI options can be used to influence the Kerberos authentication process.
sasl.options.configScope - The name of the login configuration entry used to authenticate.Default is amqp-jms-client.
sasl.options.protocol - The protocol value used during the GSSAPI SASL process. Default is amqp.
sasl.options.serverName - The serverName value used during the GSSAPI SASL process.Default is the server hostname from the connection URI.
Similar to the amqp. and transport. options detailed previously, these options must be specified ona per-host basis or as all-host nested options in a failover URI.
4.5. LOGGING
The client uses the SLF4J API, allowing users to select a particular logging implementation based ontheir needs by supplying an SLF4J binding, such as slf4j-log4j, in order to use Log4J. More details onSLF4J are available from its website.
The client uses Logger names residing within the org.apache.qpid.jms hierarchy, which you canuse to configure a logging implementation based on your needs.
When debugging some issues, it can sometimes be useful to enable additional protocol trace loggingfrom the Qpid Proton AMQP 1.0 library. There are two ways to achieve this.
Set the environment variable (not the Java system property) PN_TRACE_FRM to 1. This willcause Proton to emit frame logging to the console.
Add the option amqp.traceFrames=true to your connection URI and configure the org.apache.qpid.jms.provider.amqp.FRAMES logger to log level TRACE. This will add aprotocol tracer to Proton and include the output in your logs.
CHAPTER 4. CONFIGURATION
23

CHAPTER 5. EXAMPLESThis chapter demonstrates the use of AMQ JMS through example programs. To run them, make sureyou have completed the steps in the Chapter 2, Installation chapter for your environment and you havea running and configured broker.
See the Qpid JMS examples for more sample programs.
5.1. CONFIGURING THE JNDI CONTEXT
Applications using JMS typically use JNDI to obtain the ConnectionFactory and Destinationobjects used by the application. This keeps the configuration separate from the program and insulatesit from the particular client implementation.
For the purpose of using these examples, a file named jndi.properties should be placed on theclasspath to configure the JNDI Context, as detailed previously .
The contents of the jndi.properties file should match what is shown below, which as per theformat described previously establishes that the client’s InititalContextFactory implementationshould be used, configures a ConnectionFactory to connect to a local server, and defines adestination queue named queue.
# Configure the InitialContextFactory class to usejava.naming.factory.initial = org.apache.qpid.jms.jndi.JmsInitialContextFactory
# Configure the ConnectionFactoryconnectionfactory.myFactoryLookup = amqp://localhost:5672
# Configure the destinationqueue.myDestinationLookup = queue
5.2. SENDING MESSAGES
This example first creates a JNDI Context, uses it to look up a ConnectionFactory and Destination, creates and starts a Connection using the factory, and then creates a Session. Thena MessageProducer is created to the Destination, and a message is sent using it. The Connection is then closed, and the program exits.
A runnable variant of this Sender example is in the INSTALL_DIR/examples directory, along withthe Hello World example covered previously in Chapter 3, Getting Started.
Example: Sending Messages
package org.jboss.amq.example;
import javax.jms.Connection;import javax.jms.ConnectionFactory;import javax.jms.DeliveryMode;import javax.jms.Destination;import javax.jms.ExceptionListener;import javax.jms.JMSException;import javax.jms.Message;
Red Hat JBoss AMQ 7.0 Using the AMQ JMS Client
24

1
2
Creates the JNDI Context to look up ConnectionFactory and Destination objects. Theconfiguration is picked up from the jndi.properties file as detailed earlier.
The ConnectionFactory and Destination objects are retrieved from the JNDI Context using theirlookup names.
import javax.jms.MessageProducer;import javax.jms.Session;import javax.jms.TextMessage;import javax.naming.Context;import javax.naming.InitialContext;
public class Sender { public static void main(String[] args) throws Exception { try {
Context context = new InitialContext(); 1
ConnectionFactory factory = (ConnectionFactory) context.lookup("myFactoryLookup"); Destination destination = (Destination)
context.lookup("myQueueLookup"); 2
Connection connection = factory.createConnection("<username>", "<password>"); connection.setExceptionListener(new MyExceptionListener());
connection.start(); 3
Session session = connection.createSession(false,
Session.AUTO_ACKNOWLEDGE); 4
MessageProducer messageProducer =
session.createProducer(destination); 5
TextMessage message = session.createTextMessage("Message Text!"); 6 messageProducer.send(message, DeliveryMode.NON_PERSISTENT, Message.DEFAULT_PRIORITY,
Message.DEFAULT_TIME_TO_LIVE); 7
connection.close(); 8 } catch (Exception exp) { System.out.println("Caught exception, exiting."); exp.printStackTrace(System.out); System.exit(1); } }
private static class MyExceptionListener implements ExceptionListener { @Override public void onException(JMSException exception) { System.out.println("Connection ExceptionListener fired, exiting."); exception.printStackTrace(System.out); System.exit(1); } }}
CHAPTER 5. EXAMPLES
25

3
4
5
6
7
8
The factory is used to create the Connection, which then has an ExceptionListenerregistered and is then started. The credentials given when creating the connection will typicallybe taken from an appropriate external configuration source, ensuring they remain separate fromthe application itself and can be updated independently.
A non-transacted, auto-acknowledge Session is created on the Connection.
The MessageProducer is created to send messages to the Destination.
A TextMessage is created with the given content.
The TextMessage is sent. It is sent non-persistent, with default priority and no expiration.
The Connection is closed. The Session and MessageProducer are closed implicitly.
Note that this is only an example. A real-world application would typically use a long-livedMessageProducer and send many messages using it over time. Opening and then closing a Connection, Session, and MessageProducer per message is generally not efficient.
5.3. RECEIVING MESSAGES
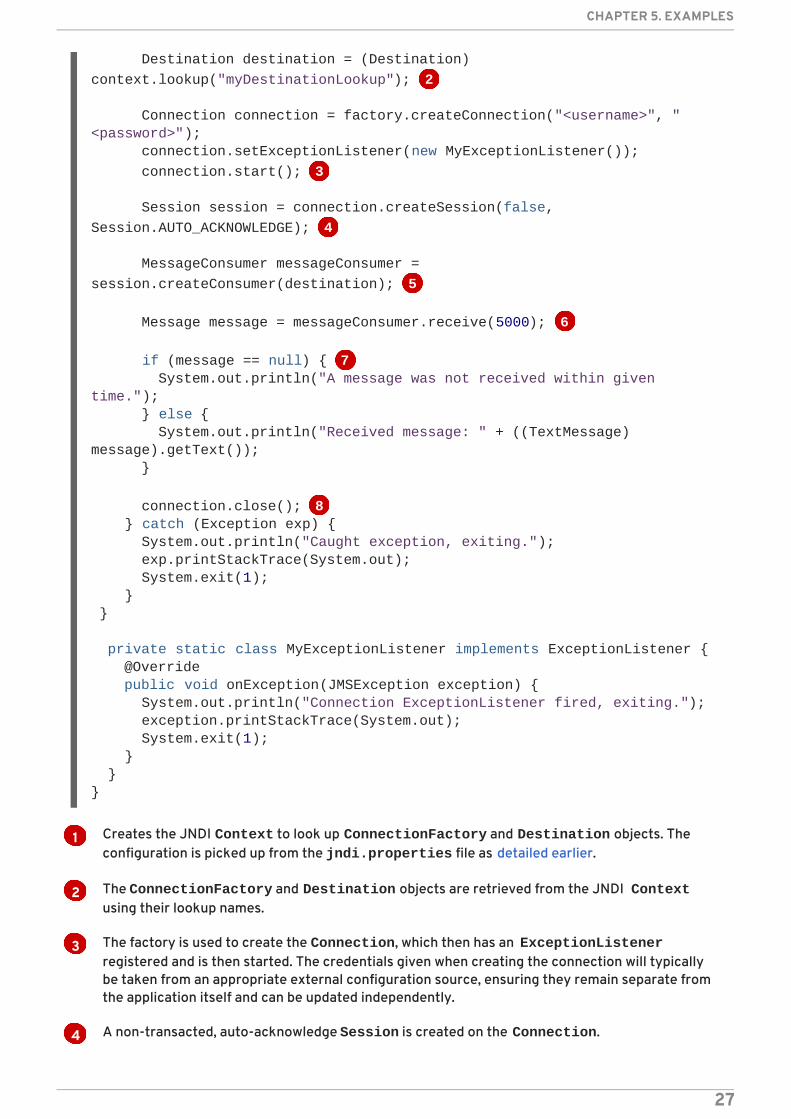
This example starts by creating a JNDI Context, using it to look up a ConnectionFactory and Destination, creating and starting a Connection using the factory, and then creates a Session.Then a MessageConsumer is created for the Destination, a message is received using it, and itscontents are printed to the console. The Connection is then closed and the program exits. The sameJNDI configuration is used as in the sending example .
An executable variant of this Receiver example is contained within the examples directory of theclient distribution, along with the Hello World example covered previously in Chapter 3, GettingStarted.
Example: Receiving Messages
package org.jboss.amq.example;
import javax.jms.Connection;import javax.jms.ConnectionFactory;import javax.jms.Destination;import javax.jms.ExceptionListener;import javax.jms.JMSException;import javax.jms.Message;import javax.jms.MessageConsumer;import javax.jms.Session;import javax.jms.TextMessage;import javax.naming.Context;import javax.naming.InitialContext;
public class Receiver { public static void main(String[] args) throws Exception { try {
Context context = new InitialContext(); 1
ConnectionFactory factory = (ConnectionFactory) context.lookup("myFactoryLookup");
Red Hat JBoss AMQ 7.0 Using the AMQ JMS Client
26
1
2
3
4
Creates the JNDI Context to look up ConnectionFactory and Destination objects. Theconfiguration is picked up from the jndi.properties file as detailed earlier.
The ConnectionFactory and Destination objects are retrieved from the JNDI Contextusing their lookup names.
The factory is used to create the Connection, which then has an ExceptionListenerregistered and is then started. The credentials given when creating the connection will typicallybe taken from an appropriate external configuration source, ensuring they remain separate fromthe application itself and can be updated independently.
A non-transacted, auto-acknowledge Session is created on the Connection.
Destination destination = (Destination)
context.lookup("myDestinationLookup"); 2
Connection connection = factory.createConnection("<username>", "<password>"); connection.setExceptionListener(new MyExceptionListener());
connection.start(); 3
Session session = connection.createSession(false,
Session.AUTO_ACKNOWLEDGE); 4
MessageConsumer messageConsumer =
session.createConsumer(destination); 5
Message message = messageConsumer.receive(5000); 6
if (message == null) { 7 System.out.println("A message was not received within given time."); } else { System.out.println("Received message: " + ((TextMessage) message).getText()); }
connection.close(); 8 } catch (Exception exp) { System.out.println("Caught exception, exiting."); exp.printStackTrace(System.out); System.exit(1); } }
private static class MyExceptionListener implements ExceptionListener { @Override public void onException(JMSException exception) { System.out.println("Connection ExceptionListener fired, exiting."); exception.printStackTrace(System.out); System.exit(1); } }}
CHAPTER 5. EXAMPLES
27

5
6
7
8
The MessageConsumer is created to receive messages from the Destination.
A call to receive a message is made with a five second timeout.
The result is checked, and if a message was received, its contents are printed, or notice that nomessage was received. The result is cast explicitly to TextMessage as this is what we know the Sender sent.
The Connection is closed. The Session and MessageConsumer are closed implicitly.
Note that this is only an example. A real-world application would typically use a long-lived MessageConsumer and receive many messages using it over time. Opening and then closing a Connection, Session, and MessageConsumer for each message is generally not efficient.
Red Hat JBoss AMQ 7.0 Using the AMQ JMS Client
28

CHAPTER 6. INTEROPERABILITYThis chapter discusses how to use AMQ JMS in combination with other AMQ components. For anoverview of the compatibility of AMQ components, see the product introduction.
6.1. INTEROPERATING WITH OTHER AMQP CLIENTS
AMQP messages are composed using the AMQP type system. Having this common format is one of thereasons AMQP clients in different languages are able to interoperate with each other. This sectionserves to document behaviour around the AMQP payloads sent and received by the client in relation tothe various JMS Message types used, to aid in using the client along with other AMQP clients.
6.1.1. Sending Messages
This section serves to document the different payloads sent by the client when using the various JMSMessage types, so as to aid in using other clients to receive them.
6.1.1.1. Message Type
JMS Message Type Description of Transmitted AMQP Message
TextMessage A TextMessage will be sent using an amqp-value body section containing a utf8encoded string of the body text, or null if no body text is set. The messageannotation with symbol key of “x-opt-jms-msg-type” will be set to a byte valueof 5.
BytesMessage A BytesMessage will be sent using a data body section containing the raw bytesfrom the BytesMessage body, with the properties section content-type field setto the symbol value “application/octet-stream”. The message annotation withsymbol key of “x-opt-jms-msg-type” will be set to a byte value of 3.
MapMessage A MapMessage body will be sent using an amqp-value body section containing asingle map value. Any byte[] values in the MapMessage body will be encoded asbinary entries in the map. The message annotation with symbol key of “x-opt-jms-msg-type” will be set to a byte value of 2.
StreamMessage A StreamMessage will be sent using an amqp-sequence body section containingthe entries in the StreamMessage body. Any byte[] entries in the StreamMessagebody will be encoded as binary entries in the sequence. The message annotationwith symbol key of “x-opt-jms-msg-type” will be set to a byte value of 4.
ObjectMessage An ObjectMessage will be sent using an data body section, containing the bytesfrom serializing the ObjectMessage body using an ObjectOutputStream, with theproperties section content-type field set to the symbol value “application/x-java-serialized-object”. The message annotation with symbol key of “x-opt-jms-msg-type” will be set to a byte value of 1.
Message A plain JMS Message has no body, and will be sent as an amqp-value bodysection containing a null. The message annotation with symbol key of “x-opt-jms-msg-type” will be set to a byte value of 0.
CHAPTER 6. INTEROPERABILITY
29

6.1.1.2. Message Properties
JMS messages support setting application properties of various Java types. This section serves toshow the mapping of these property types to AMQP typed values in the application-properties sectionof the sent message. Both JMS and AMQP use string keys for property names.
JMS Property Type AMQP ApplicationProperty Type
boolean boolean
byte byte
short short
int int
long long
float float
double double
String string or null
6.1.2. Receiving Messages
This section serves to document the different payloads received by the client will be mapped to thevarious JMS Message types, so as to aid in using other clients to send messages for receipt by the JMSclient.
6.1.2.1. Message Type
If the the “x-opt-jms-msg-type” message-annotation is present on the received AMQP message, itsvalue is used to determine the JMS message type used to represent it, according to the mappingdetailed in the following table. This reflects the reverse process of the mappings discussed formessages sent by the JMS client .
AMQP “x-opt-jms-msg-type” message-annotation value (type) JMS Message Type
0 (byte) Message
1 (byte) ObjectMessage
2 (byte) MapMessage
3 (byte) BytesMessage
4 (byte) StreamMessage
Red Hat JBoss AMQ 7.0 Using the AMQ JMS Client
30

5 (byte) TextMessage
AMQP “x-opt-jms-msg-type” message-annotation value (type) JMS Message Type
If the “x-opt-jms-msg-type” message-annotation is not present, the table below details how themessage will be mapped to a JMS Message type. Note that the StreamMessage and MapMessage typesare only assigned to annotated messages.
Description of Received AMQP Message without “x-opt-jms-msg-type”annotation
JMS Message Type
An amqp-value body section containing a string or null.
A data body section, with the properties section content-type field set toa symbol value representing a common textual media type such as"text/plain", "application/xml", or "application/json”.
TextMessage
An amqp-value body section containing a binary.
A data body section, with the properties section content-type field eithernot set, set to symbol value "application/octet-stream”, or set to anyvalue not understood to be associated with another message type.
BytesMessage
A data body section, with the properties section content-type field set tosymbol value “application/x-java-serialized-object".
An amqp-value body section containing a value not covered above.
An amqp-sequence body section. This will be represented as a Listinside the ObjectMessage.
ObjectMessage
6.1.2.2. Message Properties
This section serves to show the mapping of values in the application-properties section of the receivedAMQP message to Java types used in the JMS Message.
AMQP ApplicationProperty Type JMS Property Type
boolean boolean
byte byte
short short
int int
CHAPTER 6. INTEROPERABILITY
31

long long
float float
double double
string String
null String
AMQP ApplicationProperty Type JMS Property Type
6.2. CONNECTING TO AMQ BROKER
AMQ Broker is designed to interoperate with AMQP 1.0 clients. Check the following to ensure thebroker is configured for AMQP messaging.
Port 5672 in the network firewall is open.
The AMQ Broker AMQP acceptor is enabled. See Configuring Network Access.
The necessary addresses are configured on the broker. See Addresses, Queues, and Topics .
The broker is configured to permit access from your client, and the client is configured to sendthe required credentials. See Broker Security.
6.3. CONNECTING TO AMQ INTERCONNECT
AMQ Interconnect works with any AMQP 1.0 client. Check the following to ensure the components areconfigured correctly.
Port 5672 in the network firewall is open.
The router is configured to permit access from your client, and the client is configured to sendthe required credentials. See Interconnect Security.
Red Hat JBoss AMQ 7.0 Using the AMQ JMS Client
32

APPENDIX A. USING YOUR SUBSCRIPTIONAMQ is provided through a software subscription. To manage your subscriptions, access your accountat the Red Hat Customer Portal.
Accessing Your Account
1. Go to access.redhat.com.
2. If you do not already have an account, create one.
3. Log in to your account.
Activating a Subscription
1. Go to access.redhat.com.
2. Navigate to My Subscriptions.
3. Navigate to Activate a subscription and enter your 16-digit activation number.
Downloading Zip and Tar FilesTo access zip or tar files, use the customer portal to find the relevant files for download. If you areusing RPM packages, this step is not required.
1. Go to access.redhat.com.
2. Navigate to DOWNLOADS.
3. Locate the Red Hat JBoss AMQ entry in the JBOSS INTEGRATION AND AUTOMATIONcategory.
4. Select the desired component type from the drop-down menu on the right side of the entry.
5. Select the Download link for your component.
Registering Your System for PackagesTo install RPM packages on Red Hat Enterprise Linux, your system must be registered. If you are usingzip or tar files, this step is not required.
1. Go to access.redhat.com.
2. Navigate to Registration Assistant.
3. Select your OS version and continue to the next page.
4. Use the listed command in your system terminal to complete the registration.
To learn more see How to Register and Subscribe a System to the Red Hat Customer Portal .
Revised on 2017-12-15 13:52:27 EST
APPENDIX A. USING YOUR SUBSCRIPTION
33


